Weaving toys from rubber bands on the machine / Toys with their own hands, patterns, video, MK
Weaving from colorful rubber, as a new kind of handmade creativity, although it appeared relatively recently, it has already grown fond of children and adults.
Weaving from rubber bands: what is it and how to do it?
Forerunner for Lumigurumi (weaving from rubber bands)became the Japanese art of knitting - amigurumi, only in the latter are applied knitting needles, hooks and threads. Small silicone multi-colored rubber can be the basis for future masterpieces. You can buy them in almost every stationery store. The choice of color simply amazes with its diversity. From these rubber bands you can create:
- stylish accessories (cases for phones, charms, pendants, hairpins, bags, wallets, etc.);
- ornaments (rings, bracelets, pendants, necklaces, etc.);
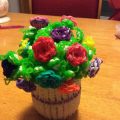
- figurines and toys;
- paintings and clothes.
Each woven object will be a real work of art, because you can give it a unique shape and size, choose an individual coloring to your liking. Ways of weaving:
- weaving with a hook (used, as a rule, to create flat geometric bodies);
- weaving with fingers (hands);
- weaving on a mini-machine (fork) or on a conventional machine.
First, you can try to do simple schemes andpatterns, weave bracelets. There are many master classes that describe in detail the basic patterns, show techniques of weaving. Having practiced with their help, you can weave more complicated things from rubbery items: three-dimensional toys, three-dimensional figures, cartoon characters, etc.
What will be needed in the work?
On sale there are whole sets, which are called"Rainbow looms" - Rainbow loom. They may have a different set, so you need to choose the most suitable option for yourself. In such sets you can find:
- a certain amount of gum (material - hypoallergenic latex) of different colors and shades;
- The machine (there are original models that can be disassembled so that you can change the shape or make a long product, there are also non-separable ones) with several bars for fixing;
- hooks (thin or thick, plastic / plastic / metal);
- beads, pendants, clips for fastening and decoration.
Many even use the usual hook forknitting. Perhaps this will also be more convenient for you to weave. The specifics of this type of needlework is that there are no generally accepted manuals or schemes, but there are master classes on video that allow you to learn how to make wonderful toys from rubber bands.
Basic techniques of weaving
One of the simplest techniques is this, socalled, "fish tail". Using this basic method, you can quickly and easily make a beautiful bracelet. The product can be weaved on a mini-machine, a regular fork or even just on the fingers. First you need to take one rubber and, twisting it with a figure eight, put it on the frame of the machine. On top of the dress one more, only not twisting, and on them - as well as the third. Next, start weaving: crocheting the first (lower) elastic band, stretch it through the two remaining to the center. Then do the same, but on the other hand. Again, put on a new rubber band on top, without twisting, and then fold the lower elastic band from two sides into the center. And according to this scheme, you need to weave until your product gets the required look and size. Being skilled, you can then make this pattern and inside out.
Lesson: funny owl made of rubber bands
To make a cute owl, pick upbeautiful multi-colored rezinochki several shades, you will also need a machine (move the central row slightly forward) and a hook. Start weaving as follows:
- sketch one rubber band on the left and right rows (from the penultimate rod to the last) and two rubber bands on the central one, shifting them to one rod;
- from the central row, cast two rubber bands on the right and left sides (on the penultimate rods);
- add two pairs of rubber bands for each row;
- then you need to make a nose owl (take a rubber band of a different color) - two rubber bands in the center);
- To finish the head, from the central row, throw the double gum on the left and right side (upwards);
- the trunk begins with the same technique, only now the pairs of gum need to be added downward;
- further came the turn of the tummy of an owl: throw four pairs of gums of the color that you chose for the abdomen of a bird, on the central row;
- and on the left and right row, add three pairs of elastics (the color of the trunk);
- It is necessary to prepare legs for an owl - for this purposeThrow one hook on the hook of the desired color (three turns), and then put it on the elastic band of the color of the trunk. Then, wear this elastic band from the center row to the side upwards. Do the same with the other side;
- fasten the product, throwing on the last column of the central row an elastic band, twisted on the hook in three turns;
- Owl's eyes are made separately: First on 4 turns black rubber on the extreme posts (above, where the muzzle), triangle throw the elastic band of the main color over the eyes, and then use the hook to throw the black blanks on the prepared triangle.
The owl on the machine is almost ready. It remains only to make the weaving itself.
Lesson: funny snake made of erasers
Prepare the rubber bands of three bright colors so that you get a nice snake:
- first on the extreme left row, put on one rubber band of two colors (for example, black-white-black), and then - three gums of the primary color of your snake (let it be yellow);
- Repeat this whole pattern in the same row downwards;
- then do the second tier (same row, same colors);
- repeat the picture on the center and add to it the second same tier;
- fix the last column of the extreme row with four turns of the main (yellow) elastic;
- You can do all the same on the third row, if you want the snake to have a long tail. But you can start weaving and with two rows.
It's also very easy to weave on the machine of cutekoala bears, bunnies, mice, horses, pupae and many other interesting toys. Such an occupation perfectly develops the fine motor skills of hands, teaches assiduity, concentration, accuracy, helps develop imagination and creativity. Be sure to try to make some kind of figure with your child, and soon you will have a lot of wonderful bright products.
Comments
Related posts:
 How to weave a snake out of rubber bands, on a machine and without, video / Toys with own hands, patterns, video, MK
 Toys from rubber bands on a slingshot, Video lessons / Toys with own hands, patterns, video, MK
 Master class on weaving flowers from rubber bands on the machine, video / Toys with their own hands, patterns, video, MK
 How to weave an owl of rubber bands on a machine or fork. Master Class. Video / Toys with own hands, patterns, video, MK
Amigurumi toys from elastic bands, video lessons / Toys by own hands, patterns, video, MK
How to weave an owl of rubber bands on a machine or fork. Master Class. Video / Toys with own hands, patterns, video, MK
Amigurumi toys from elastic bands, video lessons / Toys by own hands, patterns, video, MK