Willow Bead - weeping tree with his hands photo and video
Content
- Necessary materials
- Master class weaving weeping willow Bead
- Some tips on making willow Bead
- Video: willow weave their own hands
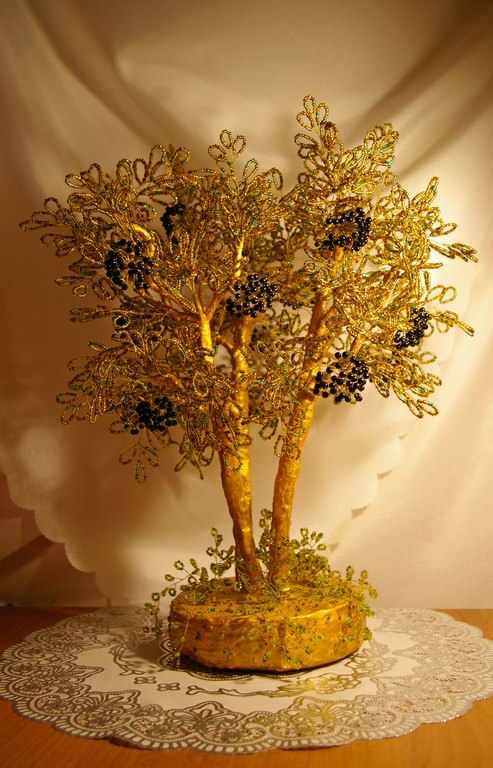
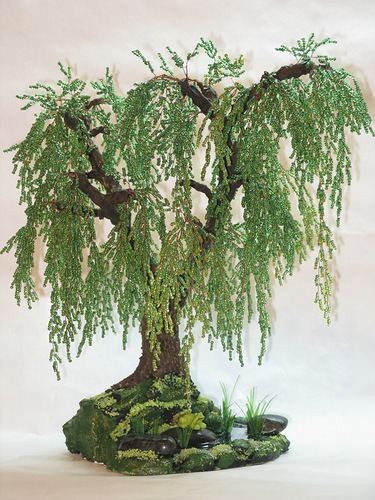
Weave Bead weeping willow can eachneedlewoman, even beginners. A master class will greatly facilitate the task. Only at first glance, looking at photos of others products, it seems complicated, but let them work and laborious - there is nothing difficult: you have to make lots and lots of twigs, then they combine and form a crown.
Willow bead created in different ways, described below is the simplest. One day will be enough if there is free time and the right materials on hand.


Necessary materials
What we need for the product:
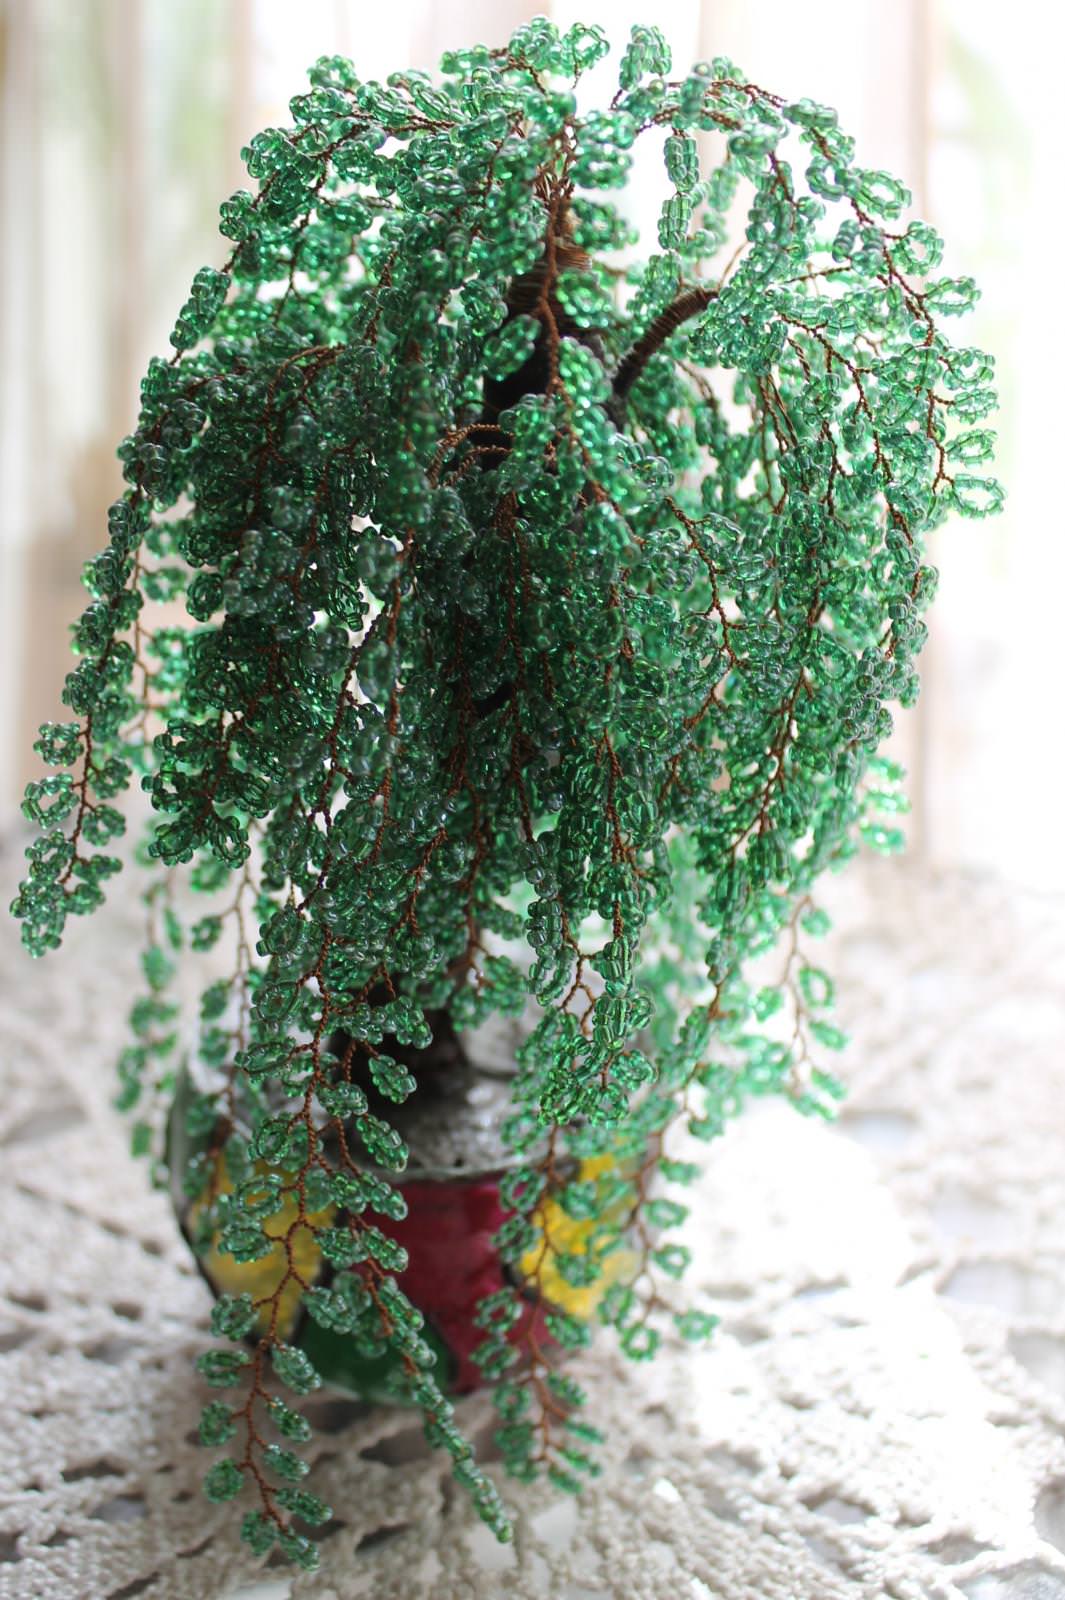
- Green beads of several colors;
- thin wire (for branches);
- steel wire (for the trunk);
- Floral tape;
- beautiful framework;
- decorative elements;
- PVA glue.
Master class weaving weeping willow Bead
Weave any bead willow start relying on netting schemes, photo workshops or our imagination, with leaves.
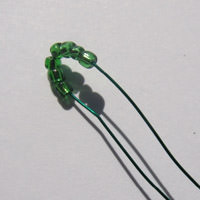
First, a thin wire is cut for futuretwigs of varying lengths better, because this willow are not the same. For one, you need to 7 leaf green beads, weaving first method: move the beads 7 to the middle and twist the wire, forming a sheet of paper.
By leaflets in the center continue to form a pair of leaves, not forgetting carefully twist the wire. You should now have 17 leaves, and each leaf consists of 7 beads.
Second method: stringing 5 or 7 beads, twist, leaving a decent tail and set aside. And so I want to collect as leaves on a twig. Such a method will allow longer attached to the twig of leaves that will make willow twigs more fluffy.
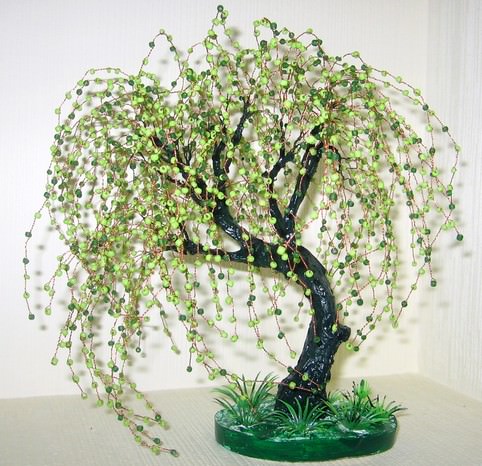
Sprigs better perform different tone: Most of the green beads, part of the green light. But quantity is not the same, for example: light - 30 branches, and from the usual green - 50 branches, that is a little more. By the way, and the number of leaves must also be different: it has 10 branches and 16 leaves, branches 10 to 25 leaves, 10 to 36 leaves.


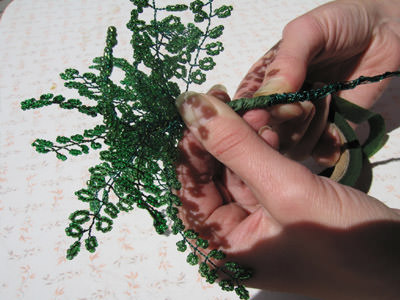
Any master class assembly always begins with the largest branches:
- first attach to the rod of a thick wire (do not forget to create the roots) 5-6 longest branches, where 36 leaves;
- later in the course will mean the branch on which 25 leaves; finish - 4-5 branches to 16 leaflets.
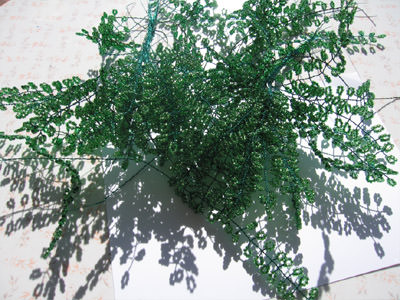
To form the crown is not complicated, open any photo and repeat this willow branches bend down. The result should be the realistic tree (many out even better than in the photo).
Prepared in this way is completely tree, including branches, wrapped floral tape, pulling it tighter.


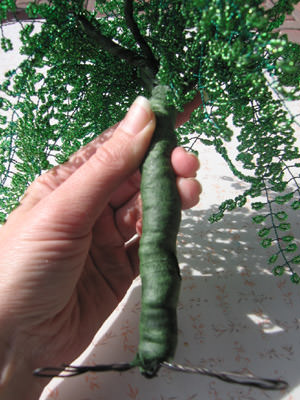
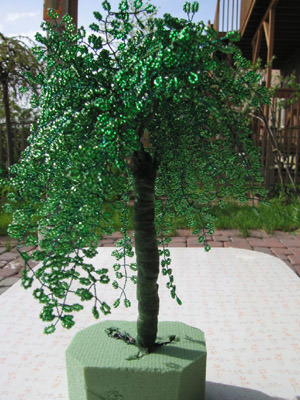
Form a trunk 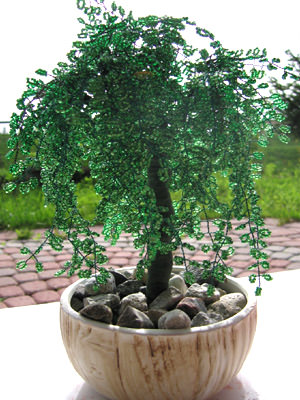
In nature, the willow trunks are rare not equal,and therefore tried to hide the wire winding as a more smoothly as possible. The best course for the formation of a natural trunk, use plaster, which is useful for "landing" on the basis of a willow. Gypsum is kneaded with water to a consistency of sour cream. In order to make the roots of a tree and the wider natural, after drying the first layer (30 minutes) covers the second layer by adding gypsum PVA glue - on 1 st. l. plaster 1 tsp glue. when the composition of a bit gripped by a stiff brush inflict oblique movements of the trunk relief.
Do not wait until the composition dries, take any sharp tool and attach the roots and bark of the natural terrain. This chip does not remove the product until dry (dry will be a few hours).
Some masters, describing his master class, show how you can make even the trunk of the foam.
The trunk of the tree for mounting penyPo about staining also has a few tips:
- brown, white, black;
- brown, green, black;
- brown, green, yellow;
- black, white, yellow;
- black, white, green.
How to make a stand for willow Bead
For this stand, it is quite heavy,beaded trees are suitable not only deep pots, sprinkled with stones and flat surfaces: flat dish, trimming the tree, beautiful smooth stones. If you do not have a stone, but really want to make it the basis of it - you can do it yourself from a mixture of 1/4 of the flour, 1/4 salt, 1/4 coffee grounds, PVA 1/8, 1/4 water, mixing the first all particulate ingredients, adding water and then glue. The dough is wrapped in foil and form a stone, not forgetting to make a hole for the tree. Decorated stone decorative elements should immediately until it is dry.
Under each willow will have to find a stand that will harmonize with the tree, to emphasize its naturalness and beauty.
Choosing a stand based on the following rules:
- the length of the container is necessary to take a little more than 2/3 of the height of the willow tree as if spreading and low - 2/3 of its width;
- the width of the stand must be slightly smaller than the scale of the longest branches;
- depth - the flatter the better.
"Planted" the tree on the stone or other surface and with the help of plaster - and it definitely will not fall and will stay for a long time.
Some tips on making willow Bead
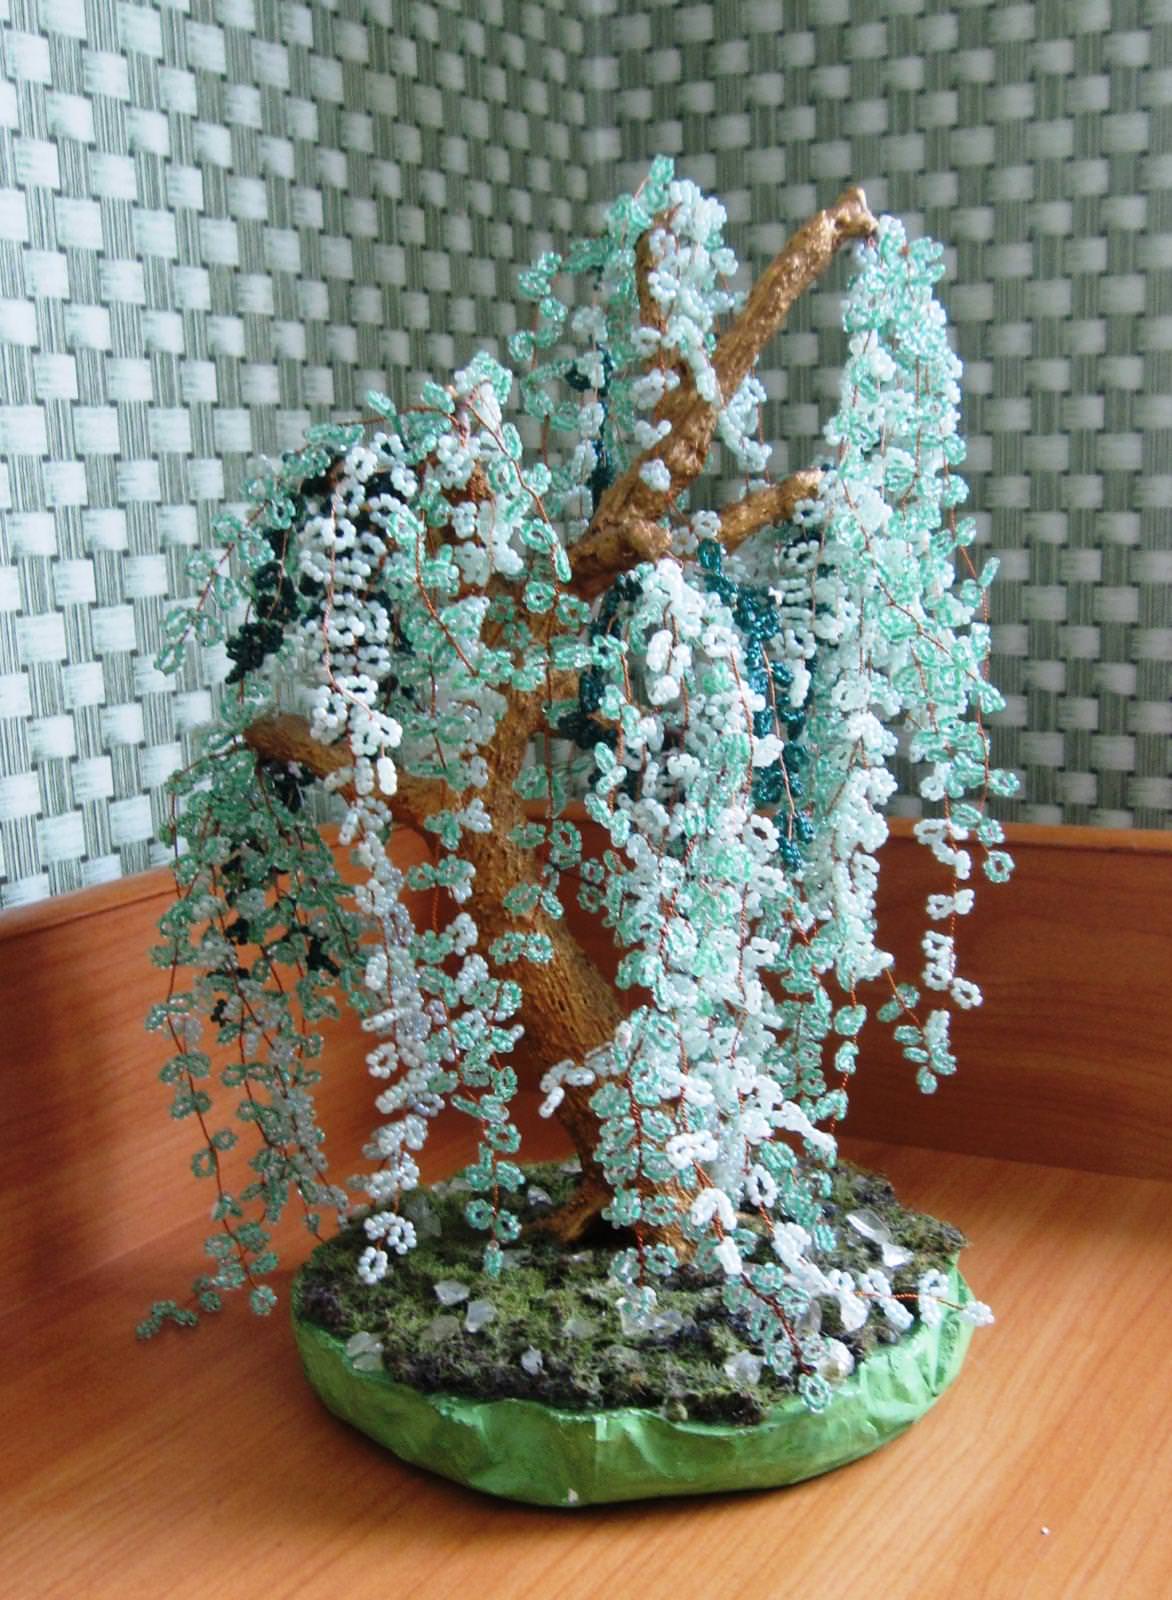
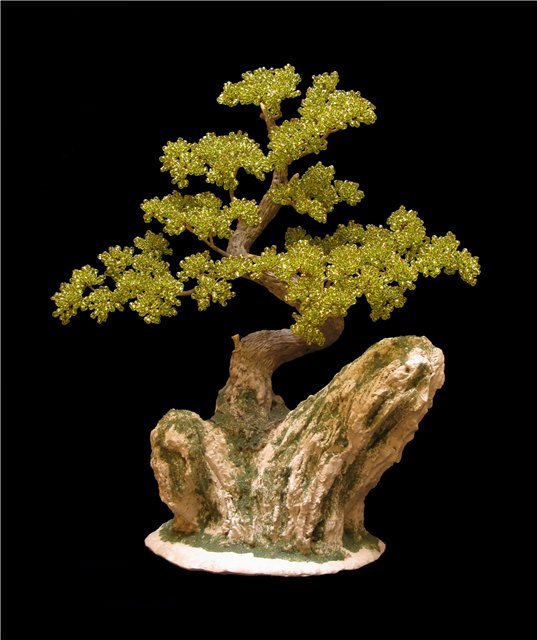
We try to choose bright beads of different colorscolor, because at present there is a monochromatic tree foliage. Ideally, use green beads at least 3 shades. The top of the willow is better to light shade of color, from the middle of a mixture, and the bottom - most dark.
When choosing foundation, also pay attention to the foliage: the lighter foliage - the lighter should stand. For trees with dark green foliage is perfect dark stand.
As you can see, if you wish, weeping willow Beaddone in a few hours, including the step of drying plaster. And of course a master class in helping very much. And if you just wrap the trunk fabric (tape) paint paint and put in the pot by imposing scenery, the time to create such a luxury goods spend even less!
If something still does not work - it is not necessaryjust frustrated and give up work - choose other weaving schemes and you will definitely be able to make its unique nice little willow, which will be an excellent gift or to decorate the interior of your home. Do not forget to make a souvenir photo for each of your products.
Video: willow weave their own hands