A word from threads: string art with your own hands
String art (string art) - not new, but enoughPopular creativity, using threads, ropes and nails to create decorative patterns, patterns and inscriptions. A small master class on this topic was already: a sprawling tree decorated the wall in the apartment. Today we will make such a string art with our own hands - the inscription in a beautiful font.  Prepare the basis for nailing. It can be a wooden board or three or four layers of cork decorative panels. In the latter version, the whole composition will be lightweight, and it will be easier to work with nails. The base can be painted white if desired, so that the bright letters look better.
  You have already chosen a word or phrase. Now work with the text on your computer: Word, Photoshop or any other editor that allows you to choose the font and size of the text. Be careful with the size. Letters will need to be printed, in most cases you will have a printer and A4 sheets at your disposal. Accordingly, the size of one letter should not exceed the A4 format. Have you created an inscription? Print out the letters and glue them together with adhesive tape in word.
  Place the template in the center of the base.
  Under the base, along the perimeter, it is better to put something to raise it above the surface. Then you will not beat the whole structure to the floor or table when you start working with nails.
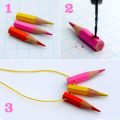
  Small carnations, hammer - and forward, to the next stage. Each letter "circle" with nails. Try to keep the nails at the same distance from each other.
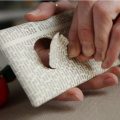
  Remove the paper template.
  Even without threads, at this stage, the picture looks original! But the most interesting is ahead.
  Prepare colored threads, for example, a mouline for embroidery.
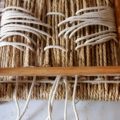
  Begin to "weave" from the top of the first letter. The less you think about the order of lines, the better. Just let your hands create! Begin and end the thread with a small and neat knot on the nail. Tail the tail "under the root".
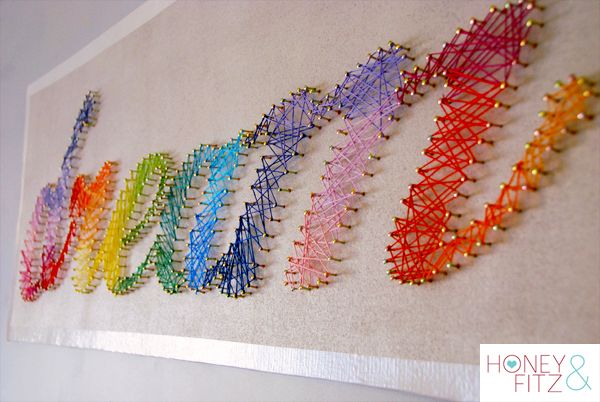
 When threads of different colors overlap one another, it gives a blending of colors and a smooth color transition.
  All! Hang your string art on the wall and admire the result!