Master class, for beginners to knit crochet, for making pints with their own hands, with diagrams describing and photo.
The greatest love in the world is experienced by mom toyour child. Care for the little man is manifested in everything. Delicious food, long lullabies for a sound sleep and sleepless mom's of the night. Clean diapers and clothes, which should always be comfortable and pleasant to wear. And of course beautiful. And you can create all this yourself. We only need a thread and a hook. Detailed master classes will help my mother's care to translate into lacy gizmos. Boots are soft shoes for very young children. It can look like a slipper, shoes, a boot or even a cowboy's boot. It protects the legs from cooling or excessive heating, but, beautifully executed, also serves as an ornament of the costume. Before proceeding directly to knitting, one must do several things. Select the yarn for knitting. It is necessary to understand for what time of year the booties will be intended. If for the winter, the choice of materials will be in favor of mixed yarn with wool content. This can also include acrylic, bamboo, silk. Yarn of pure wool is prickly enough and will not work for the delicate skin of a child. And additional components, like bamboo, give the threads softness. If booties are needed for summer time, then preference is given to an easy "breathable" yarn. It will include cotton and linen. Care must be taken to select a hook for knitting. Usually, the size of suitable hooks is indicated on the thread label. If this information does not appear, then you need to remember that the diameter of the thread must match the diameter of the hook in its narrowest place, near the head. The age of the child for whom the product is knitted is also important. If the baby is already actively moving, it is better not to use for decoration details that the baby can swallow. Beads, beads and ribbons are best replaced with a lace trim or choose a different color for the edging. If the baby learns to walk or runs, do not knit the soles of the wool or acrylic. This yarn will slide on linoleum or laminate, which can lead to a crumb injury. Another important point is the removal of measurements. There are ready-made tables with indices of length and width of the foot, and also with the girth of the child's calf. But even babies of the same age can differ in weight, height and size of the leg. Therefore, just before knitting you need to measure the baby's leg. For this it is enough to circle it on a piece of paper. The length of the foot will need to be measured from the thumb to the heel. If you plan to knit booties high, then you need to measure the girth of the lower leg slightly above the bones. All the obtained dimensions need to be slightly increased. After booties of any format should be free to put on kolgotochki or sliders and do not squeeze the legs. An important point for creating a pin is determining the length of the initial set of loops for knitting the feet. From the length of the foot, you subtract the width. For example, if the length is 12 cm and the width is 5 cm, then the length of the first row of the air loops will be 7 cm. Knitting usually uses patterns or verbal descriptions. In diagrams, all loops are indicated by certain icons. They are universal for any language and, considering a beautiful model of pints in the Japanese magazine for needlework, you can easily understand the pattern of the pattern and tie the model, even without knowing the language. The verbal description consists in listing all types of loops and actions with them. This master class is offered for beginner needlewomen, therefore it includes both diagrams and descriptions. For starters, you can consider knitting quite simple, and yet beautiful, pinets. Knitting will use the following types of loops:
- The air loop (vp);
- Stack without crochet (st.b.n.);
- Column with 1 cape (st.s n.);
- Connecting column (connecting loop);
- Two columns with a crochet with 1 top.
In this master class booties are connected fromAcrylic thread crochet №1,5. For the girls, intended for girls, you can use pink and white thread. And for boys, replace them with green or blue. And you can connect them brightly yellow. These are suitable for everyone. These booties are knitted for a small princess with a foot length of 9 cm. 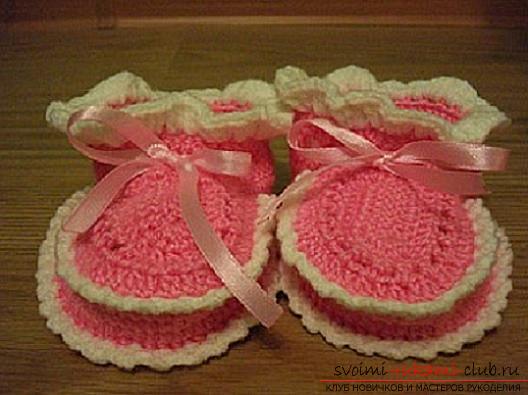 At the beginning, the soles of the pinets are knit.
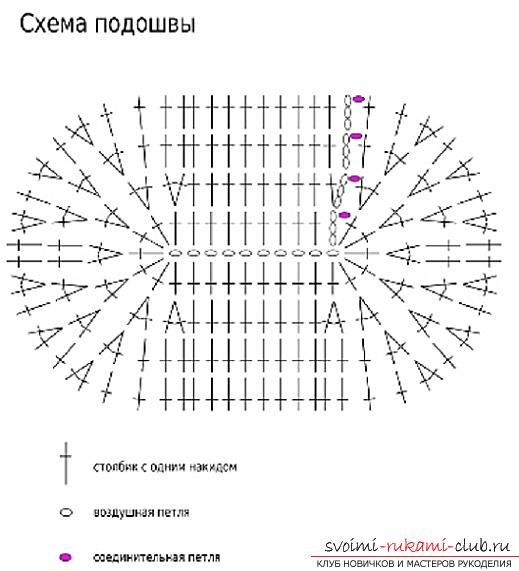
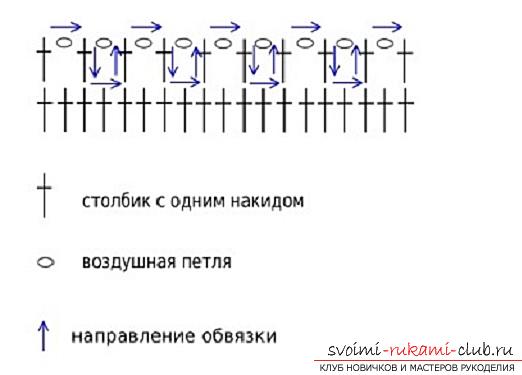
The side of the pinets. For starters, a series of jumps from the horizontal plane of the sole to the vertical plane of the booties' fittings is tied. It also serves to strengthen the form. To do this, you need to tie a row of columns without a crochet into each loop of the previous row. Hook must be entered from right to left, holding it at work (it seems to be wrapped around a column with a crochet of the last row of the foot). The thread stretches to the wrong side. After that, tie 3 rows of sts. Starting with 3 air lifting loops and ending with the connecting post. Loops do not add. Noose booties. 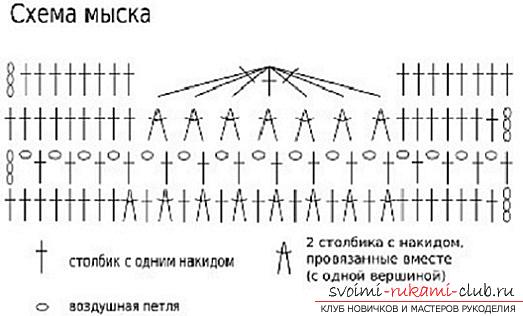 First you need to find the booties center. You can fold it along for this. Count 19 loops in each direction. Mark them. To do this, use a thread of contrasting color or a special plastic marker.
Top booties. 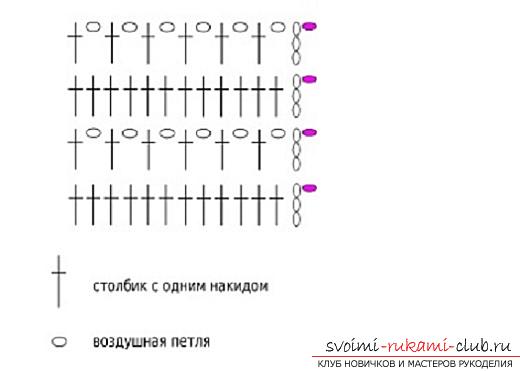 Pull the thread out on the wrong side.
Take yarn of a different color. Tie a spout and a sole according to the scheme of three air loops, then 2 connecting posts. Tie the top of the booties according to the scheme:
You can choose a beautiful ribbon or lace, thread it in the loops of the second row of the top of the booties and tie it with a beautiful bow. The second bootleg is similar.
Comments
Related posts:
 Master class on knitting monkeys with amigurum crochet for beginners with step-by-step description and photo.
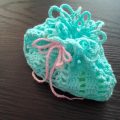 Master class with photo and description will teach how to tie your hands with New Year bags for gifts
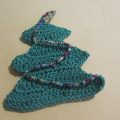 This master class New Year crafts with their own hands with a photo and description will teach how to tie a Christmas tree crochet
 This master class with a description, diagram and video will teach how to knit booties crocheted.
 Master class on creating a flower Kanzashi with your own hands for beginners with a photo and description.