
With our own hands we create original and beautiful headlights for the car, a step-by-step instruction on how to perform
The machine should not only be a toolmovement, but also be beautiful. The first thing that a person looks at is his eyes, so we'll talk about the "eyes" of the car, or rather about how to give your radiance in the headlights your four-wheeled favorite. To do this you need to purchase an extra plexiglass bar (sold in the department store specializing in light music and lighting bars, cafes, restaurants). Detailed actions: 1. The headlamp must be dismantled to such a state  2. Now the plexiglass rod is bent and tried on the headlight (the rod bends only by heating)
  3. Cut to size and solder
  4. When connecting the rod to the LED looks like this.
 A diode is necessary for safe operationstabilizer, so that when connecting, do not mix "+" and "-". If you use conders for this, then the diode is not needed and only one is enough, in this case the conditors smooth the pulsation. 5. To diodes have served you for a long time - you need to make drivers, individual for each ring. The driver is installed inside the headlight and is connected to the dimensions. Two drivers are used so that under the hood do not pull a lot of wires.
 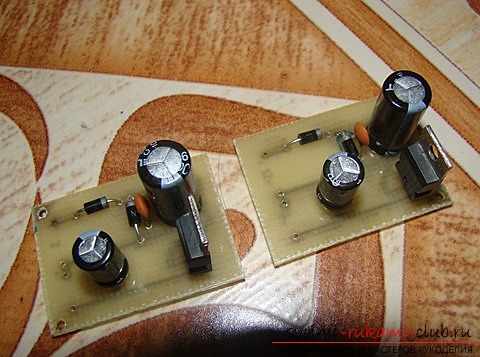 Example of a voltage regulator circuit. For example, from the 78LXX series: the last digit is the required output voltage, that is, which is taken to calculate the additional resistor for the LEDs.
 1. Cover the paint in the tone of the machine and attach the ring
  2. Assemble in reverse order the headlamp
  3. General view of headlights
  We put on a native place and we enjoy
Comments
Related posts:
 Decorative wreath in the form of cobwebs and a spider for her own hands, step by step instruction for manufacturing.
 Unusual elements of decor, how to make a hanging wigwam with your hands, step by step instruction.
 How to make your own hands beautiful and original crafts using kiwing techniques and others, step-by-step photos and instructions for creating paper crafts
 Step-by-step instruction on how to make an evening hairstyle yourself
 The idea of a scrapbooking organizer with your own hands. Materials, step-by-step instruction.