Waldorf doll, her pattern and explanations for the creation.
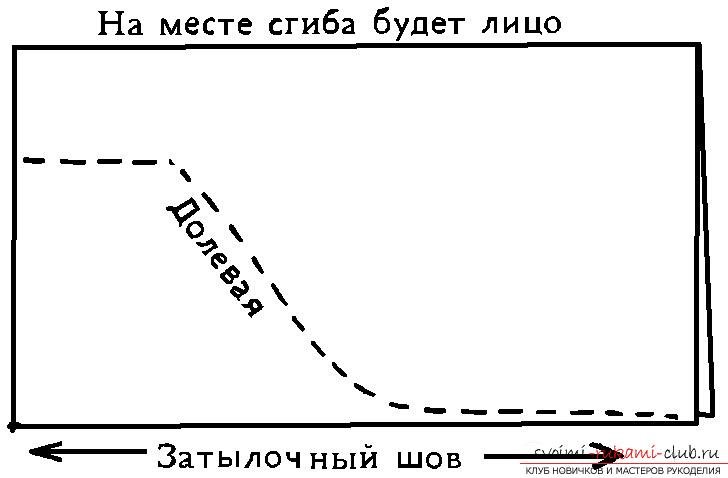
A Waldorf doll is a special kindtextile dolls, which were developed by teachers specifically for kindergartens and schools. The purpose of such dolls is to care for and provide special attention to the child's moral and physical health, taking into account their natural development. The invention of Waldorf dolls, both initially and now, is aimed at the child's proper growth and harmonious and coordinated development, and not at making a profit. When creating Waldorf dolls, the authors were guided by the use of only natural materials. The skin of babies is too sensitive to external irritants and it would be much better for any child to initially become familiar only with the natural materials of the surrounding world. And a natural doll, created with your own hands, is filled with the energy and love of its master, which will be transmitted to your baby through touch. A traditional Waldorf doll is created from materials such as knitwear, sheep wool, linen, cotton, etc. This doll is made using an exclusive technology (sewing machines are not used if possible). Unlike many well-known textile dolls, Waldorf dolls have clear proportions corresponding to the proportions of an adult or child's body. This is done with the aim that the child, playing with the doll, accepts real, undistorted information about people, animals and the world around him in general. Although each doll has its own individuality, there are still common distinctive features. These dolls have smooth shapes. All facial features, although worked out, are conditional. This is done in order to develop the child's imagination. When choosing a toy, be sure to take into account the age and character of the baby for whom this doll is intended. It should also be noted that a certain toy is intended for each age of the child. The older the child, the more specific all the details and facial features of the doll are. The doll becomes, as it were, finalized. Now let's look at the pattern diagram of a Waldorf doll, which can be found below.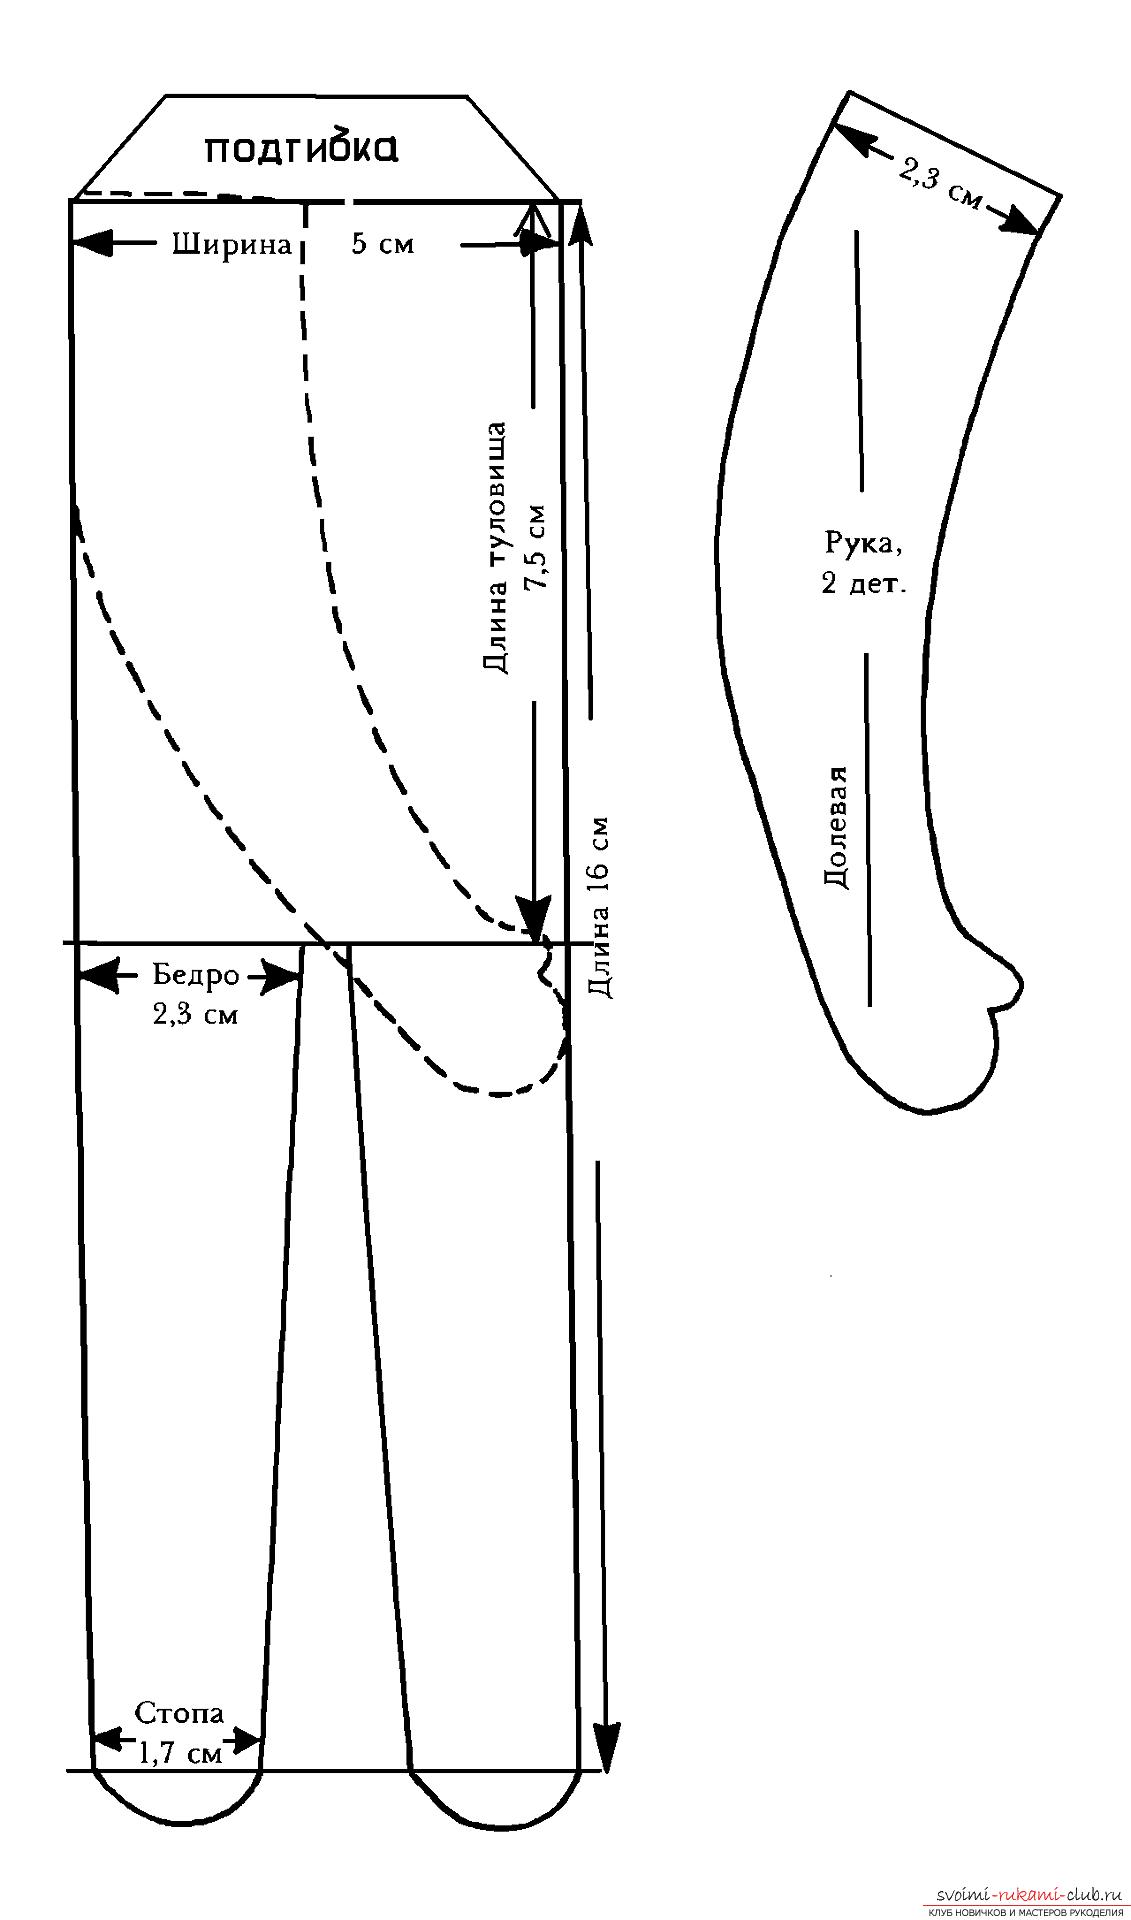 You can increase the size of your pattern byusing a computer or do it directly when cutting. But keep in mind that by increasing the doll's body by 1 cm (0.5 cm on each side), you need to increase its length by 2 cm, the length of the legs should also be increased by 2 cm. In general, the doll should become 4 cm longer. Do not forget about the arms, they need to be made thicker by 0.5 cm and lengthened by 2 cm. In any case, the arms should remain exactly the same length as the body. As for the head, the piece of fabric for its manufacture should be taken in a rectangular shape. Its size will correspond to the double width of the doll and its length. Based on the dimensions of our doll - this will be 10 by 15 cm. The shared thread should be put along the side that is shorter. It is recommended to start making the doll itself from the head, and then - select a suitable pattern for it. The head is considered the most difficult work, so it will be easier to match the body to it than vice versa. Below you can see a diagram illustrating an example of laying out the pattern on the fabric, and do not forget about the seam allowances, they should be at least 0.5 cm.
 It is also necessary to dwell separately onmaking a Waldorf doll's head. You need to prepare 3-4 wool or synthetic padding strips, their width should be 3-4 cm, and the length - about 25 cm. Keep in mind that a large amount of stuffing material will be used to make the head. Roll a ball from the material that you decided to use to fill the doll (choose one that does not shed), if it crumbles, it is better to wrap it in gauze or some similar material. Wrap the resulting ball with strips of pre-prepared synthetic padding. They should completely cover the ball, and the ends are gathered in one place to form the future neck.
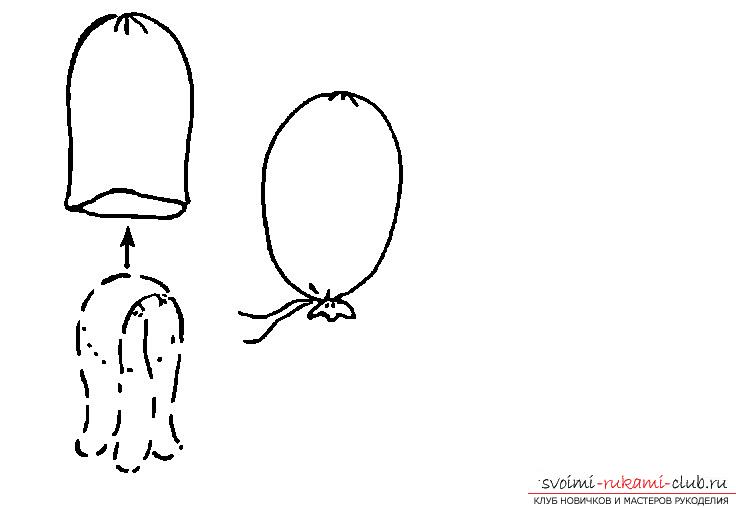 Place the resulting ball into the preparedthe shell and tie it up. Take a good look at the resulting bag. We will make the head and neck out of it. Wrap a strong thread around the area between the neck and the head several times. Before it is too late, carefully check the density of the stuffing in the chin area and the thickness of the neck. If you are not very happy with something, you can still fix it. It is better to sew the resulting knot inside as illustrated in the picture, and it is better to make the neck longer than the finished doll's (up to one third of the head of our doll).
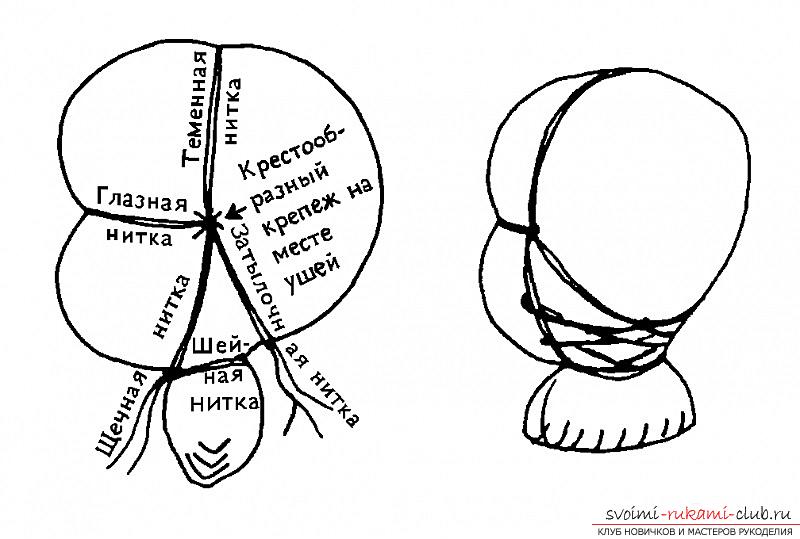
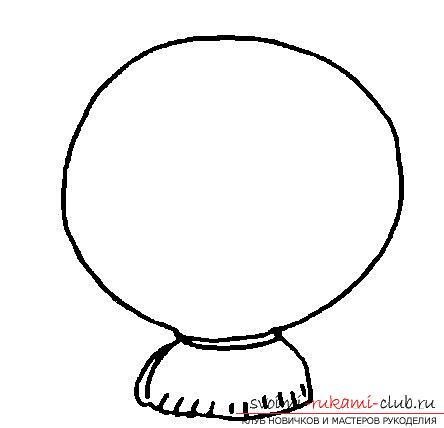 Now you can start shaping the ball.head. Take a strong thread and wrap it around the middle of the head. The thread should press the head and go into it. At the back of the head, you need to tie a knot, leaving the ends about 10 cm. The resulting eye thread should be located in the middle between the lines of our doll's chin and the top of the head, like a person. The second thread should be wrapped around the head, placing it across the first. Place the thread on the crown so that it crosses the eye thread where the doll's ears will be. It should be tied under the chin so that the ends are not too long. Both intersections of the threads on the sides are better sewn with several stitches for strength. After that, move the eye thread on the back of the head down as illustrated in the diagram. The ends of the threads should be hidden by passing them through the cheek threads located on the back of the head. Connect them with one knot and cut.
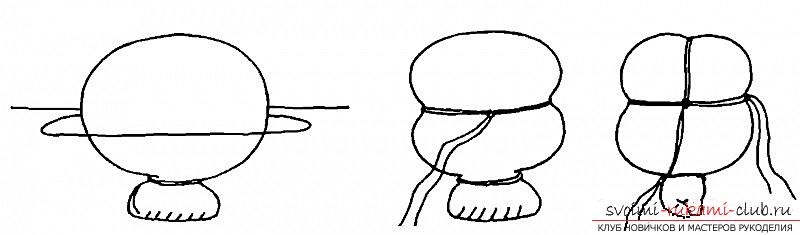
 Our head is fully formed.If your skill level is not so high, then you should not make a nose, it will cause a lot of extra trouble. Now let's start covering the head. You need to take a piece of flesh-colored knitted fabric and fold it in half with the face inward. Place the doll's face inside, the middle of the face should be on the fold line. Similarly to the drawing, outline the occipital and neck lines. Sew along the resulting line, cut out and turn it inside out as neatly as possible.The resulting shell needs to be put on the headso that the seam is in the middle of the back of the head. Make sure that the fabric located on the face lies smoothly and is not skewed. Straighten the knitwear on the neck and chin, pull it tight and sew it up. Then do the same with the shell in the crown area. Don't be afraid, the seams will not be visible, because one will be hidden in the body, and the other will be under the hair. This is how we prepared the base of our head. After our doll's head is completely ready, we need to adjust the dimensions of our doll's body so that its length from the neck to the feet is three times longer than the length of the head. Then lay out the adjusted pattern on a piece of fabric, trace it and pin it. It is easier to cut out the parts after all the seams are done. You need to sew twice: the first time - along the contour, and the second - slightly retreating outward from the contours. The top of the body does not need to be stitched. The doll's body should be cut out carefully using sharp scissors. In the area of the toes and between the legs, you need to cut closer to the seams. This is done to make it easier to turn the body inside out.
Comments
Related posts:
 A winter envelope for a newborn at home. Simple and qualitative schemes and instructions for creating clothes for your babies
 Doll-box with a surprise at the contest Spring 2016, handmade dolls pattern
 Doll-box with your hands on the 2015 contest, dolls own hands
 Doll The pupil-mischief-maker, dolls with own hands from the master Olga
 Explanations and recommendations for making a pattern of dresses for the Barbie doll.