
Halloween pumpkin: how to cut a pumpkin?
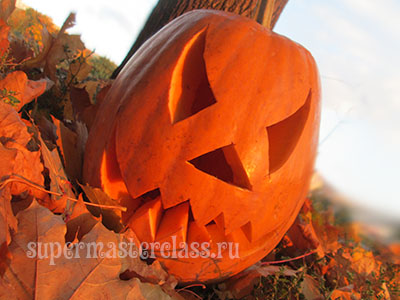 Halloween for needlewomen - a special holiday. First of all, the fact that it gives the opportunity to try yourself in new techniques. For example, in the vegetable carving technique, in particular, in the creation of a traditional lantern pumpkin head for Halloween. But do you know how to cut a pumpkin correctly? We offer you a simple master class on the creation of this extremely important holiday attribute. And how he will be - funny, mysterious or sinister - it's up to you to decide!
To make a festive pumpkin for Halloween, you will need:
1 ripe pumpkin, steadily standing and relativelysymmetrical; sharp knives - one with a short blade; a spoon on a long handle (or a regular table); marker and / or awl; to the marker - alcohol and cotton pads; capacity for sunflower seeds. 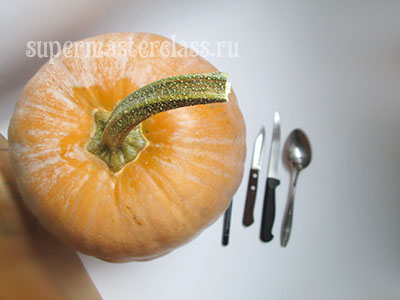
How to cut a pumpkin for Halloween: description of work
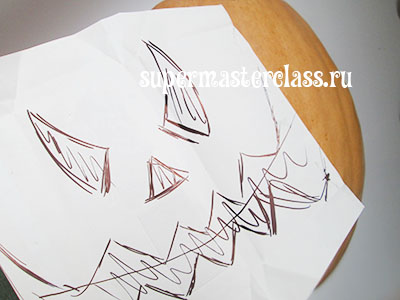
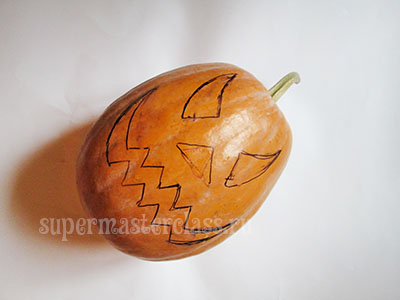
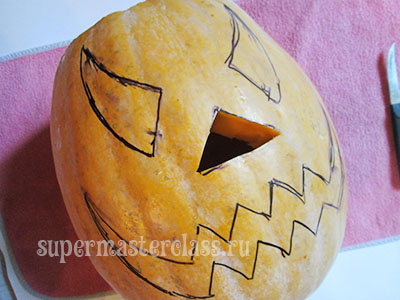
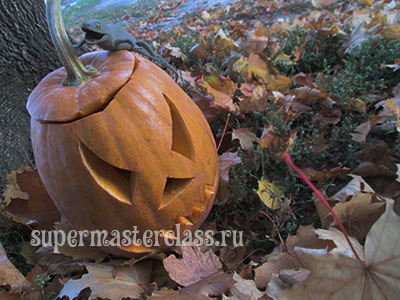
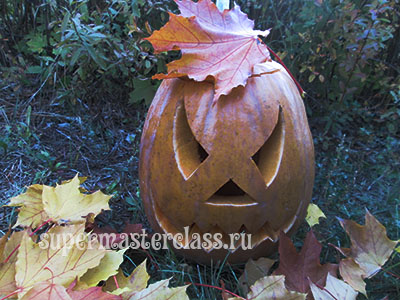
Pumpkin carefully wash and leave to dry. The “right” Halloween pumpkin should have a ripe appearance, if there is a choice - saturated color. Let the pumpkin tail look secure: you can lift a pumpkin for it. If this is not the case, it is better to search for other fruit for cutting, since it is by the tail that one can determine how long Jack’s head will live. A pumpkin with a falling tail will quickly rot, and you will not have time to enjoy the result of your work. If you are seriously going to use a pumpkin carved for Halloween as a lantern with a candle, we advise you to choose an oblong-shaped fruit that extends upwards so that the “lid” is as far as possible from the heat source. To cut a pumpkin, take 2-3 knives - if you have never dealt with carving, it is still not clear which knife is more comfortable to lie in your hand. I cut off the cover with a knife with a medium-sized blade, and cut the holes with a short knife with a curved blade-nail file. But first things first. So, the still unremarkable pumpkin is ready to be transformed in the most wonderful way with your help. Professionals of pumpkin business cut mordahi without a sketch, impromptu. But if on your conscience there are not a couple of hundreds of pumpkins decorated and turned into lanterns, you cannot do without a sketch. For the first experience, we recommend choosing a “face” easier, without an abundance of curved lines and small details. Our sample is fine. However, many prefer to make it even simpler: to complement the triangular eyes and nose with a wide smile, sometimes with a smile with teeth. Or fangs. As it should be on the eve of Halloween. I took a piece of paper, on which the face, in translation into a pumpkin, would fit, and drew one of the “classic” design options for a pumpkin. Although there is a classic in such a creative business? You can transfer the drawing to the pumpkin in two ways: with the help of the sewing, chop through the sheet with the sketch the outlines of the future slots. Or a marker - directly on the pumpkin, by eye. I chose the option with a marker, and transferred the drawing to the pumpkin. Subsequently, I clarified it several times, and erased the extra lines with a cotton pad dipped in medical alcohol, so as not to get confused when it comes to cutting. 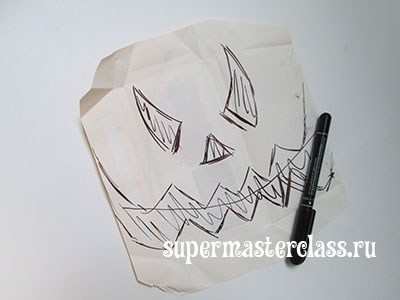
 Getting to the most important and most difficult. The lid is usually cut by inserting the knife at an angle from top to bottom - towards the center of the pumpkin. Thus, you take out the cover with a cone-shaped piece of pumpkin pulp. The flesh can be immediately cut.
 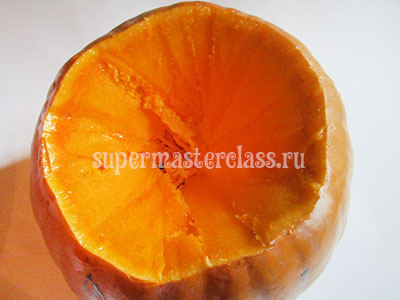 Let's work with the pumpkin itself - I was hoping fora tablespoon, but to scrape the pulp with it in the first stage did not go out categorically, so I had to work with my hands. In a separate container lay out everything that can be removed from the pumpkin - seeds and "insides". When they almost do not remain, we still return to our tablespoon (although it would be more appropriate to use some kind of scraper) and scrape the inner surface of the pumpkin with it, freeing it from fiber residues and seeds.
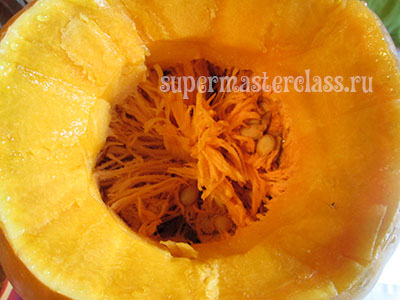
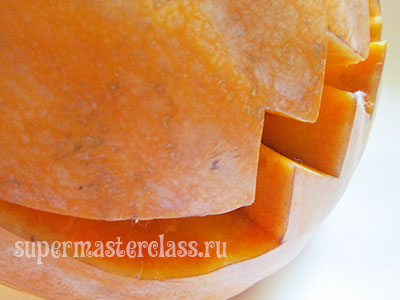
 The hardest thing behind, the most interesting - ahead. For a start, I recommend to practice on simple lines. I have this nose. Take and cut the first line, introducing the knife perpendicular to the surface of the pumpkin.
 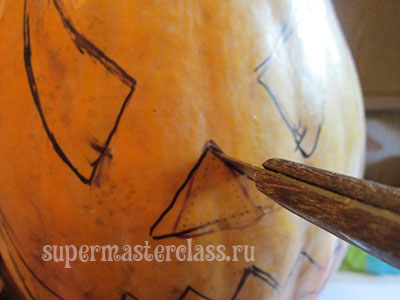 For the next line - take out the knife (notturn it in the pumpkin!) and cut it in the same way as the first one. I cut through the perimeter and ... The detail did not want to be pushed inwards! I had to cut it again, on the already prepared cuts, especially carefully studying the corners - the flesh in them, as it turned out, was not cut through to the end.
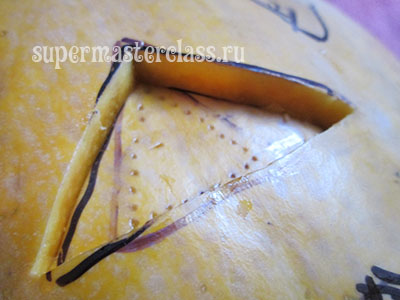
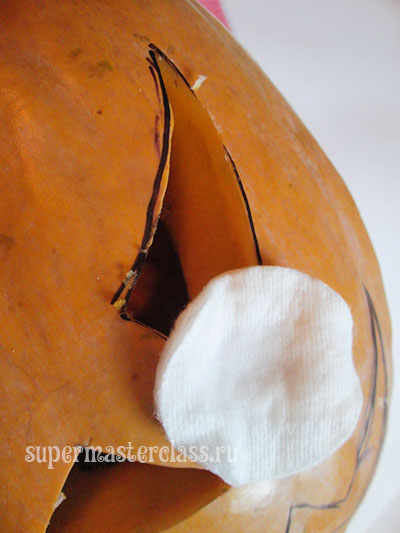
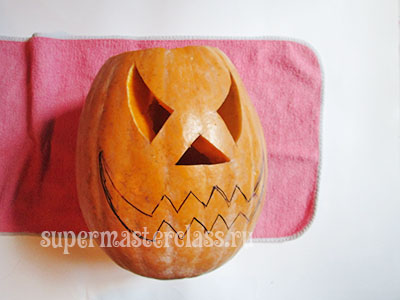
 Immediately after cutting each piece, I erasedmarker lines with alcohol so that the dye does not paint the flesh along the contour of the hole. The rounded lines can be cut as follows: mark the line with a knife, cutting through only one skin, and then “repeat” the same thing, inserting the knife deeply, through all the pulp. Thus, it is easier to avoid making unnecessary cuts. We train on the eyes, and then proceed to cutting out our charming smile. A smile can be cut in parts, in several passes. Here as it is convenient to whom.
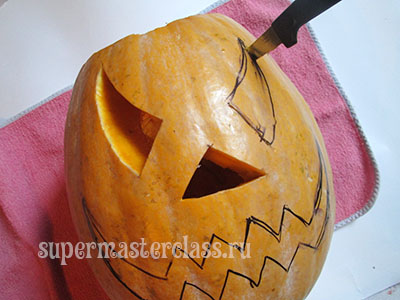
 Once again we walk on the surface of the pumpkin with alcohol,if there are areas stained with marker. We check that there are no cut fragments left in the pumpkin, cover it with a lid and leave it in a cool place for at least 12 hours to dry a little.
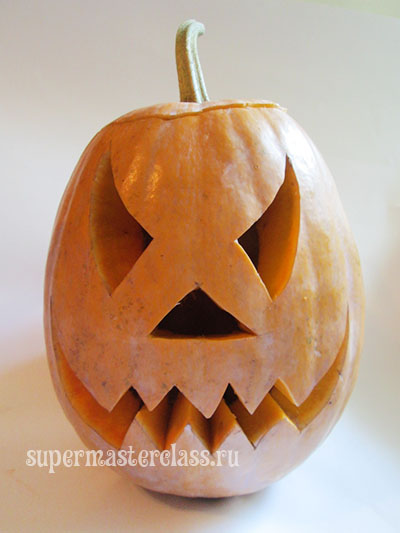
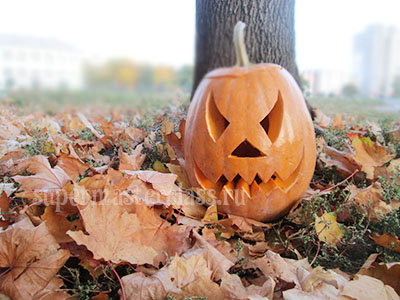
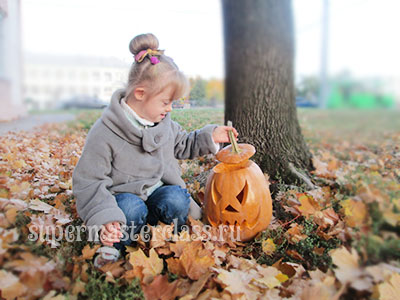
 Candle inside the "head" is recommended to put in a jar. Do not forget the seeds: they can be washed from the fibers and ... left on the seeds, dried and eaten, and before that - let the younger members of the family play. Wet in them is surprisingly fascinating to poke around, the mass of new sensory sensations is guaranteed. To count, pour from one container to another, catch naughty slippery seeds on a plate - we did all this intermittently from noon until evening, and the game did not exhaust itself! Happy holiday! We hope, our master class clearly explained how to cut a pumpkin for Halloween and inspired to perform a creative mini-feat. Eva Casio specifically for the site Previous article: Next article:
Comments
Related posts:
 Pictures from thermomosaic on the theme of halloween (schemes): ghost, pumpkin, bat
 How to make an original pumpkin for Halloween from felt with your hands? Detailed instructions with step-by-step photos
 Crafts made of pumpkin. Scenery on Halloween with your own hands.
 20 ideas how to decorate a house on Halloween with your own hands.
 Autumn crafts in school + master class pumpkin from beads.