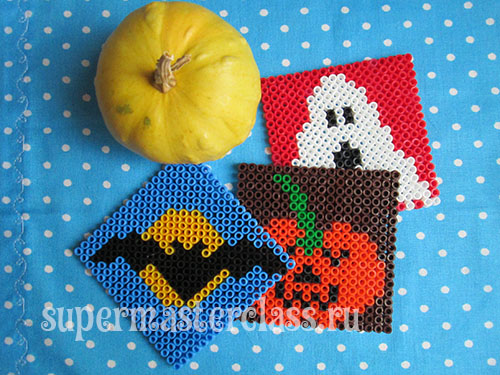
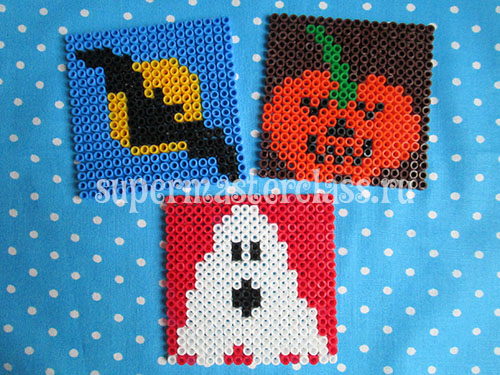
Pictures from thermomosaic on the theme of halloween (schemes): ghost, pumpkin, bat
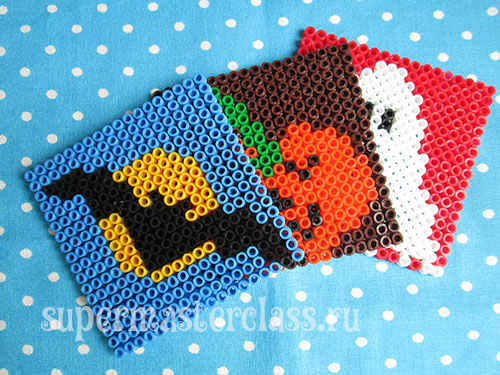
 Thermomosaic has long ceased to be a toyfor kids. Adults with no less pleasure from small cylinders make up beautiful paintings and original crafts. But today we are offering you, in honor of the upcoming Halloween holiday, to make three square pictures, which you can later use as supports for hot or turn them into cute themed pendants.
To create them will need:
thermomosaic cylinders (for me - from IKEA); a square tablet with side 19 or any other, with the location of the pins exactly one below the other (not a chess card); iron; tracing paper (baking paper will do)
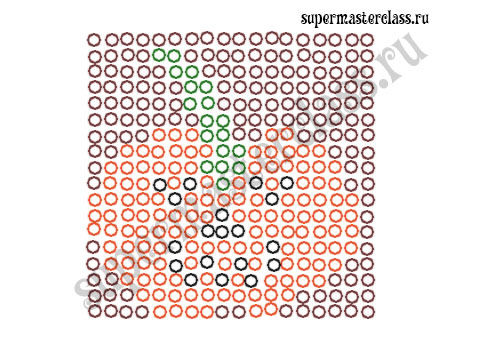
Halloween Thermomosaic Patterns
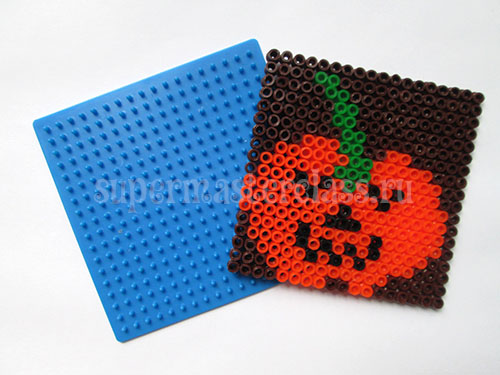
We offer you three author's schemes: bat in the night against the backdrop of the moon; carved pumpkin and ghost. Click on the scheme to go to a separate window and copy the scheme to your device. 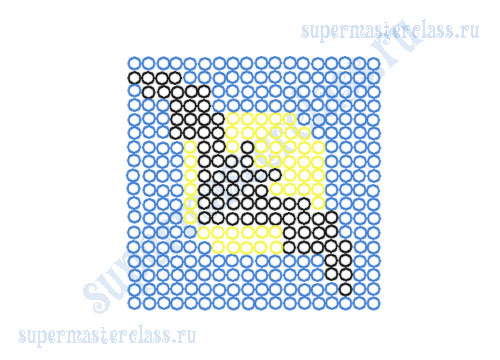

Halloween Thermal Mosaic Pictures: Job Description
We lay out the image on the plateau-based beadsdesired colors. We shift the plateau on a flat hard surface, which is not afraid of the heat (it will not be too hot, but still - damaging the varnished table will definitely be unpleasant). 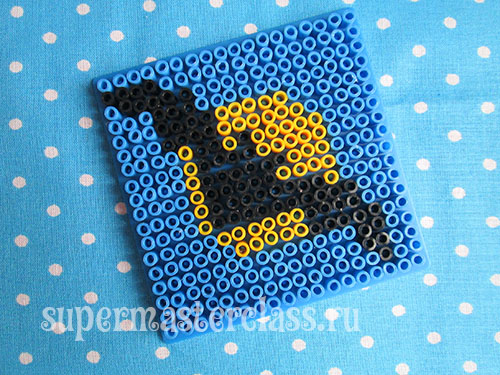 From tracing paper, I always cut a piece a little larger than the plateau on which the mosaic is laid, since a large sheet can move and drop the beads.
 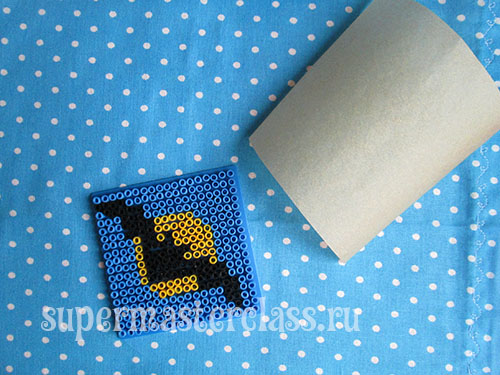 Carefully impose tracing paper on the mosaic and begin to iron, lightly pressing the iron.
 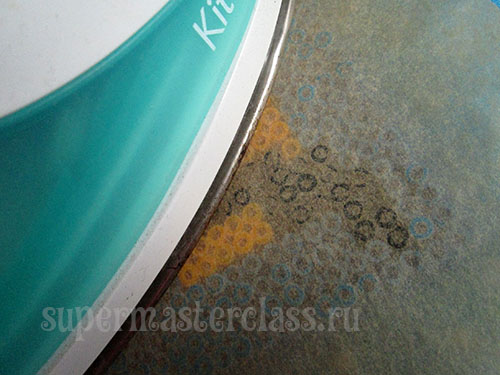 You will see how the beads flatten out a little and melt on the paper: this is as it should be. It looks something like the following photo.
 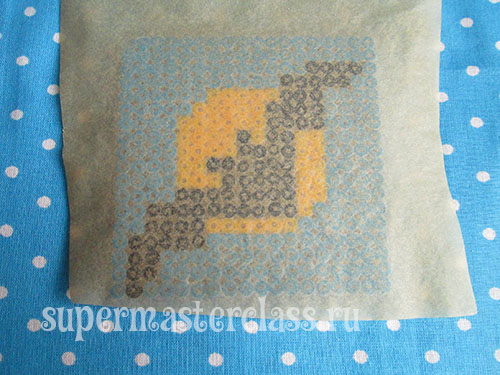 You can continue to iron to beadsthoroughly stuck together, especially if you are not preparing a suspension, but a stand for the hot: then all the elements should be connected as reliably as possible. Particular attention - the corners: they are often not captured by the iron and then break off, violating the beauty of the finished product. Leave our stock to cool and carefully remove the paper. It turns out so.
 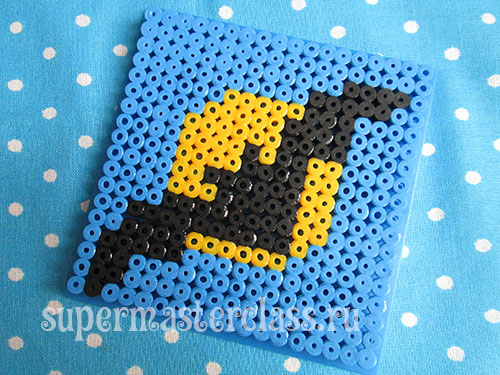 Even if the inside is melted well, on the other handside of the picture is still clear, consisting of detached elements. But, I must admit, the product itself turns out quite fragile. To glue better, it is advisable to iron (and therefore deform) the beads and from the front side. We didn’t do this and we’ve handled pictures on Halloween very carefully.
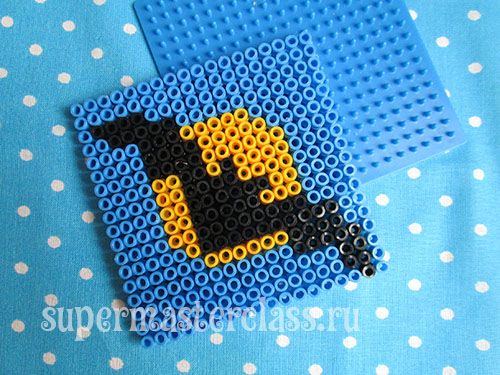
 Eva Casio specifically for the site Workshops on needlework Previous article: Next article:
Comments
Related posts:
 We make an excellent outfit with our own hands. Pattern of universal dress bat that will make you the most beautiful and irresistible. Photos and instructions
 Blouse bat - Marina's work
 Green tunic with sleeves "Bat"
 Jacket Bat. Work Alise Crochet
 Knitting needles sweater bat with holes. Diagram and description for beginners