How to knit summer sandals for a baby crochet? Detailed instructions with step-by-step photos and a video tutorial
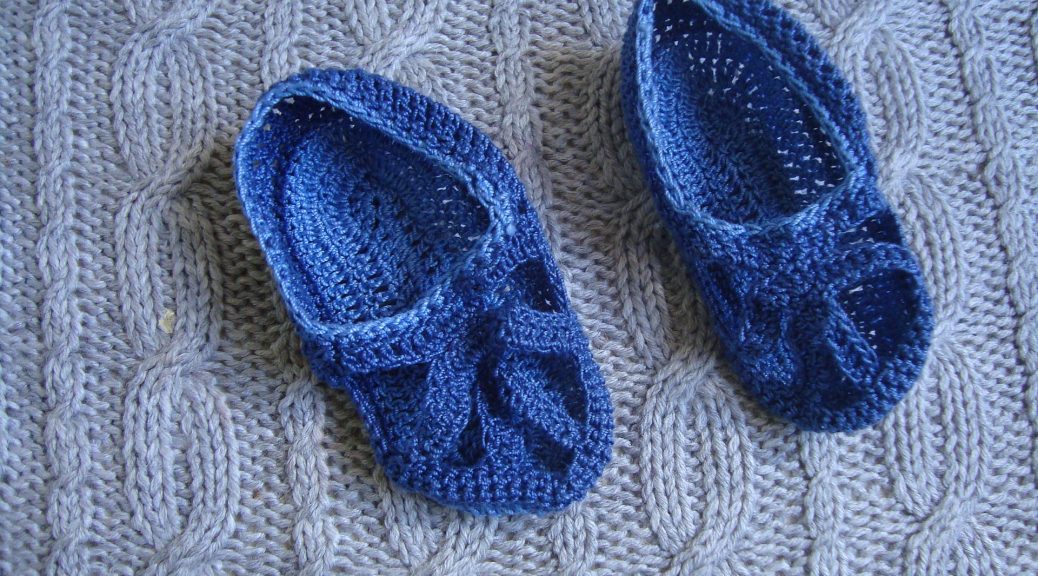
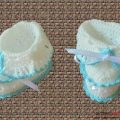
Children's shoes come in a variety of styles and the mostunpredictable. When a baby cannot walk on his own, his shoes are designed to keep his feet warm, but on summer days the purpose changes, and babies put on cute booties or thin sandals that are knitted from cotton thread. Such sandals cover the baby's foot, stay on the foot well and at the same time have a cute, interesting look. The semi-open toes of summer booties provide comfort to the baby's foot.
To create children's sandals,
Principle of operation
The product is created in strict order:First, you need to knit the base for the foot (i.e. the sole), then knit the side parts of the entire sandal, then create the front stripes, and finish the work with a circular edging. When knitting, columns and half columns are used, so a beginner craftswoman can repeat the work. Cotton yarn is quite soft and very pleasant to the touch, so the baby will be comfortable. These sandals are practical for the first steps around the house, as they are easy to wash and do not lose their original shape.
Video instruction
Stages of work
To create the sole, cast on a chain of 15air loops of blue yarn. To do this, create the first loop by bending, insert the hook into it and pull out the next loop, again hook the cotton blue thread and pull it out of the previous element to get a new loop, and repeat the actions fifteen times. The first row will be created from blue yarn in a circle. First, insert the hook into the penultimate loop, pick up the thread and pull, but do not knit the loop on the hook. Again, grab the freely hanging thread and knit it through the two loops that are on the hook. Repeat knitting in each braid of the previous row, then turn the work in a circle and knit the second side with similar manipulations. You will need three rows in a circle to create sandals for a 3-4 month old baby, if your child is older, then increase the number of rows by one.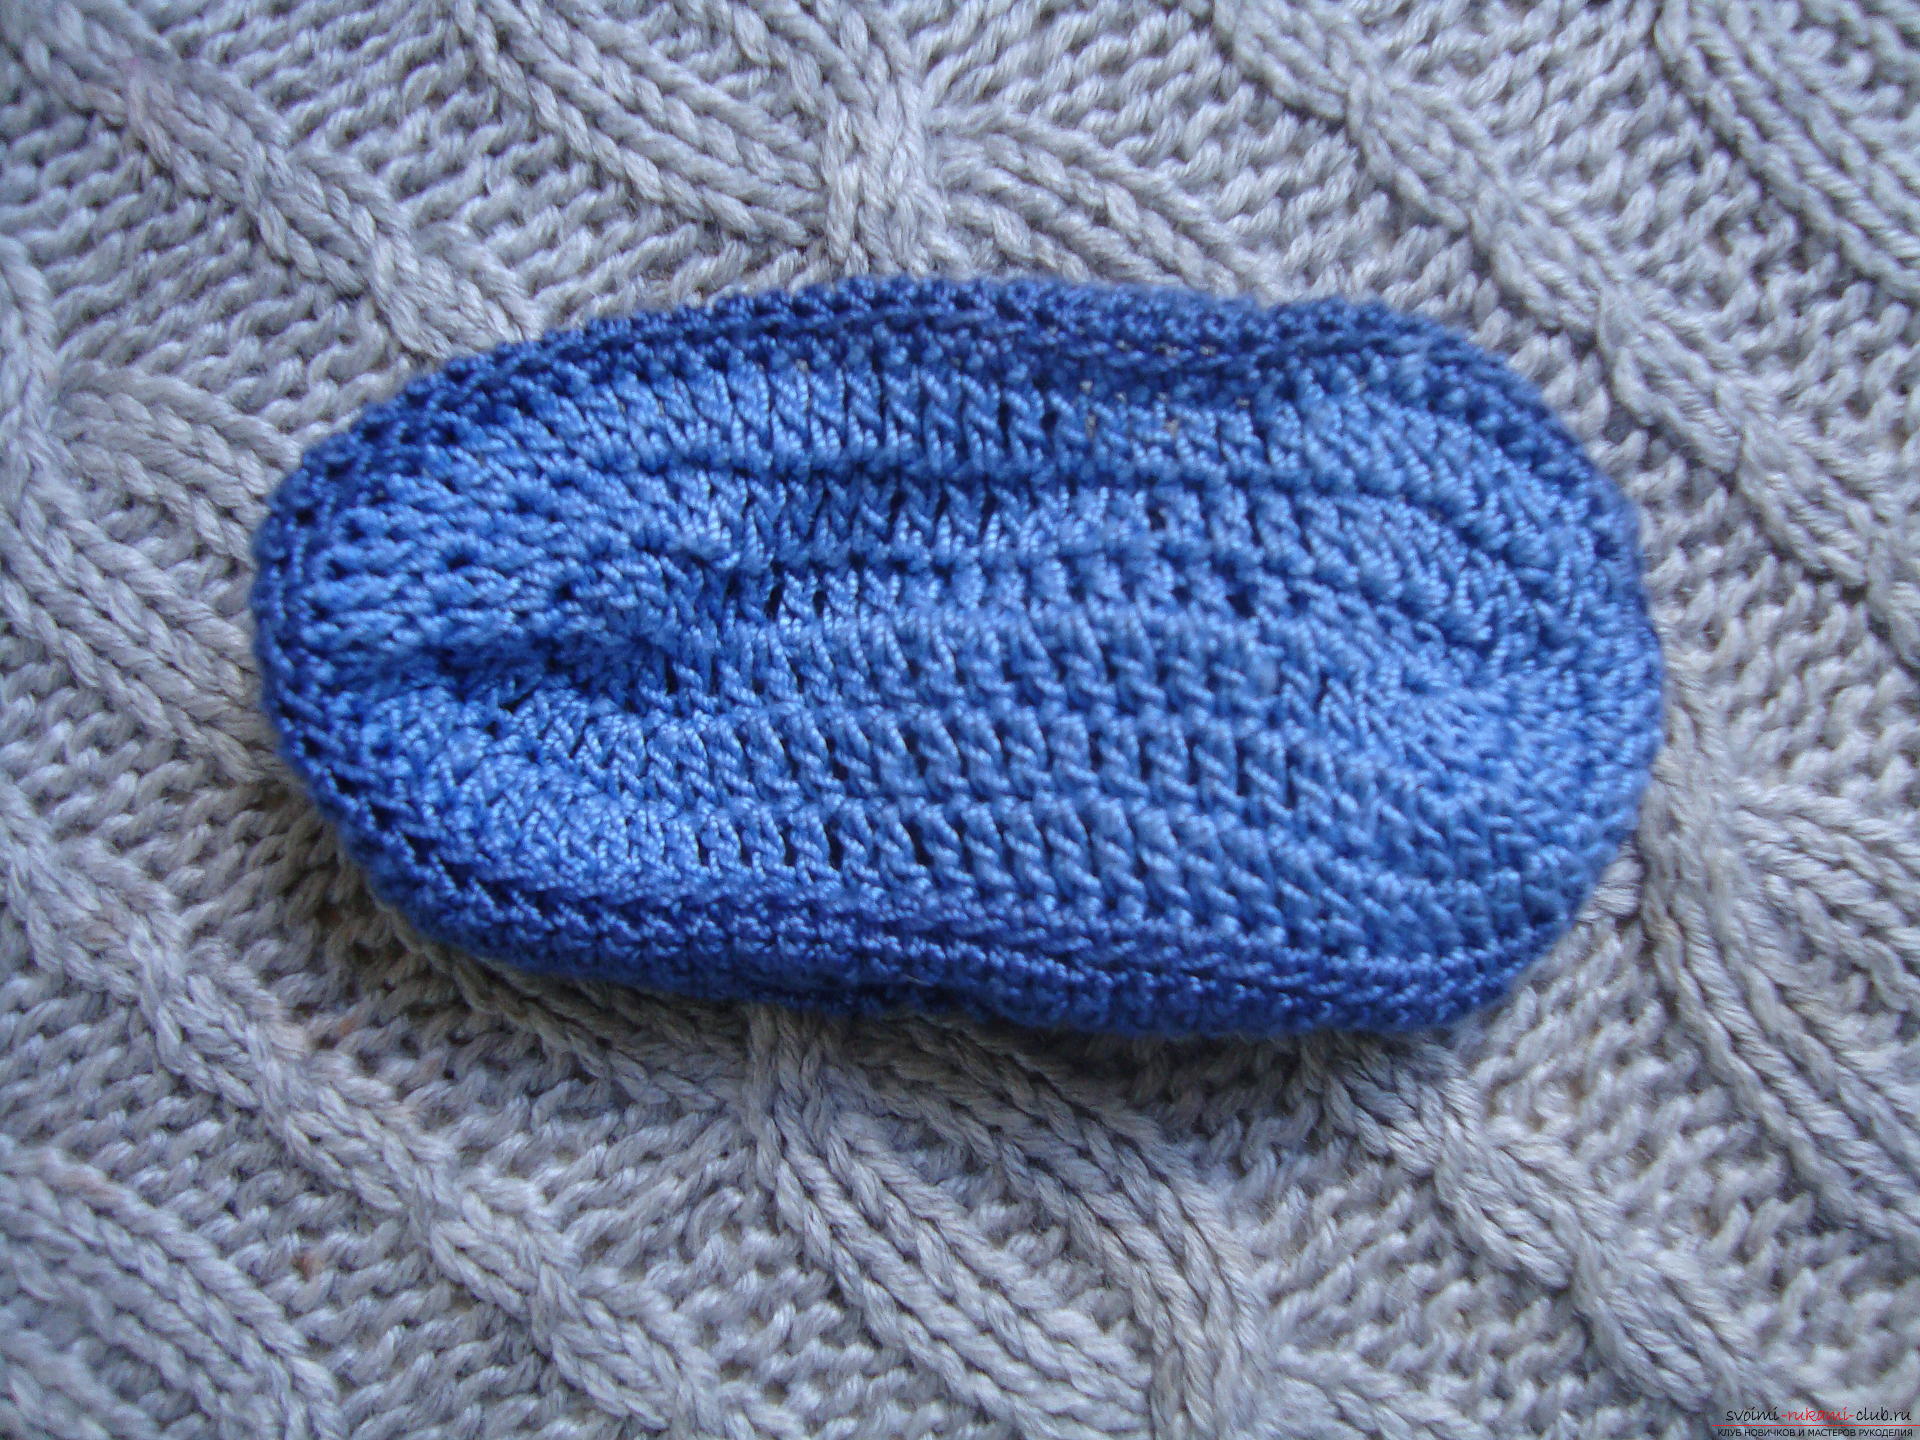 In any case, when crocheting you can alwaystry the part on the foot, to do this, stretch the last working loop strongly, remove the knitting tool and attach the part to the baby's foot. If the length of the sole is not enough, then it is necessary to tie the part with a large number of the first air loops. When the sole is narrow - additional tying with another row of columns is required. The last row of the foot is knitted from yarn of a different color (it should be similar in width). For tying, you need to knit half-columns, that is, when the hook is inserted under the braid of the previous row, you grab the yarn and immediately throw the previous element, which is on the hook, onto the new loop. At the second stage, we proceed to knitting the side of the sandal. To do this, dial a row of half-columns from the second part, that is, the inner edge, of the braid of the previous row. Such a bevel will allow you to move the knitting from the horizontal expansion vertically upward.
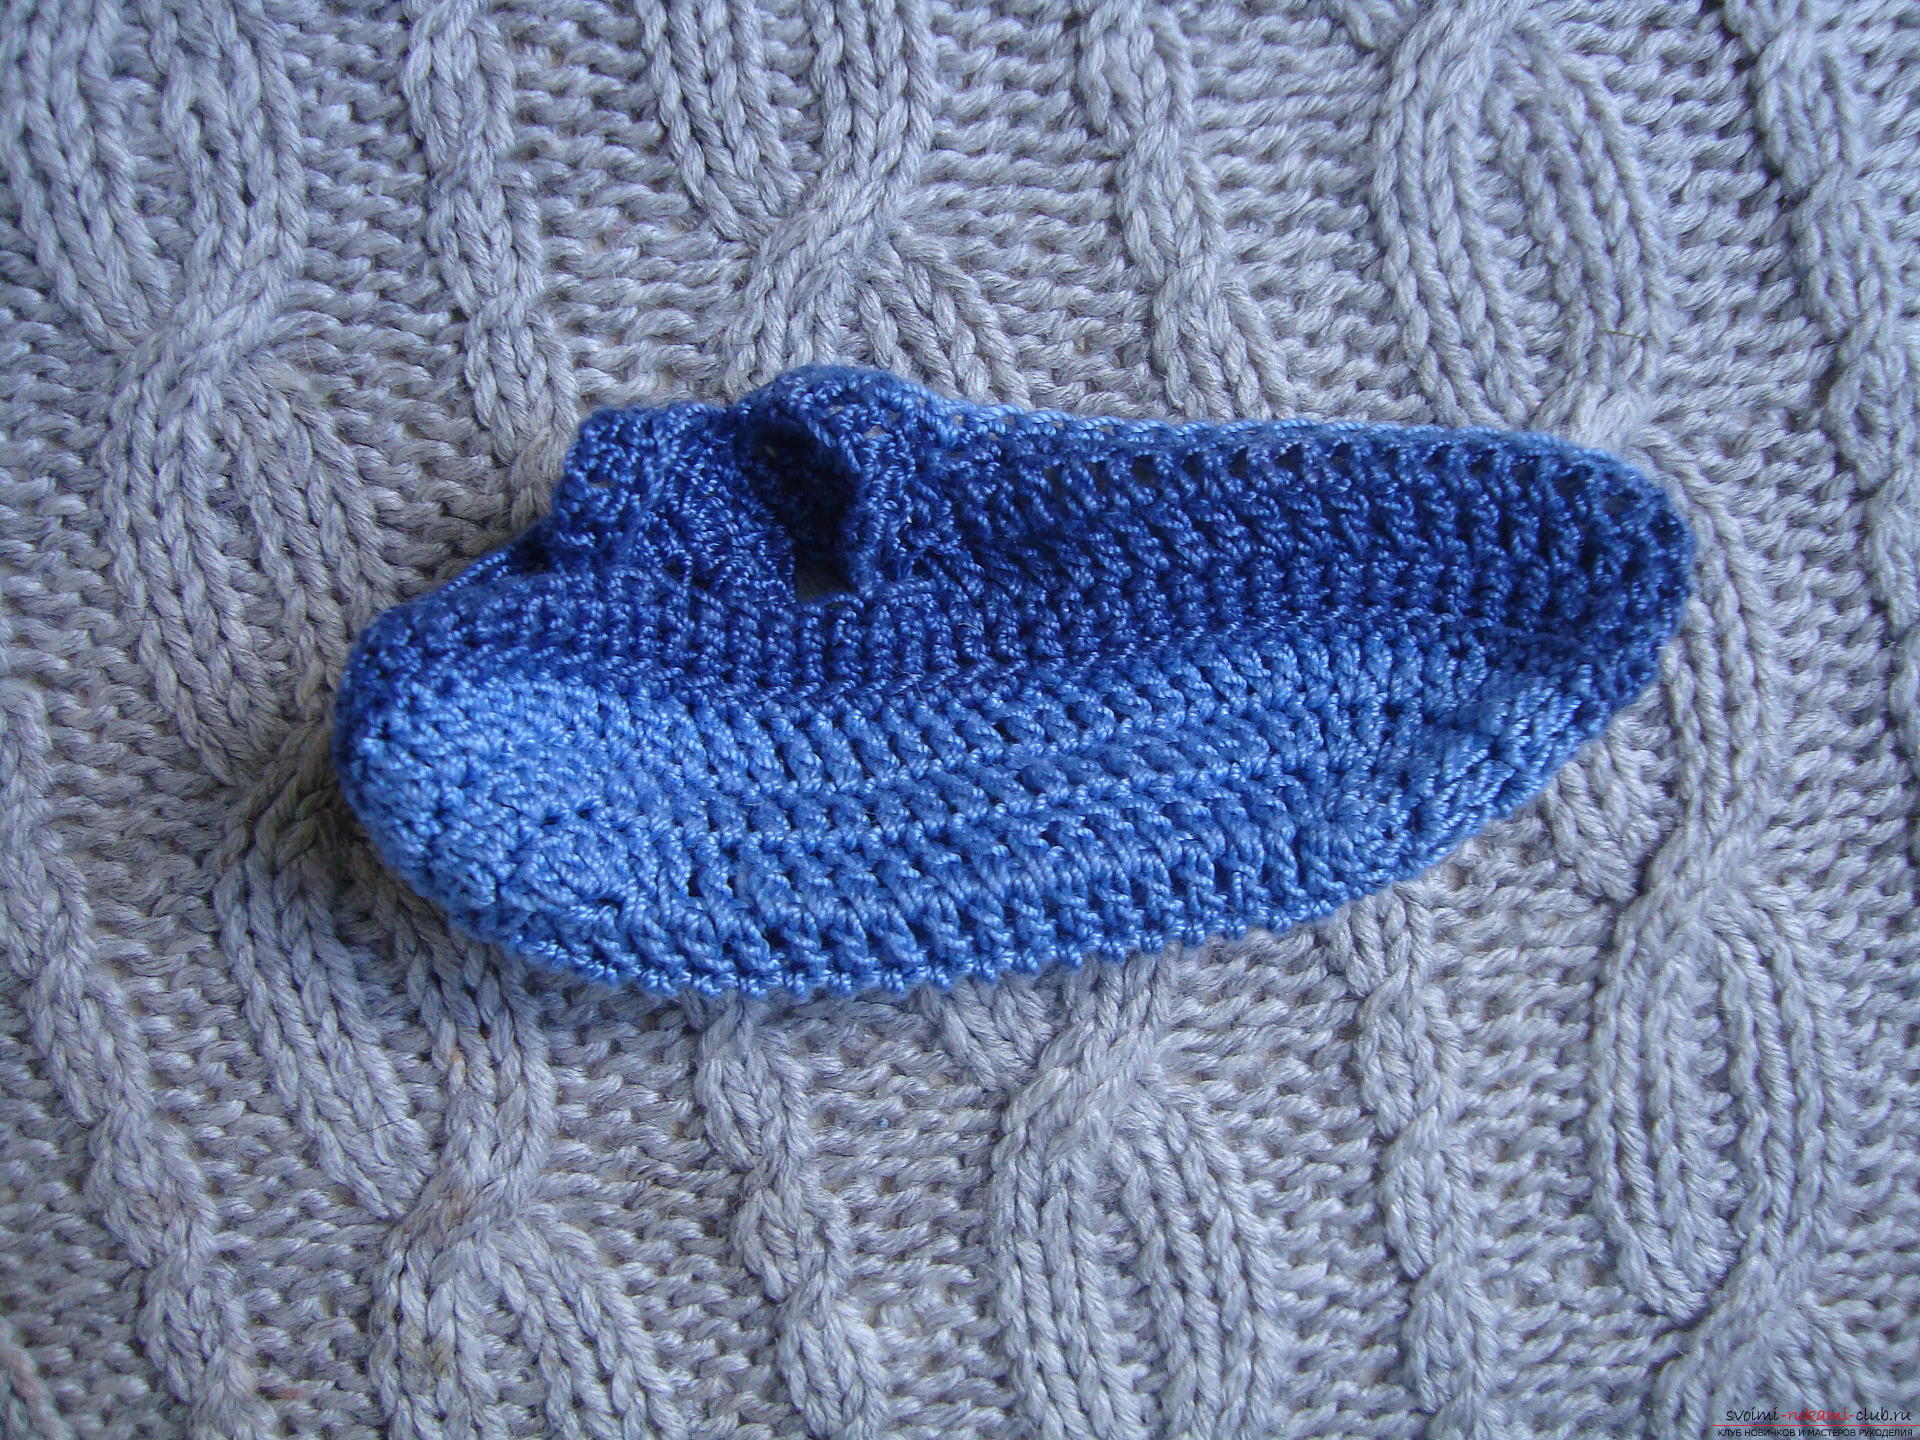 Next, two rows are knitted in a circlecolumns, in which blue yarn is used. If you are used to tightening the thread too much or the yarn is very thin, then you may need 3-4 vertical circular rows. If the height of the side of the sandals is not enough, then the baby's toes will stick out, and the sandals-booties will sit incorrectly, ugly. After the side parts are knitted, you should move on to creating the front stripes. The outer stripes should be located so that the sandals hold well on the legs. To do this, you need to mark the middle of the product, that is, fold the product lengthwise and then fold it in half. From the central points, the outer stripes will be created, on the remaining gaps, four more elements in the form of stripes are created, so divide the central part of the shoe into four segments.
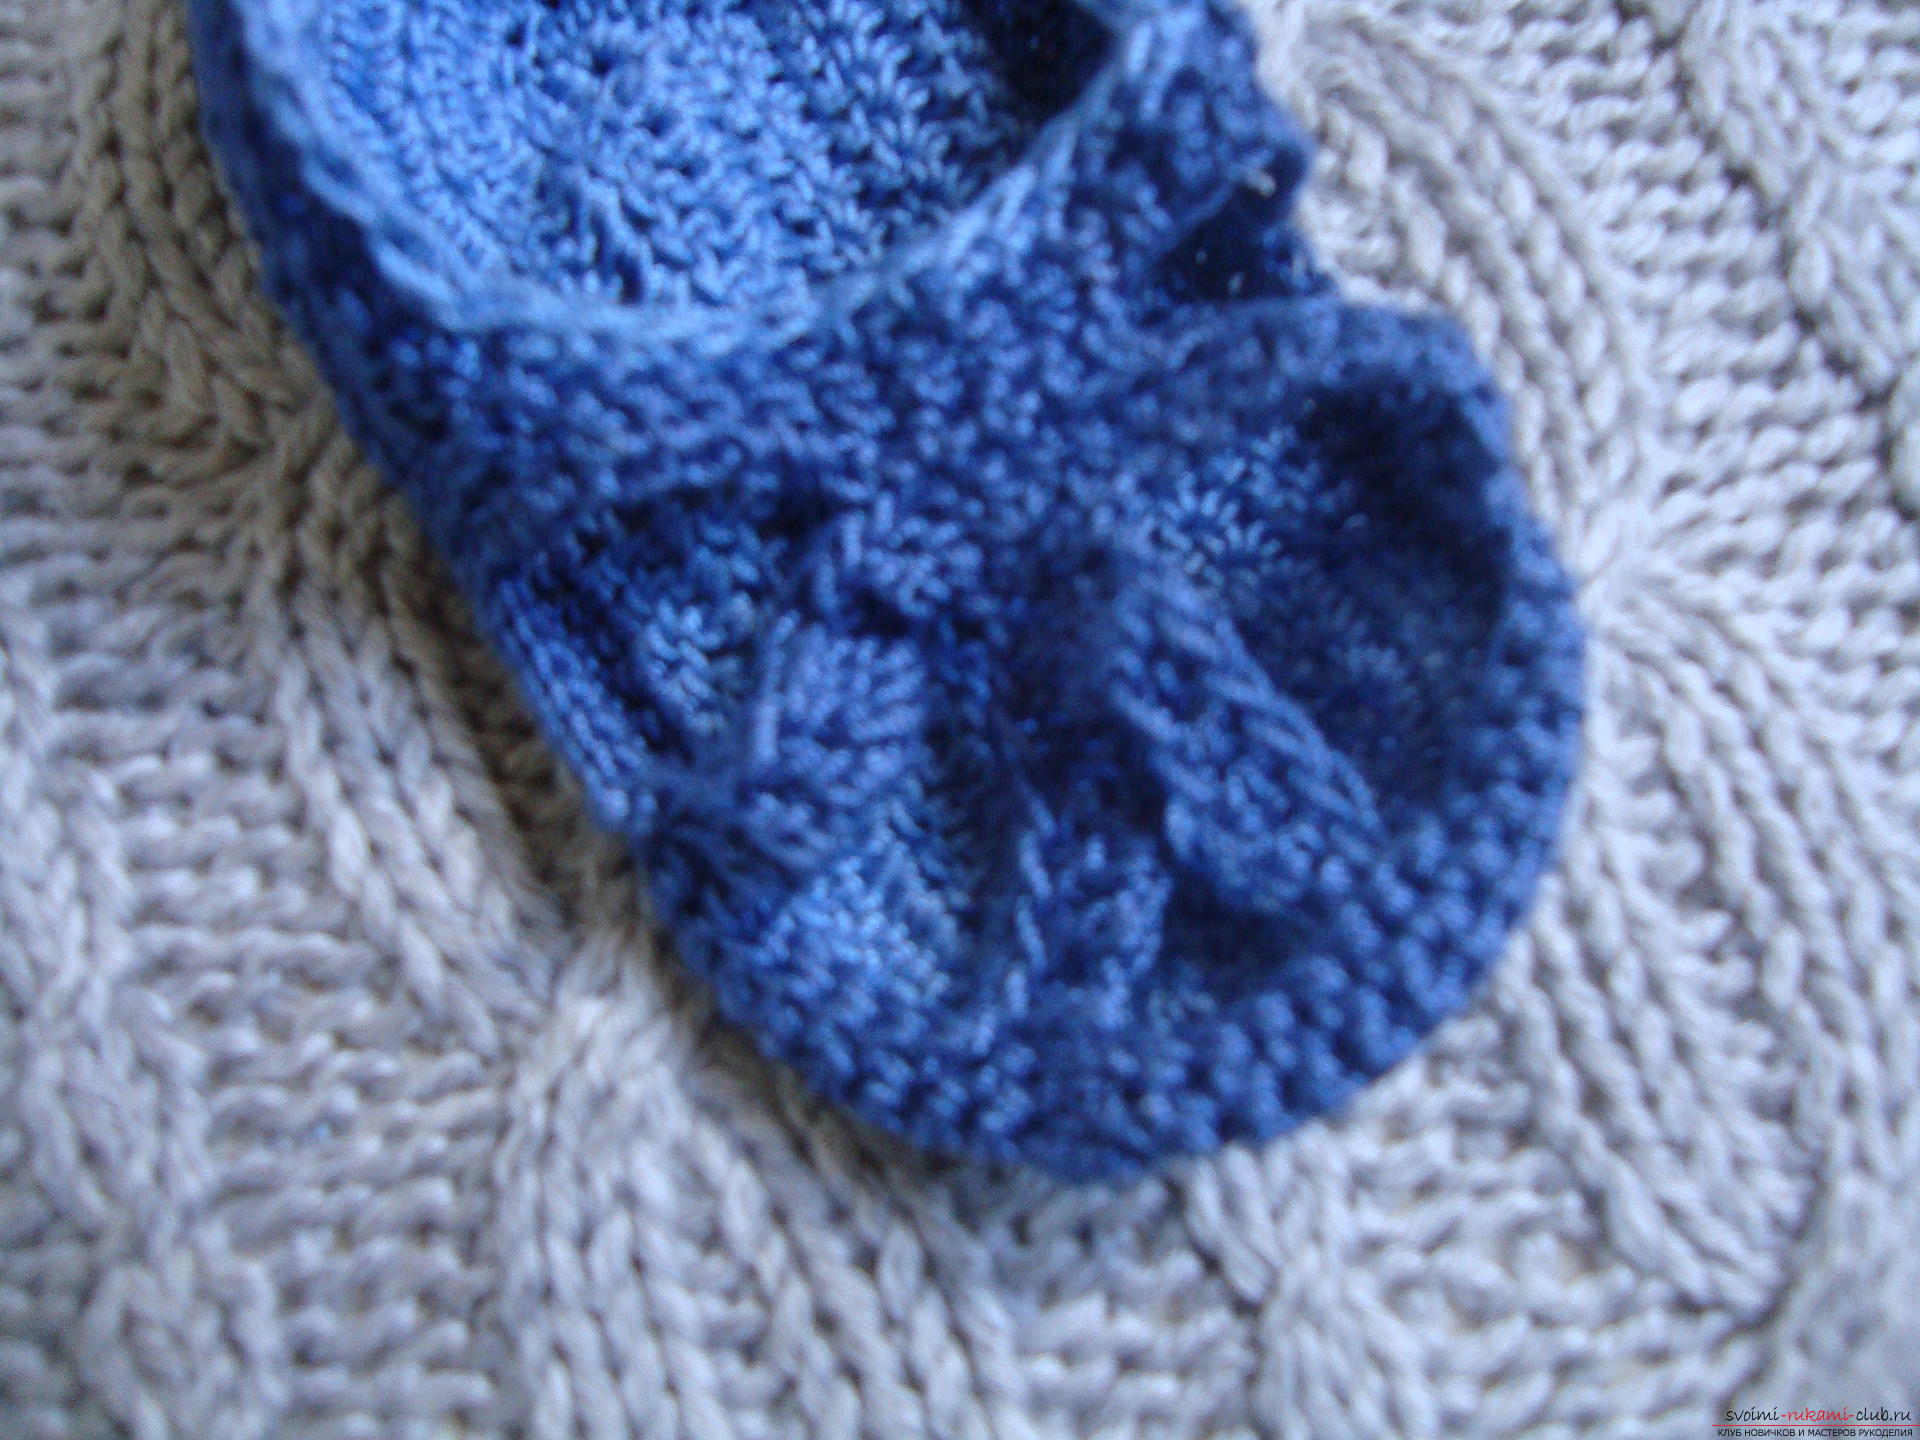 Each strip is knitted separately, and thenis tied to the top row. One strip is used for two jumpers. First, dial 30 air loops and knit columns from them. Try to knit tightly, tighten the thread a little after each column. Otherwise, the knitted parts will be loose and will not hold a beautiful shape. The second bandage is knitted from 25 loops in a similar way, that is, this strip will be slightly shorter than the first. The third part is knitted from 20 loops, which will be the smallest and will be sewn to the bottom of the sock. The number of rows is the same as in the previous elements, that is, a column is knitted. At the next stage, we proceed to sewing the parts to the base, while following the exact markings: one strip fastens the central opposite points of the sandal, the other is attached inward, retreating from the ends of the first strip by about 1 cm. The third strip is attached to the front part, that is, to the toe part.
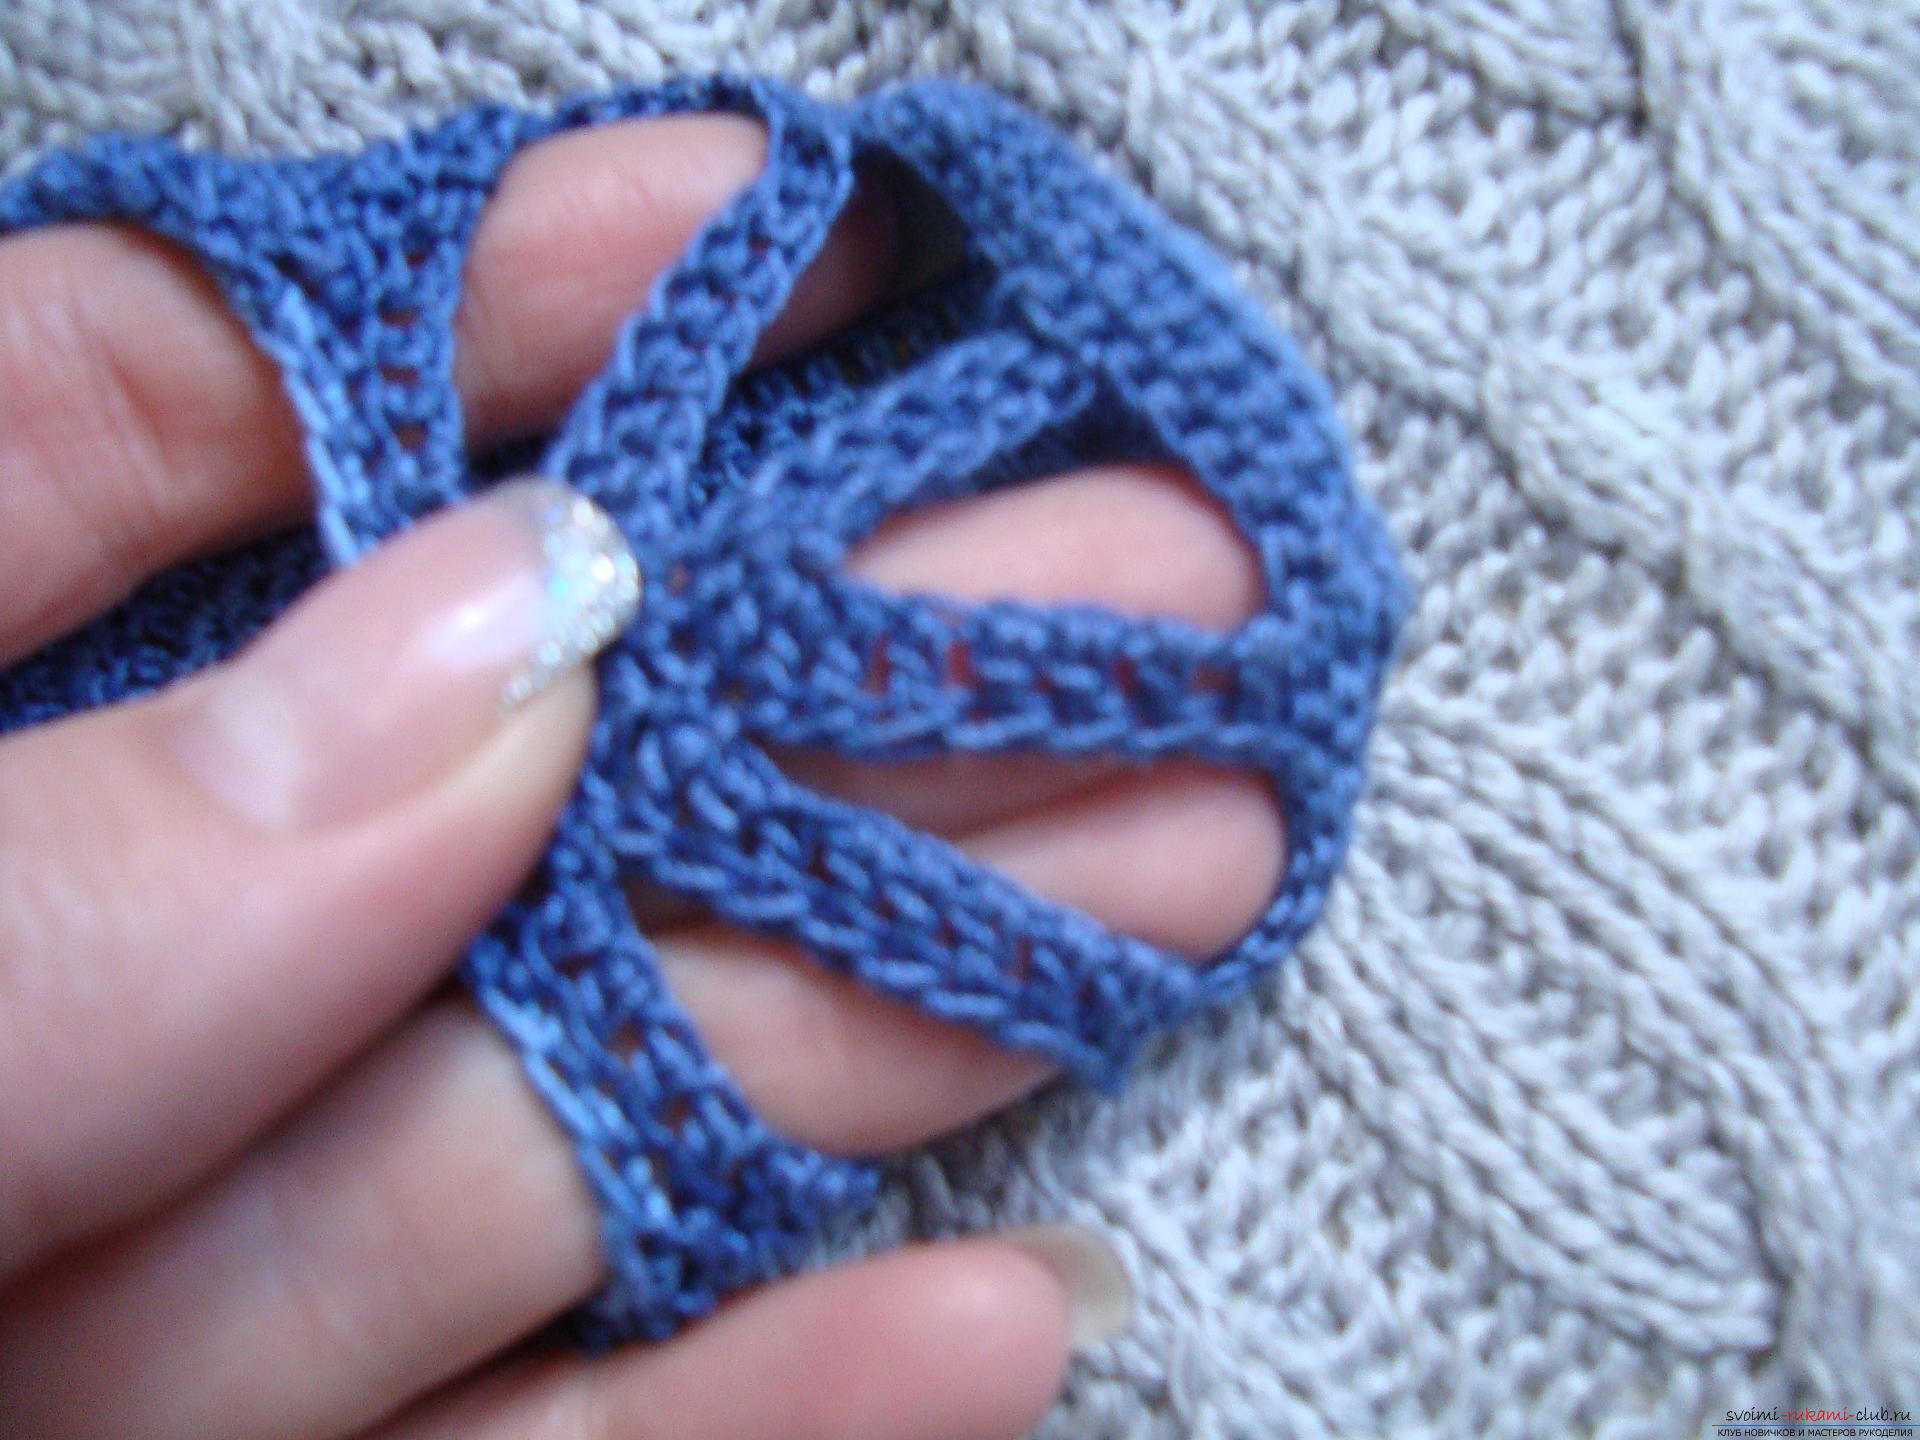 It is also necessary to sew all the strips together.The second strip is sewn to the first exactly in the center. The seam line is about one and a half centimeters. The third strip is attached to the second part and is also sewn over the edge for about one centimeter. The last stage of the work is to create the final binding from blue yarn. To do this, tie a thread in the corner (at the junction of the first strip and the side of the sandal) and create half-columns, that is, each new loop is pulled through the previous element. You need to tie the entire circle, that is, the side, heel part and a segment in the area of the other side. The binding ends at the place where it begins, secure the thread by pulling it through the loop and cut it.
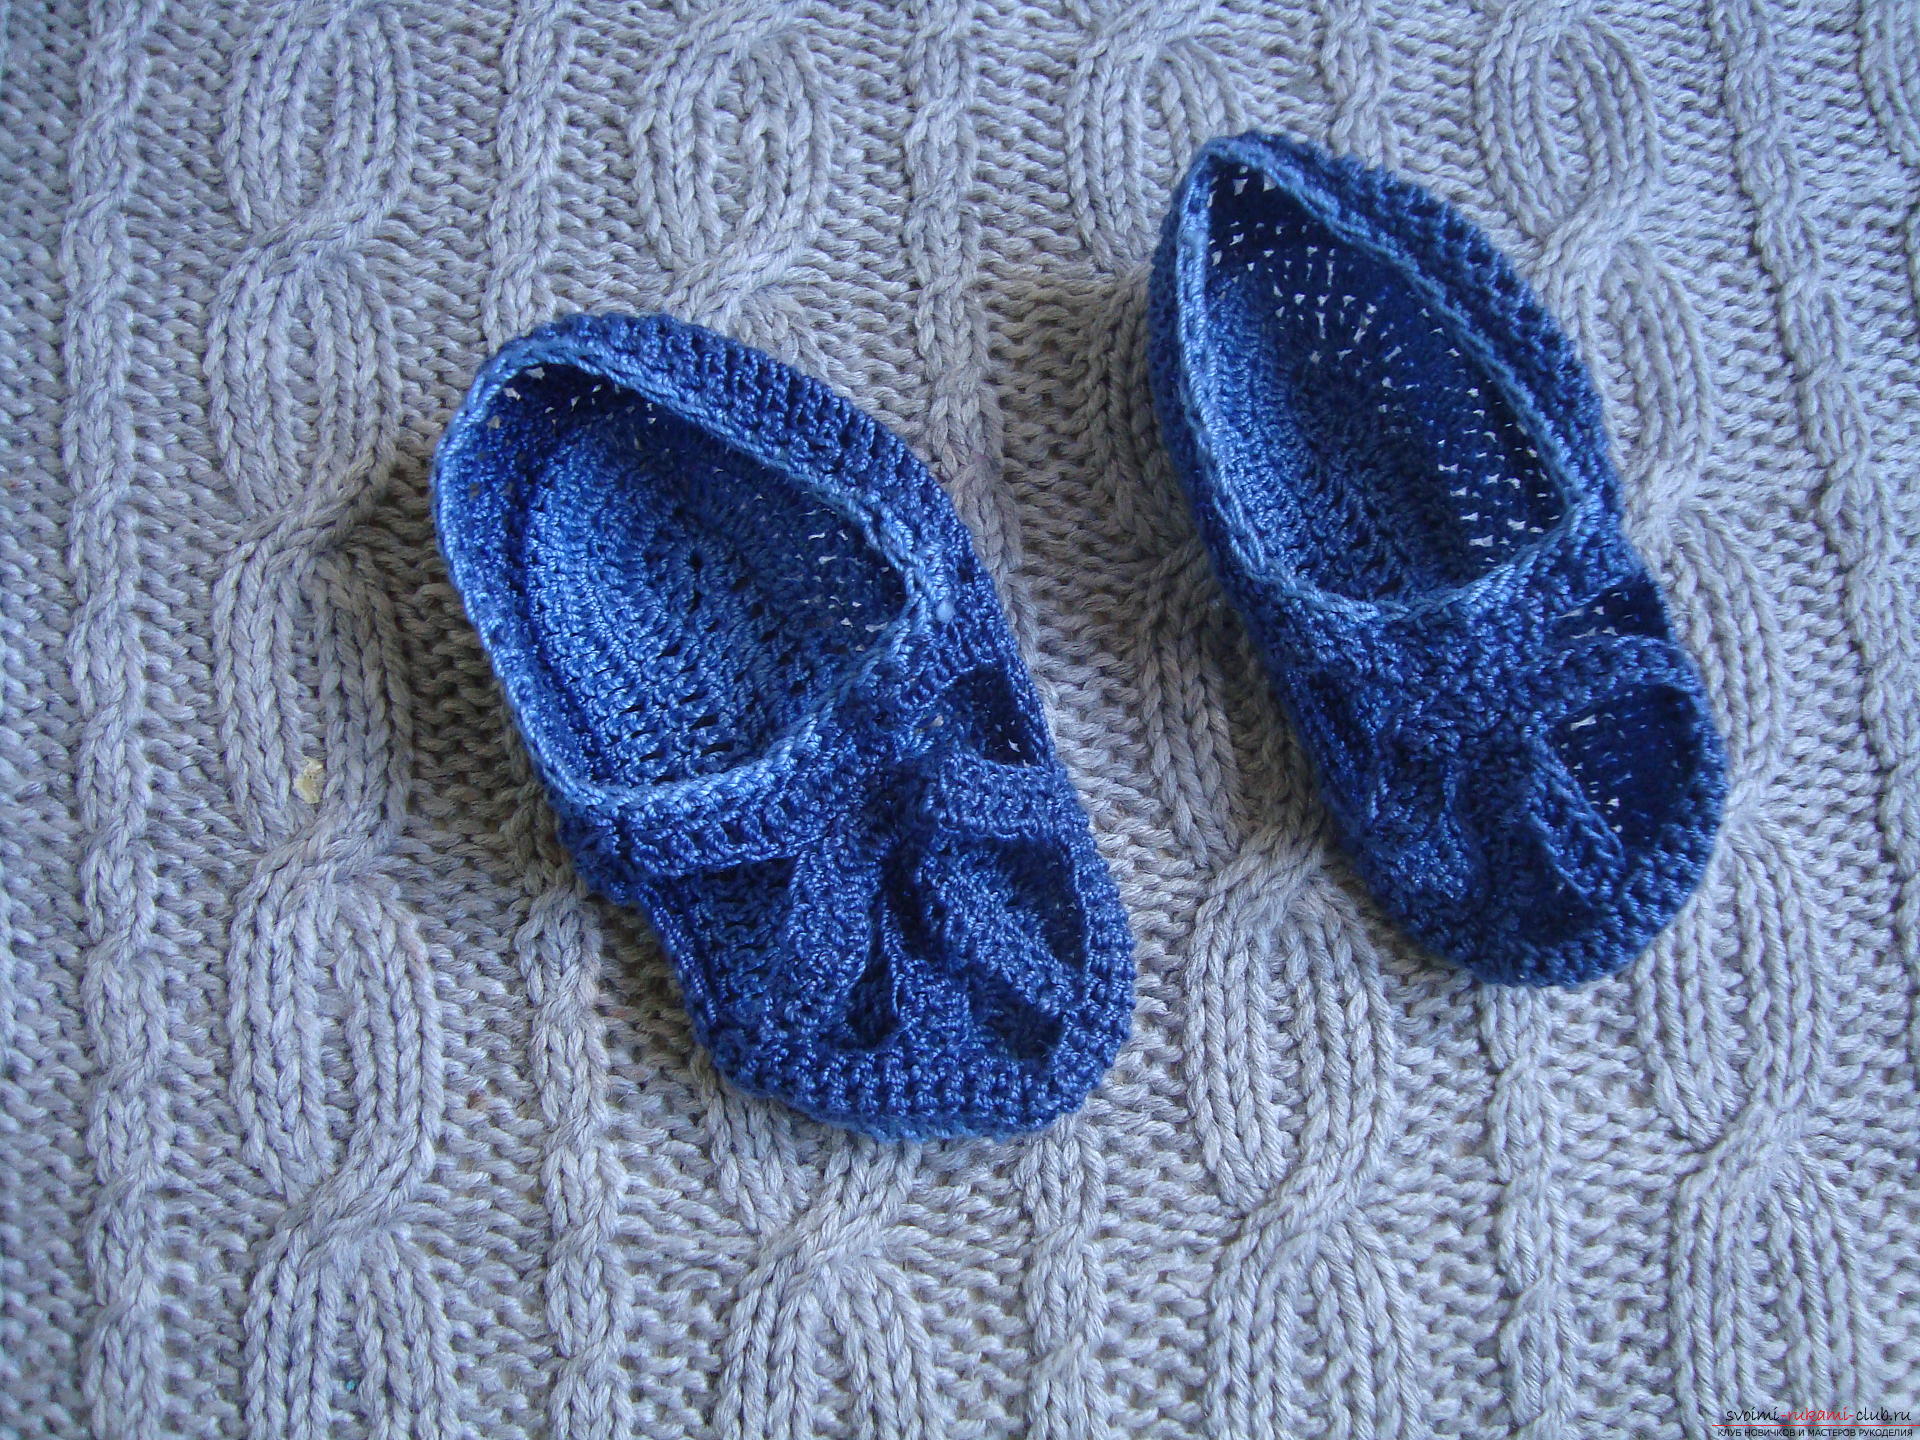 Charming, cute sandals are ready.They will suit the most beautiful boy 2-4 months old, but if you increase the size of the product, then such unique stomps can be knitted on the foot of an older baby who does not yet run far on walks.
Comments
Related posts:
 Bind the original toy crochet, using detailed instructions with photos and diagrams
 How to crochet a souvenir for the New Year holidays – snowman “Bonya”? Detailed instructions, description of knitting techniques and step-by-step photos
 Pearl booties-sandals for girls – crochet patterns for beginners video tutorials
 Crochet items for baby – crochet patterns for beginners video tutorials
 How to crochet bright warm and comfortable home slippers with an original pattern? Detailed instructions for crocheting with photos