
Beautiful Christmas tree of paper with your own hands in origami technique, easy to make
Origami, a Christmas tree of paper with its ownhands will be a wonderful decoration of your holiday. Make it absolutely not difficult. A bit of time and a wonderful piece of art is ready. We offer one of the options of the Christmas tree, which even children can easily make. Origami is a very ancient, interesting kind of art. His homeland is Japan. Few people know about the benefits of origami. Many people think that this is just the folding of different shapes of paper figures. In fact, origami is able to develop fine motor skills of fingers, intellectual and creative abilities, thinking. And also, attention, memory, patience, perseverance, etc. Recently, experts increasingly recommend young parents to instill in children an interest in origami. In today's article it will be about Christmas decorations, in particular about small paper fir-trees. And about how easy and quick to make them yourself, and even at home. For all of us, the New Year is one of the most long-awaited and desired holidays. To him, as a rule, people begin to prepare for a month before it began. It was then, in December, garlands begin to appear in shop windows, paper snowflakes on the windows of houses. But anyway, the most important attribute with which we all associate this wonderful holiday is, of course, the Christmas tree. It hangs balls, rain and various other ornaments. 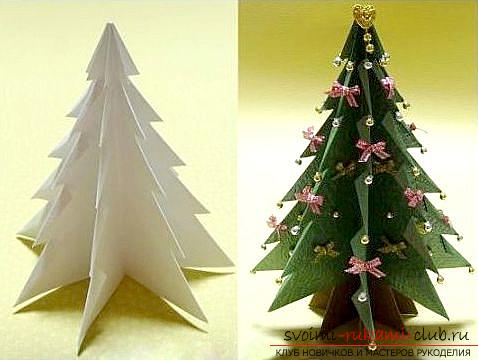 But, it's not at all difficult to make a small paperherringbone with her own hands, which can decorate, for example, your workplace. At the same time, you will spend minimum time and money on work, which is very important.
  So, how to make a small origami Christmas tree of paper with your own hands?
  This product is not difficult, especially forhis work will go very little time. It will be under the power of a beginner. Also, you can connect all family members. This process is very exciting and is able to bring you closer to your relatives even more. For work you will need: paper (in this case, green, but you can take any other). You will also need a ruler and a pair of compasses for connecting glue, it's better to take a glue stick, a simple pencil (as an alternative you can take a regular tube designed for cocktails) and a little bit of your time. First you need to take the compasses and drawseveral circles. Their number can be anything, it all depends on what product size you want to get as a result. The main thing is that each of the circles should be at least one centimeter smaller than the previous one. Then each circle should be folded three times twice, you need to do this precisely so that the folds are clearly visible. Then you need to spread the circles. In the center of each individual circle, it is necessary to cut a small hole. The size of this hole should be exactly the same as the diameter of the pencil (or any material that you use). Pencil should be carefully covered with paper of green or brown color. If you have a Christmas tree made in other colors, respectively, you need to glue the pencil with the appropriate color. Now you can start assembling the Christmas tree. Gently we pass all the circles from bigger to smaller through a pencil or a stick. The top of the Christmas tree you can decorate with an interesting mother-of-pearl bead or paper star. The product is ready. If there is a desire, then you can add, for example, a bit of beads, sparkles or decorate with other decorative elements.
Comments
Related posts:
 This detailed master class contains an origami-dragon scheme from paper, which you can make with your own hands.
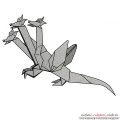 It is not difficult to make a three-headed dragon made of paper in the origami technique according to the schemes
 Making a swallow from paper in origami technique, which is easy to do according to the description, is not difficult to manufacture
 This master class will teach you how to make your own hands a New Year greeting card.
 New Year's crafts, the creation of Christmas decorations from paper, the various creation of paper balls with their own hands, how to make a beautiful garland of paper with their own hands.