
We create diamond embroidery (diamond mosaic) for detailed master-classes with photos and diagrams
Learning to create a diamond embroideryever saw a diamond embroidery, also called diamond painting or a mosaic, that, certainly, admired its unique attractive appearance. Such a product, in fact, it is easy to create independently, having at hand the appropriate sets for diamond painting. To create your first masterpiece of diamond mosaic, we offer a set called "Sail", which in the finished form will be approximately 20 x 20 centimeters. The kit should include the following elements:
- key-scheme (canvas with a coated adhesive material), which will be the basis of our product;
- Rhinestones;
- sorting object for rhinestones;
- tweezers;
- instruction and key.
Before starting the needlework, we advise you to prepare yourselfa spacious workplace, to spread out all the materials and tools on it, and it is desirable to arrange the numbered strasses in ascending order in order to facilitate the search for the desired color in the future. Carefully separate the film that protects the glue coating, but do not try to remove it completely, just gradually bend it. Apart from the fact that this will protect the canvas from dirt and dust, your hands will not once again get dirty in sticky glue. The set offered to your attention comes with an already cut protective film. However, it should be borne in mind that other sets may not be this, so they need to cut the protective film in them. 
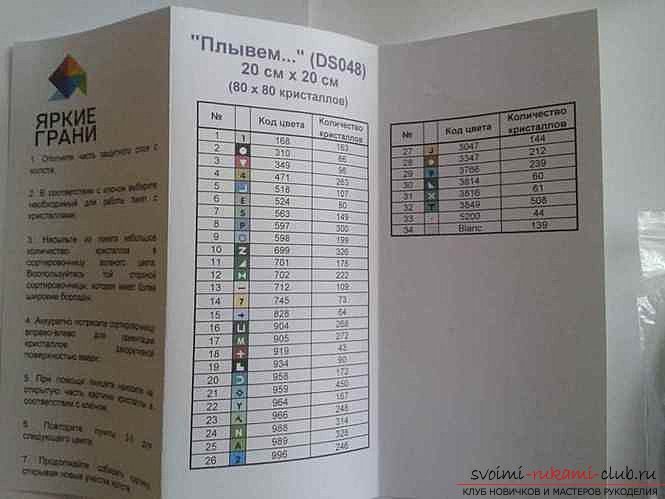
 On the canvas-scheme and key are symbols, whichduplicated also on bags with rhinestones. We choose a symbol, find the necessary package and pour the desired number of rhinestones into the sorting object, using the side with large furrows. If the kit does not include a sorter for rhinestones, it is replaced by a special tray.
  Thanks to the sorter you can easily installrhinestones up the sides, for which it is enough to slightly sweep it from one side to the other. Next, proceed to unfold the rhinestones. The layout is done on the cells with the necessary symbols on the flat side and pressed down a little. Do not worry, if in the process of unfolding you will miss the cage a bit. It will be necessary to use a pair of tweezers to take the rhinestones and transfer them to the correct cell. When you finish unfolding the crystals of a certain shade in a small area, pour unused strasses into the bag and proceed to laying out another shade. Of course, diamond mosaic can be laid out in rows, which, in our opinion, is not the best way, because in the rows of the shades of crystals are constantly changing. It is more optimal to make a calculation on the colors of rhinestones.
 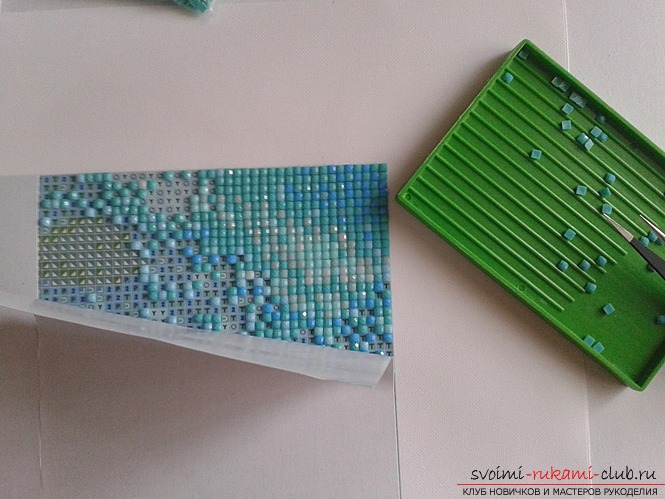 Putting the crystals into free cells, aroundwhich already have rhinestones, they should be slightly pressed, until a slight click (which occurs due to a tight fit between them), after which the crystal will be in place. In this case, the remaining rhinestones are simultaneously aligned. If you need to interrupt during the operation, be sure to return the protective film to the place. After completing the layout of the crystals with one place, slightly fold the film from the canvas and continue the next section. Carried away by this process, you will not notice that in a short period of time half the product will be ready. Next, slightly bend the next part of the protective coating and continue to unfold the diamond mosaic.
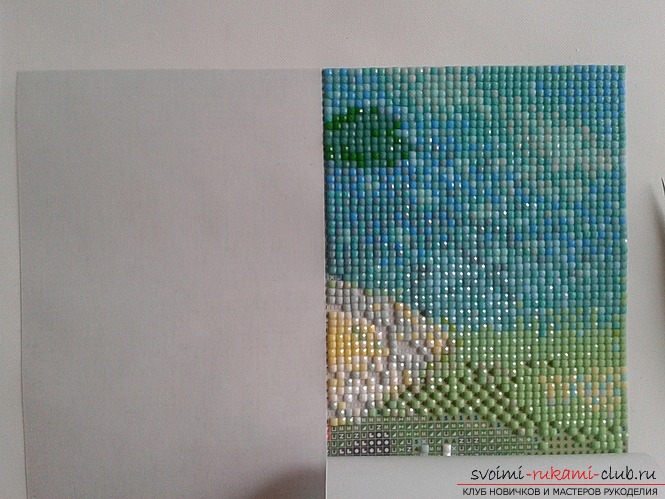
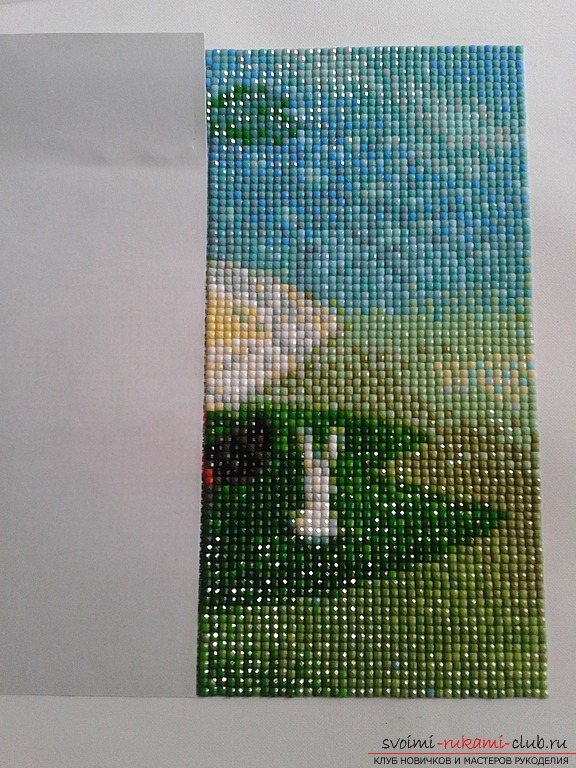 It is worth noting that manufacturers of sets usuallythey invest crystals in them with a reserve (although small). So, if sometimes there are some defective crystals in the process of laying out, they can be put aside, but they should not be thrown away altogether. While the unfolding of the diamond mosaic is nearing the end, it is allowed to completely remove the protective film and to decorate the finishing touches. At the last stage, align the edges of the product and tighten the crystals more tightly, for which using a rolling pin, glass bottle or ruler, placing a piece of soft cloth under the picture.
 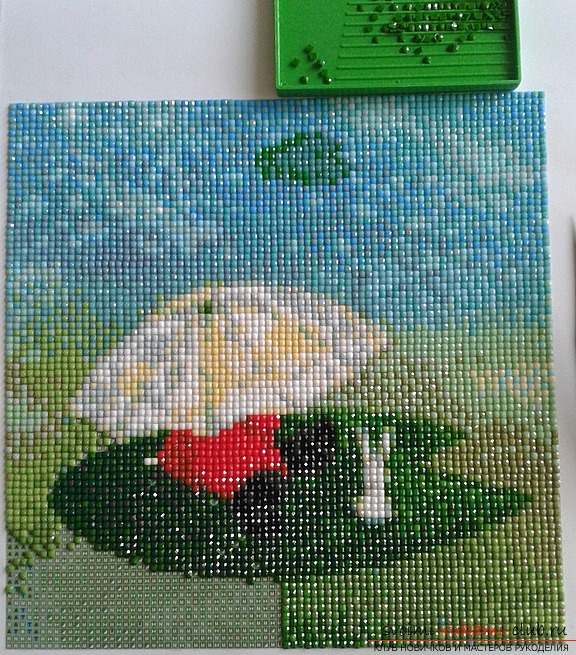 Certainly, the created masterpiece demands registration in the same beautiful frame, after which it can be hung on the wall or presented to a loved one.
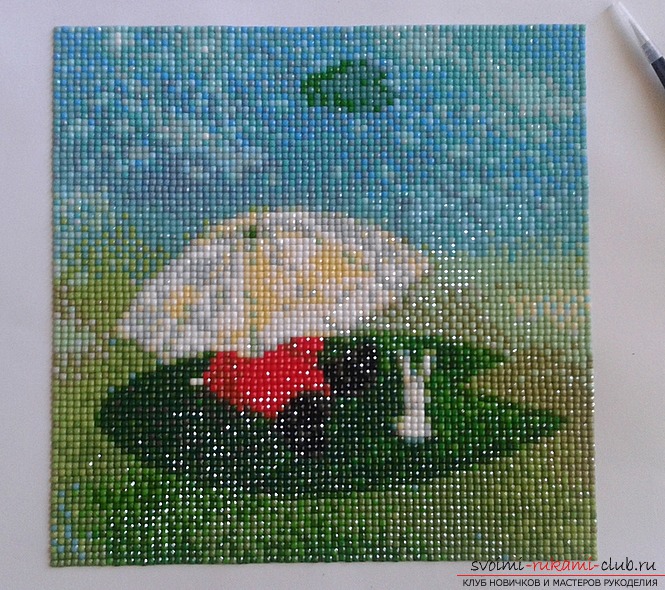
Comments
Related posts:
 Create knitting needles two variants of the pattern "honeycomb" with diagrams and detailed description which you can download absolutely free of charge.
 A master class with a detailed description and photo will show how to crochet a toy-symbol of the year - a monkey on a Christmas tree
 Knitting for a girl with knitting needles model of a children's beret with detailed descriptions, diagrams and bright photos
 Master class on knitting with peacock tail patterns with diagrams and detailed description which you can download absolutely free of charge.
 We learn to knit several kinds of "pearl" pattern with knitting needles to create original sweaters, sweaters with diagrams, detailed descriptions and photos for free.