Easy making of a Japanese bag of Omega in the style of Japanese patchwork is possible with a master class
Making a Japanese Omiage bag in styleJapanese patchwork is not only an exciting process, but also a pleasure from the end result. The sewing process is not complicated. With work to cope even a beginner skilled worker. The peculiarity of the technique and the product itself will allow you to acquire the skills needed in the future. The patchwork technique by right can claim an international kind of needlework. Patchwork mosaic is incredibly popular for a long time. Its origins go to distant England, however, as art, patchwork has gained wide popularity in Russia, Europe and the Far East. Japanese patchwork, as a separate kind of needlework, appeared in combination with a quilting, that is, a manual stitch. Special quilting of several layers of fabric, namely a needle forward, still characterizes patchwork in the Japanese style. It is with the use of this technique and presented a master class on making a Japanese bag omega in the style of Japanese patchwork. 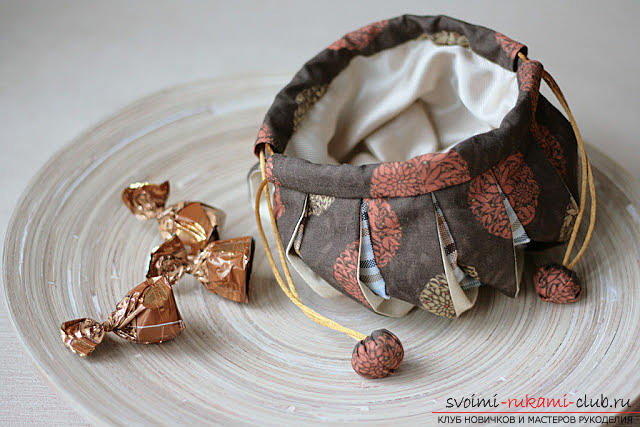
 In this case, cotton is usedfabric, in particular 3 kinds. You need to take the fabric light, dark and with some kind of pattern. It is necessary to prepare strips in an amount of 12 pieces from each kind of fabric. The size of each strip is 3.5 by 15.5 centimeters. After this, it should be determined which order of color contrast most corresponds to aesthetic perception.
 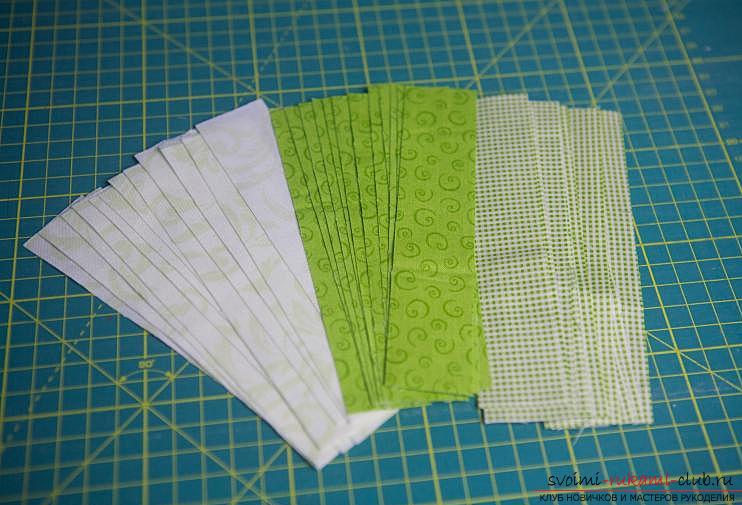 Next, you need to sew three pieces of strips eachcolors. Before the line is made, the scraps are connected by tailor's pins, and with respect to the future seam of the pin must be located perpendicularly.
 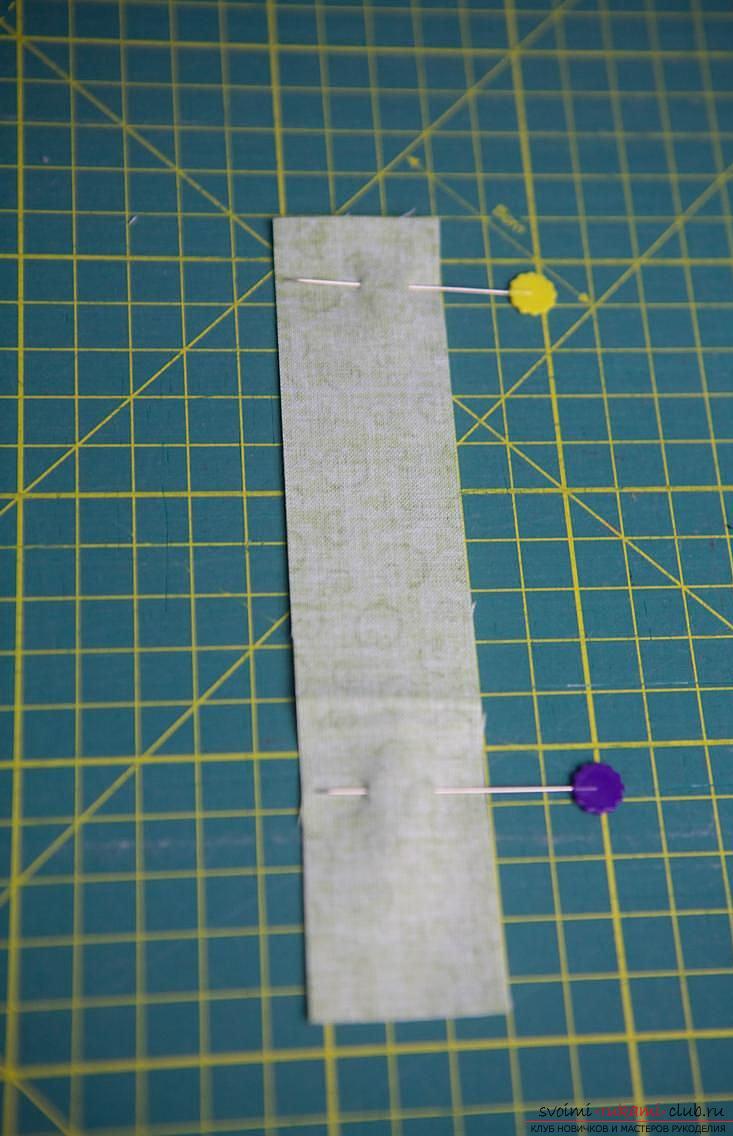 Patchwork sewing has several rules and one of them is the standard (0.6cm) allowance for the seam.
 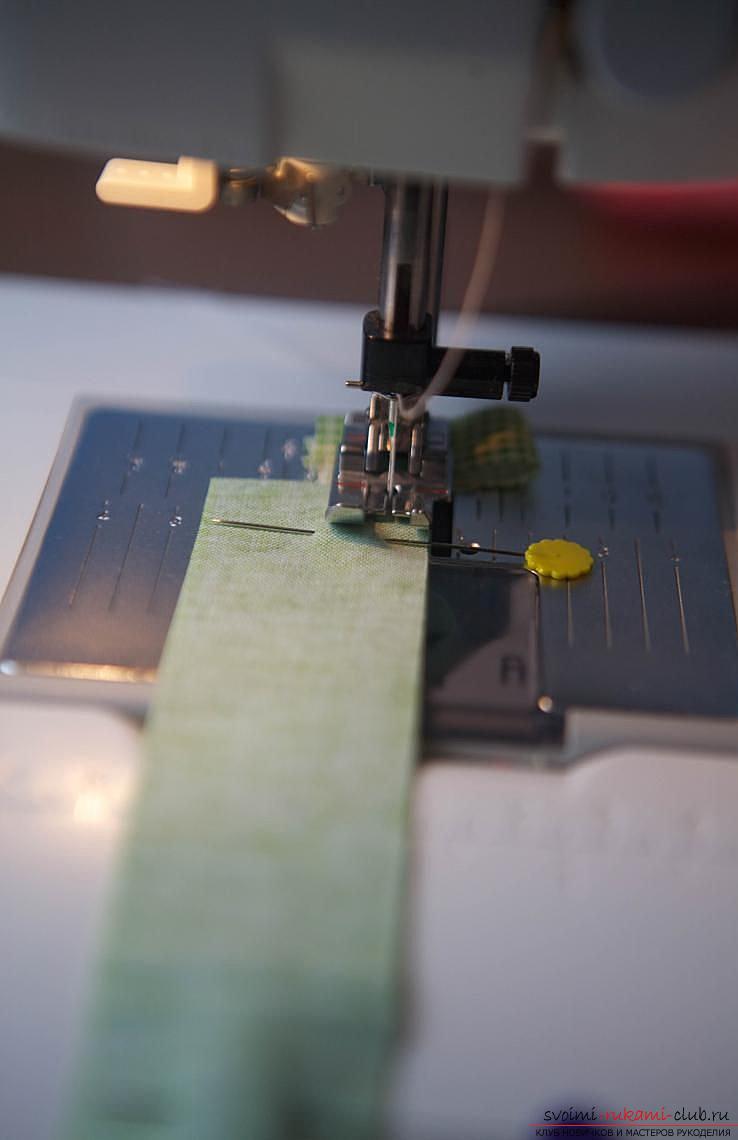 Initially, two colors are sewn, then the third kind of fabric is sewn. All you need to pin. The seam allowances must be pressed in one direction.
 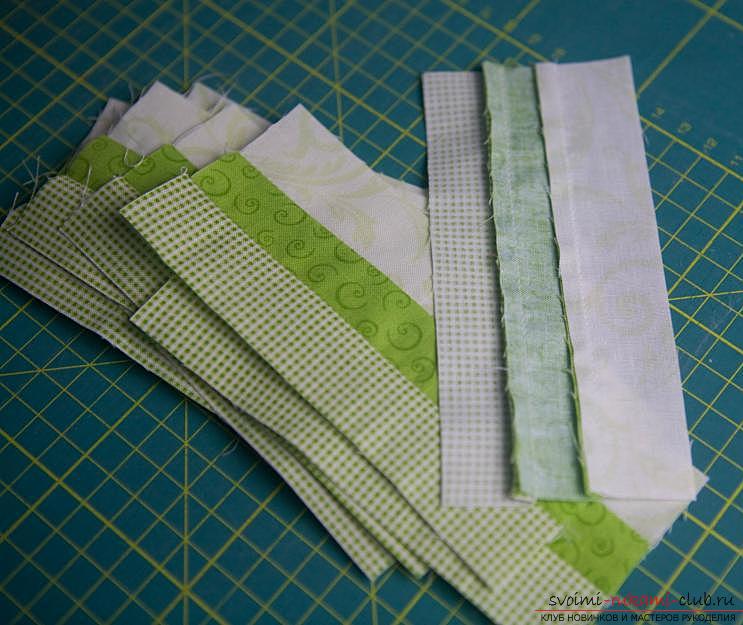 After that, the shreds of the three colors that were produced in the process are sewn together in the same order. It turns out a strip, similar to a multi-colored snake.
 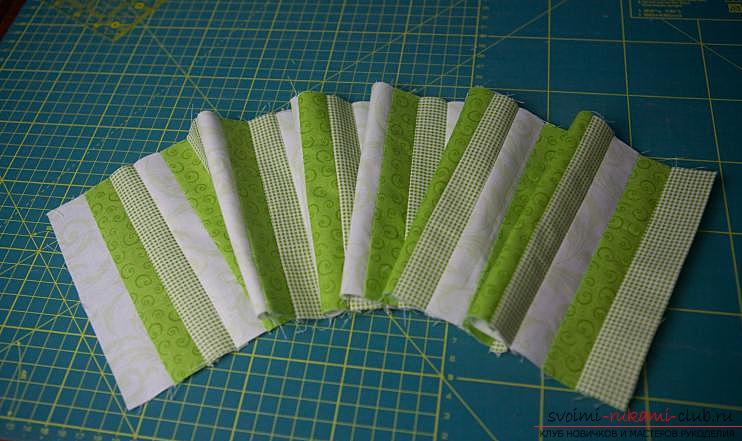 But now it's time for magic in the style of Japanese patchwork. The strip is folded as shown in the photo below.
 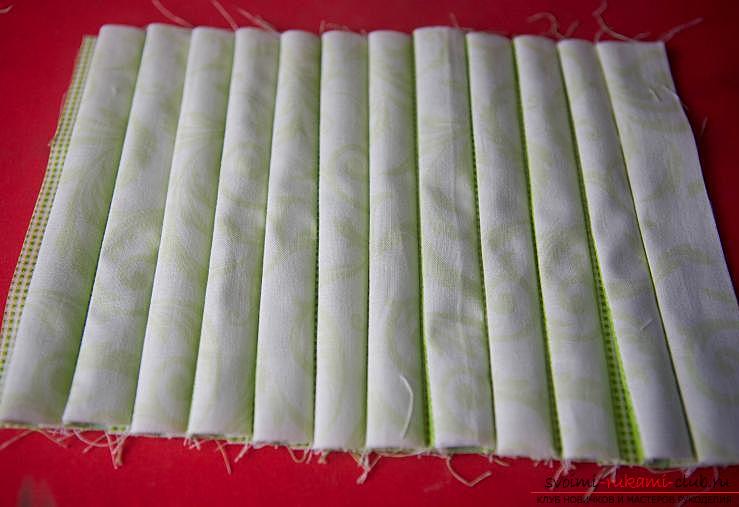 The folds thus obtained must be swept away in the form of a skirt.
 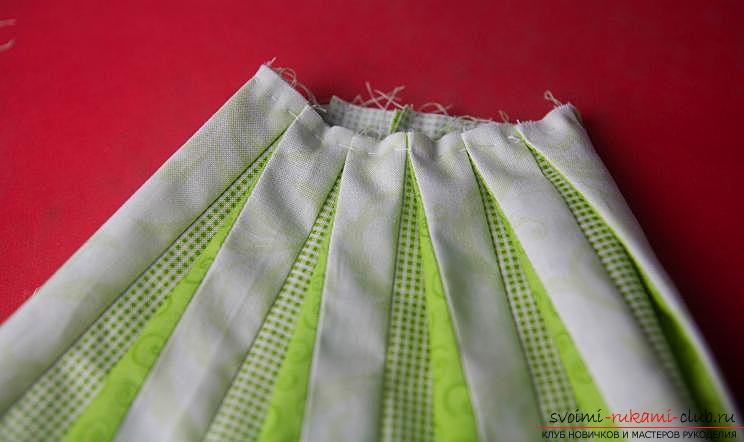 The next step is to sweep the other side of the future bag, only this process needs to be done in the direction opposite to the first one.
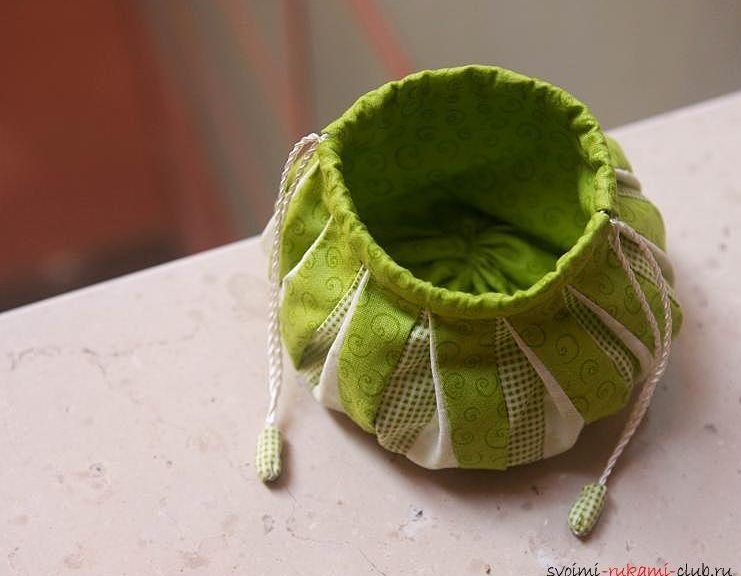
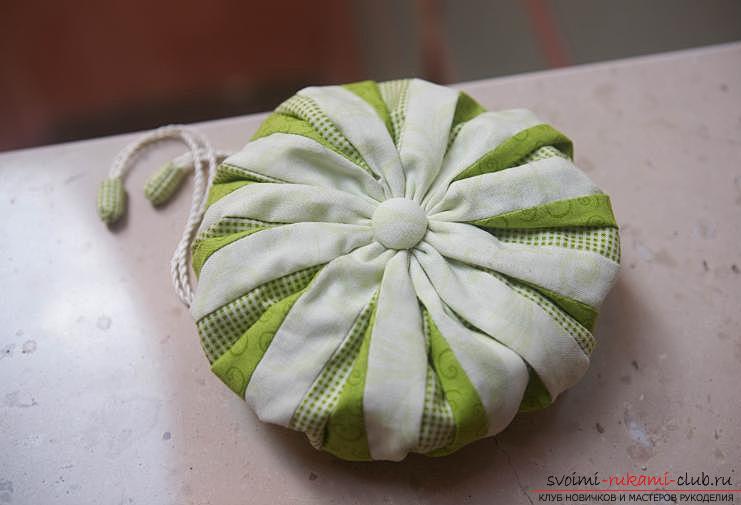
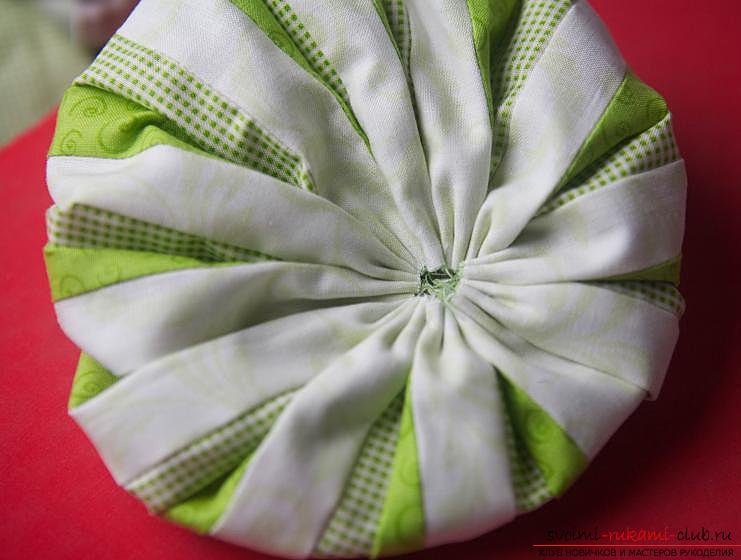
  After the two sides are omega cream, it is importantDetermine what will be the bottom: dark or light. After that, the selected side is tightened and strengthened with additional seams and masked with a button (ideal will be the use of a padding for tightening).
 Then the inner side of the pouch is cut outOmega. To do this, you need to make a canvas with dimensions of 12, 5 - 30 centimeters. The edging will consist of two parts, each of which has the parameters 4х15 centimeters. Since the lace will be used as a tightener, squares with sides of 3.2 centimeters will be useful for fixing and ennobling its edges.
 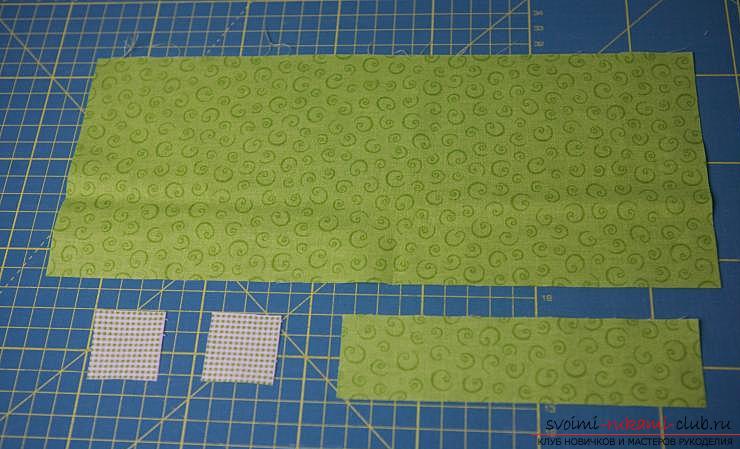 The strip for the wrong side is stitched, as shown in the photo below.
 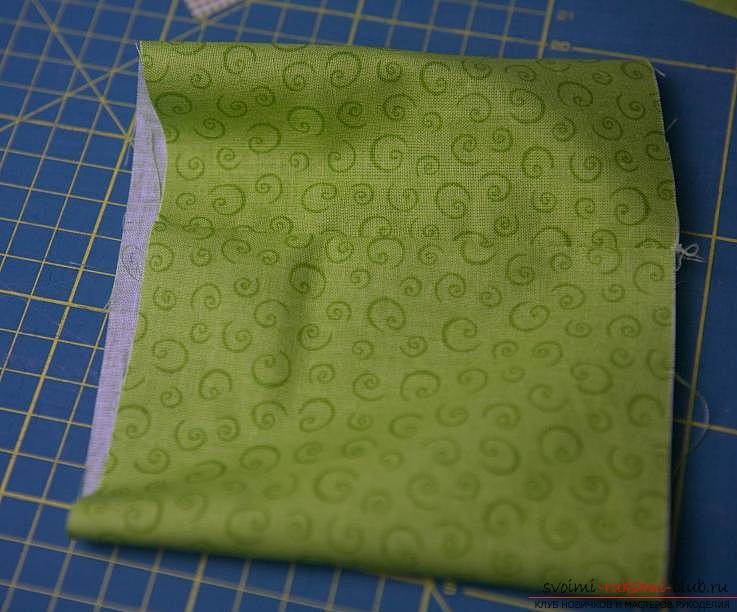 Next, you need to pull the tissue in the form of a bag.
 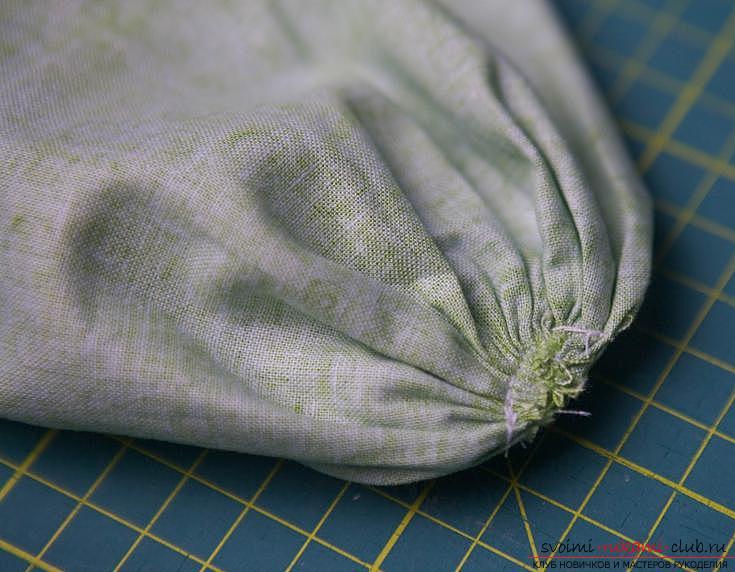 This pouch is inserted into the facial sack of Omega.
 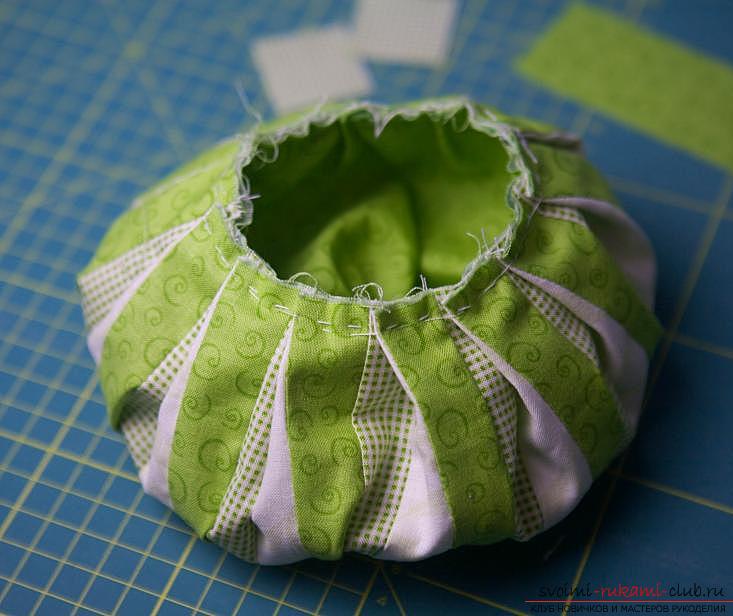 After these two parts are sealed with a suture, you can begin to make edging. To do this, you need to cut two rectangles and fix them along the edge of the bag.
 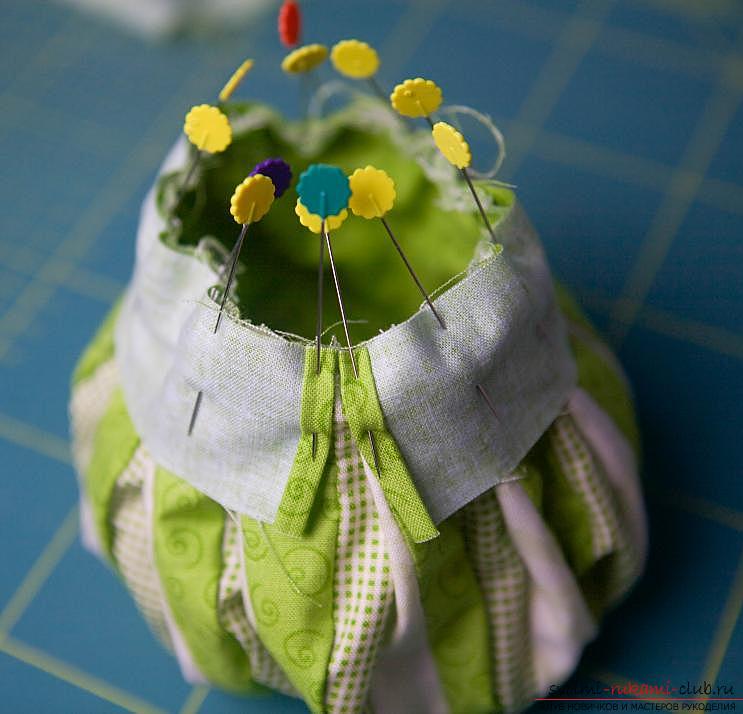 After that, sew thoroughly edging material and wrap the inside of the product, securing it with a hidden seam.
 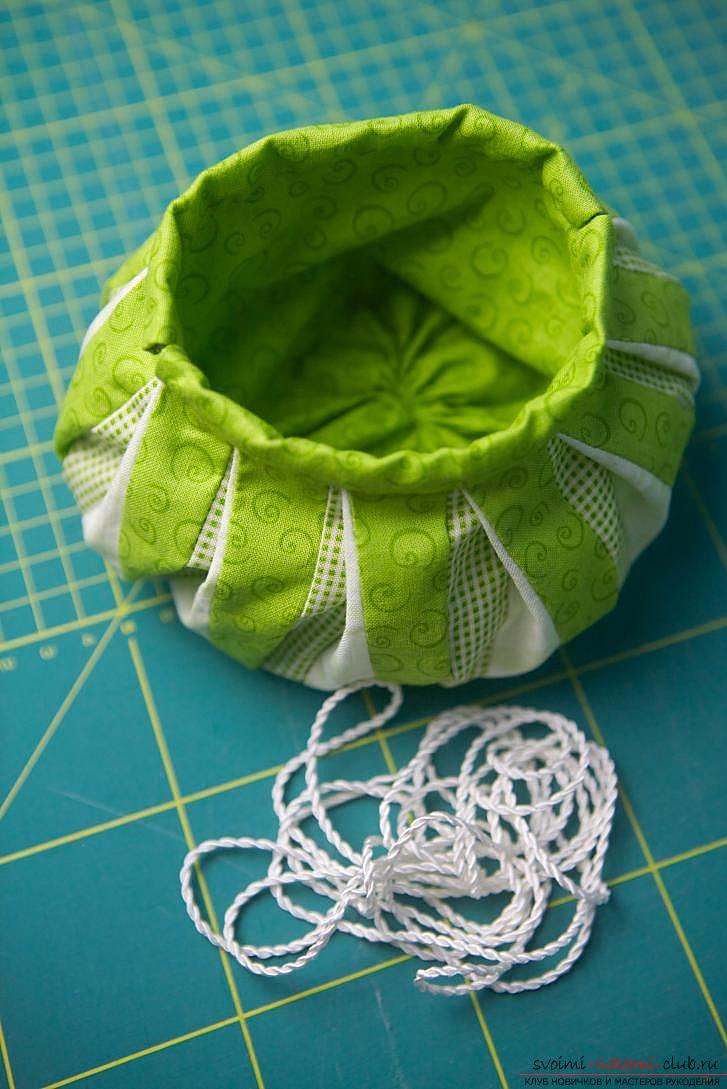 Between our rectangles sewn intoedging an omega, the entrances were formed, into which the strings chosen for the string should be passed. The ends of the passed lace should be fixed with the help of cut out squares.
 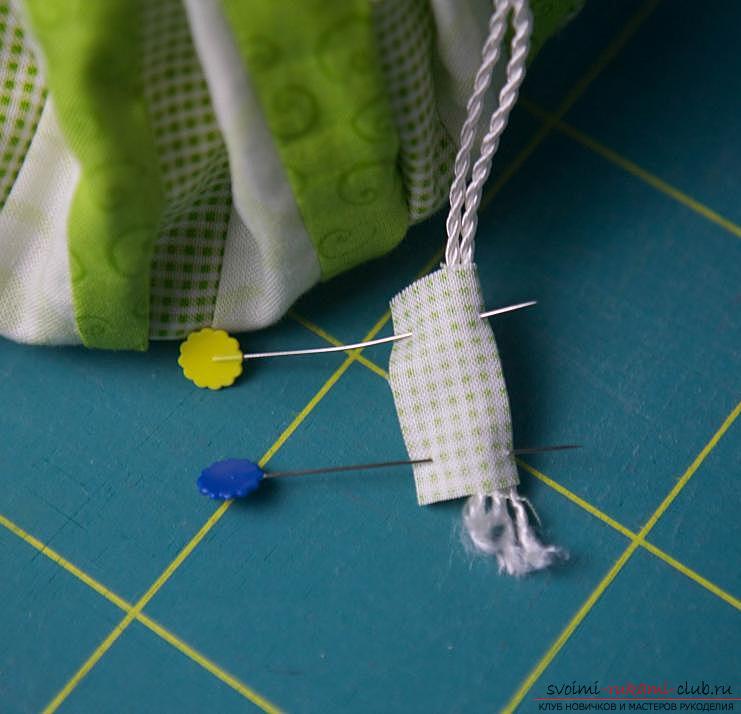 One edge of the received rectangular shredder is pulled together, and the second is turned out.
 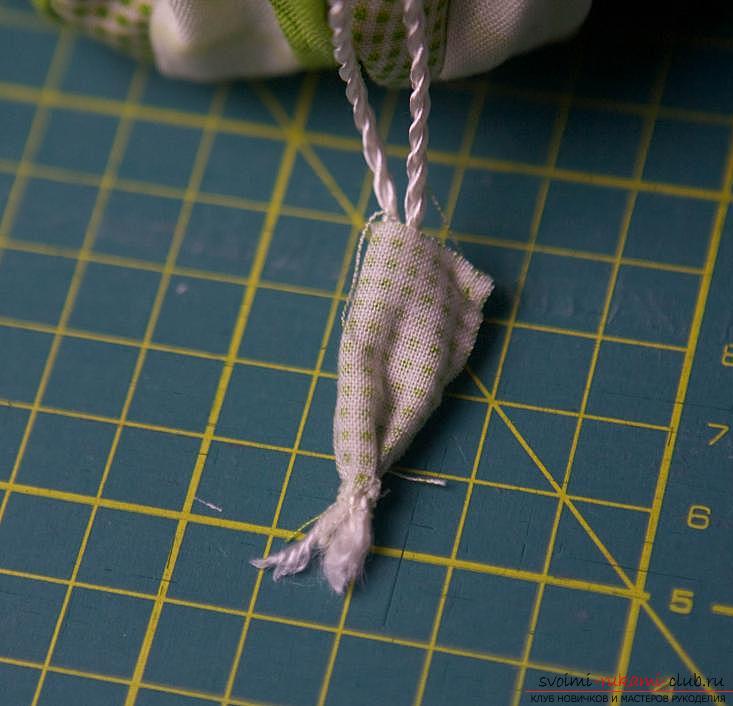 A wonderful bag of Omega in the style of Japanese patchwork is ready!
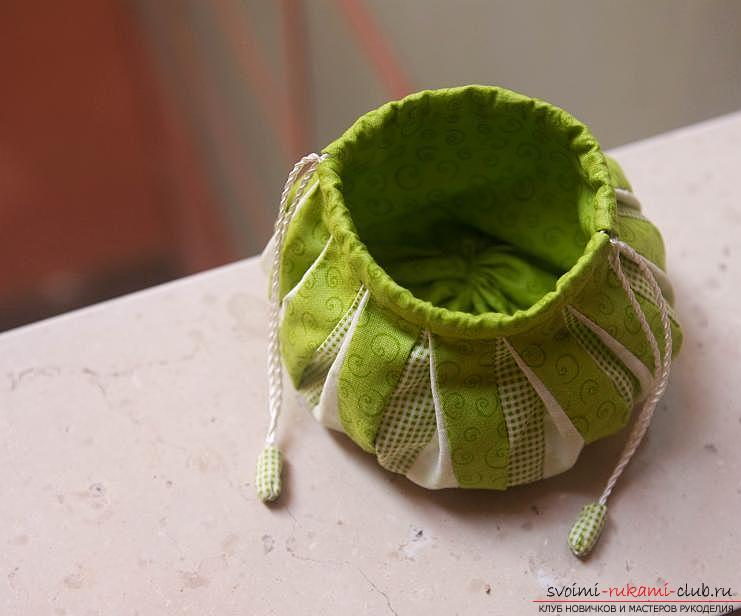
Comments
Related posts:
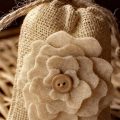 Step-by-step manufacturing of a decorative bag for coffee with your own hands using natural materials.
 This master class will teach you how to make a card with your own hands in the style of ayris folding.
 How to sew a light dress for the summer for a girl. A unique master class on sewing elegant dresses on a pattern
 Family tree with their hands in the technique of quilling with step-by-step photos and a detailed master class for children and adults
 Painting dostochki in khokhloma style - master class and instruction