Instructions for making dolls by yourself.
You can make a doll for your beloved daughterany mother, and even better if we take on this matter together. Rag doll – This is a great character for new games or a souvenir for a loved one. A master class on sewing such a doll with a pattern diagram and explanatory photos will always help you make the perfect toy. If you love rag dolls and homemade clothes for them, then collect all unnecessary ribbons, lace, scraps of fabric or old, unnecessary clothes. After all, from all this you can make amazing dolls and clothes for them. And although the first time it may not turn out very correctly or beautifully, the fact that it was made with your own hands and with all your heart will give the doll special value.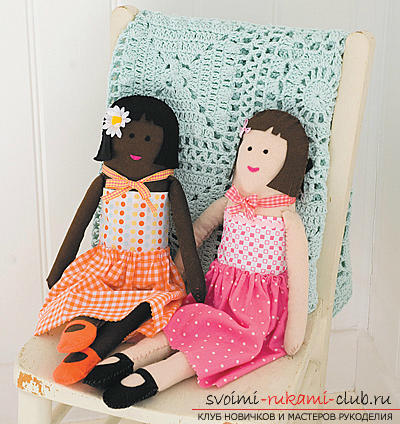 To create such a textile doll youYou will need two pieces of fabric, felt is ideal. One should be large, flesh-colored – he will go to create the doll itself. Second piece – less, we will use it to make hairstyles. And for the rest of the work, you can use any materials and tools that you can find in your home. How to use a pattern You need to print out the existing pattern and put a pre-prepared sheet of tracing paper on top of it. Trace all the details and cut them out. With the help of such manipulations we prepared our pattern.
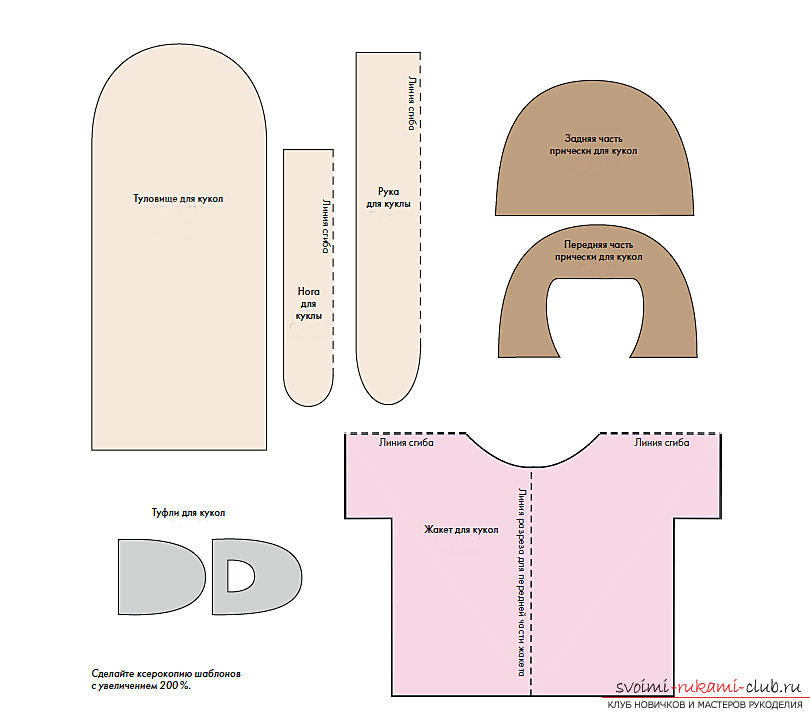 Before attaching the resulting pattern tofabric, you need to lay out the material, smooth it out and see if there are any folds. If such are found, the fabric must be ironed first. Next, you need to place the pattern on a piece of fabric so that the pieces are closer to the edges and to each other. This is necessary so that the output ends up with as little unnecessary scraps as possible. If you need to make two similar pieces, then fold the fabric in half and then attach the pattern pieces. Cut out the resulting pieces as close to the edges of your patterns as possible.
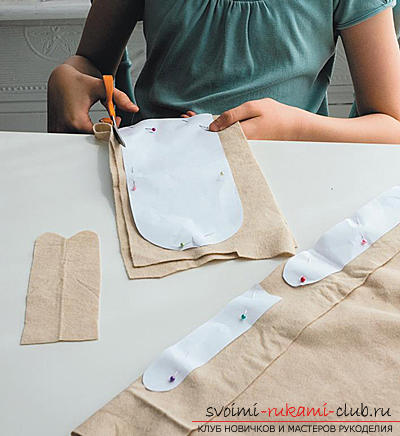 Sewing the doll Next, we proceed to the sewing itself.To do this, you need to connect the two parts of the resulting body with pins and stitch it around the perimeter with a hidden seam. There is no need to sew the bottom yet. Next, start working on the doll’s legs and arms. Everything here is the same as with the body. Sew all the pieces together around the perimeter, leaving the top edges unstitched.
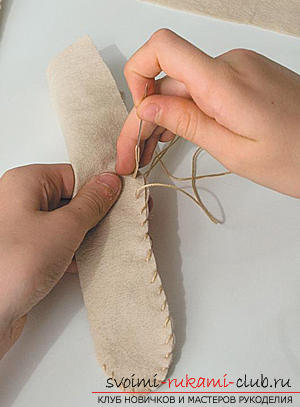 Now start filling in all the details.The stuffing should be carefully pushed inside with a pencil or stick and special attention should be paid to hard-to-reach places. You should not use a large amount of filler, otherwise our seams will crack. Leave a little free space at the tops of the arms and legs.
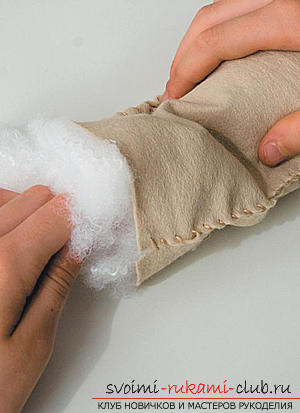 Next, you need to place the arms and legs in the holes of the body, fasten them with pins and sew the whole thing with a running stitch, connecting the legs and arms to the body and at the same time sewing all the holes.
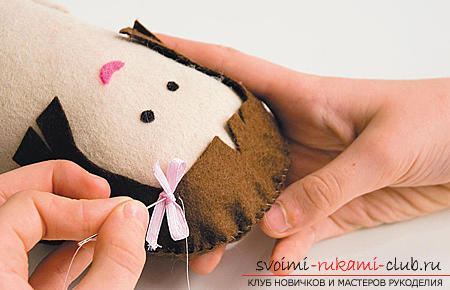
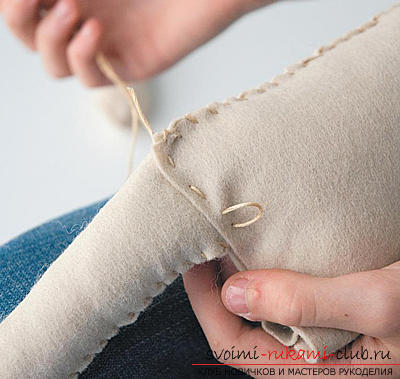 Start making your hairstyle.Sew the pieces together using a hidden seam. Secure the finished hairstyle to the doll’s head using several small stitches. Make eyes and a smile from felt, and sew it all to the face. If you wish, you can also make a bow and attach it to your hair.
Comments
Related posts:
 A master class with photos will teach you how to make a homemade toy – DIY dolls
 We learn how to make a house for a cat with our own hands by step-by-step instructions with a photo
 Dolls and households, dolls with their own hands from the master Virahovskaya Rimma Nikolaevna
 Making dolls from cardboard, dolls with their own hands from the master Batobalotov Amgalan Batotsyrenovna
 Booties crocheted for baby boom dolls. We knit ourselves for dolls