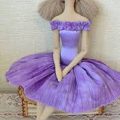
Crochet crocheted ballerina doll. Master class from Xenia
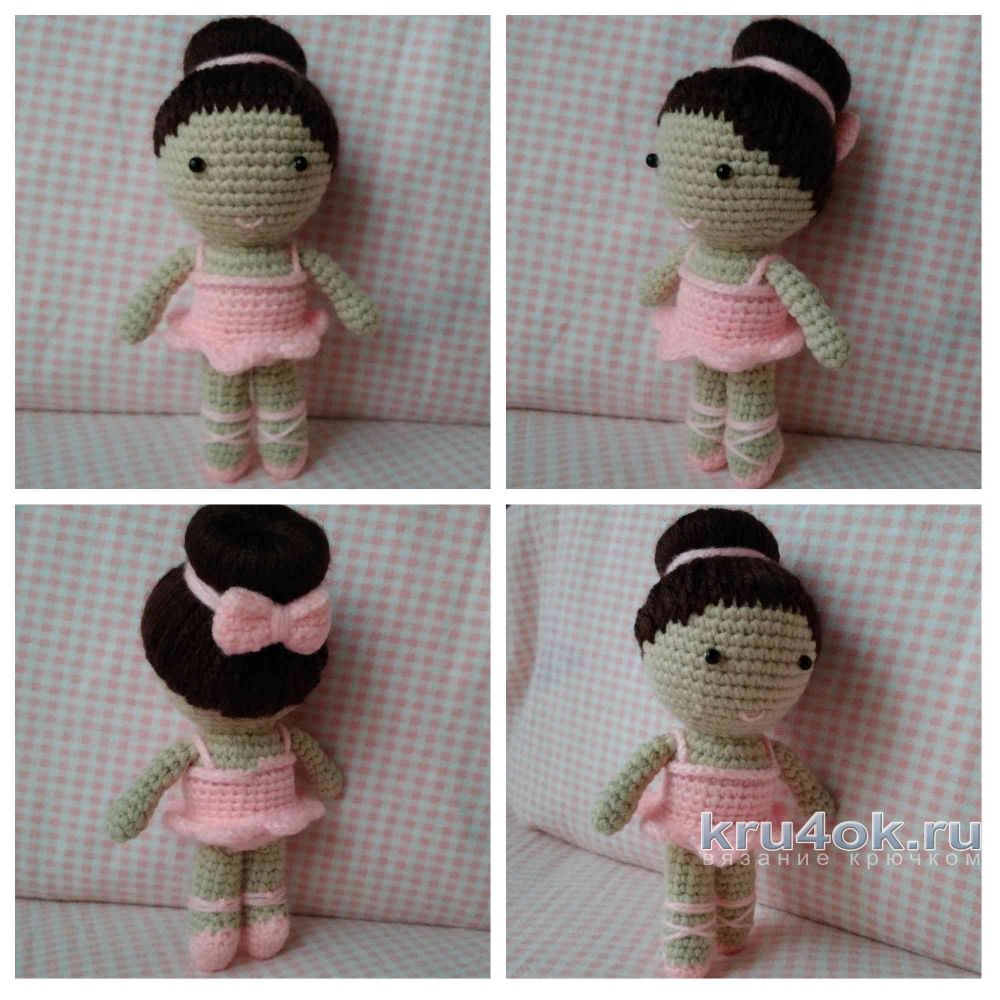 For a long time in my head the idea was to linka small neat little ballerina - with miniature pointe shoes, a tiny bundle and necessarily a large bunch :)) At first the idea was imaginative, not shaped into concrete figures. Then I started experimenting, bandaged the n-th number of pairs of legs (with them was the greatest difficulty) and eventually got exactly the ballerina who imagined. Growth of the ready dancer (from the tips of the pointe to the top of the beam - 14 cm). To create it, I used three kinds of different yarns (I chose in the first place in terms of color, then in density). For the body, she used Trinity yarn "Kroha" (20% wool, 80% acrylic), the color "Sand", it took less than half the skein; for the bundle and the pointe-player used yarn "novelty" (it is a bit thinner than "Crumbs", but it needed such a pink shade), it took quite a bit; for the hair chose the yarn "Bambino", a shade of chocolate (here it is not important what kind of yarn to take, you can take any favorite shade, the main thing is that in terms of density, this yarn is not denser than the other two). In addition to the yarn I needed a hook (I took my standard No. 1,4), a sintepon for filling and beads for the eyes. The ballerina is connected on the basis of my imagination :) Description of the toy: Let's start with the head. The head passes into the trunk, they are cohesive, knit in a circle (the bundle is not removed, it is part of the trunk, in the trunk region there will be a change of yarn from corporal to pink). So, we knit the head, the yarn of a solid shade: 1 row: 6 sb in the ring amigurumi (we knit two air loops, then 6 sb in the first loop, we get a circle of 6 scales) 2 row: 6 additions (12) 3 row: * 1 sb pr * 6 times (18) 4 rows: * 2 sb pr * 6 times (24) 5 row: * 3 sb pr * 6 times (30) 6 row: * 4 sb pr * 6 times (36) 7 row: * 5 sb pr * 6 times (42) 8-15 rows: 42 sb in each row 16 row: * 5 sb ub * 6 times (36) 17 row: * 4 sb ub * 6 times (30) 18 row: * 3 (18) - to fill the head 20 row: * 1 sb ub * 6 times (12) 21 row: 12 increments (24) 22 row: * 3 sbn pr * 6 times (30) 23 series: 30 sb we change the yarn to pink
 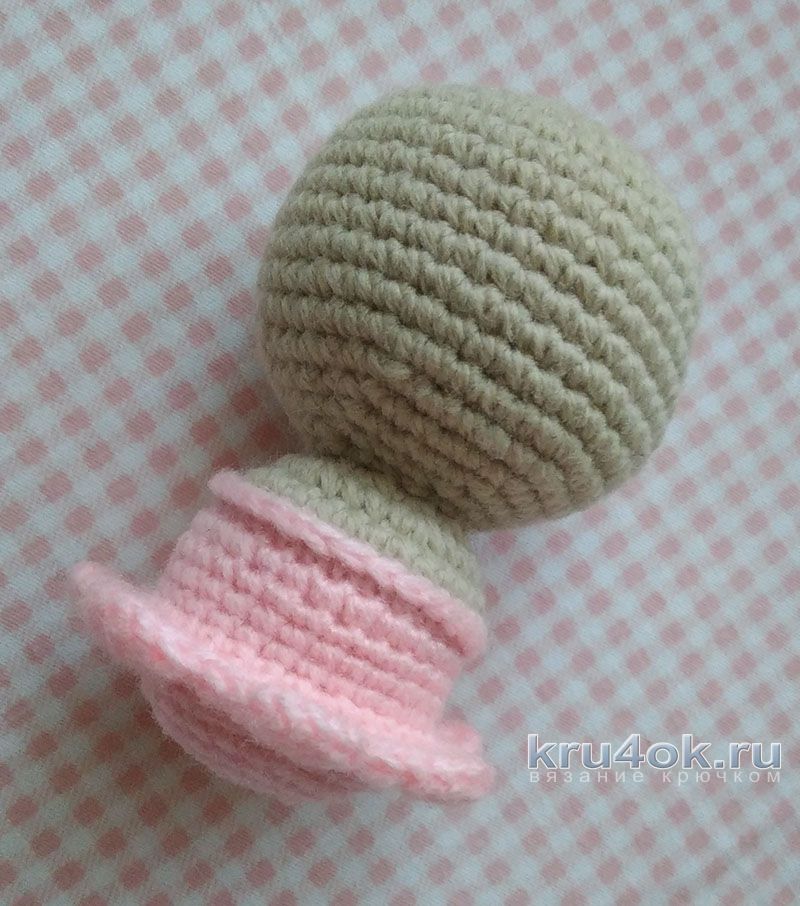 24 row: we make a hem - we tie a pink string around 30 cb for the front walls of the loops of the previous row 25 row: we tie a pink string behind the back walls of loops 23 of the row 30 sb 26-30 rows: 30 cb in each row 31 row (commence skirt): knit * 4 sb pr * 6 times (36) behind the front walls of the loops of the previous row 32 row: * 5 sbn pr * 6 times (42) 33 row: we knit rapport * skip two loops, in the 3rd loop 7 columns with a crochet, pass two hinges, connecting column * 7 times 34 row: we return to the body, to the 30th row, through the connecting posts on the skirt, we knit 30 sb for the back walls of the loops of the 30th of the series 35-36 series: 30 sb in each row 37 row: * 3 sb ub * 6 times (24) 38 row: * 2 sb ub * 6 times (18) - fill the body 39 row: * sb ub * 6 times 12) 40 row: 6 additions, close the knitting.
 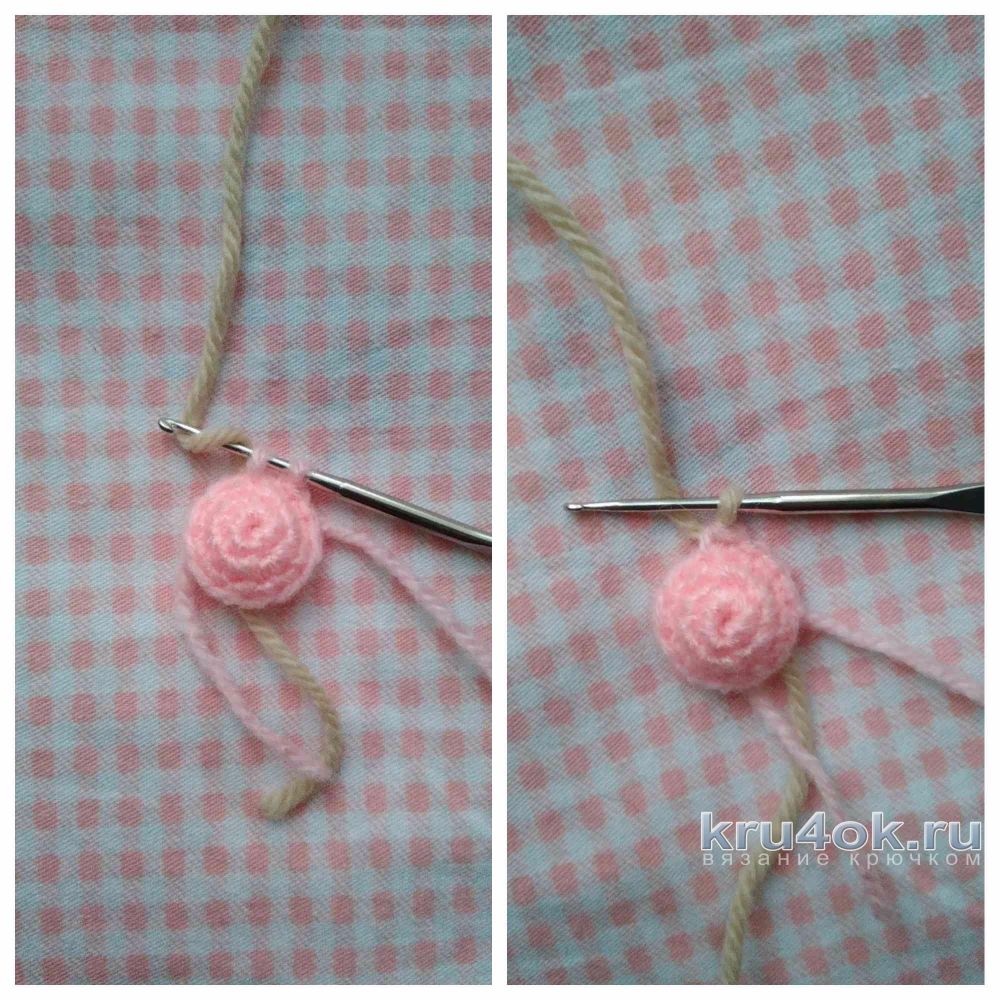 We pass to the legs. Legs knit together with pointe shoes, they are not removed. There will be a constant change of pink and solid thread, the transition is as follows: when there is one bar without a crochet before the transition, we begin to knit this extreme column as usual - grab the working thread, we have two loops of the same color on the hook. To perform a smooth color transition, we take the yarn of a different color, pick up the crochet (which now has two working loops) and stretch the loop with a new color through two working loops. At this it is necessary to try, so that the constrictions of different colors inside the legs are not too strained, if this is allowed, then when knitting this will not be visible, and when filling with the synthepone, the tightening will be observed and the leg will not be able to be stuffed to the end. We proceed to the feet, they knit in a circle, we take pink yarn: 1 row: 6 sb in the ring amigurumi 2 row: 6 additions (12) 3 row: 12 sb 4 row: pink thread: 1 sb; bodily thread: 4 sb; pink thread: 2 sb, increase, 1 sb, increase, 2 sb (total we get 14 sb in a row) 5 row: bodily thread: 6 sbn; pink thread: 7 сбн; bodily thread: 1 sb (14) 6th row: bodily thread: 7 cbn; pink thread: 1 sb, 2 decreases; bodily thread: 2 sb (12) 7 row: bodily thread: 8 sb, 1 reduction, 2 sb (11) 8 row: bodily thread: 8 sb, 1 reduction, 1 sb (10) - cut off the pink thread, fix it, further we will knit only in solid color, fill the foot, pay special attention to the heel of the 9-14 series: 10 sb, cut the thread, fix it, leave the tip for sewing, fill the leg to the end. We knit two legs :)
 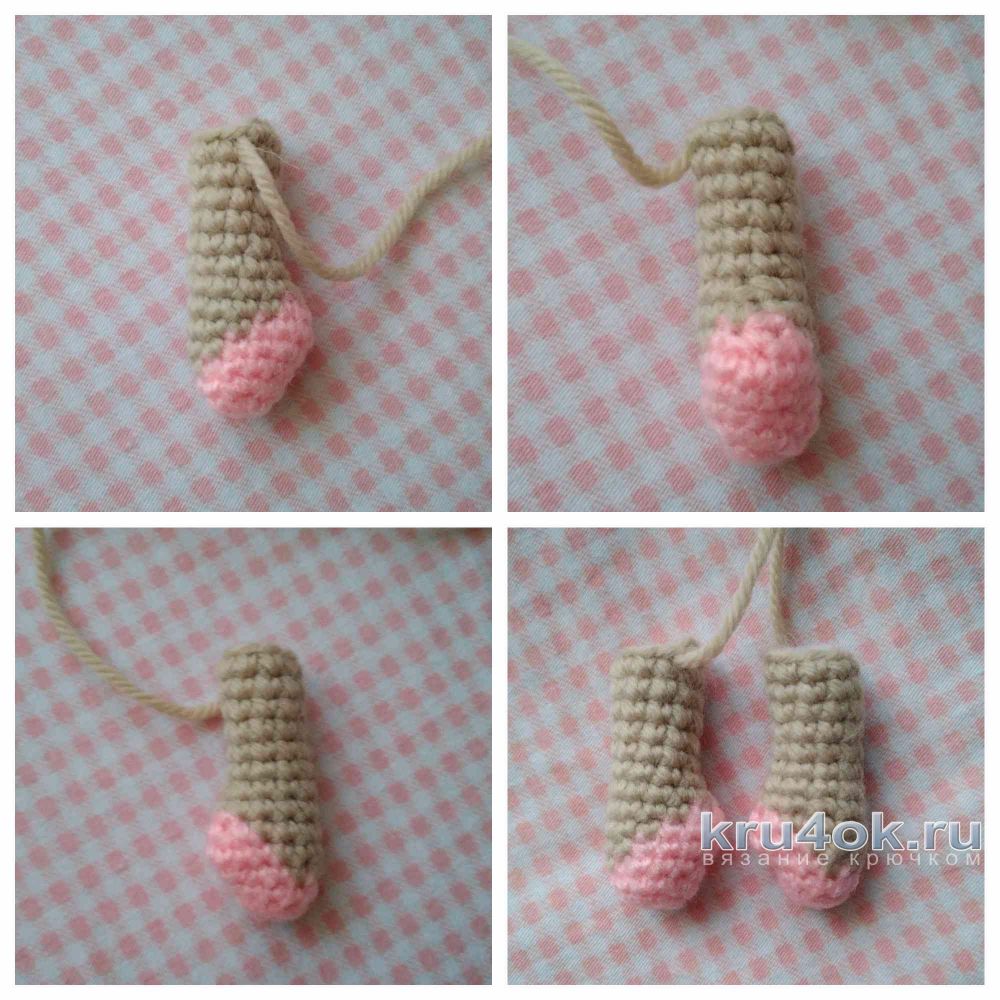 We proceed to the knobs, knit in a circle: 1 row: 4 sb in the ring amigurumi (circle amigurumi you need to try to "turn out" to link the next row) 2 row: 4 additions (8) 3-4 rows: 8 sb in each row 5 row: * 2 sb ub * 2 times (6) - fill the palm of 6-10 rows: 6 sb, cut the thread, fix it, leave the tip for sewing, fill the handle. We knit two parts.
  We knit a bunch for the ballerina. A bunch is, in fact, a donut, wrapped in a thread of the same color as he himself. It is knit like a normal ball, but without both poles. When the poles are connected, a flattened ball will be obtained, after the packing, a donut will be obtained :) 1 row: 12 air loops close into a circle, then we knit in a circle around the circle 2: * 1 sb pr * 6 times (18) 3 row: * 2 sb pr * 6 times (24) 4 rows: * 3 sbn pr * 6 times (30) 5-8 series: 30 sb in each row 9 row: * 3 sb ub * 6 times (24) 10 row: * 2 sb ub * 6 times (18) 11 rows: * 1 sb ub * 6 times (12), cut the thread, leave a long tip for stitching the "poles" of the donut. Sew several columns, fill the sewed site with a sintepon, repeat until the circle ends, then start wrapping / wrapping our donut floss th same color (if the thread is over, it does not matter, a new secure and hide the knot under the turns of thread).
  We bind the bow for the beam (an optional element,but beautiful :) 1 row: 20 air loops close in a circle, then we knit in a circle 2-6 rows: 20 sb in each row. Wind the resulting cylinder in the middle and get a bow. We fix the thread. We pass directly to the hairdress of a ballerina. Let's make her hair :)
 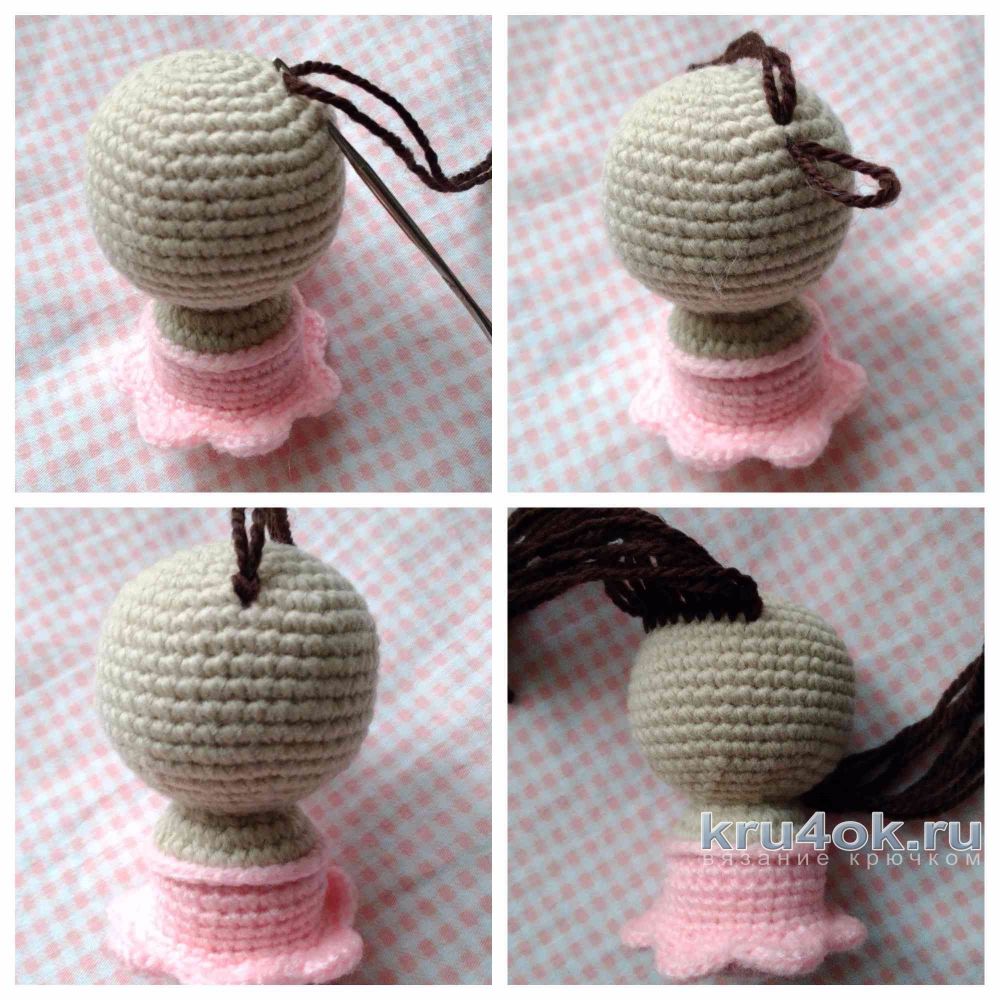 We take the same color as for the beam, cut itsegments of about 20 cm (the exact amount I will not say). Determine the front of the head (on the seam on the body, where there was a transition from the body thread to the pink one - this is the back part of the figure, respectively, the opposite side will be the front). We find the 7th row, fix the center of the first "strand" of hair (using the hook stretch for the center of the prepared segment, then in the resulting loop stretch the two ends of the segment). For the front of the head, we fix 9 strands in this way. Determine the back of the head and in the region of the 16th row we fix 7 strands.
 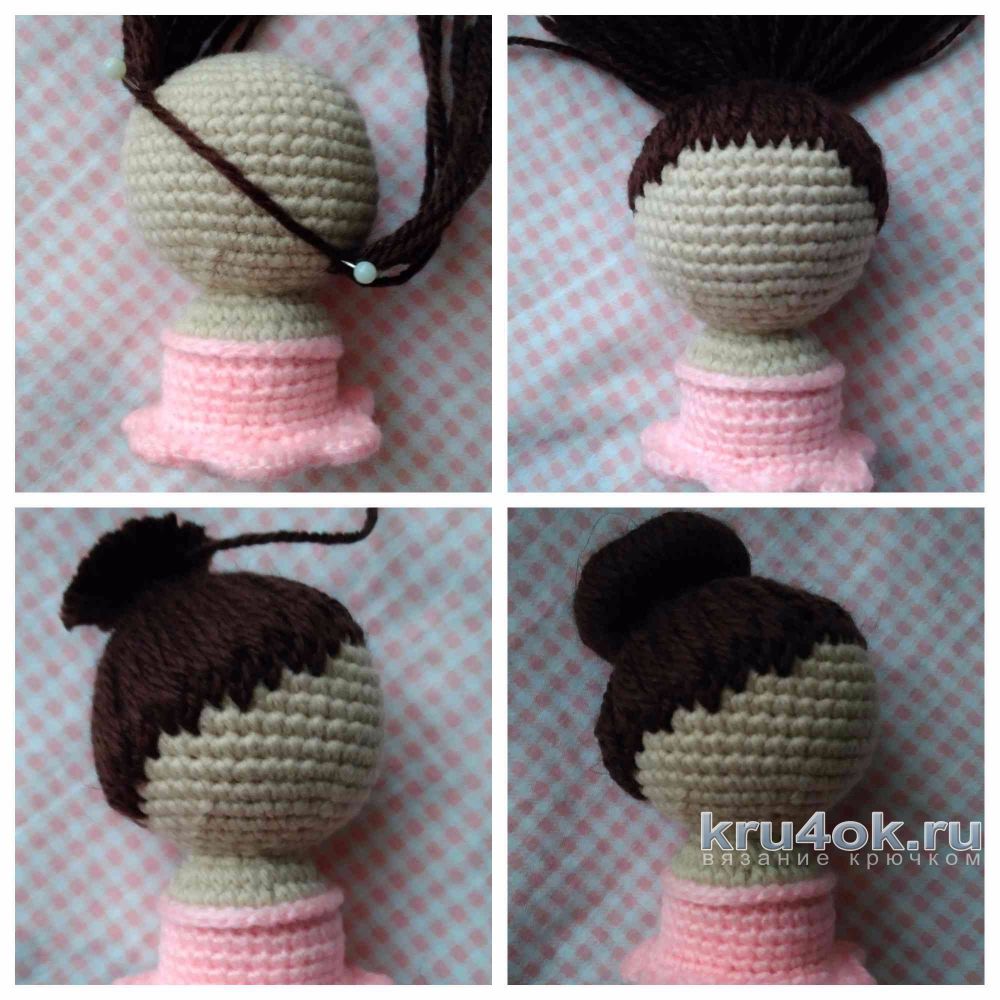 Next, we fix the strands along a smooth arc fromthe front of the head to the back (for convenience, you can periodically lay the thread and see where the next lock should be fastened). For the front and back of a single row of strands, for the side it is better to make double rows (when collecting in the tail, it will be less visible through the body part of the head). Thus, the vertex remains bald, but we will collect the hair in the tail, the vertex will close :)
 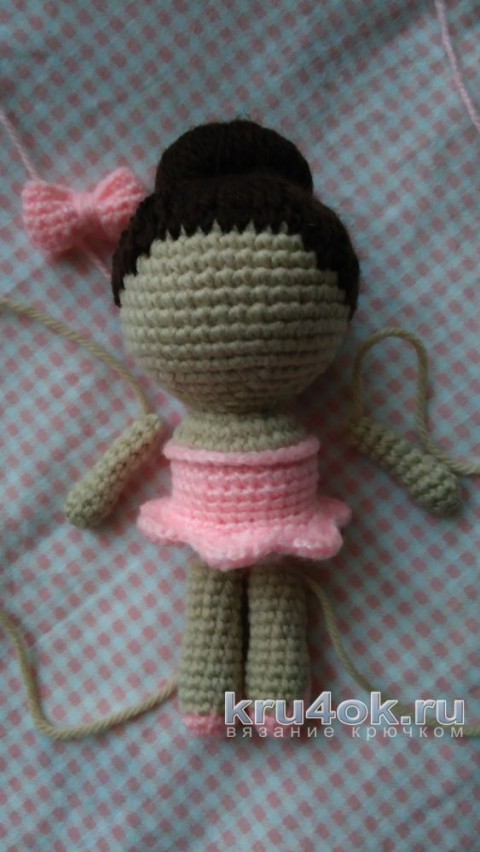 We collect hair in the tail, we tie it with a threadthe same color (tied tightly), correct the "roosters", determine the position on the head. Then the blasphemous thing happens, but I simply did not find another way out ...
  Take the bow, pass through its center threadpink color and do a few turns around the beam (I determined the place for the bow under the beam). Take the ribbons for pointe shoes. We fix small pieces of pink thread along the sides, make a crosshair from the front, then two turns around the leg (the ribbons are fastened behind, I did not make a bow because the ballerinas are taught to hide the ends of the ribbons :)
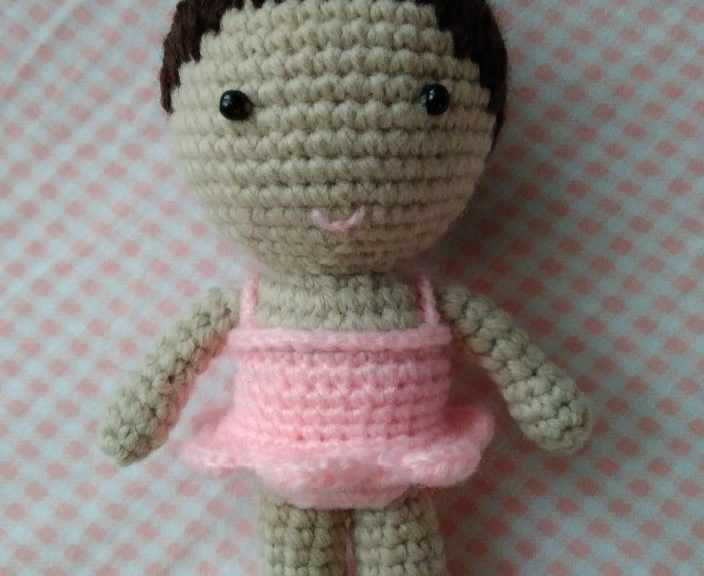
 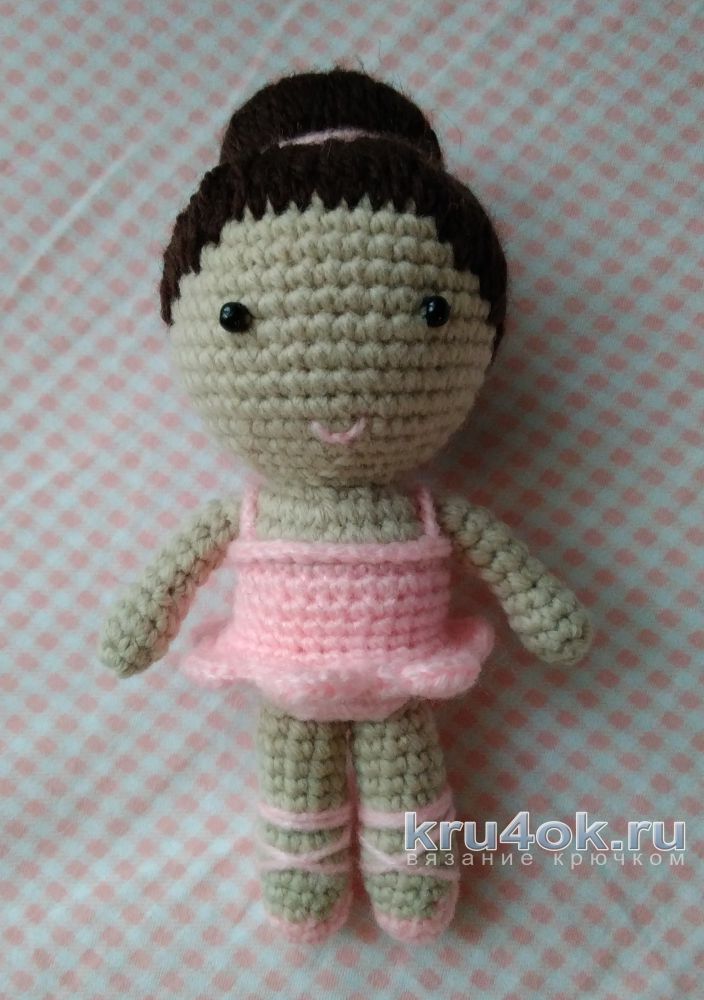 We do our ballerina person. For the eyes, you can take blanks from the store, if there are ordinary beads at home, you can paint them in black (my version). We embroider the neat mouth. You can make a blush (the effects of physical activity :)) Total, we get a small ballerina. In my opinion, a good gift both for professional dancers and for little fairies, just making their first steps in the world of dance :) Author of work Wait, download ...