
New and original ideas for the design of children's dresses. Beautiful and unique solutions that will help you make a wonderful gift to your beloved daughter. Easy instructions and photos
Naturally, every loving mother wants forown child is only the best. This applies to everything. Of course, for every parent his baby is the most beautiful, and it's not surprising. Therefore, children receive all the best, including clothes. There is nothing difficult to go to the market and buy a new dress beloved daughter, but children are growing rapidly. Therefore, wearing his girl will be one maximum of two seasons, and then the child will grow out of it. It will be best to sew a new outfit for the daughter. The main advantage is cheapness. You will spend much less money on the purchase of fabric and other materials on the dress, rather than a full purchase. In children's clothes, a simple silhouette and cut is most often used, and thanks to accessories, the desired result is achieved. Dresses use ruches, flounces, frills. Such details add sophistication along with a certain charm. If you put a little effort and work on the outfit, you will get beautiful clothes for your beloved. First you need to create a pattern on the dress? It is necessary to remove all measurements from the child, and write down on a separate sheet.
- Circumference of the thorax;
- Waist circumference;
- Hip girth;
- Length of the product;
- Back width;
- Length of the shoulder;
- Circumference of neck.
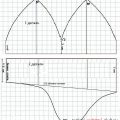
After you have removed all the parameters, you can proceed with the construction of the pattern. To facilitate the task, a ready-made model of the future dress is given.  It is worth noting that the red line is circledonly the front side of the product, and the blue line, respectively, the back of the dress. Take a closer look at the photos of the model. The dress has a simple straight silhouette. Create it will not make any problems, even those mothers who have never sewed before. The main decoration of the product is flounces. Having considered all the details, you can proceed with the modeling itself.
 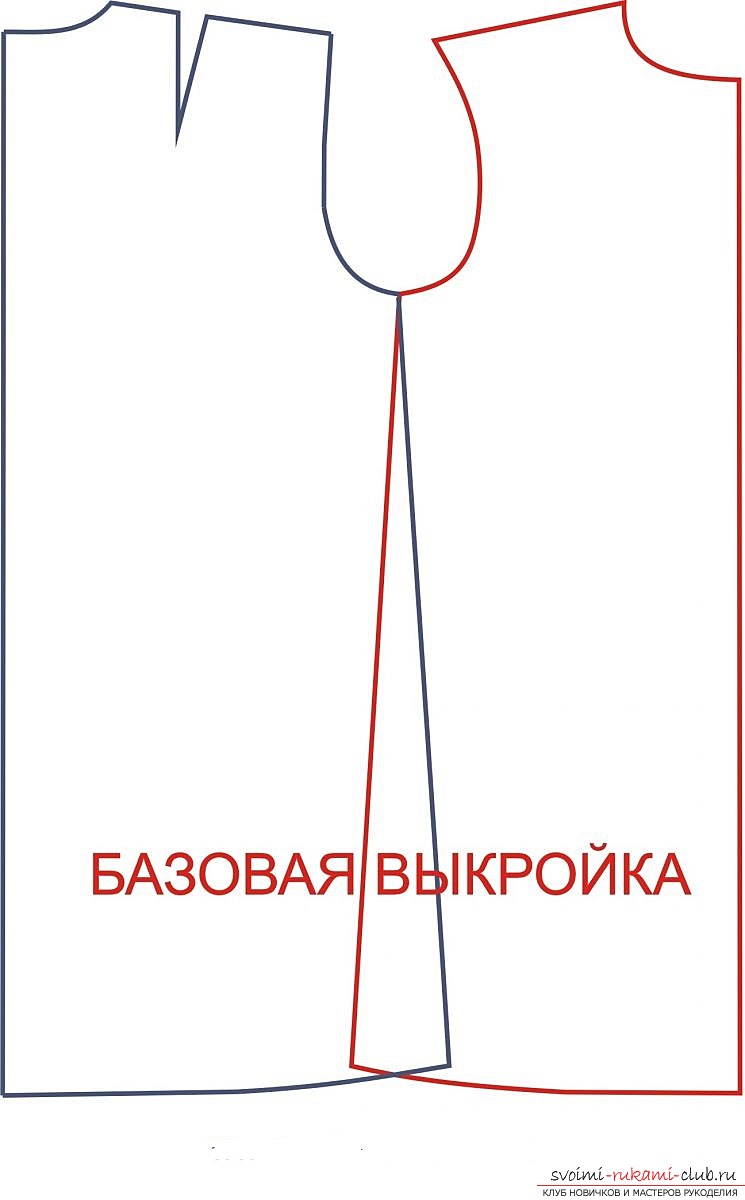 First step. Since the dress has an asymmetrical shape, it is best from the very beginning to copy all the details of the front side, as well as the backs relative to their own central center lines.
 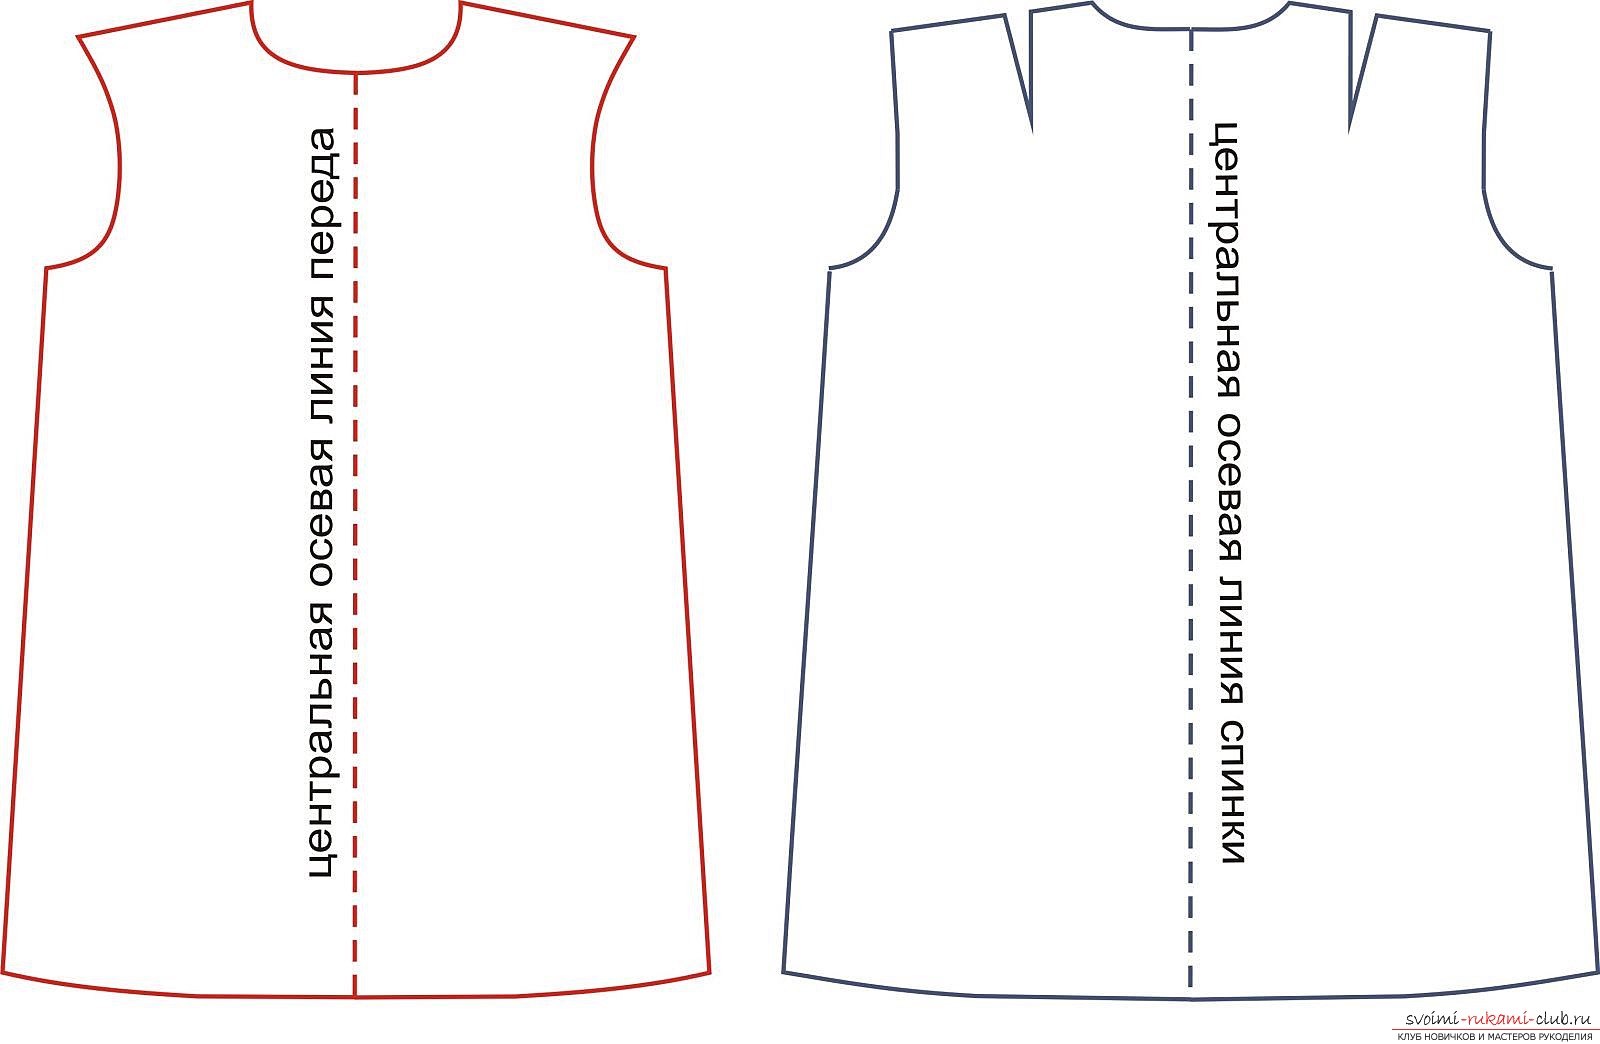 If you want, you can lengthen or vice versashorten the pattern to the desired size. If you choose a shortened version, then you will get a long tunic, which you can wear under leggings. The second step. On the front side of the detail we draw the décolleté zone. How to do it? Just draw a smooth line from the right shoulder cut to the side seam line on the left side. You can, if desired, shorten the shoulder line, and correct the armhole line. When all the manipulations are completed, you need to cut off all unnecessary. Everything, the pattern of the front half of the children's dress is ready!
 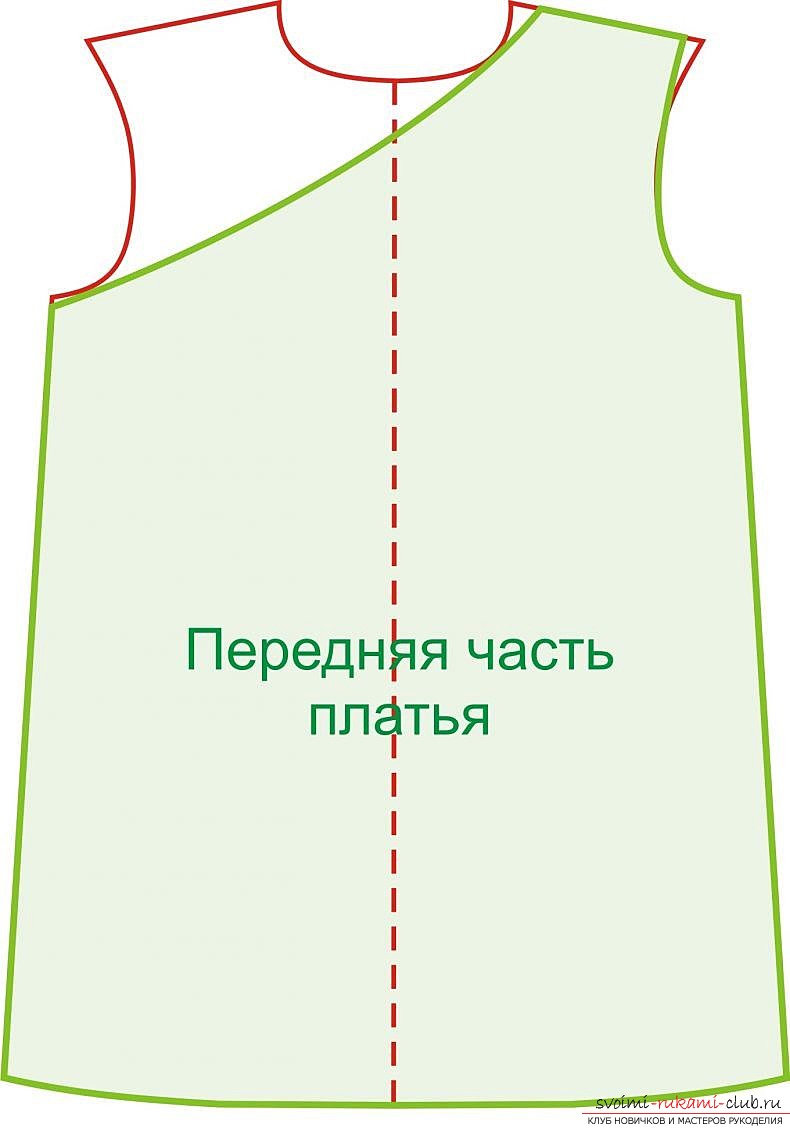 The third step. Let's do modeling of the back. From the very beginning it will be necessary to deal with the shoulder line, or rather, on the left half of the pattern. It should be shortened to the same size as the front. Then correct the armhole line. You can safely ignore the shoulder tuck, as you will not need it.
 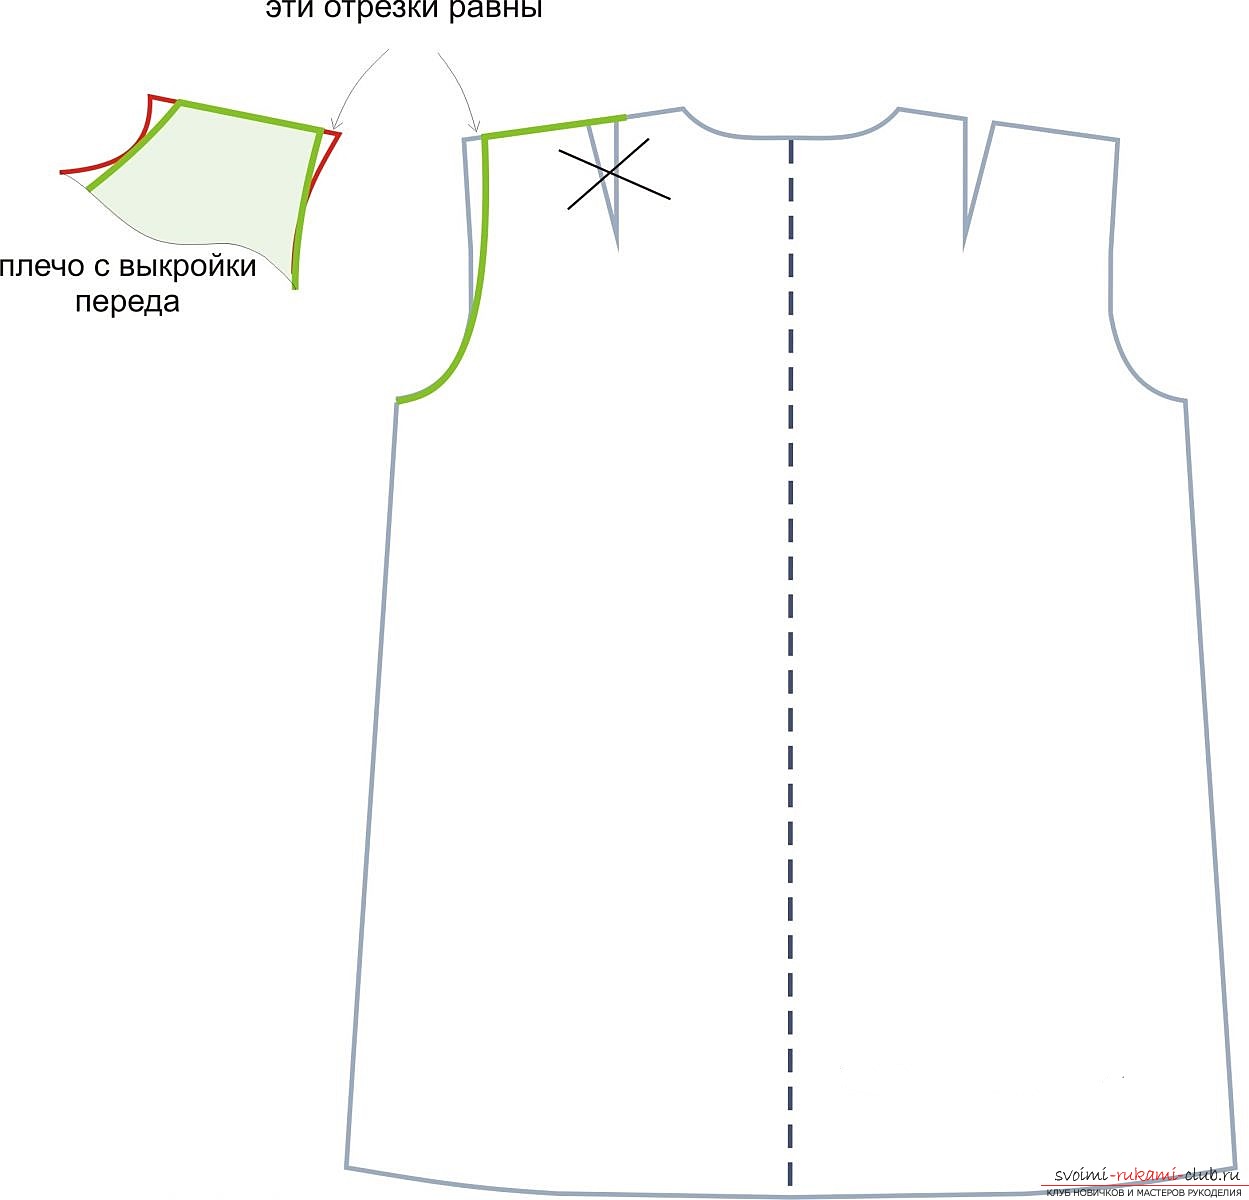 Then it is required to postpone the length of the shoulder cut,which is equal to the length of the shoulder cut on the front pattern. You can simply combine two patterns (front and back), and mark the necessary segments. Draw the décolleté line from the finished shoulder cut and down to the side seam line on the right side. So, the back pattern is ready!
 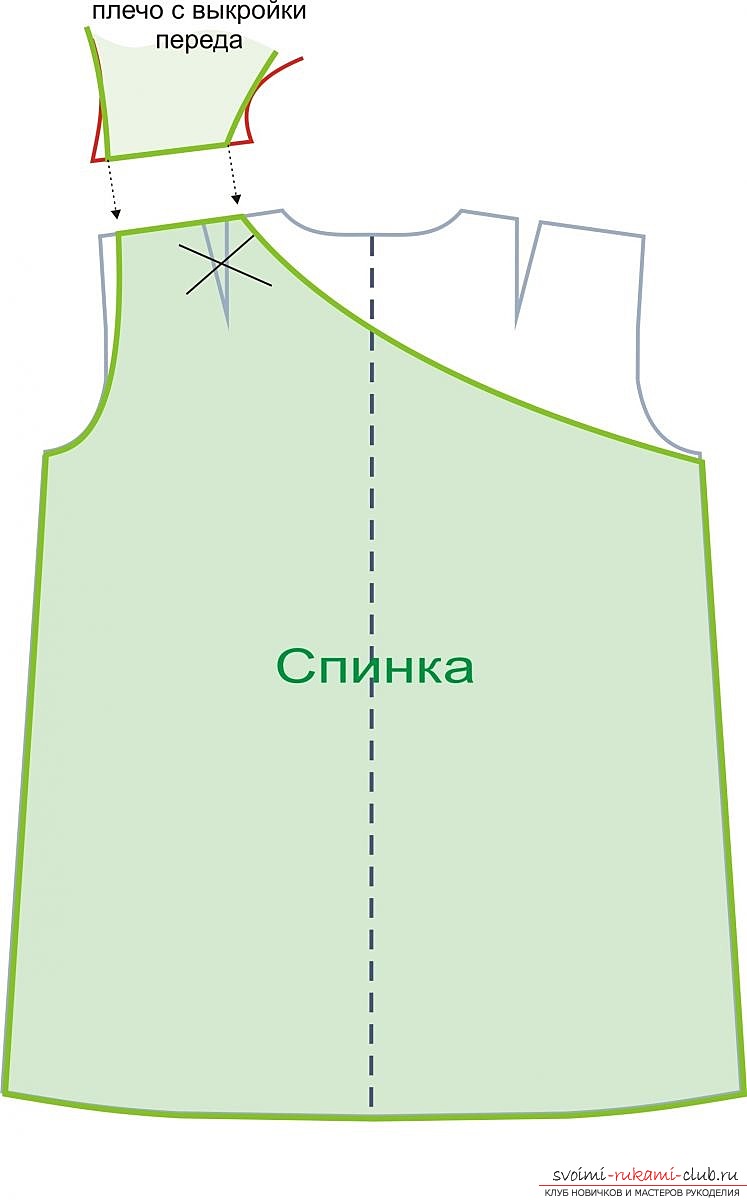 The fourth step. Now the fun begins. Let's proceed to the simulation of shuttlecocks. On the front pattern of the dress draw a contour of the shuttle, which is placed on the neckline. You can determine the width of the shuttle yourself, you can focus on the photo of the model. Judging by the photograph, it is evident that the shuttlecock covers the shoulder slightly. Therefore, it is possible to extend the line of combining the shuttle with the shoulder section of the product itself.
 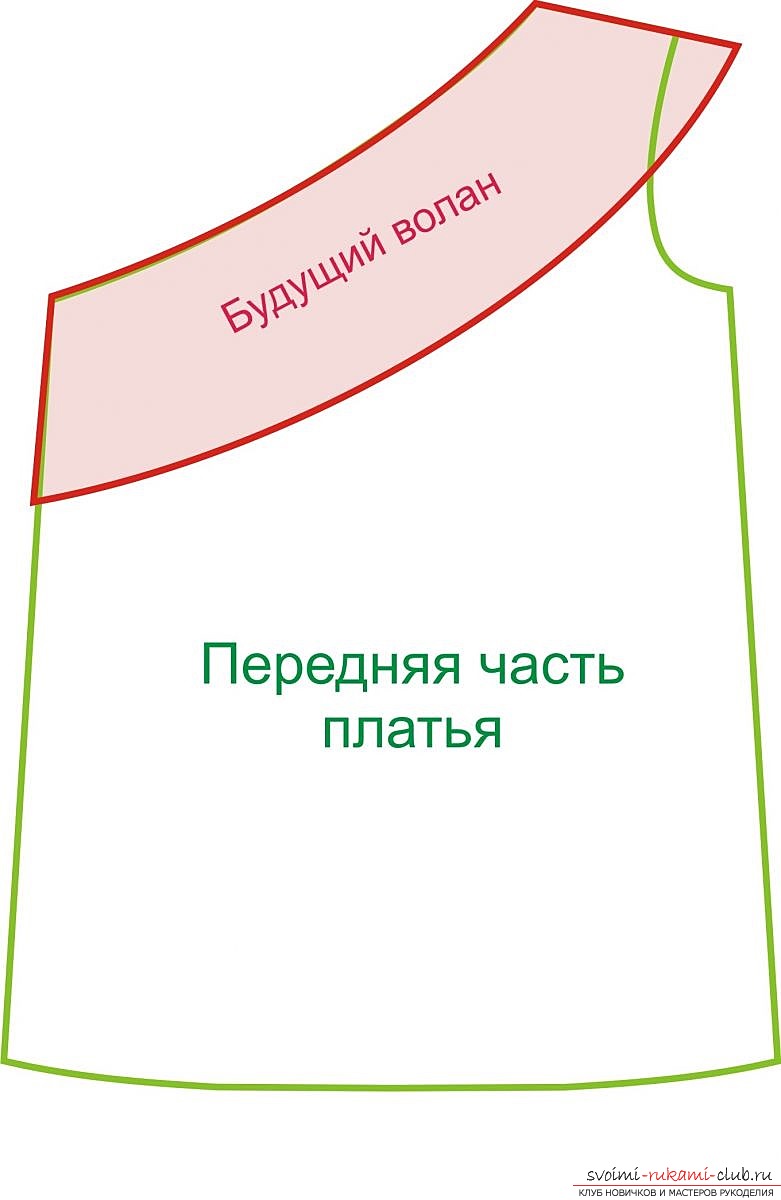 Now copy the resulting pattern on the sheetpaper, and use a technique called conical breeding. What is its essence? The workpiece must be cut into separate sectors, then they need to be placed, leaving gaps between them: on the upper side less than on the bottom. This is necessary so that the shuttle can be fettered before bite. You will get approximately the same result as shown in the figure.
 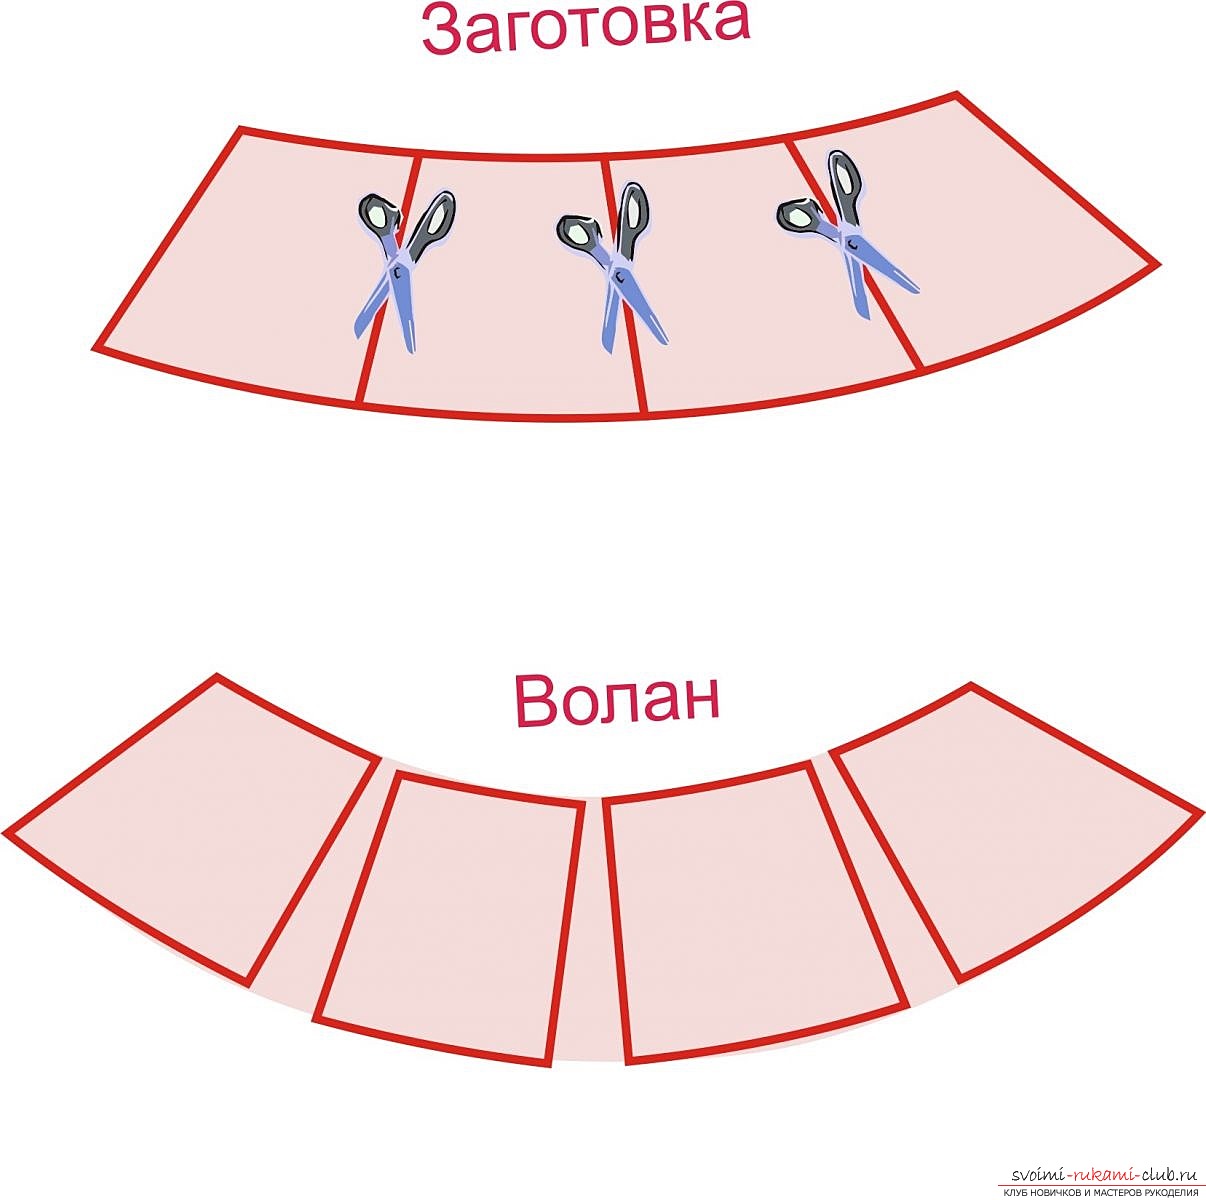 Similar actions are carried out with the back sidedresses. The second half of the shuttle will be obtained. During the sewing of the dress, both halves of the shuttlecock will be attached to each other. After that, the upper edge prpararivaem and makeweight to the neckline. If you are using knit fabric for sewing a product, then you can put an elastic band on while sewing a shuttle with a dress. Of course, you can immediately make a one-piece shuttlecock. Rationally simulate it can be based on a circle. Fifth step. If you carefully consider the photo of the model, you can see that the dress uses, in fact, one shuttle that forms the neckline. But the one that is sewn on the bottom of the product can be safely called frill. This fact greatly facilitates life, because the frill represents only a rectangular strip without any complications. What is the difference between frill and frill? The dressing, in fact, is a straight strip of tissue, in which the folds are formed during the seaming on the seam. The greater the difference in the length of the parts to be grinded, the richer the frill turns out to be. The shuttle is built around a circle, a semicircle, along a spiral and so on. The lushness of the shuttle is achieved due to the difference in the radii of the outer slice and the internal one.
 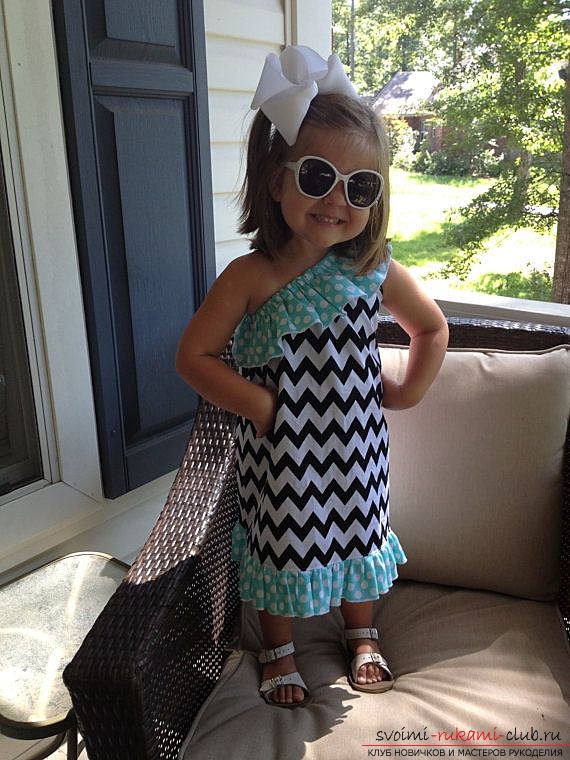 After all the manipulations, draw a rectangle bywidth that is equal to the width of the shuttle that is used on the decollete, and the length is equal to the length of the lower cut of the article multiplied by 1.5. So, all the details for making dresses are ready! You have on your hands the front side of the dress, the back, two halves of flounces and a frill. It remains only to sew together all the details and to please your child with a new thing. Your little one will have a new dress, and you have a sewing experience, which is useful anyway. Prices for things are growing every day, so many women switch to sewing, since it is more profitable. Spend a little more time and effort, and create new and fashionable things for your family. Thus, you will help save money for more necessary expenses than clothing.
Comments
Related posts:
 New and original ideas for the design of children's clothing. Original and simple solutions that will help you make an excellent gift to your child. Simple instructions and photos
 New ideas for the design of a cute baby cap. Original and simple schemes that will help you make a good gift to your child. Simple instructions and photos
 The original design of new patterns of elegant dress. A great outfit for every woman. Photos and instructions
 New and original ideas for a coat for a girl. We make clothes for the child in the latest fashion of 2014. Simple instructions and photos
 Various patterns of children's costumes for the holidays. Beautiful and bright models that will help you make an unforgettable image for any holiday. Simple instructions and photos