Beautiful and elegant decoupage of banks with their own hands: a master class of decoupage on glass
Elegant decoupage of jars with your own hands Sometimes, indecoupage new ideas appear that can be implemented extremely economically, but will amaze everyone around with their simplicity and elegance. To your attention - an interesting technique for creating beautiful jars that can be placed on one of the cabinets in your kitchen, or decorated with flowers. Decoupage is a technique that even a novice master can master. It is for these reasons that it will be easy for you to work with this topic, and doing everything possible will not be difficult.
- Glass jar)
- Drawing (napkin or map for decoupage)
- Varnish (acrylic)
- Paint (acrylic)
- Contour (acrylic)
- Brush (for processing)
- Sponge (foam rubber), cotton wheels
- Alcohol
Bank for products
 This material is more than enough.The jar will be the basis of our product. It must first be washed and then dried. Then, you need to wipe the outside of the product with a cotton pad, which you must first soak in alcohol. Next, take white paint and prepare it to prime the product. This process occurs thanks to a foam sponge, or when using a brush. It all depends on the convenience of the master. The entire outer part of the product is covered with a layer of paint. Then, put the paint to dry. If it dries, you should check the product for enlightenment. After this, you need to paint the bottom of the jar and process the outside of the product at the neck under the lid. The paint dries, and you can do other things. Or, prepare colored elements from our product napkins or decoupage cards. With their help, we will decorate our jar with beautiful ornaments and drawings. It is necessary to cut out the necessary contours with scissors, or even better, carefully tear them out where it is necessary to decorate your product as beautifully as possible. Next, work with a layer of paint. It is necessary to apply objects one by one to each side of our jar. Then, they must be coated with acrylic varnish. It is necessary to make movements from the middle of the picture to its edges so that folds or dots do not appear. In addition, it is necessary to work with the lid for the jar, which should also have a decent appearance. After the varnish layer dries, it is necessary to decorate the product with a colored outline. To do this, we will outline the outlines we need to make a solid line outline. Also, the outline can be applied using individual dots. If you are making a blank for the winter, it will be ideal to decorate the decoupage of your jars with beautiful pictures of fruits, vegetables, berries.
Bank for spices
 To work with a tin can we will need the following items
- Can
- Crackle lacquer (one-step)
- Napkins or decoupage cards
- Paints made of acrylic
- Varnish (acrylic)
- Brush
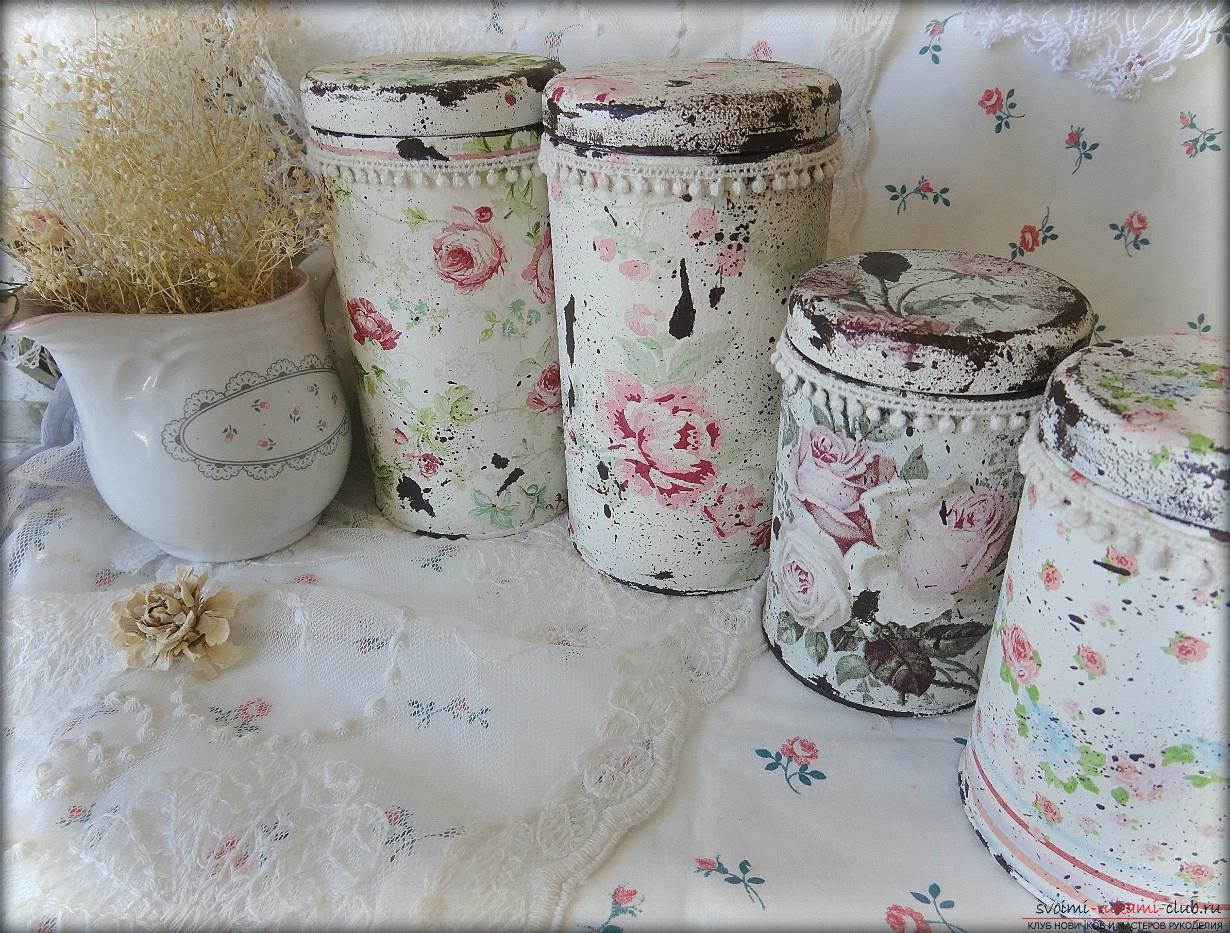
In this case, for the correct design we needA coffee can or a tea can will do. It needs to be painted in a dark color of acrylic paint and then dry our product. This color will look like cracks on our background. Next, apply craquelure varnish. This should be done with a wide brush or foam rubber, using one direction. The strokes should not go to each other. The surface should dry and then we take a contrasting color to decorate the jar. Mix white and ocher to make the appearance of aging. Cover the jar with the top layer of our paint blank. This should also be done in one direction. The thicker the layer on the outside, the rougher the crack prints will be. Prepare motifs from a layer of napkin, decoupage the jar and then wait until it dries. Then, using varnish, cover with a protective layer. Wait until it dries. In this simple way, you can independently implement many ideas for jars, using various methods and ways of decoration. Jars are great for storing spices, products or necessary spices. You can also decorate a collection of jars and give them to another person.


