
Pattern of classic trousers for women is a universal option for hand-sewing trousers
The pattern of classic trousers for women is notsomething complicated and inaccessible. With its construction can handle any woman who wants to update their own wardrobe. Beginning cutters, of course, will need a little more free time to correctly draw the drawing and transfer the pattern itself to the fabric. Experienced seamstresses can easily be cut and sewed. From the article you will learn how you can make a pattern yourself. Women's classic trousers - it's just as important a wardrobe as a classic skirt. This, perhaps, is the most comfortable thing for men, for women, children, etc. Trousers are worn at work, in a restaurant, they are worn at home, on nature, and go in for sports. Also, they can become part of the festive attire. Of course, everything depends on the material from which they are made, color and style. 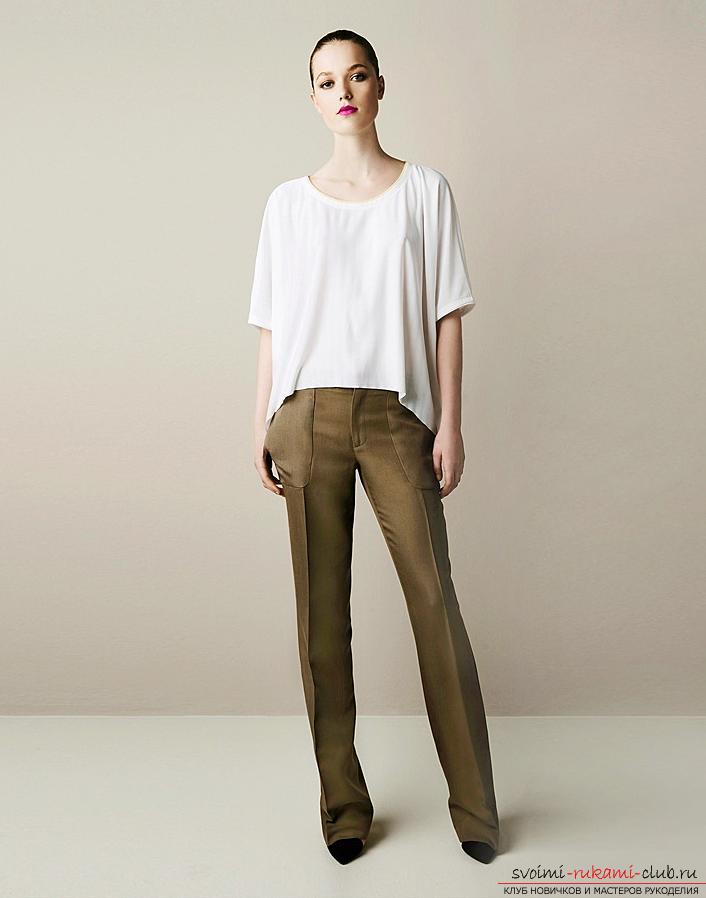 Fashion is so much now that the problems withchoice does not arise. If, however, there are difficulties with the choice, you can safely stop it on the classics. These pants should be for every woman, no matter how old she is, and what she's physique. Undoubted advantage lies in the fact that beautiful, and, most importantly, comfortable, beautiful pants can choose each representative, based on the characteristics of his own figure. Perhaps, somewhere you have to add, in another place - reduce, shorten or vice versa, lengthen, etc. They are straight, thereby able to visually draw you. Most often, classic pants do not have pockets, but if they are, they are almost invisible. Also, they do not have all sorts of decor elements. The best thing is individual tailoring of trousers. In the manufacture of trousers for girls and women, the main role, of course, belongs to the construction of a pattern. Taking the basis for the base pattern, experimenting with some details, materials and colors, I think you will certainly find for yourself what will suit you most. This, by emphasizing all its merits and hiding the shortcomings. Now the choice of clothes, as never before, is great and to buy a quality item is not a problem, you will say. But not so often, as we would like, we manage to find something interesting and unique. Current production is oriented, basically, to standard types of figures at a time when there is simply a huge number of proportions. Then you can really help out sewing. The cut will not only be unique, it will help emphasize your personality. In order to sew the product, you need to know the dimensions, namely the girth or hemming of the hips and waist. In addition to these, length dimensions will be needed along the front and sides, the hip circumference, the seat height and the width of the lower part of the trousers. A pattern built according to all the rules is already a big part of the matter, which brings you closer to triumph. What is good about classic pants? The fact that they can easily serve as the basis. Modifying them, you can get the style you need.
  I advise you to choose enough tissueresponsibly. In the event that you are going to sew wide pants, then problems with the choice of fabric should not be. Well, if you decided to sew trousers with a dappled top, then you should abandon the fabric in the likeness of corduroy, kapron, jeans, synthetics and so on. This material is more suitable for wide trousers. Now we will take up the construction of the pattern itself.
 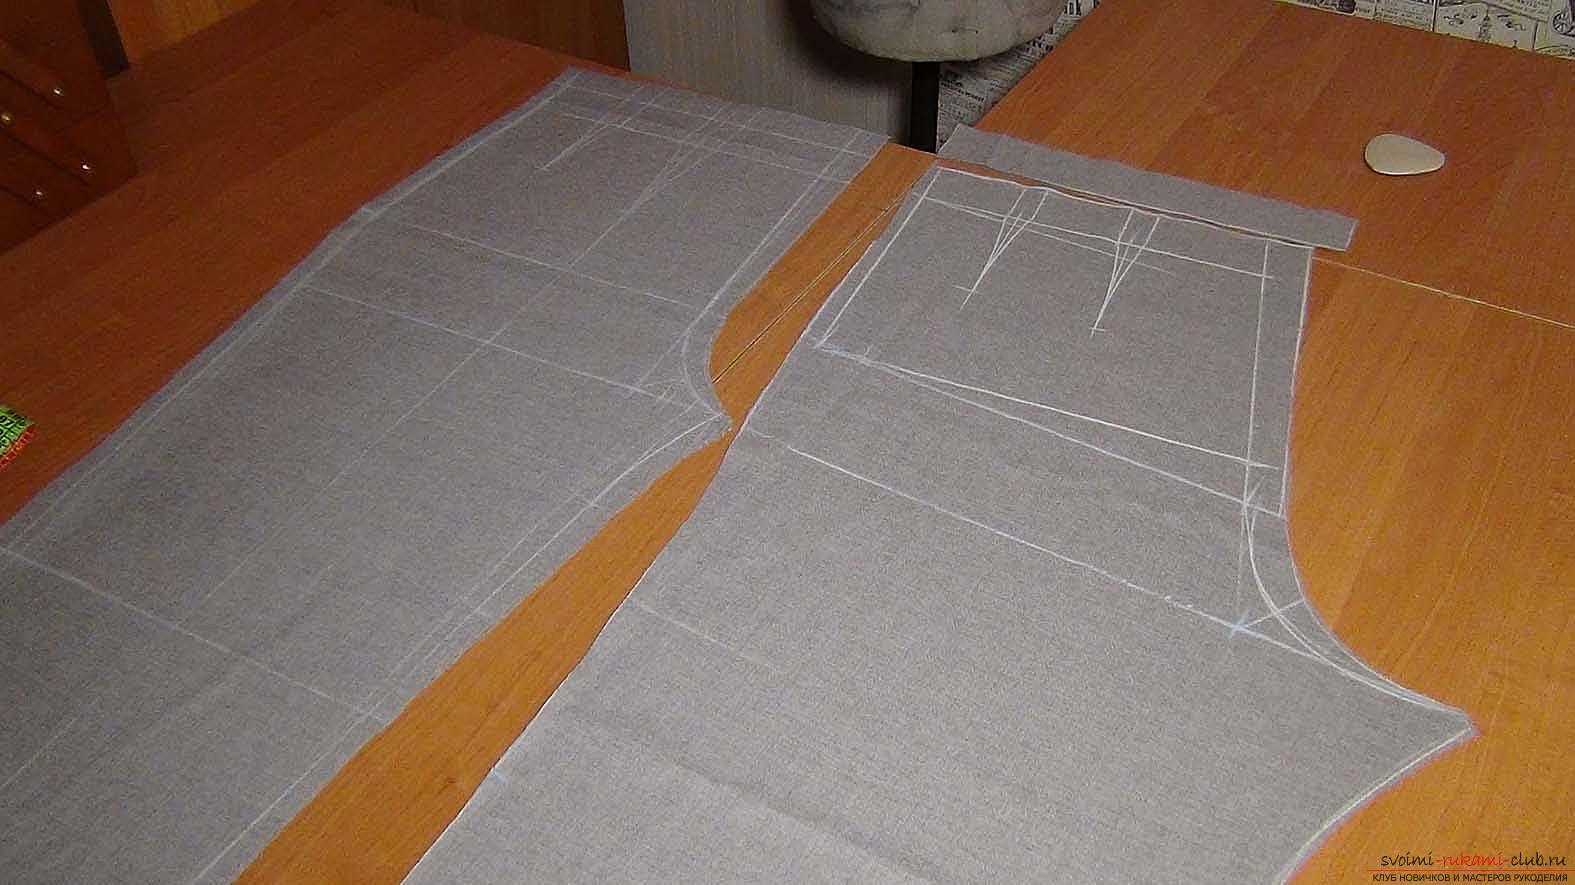 We need to take:
- Tape centimeter for taking measurements;
- Paper, better dense, you need to take a large enough size (suitable for whatman, suitable and unnecessary wallpaper);
- Pencil for drawing, sharp scissors, long ruler.
First we will remove the necessary measurements. As mentioned before, we need the dimensions of the length of the product itself, the hemispheres of the waistline of the model and the hips. Initially, we will need to build a drawing of future trousers, namely, to transfer them. On the prepared paper, draw a right angle. We learn its vertex by the letter T. One more point is postponed from it, H is the length of the product itself. Draw a straight line that departs from the second, designated by us point H, to the right. It must be perpendicular to the TN. Now, from T (direction down), we lay half of the half-hip of the thighs, to which we add one centimeter in addition. Another point was obtained, which we will denote as B. From it we put half of the half-hip of the hips and add another half-centimeter. One more point is obtained, which we denote by D1. To build the width of the trouser's seat, it is necessary to put aside a tenth of the half-hip of the hips in the direction to the right of B1. We have obtained point B2. Draw a line (straight) from B, which should be parallel to the straight line TB. The place where both lines intersect each other is denoted as T1. From point B1 we postpone the segment. It must be equal to the size of the segment B1B2. Now the points need to be connected together by means of a smooth line. Visually, you can see the pattern on the drawing. Let's proceed to the drawing of the ironing line. We need to divide the line B1B2 into two. After that, divide the line from the point of division to point B in half. The point B3 is obtained. Parallel to the TN, draw a dotted line (from point B3) upward. On the right side of point H, we plot the segment of four to six centimeters. The resulting point is connected with point B. We lay off the segment from the line of ironing to the right. We mark the point H1. H1 and B2 are connected together. Need to draw a line of waist pants. From the point T1 we lay down one centimeter. We connect the points. To calculate the undercut, or more precisely their depth, you need to subtract half the size of the waist hem from the size of the segment T1B1. Now we take another half a centimeter and distribute it to the recesses, the front and the front side. As an example, let's take the length T1B1 7,5cm. we get the following calculation: 7.5 - 0.5 = 7; 7/2 = 3.5. The depth of one recess was 3.5 centimeters. The resulting length is laid along the waist line from point T to the right side. Make an undercut using a smooth line. After that, along the line of ironing in both directions, we will lay half the size of the groove. Hence, it turns out at 1.75 centimeters, based on the example. Now you need to build the back of your future pants (pattern). To draw a drawing, first you have to put off from the point B2 to the right a tenth part of the mid-engraving of the thighs and add three centimeters. A new point B4 is obtained. The segment B2B4 is divided into two. From the point that we got, put down one centimeter. After this, from the point T1 on the waist line, we lay off the tenth part of the half-hip of the thighs. As a result, we obtain the point m. We join two points (5.2 and m) and obtain m1. The line between m1 and 5.2 is divided into two and from the resulting point to the right side we postpone 0.5 centimeters. Smoothly connect each other B4, 1, B2, 5.2, 0.5, t1. To form the belt line of the product, you must draw a straight line from T to the left. The length of this line is arbitrary. From m1 we draw a line in the left side, the length of which is the same as half of the waist half-girth with the addition of seven centimeters. The point r2 is obtained. Next we will calculate the size of the darts located on the back of the product. We take the length of the line from m1 to m2, we subtract half the waist. From the resultant figure, we subtract one centimeter and distribute it to the recesses. The distribution process is similar to the one we did in the case of the detail transfer. The segment between m1 and m2 will need to be divided into three equal parts. From each point of division in the direction downwards, at a right angle, we postpone ten centimeters - we obtain the necessary length of all darts. In the side we put one and a half centimeters and get the depth of the darts. We join the points 1,5, 10 and 1,5 together. From the bottom of the product, we put one or two centimeters on the line, it all depends on your preference, to the right of H1. After this, 1-2 and m2 are connected by a line. In order to form a future seam (step) 1-2, we connect the line with B4. Then the resulting line should be divided into two. From the obtained point, we postpone to the left side three centimeters. Using a smooth line we connect three points: 1-2, 3, B4. In detail, all connections are shown in the drawing. Pattern is ready. If you are going to draw a drawingindependently, before doing it, pay attention to very important points. Pants in classic style. The necessary width of this product should be determined based on the length of the foot of the person for whom they are intended. Their width in the knee area should be the same as the width of the trousers from below. The length of this style is the middle of the heel. That's why, try them on in shoes, shoes, sandals and so on, with which you are going to wear them. If we are talking about narrowed trousers. The width from below, of course, is not the same as that of classic trousers. It is somewhat smaller than the width in the region of the knee. Try them on solely on bare feet. Ideally, the length should be in the floor. Trousers are flared. In this case, the width from below is much larger than that of trousers made in classical style. Accordingly, in the region of the knee it is smaller. Already in shoes, the length of the trousers should be one or one and a half centimeters from the floor.
Comments
Related posts:
 Crafting a frog-boat origami from paper is a universal lightweight product
 How to build a pattern of the basis of trousers, you will learn from the materials that are posted in our article
 The design and sewing of a man's work hat is not a difficult task even for a beginner skilled worker
 How to sew fashionable jeans by yourself. Professional pattern of fashionable jeans with step-by-step steps of their sewing
 How to sew sliders for a child yourself. Pattern of children's sliders with a description of the process of tailoring their own hands