How to weave toys of rubber bands on the fork. Video lessons / Toys with own hands, patterns, video, MK
Bright rubber bands of all colors of the rainbow became one of thecoveted gifts for children of all ages and their resourceful mothers. With their help you can weave any patterns and make your own youth bracelets. An uncomplicated netting, which develops the motor skills of the hands and has a beneficial effect on the psyche, gives beautiful results in the form of ornaments and unusual figures. We propose to expand the boundaries of the traditional braiding of bracelets and make toys from rubber bands with the help of ordinary table forks. 
History of appearance
An exciting game came to us from the USA. The inventor of the unusual weaving is the engineer Chin Chong. Inspired by the idea of creating children's baubles, Chin Chong developed a special device for weaving and invented a technology that became basic for the implementation of intricate patterns and allowed to make multicolored figures, rainbow bracelets and much more. The set for turning ordinary rubber bands into stretching ornaments and springy toys was called Rainbow Loom and became a hit among American students, because with his help you can weave the original jewelry without the help of adults.
General technology of weaving
In the set of Chin Chong entered specialWeaving devices, which can easily replace a conventional plug. In order to make a toy from a rubber, it may take one or two forks, as well as a large hook (No.3-4) or a toothpick. The basic movements when weaving without a machine are: twisting in the form of a sign of infinity and passing over the edge. Alternating twisted and non-twisted elements of the pattern, and passing loops, you can get the product of any shape and size and without a special machine.
How to weave the product on one fork
With a single plug, you can make simplefigurines, often flat. It is more convenient to weave on a fork with narrow long teeth. To begin weaving it is necessary from passing several rubber bands through the teeth of the fork, twisting them in the form of a figure-eight. The first elastic band is put on the middle teeth, the second and third is threaded through one of the lateral and one middle tooth. The pattern on the fork can be made more dense, for this gum before folding are doubled. Next, alternately on each tooth, the lower loops are thrown over the top. After the teeth are put on 3 more gum and the actions are repeated. Thus, a rubber band can be produced, which can be embossed with a hook, without resorting to the use of the machine. To make a toy is best made of rubber-dies of different colors. This will highlight the eyes, nose, paws and other parts of the figure.
How to weave on two forks
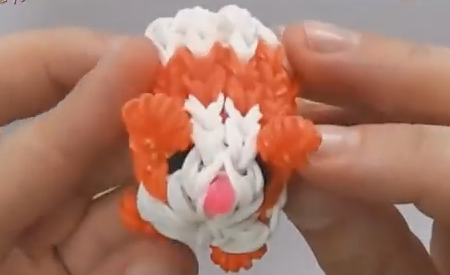
On two forks you can weave three-dimensional figurescomplex invoice. In order to do everything right, you need to place the plugs on the back of each other and fix it. You can do this with scotch tape. The role of the pins at the machine will be played by 8 tooth forks. This time weaving begins with the "eight" stretched between the two forks through the outer teeth. Then on each of the teeth two rubber bands are put on. All manipulations need to be done in volume, that is, through both forks. The pattern may differ from the one described above, but further actions will be similar. The lower layer of the rubber is passed through the top with a hook, the following rubber bands are put on and so on. Weave the figure more conveniently on the middle part of the length of the teeth. If it is necessary to obtain an element from only one side (for example, the eyes), then you need to make loops on one of the forks without touching the other. To make dense nodules, you need to toss the loops several times one over the other. Also in operation there can be air loops made of rubber bands, which in the future will allow to form the desired silhouette without using the machine. To complete the needlework, the last hinges must be fastened. You can do this with a special clamp, which you then need to hide in the body of the toy, or by binding to other loops.
Comments
Related posts:
 How to weave an owl of rubber bands on a machine or fork. Master Class. Video / Toys with own hands, patterns, video, MK
 How to weave a flower from rubber bands on a slingshot or fork. Master Class. Video / Toys with own hands, patterns, video, MK
 Toys from rubber bands on a slingshot, Video lessons / Toys with own hands, patterns, video, MK
 Lumigurumi (amigurumi) toys made of rubber bands, video lessons / Toys by own hands, patterns, video, MK
 How to weave a rabbit out of rubber bands, video lessons / Toys with their own hands, patterns, video, MK