Pencil drawing gradient shading for beginners requires special attention
Drawing gradient shading with pencil forfor beginners is an important process that requires special attention. Otherwise, the overall drawing can simply be spoiled. But do not be afraid. It is absolutely not difficult to do and you can see for yourself by reading the article and trying to repeat all the steps in practice. Gradient shading is a mandatory point in the ability to draw with a pencil. It is with its help that the background is created to complete the future drawing. Creating a background is quite a responsible task. Its drawing is sometimes difficult, especially for beginners. If you do the shading incorrectly, there is a chance that the drawing can be spoiled. But, if you take into account all the tips and try to follow the instructions set out in this article, the work will become quick and easy. We will do gradient shading with a pencil for beginners in several stages in order to master the sequence of all manipulations well. First, take an HB pencil and, using short thin lines, mark the direction of the future shading. We will need such a blank so that in the process of working on the shading, we do not stray from its correct direction.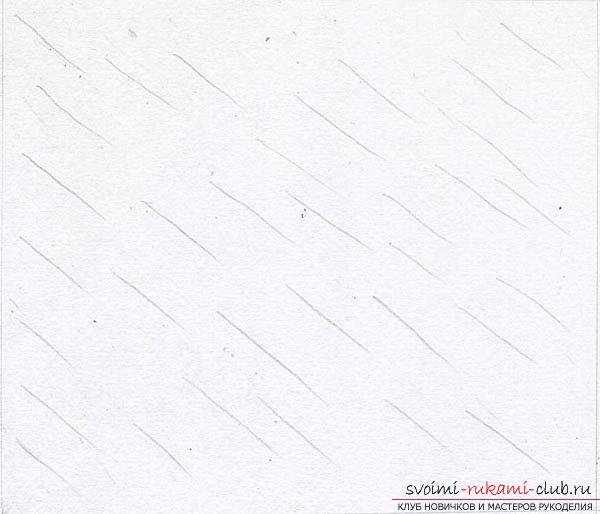 To prevent the hatching from becoming crooked while drawing, we will make the strokes more frequent.
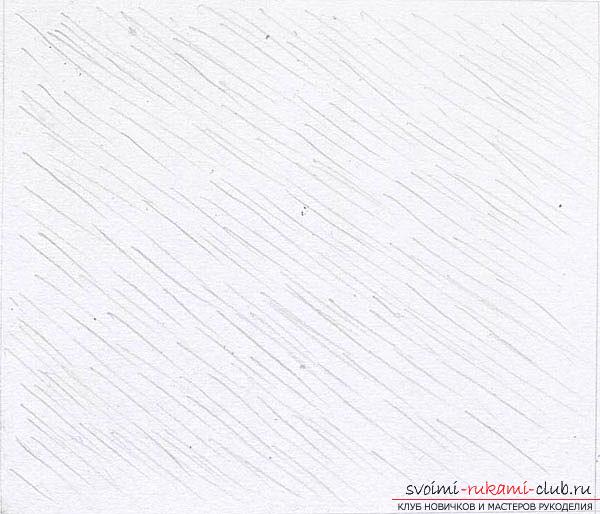 Now let's try to fill in the gaps on the sheet between the strokes that are very noticeable. It is important, however, not to stray from the direction we initially chose.
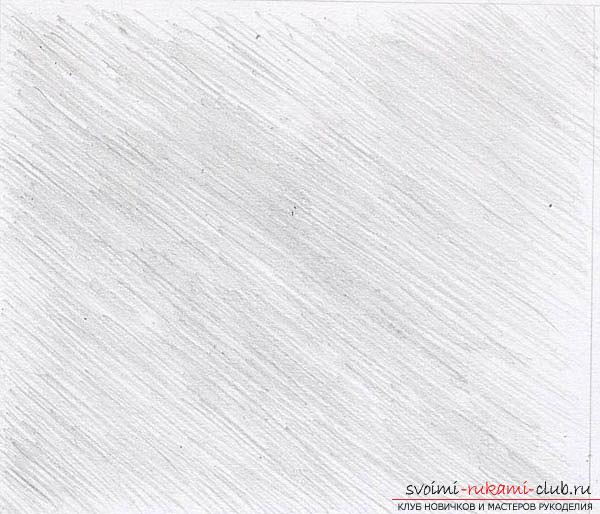 When applying shading, we pay attention tothe appearance of dark spots. Ideally, they should be absent altogether, and the shading should be even with the same shade (at this stage). If we adhere to this rule, the overall drawing will turn out very beautiful and correct. Well, and in case dark spots do take place, they must be removed. As a rule, a kneaded eraser is used to remove excess graphite. But this procedure must be done extremely carefully, since the material is sticky and some damage to the paper may appear, which should not be allowed under any circumstances. To lighten a too dark area, you will need to touch the dark spot with the pointed end.
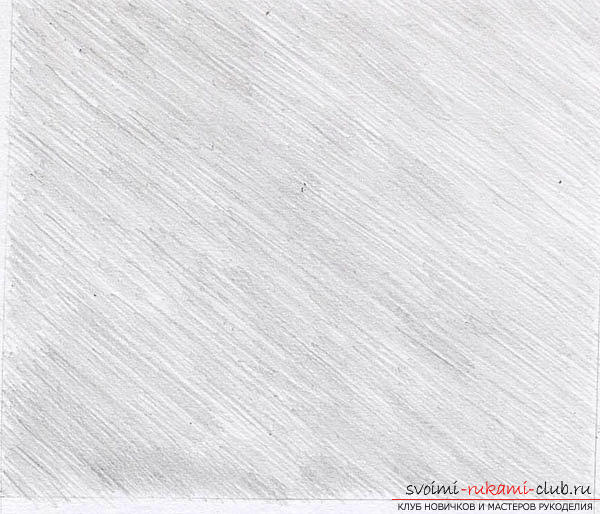 Next, as we can see in the picture, you just need topaint over all the existing gaps, including those along the edges of our drawing. You can't make the strokes too long, otherwise they may drift, which will ruin all the work done. It's correct to apply short strokes, at a small distance from each other.
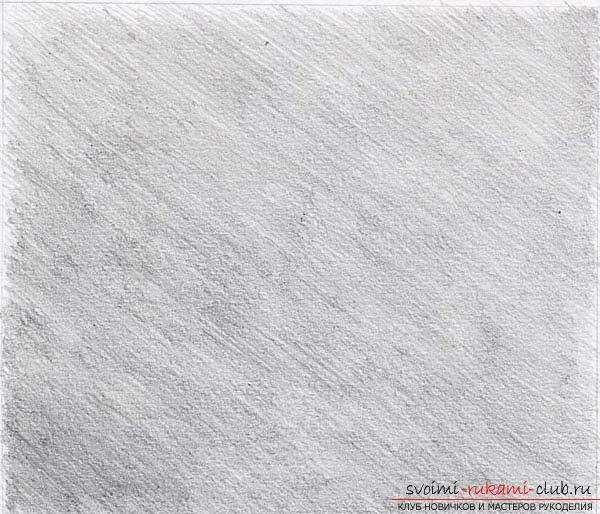 Now we will draw the darkest areas of the background, without violating the main rule - uniformity. For this purpose, a pencil with a softer lead is used, for example, a 2B pencil.
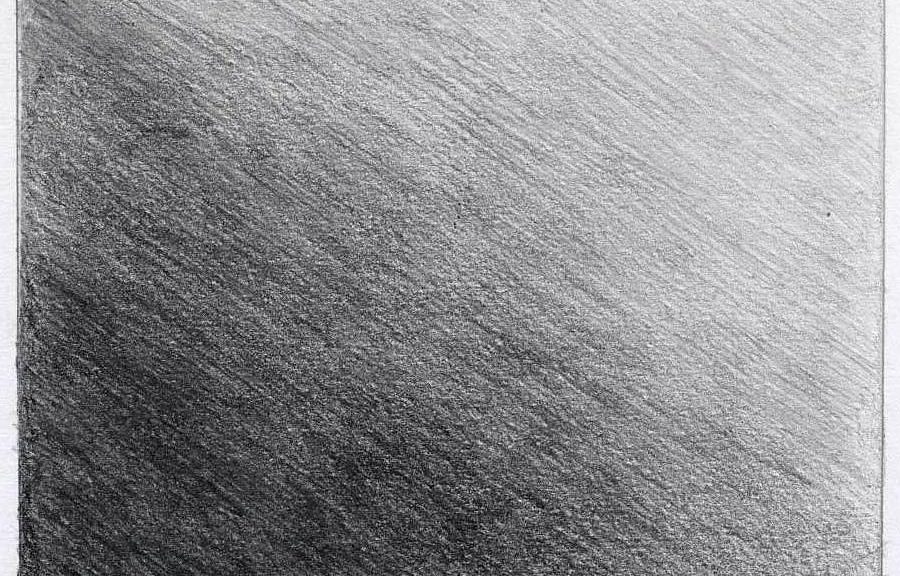
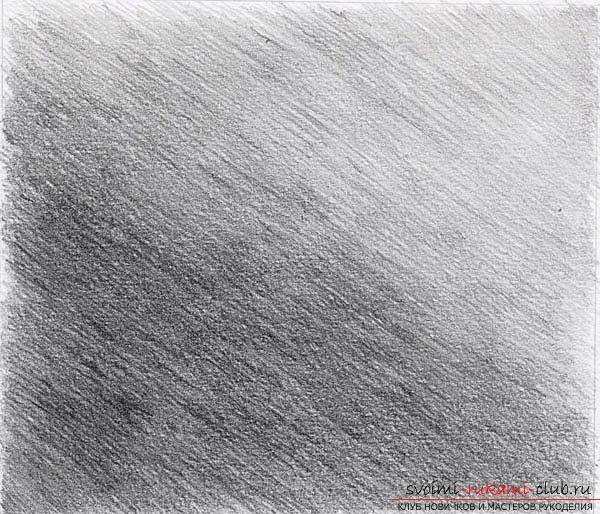 Now we change the pencil again. We will need 8B (the softest of all available) to go over all the darkest areas of the background drawing.
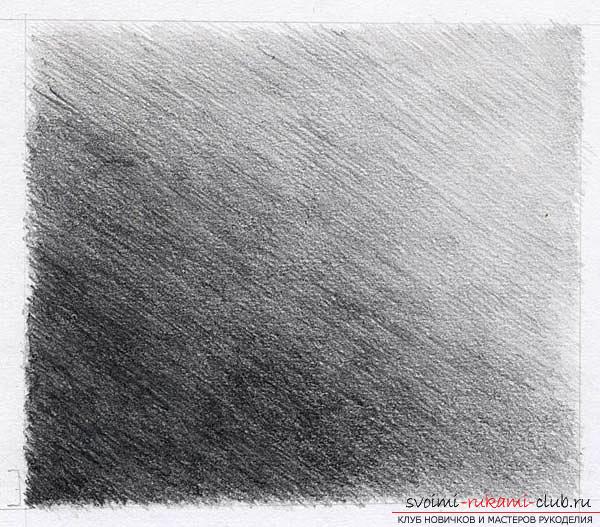 Now let's move on to the edges.Here you need to eliminate all the gaps, if any. After that, you can make an outline using a regular ruler. Just don't press too hard on the pencil. The line should not be clearly defined.
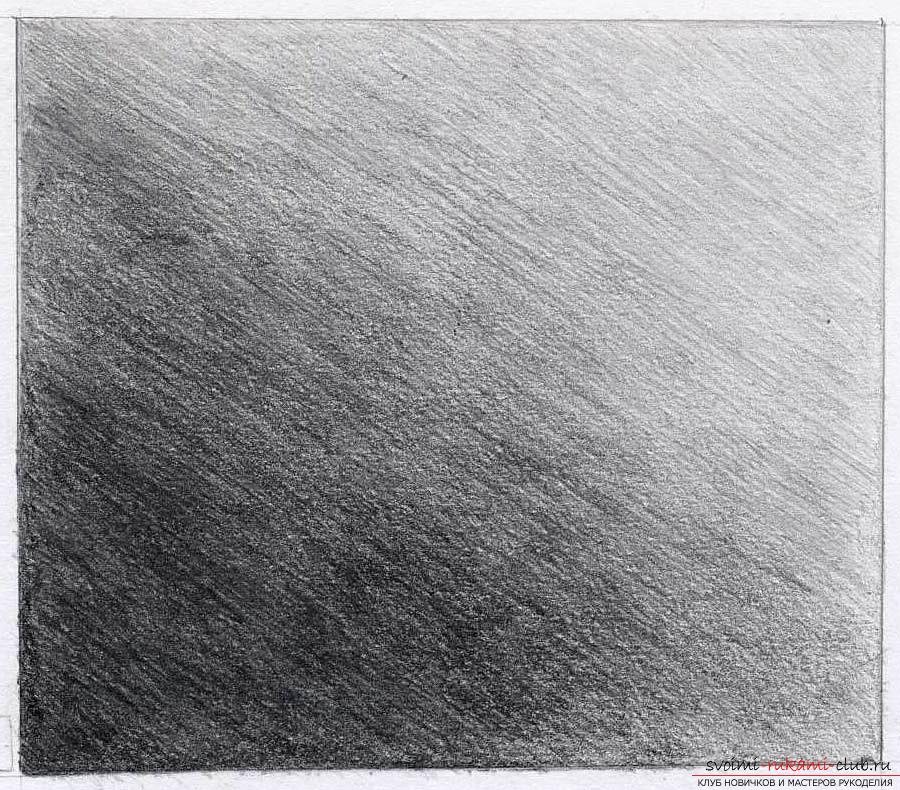 Gradient pencil drawing lessonshading for beginners has come to an end. The photos posted in the article show each stage of the work. But, all the same, you should practice a little on performing such a task and bring the skills to automatism, because this type of shading will definitely be needed to draw large areas of your painting or drawing.
Comments
Related posts:
 A simple drawing of a 3d drawing, an image of a ladder, a pencil for beginners will not take long
 Drawing a girl with a panda, drawing pencil and drawing lessons
 Draw a beautiful flower yourself you will help step by step drawing the tulip in pencil
 Drawing a portrait with a pencil - DIY portrait drawing lessons
 Draw a simple landscape pencil in stages can even a novice artist in accordance with the instructions