Learning to crochet squares, from which you can then make a beautiful plaid, according to the instructions with photos and diagrams
Crochet Plaid Crochet Squares for BeginnersCrocheting is a very fascinating activity. This needlework provides us with an endless variety of patterns, with which you can create masterpieces. Creating something new with their own hands is much more pleasant than buying in a store. In this master class, we suggest that you tie the plaid with a crochet by means of separately bound squares or as they are called motifs, which together, we will get a bright plaid. These squares are called grandmothers or Afghans. They were conceived for a long time, presumably by peasants, who, with the help of squares, knit blankets, pillowcases, carpets, capes, etc. In our time this kind of knitting is very popular, both for beginners and for designers. Grandmother's squares knit easily and are considered the easiest motifs. Even a novice needlewoman will cope with them! 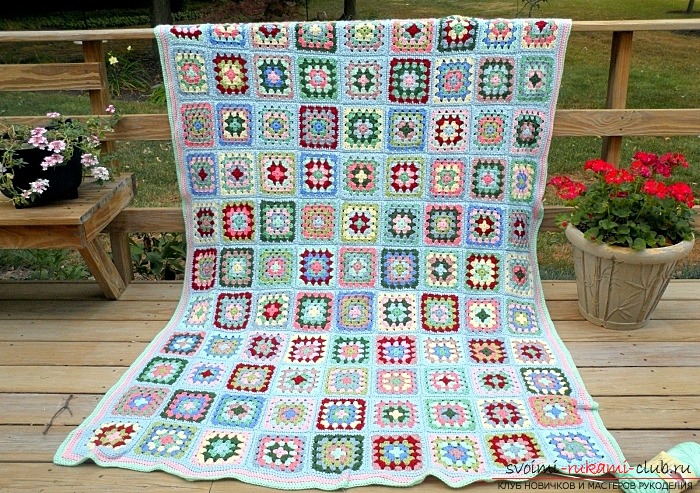 We begin to knit a plaid crochet out of squares. For plaid we choose thick threads, which include synthetic and woolen fibers. From such a yarn will come a warm and durable plaid. Step 1. We begin to knit a plaid crocheted out of squares with pigtails from 4 air loops, which we lock into a ring.
 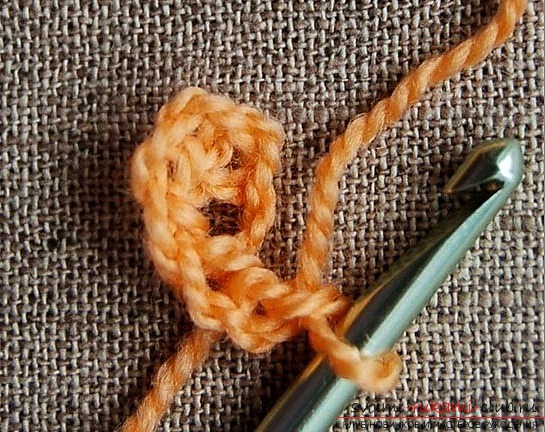 Step 2. We create 3 lifting loops, we sew two loops with one cuff in the ring in the center, then one air loop, 3 loops with one crochet in the center of the ring and an air loop. Thus, we sew two times.
 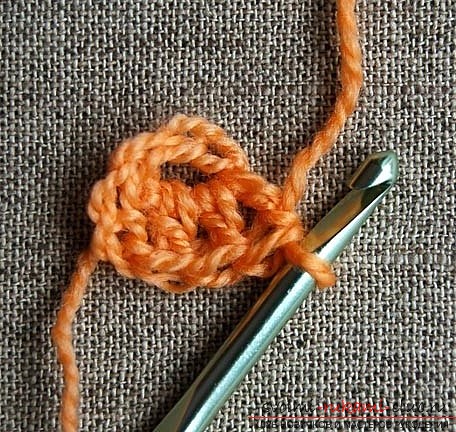 Step 3. We get a circle, which is shown in the photo. Then you can change the color of the yarn. To do this, you need to fix the thread and trim, leaving a small tail. But if you will knit with one color, then tie two half loops so that the next row starts with a badge.
 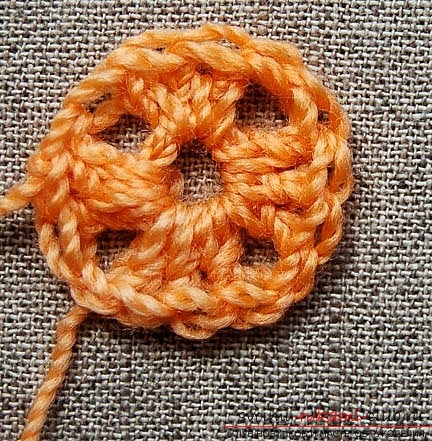 Step 4. The next row begins with tying three air loops for lifting. Then, in the air loop of the first row, we knit two loops with one cuff, then one air loop, again 3 loops with one crochet to the pass place, again one air loop. Now we knit 3 loops with one crochet into the air loop of the first row, another knit an air loop, again 3 loops with one crochet at the pass place and one air loop. We repeat in each blank until the end of the series.
 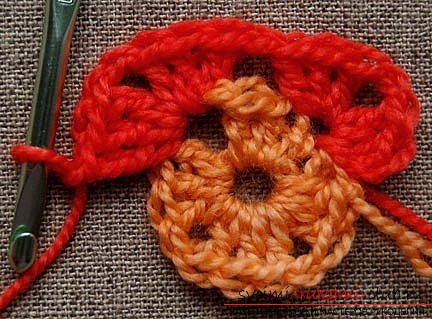 Step 5. Already the fragment is similar to the square and looks like in the photo. Then again go to another color, as well as in the first row. If we knit in one color, then we sew 2 half loops.
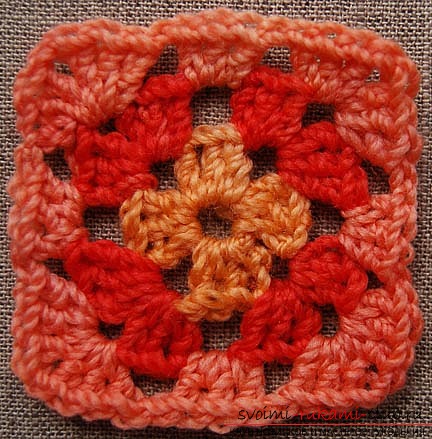
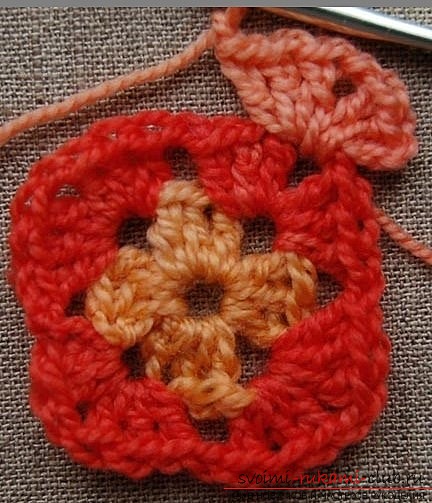
 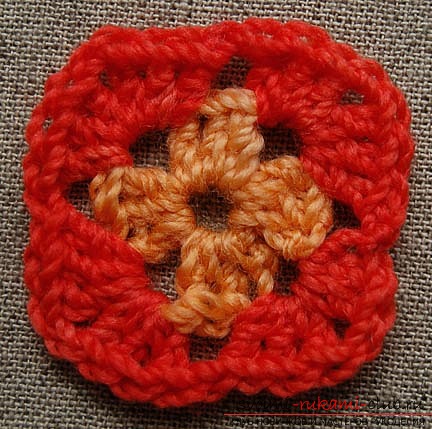 Step 6. We begin the third row, as well as the second row, with the tying of three air loops and two loops with one overhang. Step 7. The corners of the square are knitted into each pass for 6 loops with one crochet, which are separated by one air loop. In the other passes we knit 3 loops with a single crochet.
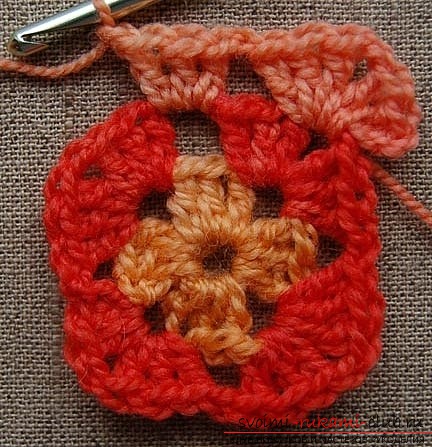
 Step 8. In the photo, it's easy to see the sequence of knitting.
 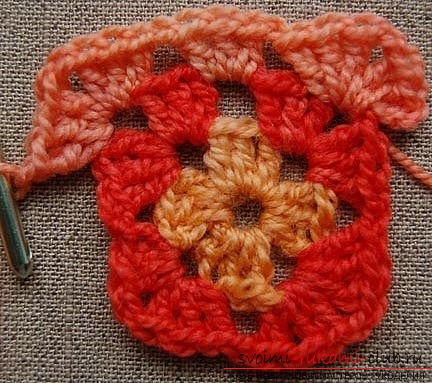 Step 9. Our square of three rows is ready! As you managed to notice, the principle of work is veryis simple. By connecting such squares among themselves, you will get a wonderful plaid created by your own hands. It all depends on your courage and imagination! Good luck in your endeavors!
Comments
Related posts:
 Learning to knit an original crochet hook according to the instructions with photos and diagrams
 Learning to crochet warm socks, using proty and available schemes, photos and instructions for beginners
 Learning to knit for beginners by step-by-step instructions with photos and diagrams
 Learning to knit the pompoms with knitting needles for beginners by step-by-step instructions with photos and diagrams
 We learn crochet crochet by step-by-step instructions with photos and diagrams