To make a paper toy "jumping frog", the technique of origami, it is not difficult according to the scheme
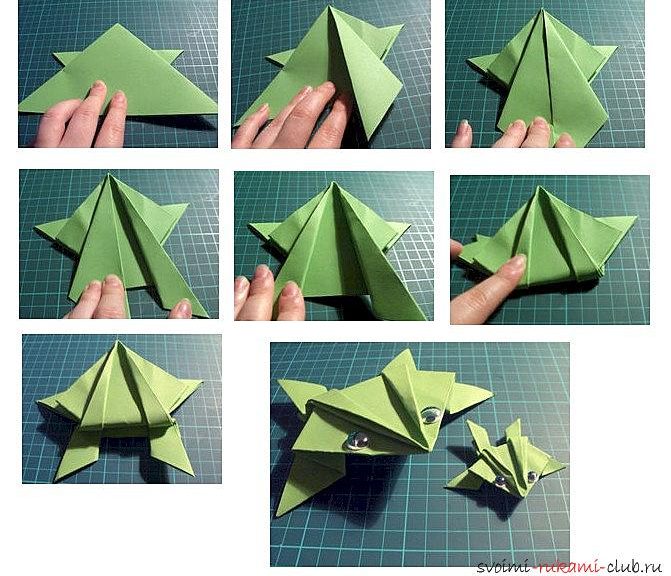
"Jumping Frog", origami technique, familiarall from childhood an odd job, but not everyone can do it. The process itself does not take much time and is available even to children. For ease of implementation, we offer a detailed description of the manufacture of a frog or even a whole family. A jumping frog is not just a name. She, in fact, knows how to jump, if you lightly push it from behind. For its production, we need only a sheet of any paper (multi-colored, printer, special paper, designed for origami) square shape. If the paper is in the form of a rectangle, it is necessary to give it a square shape, cutting off the excess with scissors. In this origami, only paper is used to work and cutting and tearing off of the material is not allowed. 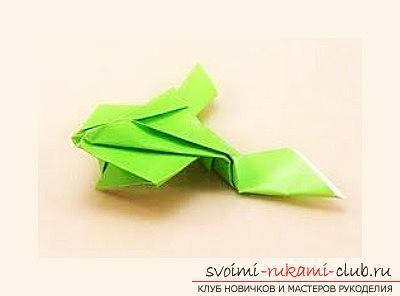 "Jumping Frog", origami technique, descriptionwork. Prepared material is placed on a hard surface (flat) in front of you. Fold the upper corners towards the center of the sheet. Take the corner, the upper right, and add it diagonally, so that the top is on the other side of the paper (complete coincidence). Well bend and unfold. We carry out a similar action with the upper left corner. It turned out two folds in the form of "X". Then we add the sheet in half. In this case, the two upper corners must completely coincide with the two lower corners. The resulting bend is fixed and unfolded. Visually, the outlines of our folds will resemble something like an asterisk or asterix. Squeeze the edges of the material inward. To do this, put the sheet with the bottom edge towards you. Bend the edges along the existing folds so that the paper is folded into two sides in the form of a triangle. For simplicity, the horizontal fold can be repeatedly bent in the opposite direction. The figure is rotated so that the longer side was directed towards us. On this side you can see the corners, on each side there are two. Alternately take the corners (only the top), first to the right, then to the left, and bend them up. In this case, the corner must come in contact with the tip of our triangle and form a fold. As a result, we get a figure of a triangular shape, with a midpoint in the rhombus. Take the corner of the rhombus (right) and add it to the middle so that its right edge and the center line completely coincide. Similarly, we bend the second corner of the diamond. Now proceed to the formation of the legs of "jumping". The right side of the top of the triangle below the diamond is bent outward, towards the right side of the triangle. There must be a complete coincidence of it with the right part of our rhombus. On the left side, we do the same (it should coincide with the left part of the same rhombus). The resulting figure is turned over and shaped to the top of our "jump". Bend the lower corners alternately (right and left) so that the edges coincide with the line in the center, resulting in a slightly elongated diamond. Alternately, both halves of the figure (right and left) are bent. The inner edges must necessarily coincide with the outer edges. The triangles formed during the work will play the role of the hind limbs of the frog. The figure turns to its hind limbs and fold it in half. Fold should be near the thinnest place of the trunk. The folded frog is turned over and we fold the hind legs so that the bottom edge of the figure and the piece of paper between its legs completely coincide. "The jumping frog", the origami technique is ready. Pressing the central folds from behind, we can make it jump. Below you can get acquainted with the schematic image of the process of working on this craft.
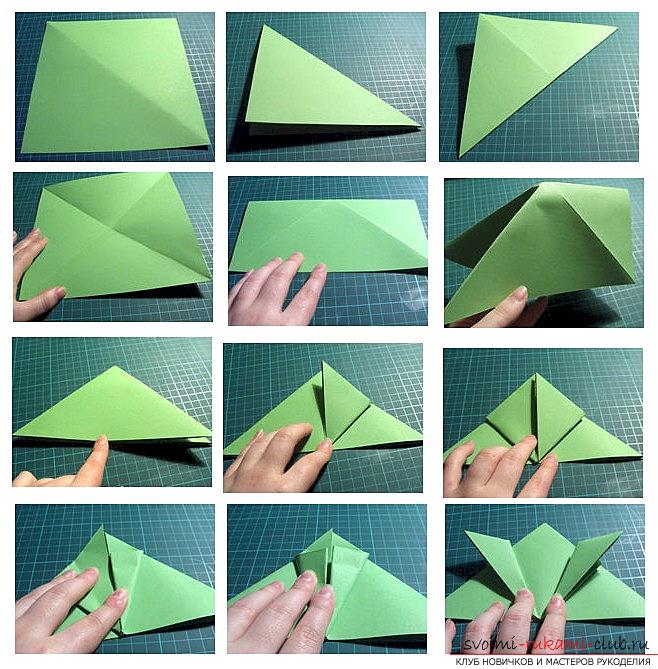

Comments
Related posts:
 It is not difficult to make a three-headed dragon made of paper in the origami technique according to the schemes
 With my own hands to make a simple figure from paper, the technique of origami is not difficult
 To make origami figure of a bunny, modular technique, the circuit and the detailed description will help you
 To make a simple model of a tank made of paper, the origami technique can be done in a few minutes
 Origami paper model airplane, modular manufacturing technique, easy to make according to the scheme