Master class with a photo of dry felting from the wool with their own hands toys - horses.
 Horses are not only helpers and a meansmovement. They are still beautiful and graceful animals. They are kind and intelligent. And in this master class it is shown how to dump a horse from a wool, which will decorate a house, and also it will become a good gift for someone close. It's a long and difficult to play a horse. But the result will please any needlewoman and members of her family, especially children. After all, such a toy can be used as an animal for Barbie dolls, for example. Materials and tools:
- wool (brown, silver, white);
- needle;
- sponge;
- artificial eyes;
- glue gun.
Stages of work: Wool can choose any colors to your liking. In our master class we will make the horse brown. Take a piece of brown hair. We need to take more wool, since we will make the head and body whole. First, we lay our heads on a sponge or foam rubber. The head of the horse will be in the form of an oblong circle - an oval. Excess hair should remain untouched.  Now, out of this extra coat, we'll be wagging the body. But we also may not have enough, so when felting we will add a little brown hair for the trunk. First we lay the neck of the horse, and immediately after it the body itself. On the back we create a bend characteristic of these animals.
  Now we need to make legs with hoofs. To do this, take silver (gray) wool and lay small sausages. It will be a hoof.
  And then wrap the resulting sausages of gray color with brown hair. And we begin to put it on. The tip of the gray hooves should remain sticking out.
  We put the legs to the horse. It is necessary to attach more firmly to keep them well.
  And now start our little toypaint with white color. Add white wool to the muzzle of the horse and chest. Well it is sealed. And where there are nostrils, we'll make small indentations to show that it's a nose. Deepening is done very simply - with a needle several times poke in one place, and they appear.
  Now turn the ears. The ears of horses resemble leaflets. Therefore, we will play precisely this form. That's how they should look.
  And again we leave a little unshackled wool for fastening. We attach the ears very well to the head of the horse.
  That's how it looks to us already. The horse is almost ready. It remains only to make her mane and tail, and also attach eyes.
  Let's start with the mane. You can take the same brown color, but to make the horse more beautiful, we'll take white wool and make the mane white. We tear off such pieces of wool so that they are sufficient for both sides of the neck. That is, the hair should hang from one side and the other. In the middle we will walk with a needle. And so we set this coat on.
  Now we will equalize. To do this, we cut a little mane with ordinary scissors.
  Let's make a tail. Tear off the white hair and begin to tie it to the tail. So that when felting does not leave an unnecessary white speck under the tail, we add brown wool. That is, the tail was stitched and the spot of sealing with brown wool was painted over. Tail should be harnessed, without lowering it down, but on the contrary, so that the base of the tail is elevated. Then in the end, he will not hang and hang out like horrible. And it will be very nice to look at the finished toy. And it remains to glue the eyes. We either buy them in the shop already ready, or we make of polymer clay. It is better to glue on hot glue, as it holds such details well on toys. And do not wait until the glue dries, everything happens fast enough. That's such a wonderful and beautiful horse turns out!
Comments
Related posts:
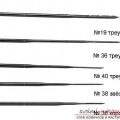 Lesson on the correct selection of needles for different types of felting, for dry felting out of wool, how to choose the right size of the needle for felting by photo and description.
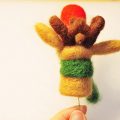 New Year's deer Rudolph - wool felting technique and master-class by own hands
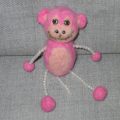 This master class felting of wool will help make a toy monkey with your own hands
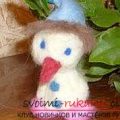 Felting a Christmas snowman with his own hands is a technique of wet and dry felting
 Master-class with a photo will teach the making of a self-made toy - dolls with their own hands