
The master class will teach you how to make an original New Year's craft – crochet Christmas tree
Christmas tree – it's not just a tree.For many – this is the main symbol of the New Year. It is to the Christmas tree that children run on the first morning of January in the hope of finding a gift from Santa Claus there. Well, what to do if for some reason it is not possible to put up a large, elegant Christmas tree? In this case, the tree can be made small. But as? To tie! This tutorial shows how to knit a beautiful small Christmas tree.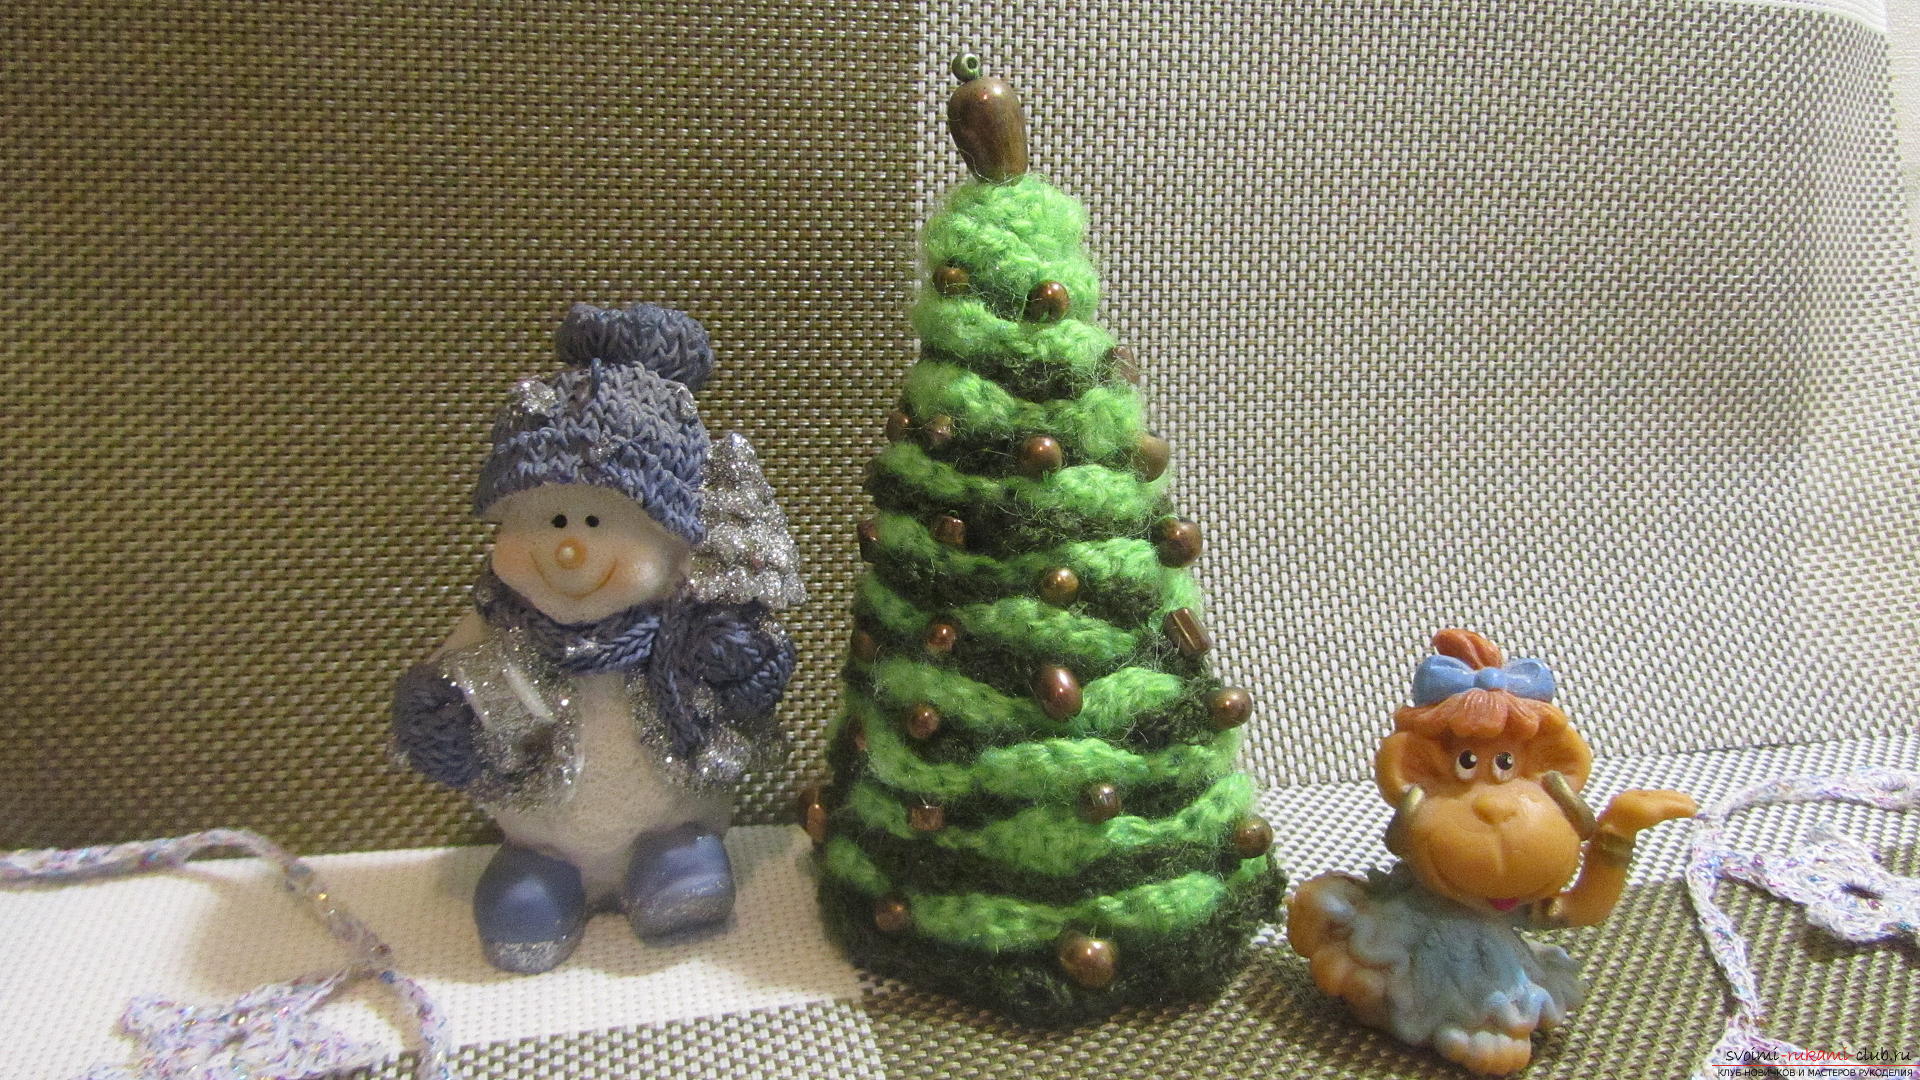 For the Christmas tree we will need:
- threads of two colors – light green and dark green (as an option - green and white);
- hook;
- beads for decoration;
- cardboard cone;
- double-sided scotch on paper basis;
- needle and thread.
This Christmas tree consists of two long ribbons,crocheted from threads of different colors. It is advisable to take threads that are contrasting not only in color (dark and light) but also in texture – mohair, boucle yarn, grass or threads with lurex. This MK uses bright green threads – angora, and dark green – boucle yarn. Let's start by knitting the first ribbon. To do this, we knit a chain of loops, approximately 150-170 cm long. Now let's knit the second row of ribbon. To do this, in the third loop from the hook we will knit 2 stitches, in which we will make one yarn over.
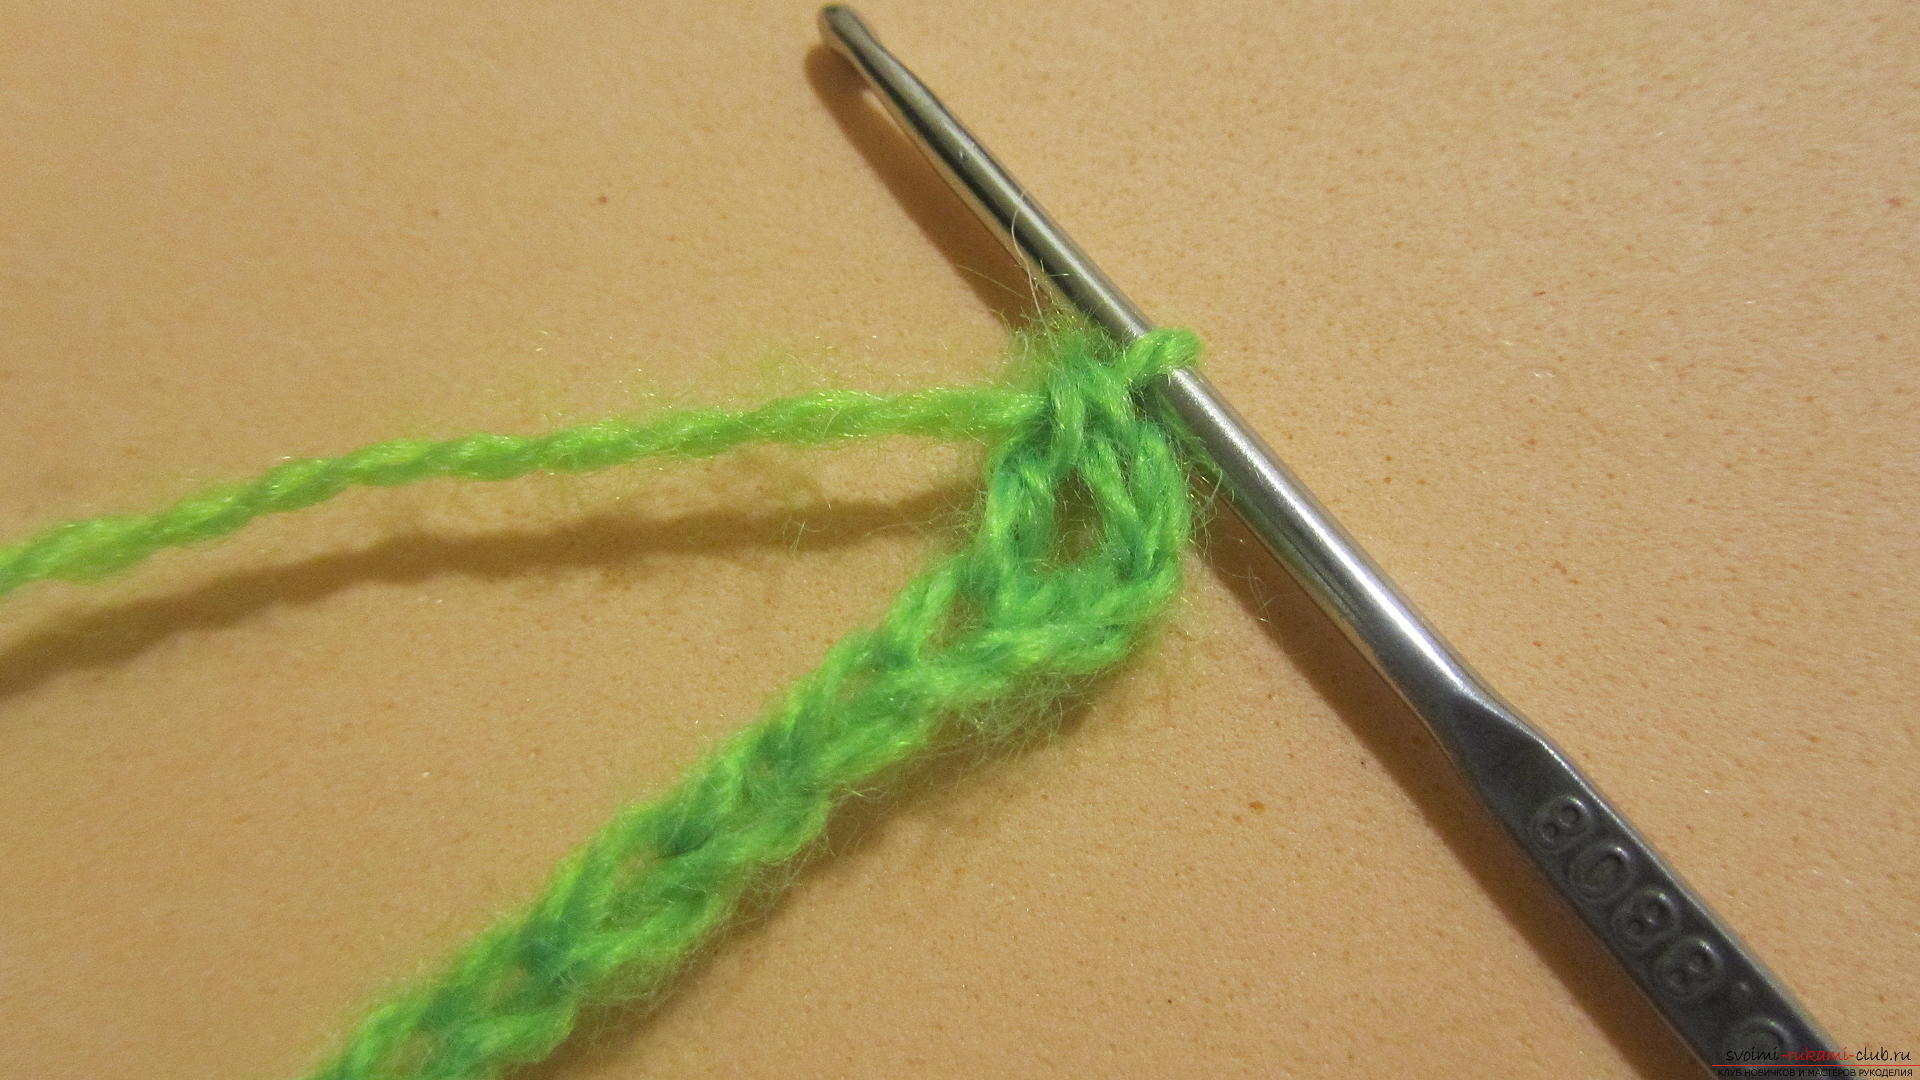
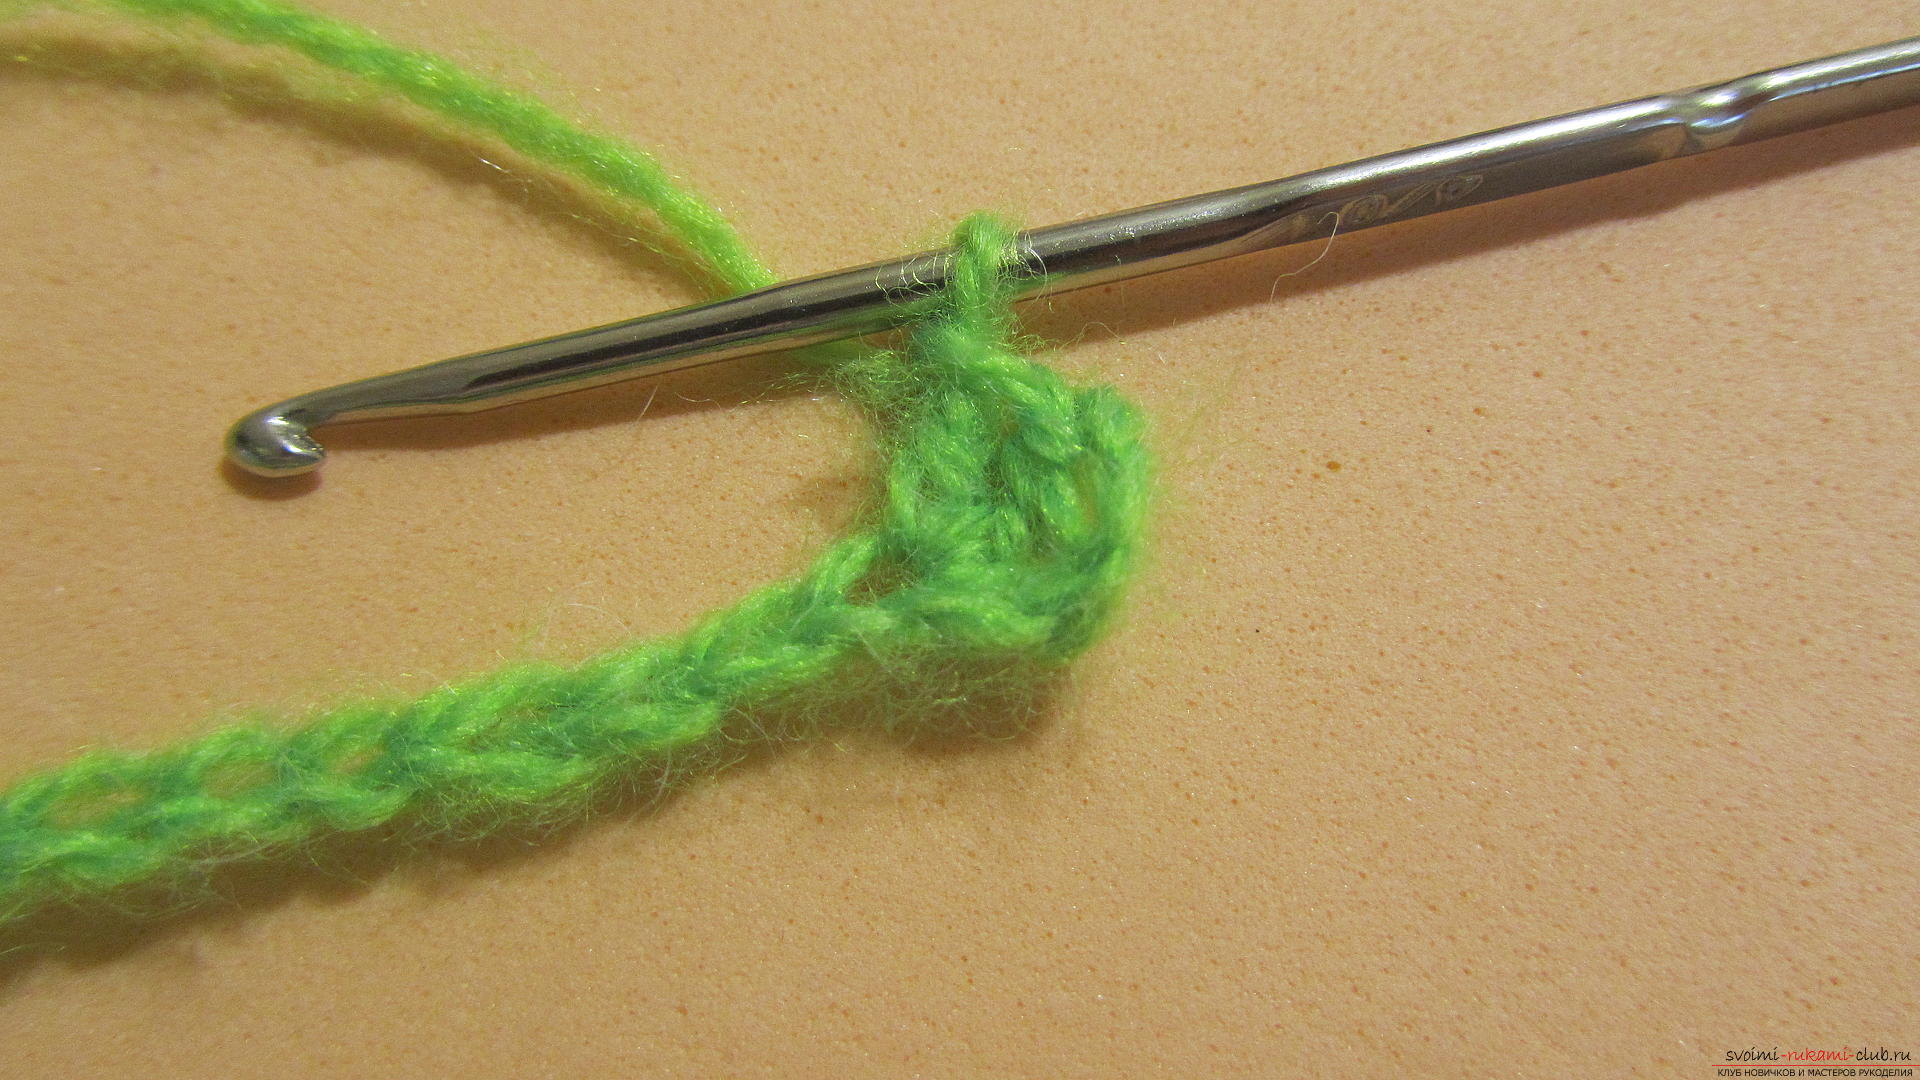 Through one loop of the chain we will knit one simple stitch.
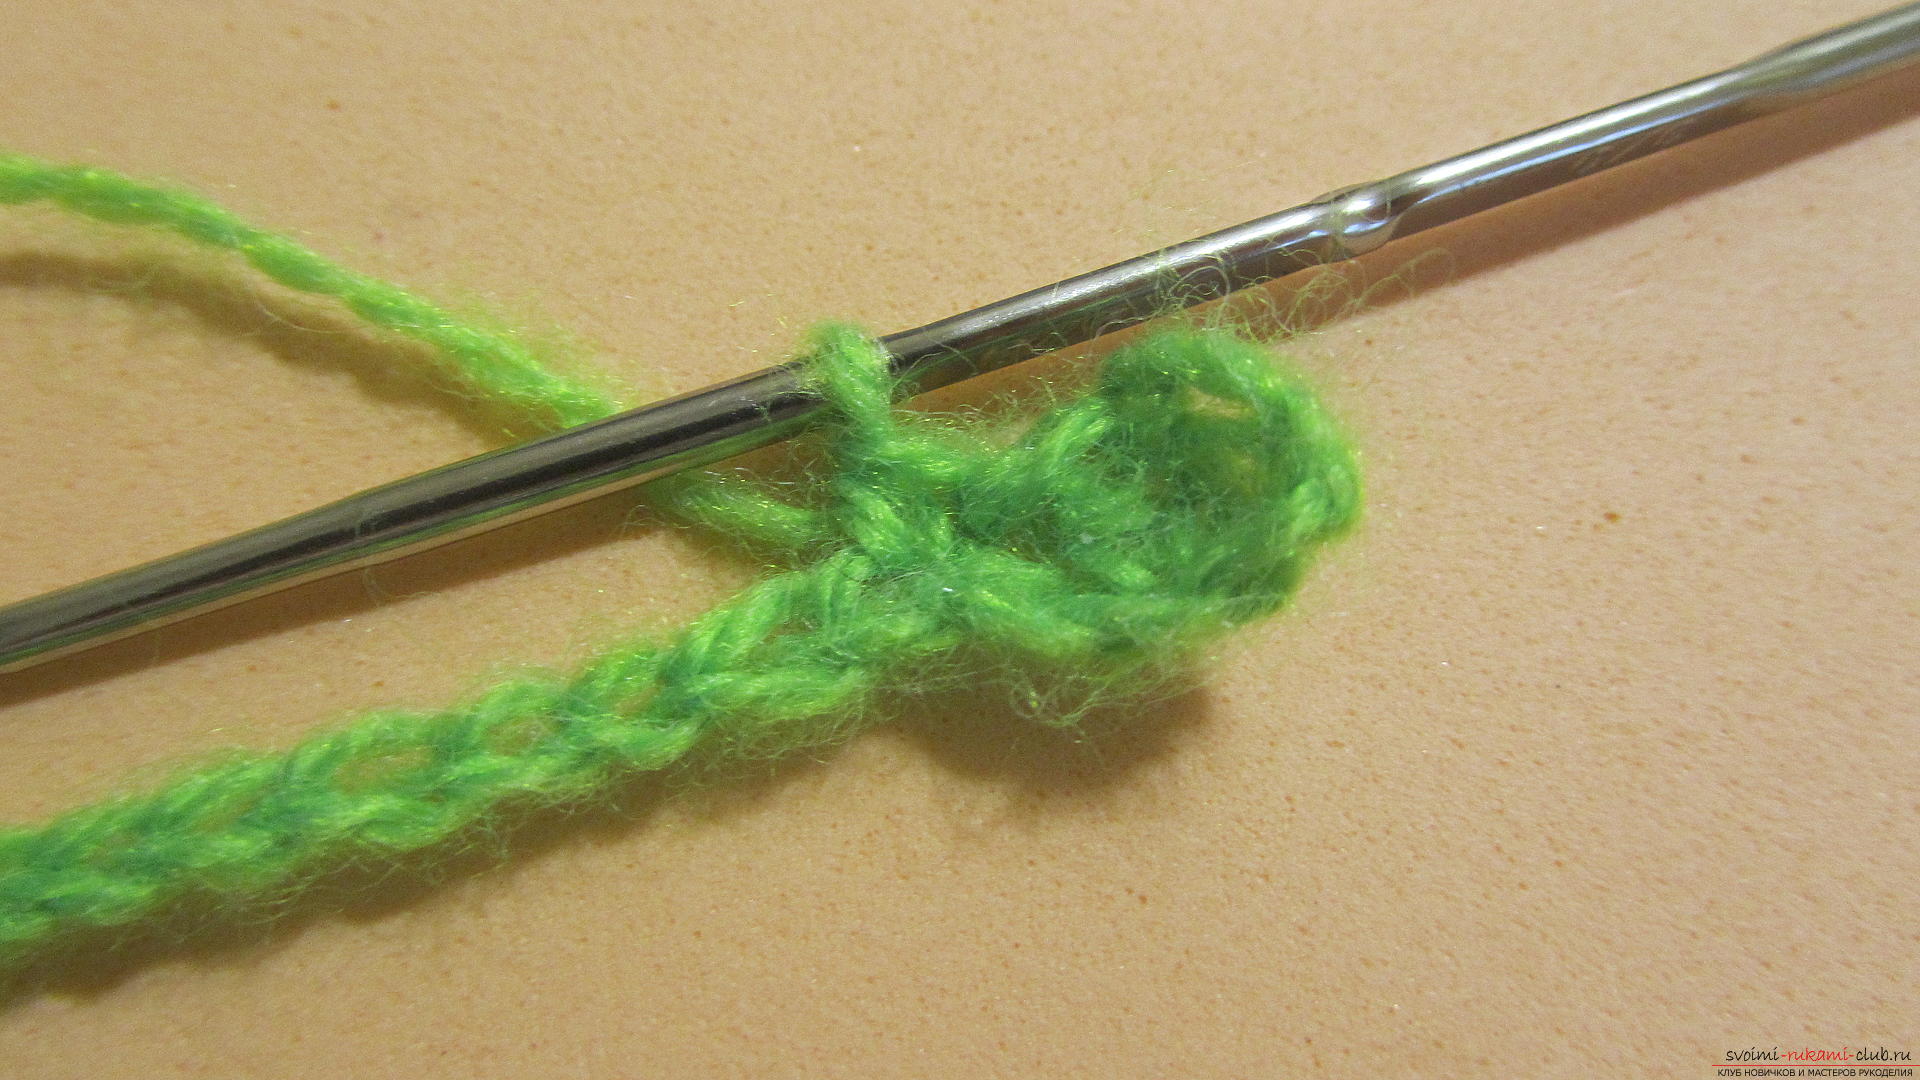 Through another loop we will knit a fan of five double crochets.
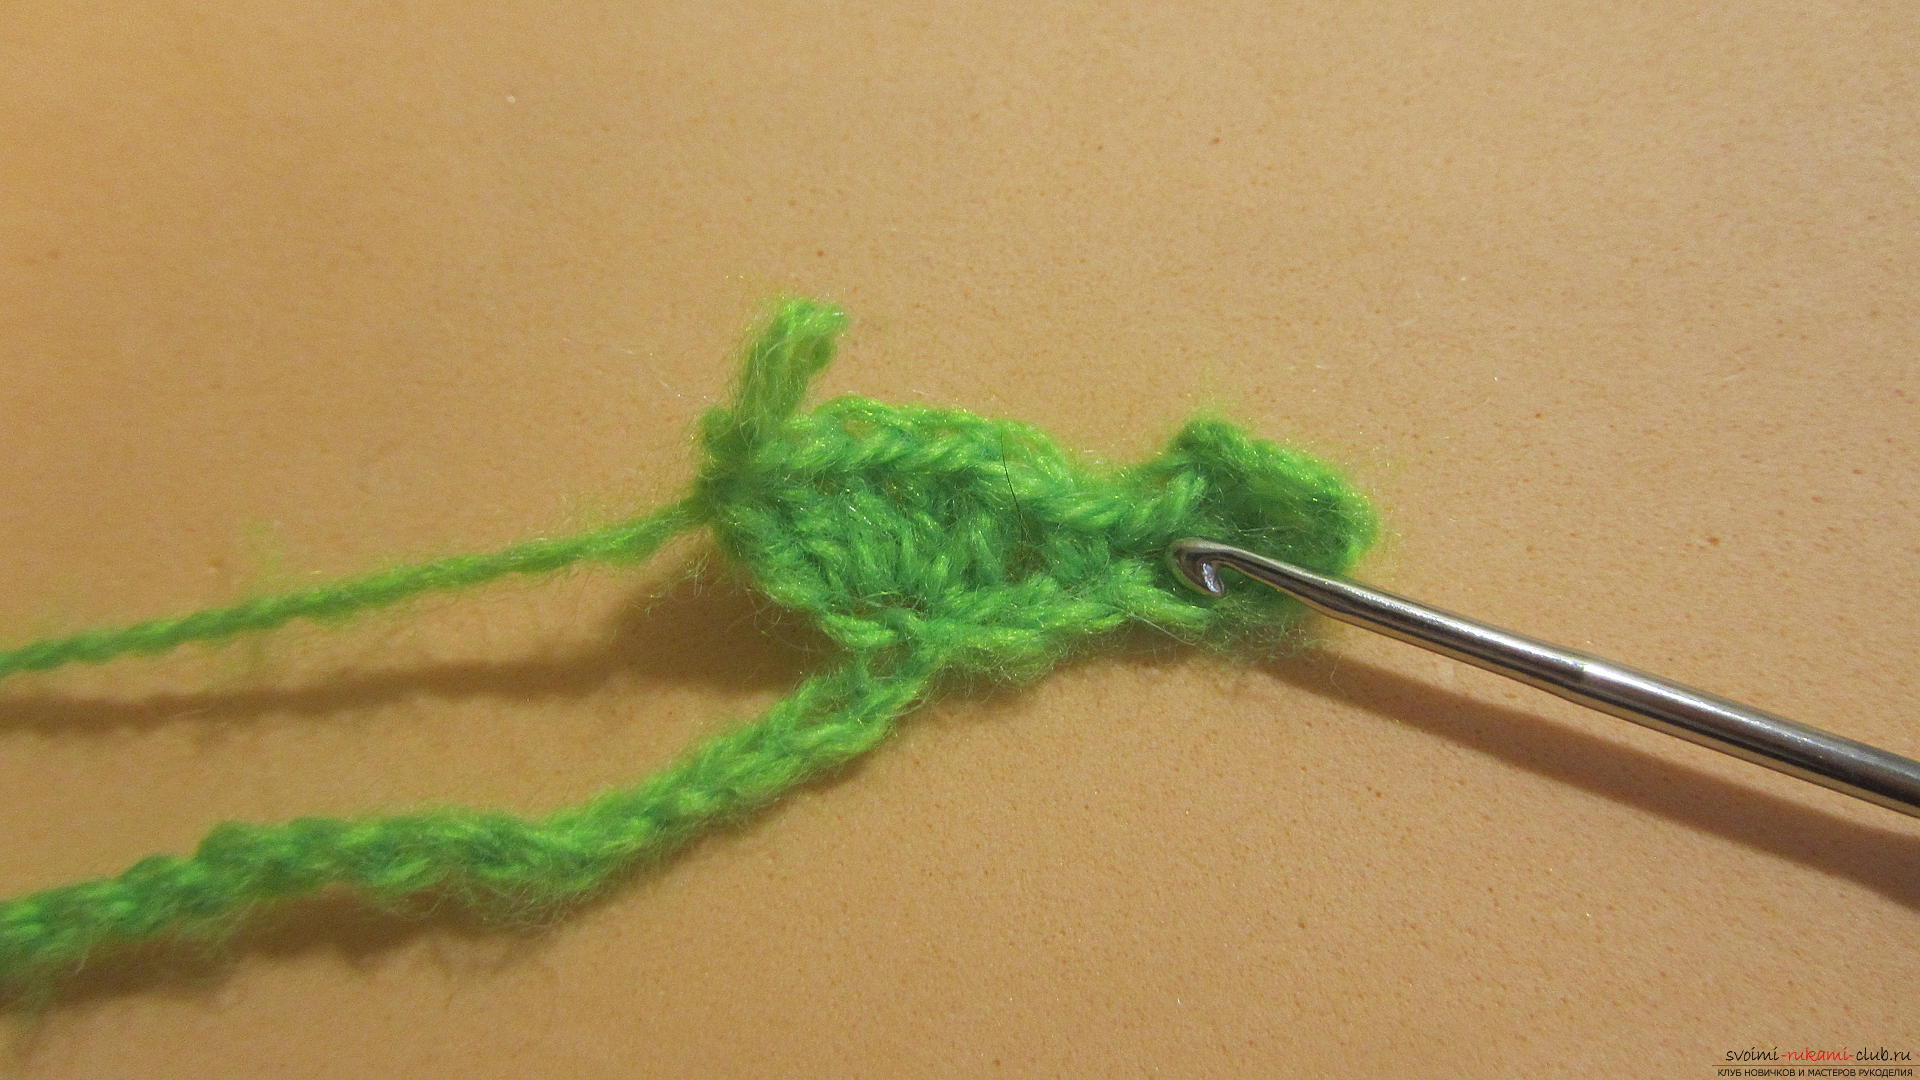 And we will continue to knit like this – a simple column, a fan of 5 columns, a simple column. Between the elements of the ribbon we always skip one loop and knit into the second.
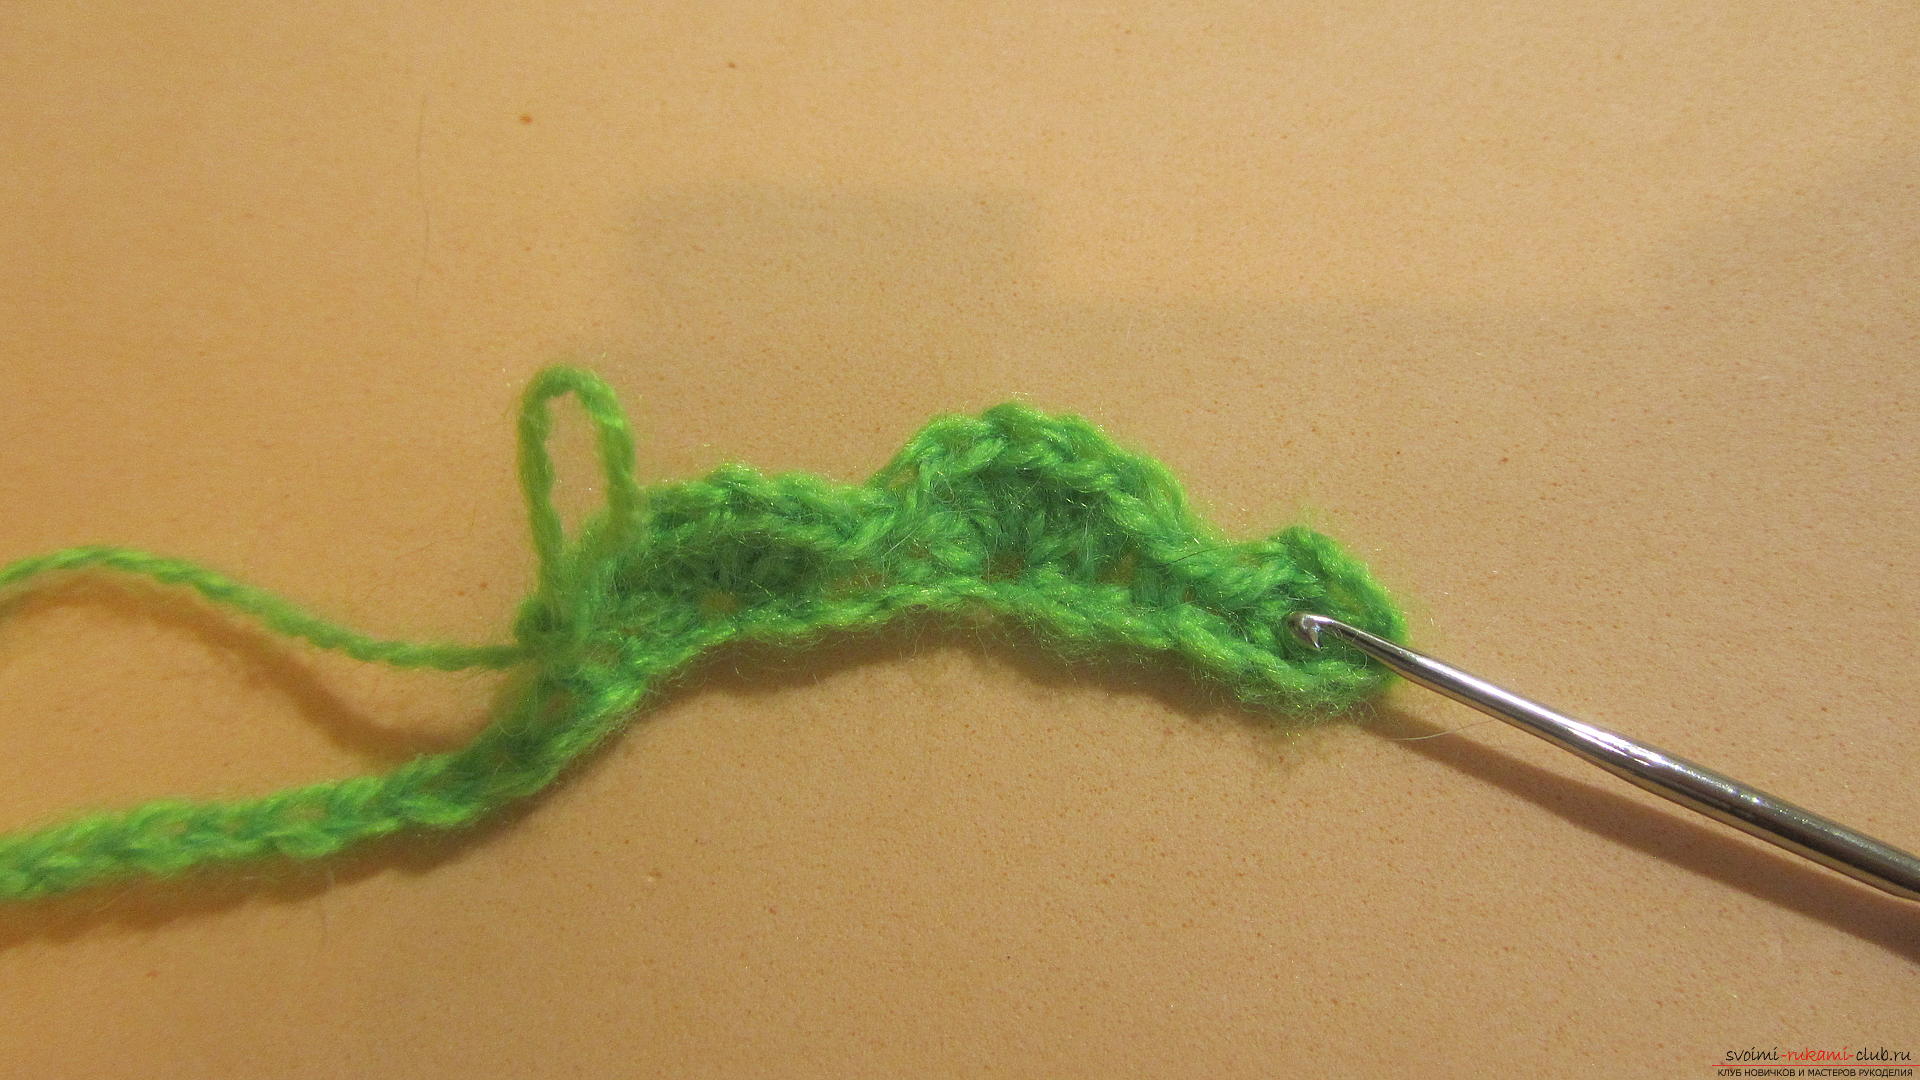 And so on until the end. We knit the second ribbon in the same way.
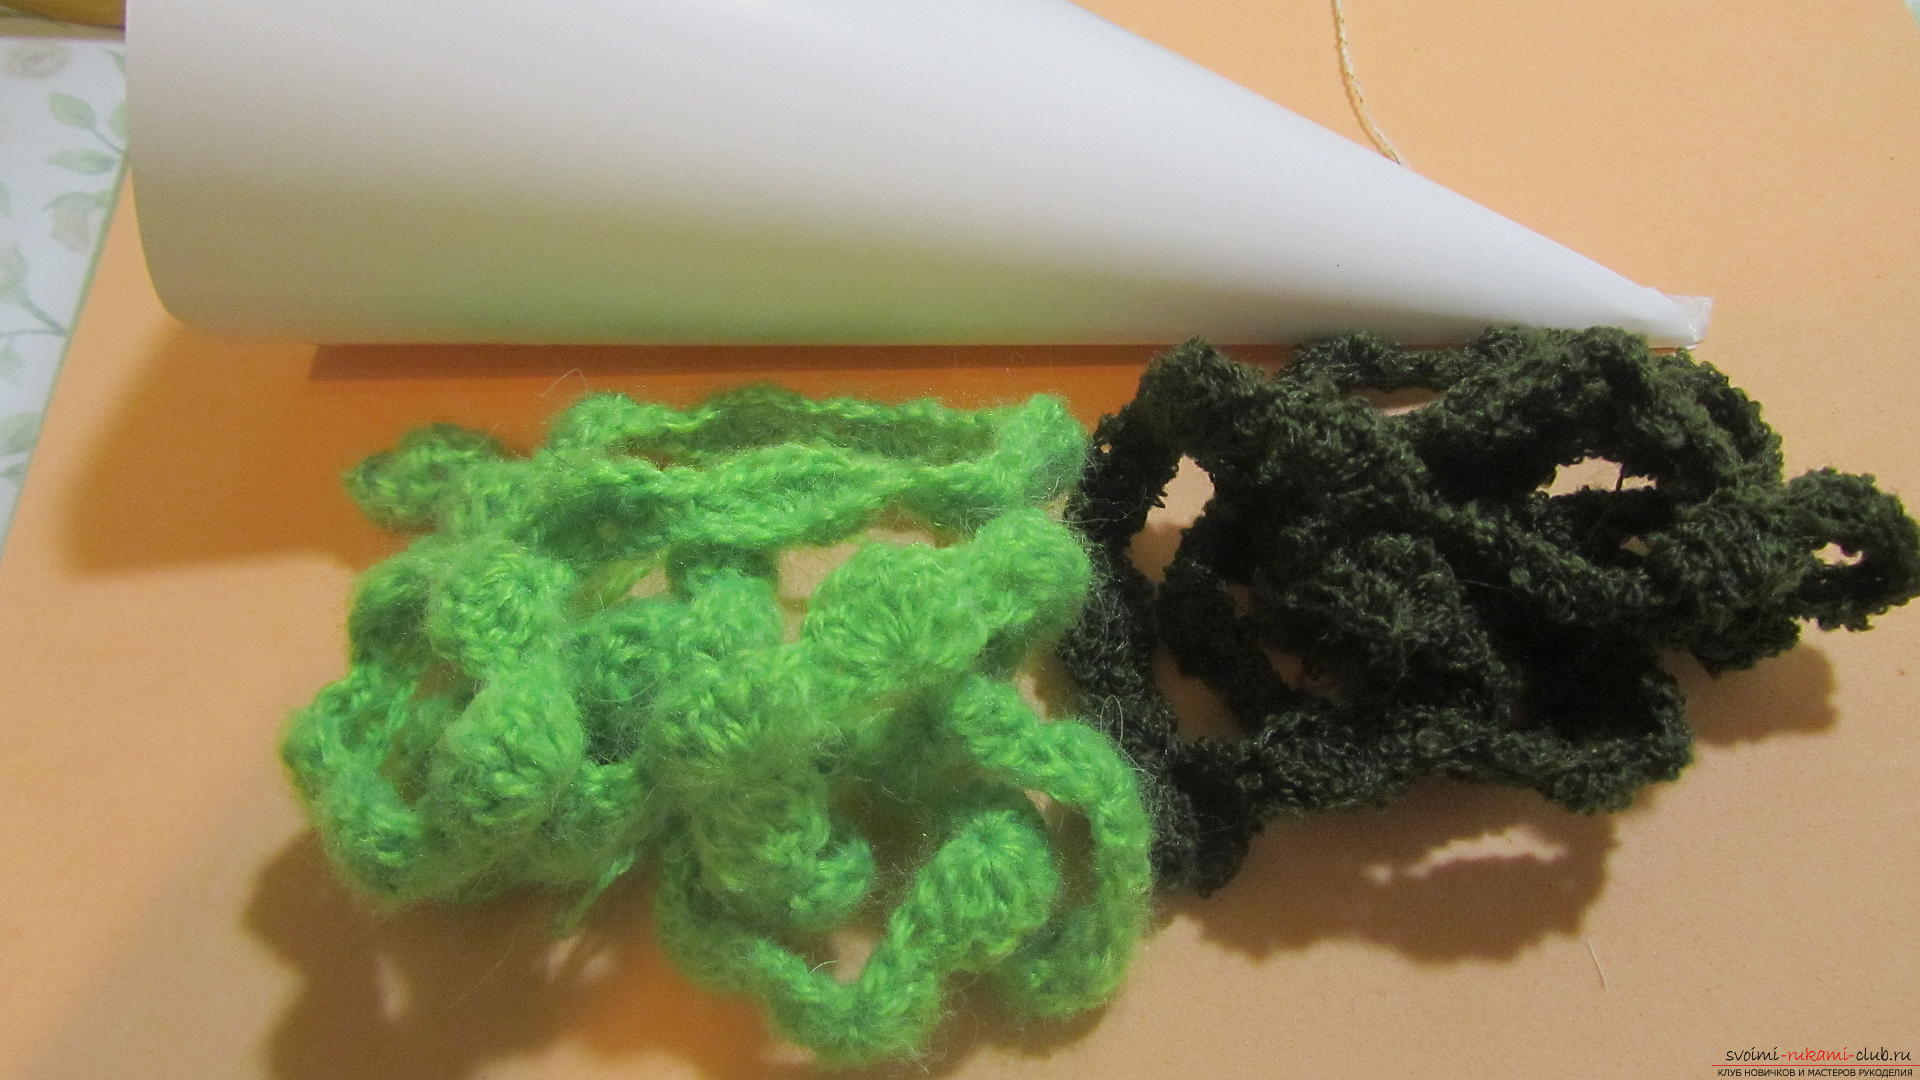 Now let's start forming the Christmas tree.To do this, cover the cardboard cone with double-sided tape. The adhesive tape should be on paper, not foam. Threads stick to it better and don’t fall off later. You need to paste it over as tightly as possible, trying to cover the entire area.
 Peel off the protective layer and wrap the cone with both ribbons at once, starting from the top.
 We wrap the tree tightly so that the paper base is not visible.
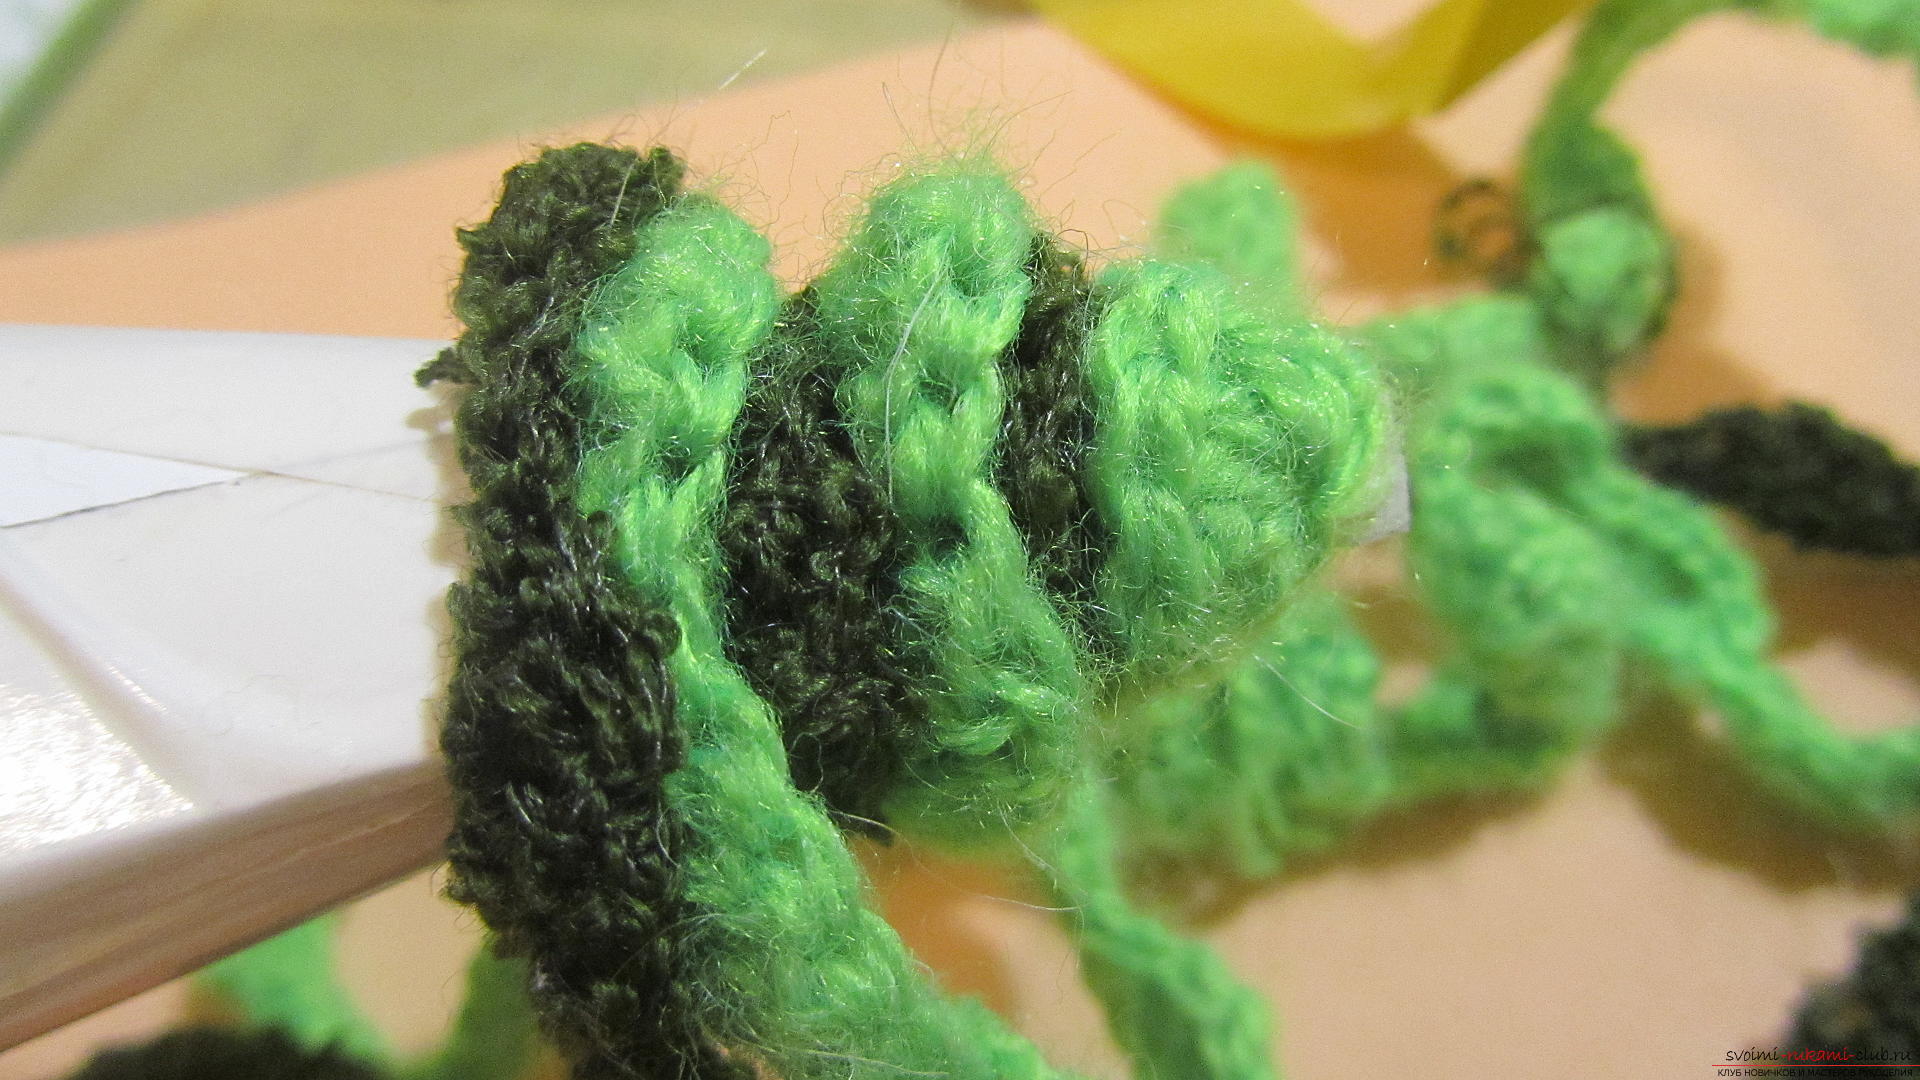 You need to attach the ribbons to the cone with adhesive tape edgewise, that is, the chain of loops with which the knitting began.
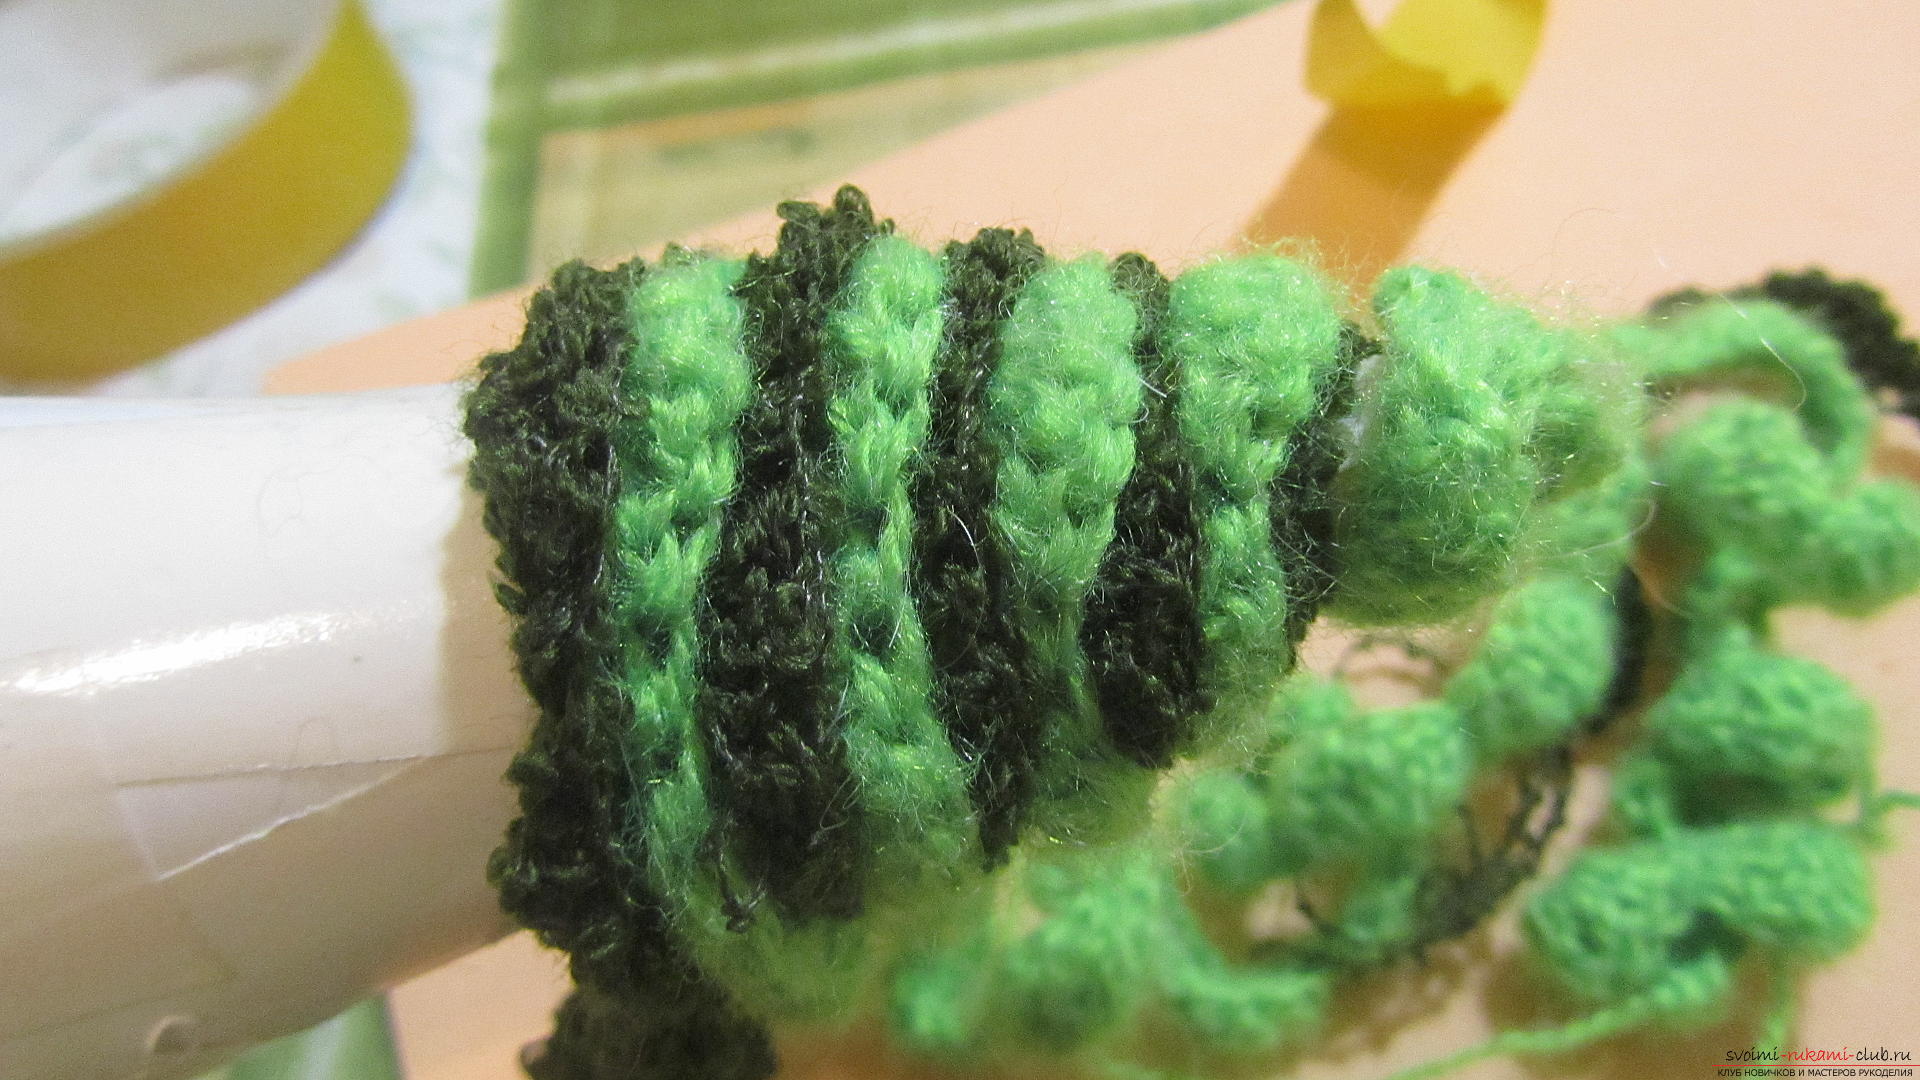 We continue to wrap the cone until we run out of knitted ribbons. We cut off the excess. You need to cut the cone so that it is not visible from under the knitted part of the tree. At the same time, the tree should stand well.
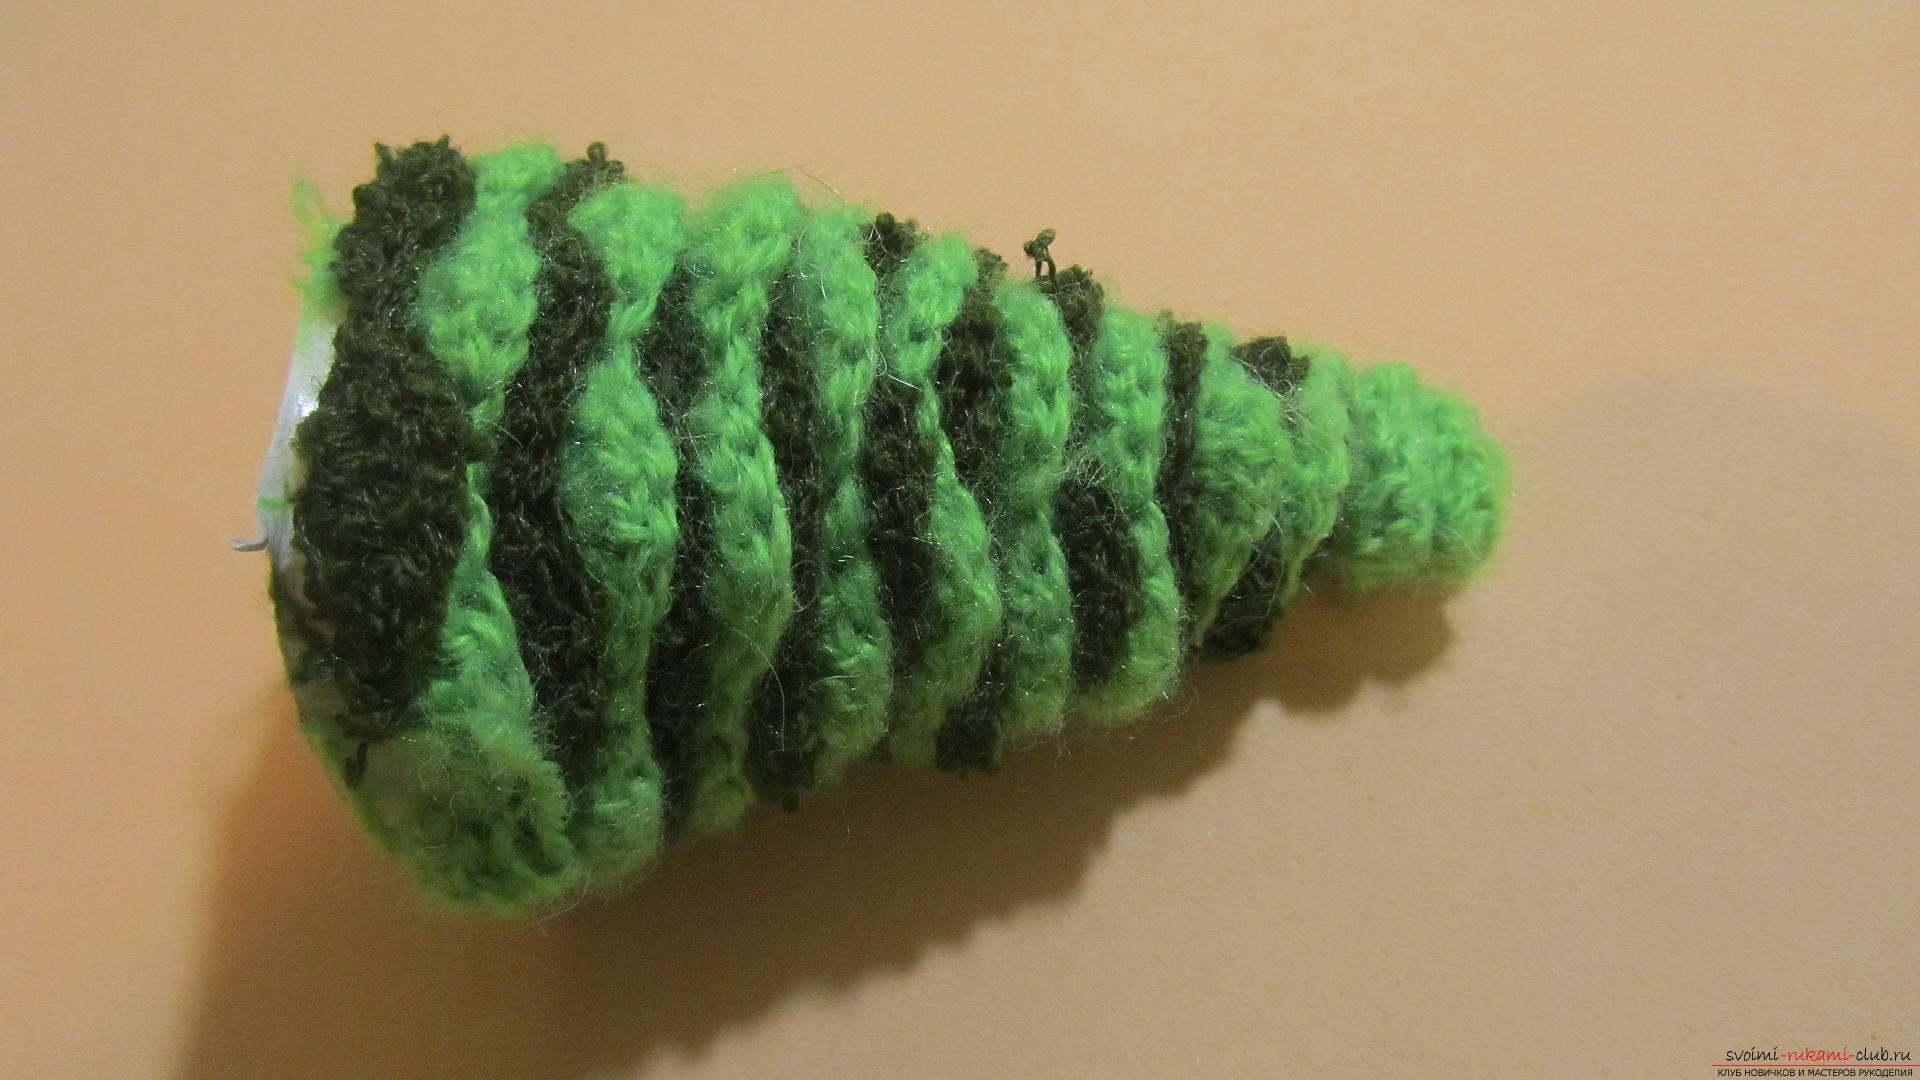 Let's start decorating the Christmas tree. To do this, we use beads of the same color, but different in size and shape. We will sew the beads to the Christmas tree using regular bobbin threads.
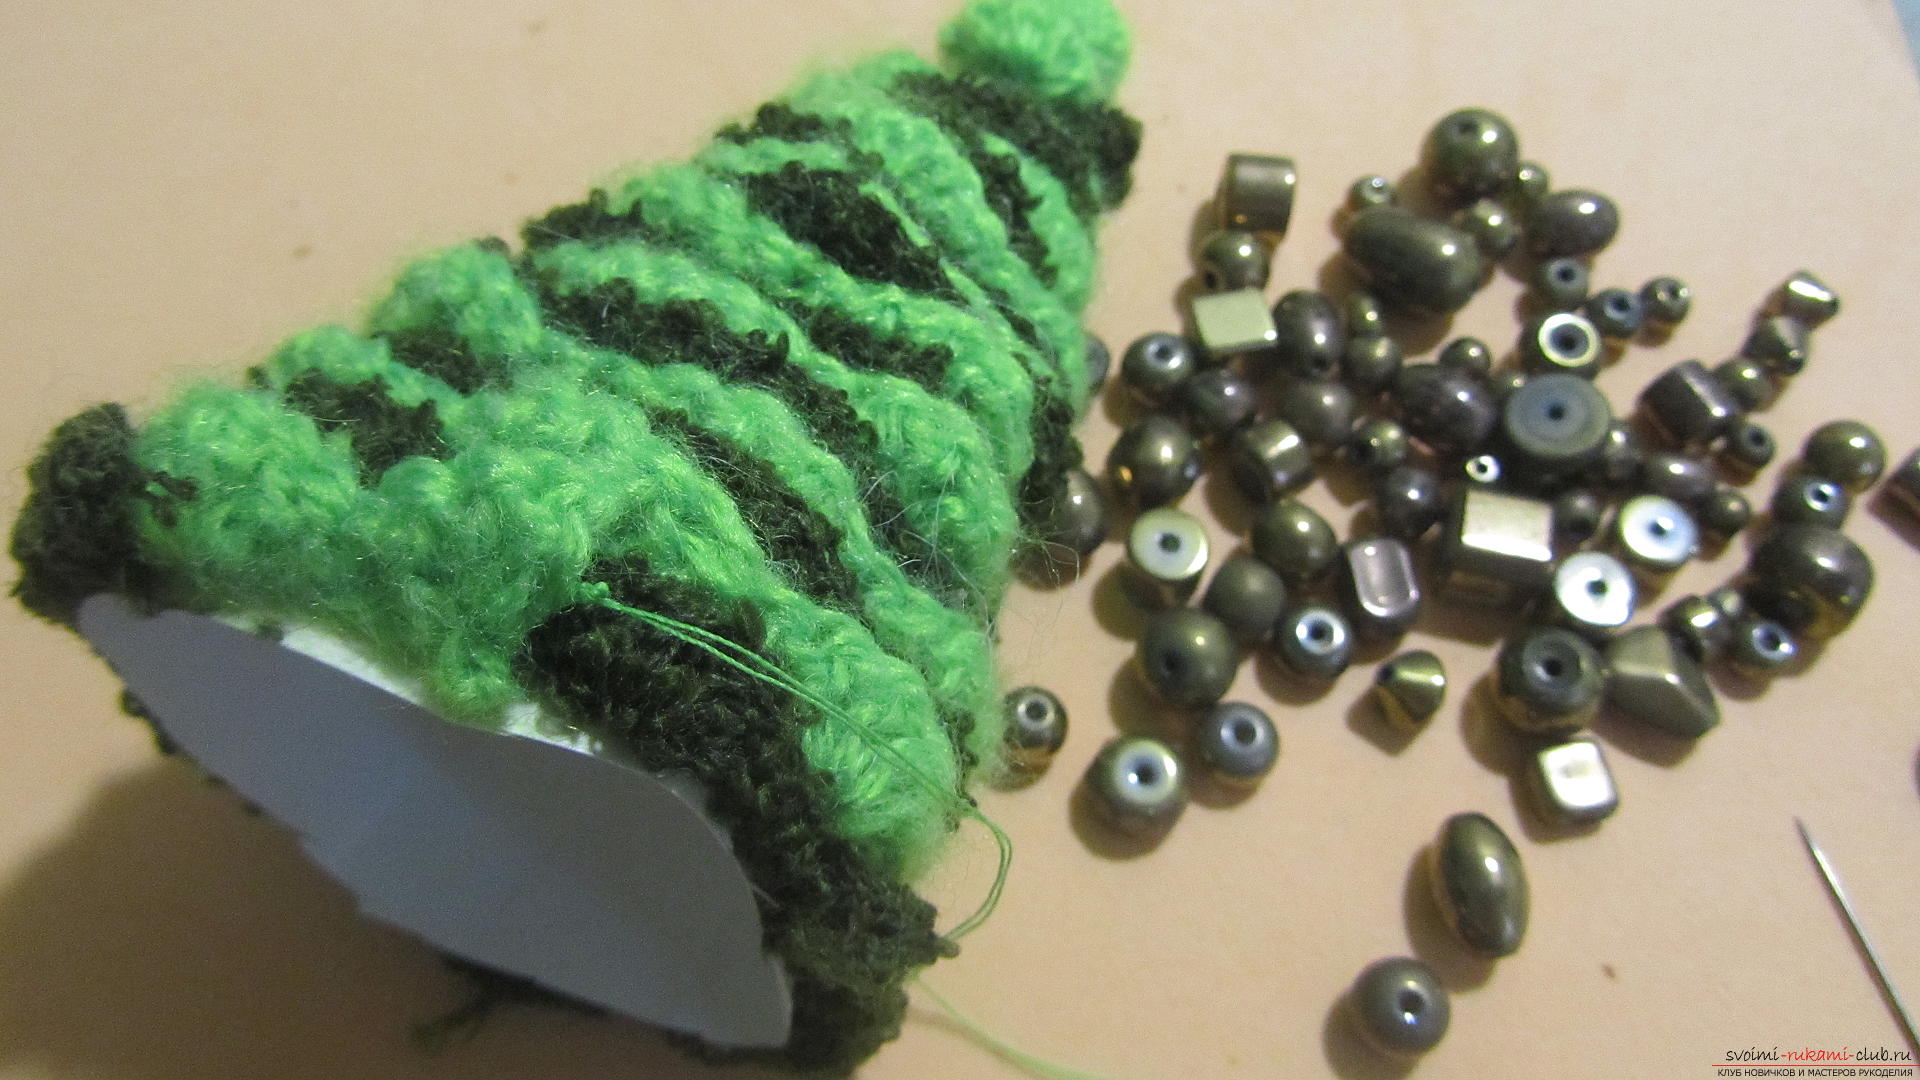 Sew the first bead between the first and second ribbon of the tree.
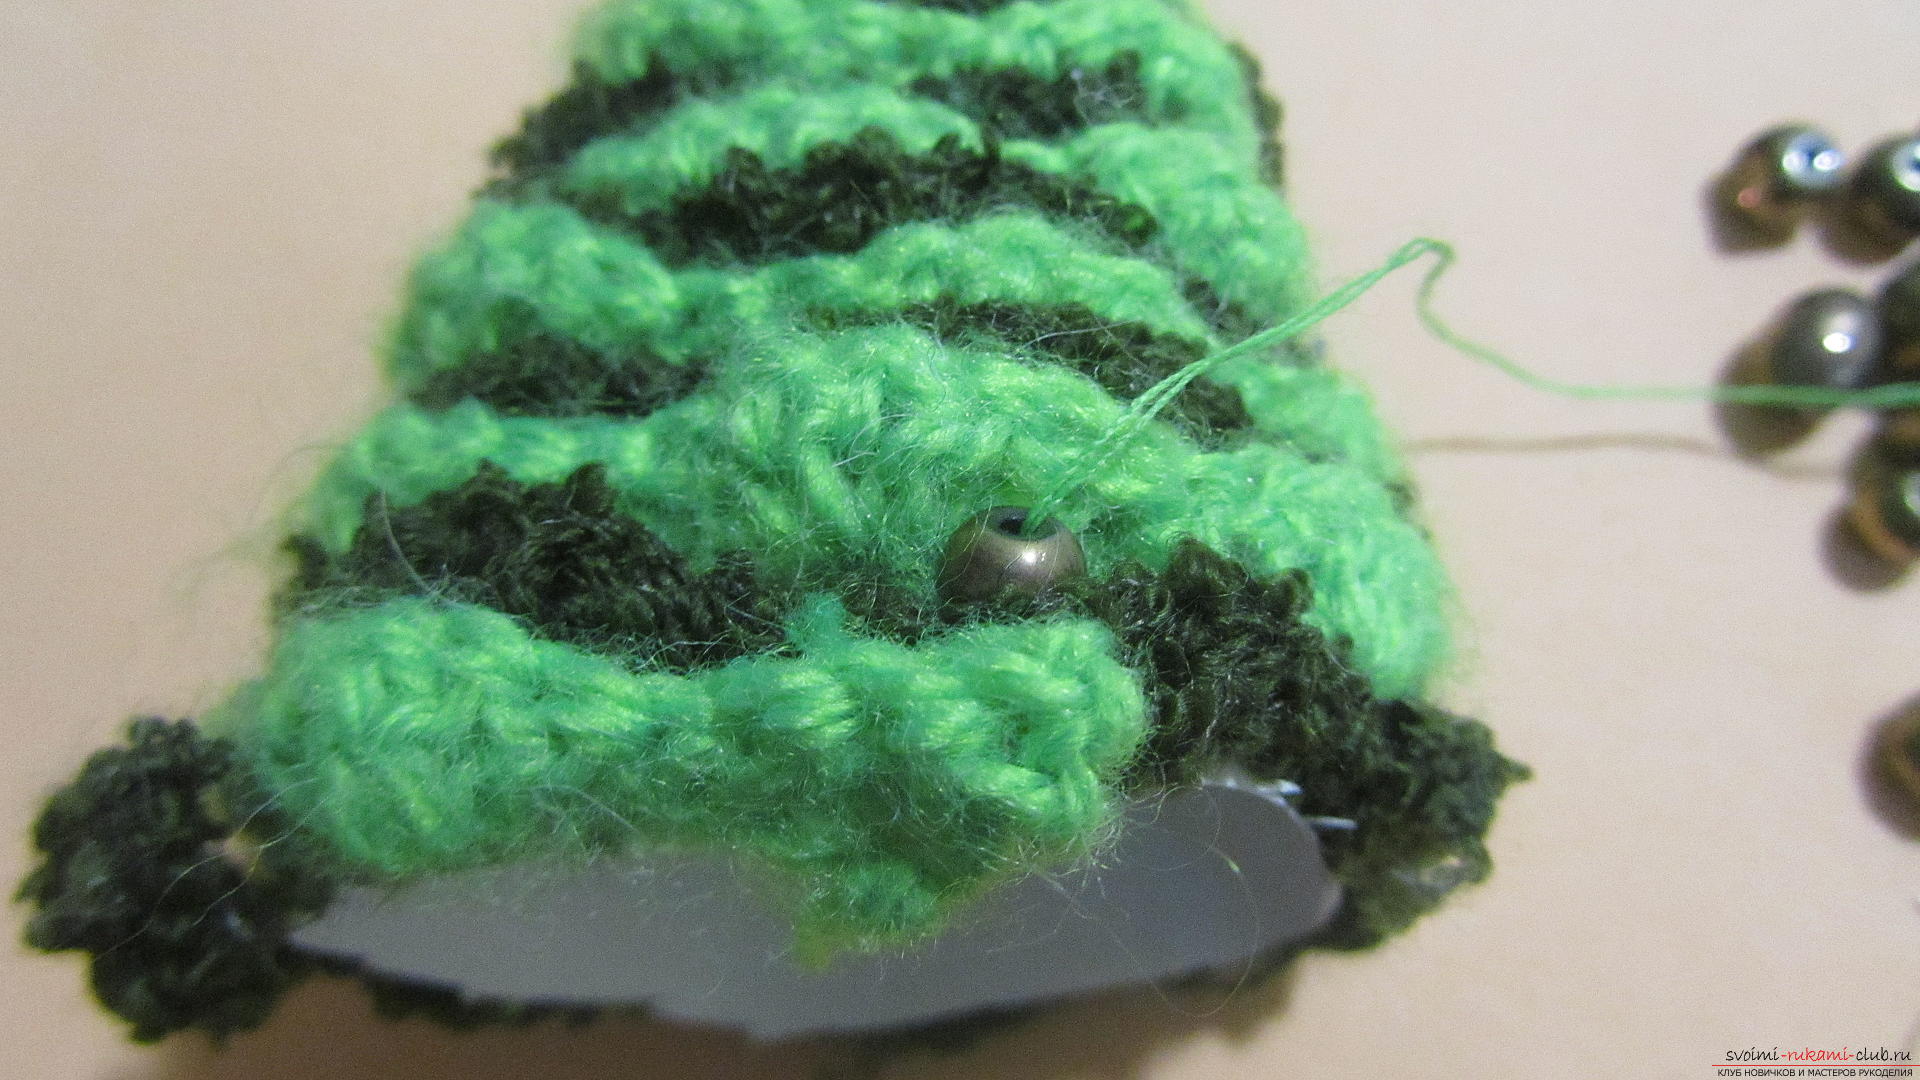 Now we pass the needle through three layers of braid.
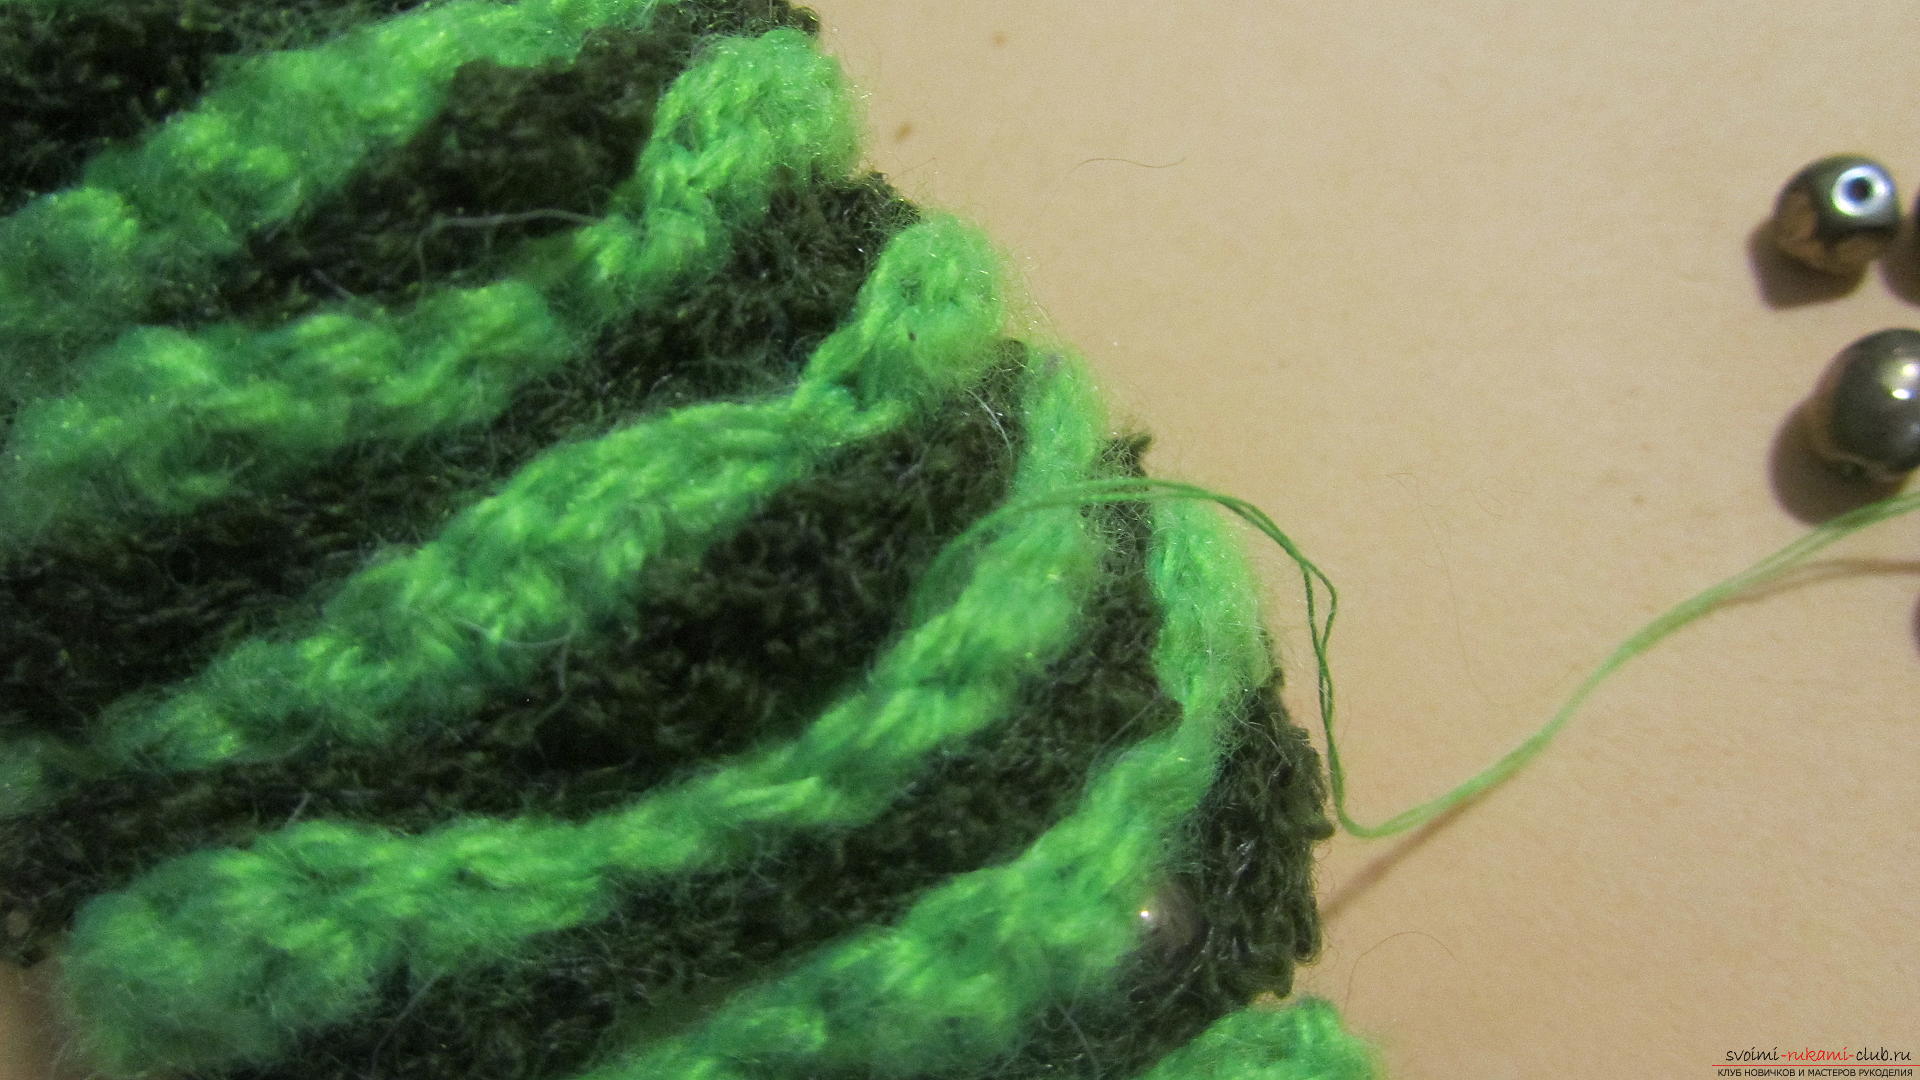 And thread the second bead onto the thread. Then we again pass the needle and thread through 3 layers of knitted braid.
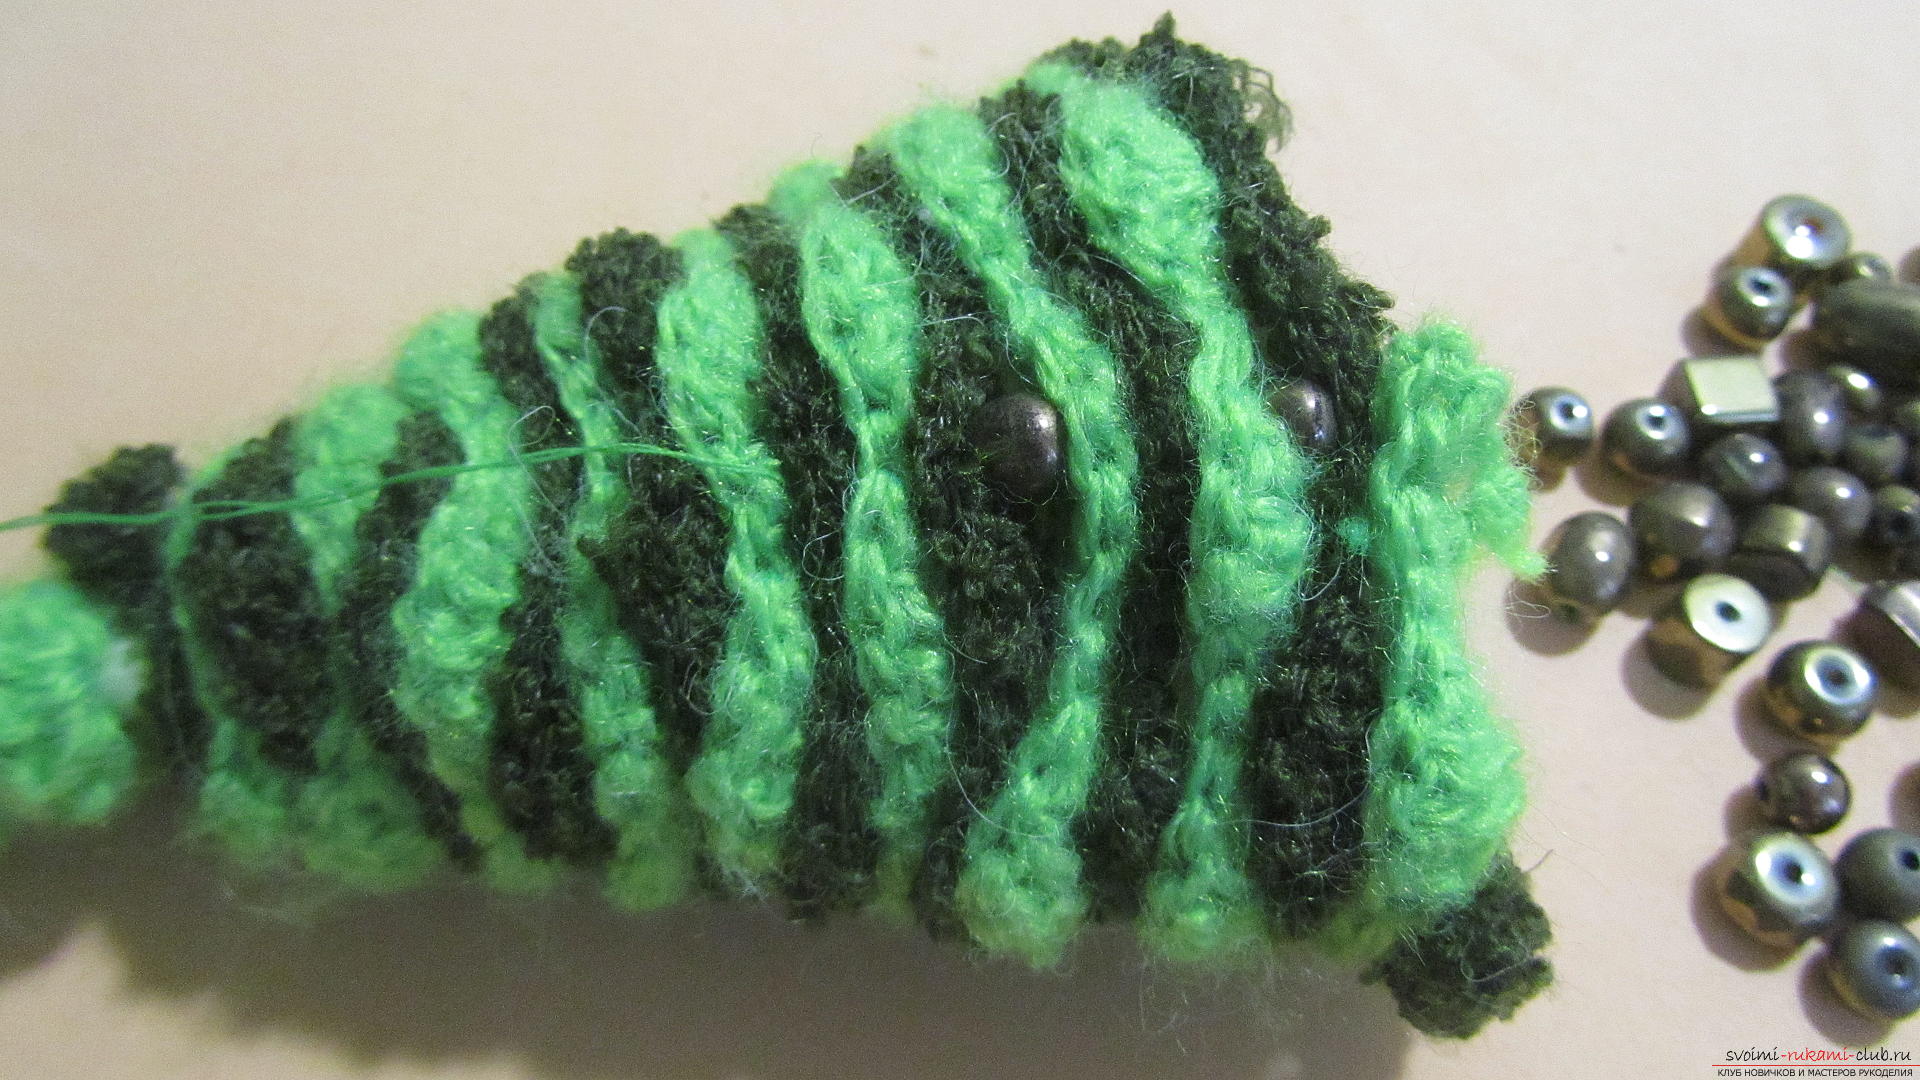 We thread another bead and again sew three layers of braid with a needle.
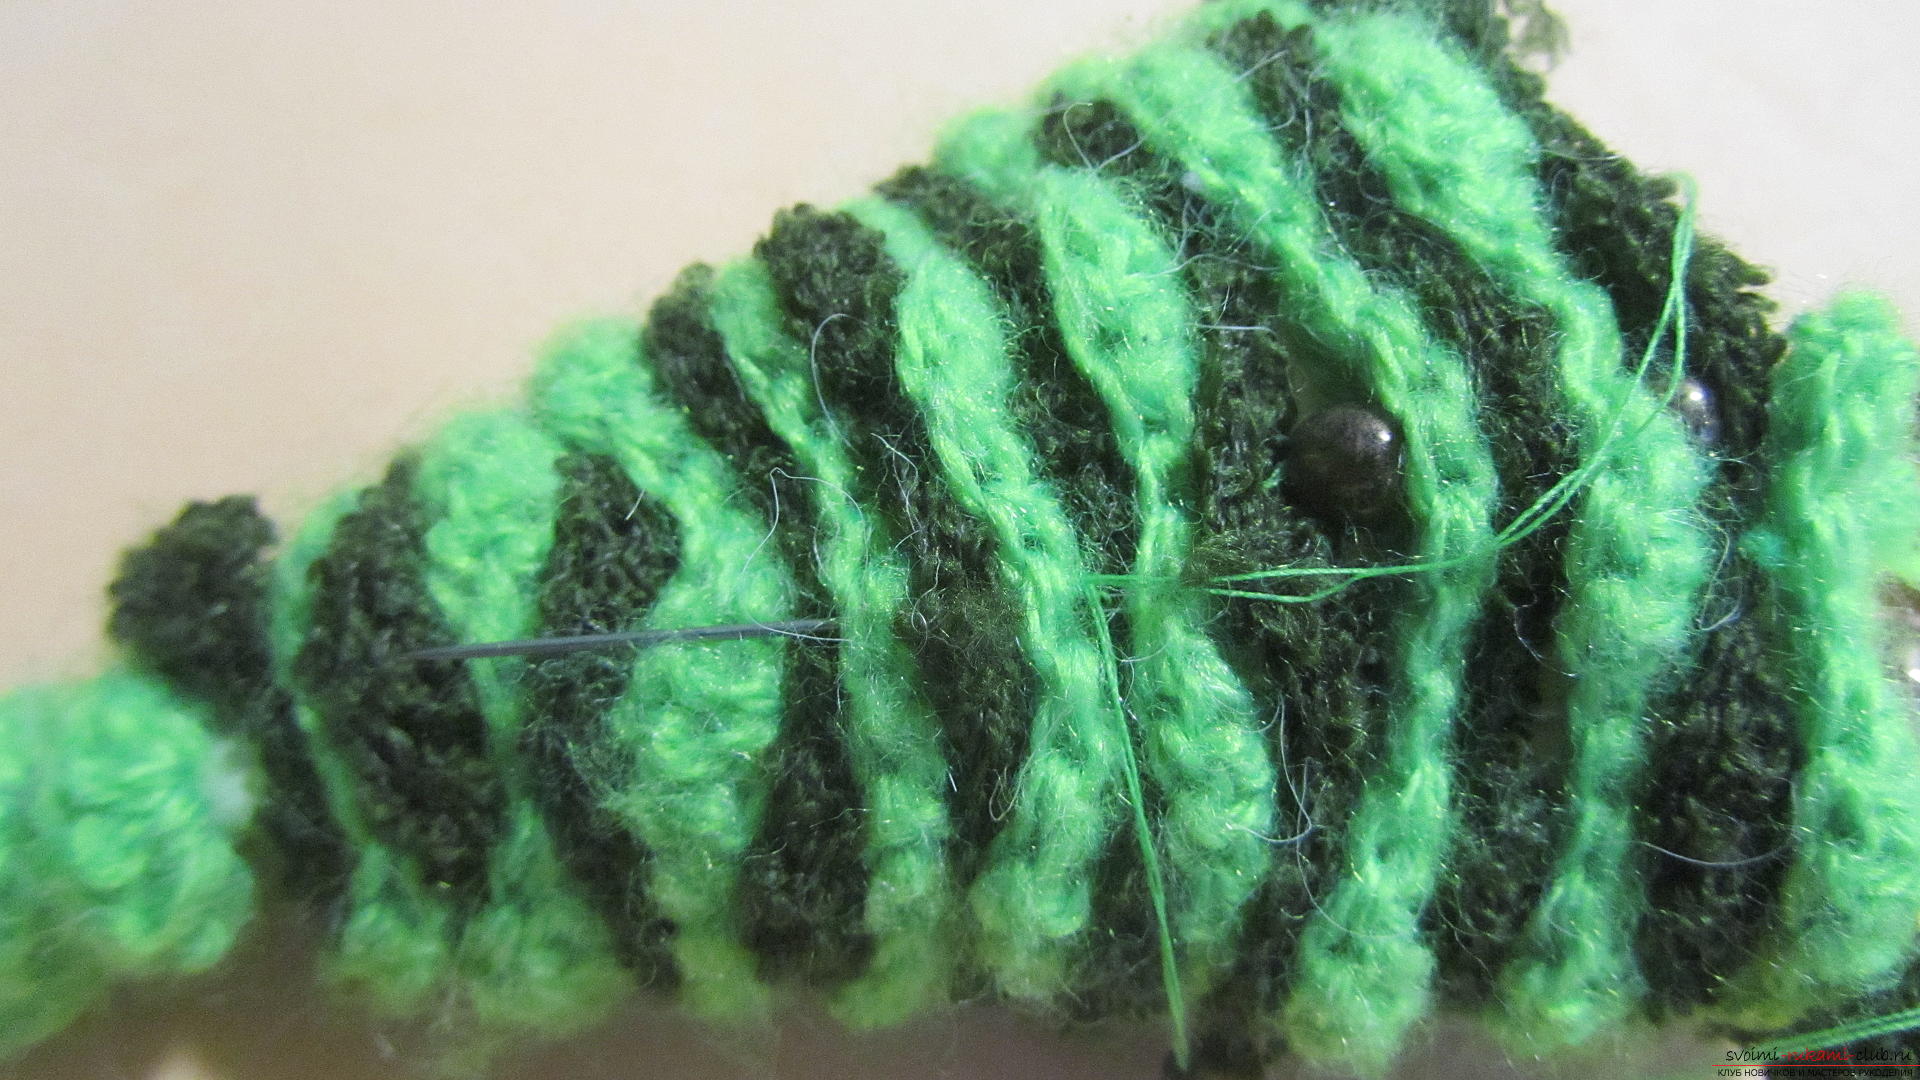 Having reached the top, we turn around and sew the beads from top to bottom, also through 3 layers of ribbon.
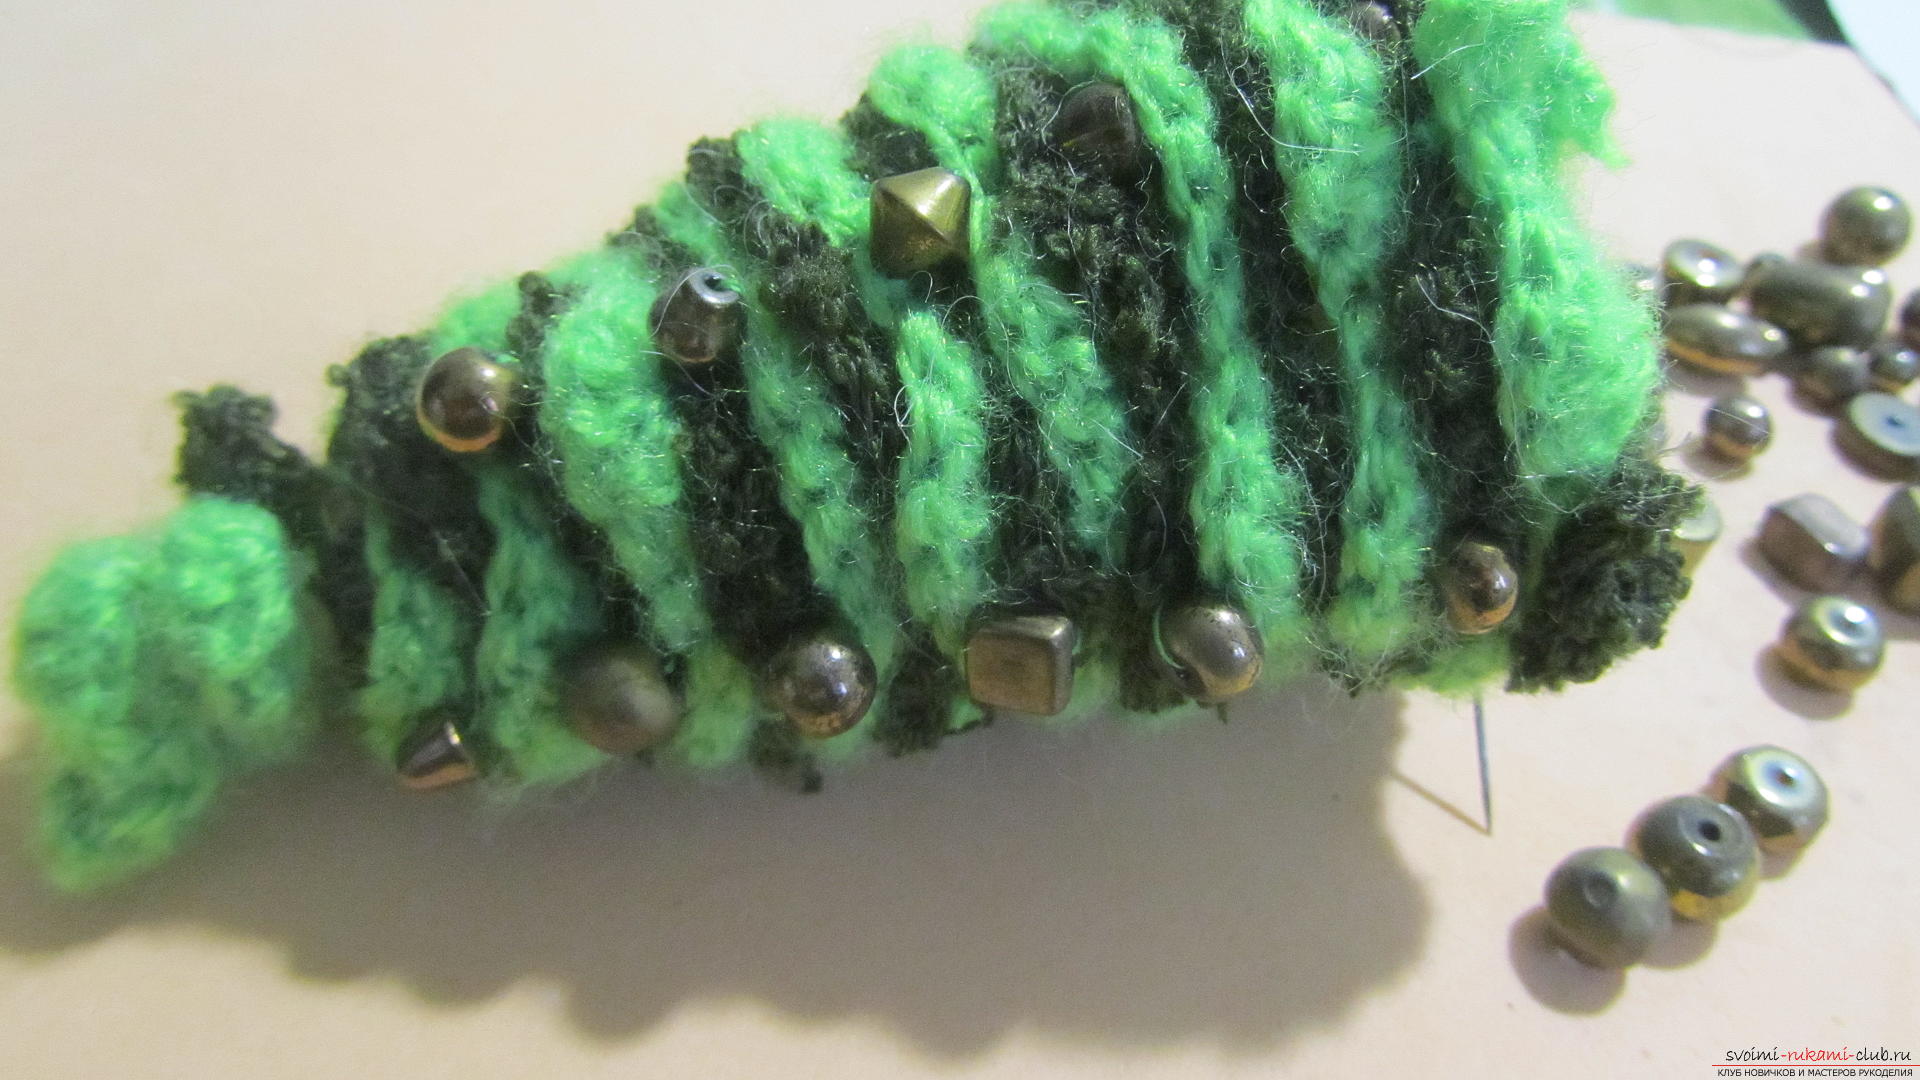 We alternate beads of different shapes and sizes. It is advisable to use large beads from below, and closer to the top of the tree – smaller ones.
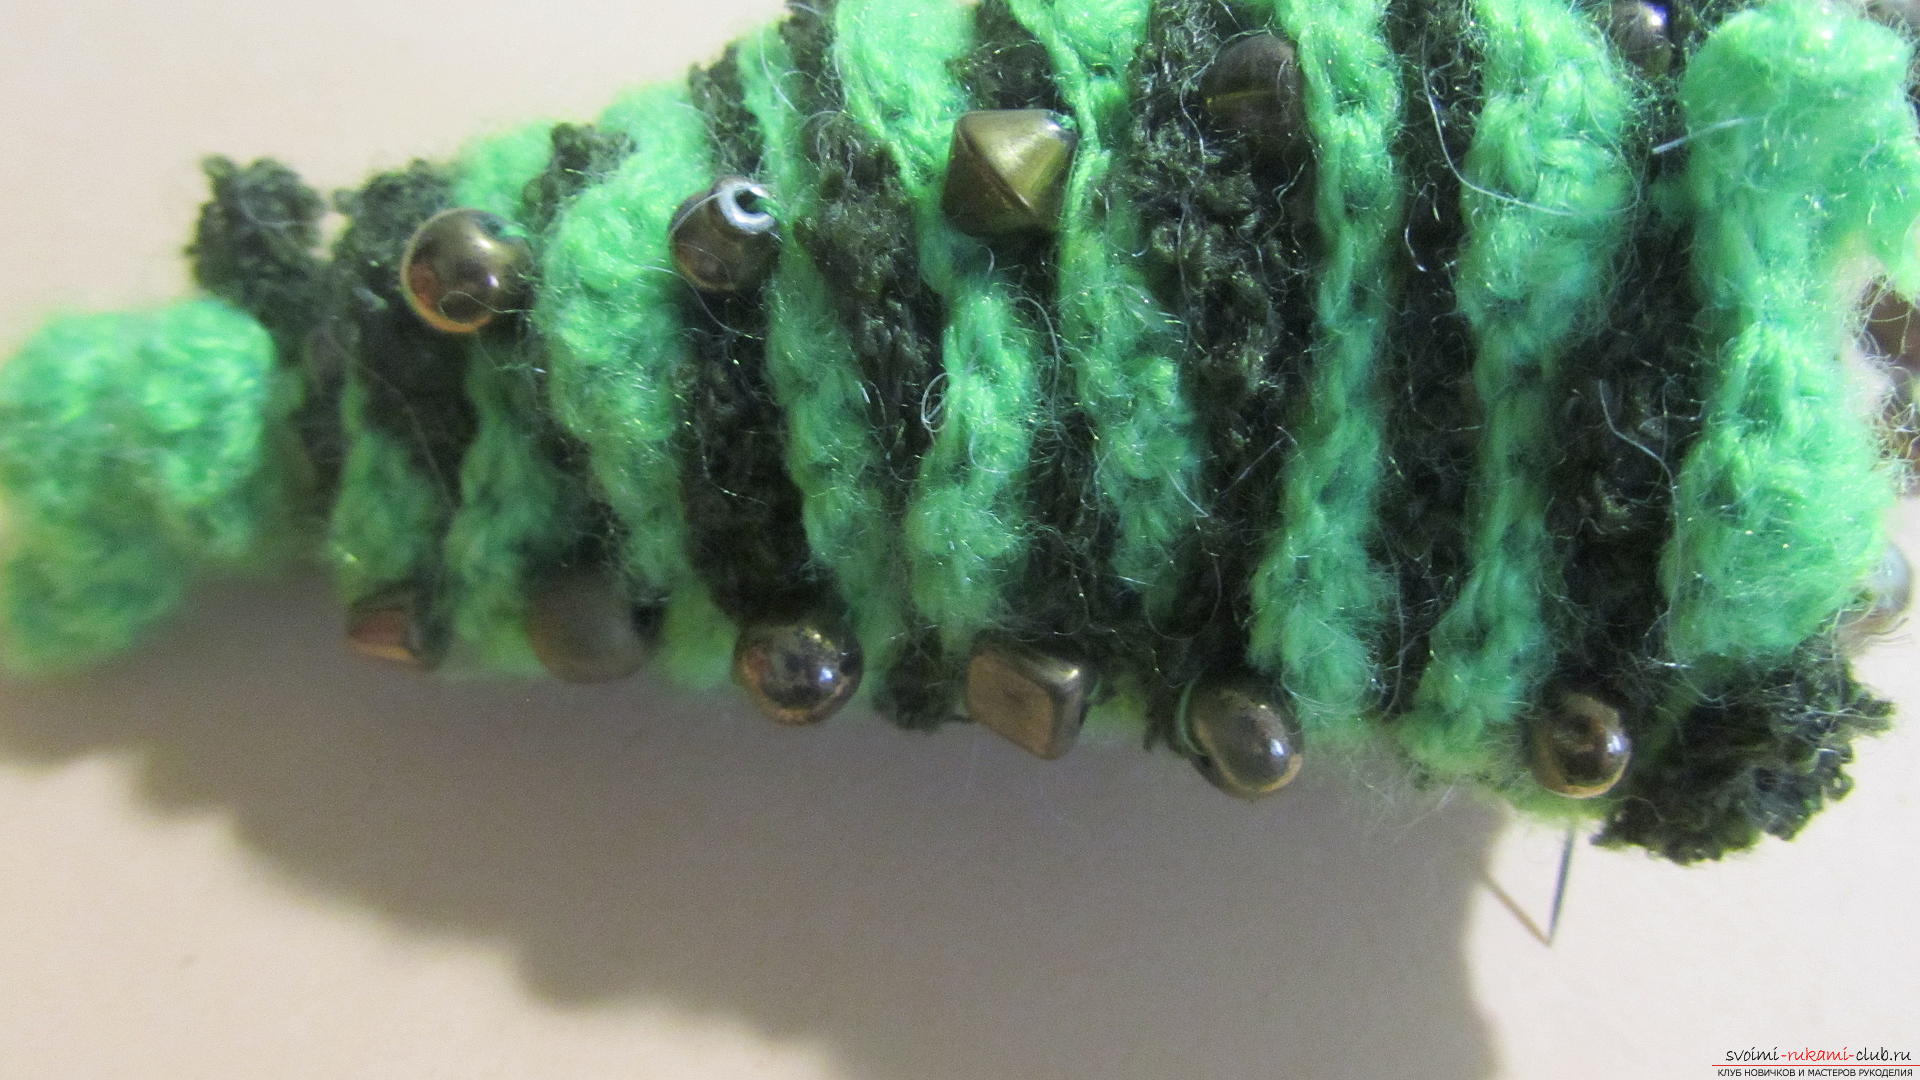 On the top of the Christmas tree we will sew a large bead and secure it with large beads to match the color. The Christmas tree is ready!
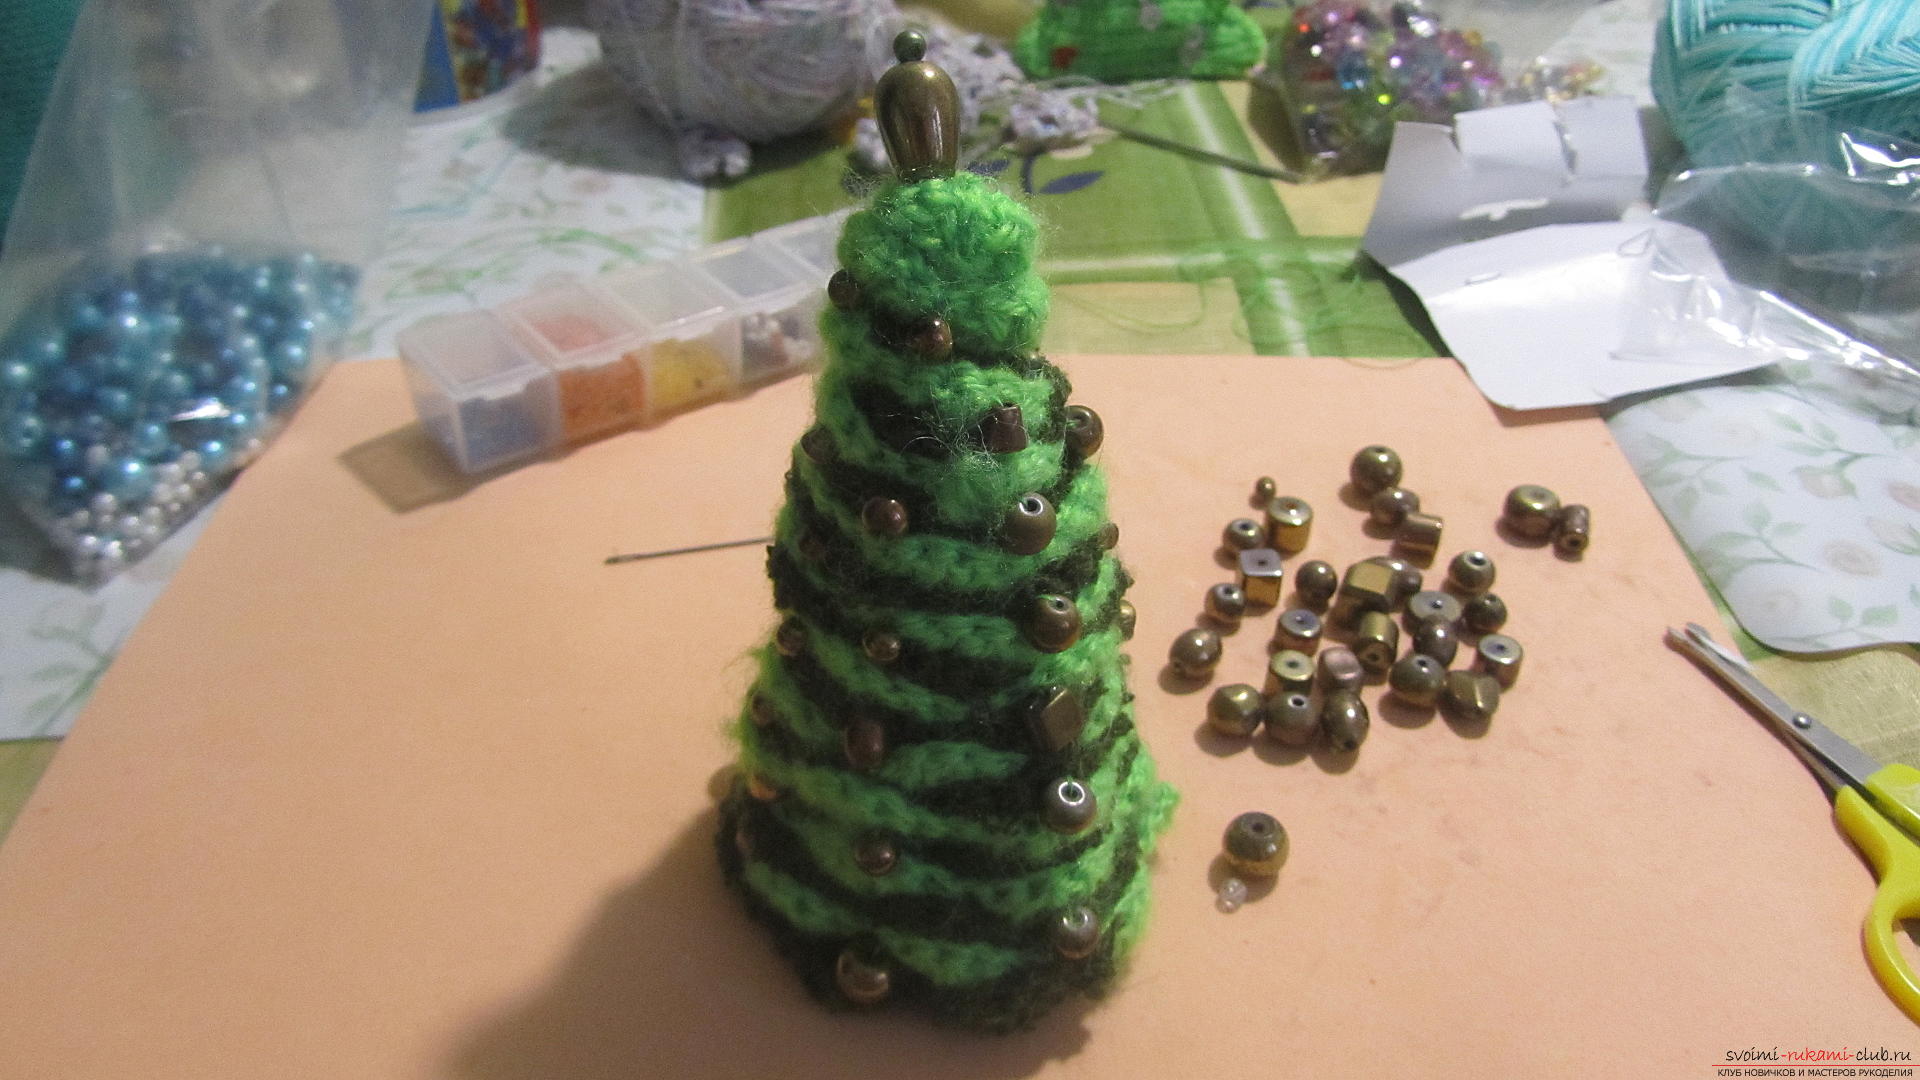
Comments
Related posts:
 The master class will teach you how to crochet a New Year's craft – knitted garland for the Christmas tree
 The master class will teach you how to crochet a New Year's craft – knitted Christmas tree toy
 The master class will teach you how to make your own hands a New Year's toy on a Christmas tree - a coffee star.
 The master class will teach you how to make your own hands a New Year tree from sisal
 The master class will teach you how to make a New Year's craft – plasticine Christmas tree on a toothpick