Thread paintings – fun DIY art
Content
- Types of paintings from threads
- Appliquation of threads of different lengths
- How to make a picture of threads and nails
- Video: pictures of threads and nails with their own hands
- Application of finely stranded threads
- Video: drawing with cut threads
- Pictures embroidered in threads
- Embroidery on cardboard in technology is easy to remove
- Video: master-class paintings of wool
If you want to make something bright with your own handsand something unusual or to spend quality time with your child, then why not try to create paintings from threads - this is a very exciting and fun creativity that requires very little: patience, imagination and a few tools.
In general, drawing with threads is called “nitcography.”and have already come up with several interesting ways to create panels of this kind. We will look at the main types, each of which is based on threads, and the rest of the tools differ.
Step-by-step simple master class of each methodwill help you make an original gift for family or friends. Creating paintings from threads is not boring, but on the contrary, it is very exciting, you can’t wait to see the end result, but haste is the main enemy of creativity. And if you are a very impatient person, then this type of needlework is perfect for training endurance.


Types of paintings from threads
You can make a thread painting using any of the following methods:
- Applique from threads (scraps of yarn of different lengths or cuttings, crocheted in pigtails);
- To isolate with the help of carnations and threads (a contour of nails to which the threads are threaded, to which the opposite carnations are engaged, to the board-base, and not those that are next to them);
- Applique from small-cut yarns;
- Embroidered with threads of panels;
- Embroidery in the technique of cardboard.
Further, already on specific examples we will tell you how to make a picture for each of these methods and you will see that everything is not as difficult as it might seem at first.
This activity perfectly develops the imagination of both children and adults, and hand-made paintings will decorate any interior or serve as unique gifts.
Appliquation of threads of different lengths
"Drawing with threads is not more difficult than drawing with felt-tip pens," say experienced needlewomen. However, this is not quite true. For a pattern of yarn, many differences are required:
- Dense base (preferably not cardboard, but a sheet of fiberboard);
- Frame for the future painting;
- Multicolored yarn;
- Glue PVA (or a bottle of other resistant glue);
- A brush or cotton swabs;
- A simple pencil;
- scissors.
First, the future image is drawn on the basis of the pencil (for the first time, choose something simpler, for example, a kolobok).
We select thread colors for this sketch.Acrylic ones look best, as they are very bright and beautiful, but everything else is good too: leftover yarn, floss, etc. What is important is the uniform thickness of the threads and the non-smooth structure. It will also be difficult for beginners to work with shaggy or curly threads; although they give an interesting effect, they are more difficult to handle.
Then we move the glue and scissors closer and begin to create our first thread painting.
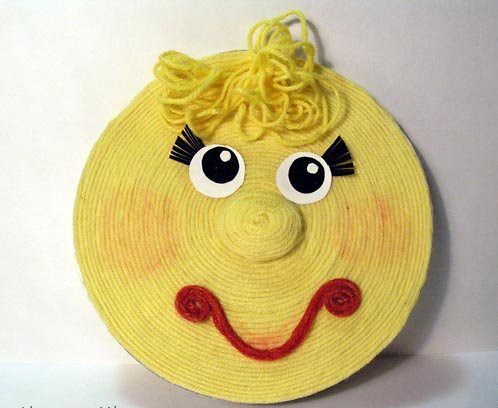
Using glue and a brush (cotton swab)draw a line along the contour of the pattern and, pressing the thread with your fingers, lay out the thread (or a braid of yarn). After the entire contour is glued with threads, we begin to lay them inside and outside, changing the colors and length of the threads. We begin to glue small details from the inside of the drawn outline.
The threads should be pressed very tightly against each other to avoid voids, otherwise the work will not look beautiful or of good quality.
Having finished pasting over the image, we leave it to dry. And then the finished painting can be steamed with an iron through a wet cloth so that the threads lie more evenly.
At the end we are already thinking about the frame. It’s not difficult to make it yourself; a master class for a simple frame can easily be found on our website.
And the painting, by the way, can be safely vacuumed in the future, without fear that the work will spoil.
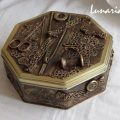
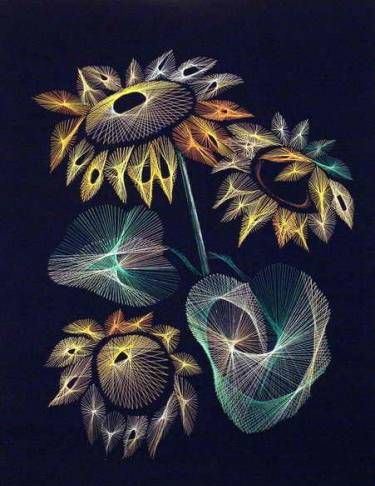
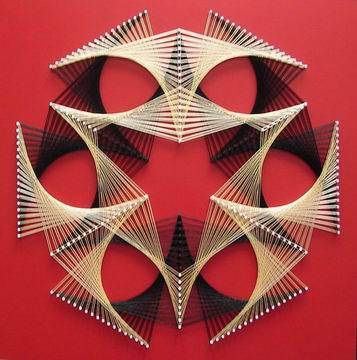
How to make a picture of threads and nails


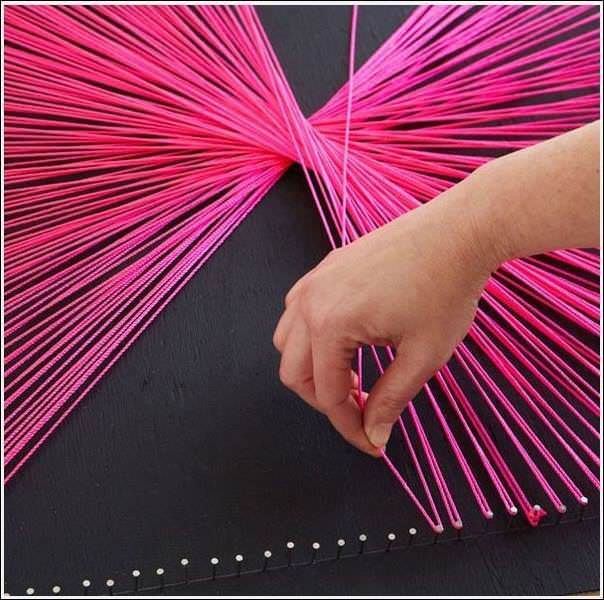
Pictures from threads and nails are created without glue and this is no longer painting with threads; here you will need completely different tools:
- Base (any wooden sheet, wall or cork board);
- Threads of any colors;
- scissors;
- Carnations;
- a hammer.
Cork boards are lightweight andYou won’t need a hammer with it, but if you don’t have any, you can nail nails onto any wooden surface that can be pre-painted in some way. It is also better to take care in advance about how the picture will then be attached to the wall.
Now we draw with our own hands any image or word on the base and nail it along the contour of the carnations and pull the threads on them.
At the very beginning, we secure the thread by tying itwith a strong knot on the first nail. Next, with a little tension, we attach the thread to the next studs in a chaotic order or according to a pattern invented by ourselves. As you can see, everything is simple, and the process itself is so captivating that you don’t want to stop.
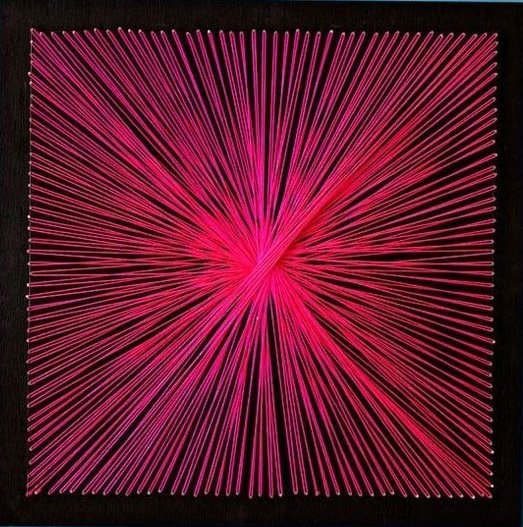
If you want to make the picture multi-colored, you canuse threads of different colors. You can first make a long multi-colored thread out of them. Or you can move from color to color, tying knots as in the beginning.
The result is a very beautiful and original thread panel.
Video: pictures of threads and nails with their own hands
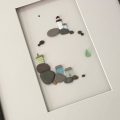
Application of finely stranded threads
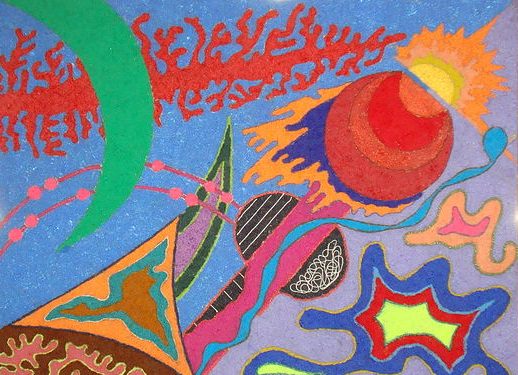
For this application, the threads are finely chopped,Literally a fraction of a millimeter long. From this material you can get really chic pictures, which can not be distinguished from the oil written in a short distance. However, the preparation and the process of creating such images requires a lot of patience and a lot of time. But such drawing can be done with children: adult materials are used to prepare materials for work, and the baby selects colors and attaches the cuttings with glue.
The length of the threads is important here - the smaller they arecut, the better the picture will turn out. You can distribute the cut pieces into bags or boxes. To make it convenient to take them and sprinkle them in the desired place.
Next, carefully press the threads with your fingers tobasis. Having applied the main colors in this way (the background of the sky above, for example, and the green field below), we let the work dry well, this will take several hours. When the threads are completely dry, you can remove the excess (not stuck) by simply “brushing” them with a brush that you use to clean clothes.
Next, we continue sizing all the restareas and wait until it dries again. Afterwards, you can try to apply flowers and trees to the already dead field. Hut, etc. corresponding shades. And let the work dry again.
That's all - the panel is ready.
This technique is considered not just applique - it is real drawing. Some people paint with sand, others with thread.
And here, too, it is not necessary to have the ability of an artist; it is enough to draw a finished picture or print it on a printer, using it later as a basis.
Video: drawing with cut threads
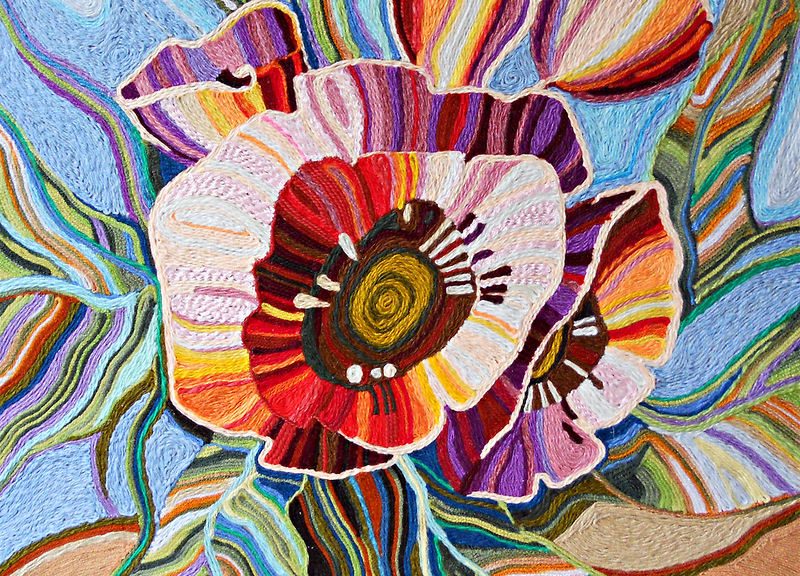
Pictures embroidered in threads
Embroidering a picture is also not difficult, if for a startDo not take too complicated schemes. The methods here are also different: smooth, cross, cross, etc. Most often for the acquisition of skills it is better to use the ready-made kit, where you will find everything you need. But if there is no set, but want to try this very second, then we will prepare the following tools:
- Multicolored thread;
- Needles, depending on the thickness of the yarn used;
- The foundation on which you will embroider;
- Elements of the decor of the finished picture (beads, ribbons, etc.).

Painting embroidered with satin stitch Think about what you want to depict: any plot, landscape, portrait, animal or children's cartoon characters.
You can choose any picture you like orphoto. With the help of modern technology, you can easily find a way to turn a picture into an embroidery pattern. Using specialized programs, you can create a diagram yourself or use graph paper with colored pencils.
Yes, and choosing colors will not be entirely easy,After all, it is necessary to ensure that the shades are without strong contrast for the greatest harmony. If the colors are chosen correctly, the panel will turn out interesting and beautiful.
Then we decide on the background, becauseThey are usually embroidered on a special fabric, such as canvas, which has different mesh sizes and colors. Many people try to draw a tree on their own, for example, and embroider it without any diagrams.
For embroidering portraits from photographs, small stitches are best suited, this way the work will look neater.
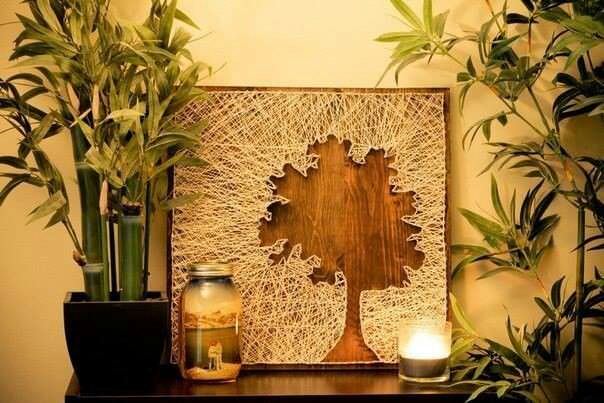
Embroidery on cardboard in technology is easy to remove

Embroidery on cardboard is a special technique,when embroidery is reproduced not on material, but on cardboard, which is also called thread graphics or thread design. Paintings created using this technique are very popular due to their ease of execution and interesting appearance. Often they teach how to make such a panel from threads in kindergarten, because it is an accessible and exciting activity for every child.
To embroider with isothread on cardboard you will need:
- the basis;
- scissors;
- An ordinary needle was sewed;
- Threads of a floss, ordinary coil or silk;
- A simple pencil;
- line;
- compass.
For pictures decorated with isonium usually takeColored cardboard or dense velvet paper. On the basis of draw a diagram or translate the image you like (it is useful for beginners to master geometric figures: circles, triangles, rhombuses, rectangles, etc. You can try simple compositions from corners and circles - a Christmas tree, a flower or a snowman).
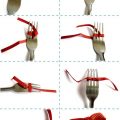
When embroidering with isothread, it is important to follow three rules:
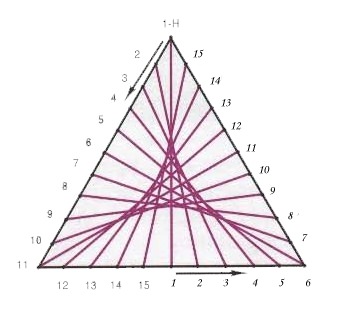
We'll show you a master class on how to work withtriangle. Draw a triangle on the back side of the cardboard and mark holes with an awl at an equal distance from each other (preferably on the front side of the base). The points should be numbered (there must be an even number) as follows: from bottom to top from 1 to 10, then from the top again from 1 to 10. That is, at the base of the triangle we get the number 1 on the left, 10 on the right. And we begin to embroider.
Having tied a knot on the needle, we thread the needle throughright number 10 and lead to the top 10. We thread the needle and thread that came out in the top 10 into the 9 next to it and lead it to the 9 below, and so we go through all the numbers: from 8 to 8, from 7 to 7, from 6 to 6, etc.
The image, accordingly, is obtained on cardboard from the front side.
You should embroider the panel carefully and smoothly - you don’t need to pull the thread too hard, otherwise the cardboard or it will tear.
It is better to choose threads that are not matte, but with a shimmer - they look more interesting, and if there are several threads, then they should be twisted, otherwise the embroidery on cardboard will not look neat.
Remember, it doesn’t matter that you don’t have panel embroideryIt always turns out perfect, it is important that this activity brings pleasure to you and your child. And if you do needlework with interest, then the paintings will turn out beautiful and original.
With your own hands you can create works of art that will add a cozy and warm atmosphere to your home.
And as a gift to friends or family, thread paintings are a great idea.
Thread applique on wood, fabric or embroideryon cardboard always surprises others, because the paintings look very chic. It’s great that everyone can make something elegant with their own hands and there is no need to master drawing here - all you need is your desire!
Video: master-class paintings of wool