Make original postcards for the New Year and give them to your friends and family!
The holiday season is coming soon.Have you already started preparing gifts for friends and family? Do you want to try making cards for your loved ones with your own hands? Then we bring to your attention the next master class on making a beautiful New Year's card! I hope you find it useful. For this postcard making we will need the following materials:
- cardboard (I take, as a rule, paper for watercolors or for pastels)
- scrap paper (or, if the economy does notavailable, colored paper or packaging for gifts, any one, with suitable patterns). I have already lay for a long time, as if a merry paper in herringbone was waiting for its hour
- ornamental felt green
- lace
- half beads (you can use beads, buttons)
- a piece of beautiful thread
- And further:
- cutting mat
- ruler
- scissors
- mocking knife
- glue stick
- PVA glue
- needle
 First you need to prepare a form for the base of the postcard. My card will be 10*15 cm, so I cut out the base from cardboard measuring 20*15 cm.
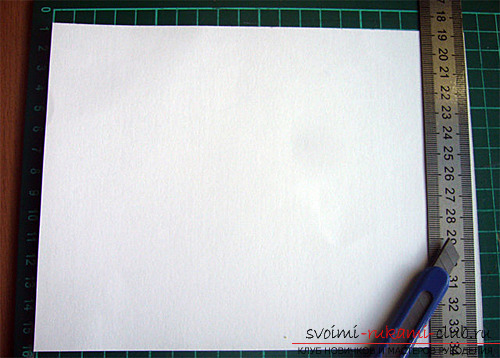 On the form we mark the middle — for bending andUse the blunt end of the scissors to draw a line, not forgetting the ruler. Thus, we do creasing (applying fold lines) at home and fold the base of the card in half.
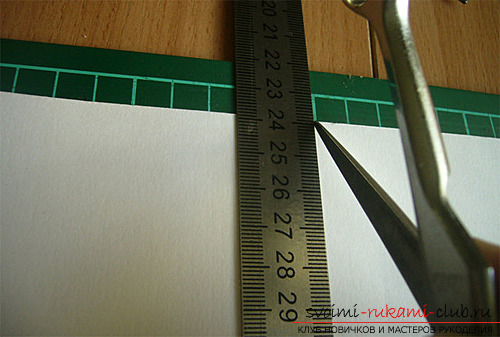 The result is an even and neat fold.
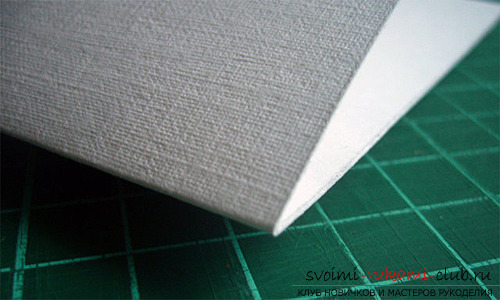 Next, from scrap paper (or any other beautifulpaper) cut out a rectangle measuring 9*14 cm (that is, each side will be 0.5 cm smaller than the postcard itself). This will serve as the background for our card.
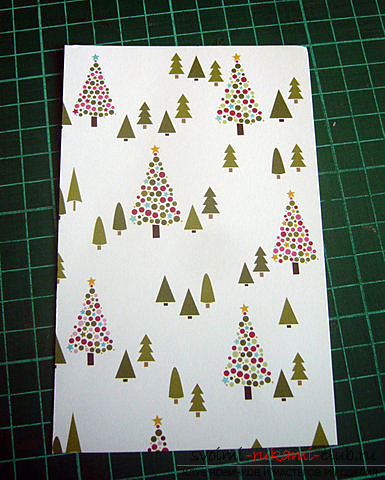 We trace the silhouette of the Christmas tree on felt (you can use a template, or you can draw it by hand – as you like). Carefully cut out the Christmas tree.
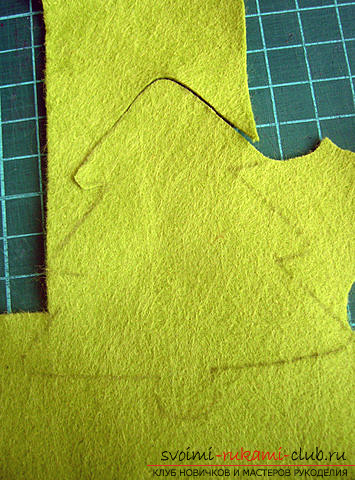 The edges of the felt do not fray, so there is nono further processing is required. Instead of felt, you can use any paper (plain or with some effects, for example, velvet) or fleece, which also hardly crumbles.
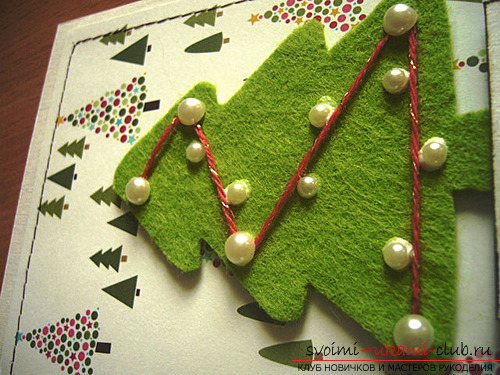
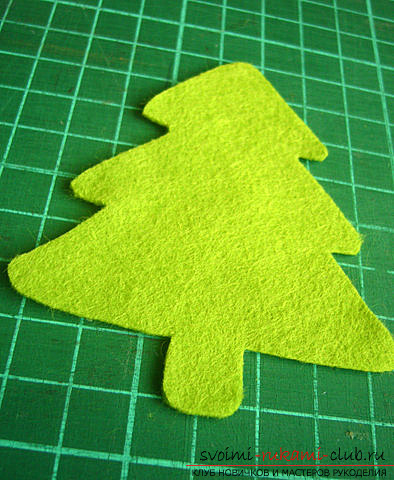 Next, using a contrasting thread (I have red, with lurex), we mark a “garland” line on the tree and secure it on the back side.
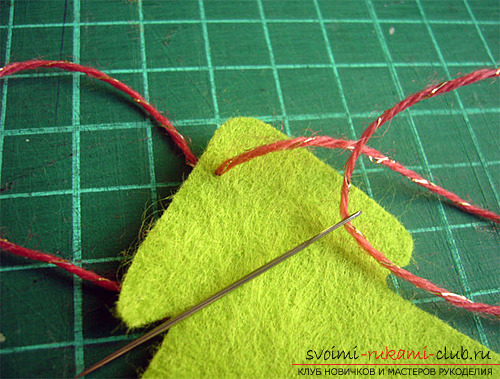 We will return to further decoration of the Christmas tree a little later.
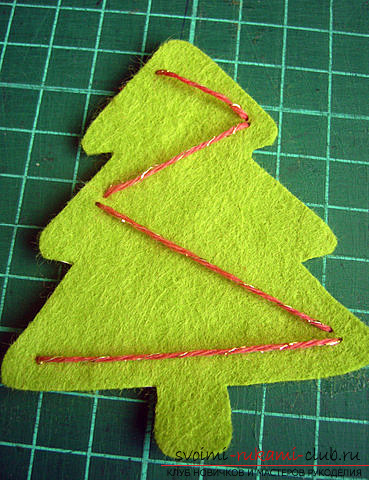 We cut out a similar Christmas tree from cardboard, onlycut off the edge 1-2 mm. We glue it to the back side of the felt Christmas tree so that this cardboard is not visible from the front side. This will give us the opportunity to make the Christmas tree denser and more voluminous (if you took thick felt, then you don’t have to do such manipulations, the Christmas tree will turn out voluminous anyway)
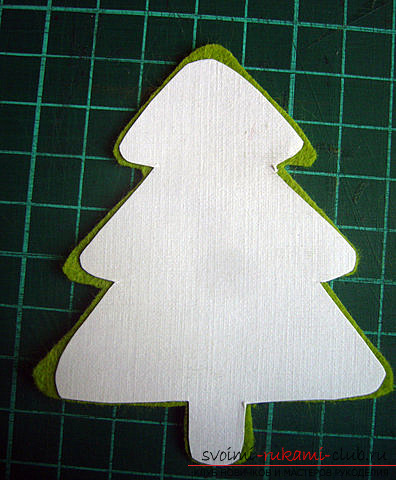 Next, take a small piece of white paper (fromme again in watercolor, with a “linen” effect), and we apply an inscription, for example, “Happy New Year.” I did this using a stamp, but in general such an inscription can be printed on a printer, written by hand or cut out from somewhere. I stamp it on paper and tint the edges with the same ink.
 We measure the lace according to the width of the background.
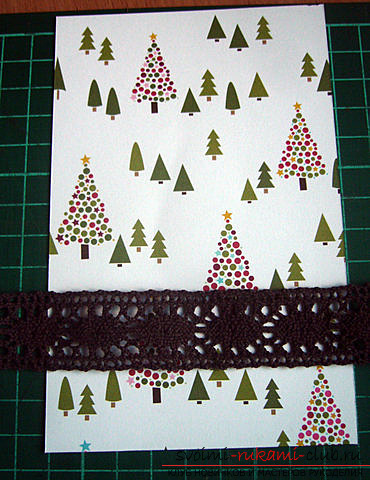 We lay a line around the perimeter of the background paper, bring the threads to the wrong side, tie a knot, and the extra ends – cut it off.
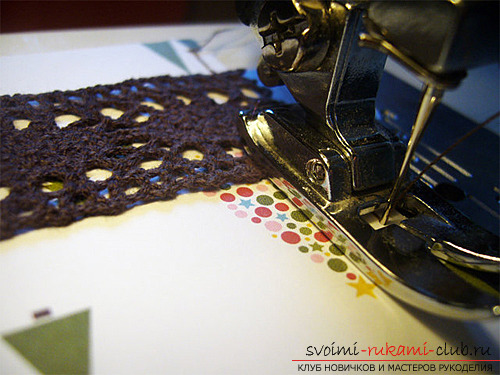 Machine stitching, firstly, performs a decorative function, and secondly, it secures the lace at the edges.
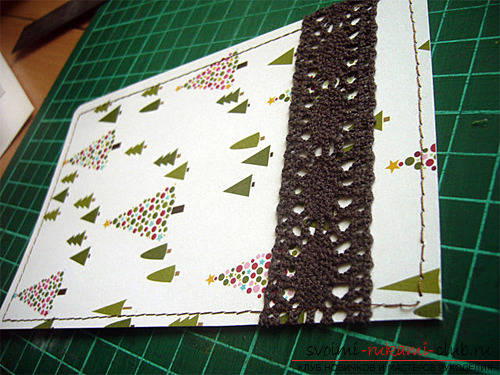 Prepared Christmas tree using double-sidedWe carefully glue the bulk tape onto the background (double-sided tape is glued instantly, so we won’t have the opportunity to move the tree a little straighter or to a better place).
 We also glue the inscription onto the bulk tape.
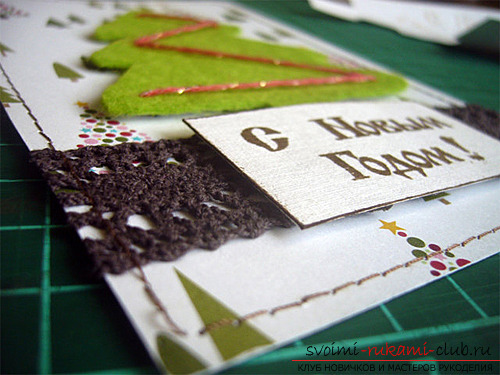 Next is a prepared background with a Christmas tree and an inscriptionGlue it onto the card base. You can glue it with double-sided tape, with universal glue, even with Moment Crystal. I usually glue the card I made to the base before I start gluing the small decorations on it. Therefore, when you press the glued paper, there is no fear that you will move or peel off small beads, flowers, etc. All that remains is to decorate our Christmas tree. Pour a small amount of PVA glue onto a convenient surface.
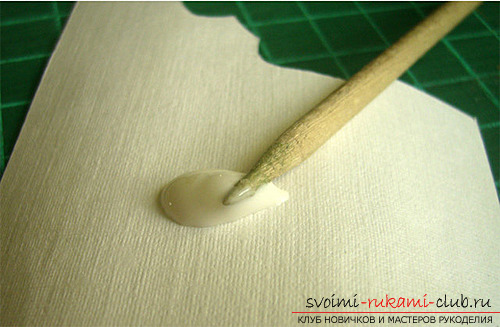 Apply with the sharp end of a manicure sticka small drop of glue on the Christmas tree in the place where we will glue the bead. If the Christmas tree were made of paper, the droplet would be very small. Felt, like any other textile, absorbs liquids very well, so the drop here will be large.
 Glue the halves of the beads onto this drop. In general, instead of halves, you can use beads, buttons or brads (decorated clips).
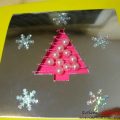
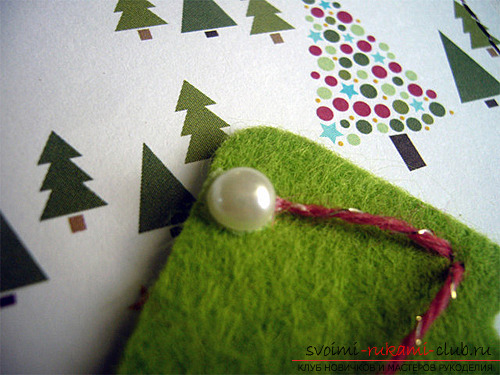 Please note that around the glued beadsSmall (1 mm) excess glue may form; later it will be absorbed, dry and will not be visible. But larger excesses need to be removed (you can use the same manicure stick).That's all, our Christmas tree card is ready!
Comments
Related posts:
 Gifts for your loved ones with your own hands
 Give your child a real treat. Colorful and original costumes make it so easy and fun. Photos and instructions
 Instructions on how to create original cards with your own hands, using improvised materials.
 This master class will teach you how to make original postcards on February 23 with your own hands.
The master class will show how to make valentines - simple cards with their own hands, such cards for children are light in performance, but very touching.
This master class will teach you how to make original postcards on February 23 with your own hands.
The master class will show how to make valentines - simple cards with their own hands, such cards for children are light in performance, but very touching.