
Felting for beginners. Master classes Video / Toys by own hands, patterns, video, MK
Making toys with your own hands is not easya pleasant pastime, but a creative process, during which small masterpieces are born, capable of pleasing, amusing and just giving a good mood. Recently, the technique of dry felting has become especially popular, with the help of which pieces of spun wool from the light hand of needlewomen become intricate figures of people, animals, heroes of fairy tales and so on. Today we try to join this fascinating kind of needlework and try to create a felted toy that will be the first "swallow" at the beginning of the creative path. 


Funny Snakes
So, we open a master class for beginners to make charming snakes (or worms, how anyone will like it!). 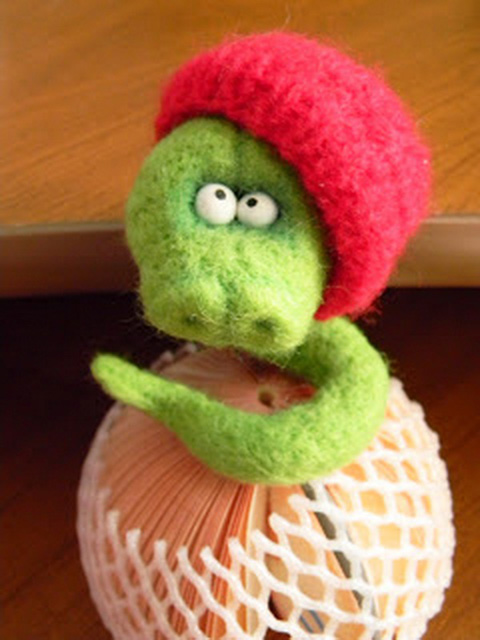 To do this, we prepare:
- wool;
- Needles No. 36 and No. 38;
- beads for the eyes (you can take ready "puppet" eyes);
- glue.
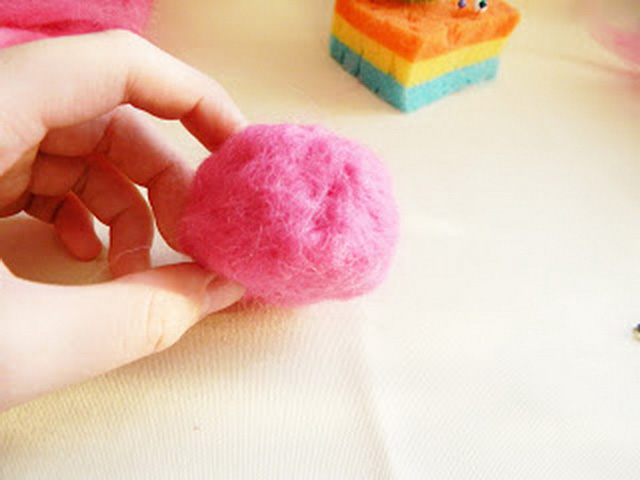
If necessary, you can use a pudding machine, as well as a wire or a beautiful stone (for a stand). 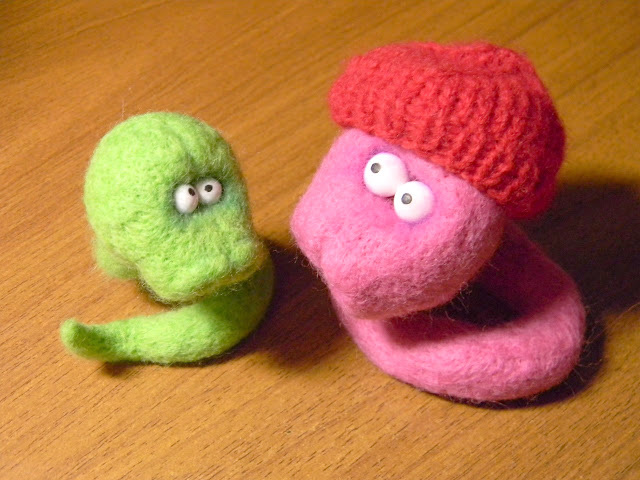 First we need hands or a puerpercarefully comb the hair, then spread it on the surface and roll it up with a "sausage". Then take the needle number 36 and start felting. You can make a skeleton toy, twisting inward a thin wire (for the spine). Untouched leave one edge - the place where the head of the snake will be. A tip for beginners! Failing a toy, gradually turn the shape to punch as deep as possible and over the entire surface. This will make it possible to properly connect the wool with each other. And the toy will turn out strong and will please many long years. For a head one more piece of a wool which it is necessary to give appropriate outlines and to begin felting is required. The ball should look slightly flattened and not very loose. And when the part is ready, we attach it to the calf and put it in one piece.
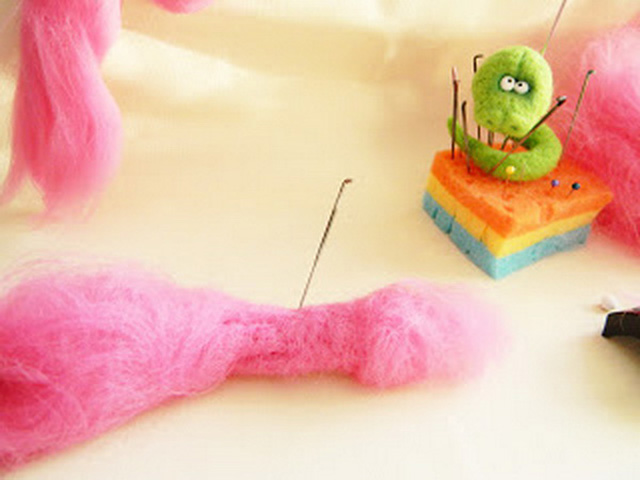
 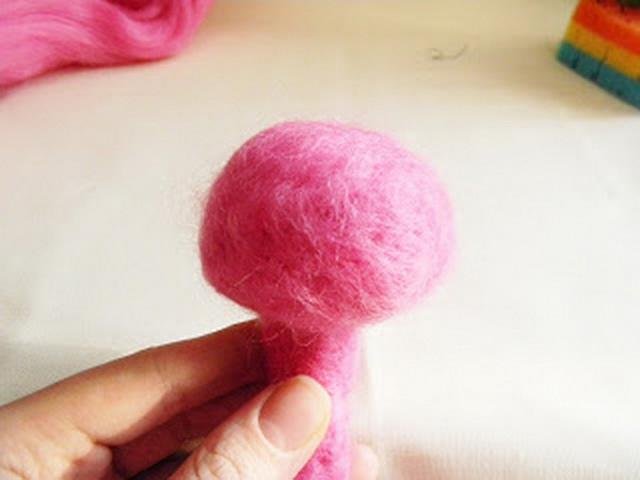 Then choose a place for the eyes. To do this, we pinch the desired area of the head with the finger, make a deepening and again work with the needle. After a while, the wool will hold the shape without the help of the hand. And after the eye sockets we make a spout. To do this, the muzzle needs to be squeezed and also choose the right place, where to start felting. Tip! The more we work in one place, the deeper it settles. After that, you should fail the surface, inserting the needle in a shallow position. And of course, do not forget to make a sponge. To do this, we use a folded piece of wool, which you need to fail, attach to the snake and again thoroughly ground. Now the snake figure needs to be rolled. To do this, it should be slightly twisted, hold the tail and knead it. Then once again do such an operation. And the tail itself will gradually begin to round off. If we did not use the wire, and there is no frame inside, "arm" with glue! To the snake does not fall and keep the shape, it can be fixed with glue on the stone.
 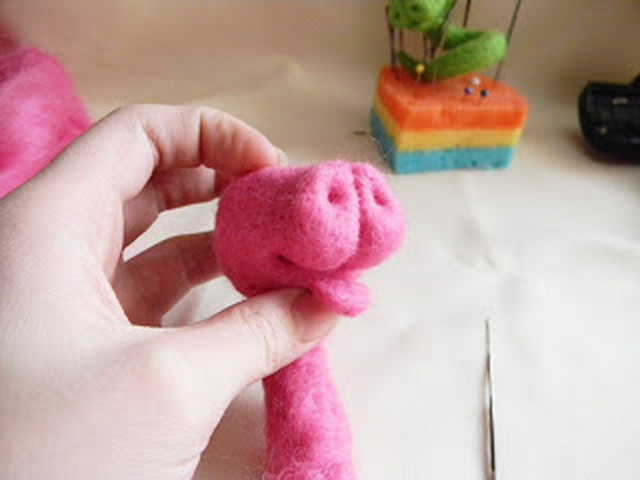 Those who wish to give the snake the image of a sleeping onebeauties, you can not make eyes. Our sleepy will sweetly luxuriate on a warm stone and dream. But if the tailed fidget is awake, you need to perform one more stage of the work. In the finished eye sockets, you need to paste "puppet" eyes or white beads, putting on them two dots (pupils). After this, a thin needle No. 38 shallowly treat the surface.


 Complete the image of the finished toy with the help ofcatchy accessory. It can be a hat, a bow tie, a bow or a flower - depending on who turned out: snake-girl or boy. And that the baby was not bored, you can repeat the "experiment" and in a few hours make him a good friend of wool in contrasting colors.
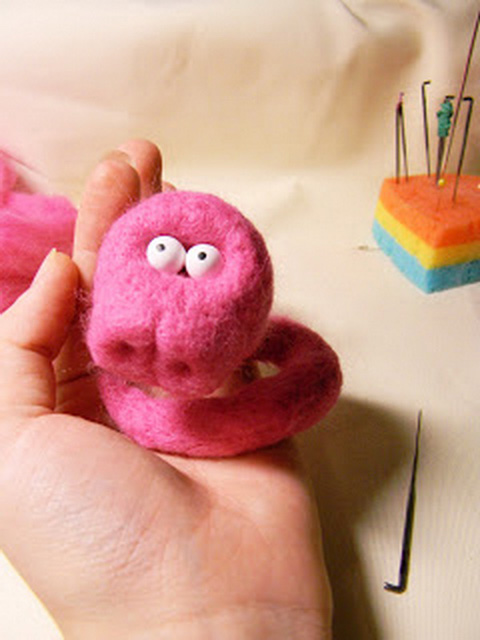
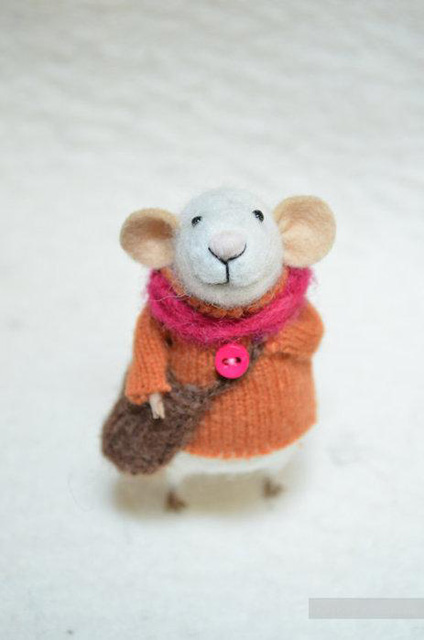
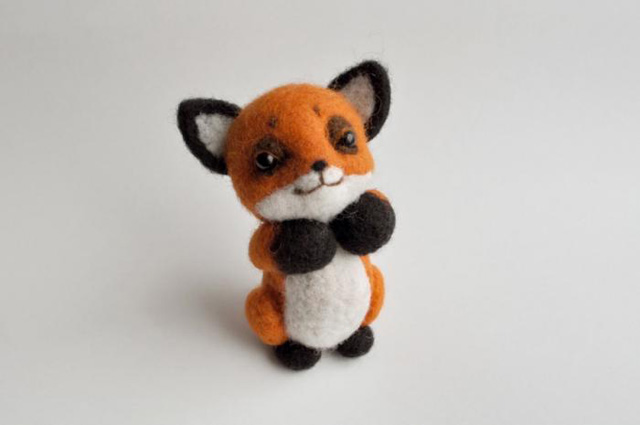
Little Ratatouille rat
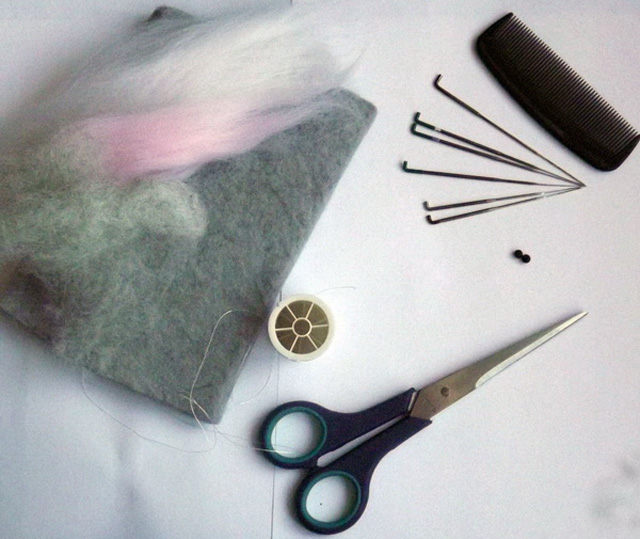
No less interesting to the novice masters will seem a master class to the creation of this little rat. It takes only three hours to produce it, patience, desire and the following materials:
- White wool (main color), gray carded (skin), pink (paws, ears and tail);
- felt base or mat for felting;
- set of needles for felting (№ 36, 38, 40);
- thin comb (separate the pieces of wool from the combed ribbon);
- beads for eyes of black color;
- scissors (remove the protruding wool);
- monofilament for whiskers of white color.
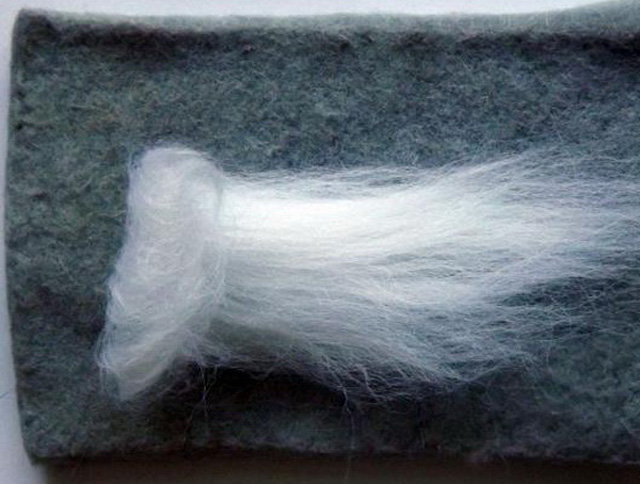
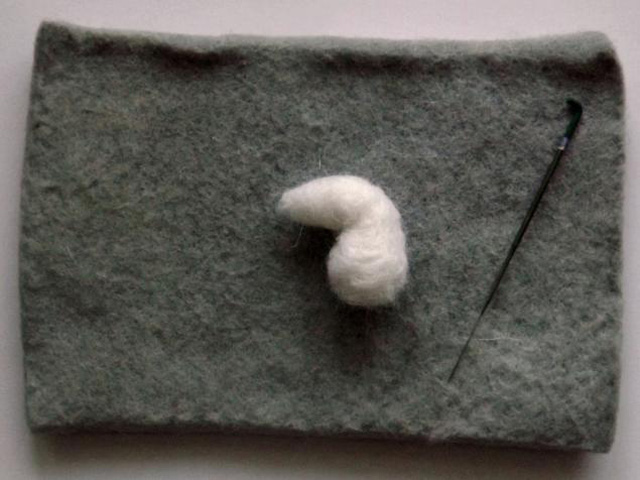
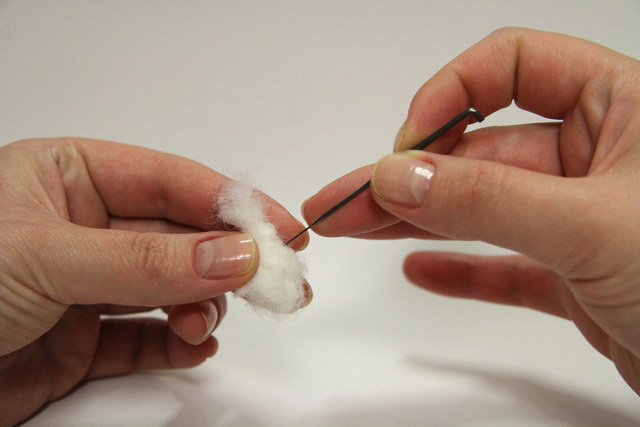
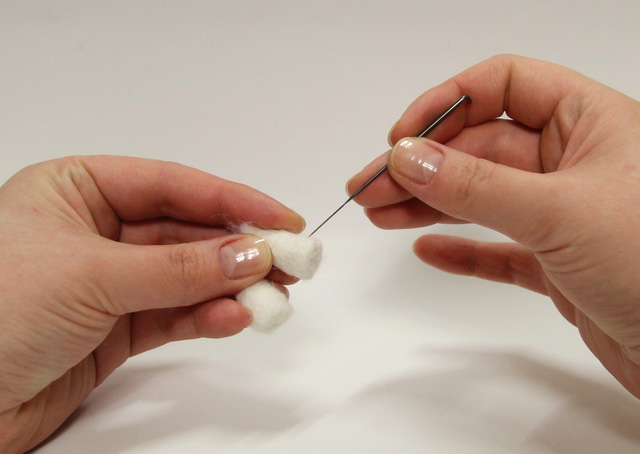
 First of the combed tape you need to take a piecewhite wool and make a roll from it. Then wrap the edges and start felting with needle No. 36, giving the wool a cone-shaped shape. It should be remembered that in the process of felting the volume of wool is reduced by half. Separating the hair with a comb and rubbing it between the fingers, tangles the hair and do something like a cloud. Thanks to this in the process of stalling there will be no sharp transitions. From the soft workpiece, make the head of the rat, bending the upper end of the cone and passing the needle at the location of the fold for fastening. Then we form a gray cardo pattern. The muzzle is adorned with a wedge that comes over the cheeks, and on the back we perform a spot of arbitrary shape.
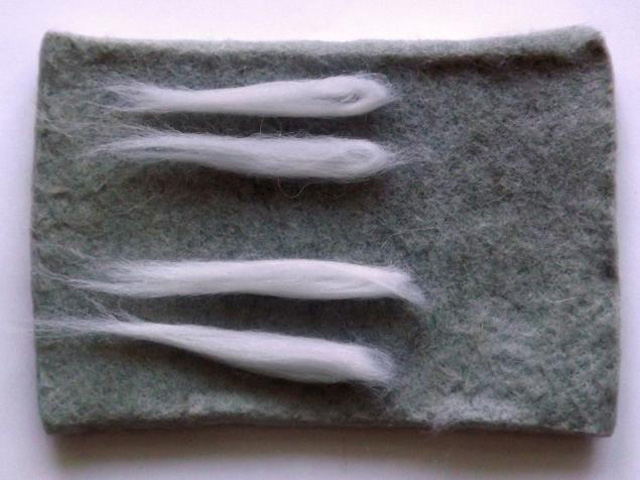
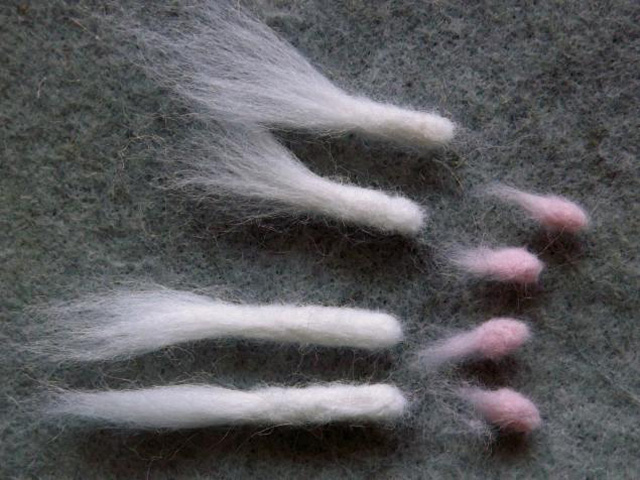
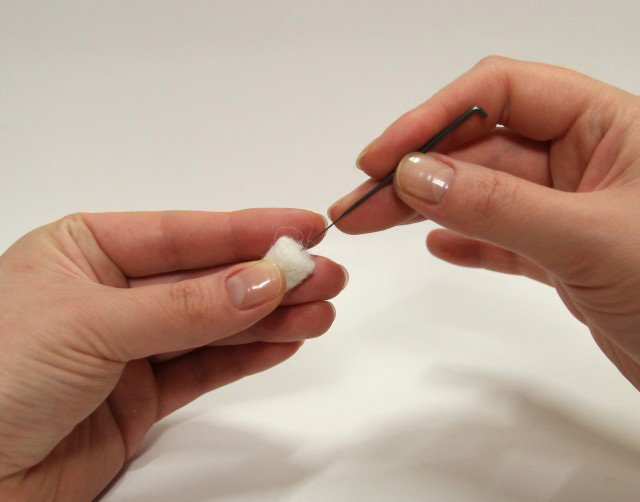
 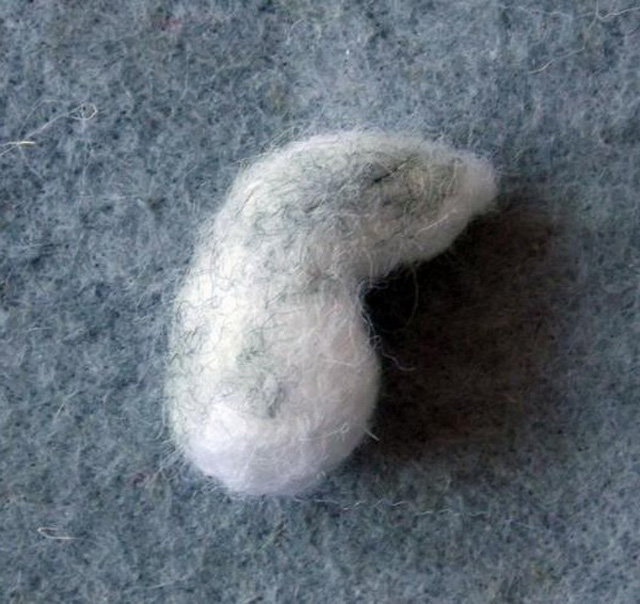 The paws are formed from four strips of wool (forthe upper paws are short, the lower ones are longer). To make the paws the same shape, we make them parallel. For this, we need to roll them in half and roll with two Needles No. 38 along the wool strip, holding them with two fingers and gradually turning. Then we make the palms . To do this, we place pieces of pink wool with needles No. 38 and 40. Then, we put the prepared palms to the paws and process the surface with needle No. 40. Finally make a small bend.
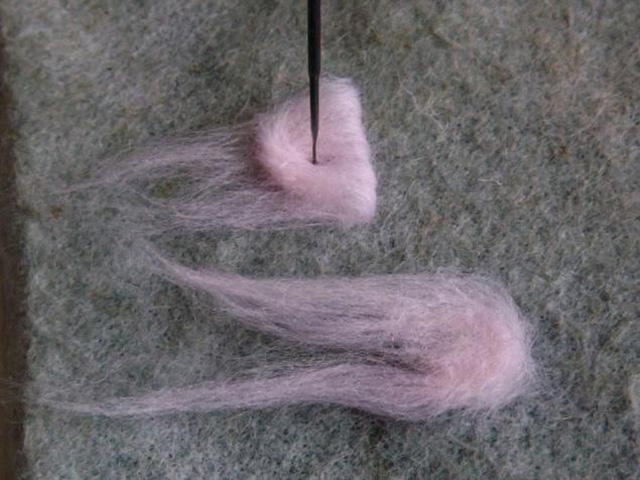
 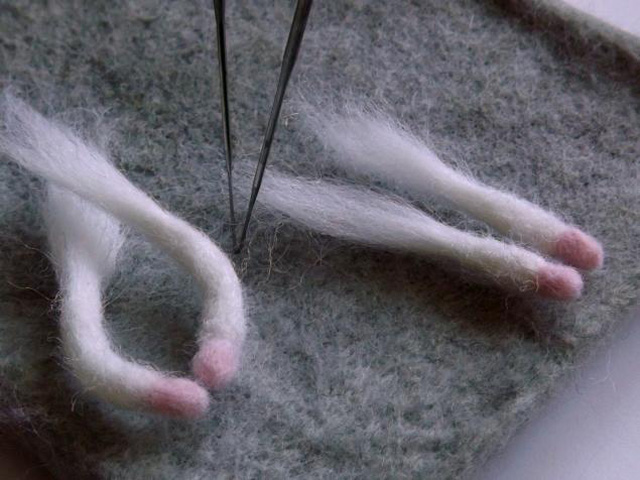 The tail should be piled according to the same principle asand feet. But it should not be very dense, but on the contrary - soft and supple. To make ears, stripes of pink wool is added in half, add a little to the center, then we fail and add it in half. Then on both sides you need to fail, the edge to be worked with a thin needle and make a deepening. The bases of all parts of the body should be slightly inflated and sealed to the trunk. Then the final stage begins - the design of the toy.
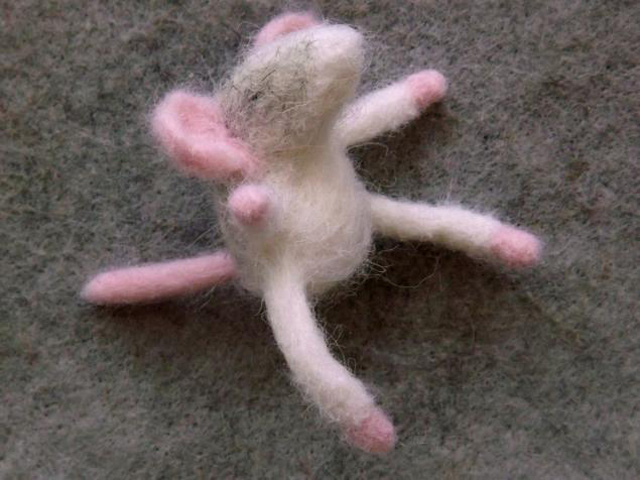
 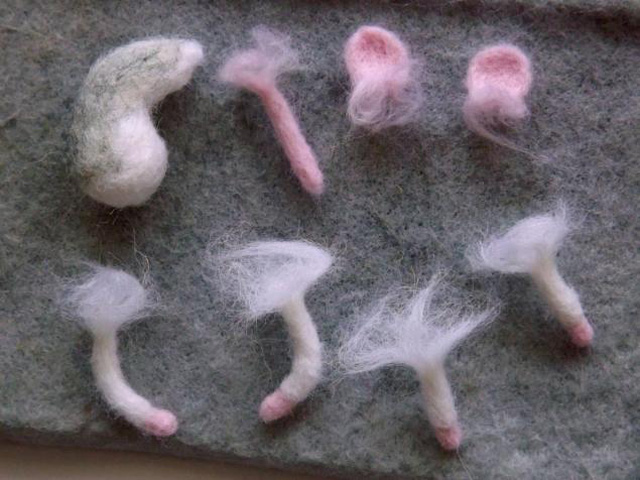 First, a thin needle needs to be treated with the tummy andto form the navel. Further, it is necessary to bend the paws and, on the same principle, treat the muzzle and back. With black hair we perform the mouth and we stick the nose. Glaznitsy should be thoroughly poured, then glue or sew sights and mustaches.


 In the end, you can scissor around the entire body to cut off the protruding hair. And our little rat is ready to poke his curious nose into the affairs of the owners!
Guest from the Ice Age
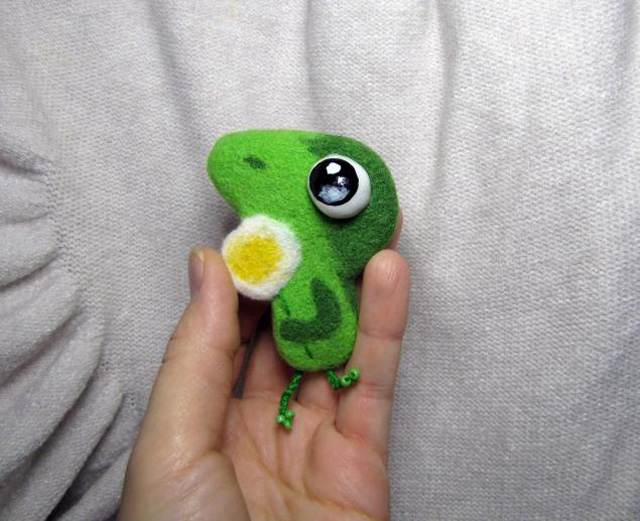
Master Kalass from Elena Smirnova (http://utichka.livejournal.com/152140.html) 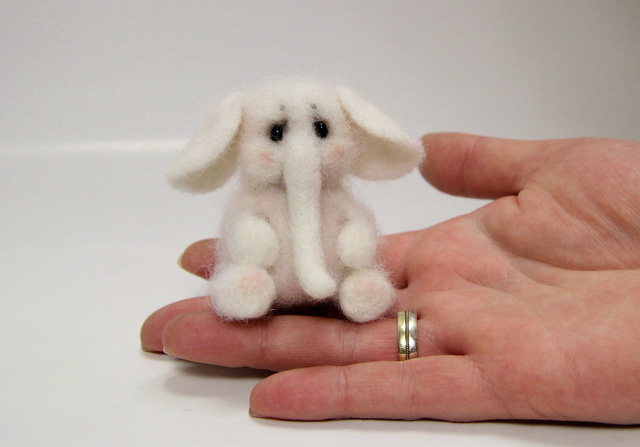 A sea of pleasure and a good mood will give andsmoky mammoth, made in the technique of dry felting, which will take a little longer, but the result will certainly please the needlewomen. For work we will need:
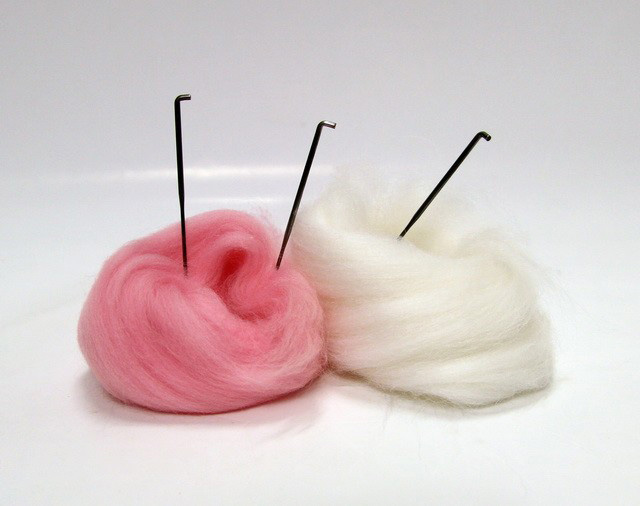
- wool white (ayvory) and pink;
- needles No. 36 and 38, as well as a needle with a reverse tooth;
- black bead-eyes and glue;
- a sponge for dishes;
- cosmetics for toning.
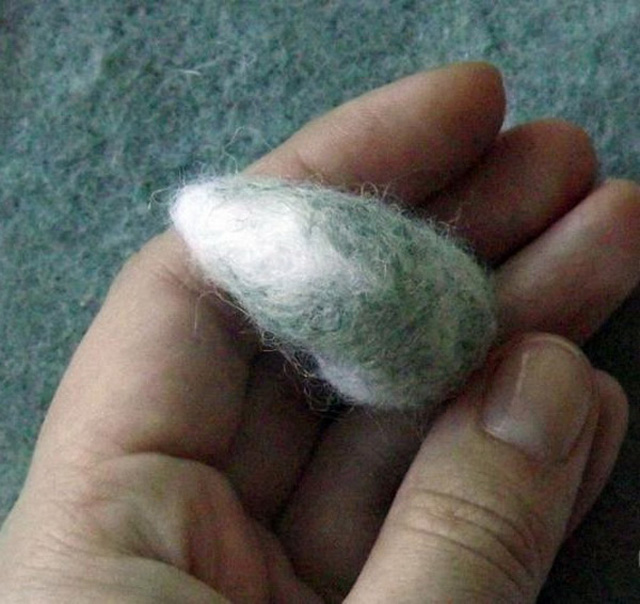
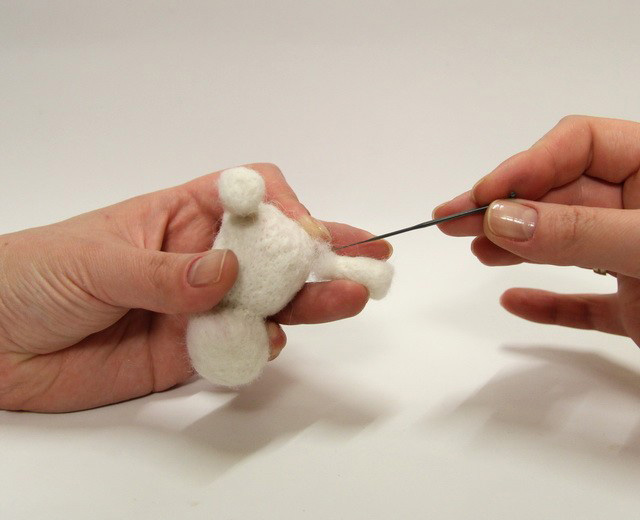
 We begin work with the teardrop-shaped billet of the trunk,deeply sticking the needle so that the wool condenses from the inside. The place of connection with the corpus is left untouched. Similarly, we make the preparation of the head, after which the details are tied to each other.
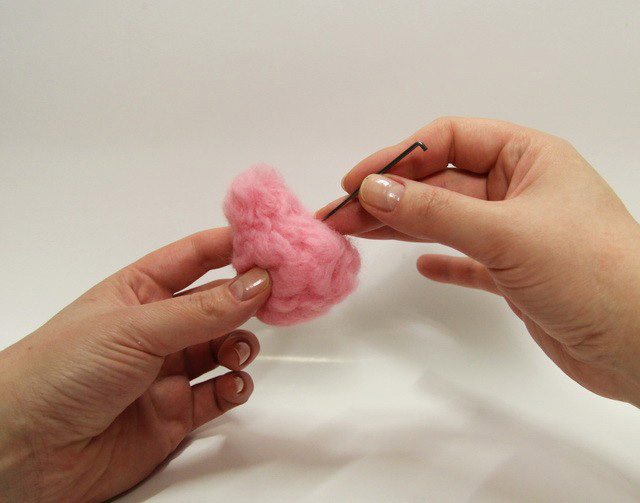


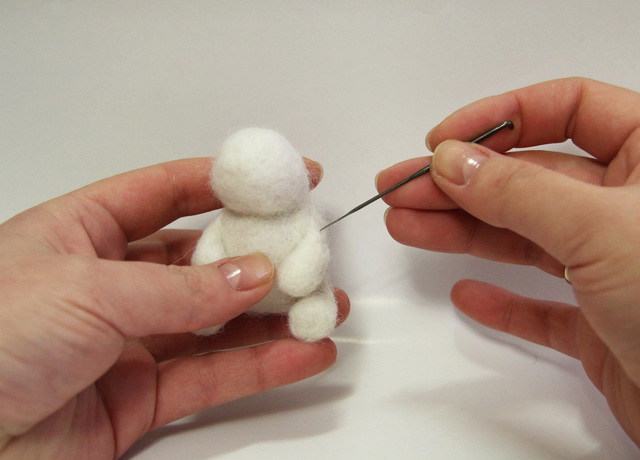
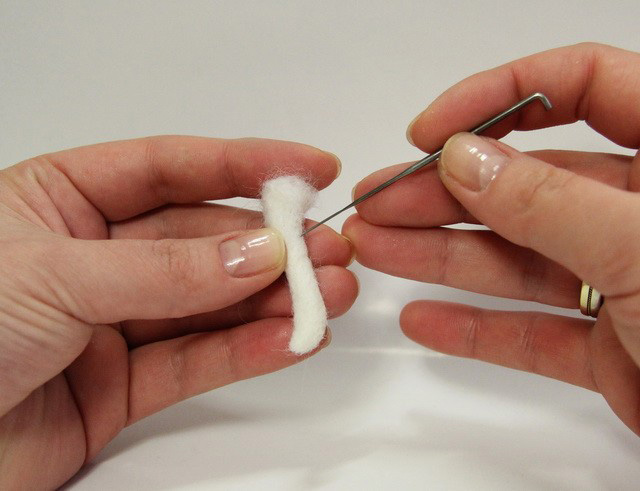

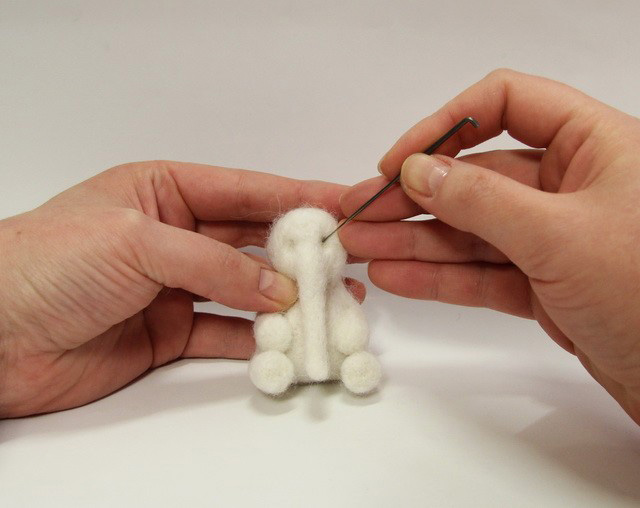


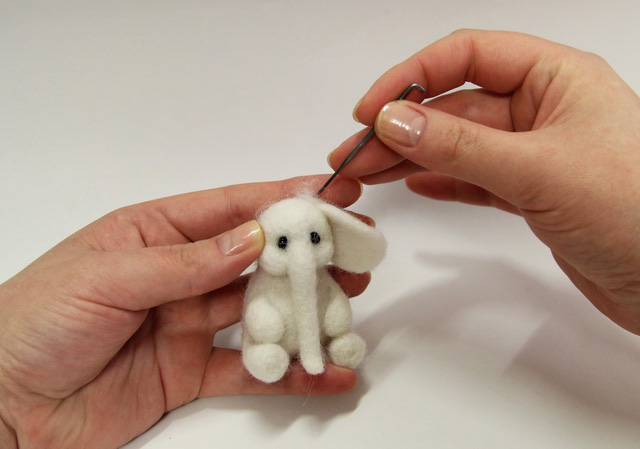

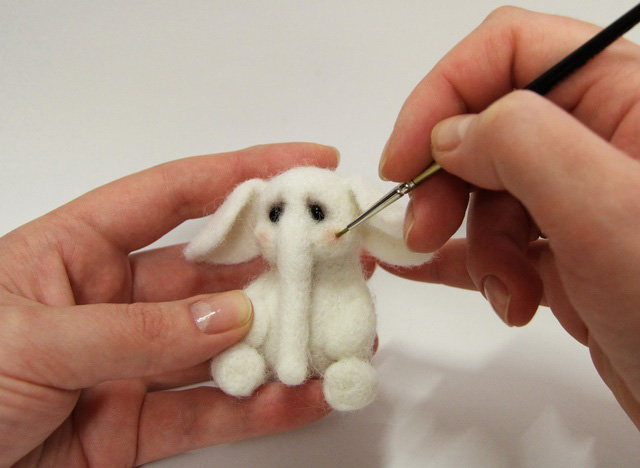


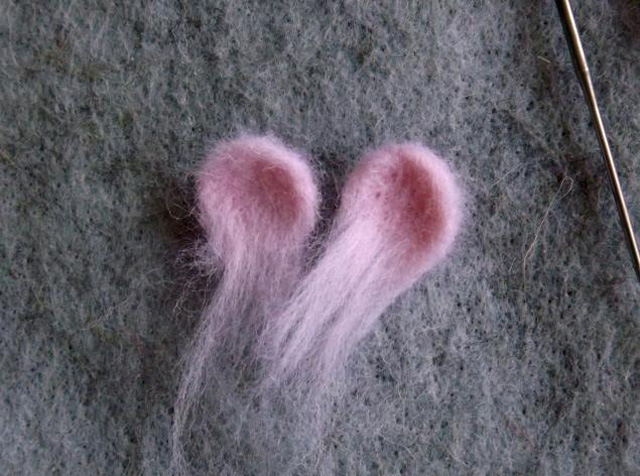
 Next, with the help of white wool, we fall downA blank so that the internal pink shade does not shine through. And well we fail the received figure. In those places where further work is supposed to be done, the wool must be pliable and loose. Next, we make and attach paws, trunks, ears and tail, and glue the eyes into ready grooves. With the help of decorative cosmetics, slightly toning the eye area, cheeks and the inner side of the ears. And in the end we go through the whole surface (except for the cheeks, trunk, tail and the edges of the ears) with a tooth with a reverse tooth, which will draw pink hair behind it, and the mammoth will get a beautiful smoky color and a gentle edge.
 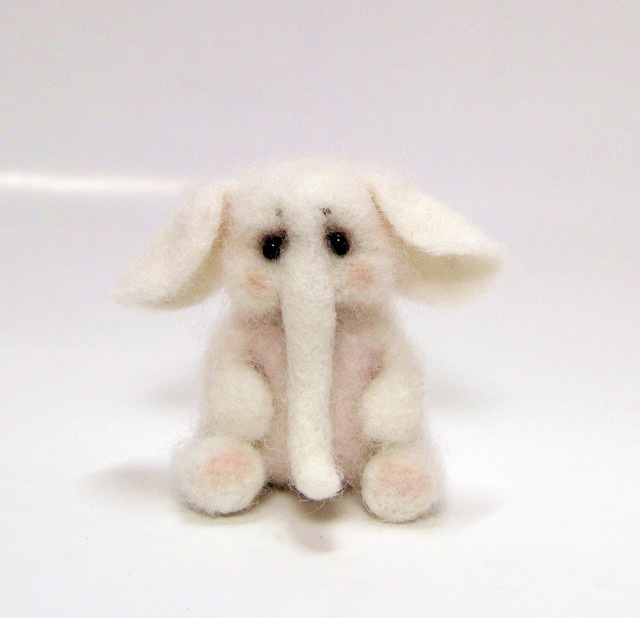 Felting toys is a very interesting process andfascinating kind of needlework. And despite the fact that patience and time will be required, at the end of the work there will be guaranteed an incomparable pleasure. Starting with fencing lessons for beginners, and with simple ideas, you can gradually move on to more complex forms and improve your skills. Be creative, create, and let your faithful companions always be desire, inspiration and only positive emotions!
Comments
Related posts:
 Cat, cat, kitten - dry felting out of wool, master classes / Toys with own hands, patterns, video, MK
 Master classes: Angels from salted dough. Video / Toys with own hands, patterns, video, MK
 Felting lamb master class / Toys with their own hands, patterns, video, MK
 Felting out of wool: bullfinch, master class / Toys with their own hands, patterns, video, MK
 Dry felting out of panda wool, master class / Toys with their own hands, patterns, video, MK