Free master classes on creating wisteria from beads, tips and advice on making blossoming brushes and decorating the trunk. step-by-step photos.
Wisteria is a very famous tree growing inJapan. It occurs almost everywhere. This amazing plant is depicted on a kimono and paintings, then its bright branches flow smoothly like a fontanel, then they sway, like waves in the wind, and sometimes they are thrown down by the destructive force of the waterfall. This fairy tree symbolizes female beauty. Try to create for a loved one such an amazing gift in the form of a bright wisteria made from beads.
Fabulously beautiful wisteria of beads
For work it is necessary to prepare a green cabin,transparent beads of white, as well as blue, beaded and aluminum wire, brown threads of mulina (suitable and silk). In addition, the decoration will require stones, beads, moss, white and brown acrylic paints, putty, gypsum, PVA, aerosol varnish for cars and a brush, it must be rigid. 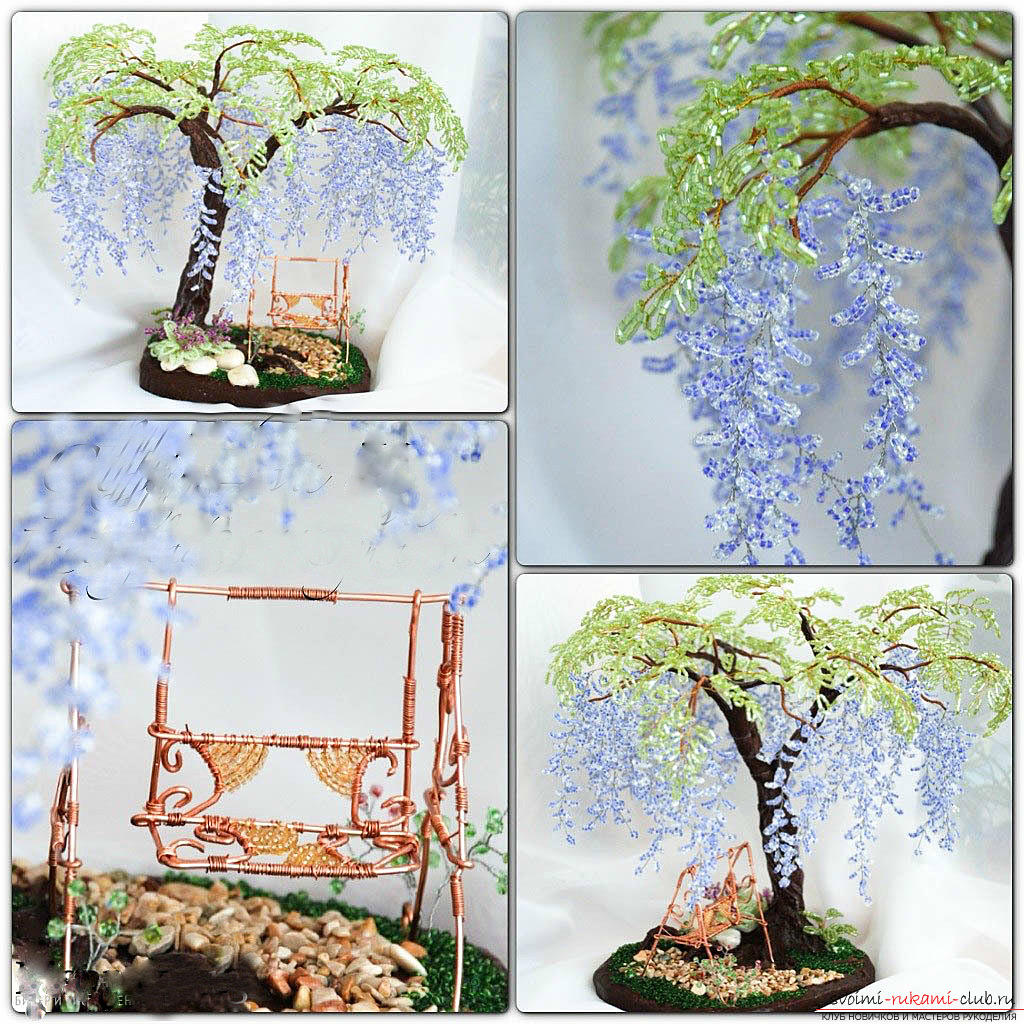 When all the necessary tools and materials areprepared, proceed to create the product. Weave twigs In this work we use stitchers. Take the wire, step back from the tip 10-15 cm and start making the eyelets at a distance of 1 cm from each other. Each loop should have 12 beads, you need to weave 9 identical loops. Leave the last loop about 10-15 cm and cut the wire.
 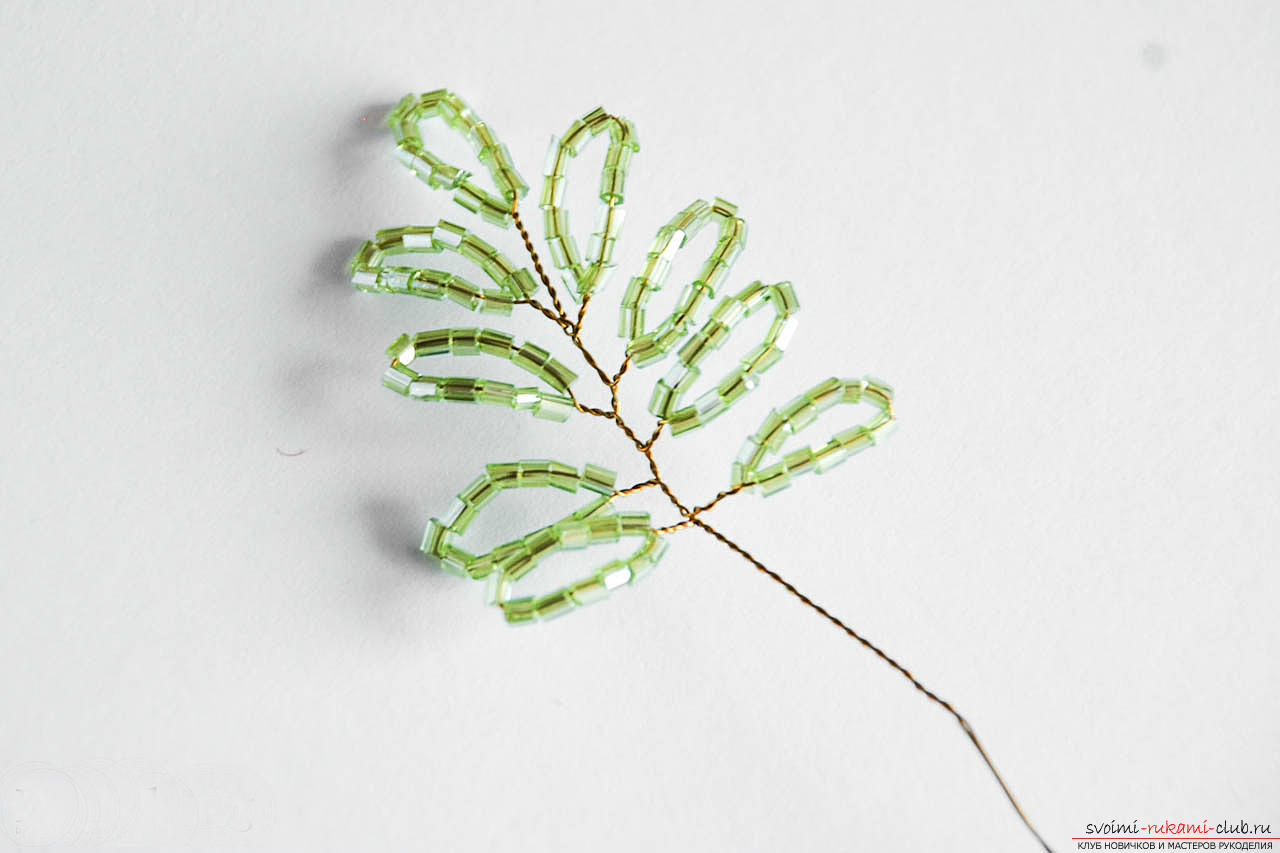 Now the ready stock must be collected in a twig. In accordance with the illustration, select the center loop and twist the wire, as in the illustration. Then the remaining loops are twisted in pairs. By combining the last pair, twist the wire another 3-4 cm down and cut the remaining tips. You can choose another number of loops, this will determine the length of the workpieces. The main thing is to weave an odd number of loops. Braiding Wrist Brushes In order to make wisteria brushes, you will need two shades of beads - white and blue (lilac). When choosing materials, consider one important point - beads should be monotonous: matte, rainbow or transparent.
 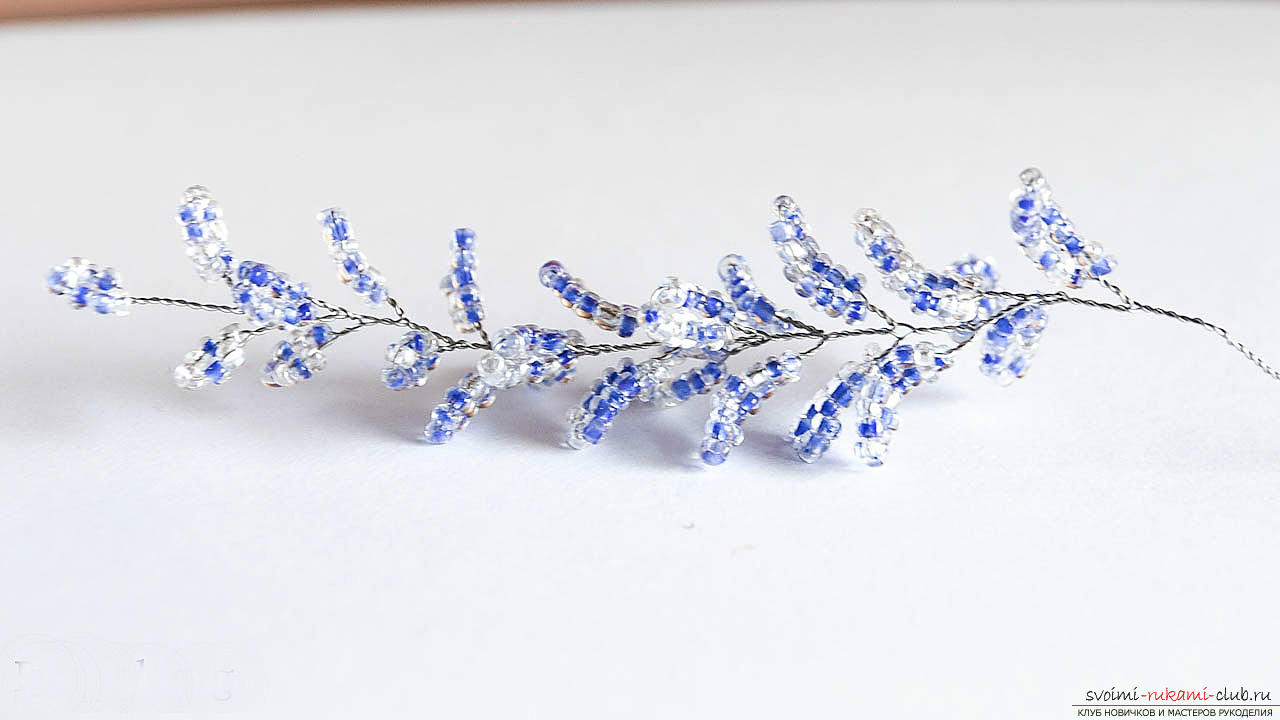 As in the previous step, take the wire,retreat about 10-15 cm. Start creating loops at a distance of about 1 cm from each other. You need to weave 9 loops of 15 beads, the next 3 loops - out of 10 beads, then retreat 2 cm and make a loop of 7 beads. Next, you need to weave the same pattern, but in the reverse order. As a result, it remained to retreat from the last loop of 10-15 cm and cut off excess. Collect the workpiece by placing a loop of 7 beads around the center, twisting all the loops in pairs, after twisting the pair of loops twist the wire and cut off excess for a distance of about 4 cm. Assembly of twigs To create twigs, use a frame. For him the wire of average thickness, diameter should be not less than 1-1,5 mm, you need about 25 cm. All the workpieces are fixed on the frame with threads of similar color. All other branches are spirally aligned. To make one branch, you need 3-5 workpieces. Example you can see below in the illustration.
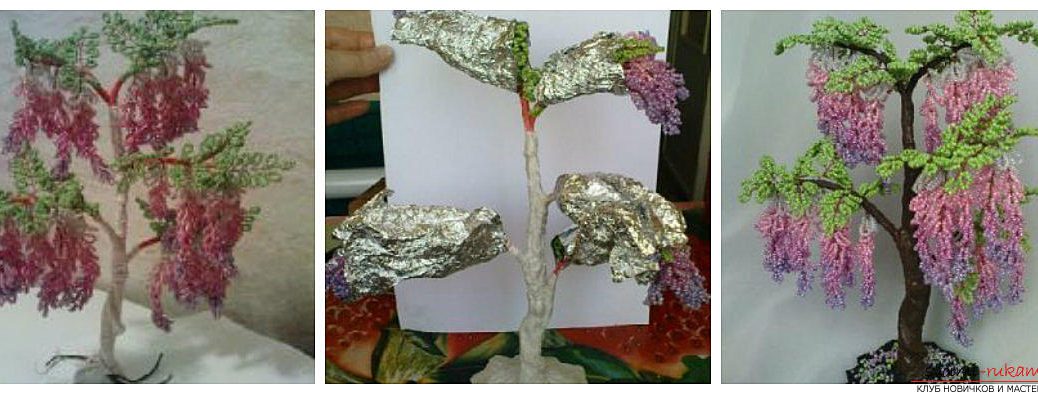
  Of all the twigs that you have, you needcollect the branches of the wisteria itself. Take an aluminum wire with a diameter of 2 mm and a length of about 35 cm. To make a branch, use one brush of green and the other in blue. Make at least 16 pairs. The photo shows how the branches for wisteria will look. The crown must be formed in accordance with the wisteria in the realities: branches with leaves are led upward, and the brushes with flowers fall to the ground.
 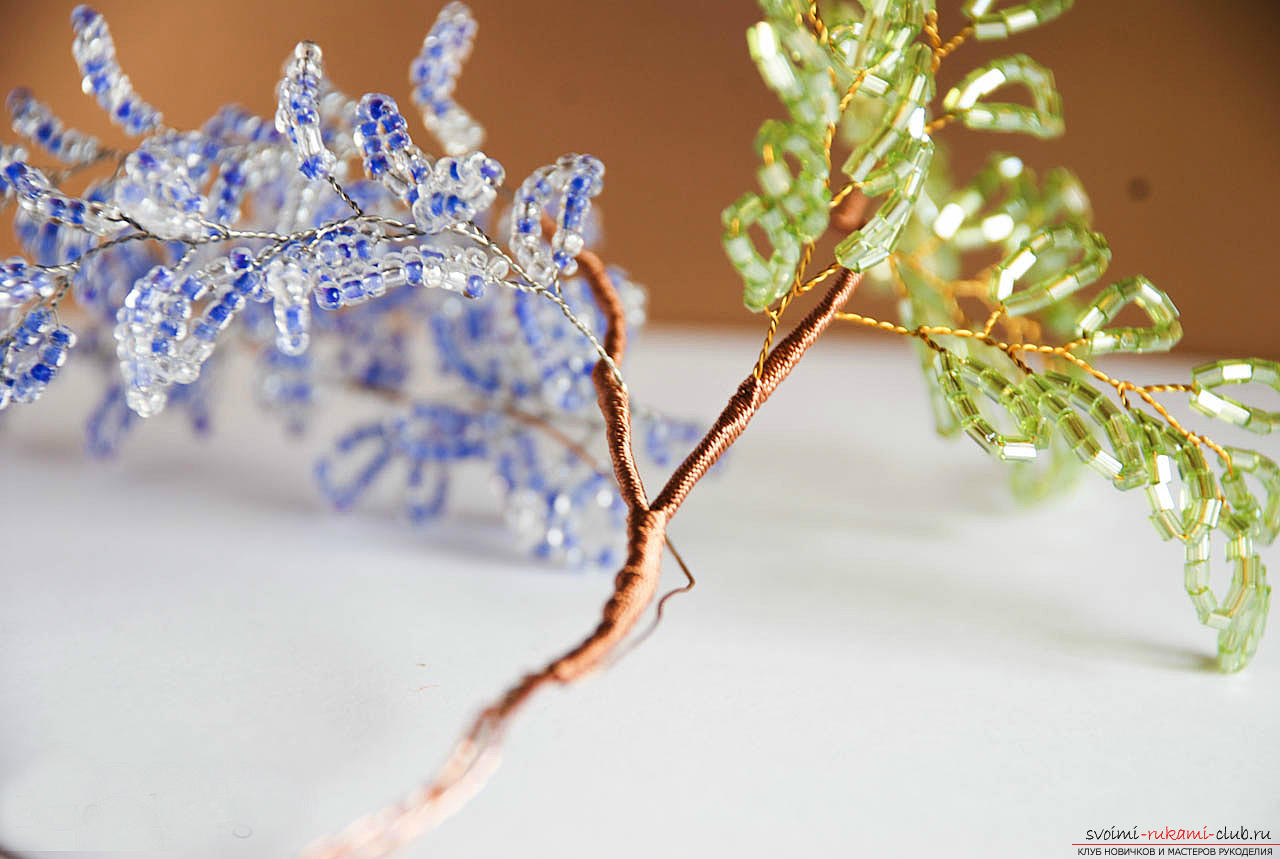 When working, the wire twists in a spiral -so you can create a characteristic relief of the tree trunk. Making the trunk and fixing the tree The first step is to make a stand. Prepare a plastic mold, cover it with a film and fill it with a mixture of PVA, water and gypsum (it must be brought to the consistency of sour cream). Fill the base to a height of 2-3 cm. You can place the tree at your discretion in the center or at the edge of the podstavochki. Hold the frame for about 15 minutes to allow the solution to take, then leave it for final drying. The podstavochku can be pulled out after 2-3 hours.
 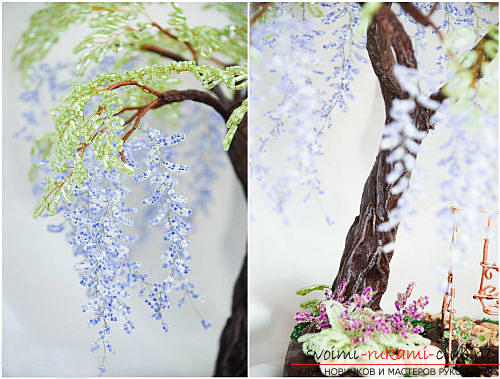 To decorate the trunk, prepare a similarmixture and cover it. At the bottom of the trunk you need to make a thickening - so it will look more natural. After the solution has dried, paint the trunk and branches with acrylic paint of brown color and allow the paint to dry. To create a relief effect on the trunk, take the black paint and start applying vertical lines on it, use a hard brush. Lower part with thickening paint more saturated. Decoration of wisteria On desire you can find the instruction on manufacturing of a swing from a wire. Glue to the basis of the decor in the form of flowers and other plants from beads. Beautifully look tracks from pebbles, sand and seashells. These elements are fixed with PVA (the layer must be thick enough). If as a decor you have chosen large pebbles, then it is better to fix them with a solution of gypsum and glue. Original will look and grass from beads.
 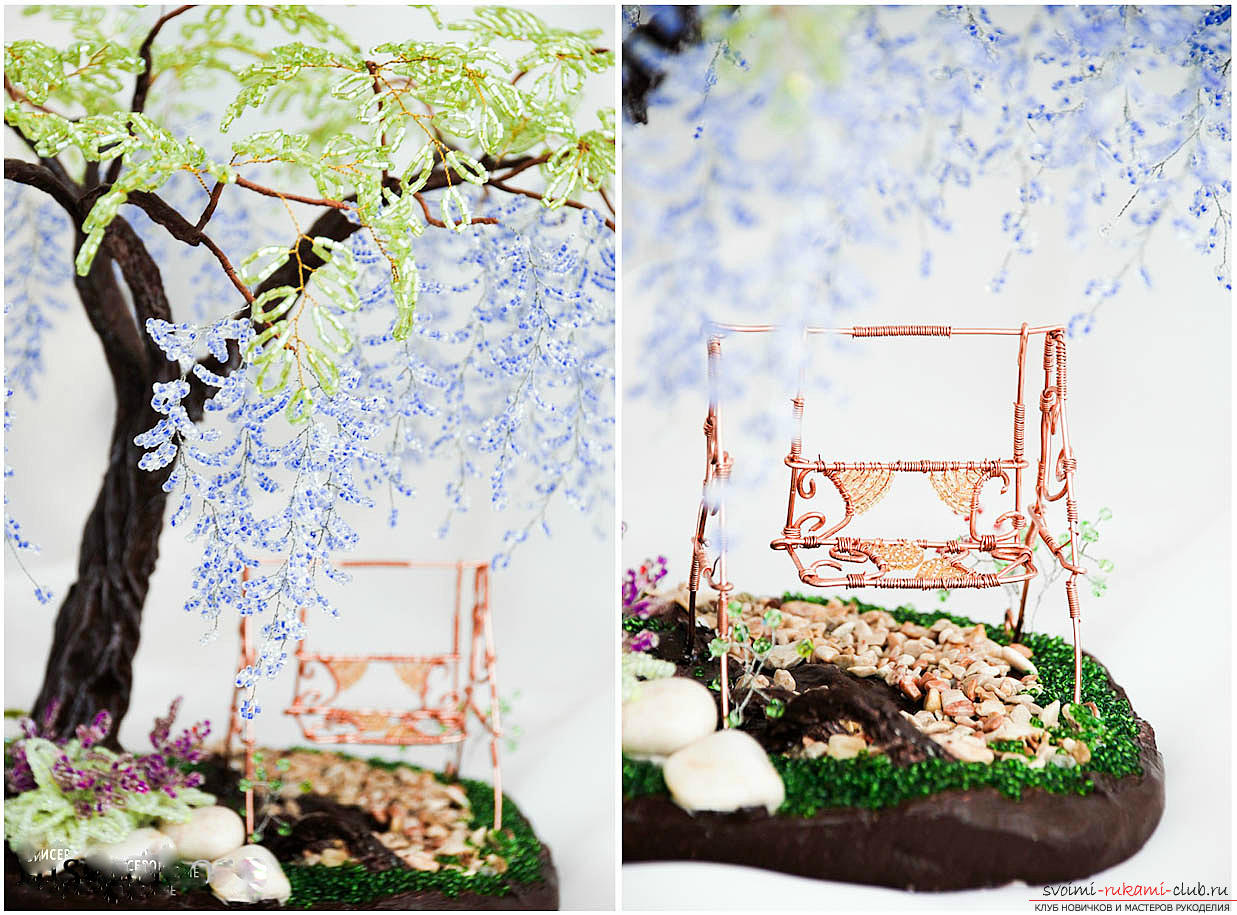 In the end, cover all the work with aerosol varnish and wisteria of extraordinary beauty is ready.
Yellow wisteria
This wonderful yellow tree weaveabsolutely easy. The whole stage of work does not involve surprises. It's enough just to study the picture of the tree, presented in the photo, to create something like this with your own hands. Below you will find only tips on how to weave it, which will make your work easier. 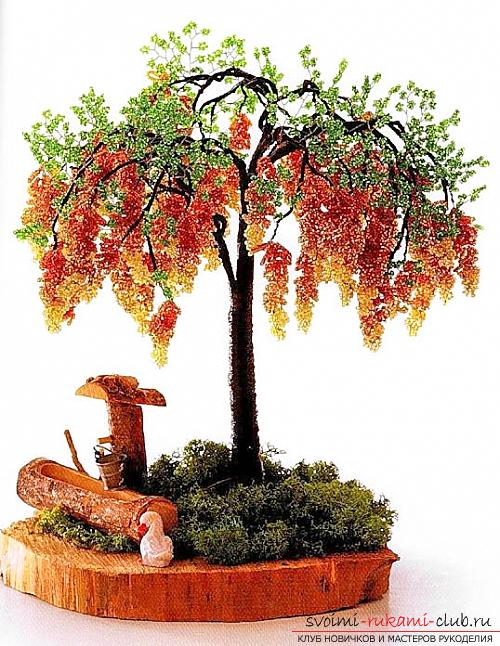 The process begins with weaving branches. They are made from beads of three different shades (yellow, orange and light orange). To make your wisteria come out more lush, you need to make at least 50 brushes. When creating branches, increase the loop to the bottom. Braid in such a sequence: 5 yellow loops, about 10 loops of beads of light orange color and 10-14 loops of orange color. Adjust the length of the brushes to your liking. Creation of green twigs. Here we use the same principle of weaving twigs from beads. Create branches from green beads and wires of the same color, they should not go out too thick. Make branches of different length, containing from 5 to 9 petals. You will need about 45 similar branches.
 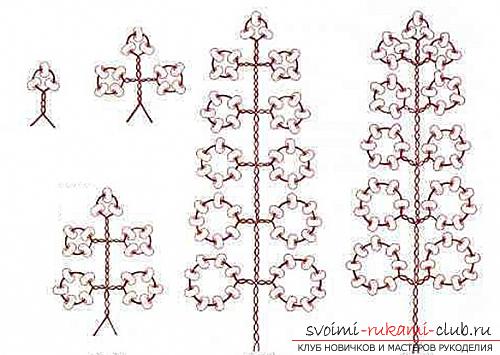 Formation of the crown At this stage of work as welleverything is very simple. Prepare a thick wire and begin to fasten individual elements to it. First, fix the color brush, then attach the green branch. On the same branch, make a few more branches from the brushes and twigs. Assemblage of a tree When all twigs will be collected in a tree, in addition wrap up all trunk a thick wire. You need to do this carefully, so that the product is even. In addition to the trunk, you must wrap and twigs, but do it best with the help of thread, and the trunk is additionally wrapped in floral tape. The tree can be mounted on a wooden stand. Just drill a hole in it and secure the barrel inside. Decorate the stand with moss, and your yellow wisteria is ready.
How to make brushes from beads for wisteria
That at you it turned out beautiful, bright and magnificentwisteria, be sure to focus on the manufacture of brushes. Below is a master class for creating them. For work it is necessary to prepare a fishing line, beads of several shades and a needle. Weaving of flower brushes Type beads of pink and red color on the fishing line with the help of a needle. Carry out a loop of 9-11 beads and fasten it, for this you need to pass the needle with a fishing line through two other beads. 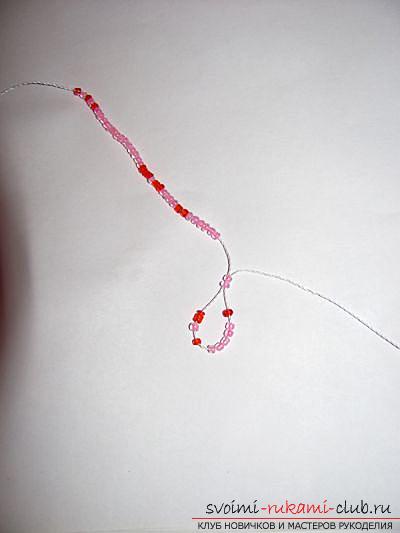 Perform the same procedure a second time.
  So you need to weave the whole brush,increasing the size of the loops by adding additional beads. All inflorescences are fixed with a single bead with a double knot. To wisteria turned out lush and beautiful, you need to weave about 70 such inflorescences.
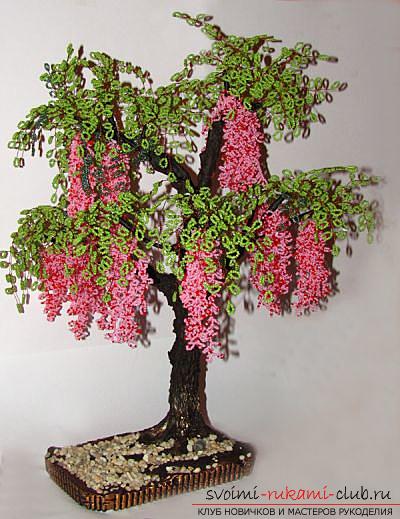
The most delicate wisteria from beads
When you look at such a beautiful tree, thenit is very difficult to believe that it was made by hand. Inflorescences shimmering in the sun, look like living. However, there are a lot of efforts to create them. But still, with maximum effort and having studied the master class presented below, even a novice craftsman can make such wisteria. To work you will need beads of different colors, wire of different diameters, glue, foil, bottom of a plastic bottle, alabaster and brown paints. The scheme for creating branches for wisteria is simple, but requires utmost attention. Take a thin wire (0.3 mm) and string on it 6 beads of purple and twist them in a loop. 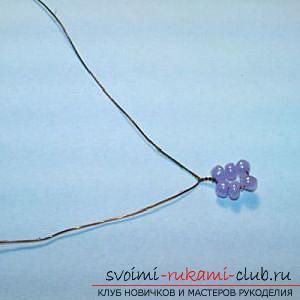 Next, on either side, make two loops along the7 beads (the color is the same). After that create two more loops, but already consisting of 9 beads of different colors. Then increase the number of beads in the eyelets to 12. In the total, make as many loops as illustrated in the photo below. There you can see an example of a combination of different colors.
 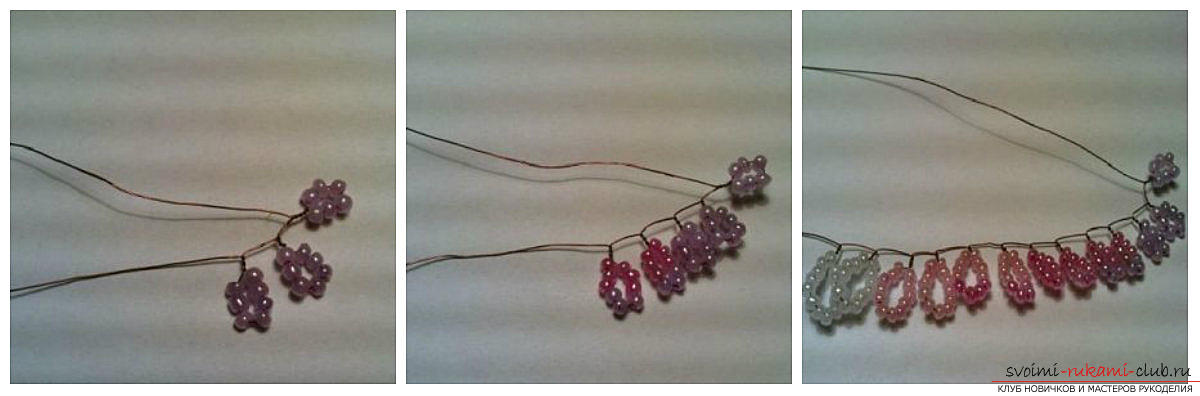 The second side needs to be formalized in the same way. Combine the brush, twisting the wire so that the loops are arranged in pairs. When the work is done, bend all the loops to the top. For wisteria to turn out lush and beautiful, you need to make at least 30-32 similar brushes.
  Now start creating green twigs. To do this, prepare a wire with a diameter of 0.4 mm and twist 11 loops consisting of 10 beads. Twist the loops in pairs, to get a full twig. You need to make them the same amount as the brushes (30-32 pieces).
 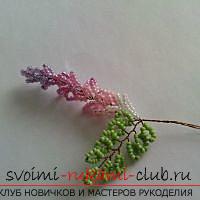 Connect the brushes to the leaves and proceed to theassembly of wisteria. For these purposes, you will need a wire with a diameter of at least 1 mm. Connect it with a couple of twigs and wrap the mauve with brown threads. Then retreat about 1 cm and reattach another twig. In this way, wind four branches in turn. Make four identical branches, and to the fifth add two more separate details.
 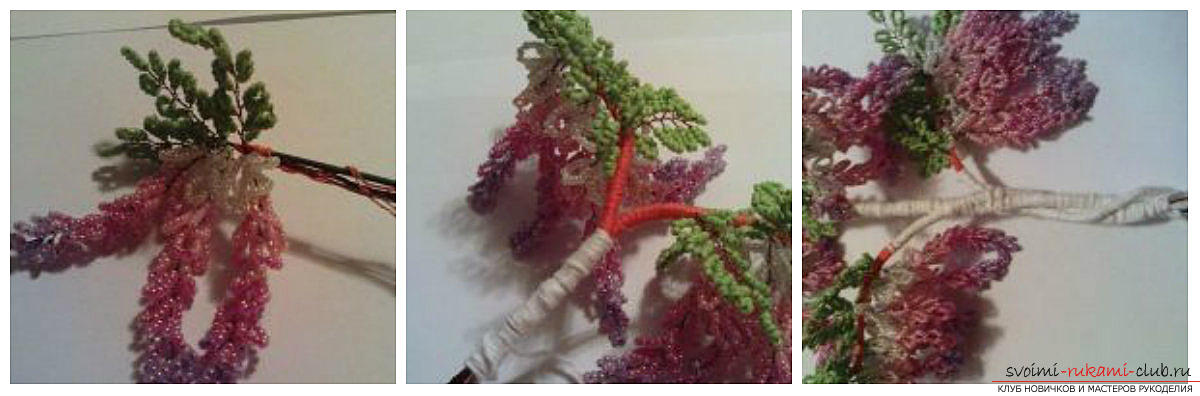 Now you can start assembling the wisteria itself. The top will consist of two large branches, connected by a wire with a diameter of 3 mm (at the end they will need to be wrapped in brown threads). After that a little lower, fasten one more branch, it will also need to be wrapped with a thread. The remaining twigs should be threaded to the bottom. In the same way, attach all branches to the trunk, wrapping the base with threads.
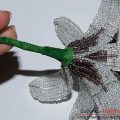
  After that, start making the base. Prepare a mixture of alabaster and PVA glue in a 1: 1 ratio, pour it on the bottom of a plastic bottle, insert it inside the tree and wait until it dries completely. At this time, wisteria should be maintained or invented any props so that the tree does not warp. To avoid possible contamination of the branches, wrap them with foil, then the trunk and twigs must be treated with the same mixture. Leave the product to dry and then cover it with a brown paint in several layers. The stand can be decorated with beads, an example can be seen below. As you could see for yourself, creating such a wisteria is a laborious process, but the result is worth the effort. The most delicate wisteria will become a bright decoration of your house, and you will not think of a better gift. In a separate category of work can be attributed and the creation of supports for trees from beads. And what only do not invent experienced masters. At the base of the trees you can create a variety of paths, ponds, swings and other buildings of small size. But novice craftsmen should always start small. The main list, which will be needed for decor at the very beginning, is pebbles, beads, beads, moss, etc. Having seen such luxurious trees, it is very difficult to imagine that these products are laborious manual work. Bright brushes, flickering in the day and evening light, are so similar to the real ones. The creation of such trees as wisteria is a very tedious process, and will take you more than one evening. But if you can understand the smallest details, then the work will enthrall you, and you yourself will not notice how to immerse yourself in the fascinating world of beading. In detail, disassemble all the master classes presented above, and you will be able to independently invent new variations of the execution of these wonderful blooming trees from beads.
Comments
Related posts:
 Free master classes to create modular origami balls, step-by-step photos and description.
 Crafts from paper for young children, free master classes to create gifts from paper on March 8, tips and phased photos.
 Free master classes on weaving tiger and white lilies from beads with photo
 Free master classes to create colors with step-by-step photos.
 Free master classes with step-by-step photos on weaving earrings from beads.