Gifts for mom with their own hands, how to make a gift on March 8 with their own hands, advice and recommendations for making crafts with children.
For all the big holidays in kindergartens beginwork on crafts for parents. And on March 8th - not an exception, crafts for this holiday are a mandatory item in all educational programs of kindergartens and primary schools. Such classes teach small children to create all kinds of crafts from the most ordinary objects, and also take care of their loved ones. An odd job for your mother by March 8 An article can be made from a wide variety of subjects, any material you like can become the basis of a beautiful gift by March 8. Below is a master class offering to perform a beautiful souvenir for a mother from an old CD, as well as an economic foam sponge. In addition, a green cardboard leaf (it is desirable that it was shiny), a simple pencil, ruler, glue, crystals, as well as small scissors, is useful in this work. 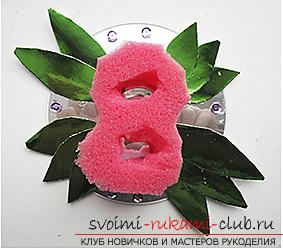 First, take the green cardboard and draw it on the other side in such a way that two lines are produced: one is slightly wider than the other. They need to be cut.
 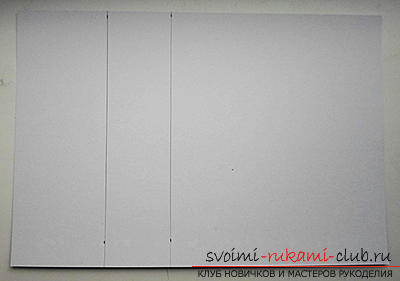 Straighten both strips so that the resulting small rectangles, they also need to be cut.
 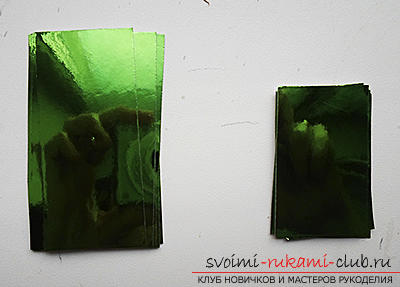 Now cut out the beautiful petals. Just cut the corners and trim the shape of the parts.
 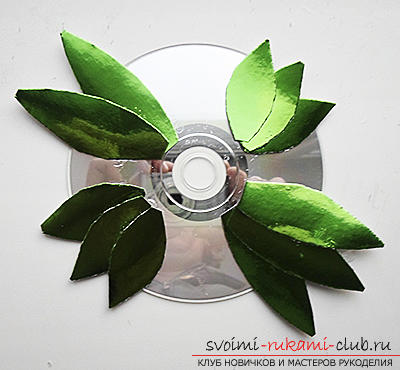 Green leaves need to be glued to the CD. Pre-arrange them in the most favorable order for the product to look beautiful. An example can be seen in the photo. Take the sponge. In it, you need to cut two identical holes, which will be located at the same distance from the edges.
 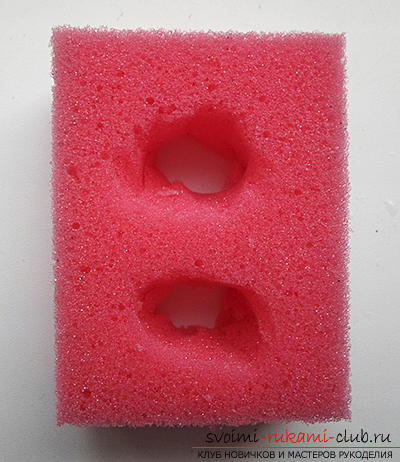 After that, cut off all the corners so that the figure turns out 8. Paste the eight on the disk between the leaves.
 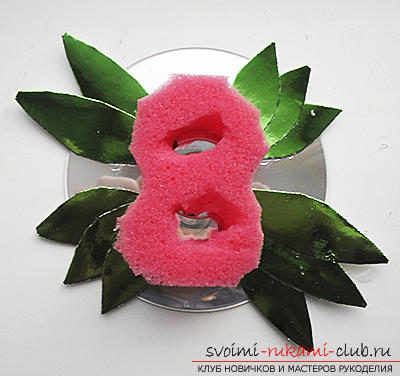 Now, when the craft is almost ready, deal with its decoration. To do this, you may need sequins, sequins, sequins, etc. Just glue them in a free place in any order you like. Now a gift for my mother on March 8 is ready. Textile flower for mom
 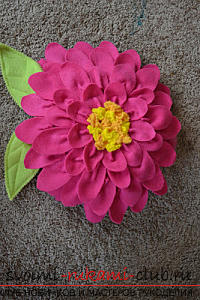 To perform with the kids a similar craft,you need to pick up a soft cloth that will not crumble, besides, it should be easily cut. This can be felt, cloth or drape. In this case it is very important to help the children to fulfill all the work items, and then you can just lead the process. For work, prepare a fabric of three colors: green for leaves, any available for petals, and also something bright for the middle. In addition you will need material for filling the product, transparent glue, ordinary and zigzag scissors, paper and a simple pencil, threads with a needle. The first thing to do is to make the flower base patterns in the form of a circle, a smaller circle will be needed to make the middle, and also you need to make petals of different sizes.
 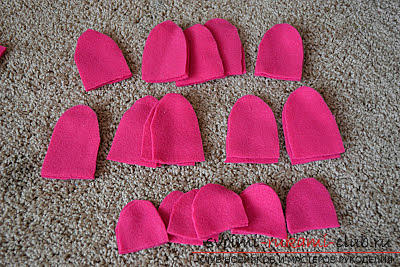 When the templates are ready, transfer them to thecloth and cut. To make one flower you will need two circles-bases, four leaves, about 5 circular mid-points, and at least twenty-five petals.
 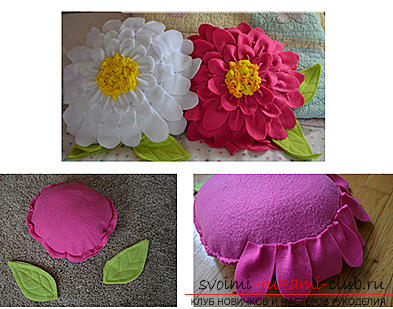 First, sew two circles, leaving a smallhole, through which the substrate must be filled with holofayber or sintepon. After that, go to work on the leaves. Draw on them streaks that need to be stitched. Treat the edges of the parts with zigzag scissors. Sew the leaves in the place where there was not a sewn hole for the filler. And after that, treat the edge of the base with zigzag scissors. Next, proceed to the design of the petals. At the base of each of them, apply a small strip of glue and bend the base in half. You should get a wrinkle.
  Such a petal must be glued to the base, with all the subsequent it is necessary to do the same.
  When you have finished the first circle, go to the second one, but the petals should be slightly smaller.
 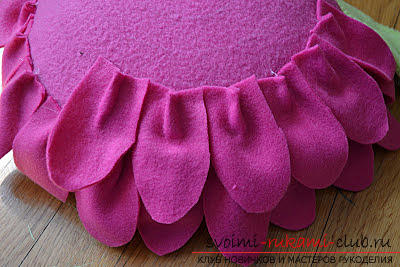 So continue to decorate the flower until a small round space is left in the center.
 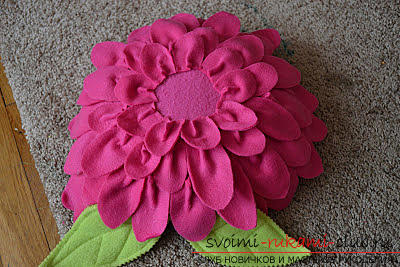 It remains to decorate the middle. To do this, all the circles designed for it, you need to cut off the edge of the zigzag scissors. Further in the middle of each detail, drip a small amount of glue and fold the circle in such a way that the trefoil turns out.
 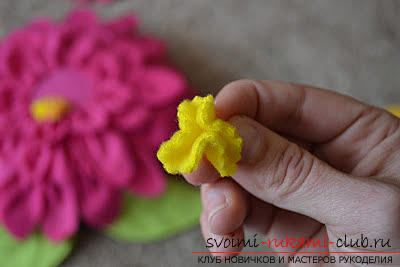 It is these details that need to fill the entire middle, they are also fixed with the help of glue.
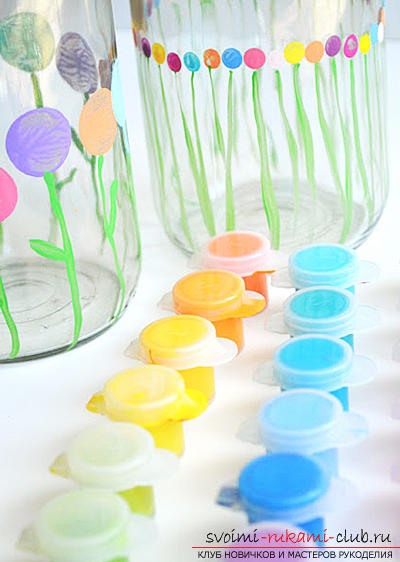
 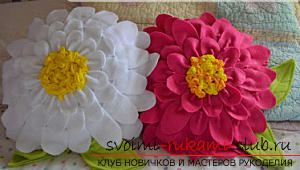 Textile flower is ready, it can be usedas a pillow. Vase from a jar as a gift for March 8 Of course, it will not be possible to make an elegant crystal vase from a jar, but a touching colored product made with all the love for your mother is guaranteed to you. This article does not require significant costs. You will need a glass jar, acrylic paints, a thin brush, as well as a wine cork and a pencil with a grater - these items will be needed to create flowers. These vases can be created with different images. To perform one of them, you will need a wine stopper. Pour a little paint into a special container and use a stopper as a stamp. Just dunk it in the paint and put the stamps on the center of the jar, alternating the different colors of the colors among themselves. An example can be seen in the photo.
  Children are delighted with the technique of stampingvarious subjects. The process for kids becomes more vivid and memorable. To complete the drawing, take a thin brush and draw a green stalk with leaves. The jar can be decorated and a little different. Flowers can be applied to the surface of the can with a small rubber on the tip of the pencil.
 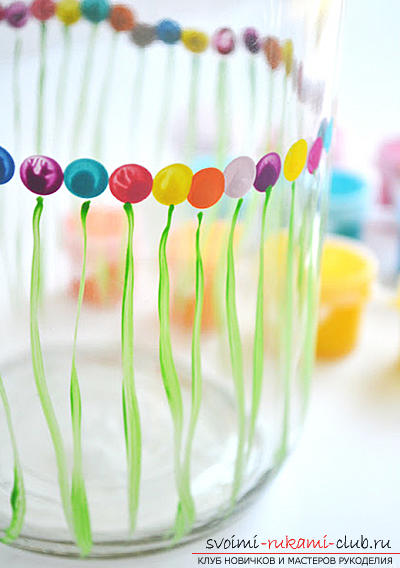 In this case, the stems are also drawn with a brush. This pattern is suitable for smaller cans. The bright product is ready, it remains to think about which bouquet is best placed in it. As you see yourself, children can be offereda lot of ideas for creating beautiful gifts for mom on March 8. And this is a small part of what can be done. Be inspired and gain new ideas. Successful creativity to you and your children.
Comments
Related posts:
 A gift to my mother and grandmother with my own hands. Ideas for a birthday, March 8.
 Festive decorations with their own hands, tips and advice on making pumpkin out of cloth.
 What a gift you can make to dad. Gifts for February, 23rd own hands.
 How to make a gift to mom with their own hands. Ideas for crafts for mother's day.
 Gifts for March 8 with their own hands. Children's hand-made articles for women's day.