
How to make Christmas toys with your hands of dough, silicone sealant, tangerines and crochet and knitting, master classes with recipes and photos
Celebrating the New Year is one of the mostwonderful moments of winter time. Merry bustle and pleasant troubles fill our life with warmth and joy. In the previous article, we started a story about creating Christmas-tree toys with our own hands. Here you will also find master classes and recommendations for creating beautiful ornaments that you can easily make at home with your own hands from ribbons, laces, beads, threads, paper and even peel from mandarins. You can do all these wonderful things together with children or your soul mate. New Year's holidays are a time of unity and fun. Christmas ball of acorns Materials:
- Caps of acorns (approximately one size);
- Silvery or golden paint;
- Sequins;
- Ball (diameter of your choice). If you have a foam ball, you need to pre-paint it;
- Twine (thread);
- Ribbon for decoration;
- The gun is glue.
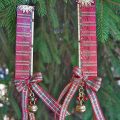
It is quite easy to make such a ball. Below are the step-by-step photos, looking at which you easily make this Christmas tree toy yourself.  Christmas ornaments in the form of a ball and a heart in icy silvery tones
 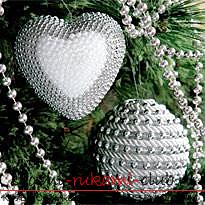 Materials:
- A twisted cord of silver or milky white color;
- Polyfoam blanks in the form of a ball and a heart;
- 2 threads of beads (larger and smaller);
- Tweezers;
- The gun is glue.
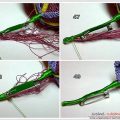
If you do not have foam bases, do notBe upset. For certain in the house there are old fur-tree toys: pouring from time, in the peeling paint or simply unsuccessful coloring. Use them as a basis. We took a cord of the same color, but several bright laces will look no less beautiful and much more festive. Experiment with the diameter and color of the beads, replace them with rhinestones or beads. We begin to decorate the ball. The end of the cord we "heat" in a foam piece. It is very convenient to do with tweezers or sharp end of small scissors. Apply a few drops of glue next to the attached cord. We take the string with beads, glue it closely to the cord and begin to spiral lay the cord and beads on the surface of the ball, pre-lubricating it with glue. 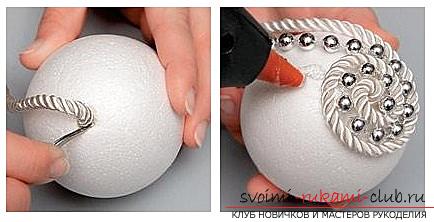 Having reached the end, cut off the excess and again "drown"the end of the lace in the foam. Now it remains only to attach the eyelet, for which it can be hung on the tree. This can be done with a needle, inserting a suitable shade into it and threading the already stuck cord. In approximately the same way, we also decorate the heart from the foam. Apply glue on the side (flat) part and start spreading low with beads. We moved in a spiral. The work is done in two parts. Silver and pearl beads were used for the heart.
 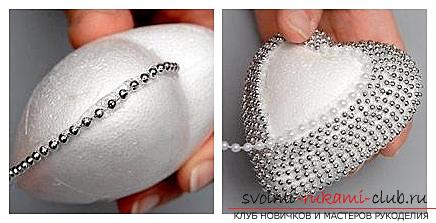 Magic of the brush In childhood, many loved to draw. It was much more fun and interesting to create masterpieces not on paper for drawing, but, for example, on wallpaper in the living room or on a new coverlet in the bedroom. During the holidays, you can briefly return to that carefree time and try your artistic skills for decorating Christmas decorations.
 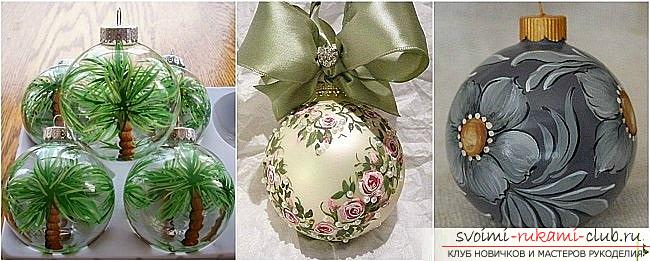 In the shops for creativity is now very muchvarious paints for glass and plastic. Use them and create bright Christmas balls. Do not necessarily have the talent of Van Gogh or Michelangelo, just enjoy the creative process. You can create such crafts with the children. Young artists, they just like it.
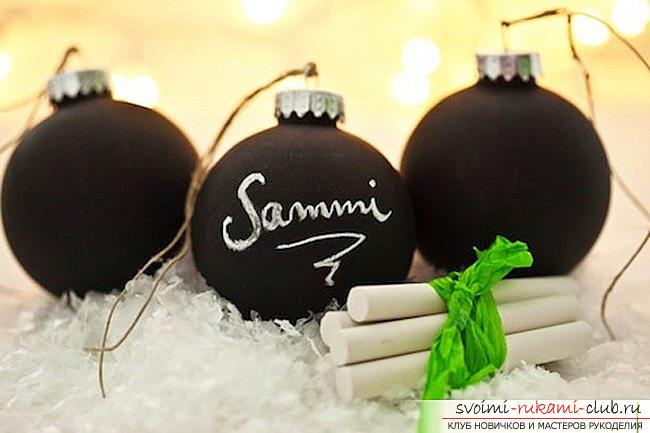
Magic Ties
 Do you know how to knit or crochet? Then create bright knitted ornaments or make nice "clothes" for old and boring toys. It's very easy to tie this up. For beginners, we'll lay out a diagram and a step-by-step master class for creating a Christmas tree ball from pentagonal motifs. A lot of schemes exist in free access on the pages of the Internet, and you can choose any pattern you like. Another nice point is that you do not need very much thread for such crafts, so you can safely use the rest of the yarn from your past products.
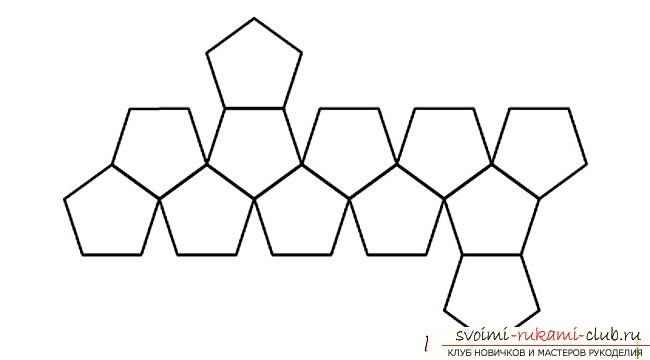
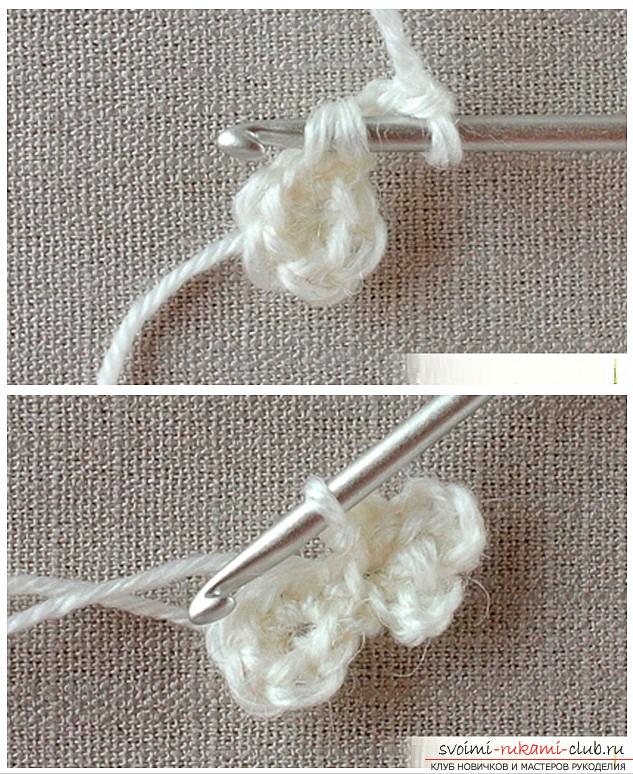
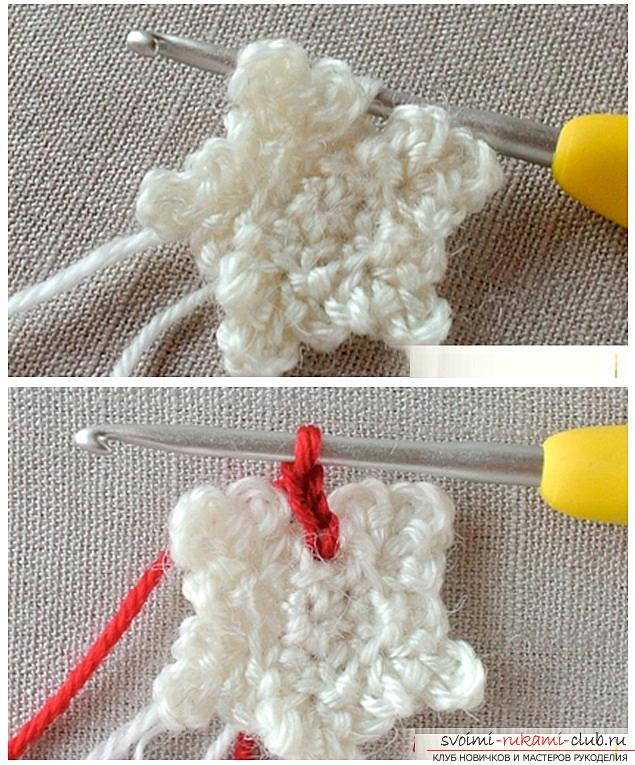
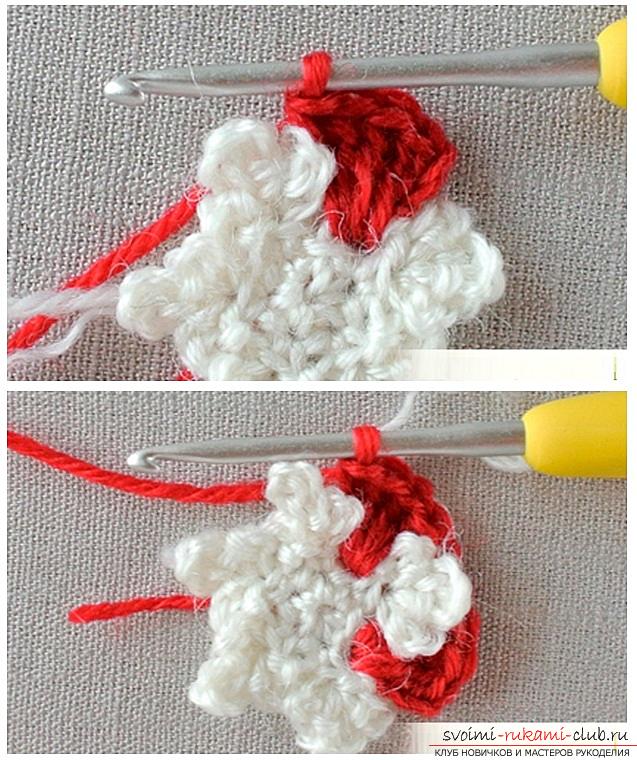
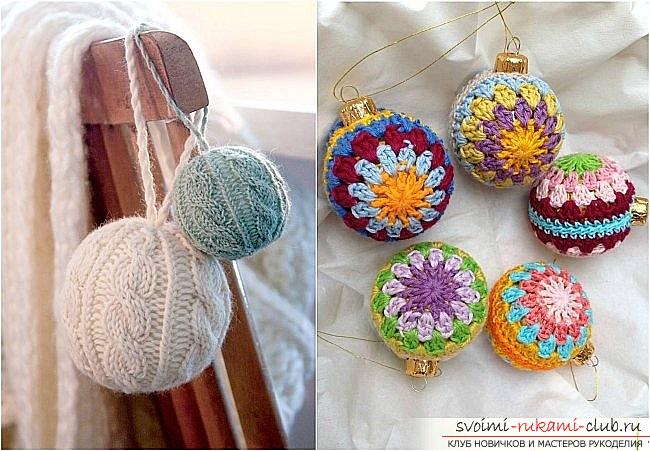
 For those who prefer to crochet the easiest and most convenient will simply create a ball.
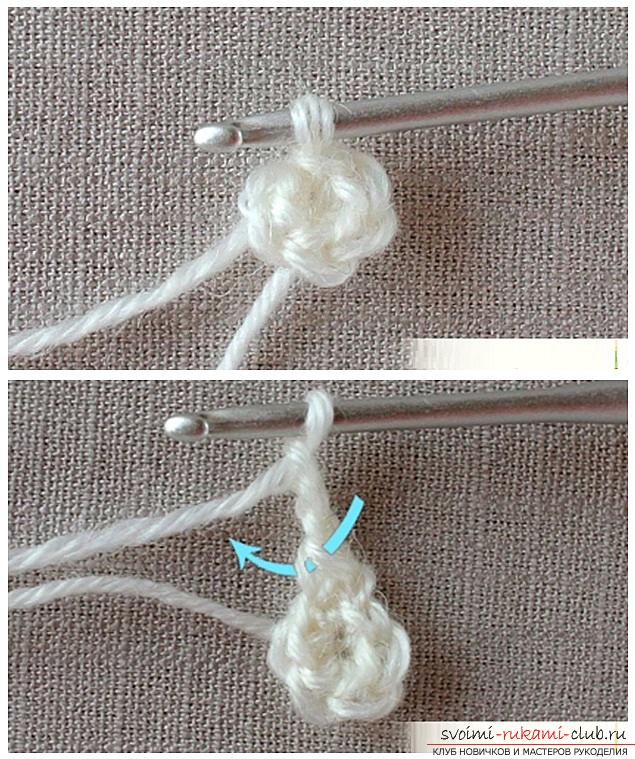
 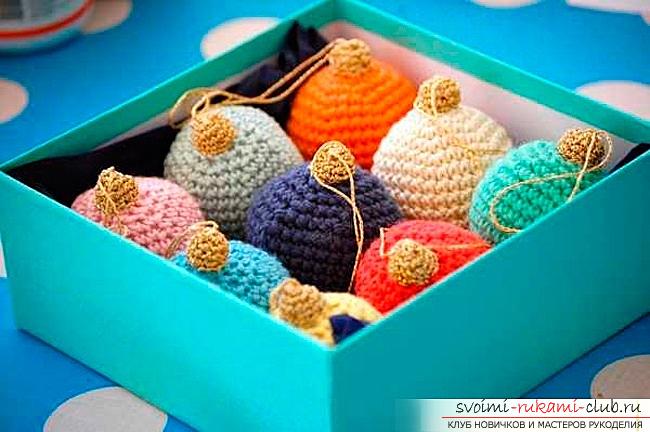 Knitting pattern is familiar to every needlewoman. First we knit a circle of the required diameter. And then we use cunning! We count how many rows we had with the addition, while we were knitting a circle, and we knit exactly the same number of rows without increments. Now it remains only to associate the rows with the loops of the loops symmetrically to the additions, and the ball is ready. You can fill it with material for stuffing or tie up an old Christmas tree toy.
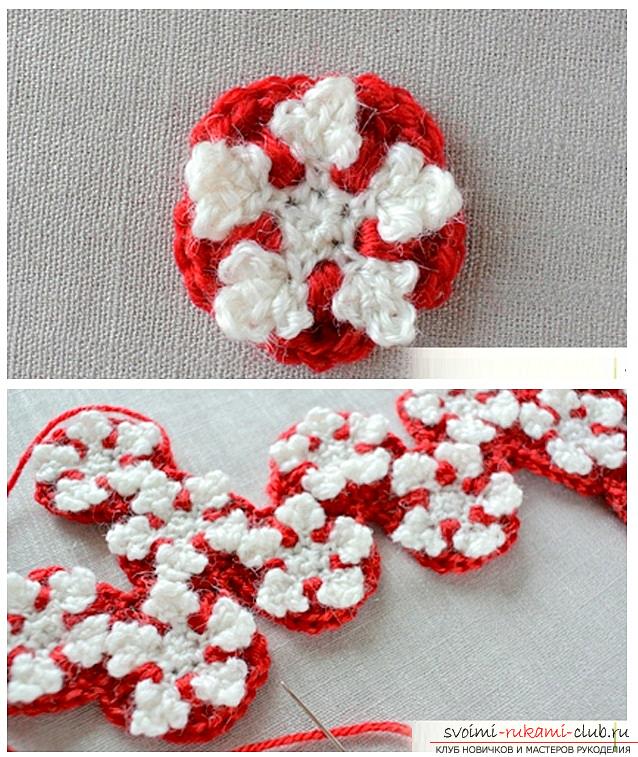
  We offer several photos, as an example for inspiration.
 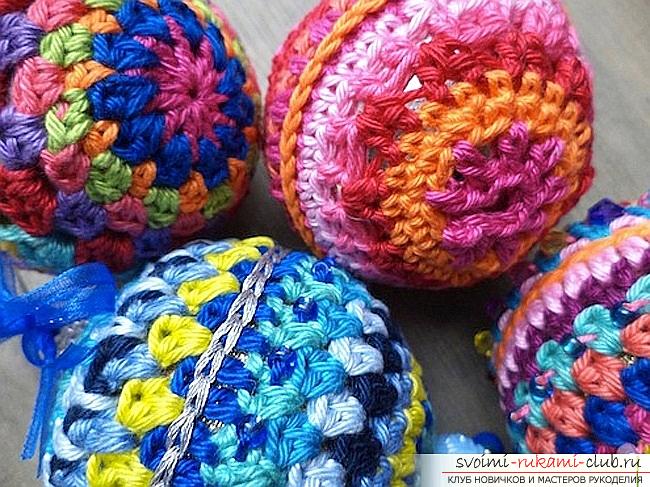 And here's another wonderful New Year's Christmas tree toy in the form of a Christmas tree, crocheted.
 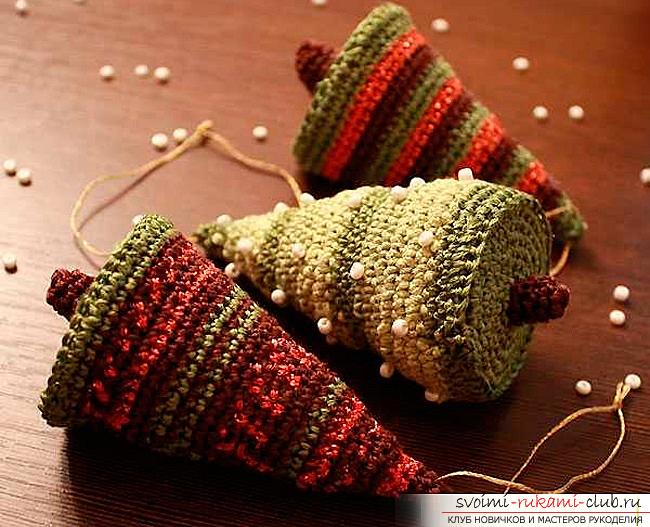 It will take:
- Threads (you can use the leftovers) that you like;
- A hook of the appropriate size;
- White beads 8/0 or 10/0;
- Material for packing;
- Golden thread (waxed);
- Needle with thread.
To knit a fur-tree we begin from a vertex (so it will beit is more convenient to fill with filler). We knit with columns without a crochet and alternating strips of dark and light green threads. We dial 4 c.p. threads of dark green color and close them in a ring. The first river. We knit * 2 tbsp. b / n with one base, 1 tbsp. b / n * repeat again from *. The second and third rows are knitted without additions (6 items b / n) with threads of dark green color. Fourth р. we knit without light green threads. The Fifth River. We knit for 2 tbsp. b / n with a common base in each loop. It turns out 12 loops. 6th, 7th and 8th rows we knit without any increase. The ninth river. * 2 tbsp. b / n with one base, 1 tbsp. b / n *, repeat to the end of the row. It turns out 18 loops. The 10th, 11th and 12th rows are knitted with dark green threads without any additions. We do not detach the thread, just pull out a long loop. Sew white beads across the surface of the Christmas tree at will. Now we take for a basis. A thread of brown color is typed 4 cp. and close the ring. We corrugate the foot according to the scheme of the first three rows of the herringbone top. Fourth р. We impose threads of dark green color on 2 tbsp. b / n with a common base in each loop. The Fifth River. * 2 tbsp. b / n with one base, 1 tbsp. b / n *, repeat to the end of the row. In order for our base to be more solid, we cut out a circle of cardboard with the diameter of our circle. Sewing to the wrong side of the base. Now we take our workpiece, already filled with stuffing for packing and we connect with our base connecting posts. 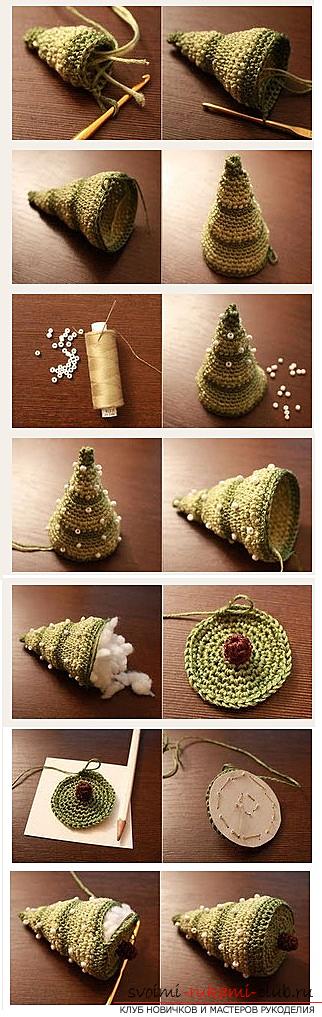 And one more wonderful Christmas tree crocheted
 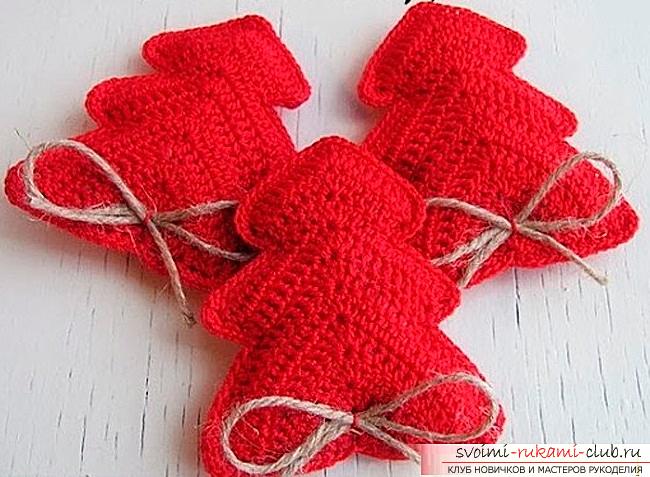 It will be necessary to tie two parts according to the above scheme, and sew, filling with stuffing for packing.
 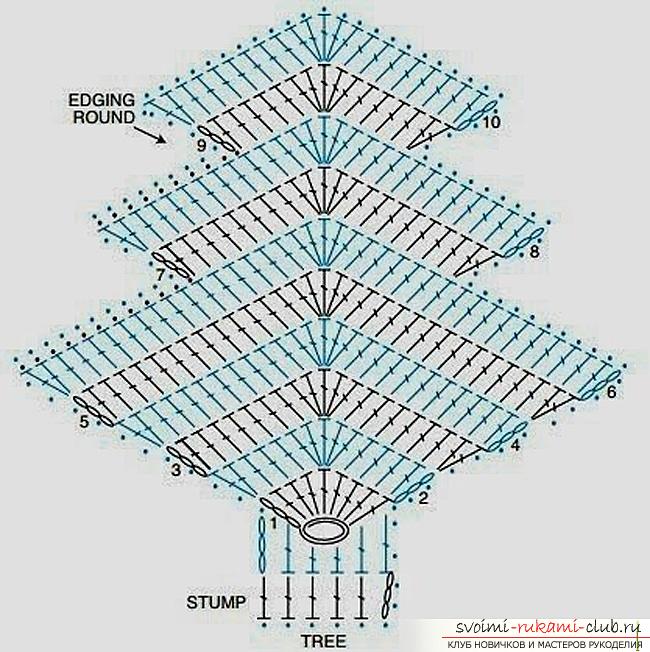 Those who like knitting needles can also tie bright and beautiful "clothes" for Christmas balls. Very unusual and advantageous look jacquard patterns from contrasting threads.
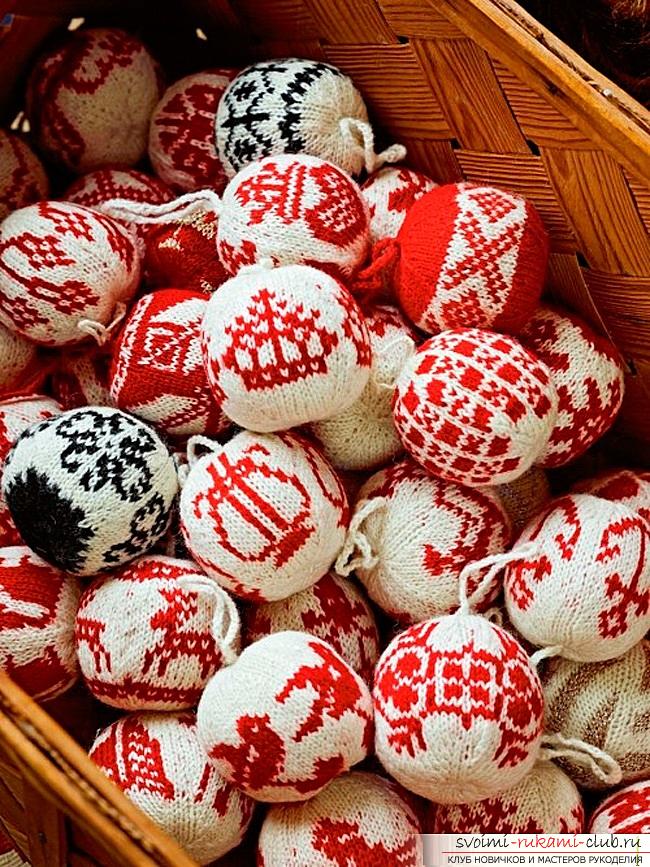
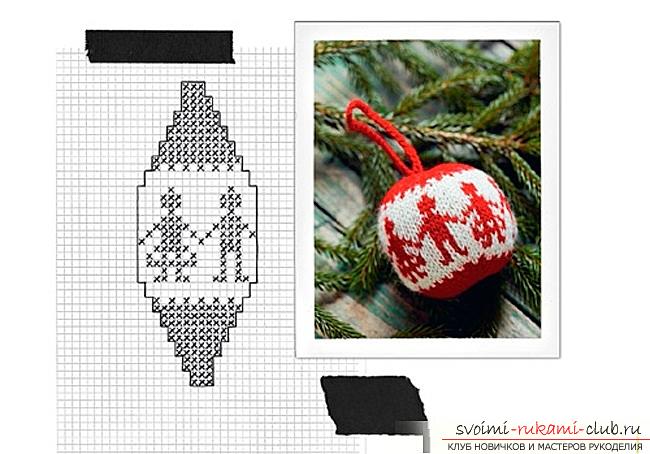 The main thing when choosing a yarn, give preference to thin threads, so the products will look more neat. Aroma of the holiday
 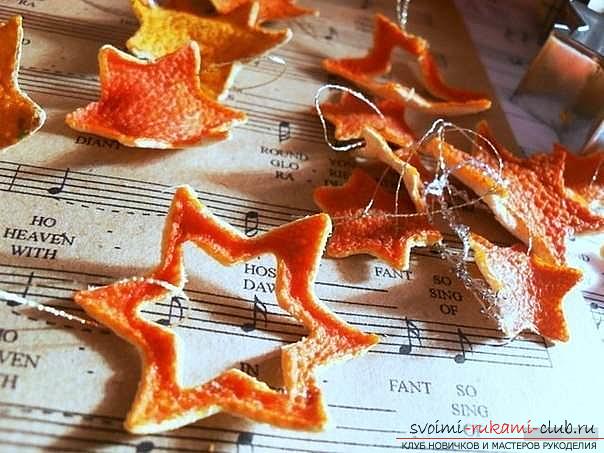 Brightly orange mandarins long and firmly occupiedone of the leading places in the New Year's menu. Solar and positive citrus can be not only delicious, from their peel will turn out wonderful Christmas decorations. Materials:
- Mandarin;
- Molds (suitable for small metal baking molds);
- A thick needle and golden threads.
 And now the most pleasant! Gently clean the mandarin, trying not to sever the skin. Delicious flesh to eat, and from the peel cut out the shape of future jewelry. Now it remains just to make a loop of golden thread, for which you can hang our ornament on the Christmas tree and leave it to dry completely. If you want the figures to be even, you should put the workpiece under a small press with air access before the final drying of the peel.
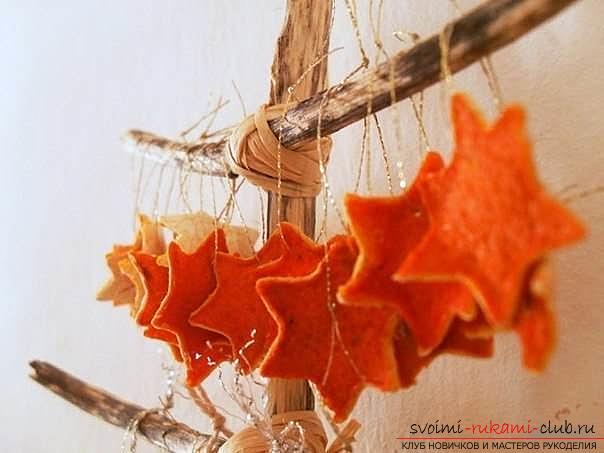
Sweet taste of the holiday
Such a wonderful time, like New Year's days, notbypasses without sweet. All kinds of goodies can become not only a dish in the menu, but also a sweet decoration of the festive table. We propose to make this herringbone-biscuit. 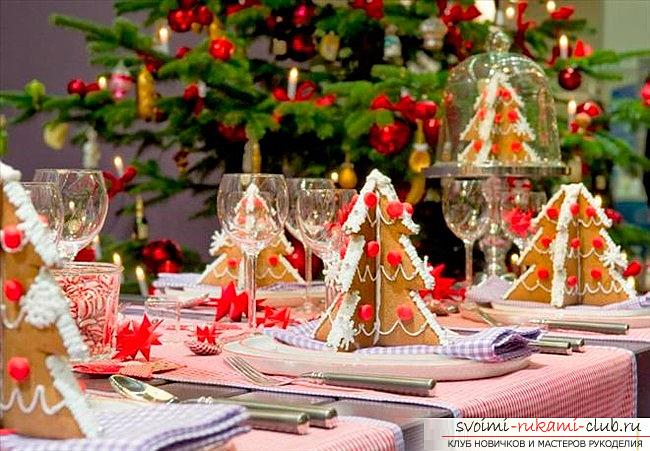 It is necessary:
- Ingredients for the dough;
- Confectionery powder or glaze (we have a white color to make it look like snow);
- Baking paper;
- Paper for stencils;
- Scissors;
- Knife.
First you need to prepare the dough:
- Honey liquid 300 g;
- Eggs 4 pieces;
- Sugar 250 g;
- Ground ginger 2 tsp;
- Cinnamon powder 2 tsp;
- Butter 200 g;
- Flour 750 g;
- Vanillin at the tip of the knife;
- Cocoa 2 tsp. (instead of it you can use green food color);
- Baking powder for dough 4 tsp;
- Orange peel 2 tsp.
Of this amount of ingredients willa sufficiently large number of cookies, if you want to do a trial batch, take a serving twice less. It is not difficult to make it. Mix the softened butter with sugar, eggs and honey. Separately mix all the loose ingredients. Knead it all together and send the dough for 25 minutes to the refrigerator. While our dough is "resting", we will stencil. To create it you need a thick paper. You can draw a Christmas tree or traverse a ready-made form, for example, from a cookie. Now we are going to create a template for the future sweet decoration. We need three paper fir-trees. First step. We draw a line in the middle from top to bottom. Now, on the right and to the left of it at a distance of 1 cm, we run parallel one more line. Now take the height of the Christmas tree (we will designate it as A) and divide by 3, multiply by 2 and add 0.6 cm. We divide the resulting quantity (we denote it as B) by 2. We denote this number by (B). In our three drawings the Christmas tree is celebrated. On the first, we draw a horizontal line through the point at a distance (B) and separate it from this line to the end of the branches. In the second figure, draw the lines through (B) and (B) and select the regions from the crown to (B) and from (B) to the end of the branches. On the third template, you need to select the area from (B) to the top of the tree (see the picture). On all three fur-trees we have long and narrow rectangles in the middle of the stencils. We cut out our blanks from paper.  We take out the dough from the refrigerator and roll it outlayer about 0.5 to 0.6 cm thick. Cut out the blanks. Each tree needs one template. Bake for 25 minutes at 180 °. When all the details cool down, you need to glue them together. You can use syrup or an aysing.
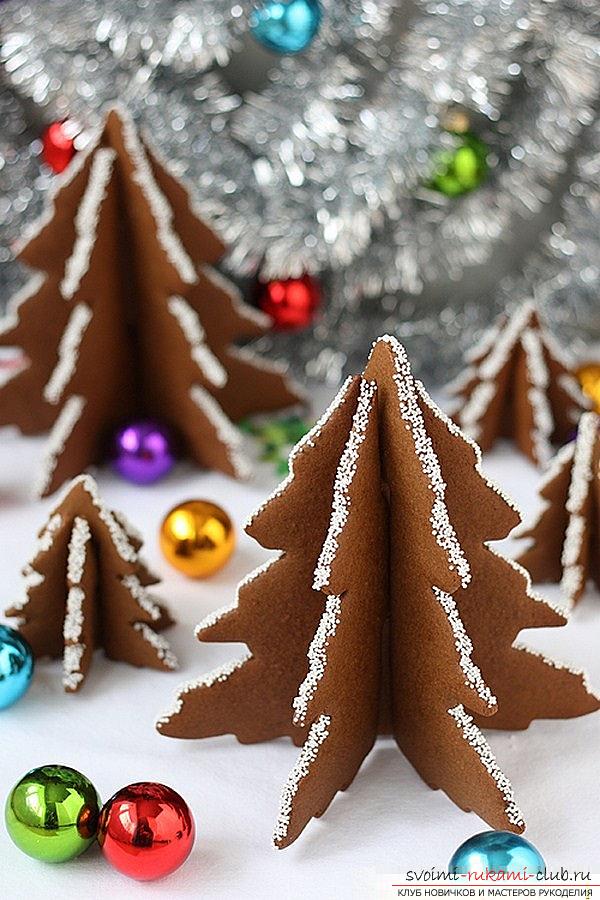 Cover with frosting or sprinkling, and our deliciousChristmas decoration is ready. Snow New Year For the New Year, both adults and children always wait for snow. And if we can not influence the weather, we can always decorate our house and the tree with beautiful snowflakes. A variety of materials are used to create them. In the next master class, we propose to make an amazing snowflake. It looks really icy and airy. Snowflake from silicone glue
 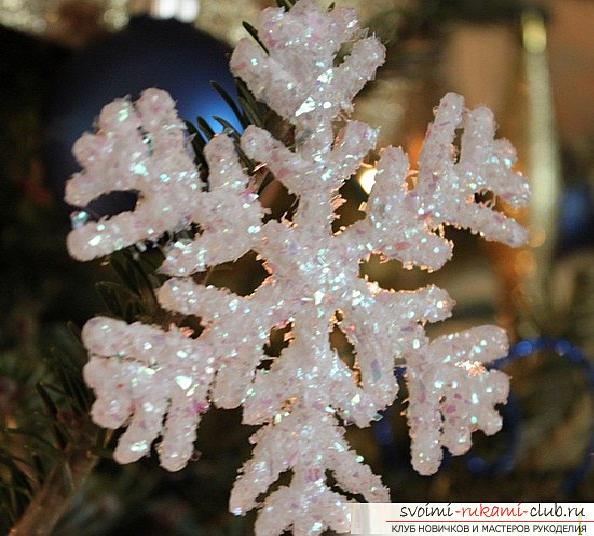 Materials:
- Silicone sealant (transparent);
- Parchment;
- Sequins;
- The snowflakes were patterned;
- Delicate procrastination;
- Brush;
- Acrylic paint (optional).
Before creating snowflakes we needmake stencils. Below we have given several schemes, but you can choose whatever you want. Such crafts can be done with children. Offer the kids a match for the most beautiful snowflake. When the winner is announced and the best snowflake is chosen, you need to transfer the picture to parchment. If you did not find it at hand, use ordinary thick paper, but cover it from above with a film so that our snowflake can be easily detached. 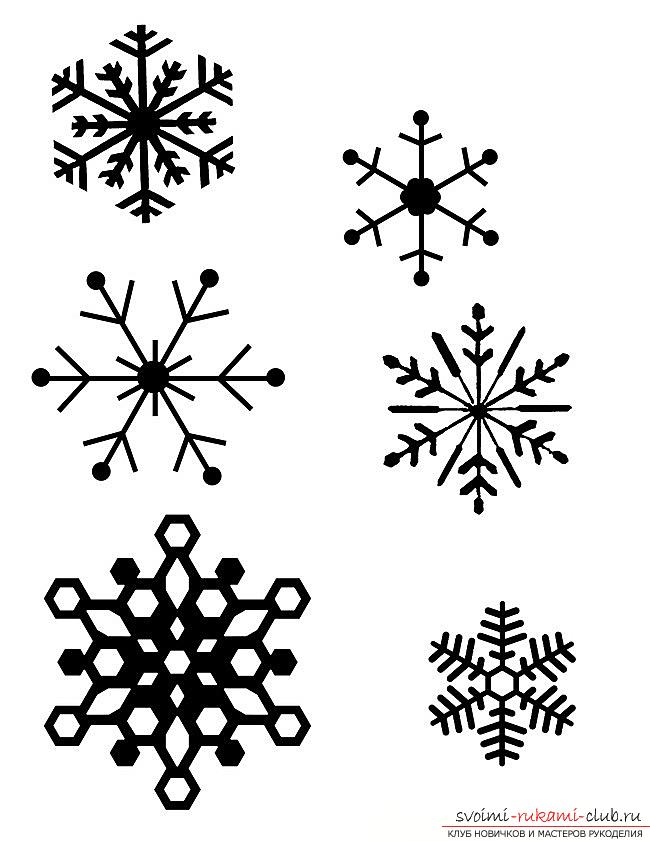 The next stage is better for adults to performyourself. We begin to make a skeleton of snowflakes. To do this, we take the sealant and simply apply it along the drawn lines. If you want to make it more voluminous, apply several layers. Now we wait until it dries. A thick layer of sealant will dry for several hours. Have patience.
 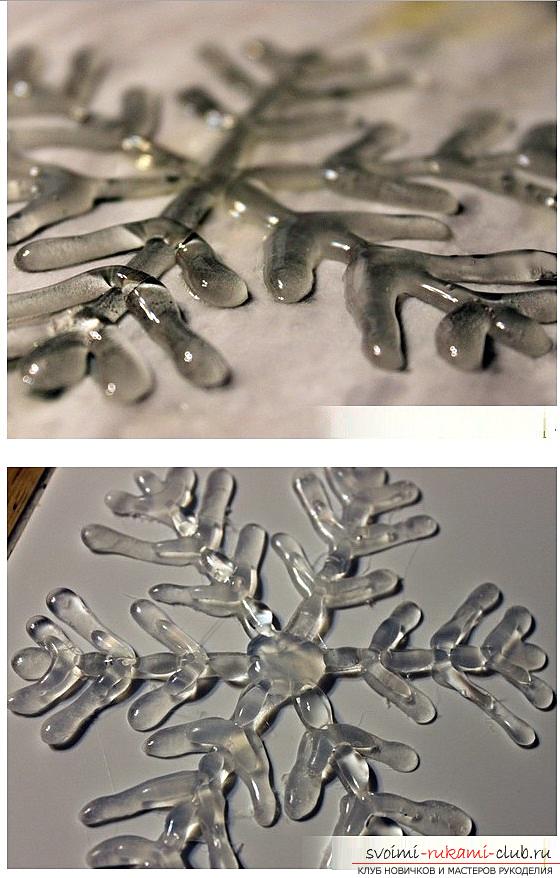 When the workpiece is completely frozen, neatlywe separate it from paper. If some pieces are still stuck, just moisten them with water and remove. Our workpiece is ready for the most interesting process - the final decor. Here your imagination is not limited to anything.
 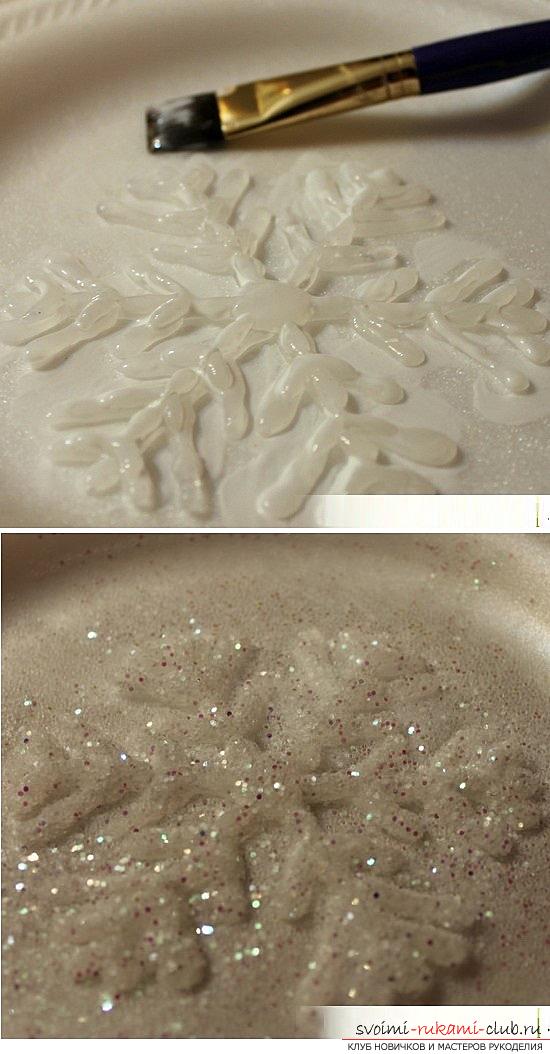 At this stage, you should glue a loop from a thin wire or thread, after which you can then hang snowflakes on the tree.
  You can decorate the blanks with bright colors,cover with a thin layer of glue and sprinkle with sequins. Connect to this lesson of children. Your joint creativity will bring even more happiness and warmth to the joyous pre-holiday efforts.
Comments
Related posts:
 How to make Christmas-tree toys: balls, snowflakes and much more by yourself, master classes on creating Christmas tree toys with step-by-step photos and descriptions
 Snow-white Christmas-tree toys for the 2015 Competition, master crochet lessons
 How to knit crochet flowers, tips and master classes with a photo.
 How to bind a solid heart with knitting needles, master class, photo, ideas / Toys with their own hands, patterns, video, MK
 Master classes: Angels from salted dough. Video / Toys with own hands, patterns, video, MK