How to sew a developing mat for a baby, master class, ideas / Toys with their own hands, patterns, video, MK
Rug, developing logic, thinking and smallthe motor skills of the baby, any mother can make. On it the child will get acquainted with bright colors and the texture of materials, and then, as they grow up, play various games with fairy-tale characters. In addition, while the kid is busy playing, my mother can safely do household chores.  Rugs can be completely on any subject: the surrounding world, plants, animals or fairy tales. It is only necessary to take into account the peculiarities of your child, be patient and apply all your creative imagination. And our advice, how to sew a developing mat, will help in this difficult, but fascinating business.
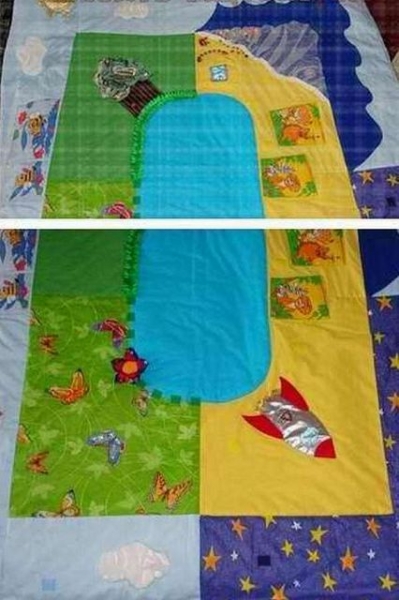
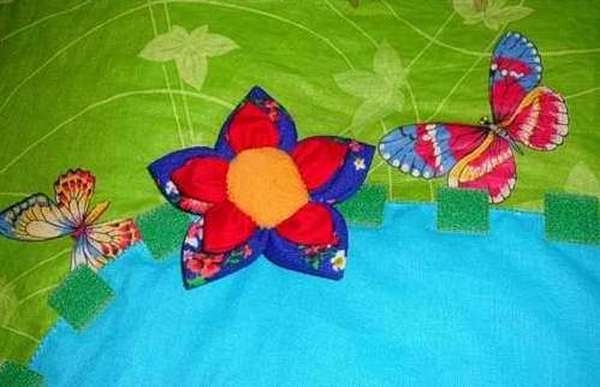
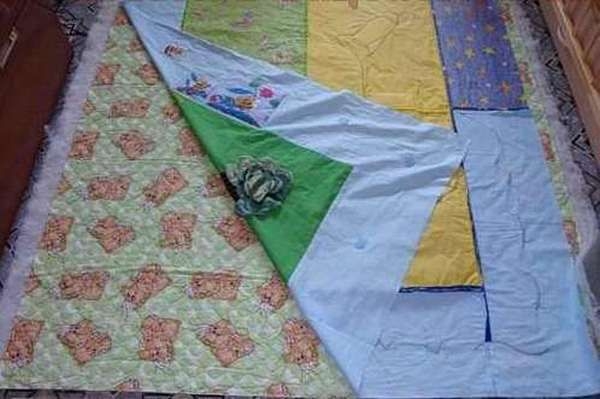
Rug "The World"
 Materials:
- pieces of material of different colors (blue, blue for the sky and the sea, green for the grass, yellow for the sand, etc.);
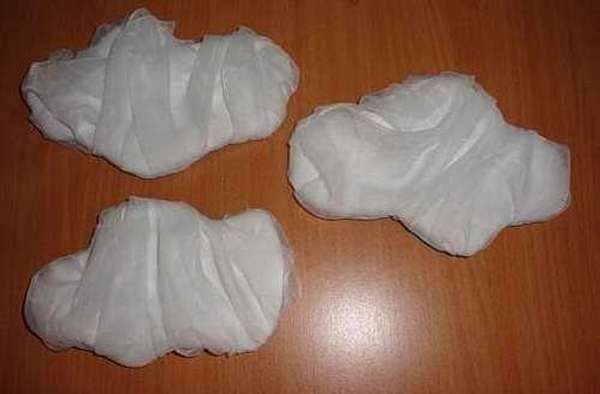
- fleece, organza (for sea waves and clouds);
- sintepon (as a filler);
- decorative braid;
- Velcro tape;
- buttons of various textures, beads, brooches, appliqués of animals.
Instruments:
- thread, needle;
- sewing machine.
Stages of work 


Helpful Tips
Developing pads for the youngest children
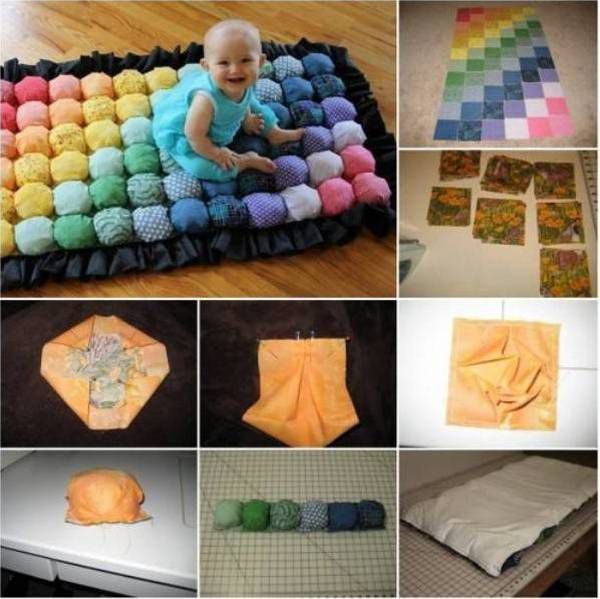 For very small crumbs the mat is perfectfrom multi-colored soft pads. To do this, you need to cut out the right number of identical squares from the material of different colors and textures. Then, the same number of basic squares, but of a smaller size, is cut out. Each multi-colored square is picked up to the size of the base square, sewn in this form to the last one and stuffed with any kind of filler. Next, the resulting pads are connected to a piece of material that serves as the base of the entire rug.
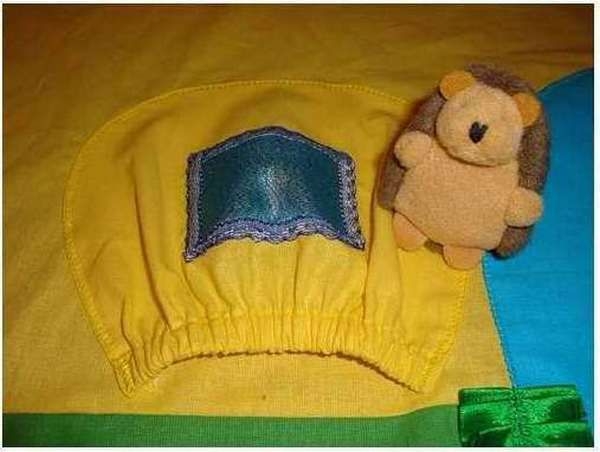
Developing tactile rug "Sun"
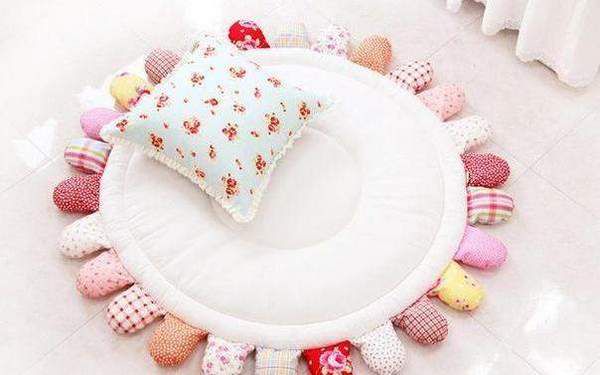 Such a "sun" can not only fulfillfunction of the resting place of the baby, but also to familiarize his fingers with various tactile sensations that help the development of fine motor skills. The center of the sun is made of a round piece of material sewn with a sintepon, and its petals or rays are made of multi-colored cotton fabrics. Each petal is stitched in the form of a pocket that is filled with various materials: beads, cereals, macaroni, beans, sand, rustling polyethylene, buttons and small pebbles.
Foldable "Garage"
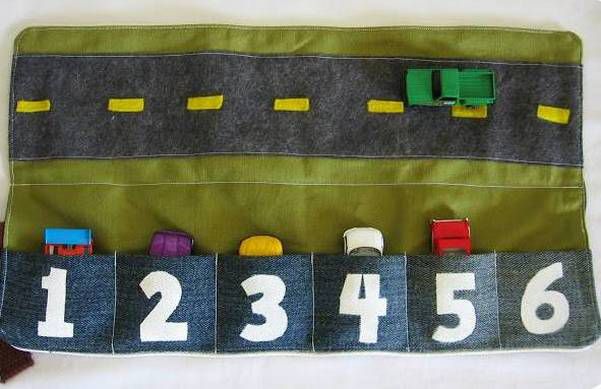 For older children you can sew a developinga collapsible carpet in the form of a garage for cars or cottages for dolls, which will introduce the baby to numbers, accustom to accurately folding their toys. Since such a garage is easy to fold, it can be taken with you for a walk, a visit or a kindergarten. A base of a rug is sewn from a dense denim fabric. On the one hand, a tape is sewn from the same material, which is divided into pockets. Each figure is glued to each pocket. On the opposite pockets side sewn a road of felt. An eyelet and a button are attached from the back of the mat.
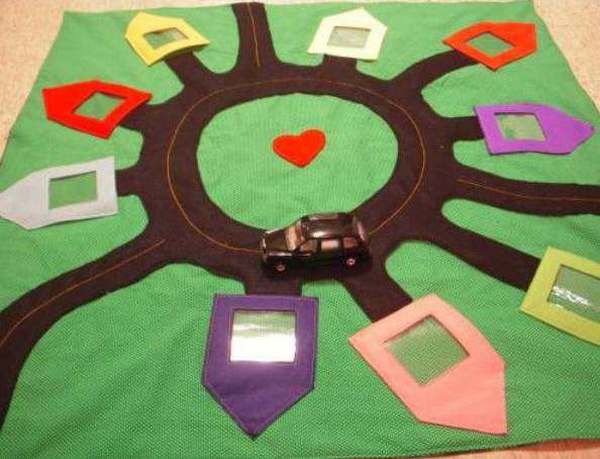
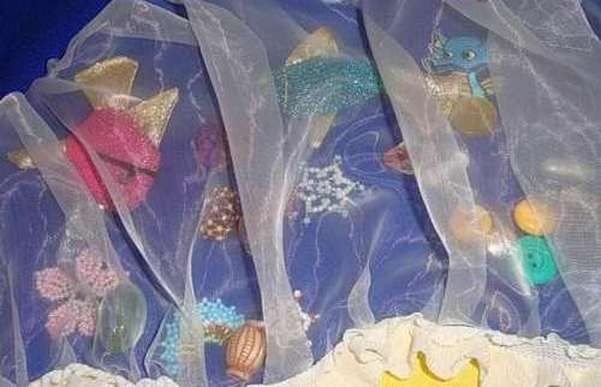
Carpet with pockets for photos
Such an educational toy for a baby is convenient because,which can replace several cognitive books. After all, in pockets with a transparent wall, you can put any images: animals, household items, plants, figures, letters or photos of family members. To play with such a toy the child will never get bored, because the inhabitants of the houses can be changed as they grow up. It is very easy to sew such a rug. To do this, the houses with a transparent material window, for example, vinyl, are sewn onto a fairly dense material, and in the center there is a ring road with branches to the houses. Universal development mat is ready!
Comments
Related posts:
 Cloth for dolls Tilda, from which to sew, materials / Toys with their own hands, patterns, video, MK
 New Year's toys from a foil by own hands: ideas of a candle and snowflakes - a master class
A detailed master class will teach how to sew pants for a child with their own hands quickly and simply, without patterning.
New Year's toys from a foil by own hands: ideas of a candle and snowflakes - a master class
A detailed master class will teach how to sew pants for a child with their own hands quickly and simply, without patterning.
 This master class will teach how to sew hand-made house slippers with the symbol of the year - the monkey.
 Toys for parrots by their own hands, swings, simulator, ladder / Toys with their hands, patterns, video, MK