
How to weave a kitten from a bead: a master class and weaving schemes
Content
- Necessary materials
- Cat with beads own hands
- The scheme for weaving a cat from beads
- Schemes of weaving funny kitties
- Video: Cat shoe from beads
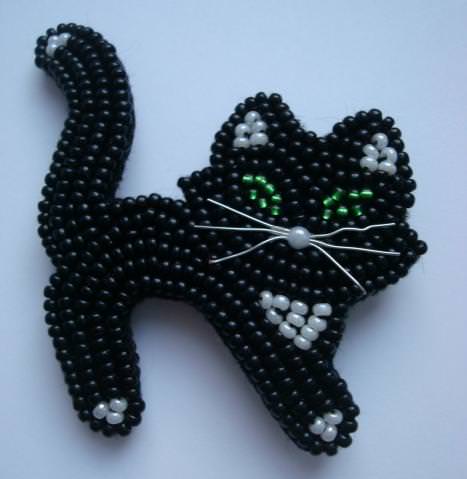
A beaded kitten is a wonderful gift thatYou can present it to your family on any occasion: March 8, birthday, February 23 and others. After all, what could be more beautiful than a gift that is made by hand with love and best wishes from a child.
In this lesson you will learn how to weave a cat in volumetrictechnique, get the diagrams of the popular cat Kitty. The manufacturing process is simple. You can verify this when you finish your work. So, how to make a cat out of beads? We watch the lesson and have fun with the kids.

Necessary materials

For work we take the following materials:
- Beads (black, white, red);
- Acrylic paints (black, white for painting balls);
- Beads of a larger size (green for the peephole - 2 pcs., Pink for the spout - 3 pcs., And red for the mouth - 3 pcs.);
- 2 balls for modeling a cat (head and trunk);
- Fishing line;
- wire;
- scissors.
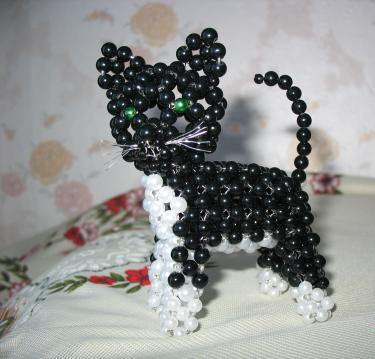
Cat with beads own hands
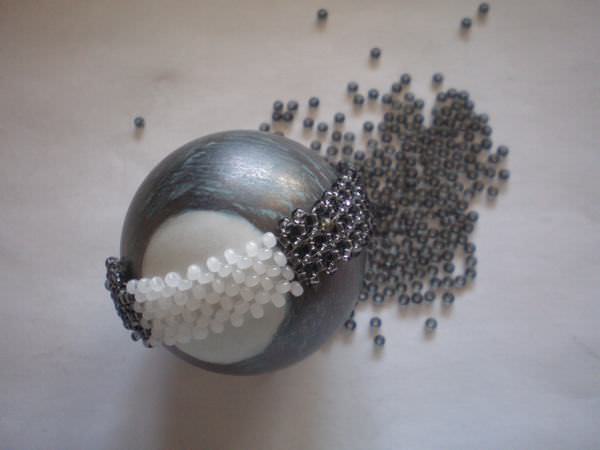
We model a volumetric body: We paint the ball in color, which will match the color of the bead - the color of the cat. For example, black beads, then we paint the ball into black. Only we remember that for a pussy it is necessary to leave a circle white.
We draw a belly on the ball - in the photo it is a white circle. When the paint dries on the ball, we begin weaving with beads.
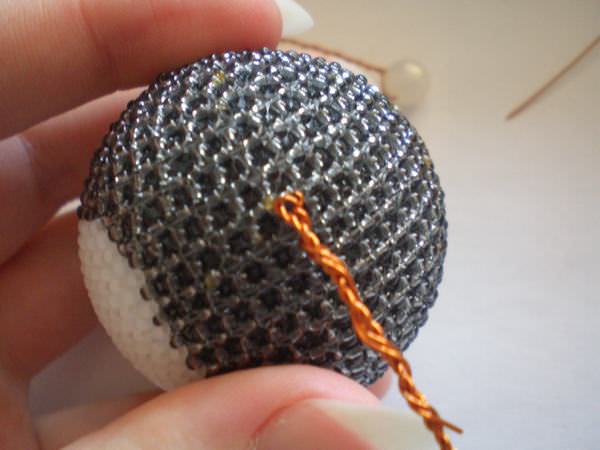
Weave a chain around the circumference of the ball with a cross. In order for the product to turn out neat, you should secure the ball with fishing line.
We weave a belt in both directions. In the belly area we weave a white belt. See photos for details.
When, during weaving, the row along the circumference becomes wide, it is necessary to remove 1 bead at a time.

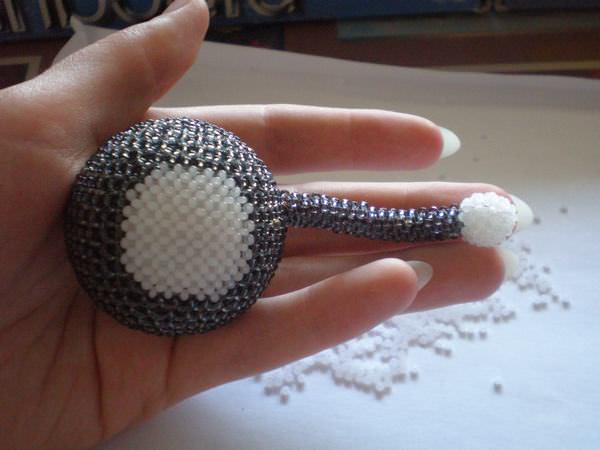
A beaded kitten needs paws and a tail, so we model them: fold a piece of wire in half. Place a bead in the middle of the wire that matches the color of the cat's paws.
Twist the wire and leave the tails at 3 cm. Also, do not forget to leave another 2 cm from the expected length of the legs. This 2 cm segment is necessary for twisting the legs.
We make 5 blanks of the required length: remember that the longest piece is the tail, and we use the short pieces for the front legs.
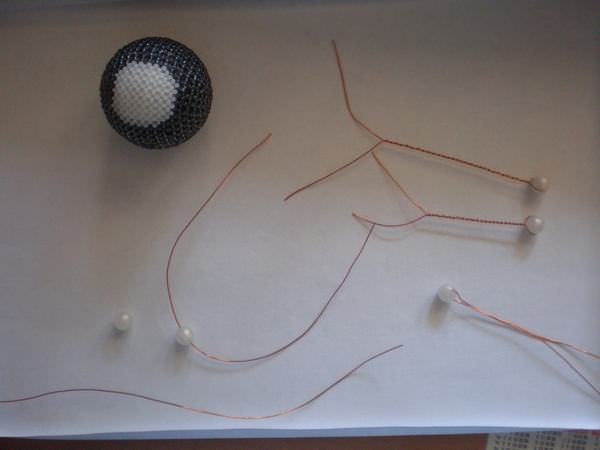
We attach the tail and legs to the body: we pull the wire through the bead in the intended place, and twist the rest of it around the wire, cutting off the excess.
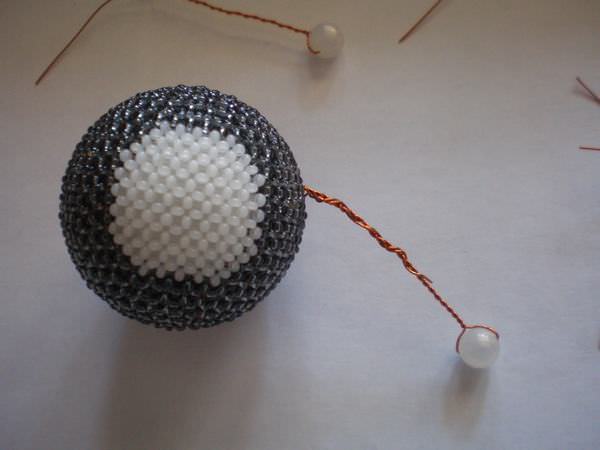
After we have secured all the limbs, we move on to braiding. We put the 1st row on the body beads and weave it with a mosaic strand. For normal thickness, you should take 3 beads at the base, and then 5 beads.

We will weave to the bead and on the edge of the flagellum weave a cross of white beads with the addition of beads in the following rows.
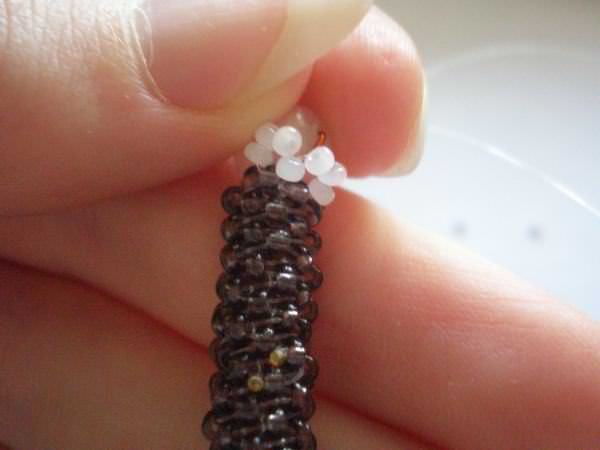

We braid the bead and the kitten's paw is ready. Next, you should do all the same manipulations with the other legs and tail.
How to weave a cat's head? For the head we use a smaller diameter ball.
We paint such a small ball with paint according to the color of the body. We wait until it dries completely.
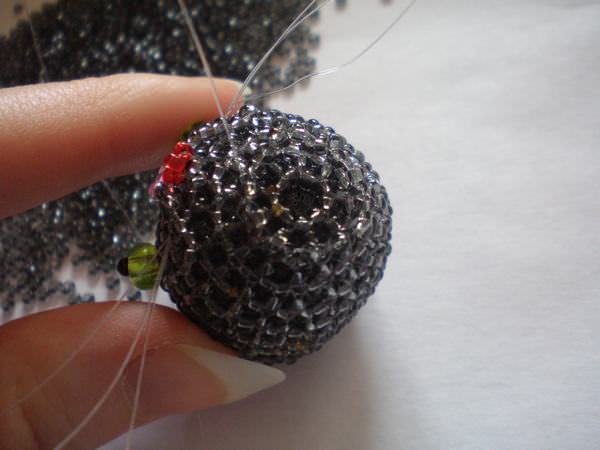
When the head ball is dry, it must be secured by passing a needle and fishing line through it. Then you can start weaving with beads. We weave the same way as the body - from the belt.
After weaving the head, you can weave the heart:In the shape of a heart, we weave 2 fabrics with a cross. One side should consist of five crosses, and the other, shorter side should consist of 3 crosses. To weave a voluminous heart, you need to put beads inside on the sides and sew them together. Next, we sew the heart to his paws.

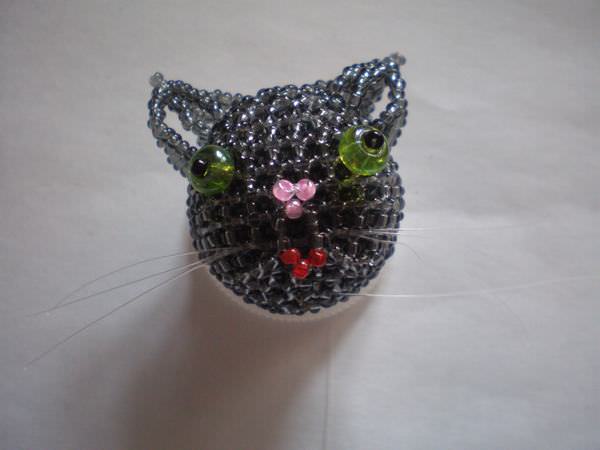
How to weave a cat's face?
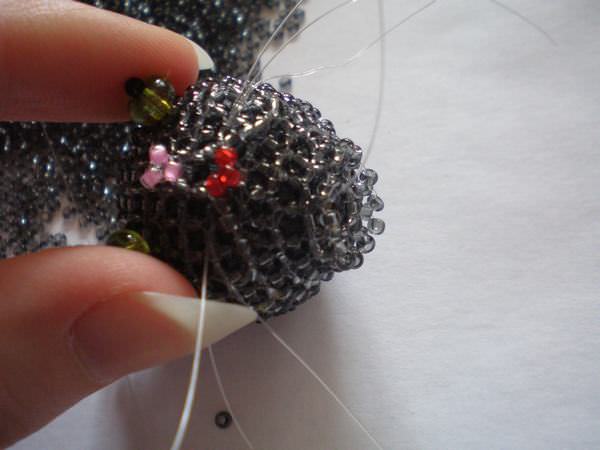
We weave a cute face:sew 2 green beads in place for the eyes - symmetrically. We weave the nose and mouth between the beads of the muzzle (3 pink beads are for the nose and 3 red beads for the mouth).
Making the ears. We string a corner onto the wire and weave the rest. There are no clear rules for weaving ears. Therefore, here you can weave according to your imagination.
For the antennae, you need to pass several pieces of fishing line through the face. In the photo they resemble real “cat whiskers.”
We put the finished cat's head in place. To prevent the cat from getting a long neck like a giraffe, it is enough to weave just 1 row of crosses on the lower part of the head.
We sew the cat’s head to the body, tighten the fishing line tightly and melt the ends.

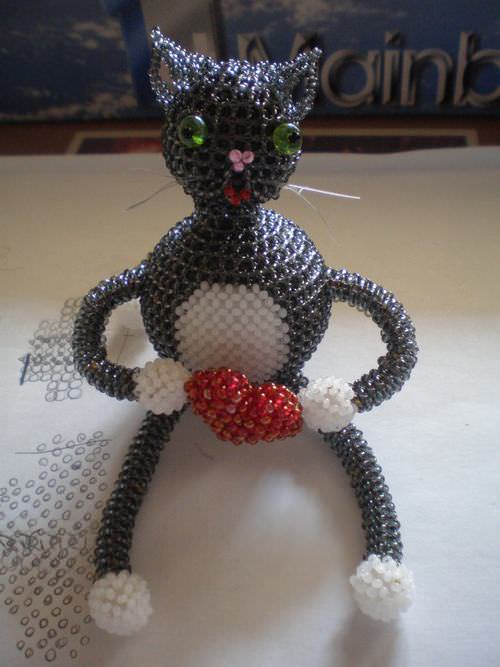
Here's an easy master class and a cute beaded cat is ready. It turns out to be a fun miracle that you are not ashamed to give to your loved ones, family and friends.
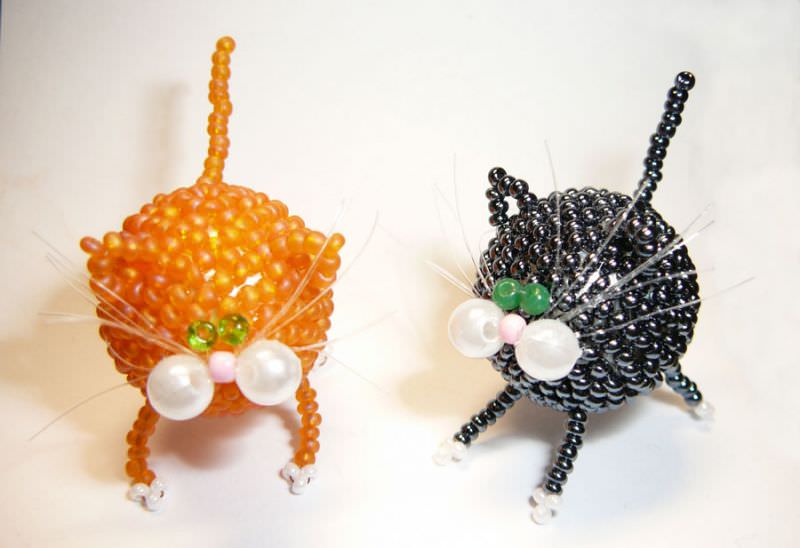
Let the master class and weaving bring youpeace of mind and pleasure from the work process. According to this principle, by the way, there will be another addition - a cat made of beads. She will keep the cat company! They'll make a cute couple.
How to make a cat out of beads? To do this, simply change the color of the beads, for example to pink, and our craft will sparkle with new colors.
As a bonus and to make your work easier, you can use interesting diagrams and a video tutorial on how to create an original figurine.
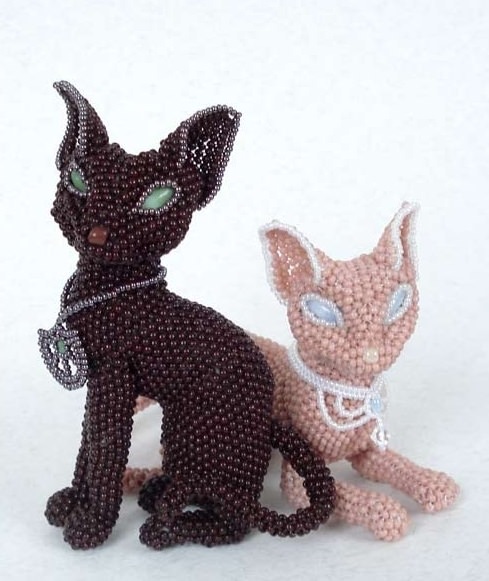
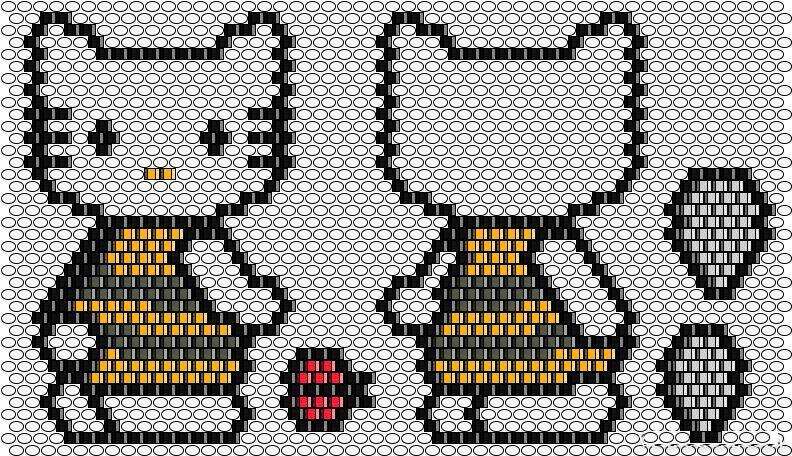
The scheme for weaving a cat from beads

Source of the pattern: Ingrid Moras's book "Beaded Animals".
Schemes of weaving funny kitties
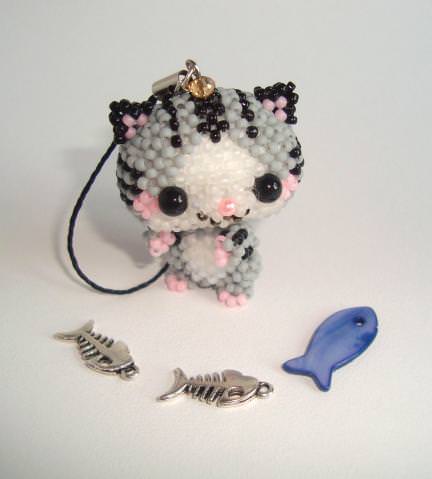
As an addition, we suggest you familiarize yourself with the spring collection of colored cats “Hello Kitty”, which must be woven using the brick-mosaic technique.
First pattern: Beaded cat - Kitty-bee!
Second pattern: Kitty as a butterfly
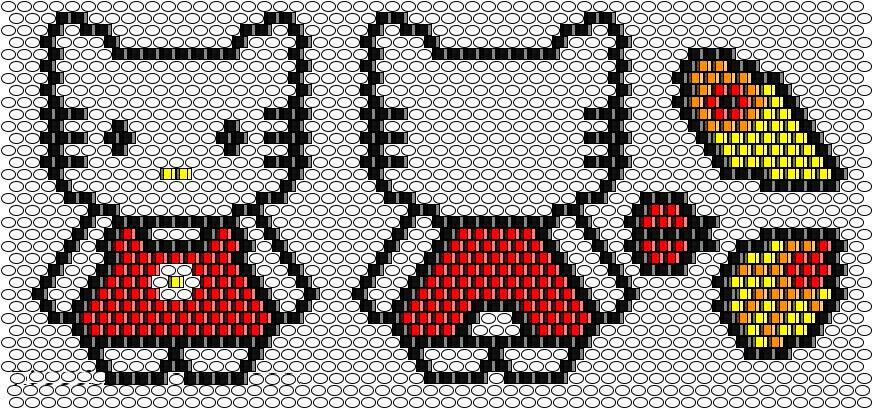
Third scheme: Kitty Fairy
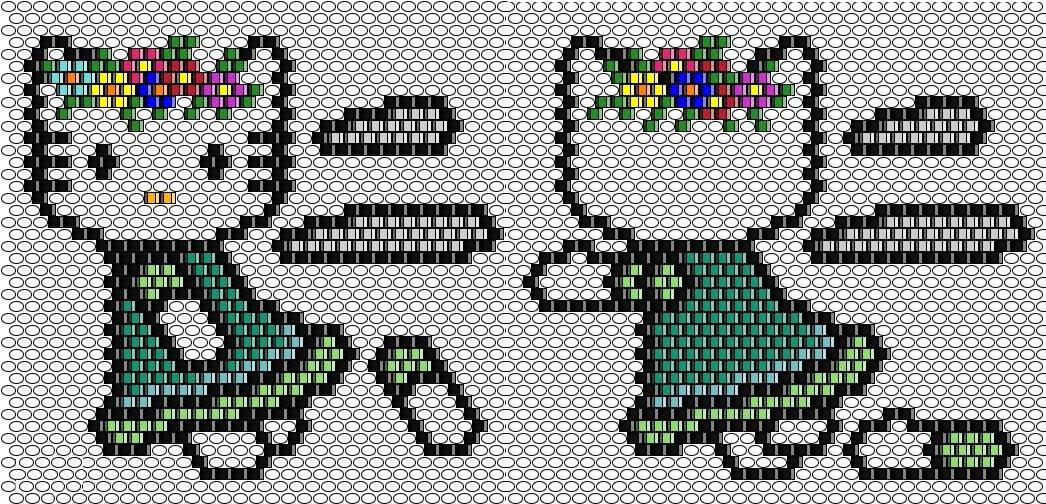
Making a cat out of beads using these patterns will not be difficult, and after beading the crafts will look like this:

The size of such cats is only 6 cm. This pattern is drawn in the EasyBeadPatterns program. To make these kittens more voluminous, you can put a padding polyester in the middle.
Video: Cat shoe from beads
Comments
Related posts:
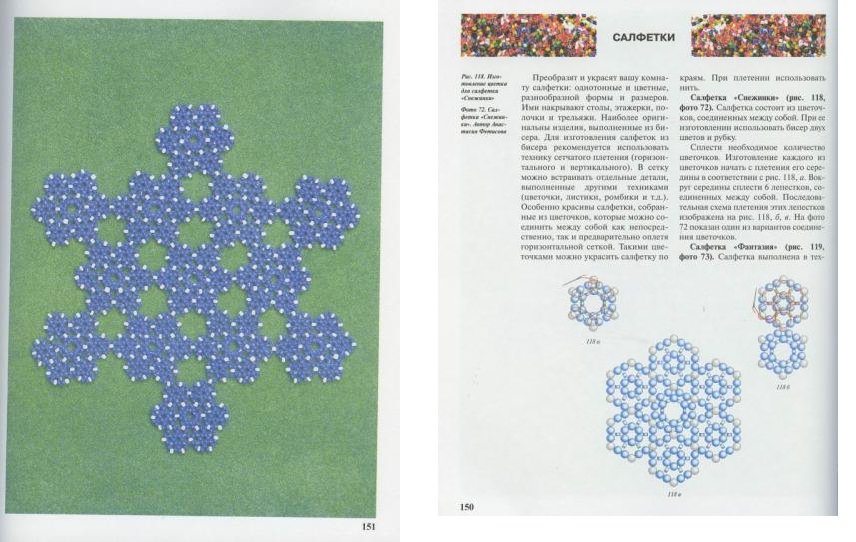 Napkins made of beads, weaving scheme and turn-based master class
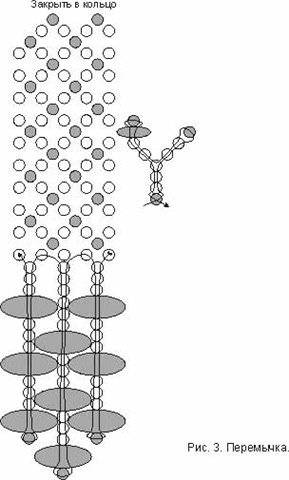 Headdress of beads master-class of weaving an elegant accessory
 Maple Bead: a master class weaving autumn tree
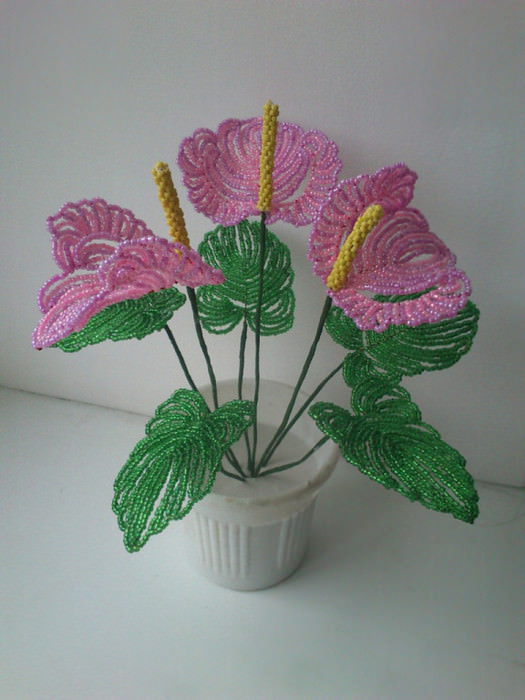 Anthurium from beads master class and weave scheme (photo)
 Bantik from beads master class of different techniques of weaving (video)