Master class sewing a children's tent will help sew the necessary for the home thing
Master class on sewing a children's play tent– an indispensable help for those who have little fidgets at home. Even if you are not an ace in this type of needlework – no problem. The process is so simple that even a novice craftswoman can handle it. All that remains is to arm yourself with patience and desire and follow our instructions. Sewing for beginners – a great way to learn needlework. The ability to sew can solve many problems in your life. It happens that you bought a thing, but, alas, it is not perfect. It requires some adjustment. Hem, take in, re-sew, etc. Therefore, you are forced to seek help from a seamstress. But why, if you can do it all yourself, saving money. Moreover, you can sew for yourself and your family. You can also decorate your home with various decorative elements. This will give it more coziness and originality. Things made with your own hands will never go unnoticed, that is why all the guests who come to your house for the first time will definitely pay attention to them. Today we will talk about how to sew a children's play tent with your own hands, an important thing for everyone who has little ones.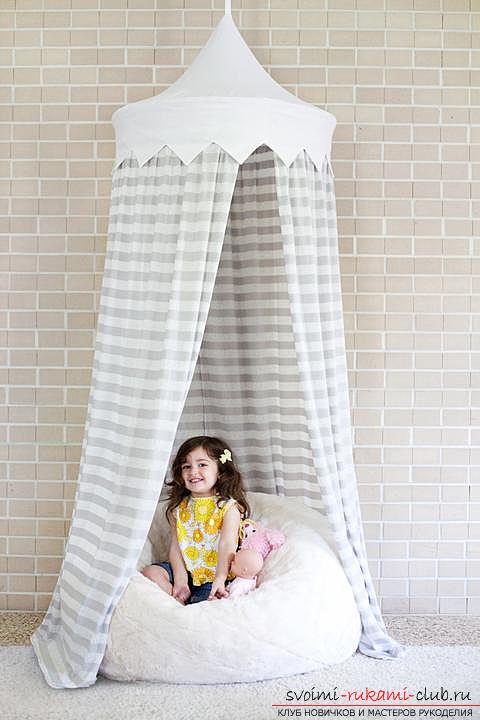 The idea is very interesting and unusual.Your kids will definitely appreciate it. They will be able to play in it themselves, and even bring their friends there. After all, it can be of absolutely different sizes. For work, you will need: two types of material: for curtains and for the roof; hula hoop; pins; scissors; marker; fasteners; sewing machine. First, you need to cut the fabric for the curtains. If you are going to make a not very large tent and will use a small hula hoop, then you will need only two strips, if the tent is larger, then there should be more strips. All the strips need to be folded together. Try to match the pattern. After that, you need to stitch on a sewing machine. Then hem the edges on the side and bottom.
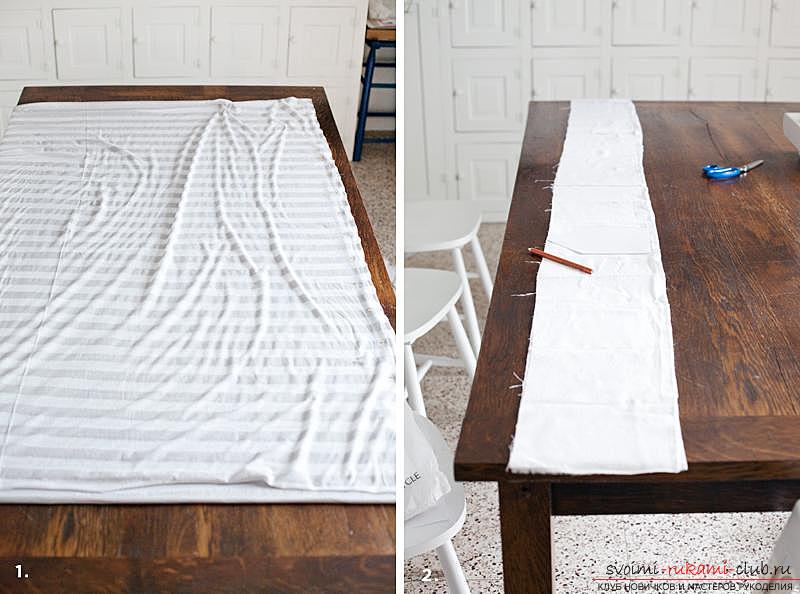 Now you need to cut two strips.Approximate length - 20 cm. They will play an important role. The role of perforated roof edges. After that, you need to cut a template from cardboard, which will indicate the perforation.
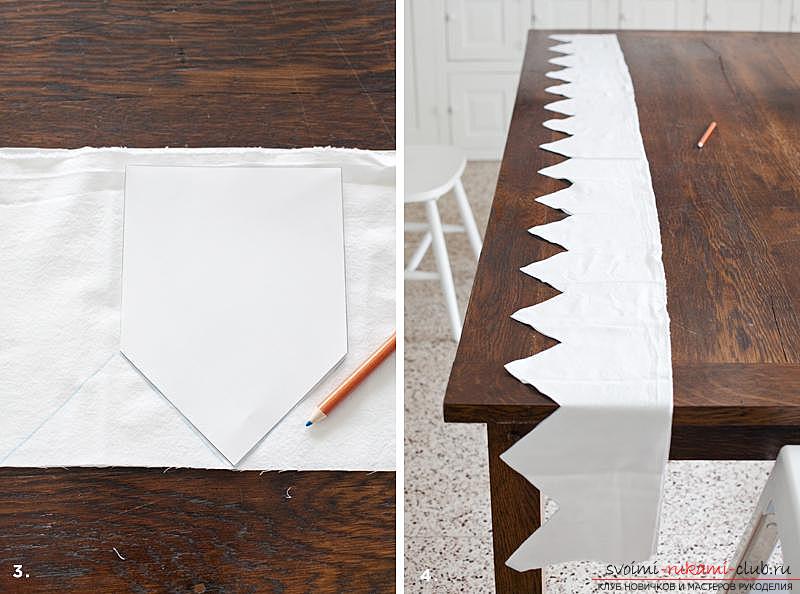 We put two strips together. We cut triangles on them according to the markings. We wrap the two-layer strip that we already have around the hula hoop. After this layer, we connect it so that in the end we get a circle.
 Now we pin the strips. We do this carefully so that the strips fit tightly to each other.
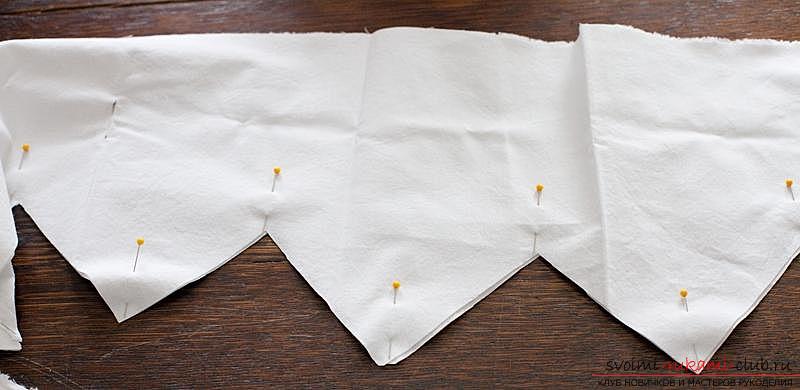 It's time to stitch the perforated edges. To do this, you need to step back about 5 mm from the edge. Now you need to trim the tops. Turn our workpiece inside out and iron it well along the edge for that.
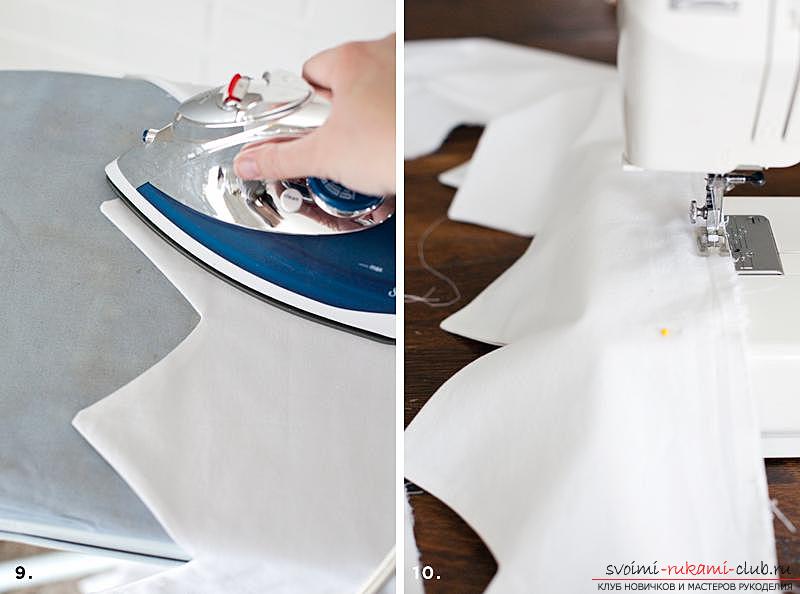 I draw your attention to the fact thatcarefully turn the flags out, you can use a long stick or wire. After that, stitch the top of the ribbons. From the material intended for the top (roof) of the tent, you need to cut a thin strip, long enough. From it you should sew a loop for the tent itself. During work, be guided by the height of the ceiling and the height of the tent itself.
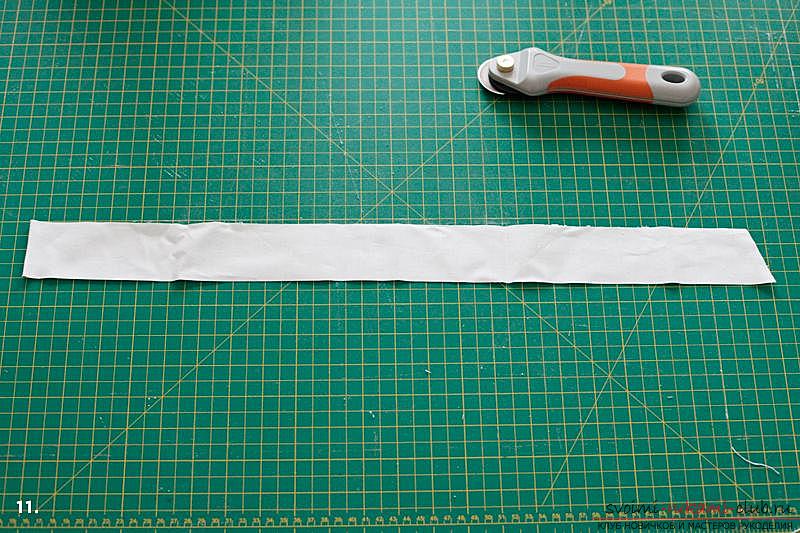 Fold the strip, then stitch it. As a result of all manipulations, you should get a sleeve of a certain length. Now it needs to be turned inside out.
 Iron the tape so that the seam is exactly in the middle. Cut out exactly eight identical triangles that we need for the roof. Their size should correspond to the size of the hula hoop.
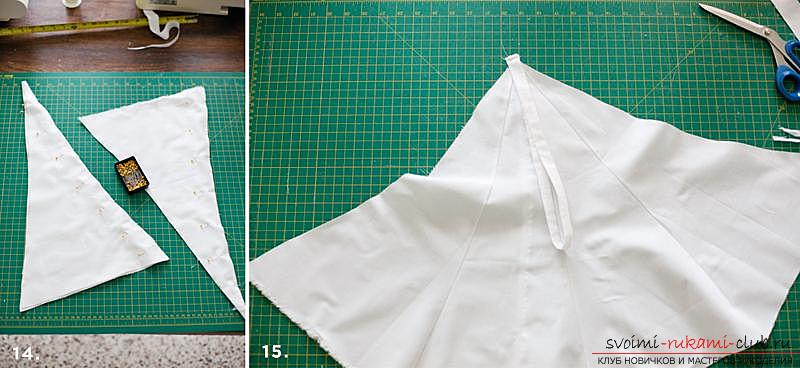 We pin the edges and stitch fourtriangle. We do the same with the rest of the triangles. Before you are going to connect the two parts, you need to fix the loop that you have already made earlier. We fold the two parts, there should be a loop between them. We pin these parts together, then stitch the edges.
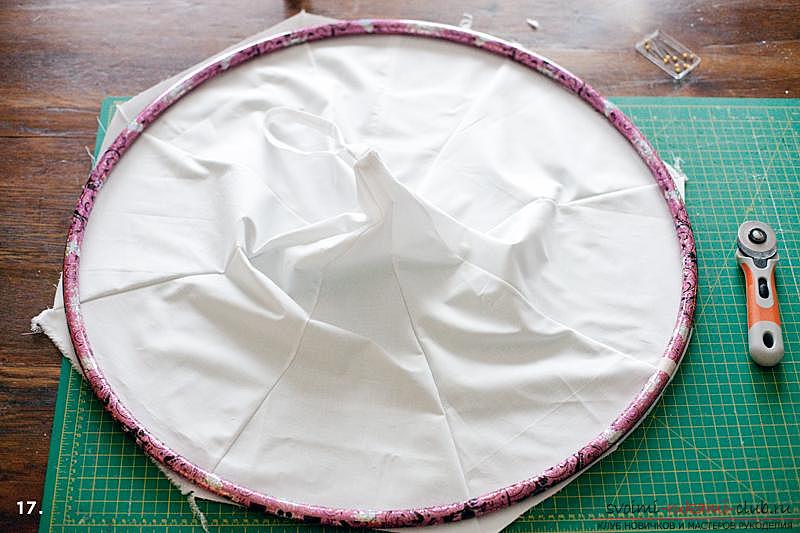
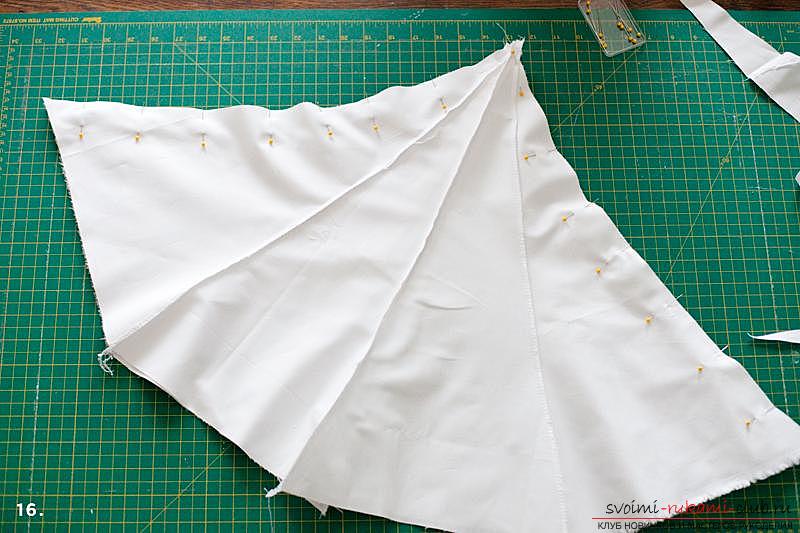 Now we place the hula hoop. Then we trim it so that the allowances are 3 cm.We attach the tape to the curtains.All the finished parts need to be connected using a sewing machine. Sew a Velcro fastener to the inside of the curtain. They will be able to fix and hold the hula hoop. There is very little left. Fix the tent to the ceiling.
Comments
Related posts:
 A simple master class on sewing a dark mask for sleeping will help yourself to sew a useful thing
 Sewing any thing you will help remove the measurements from the model for example, sewing a straight skirt
 An interesting master class on sewing a baby blanket from triangles will help you learn how to sew from shreds
 We offer a master class, a detailed study of which will help you easily sew a dress transformer yourself
 A master class with photo on knitting with needles will help to create a children's sweater that will warm in any weather. The use of bright yarn will make the thing unique and beautiful.