Master-class with a photo and diagram will teach how to tie snowflakes on a Christmas tree crochet
To create a snowflake, we need:
- thin yarn, preferably cotton, in my version it is yarn Yarnart Violet;
- hook number 1;
- adhesive PVA (with a thick adhesive a little water);
- sewing pins.
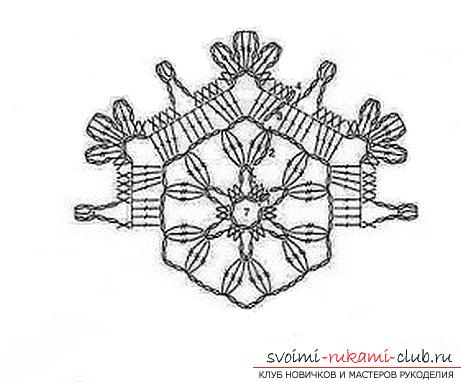
So, let's start knitting. 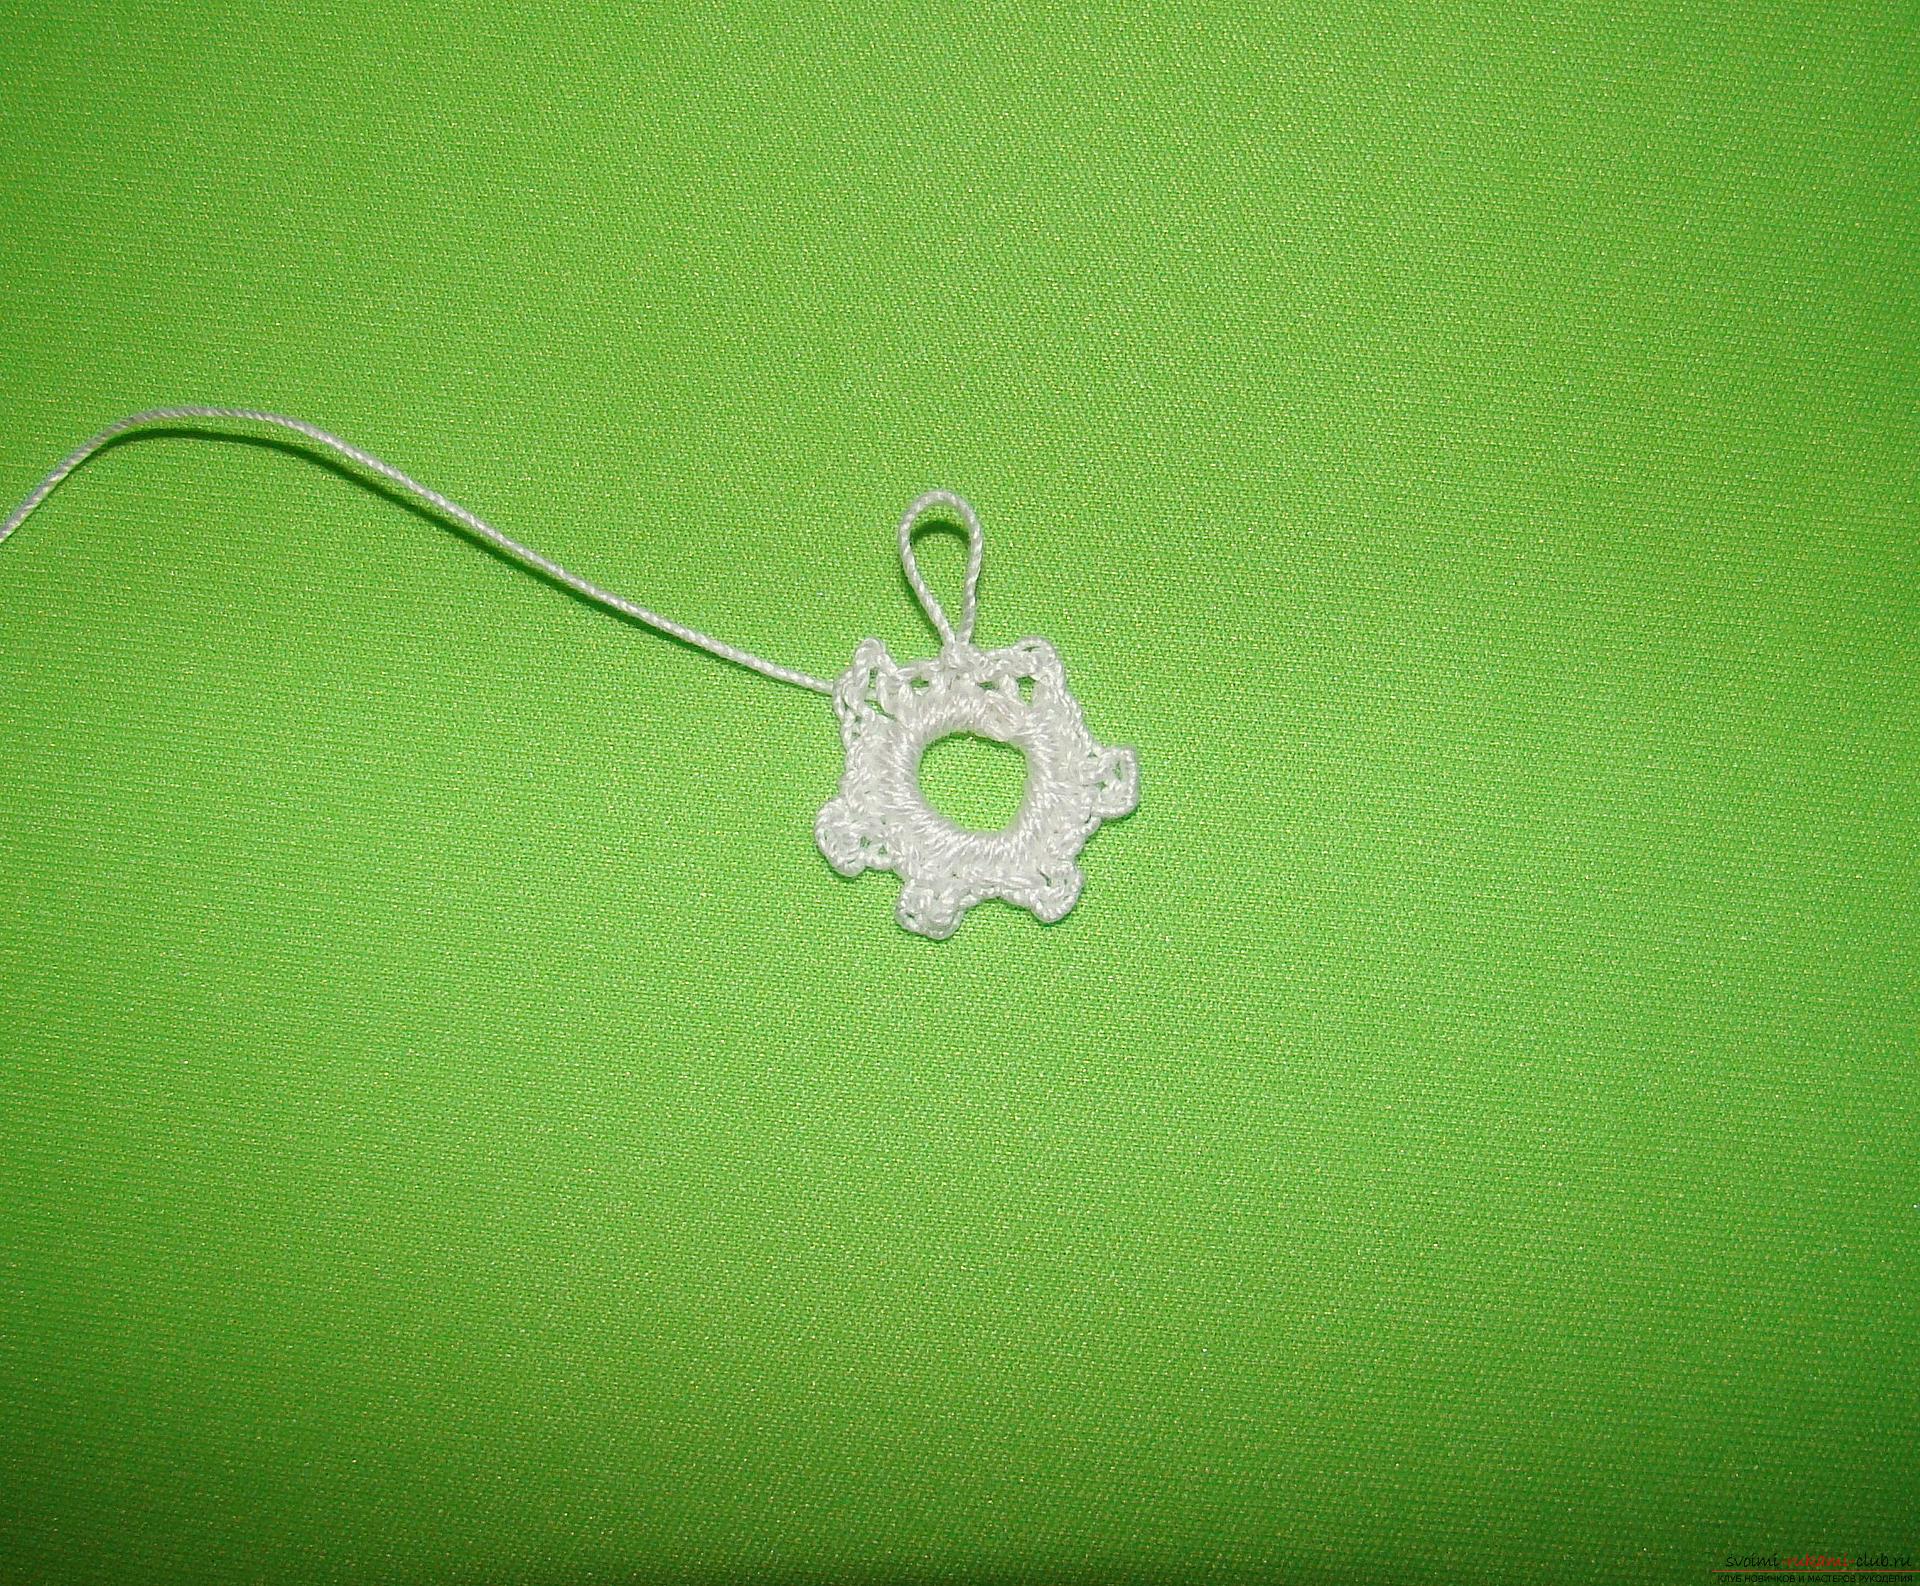 1. Begin knitting with a set of chains of 7 air. loops (VP), which we loop into the ring with a connecting loop (SP). Now we make 1 VP of lifting and begin to knit in a ring 3 polostolbika, we make 4 VP, again 3 polostolbiki, so repeat, until we have 18 holes and 6 arches from 4 VPs. We finish a number of joint ventures.
 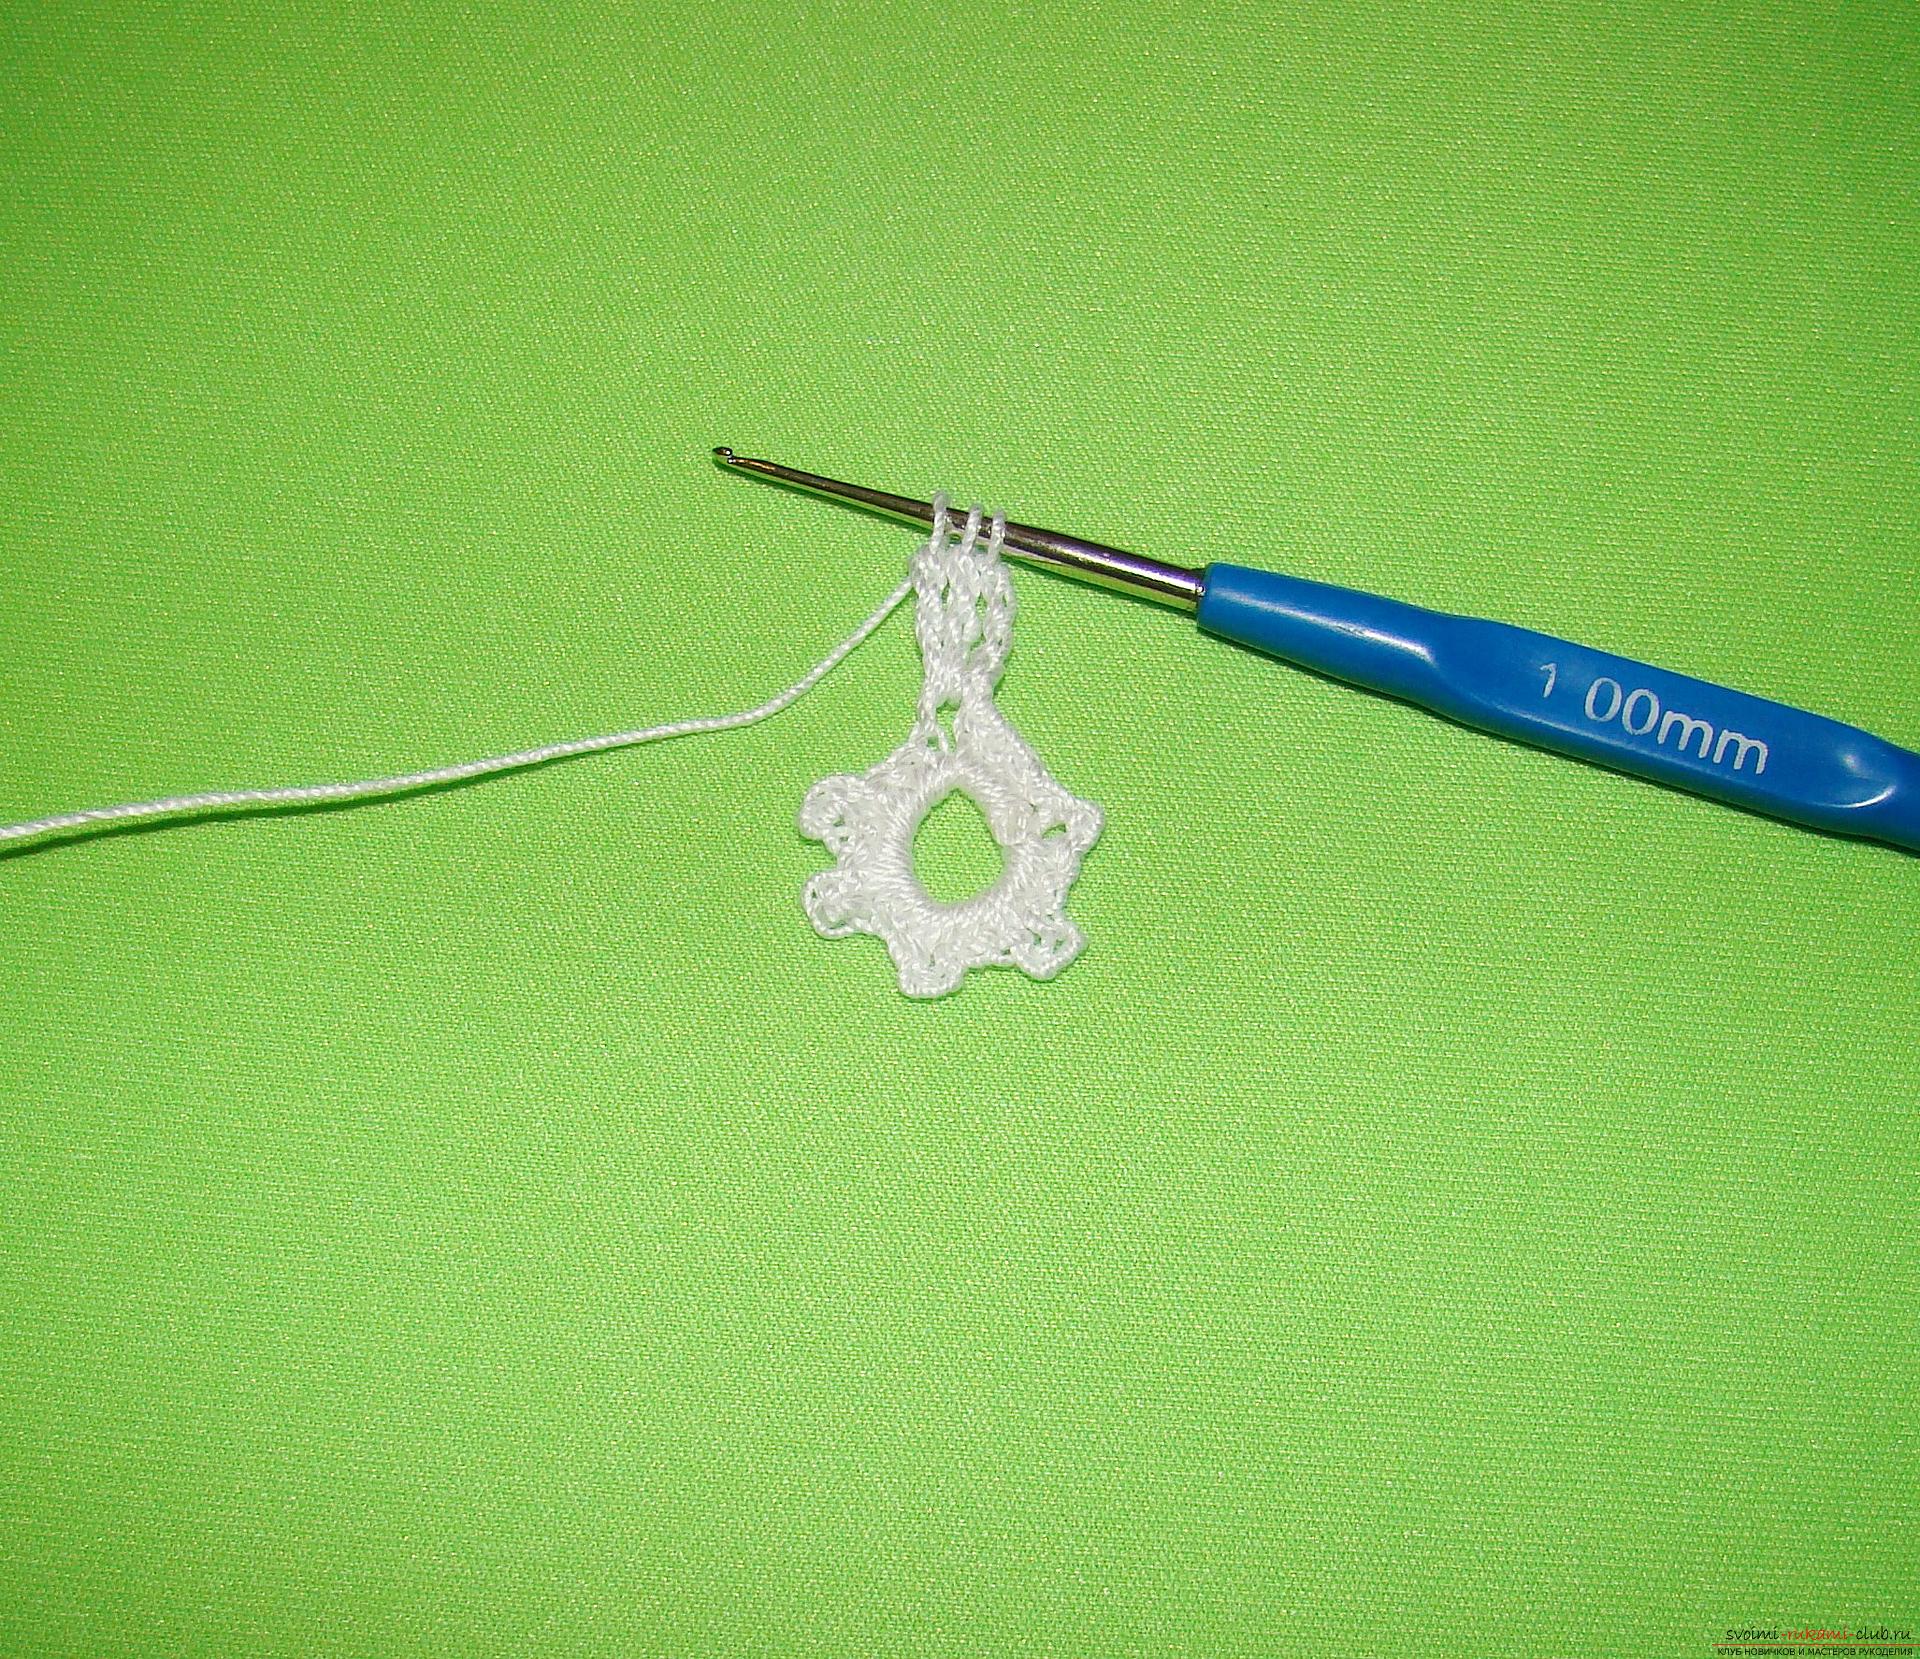 2. Now we need to go to the top of the arch from the 4 lower-row VIs. To do this, we move along the semi-columns of the lower row of SP to our arch, make one more joint venture in the arch and proceed to knitting lush columns consisting of 3 columns with two capers (CC2N) in one base and with a common top. We start knitting with 4 VP lift, then we knit in the arch 2 SS2N, but we do not tie them to the end, only nakids, as a result we have 3 loops on the hook.
 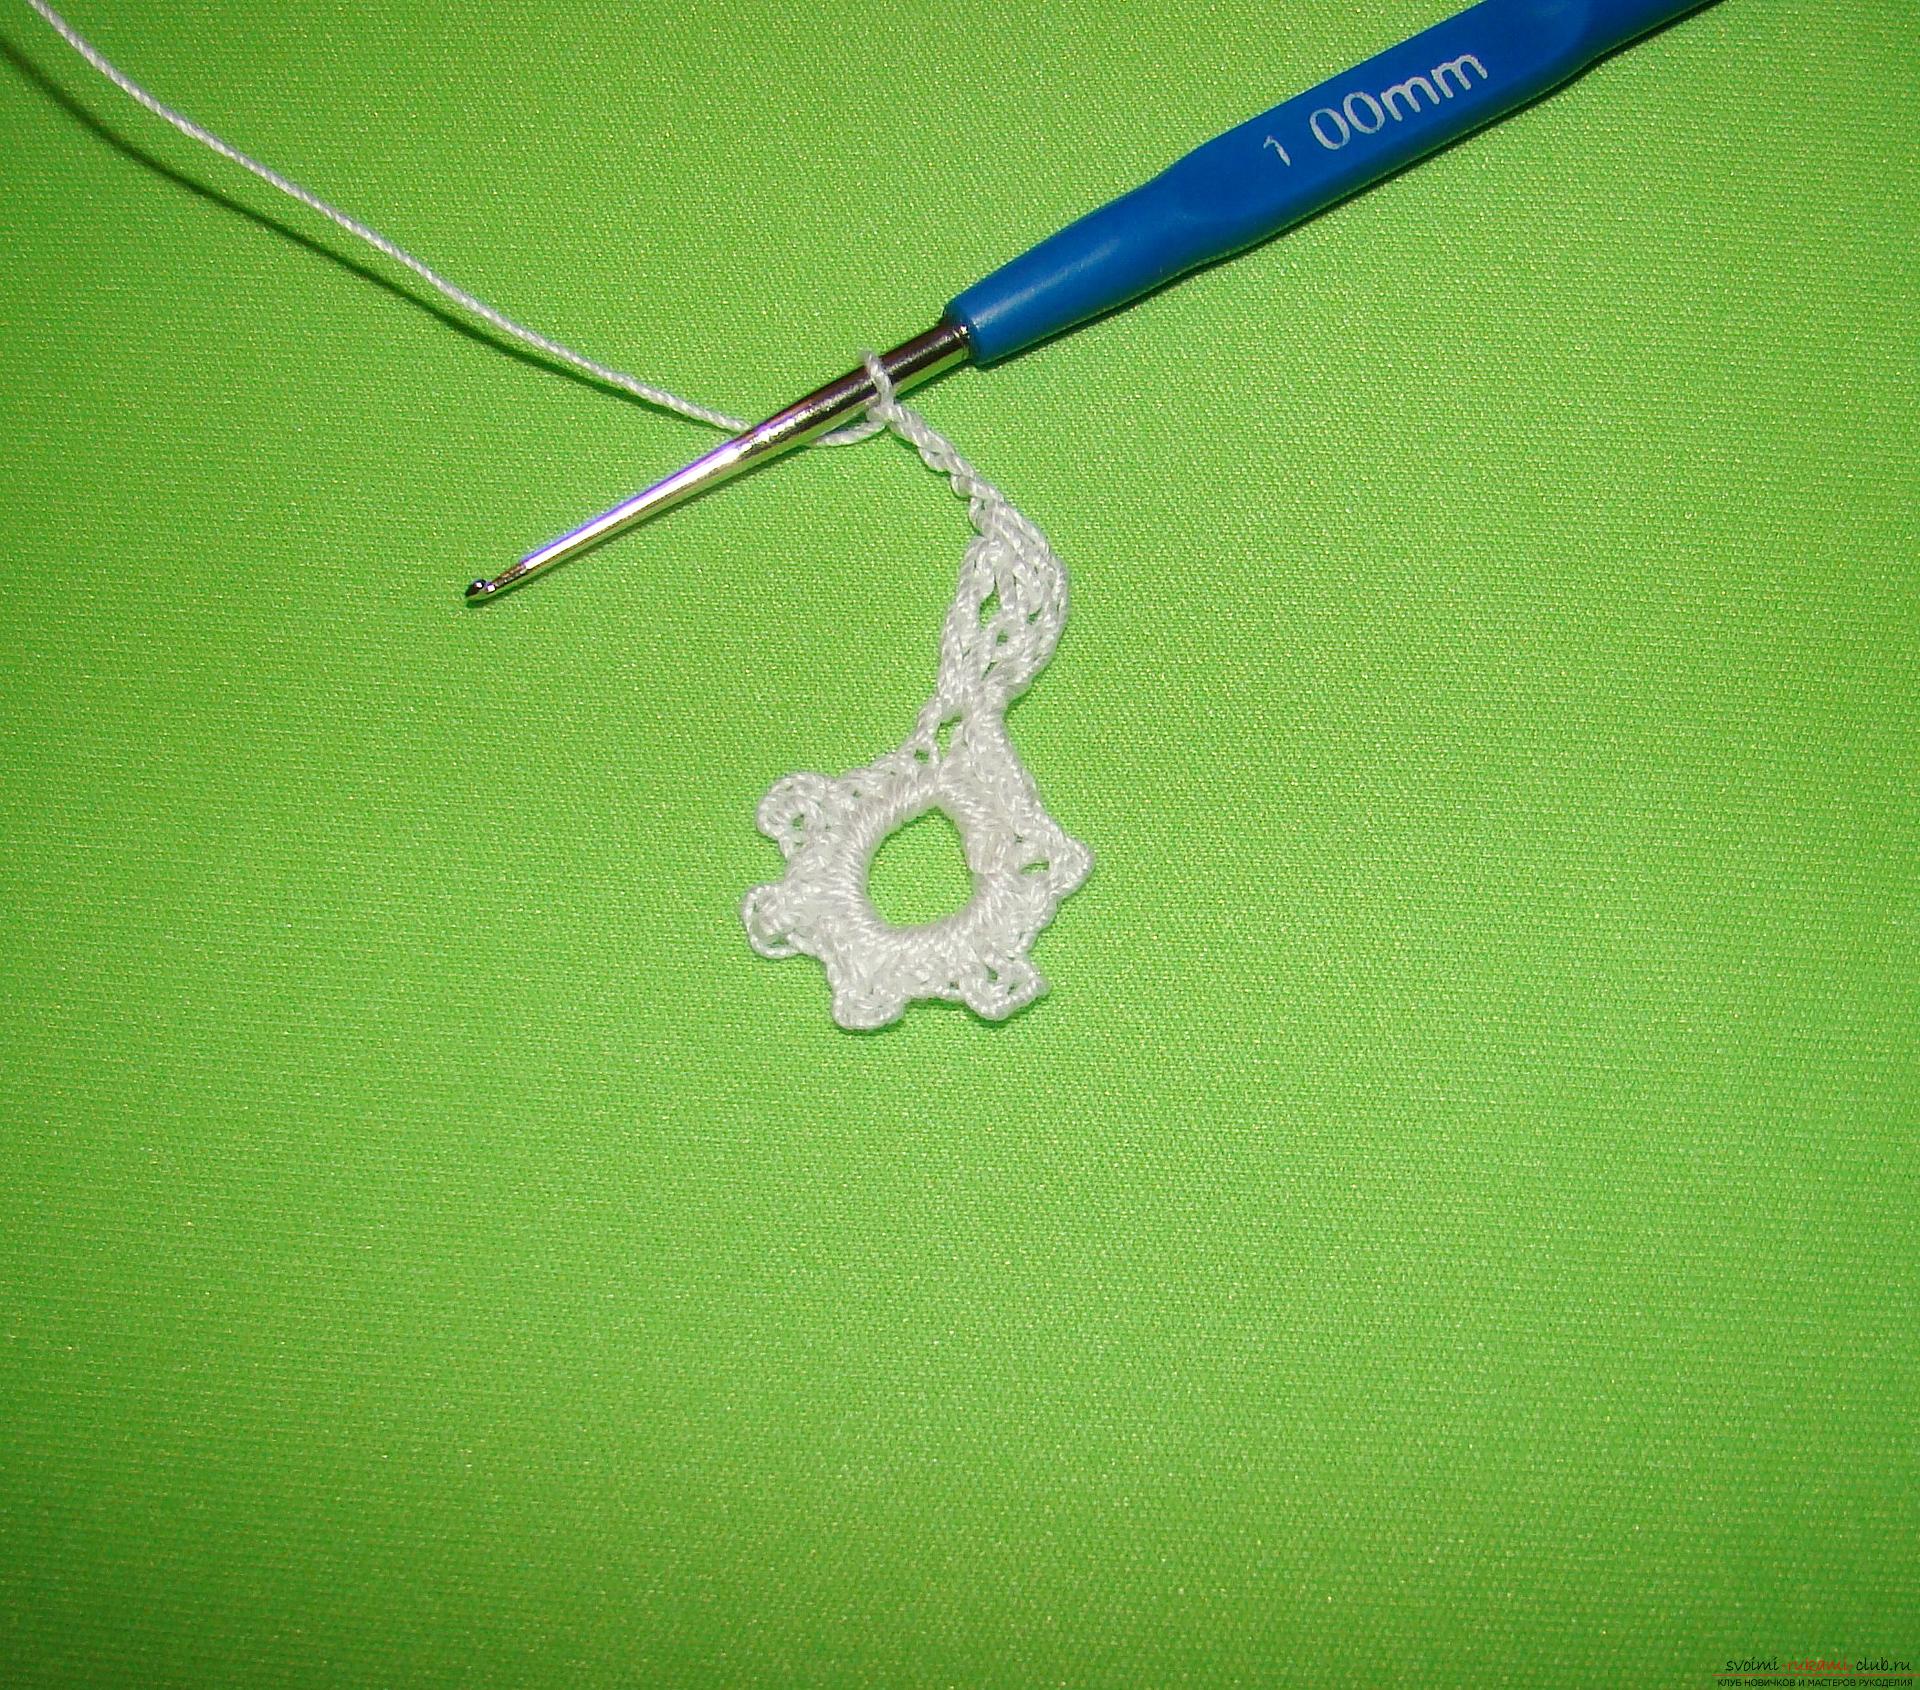 3. Grasp the working thread and stretch it through 3 loops on the hook - we tied 3 CC2N with a common top and bottom. Then we make 4 VP.
 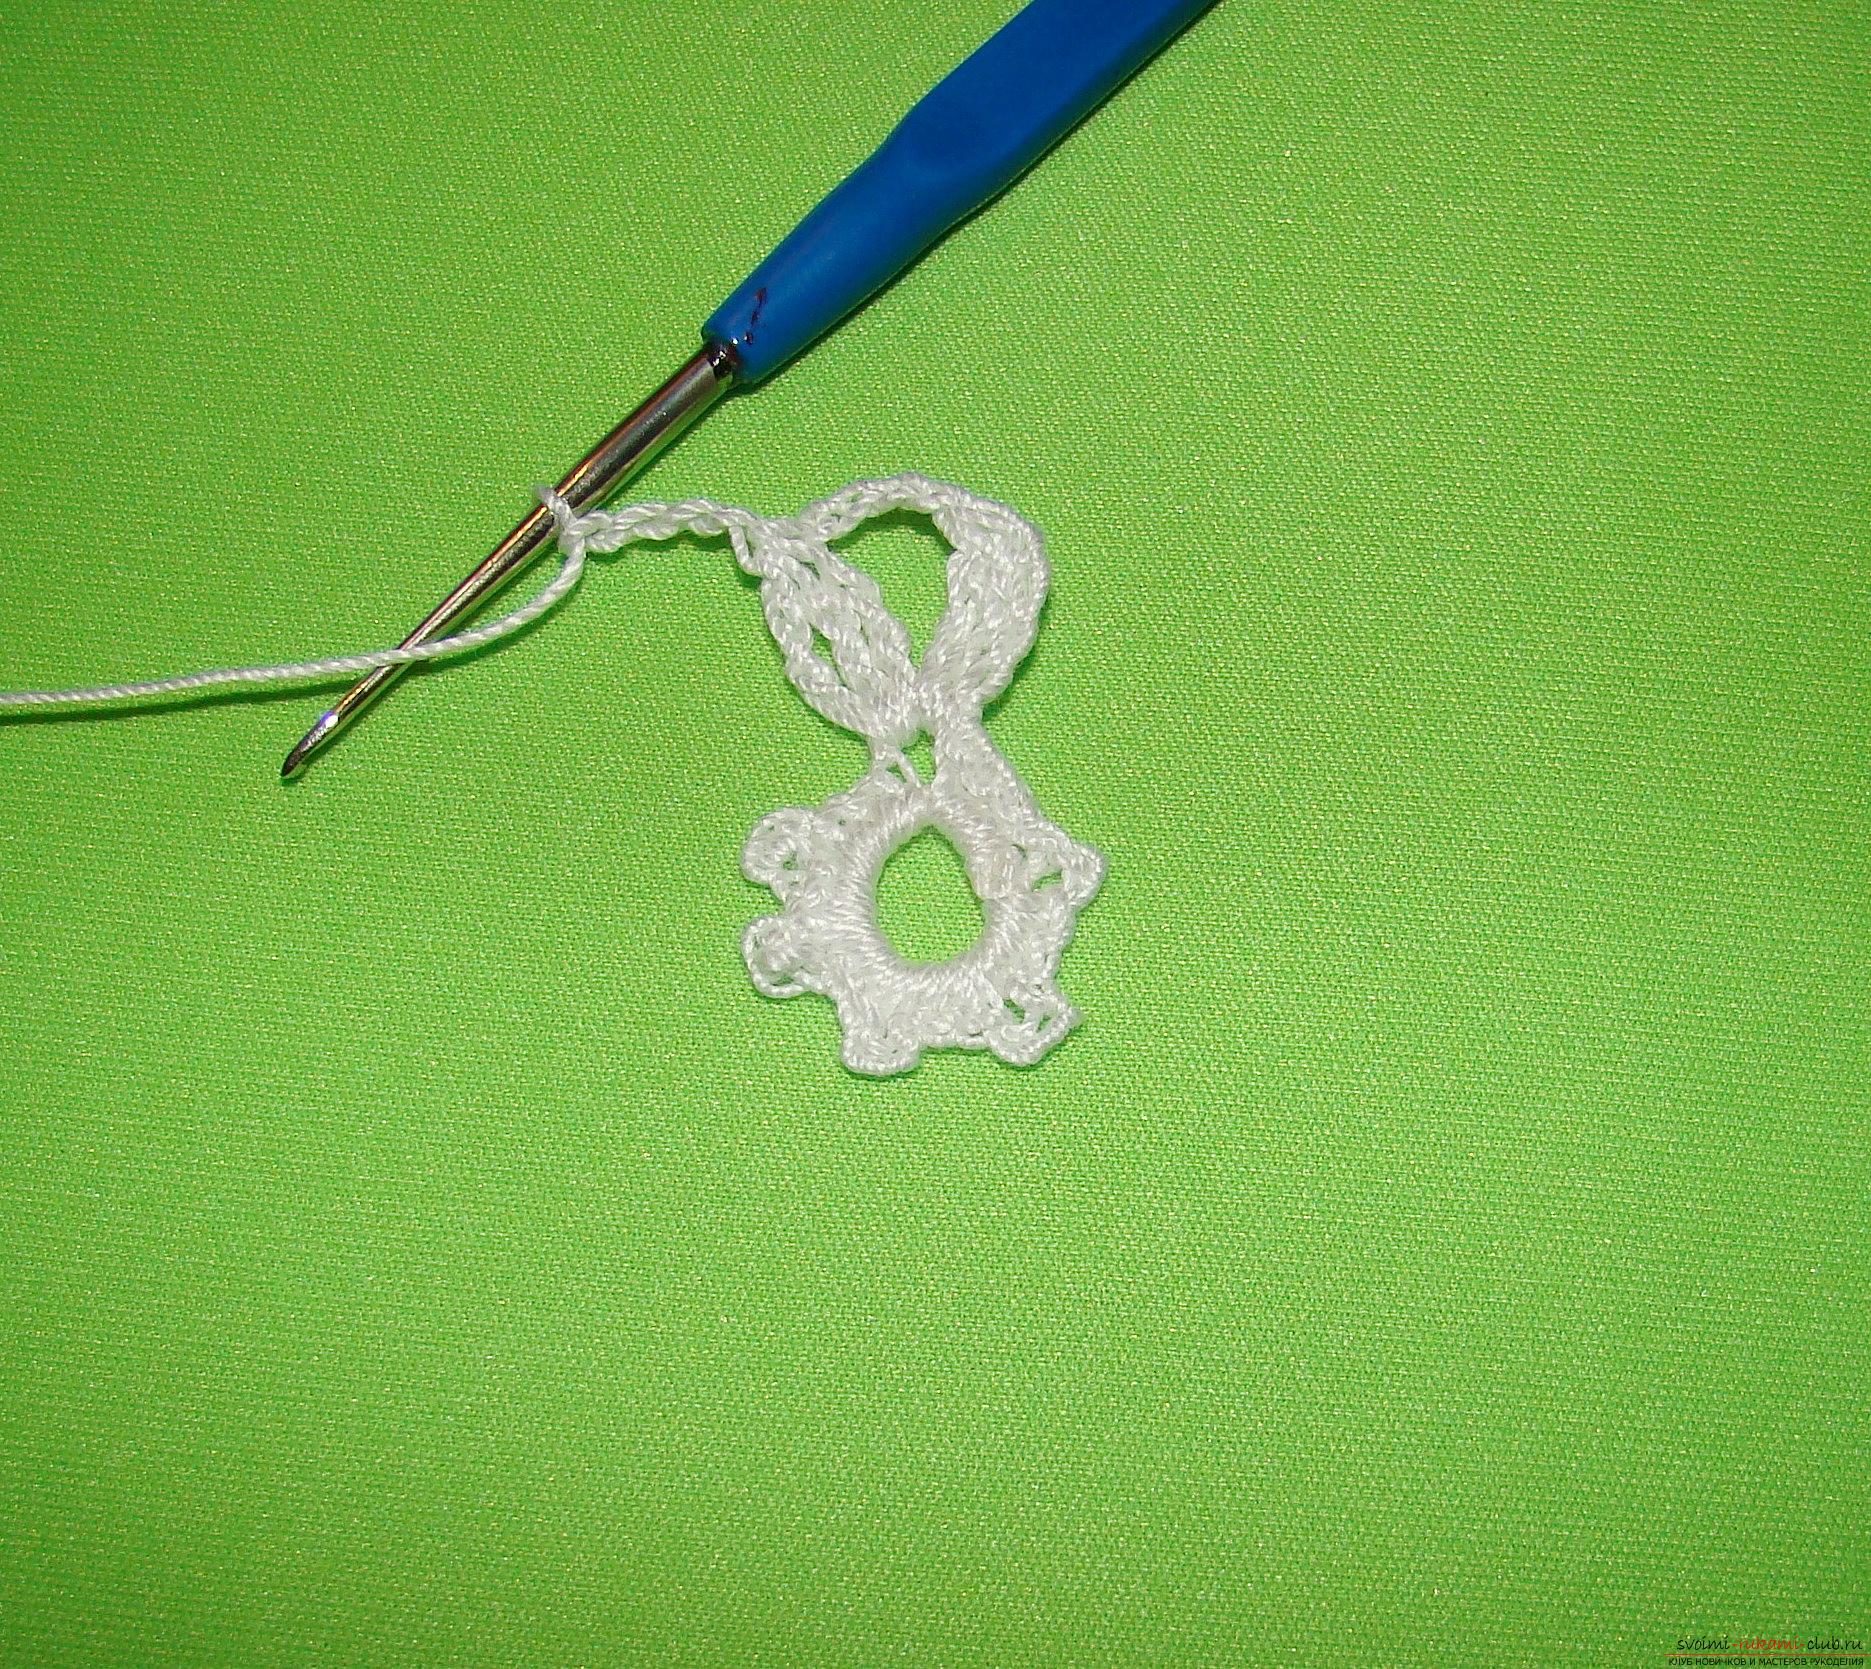 4. Having made 4 VP, we knit a magnificent column in the base, where we already tied one magnificent column. We make 4 VP and knit the following magnificent columns already in another arch from the 4 lower-row VIs.
 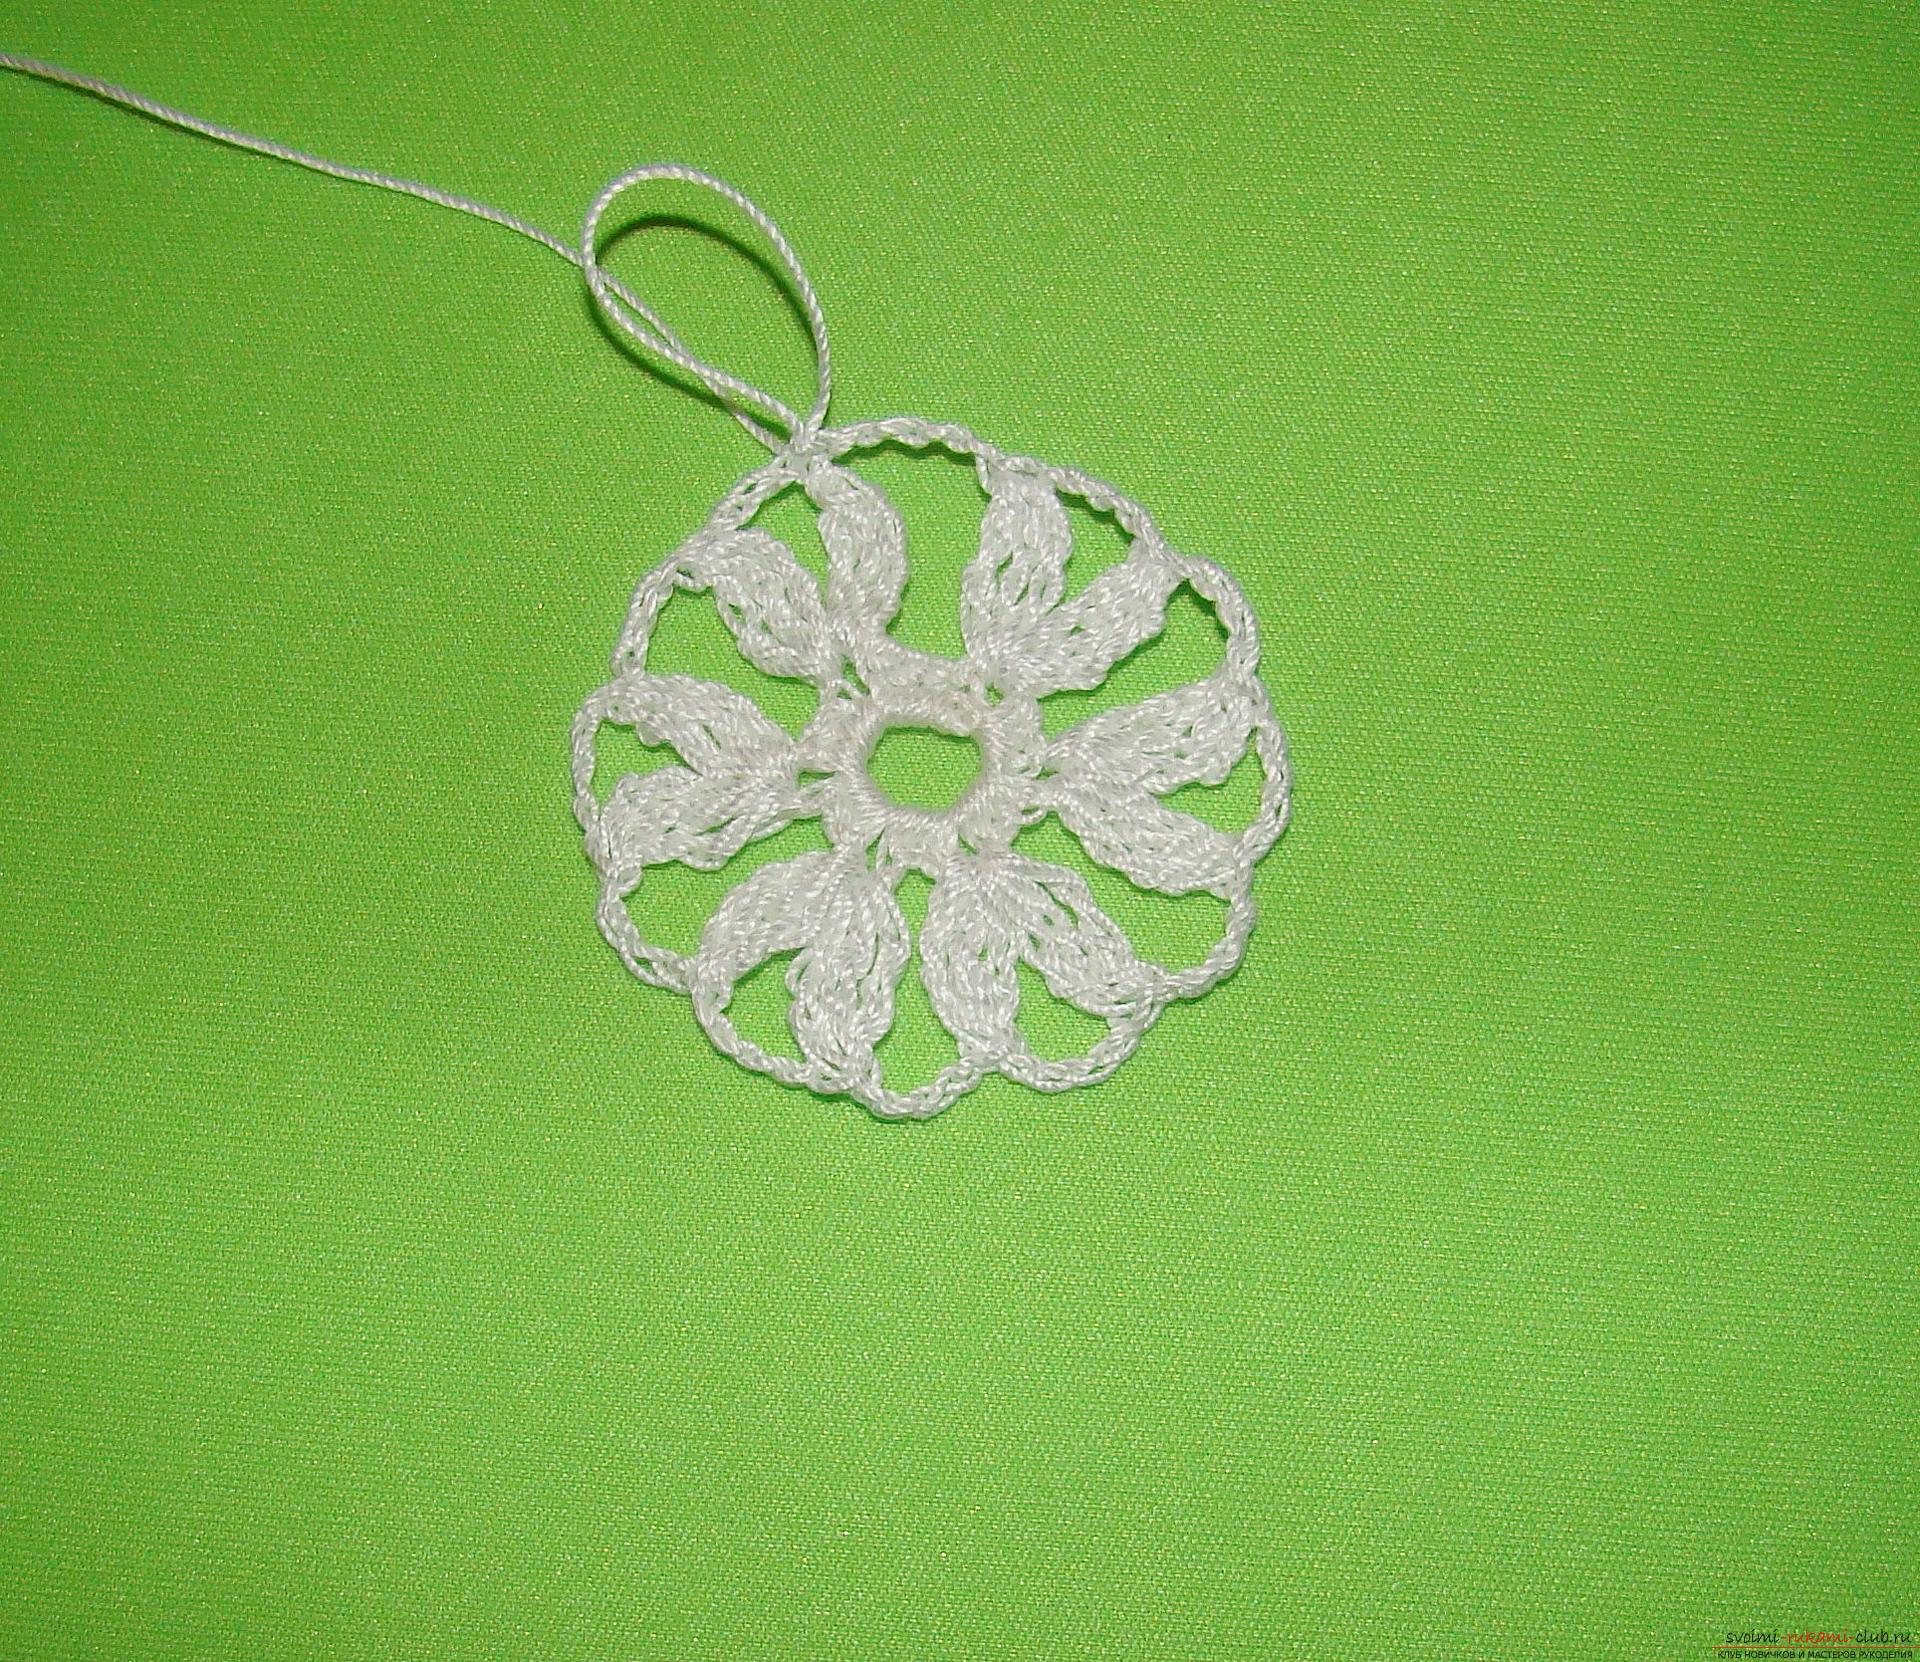 5. Continue knitting to the end of the row, finish the series with a connecting loop.
 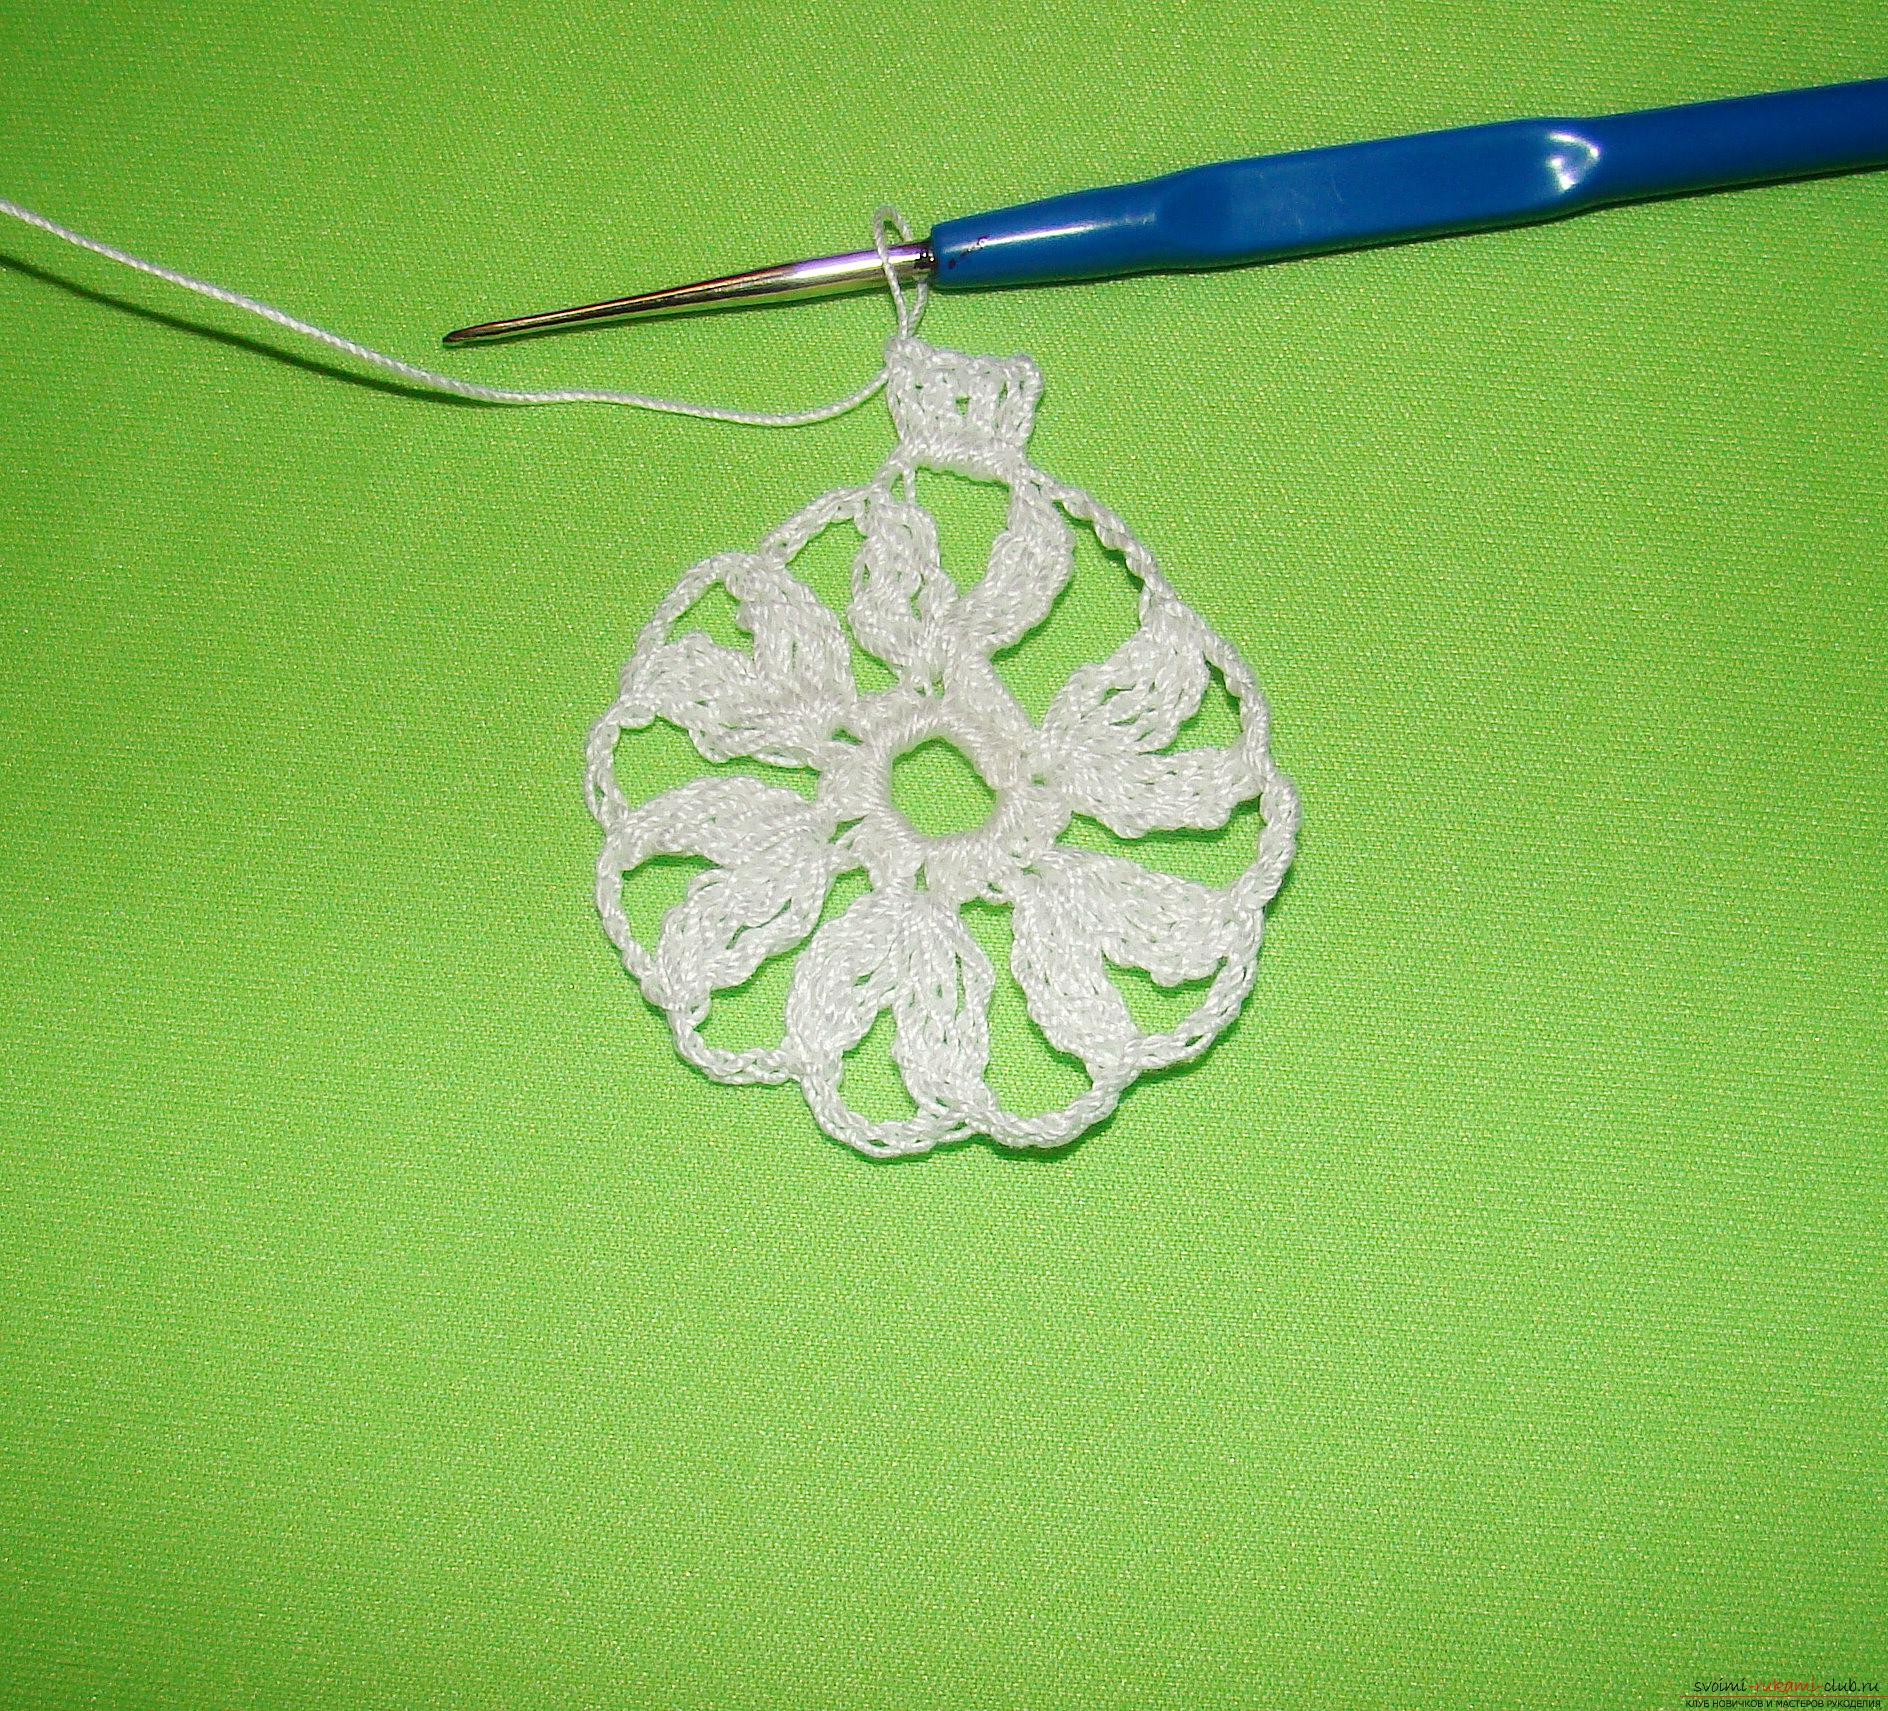 6. Now we pass the joint venture on an arch of 4 VP between two magnificent columns of the bottom row. We make 3 VP of lifting, then 3 more columns with a crochet (CCH).
 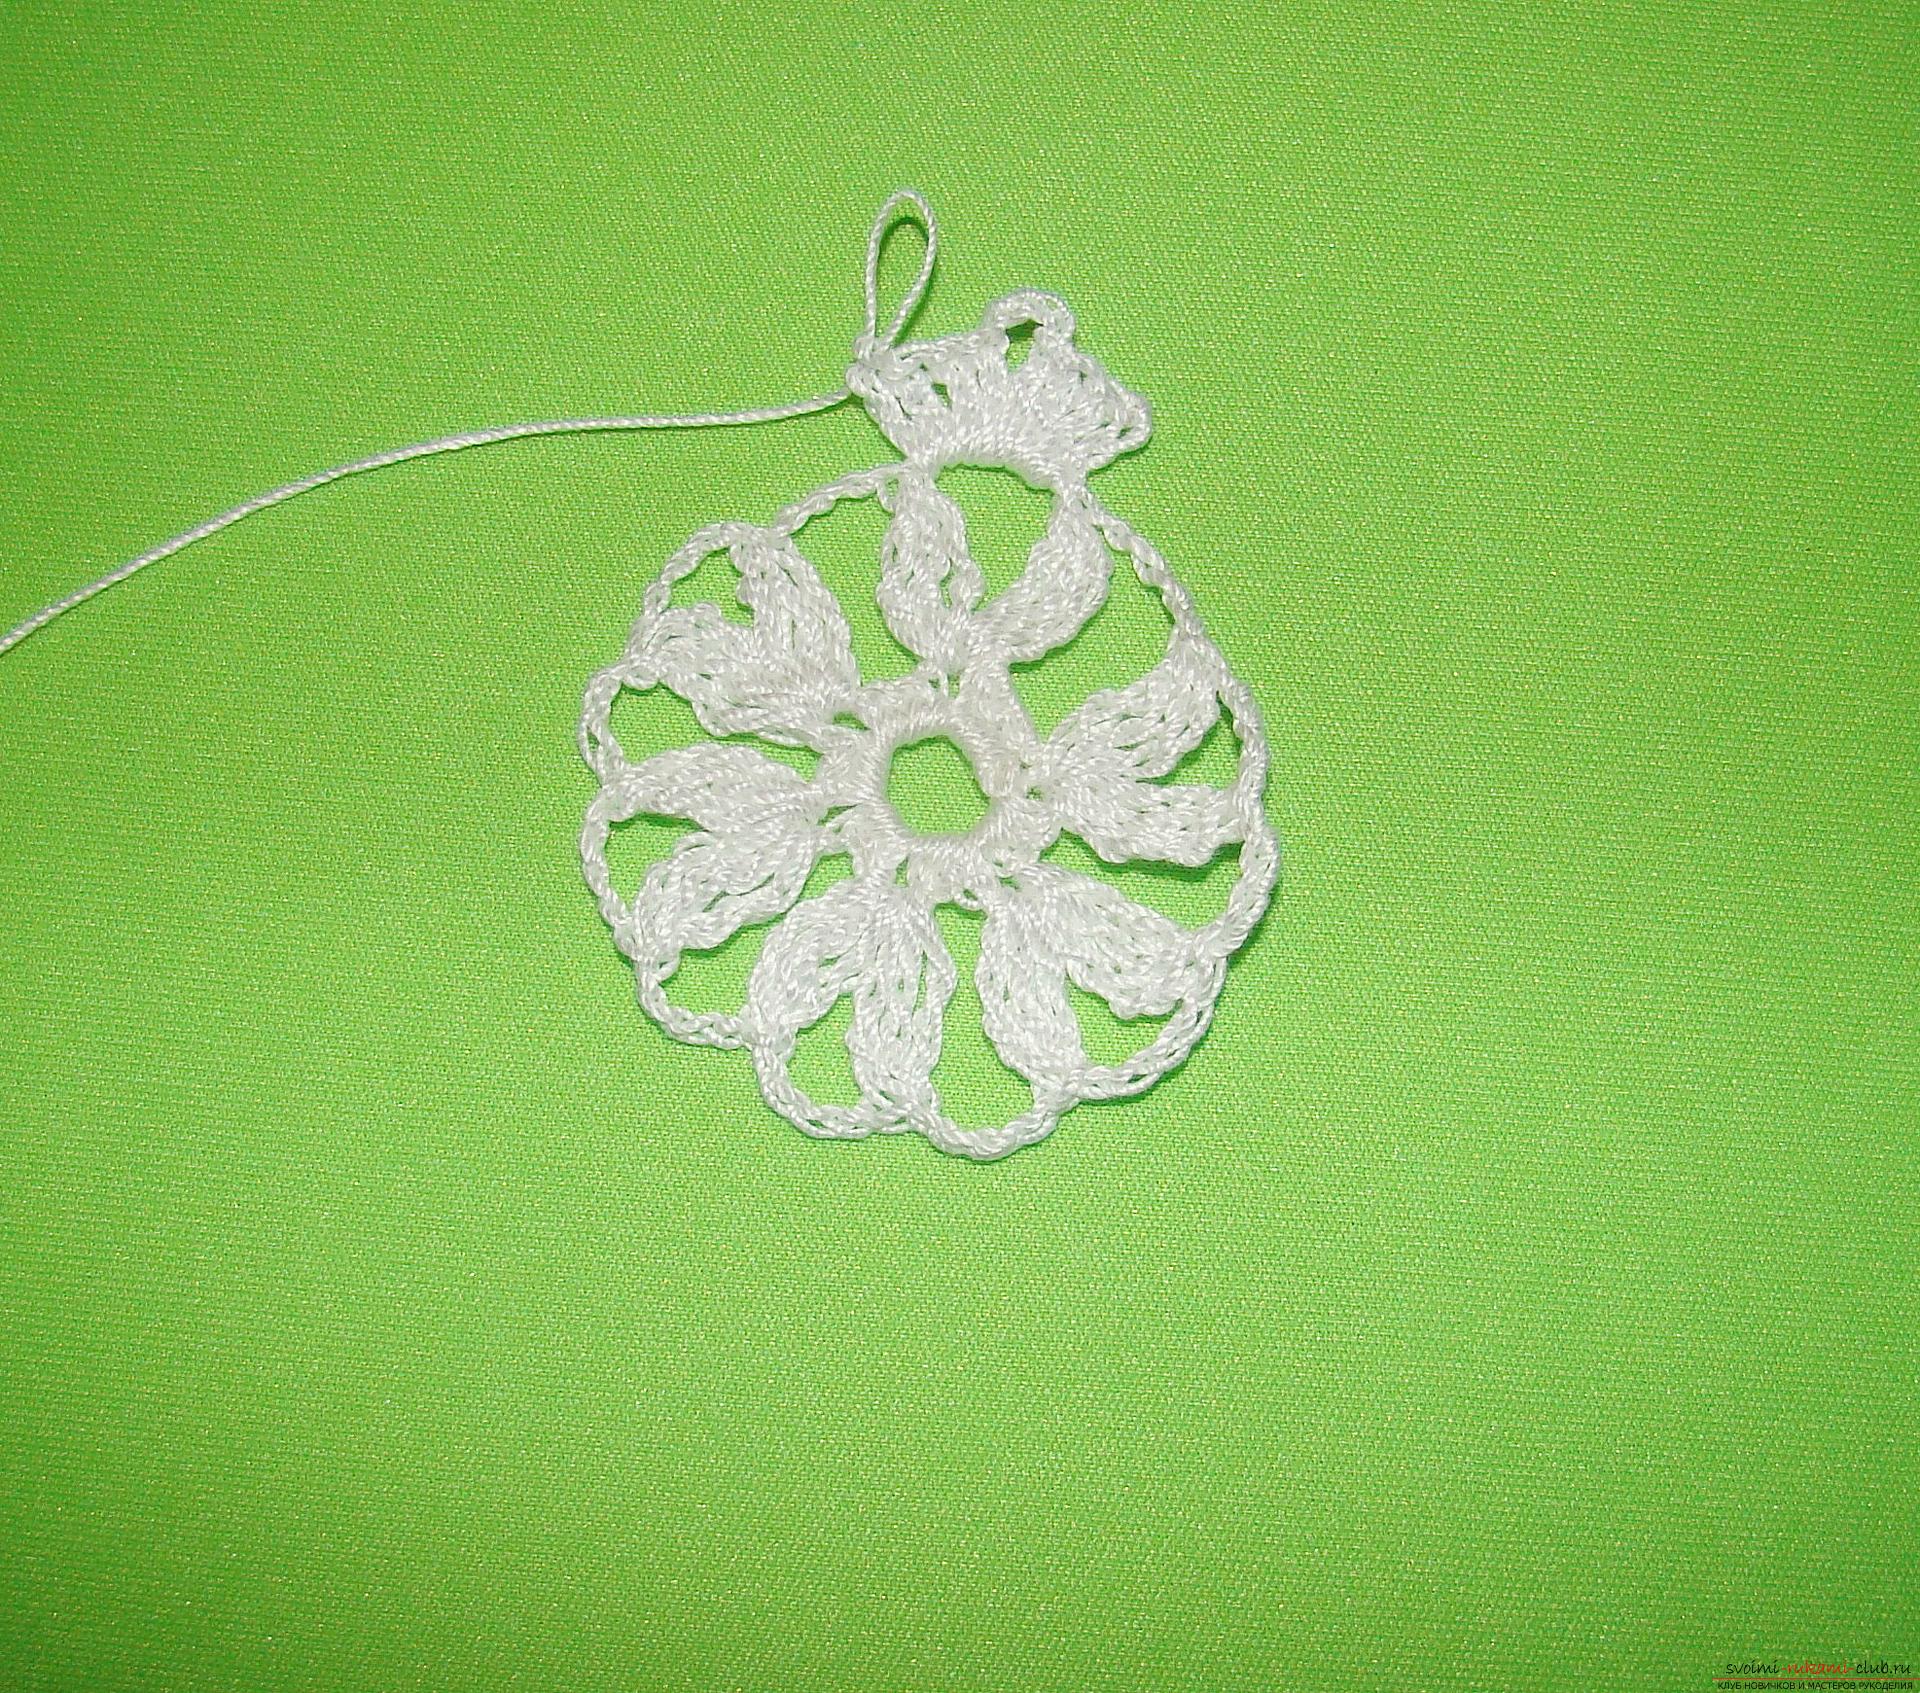 7. Next we knit 4 VP and on the same basis we knit 4 CLS.
 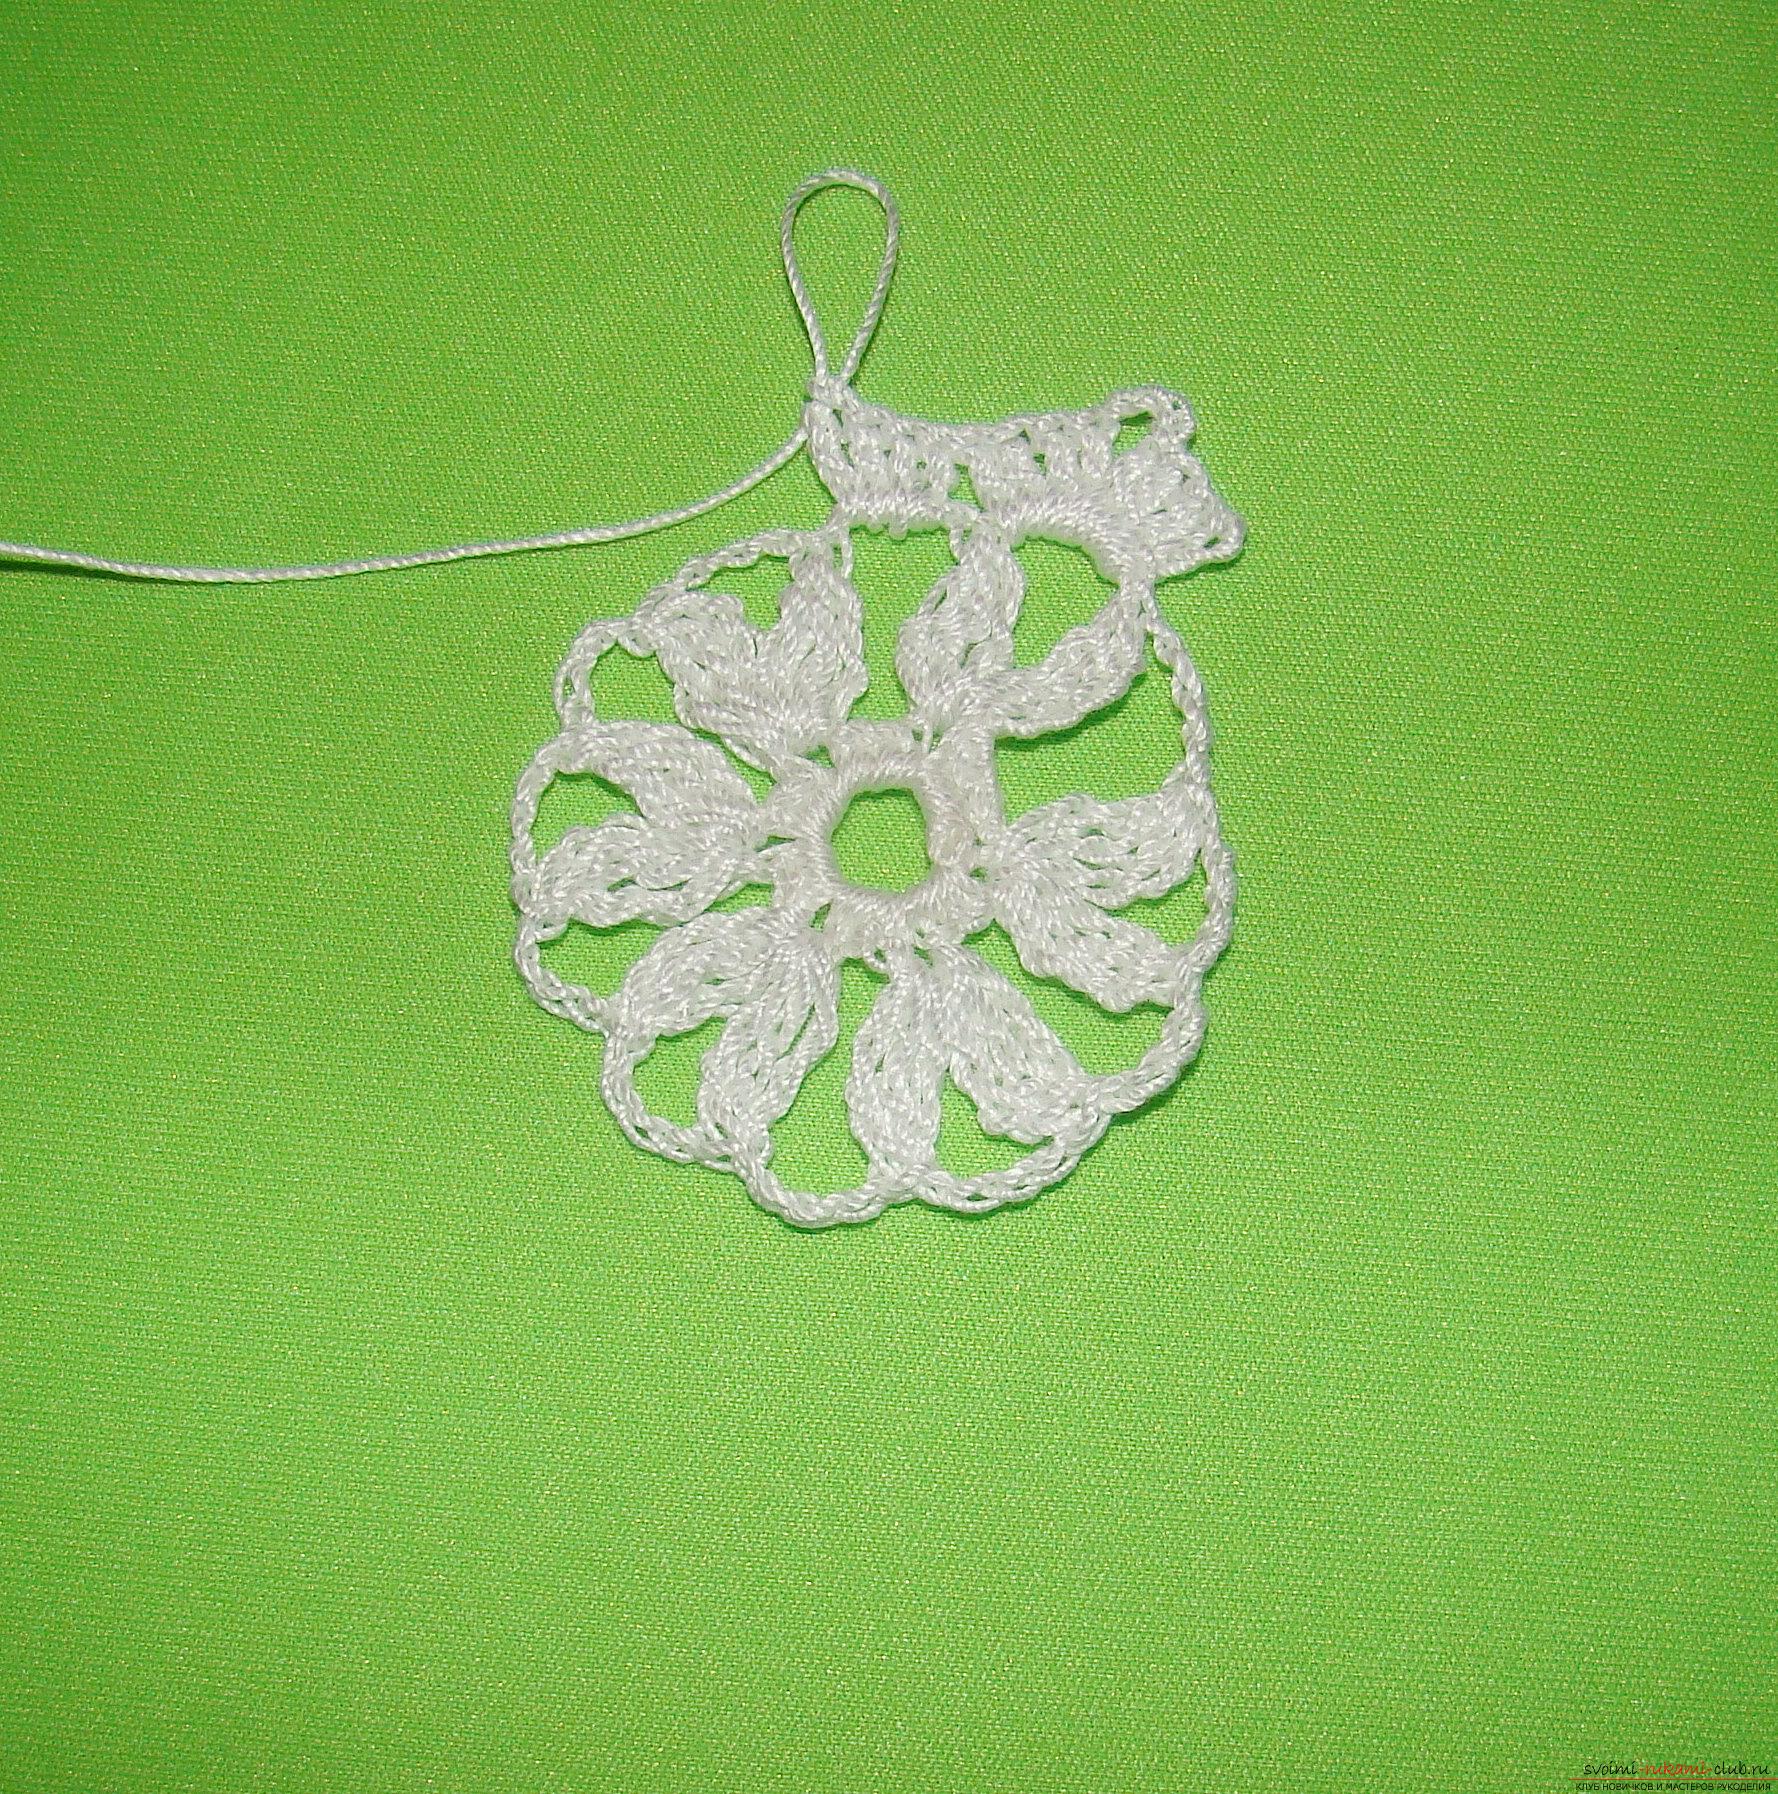 8. In the next arch of the 4 lower-row EP we only knit 4 CLS.
 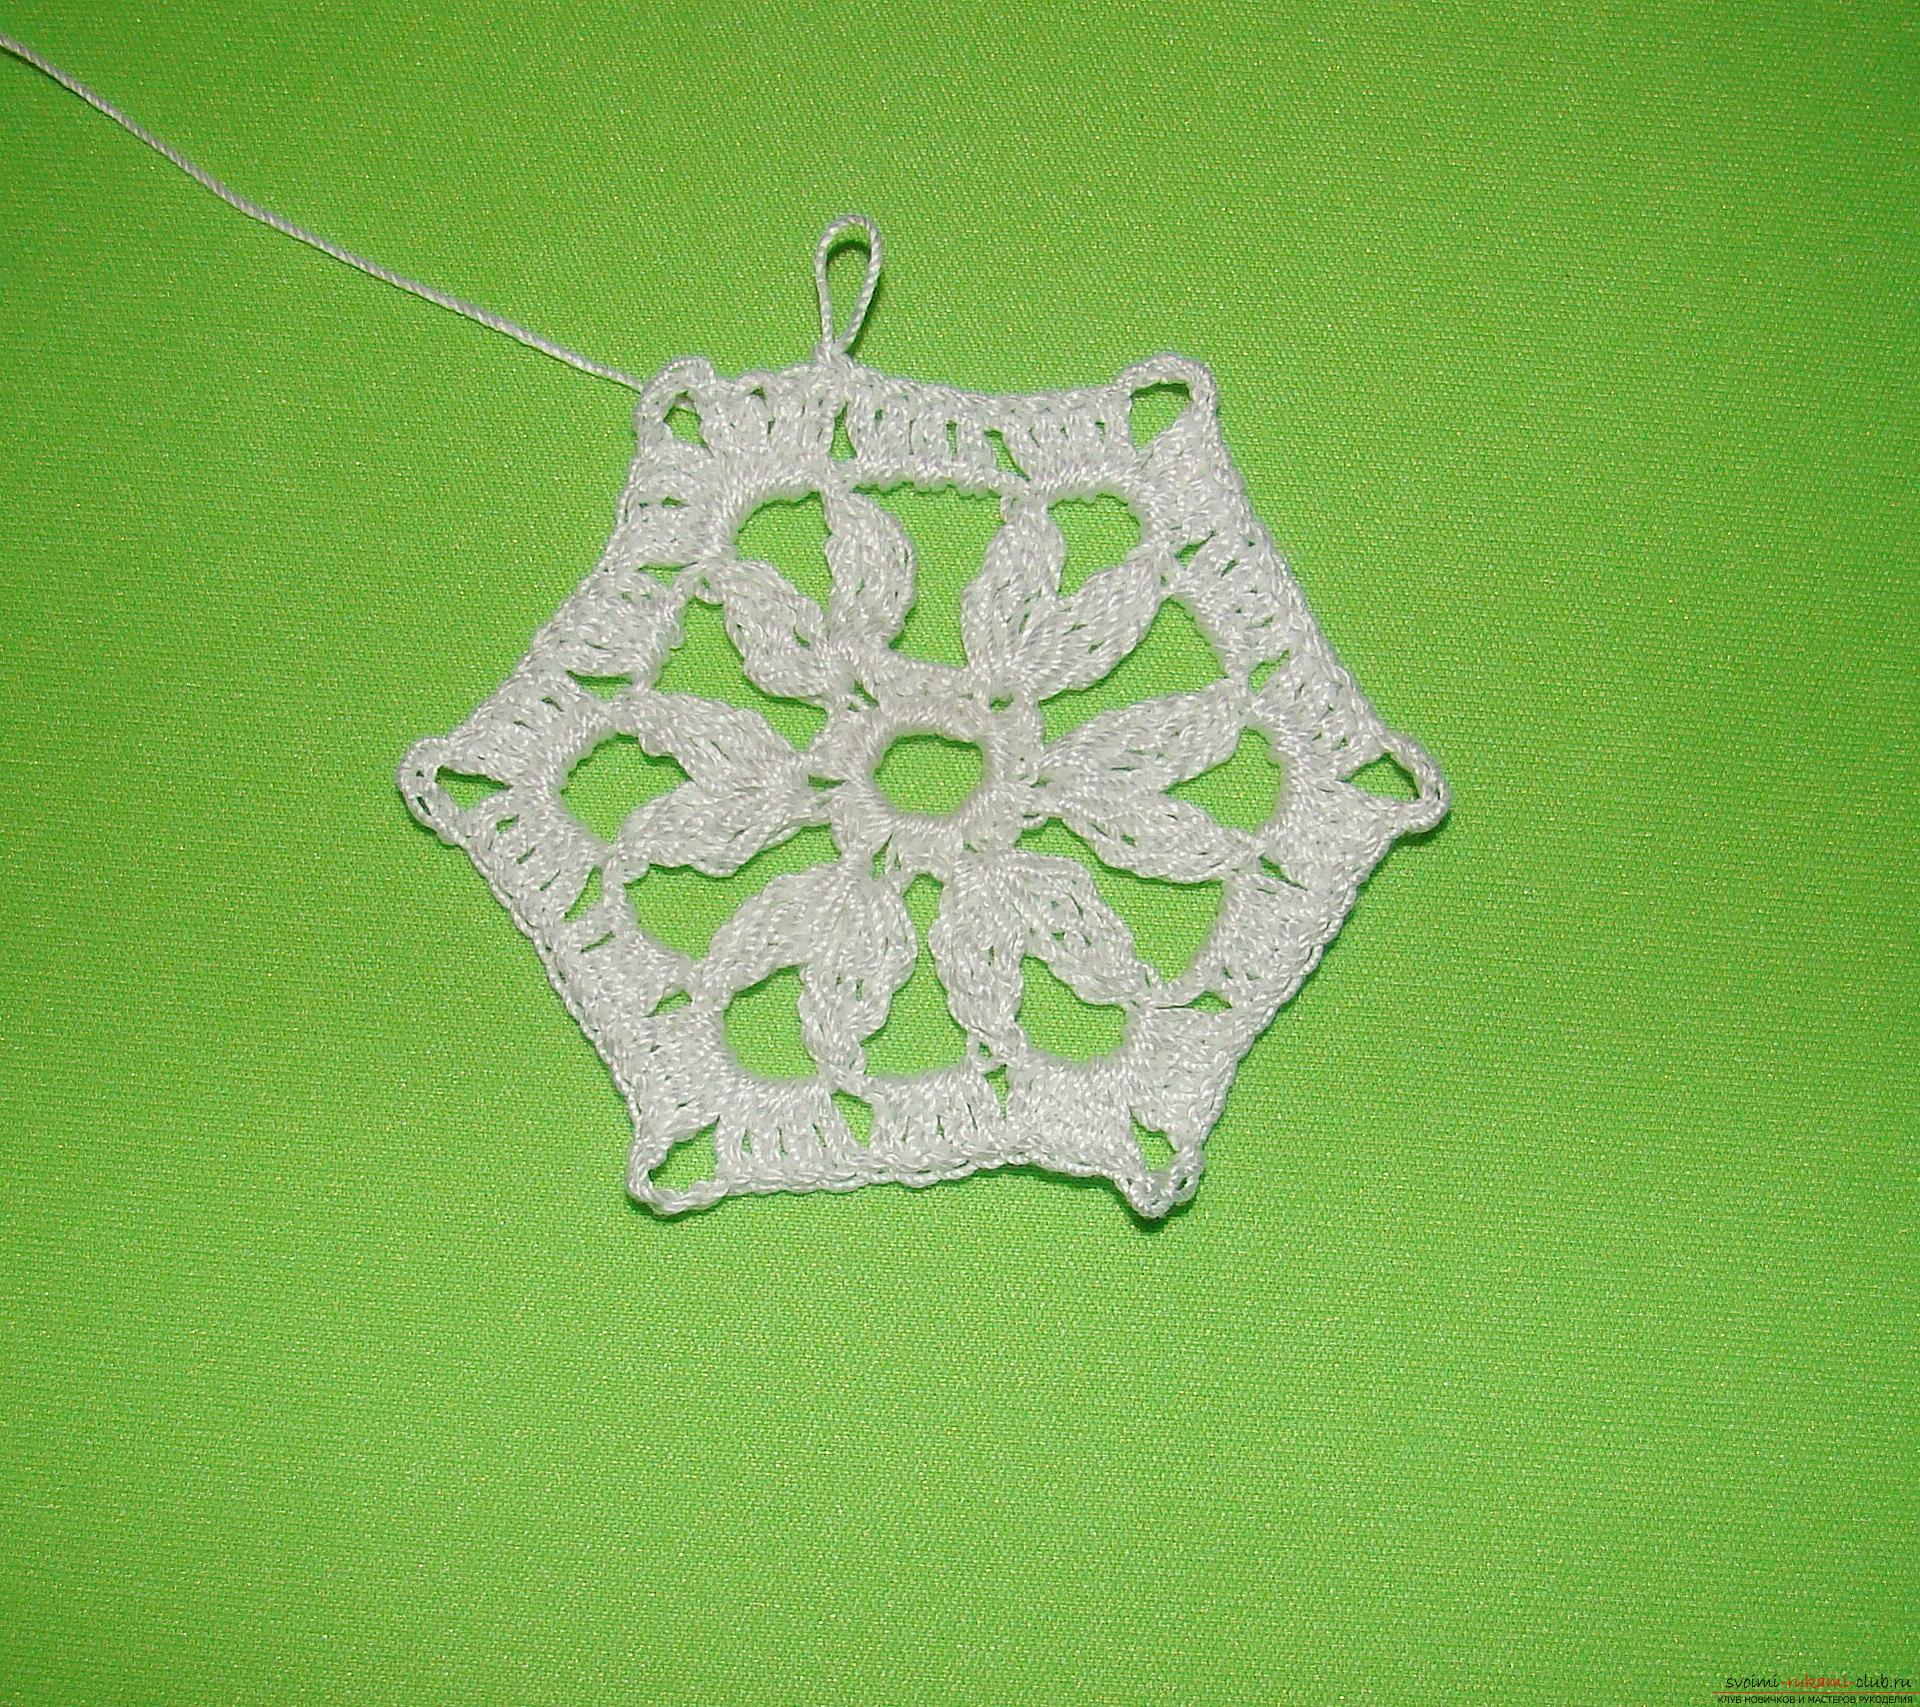 9. Thus, we repeat the alternation to the end of the series, we finish the series of joint ventures.
 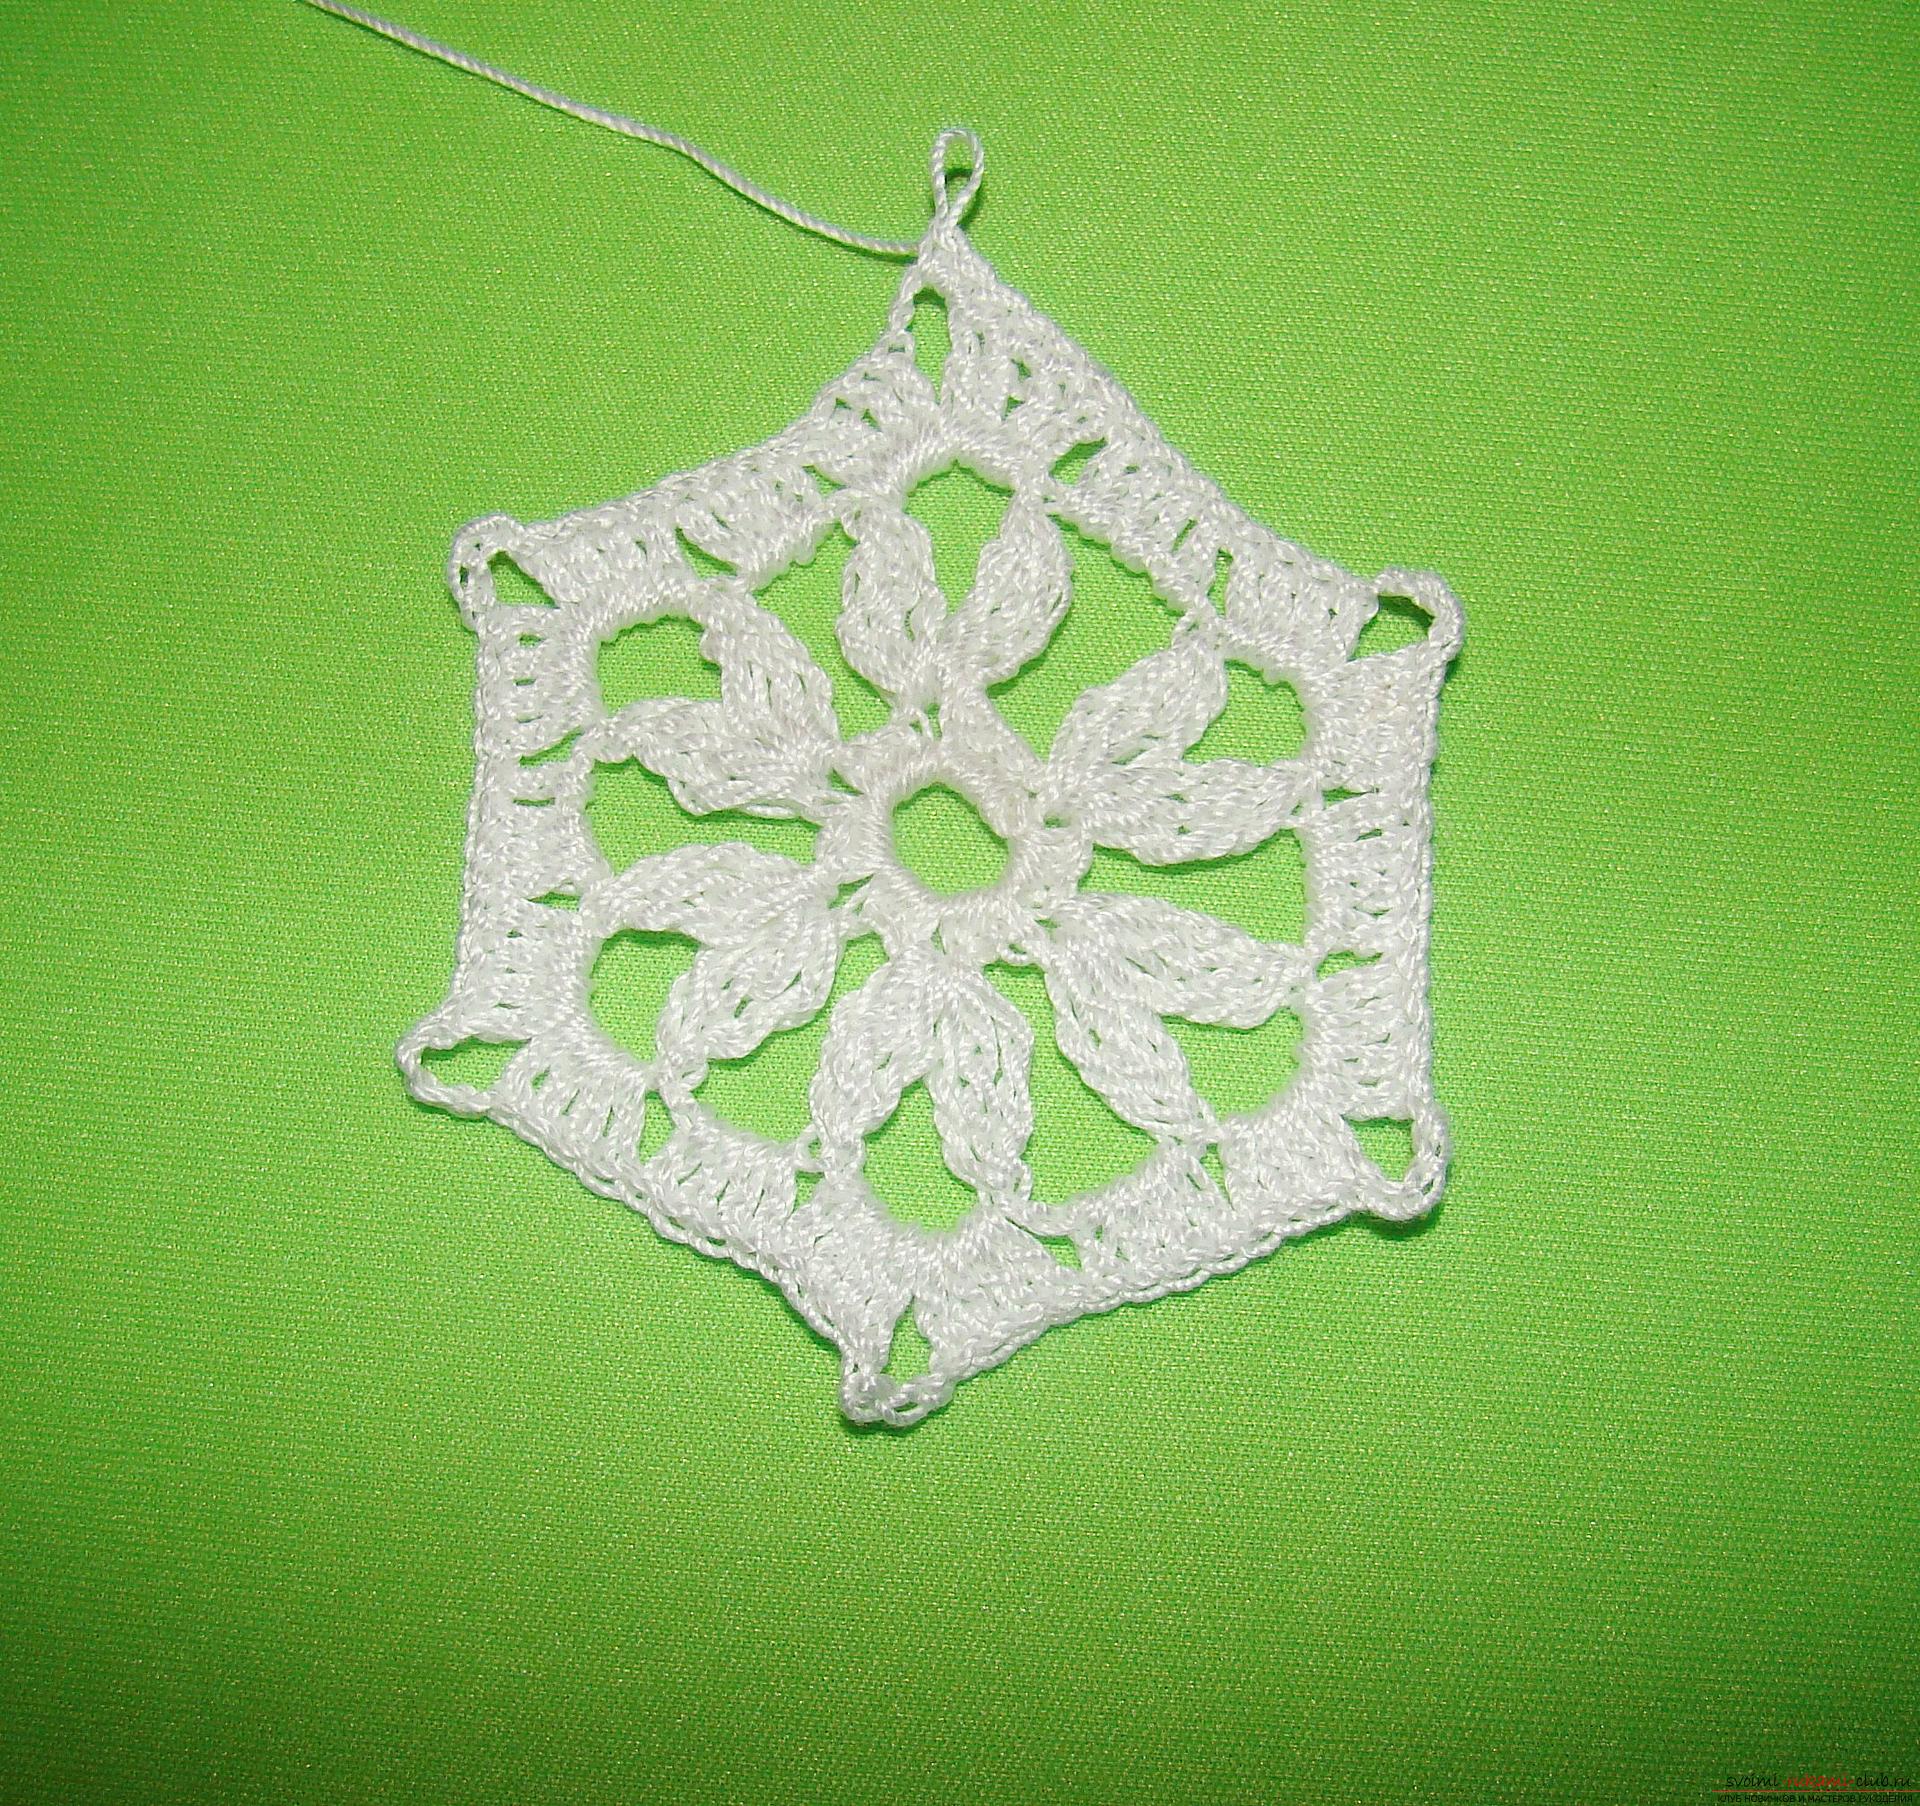 10. We make 1 VP of lifting and we knit in each SSN of the lower row of half-columns, then 2 half-columns into an arch of 4 lower-row EPs.
 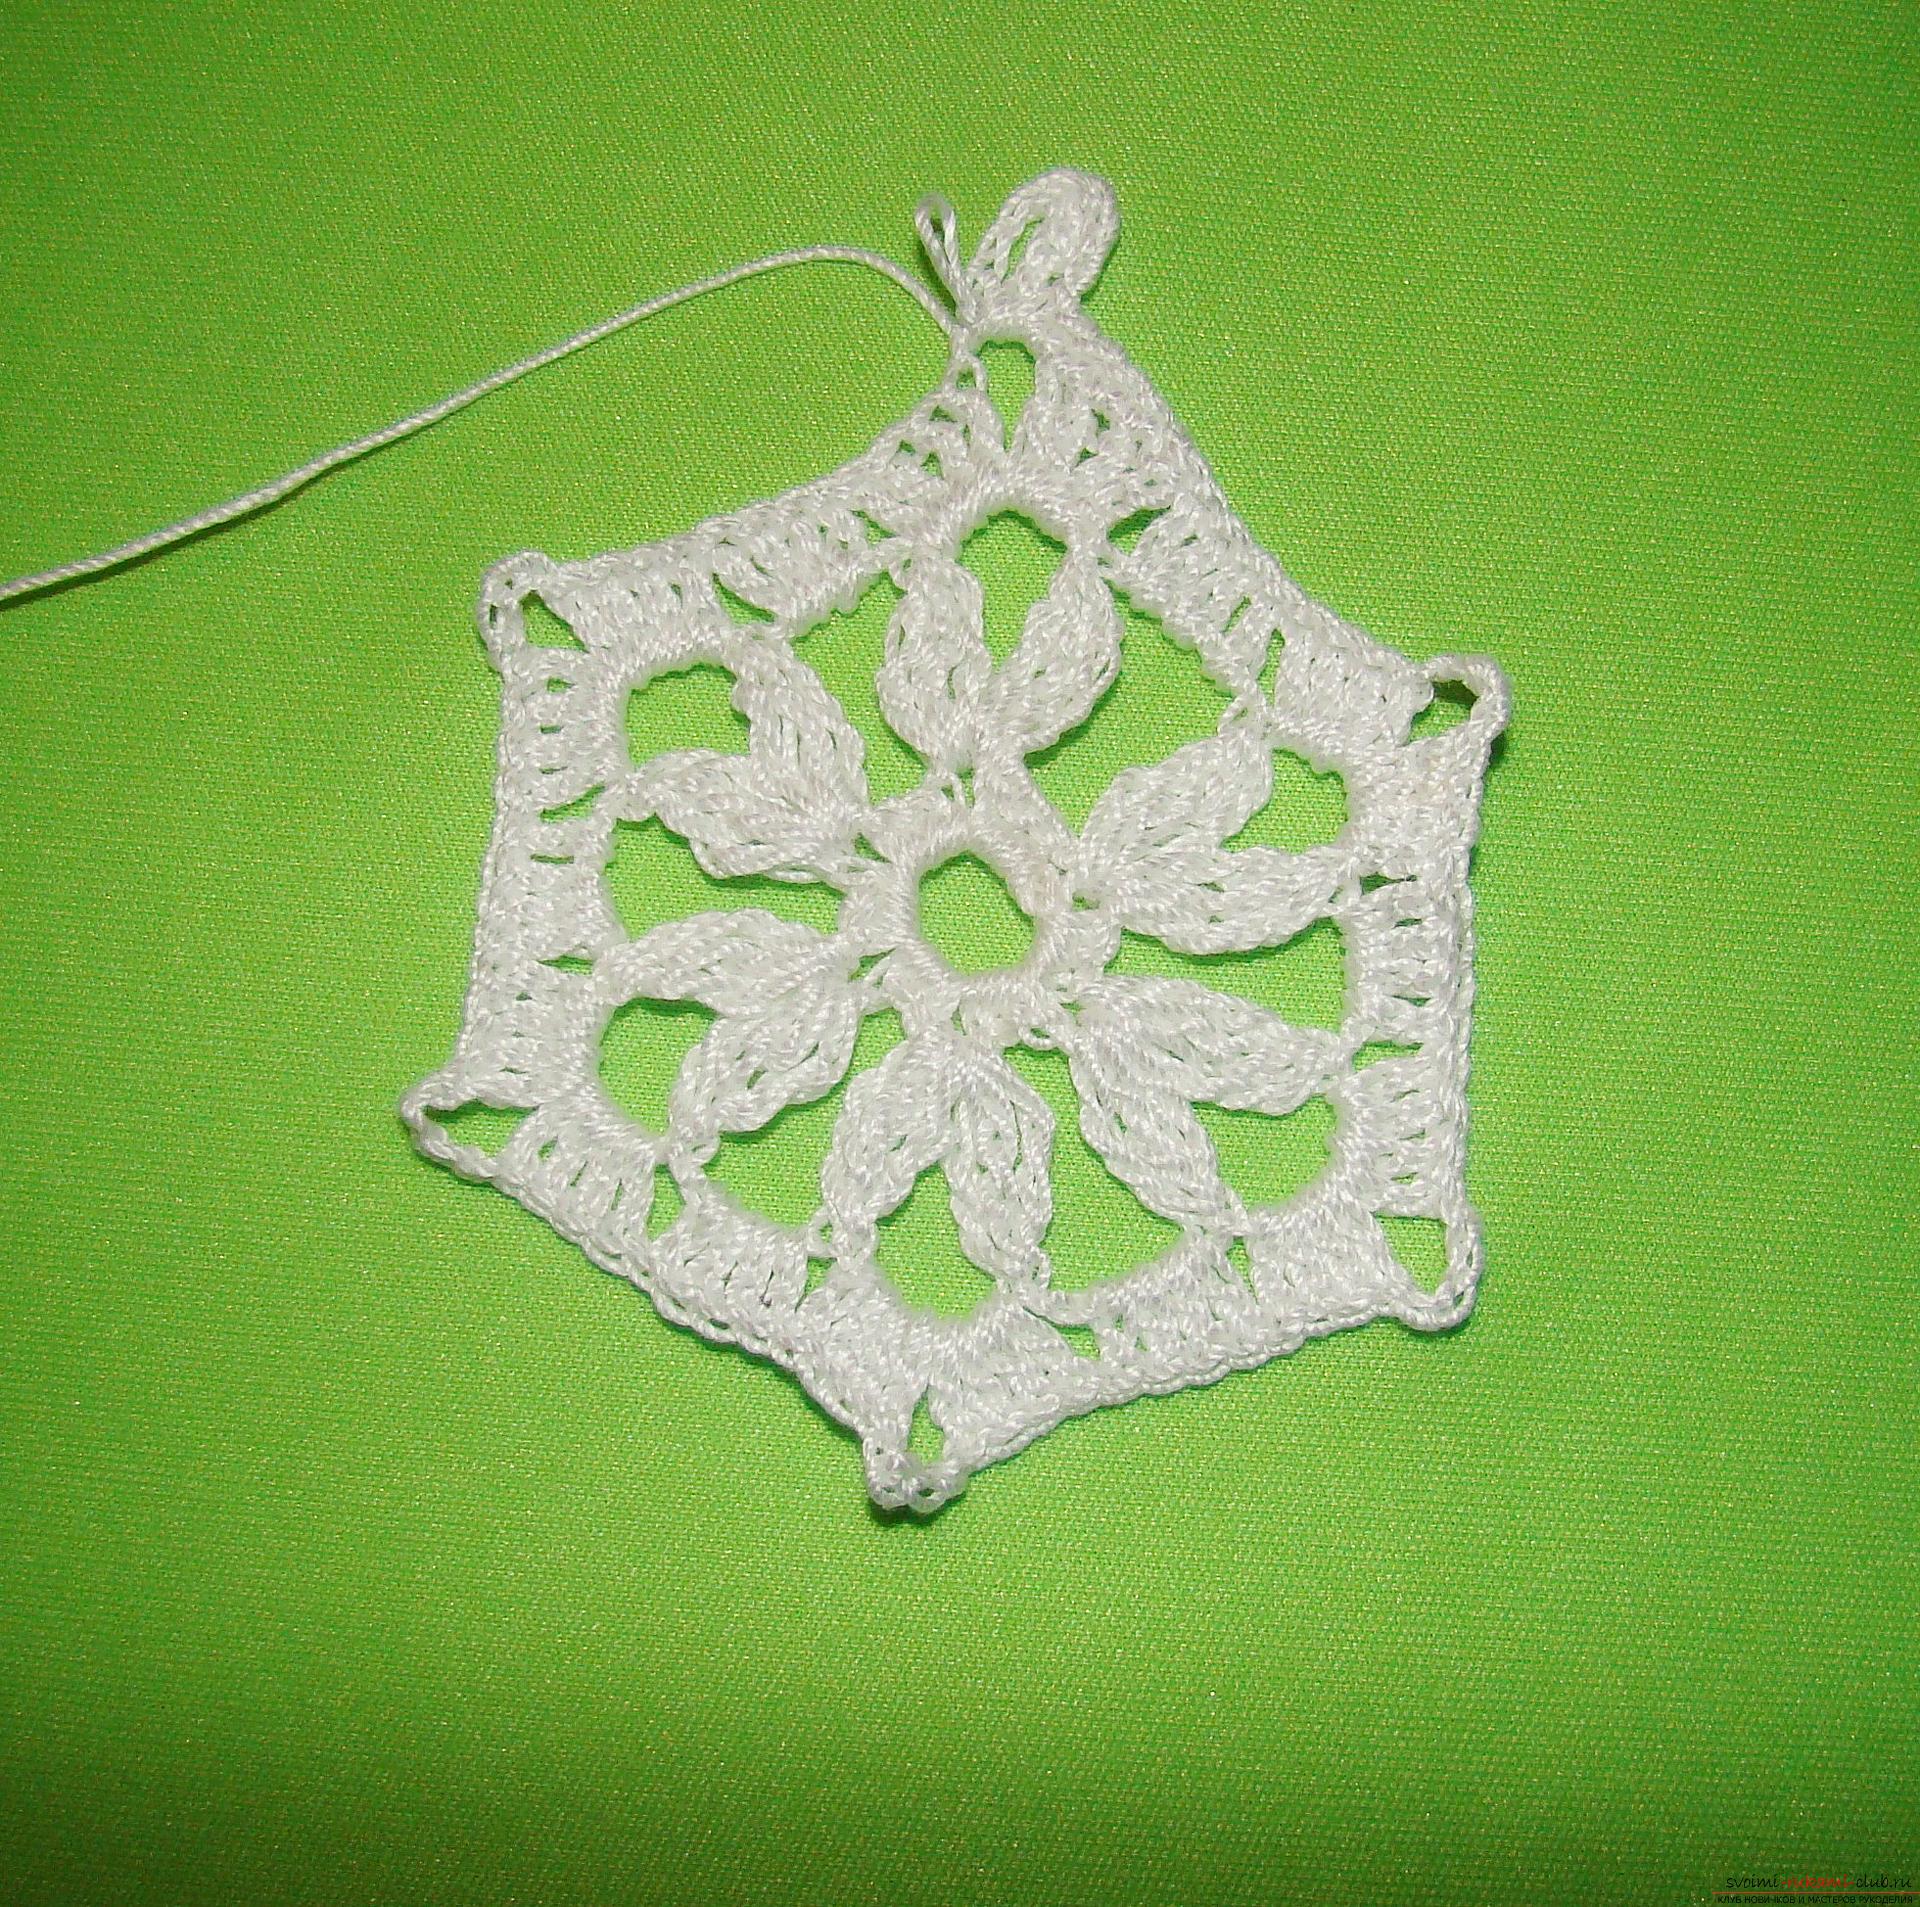 11. By linking the two half-columns into an arch, we make 3 VP lifts, 1 CC2N, 3 VPs of descent, which we attach the SP to the arch from the 4 lower-row VIs.
 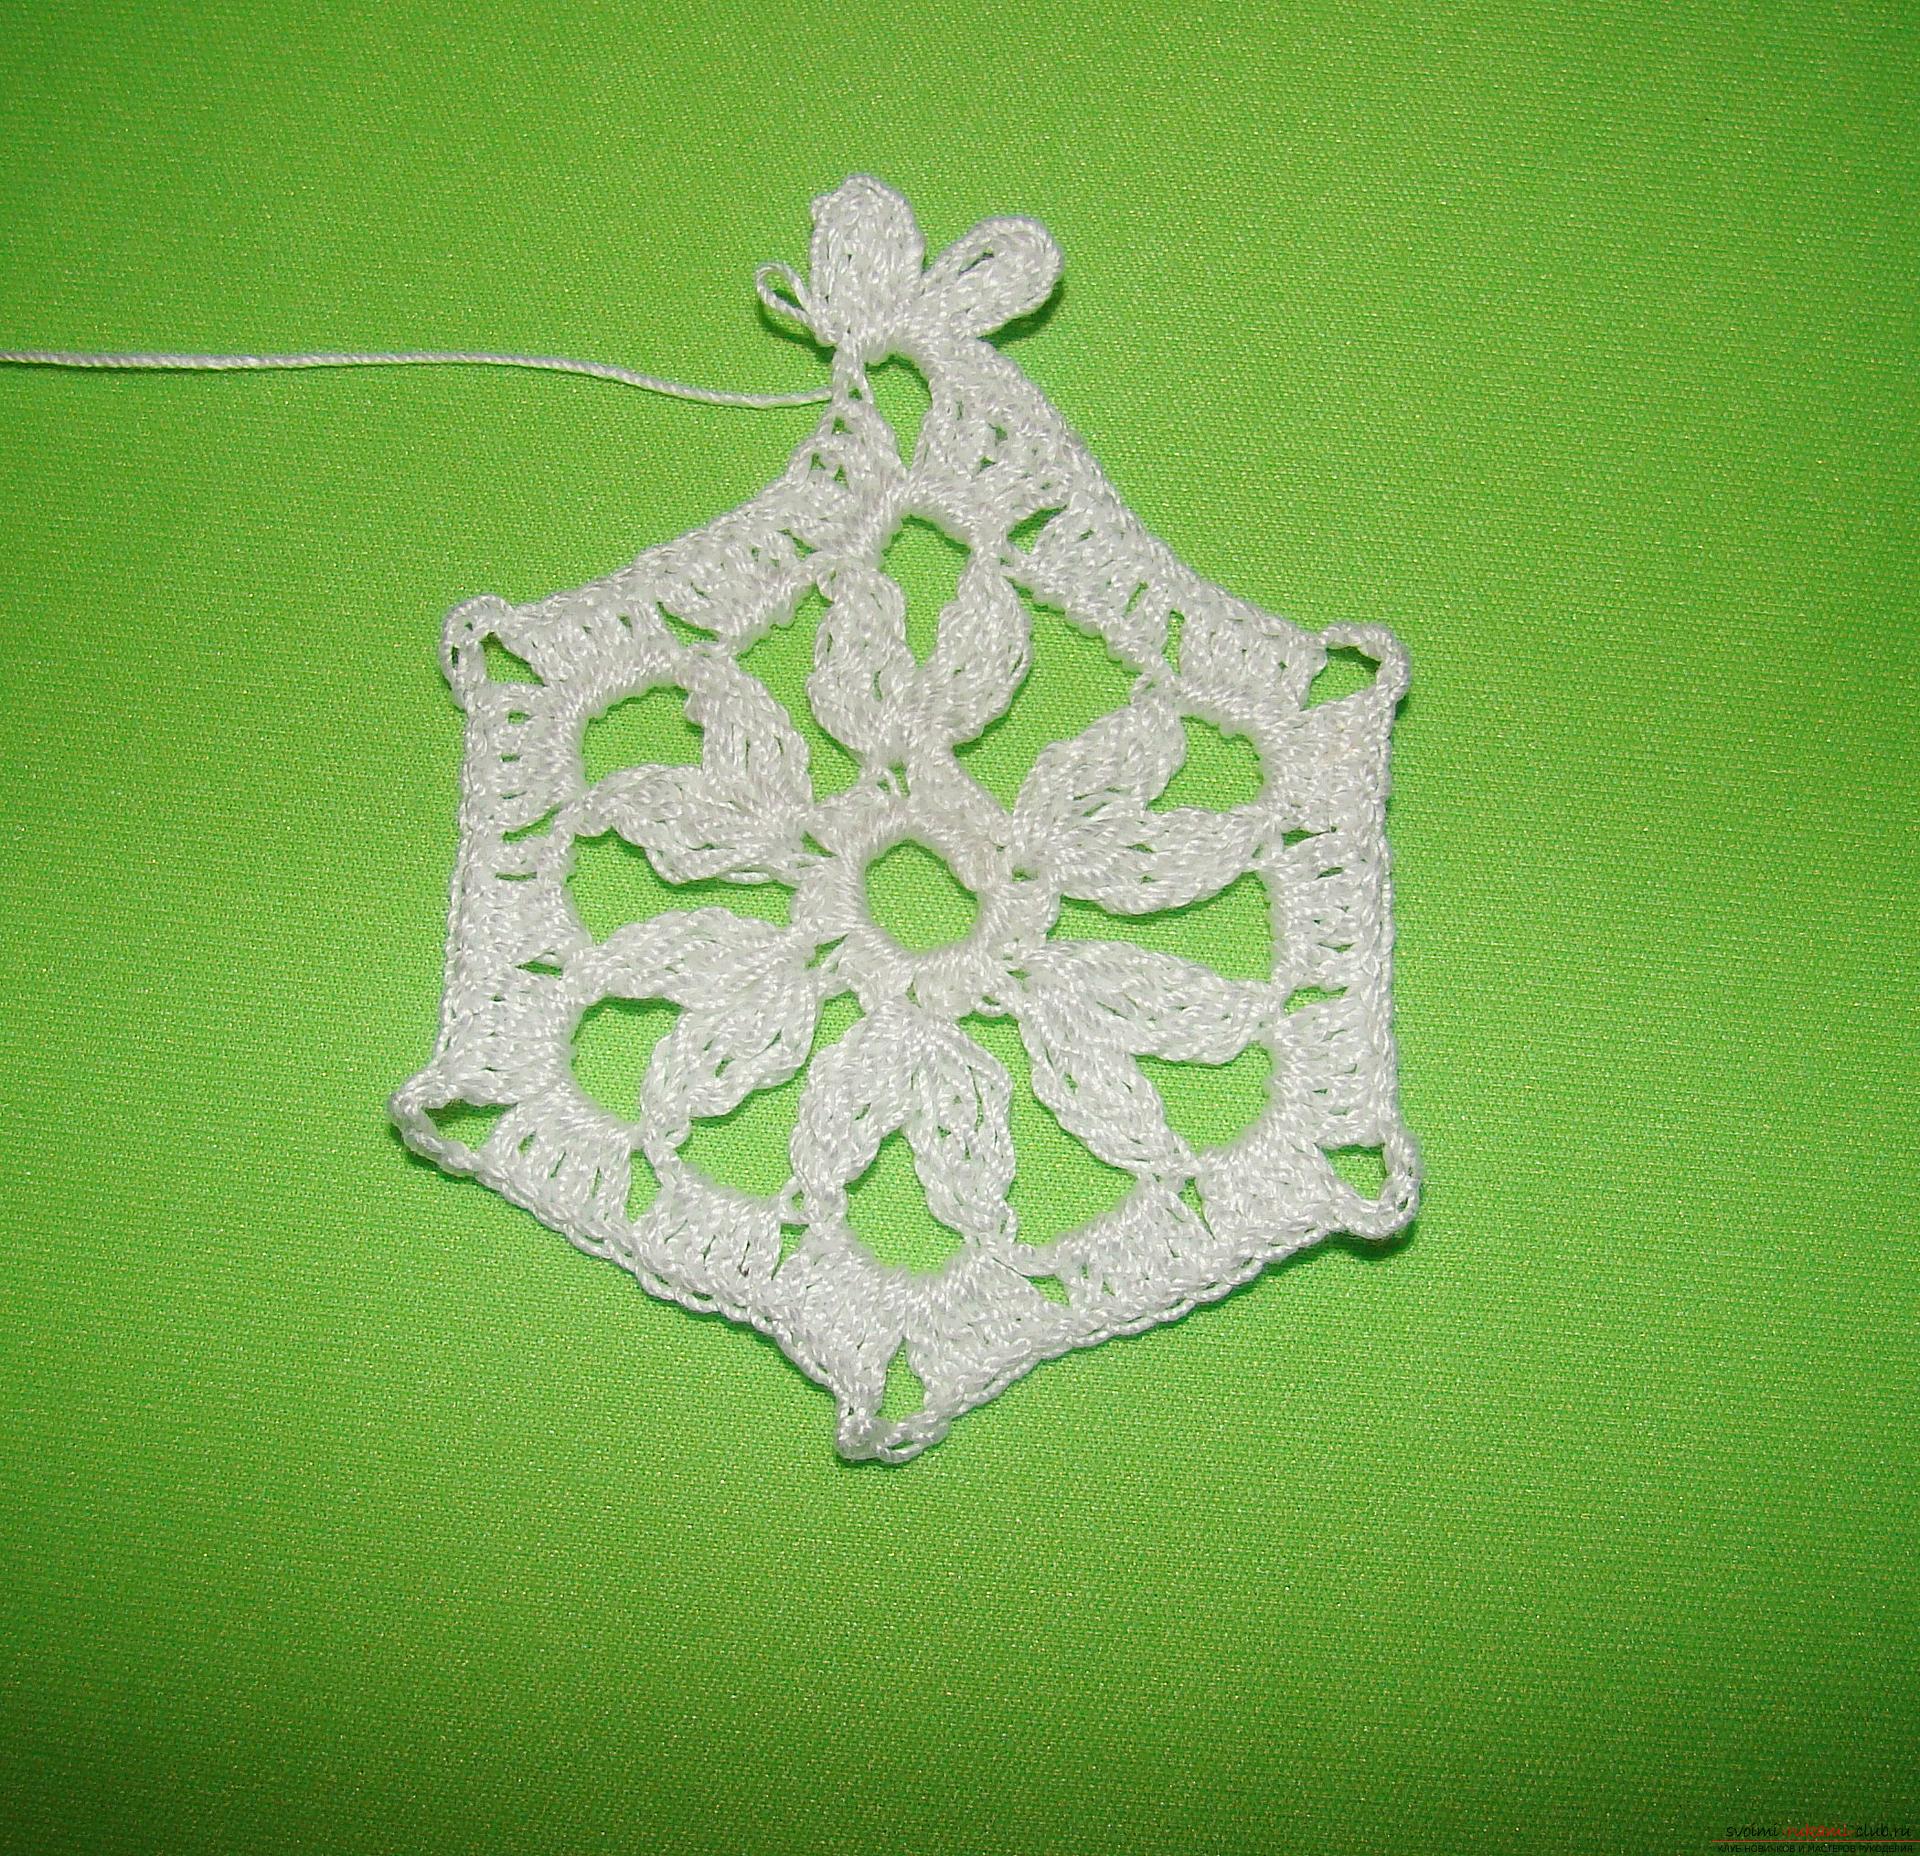 12. Then we again do 3 VP of lifting, we knit 2 SS2N and 3 EPs of descent, which we also attach to the arch of the lower row of SP.
  13. Again, do 3 VP lift, 2 CC2N, 3 VP descent and bind 2 half-columns into the same arch of the 4 lower-row VIs.
 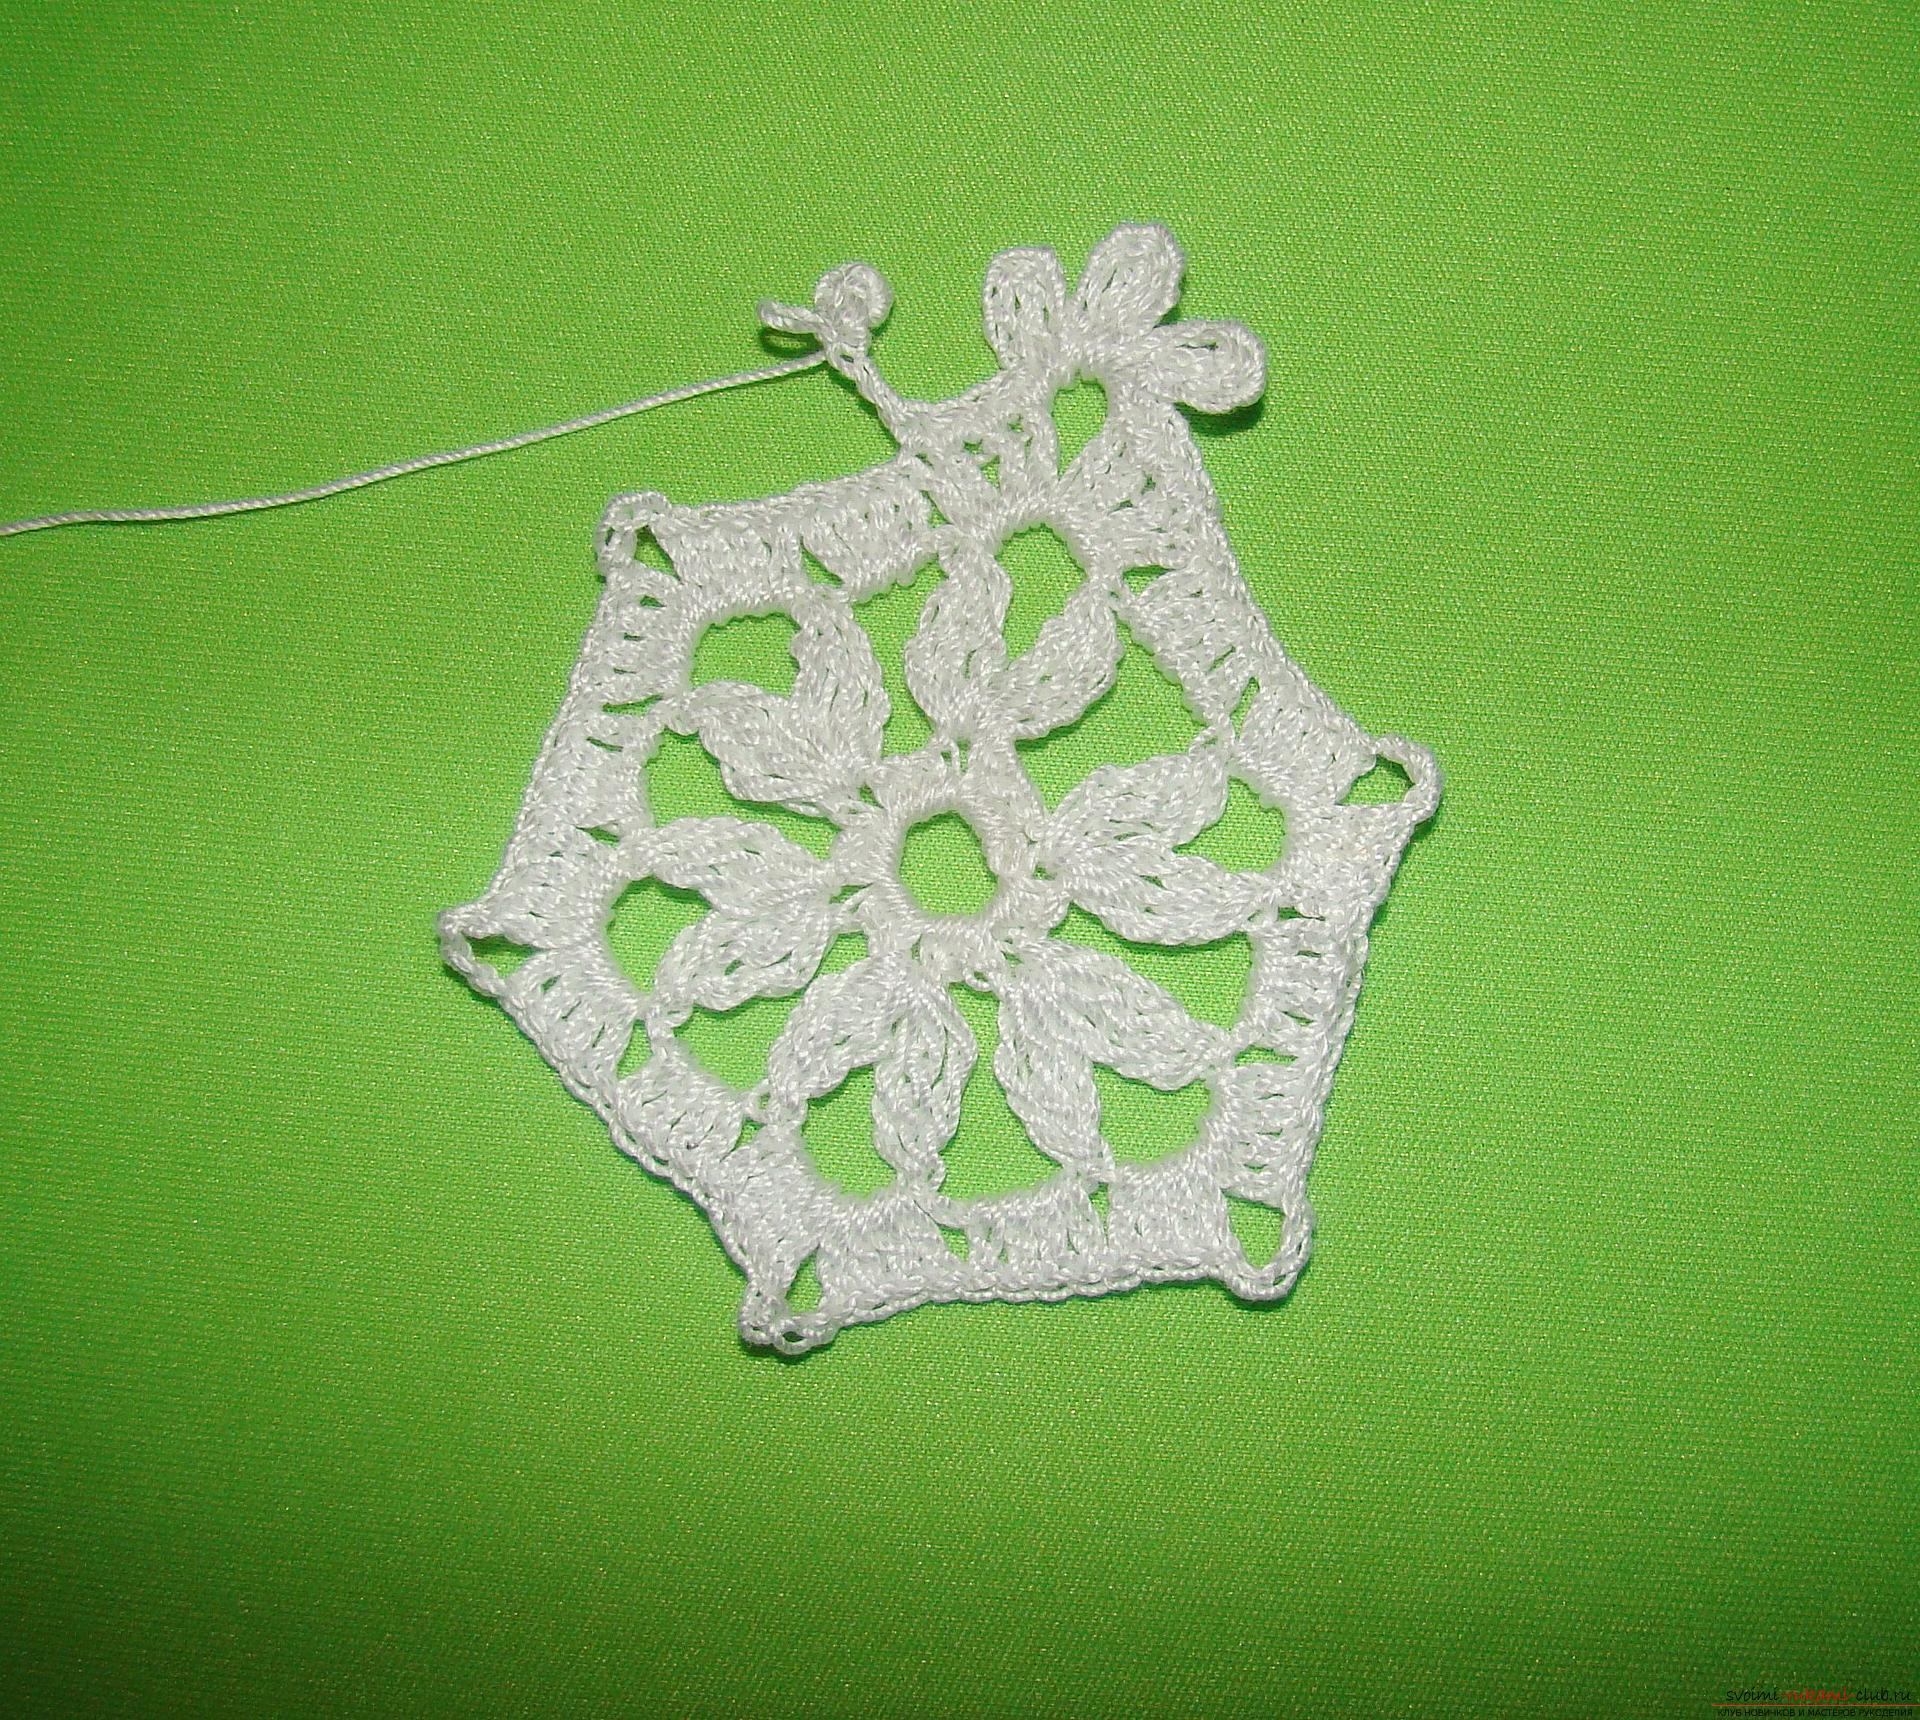 14. We knit 4 half-loops on the tops of the four CMS of the lower row. Then we make 4 EP and we knit in the third EP one column without a crochet, we make 2 EPs of descent and attach their joint venture to the third EP, where we were tying our column without a crochet, we got a little shishechka.
 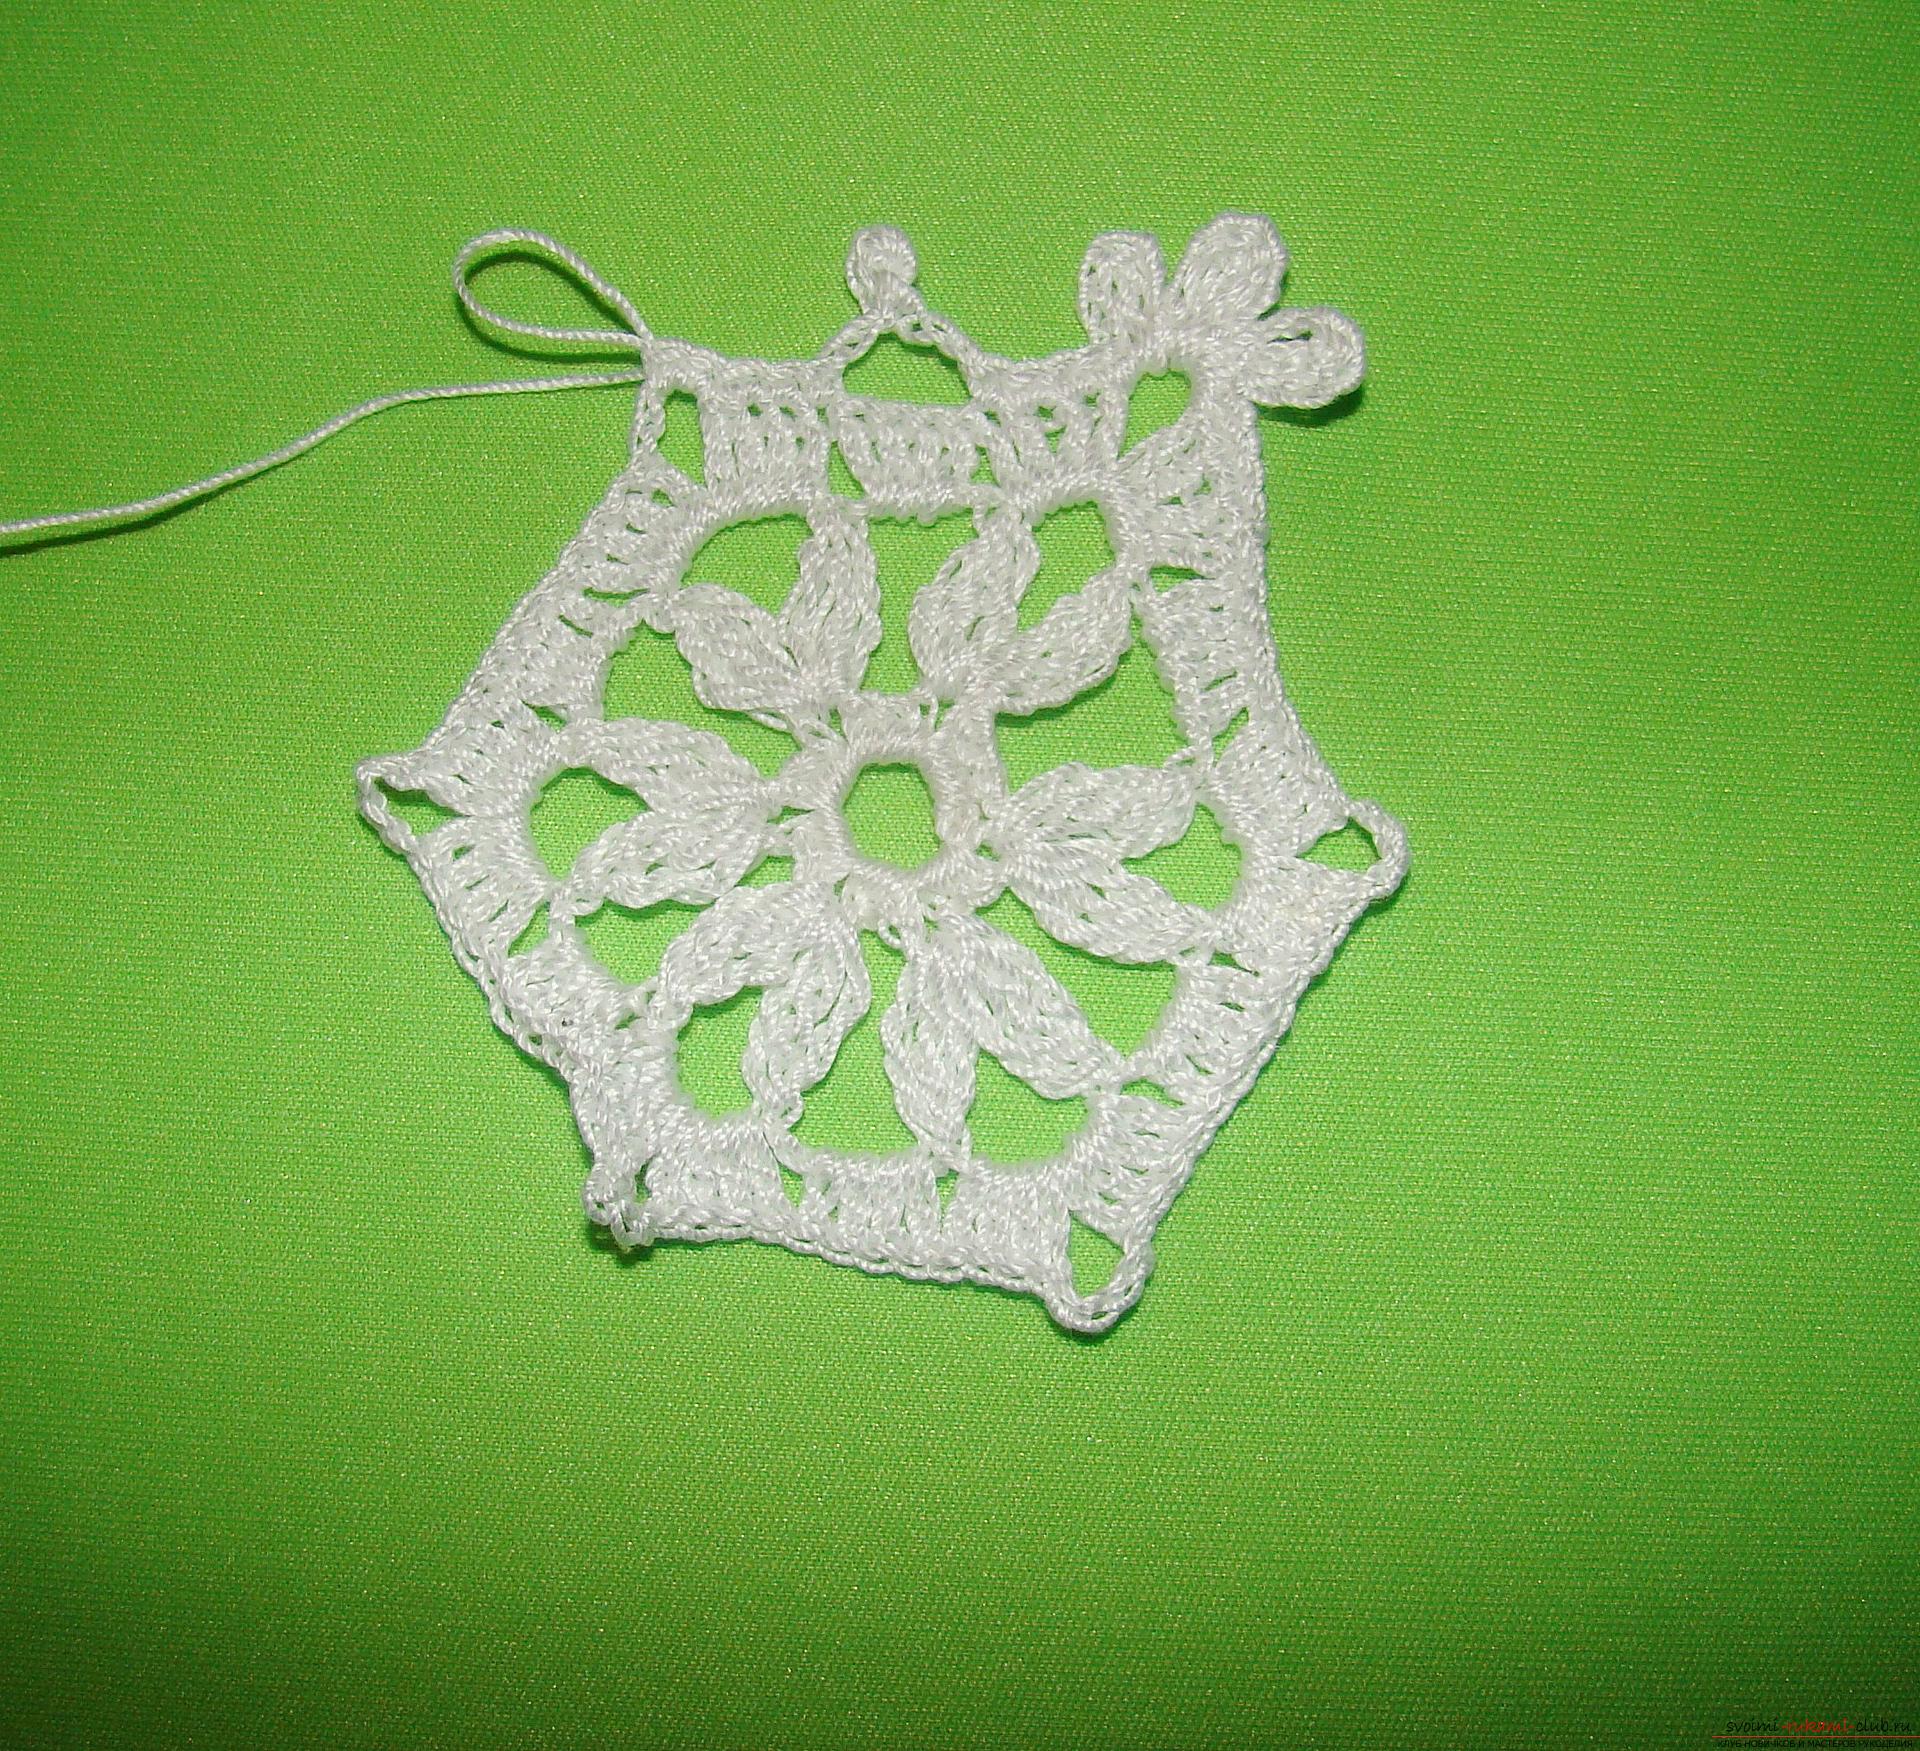 15. Then we knit 2 VPs of descent and, letting 4 CCN of the lower row, knit on the tops of the CLN of the lower row of the half-column.
 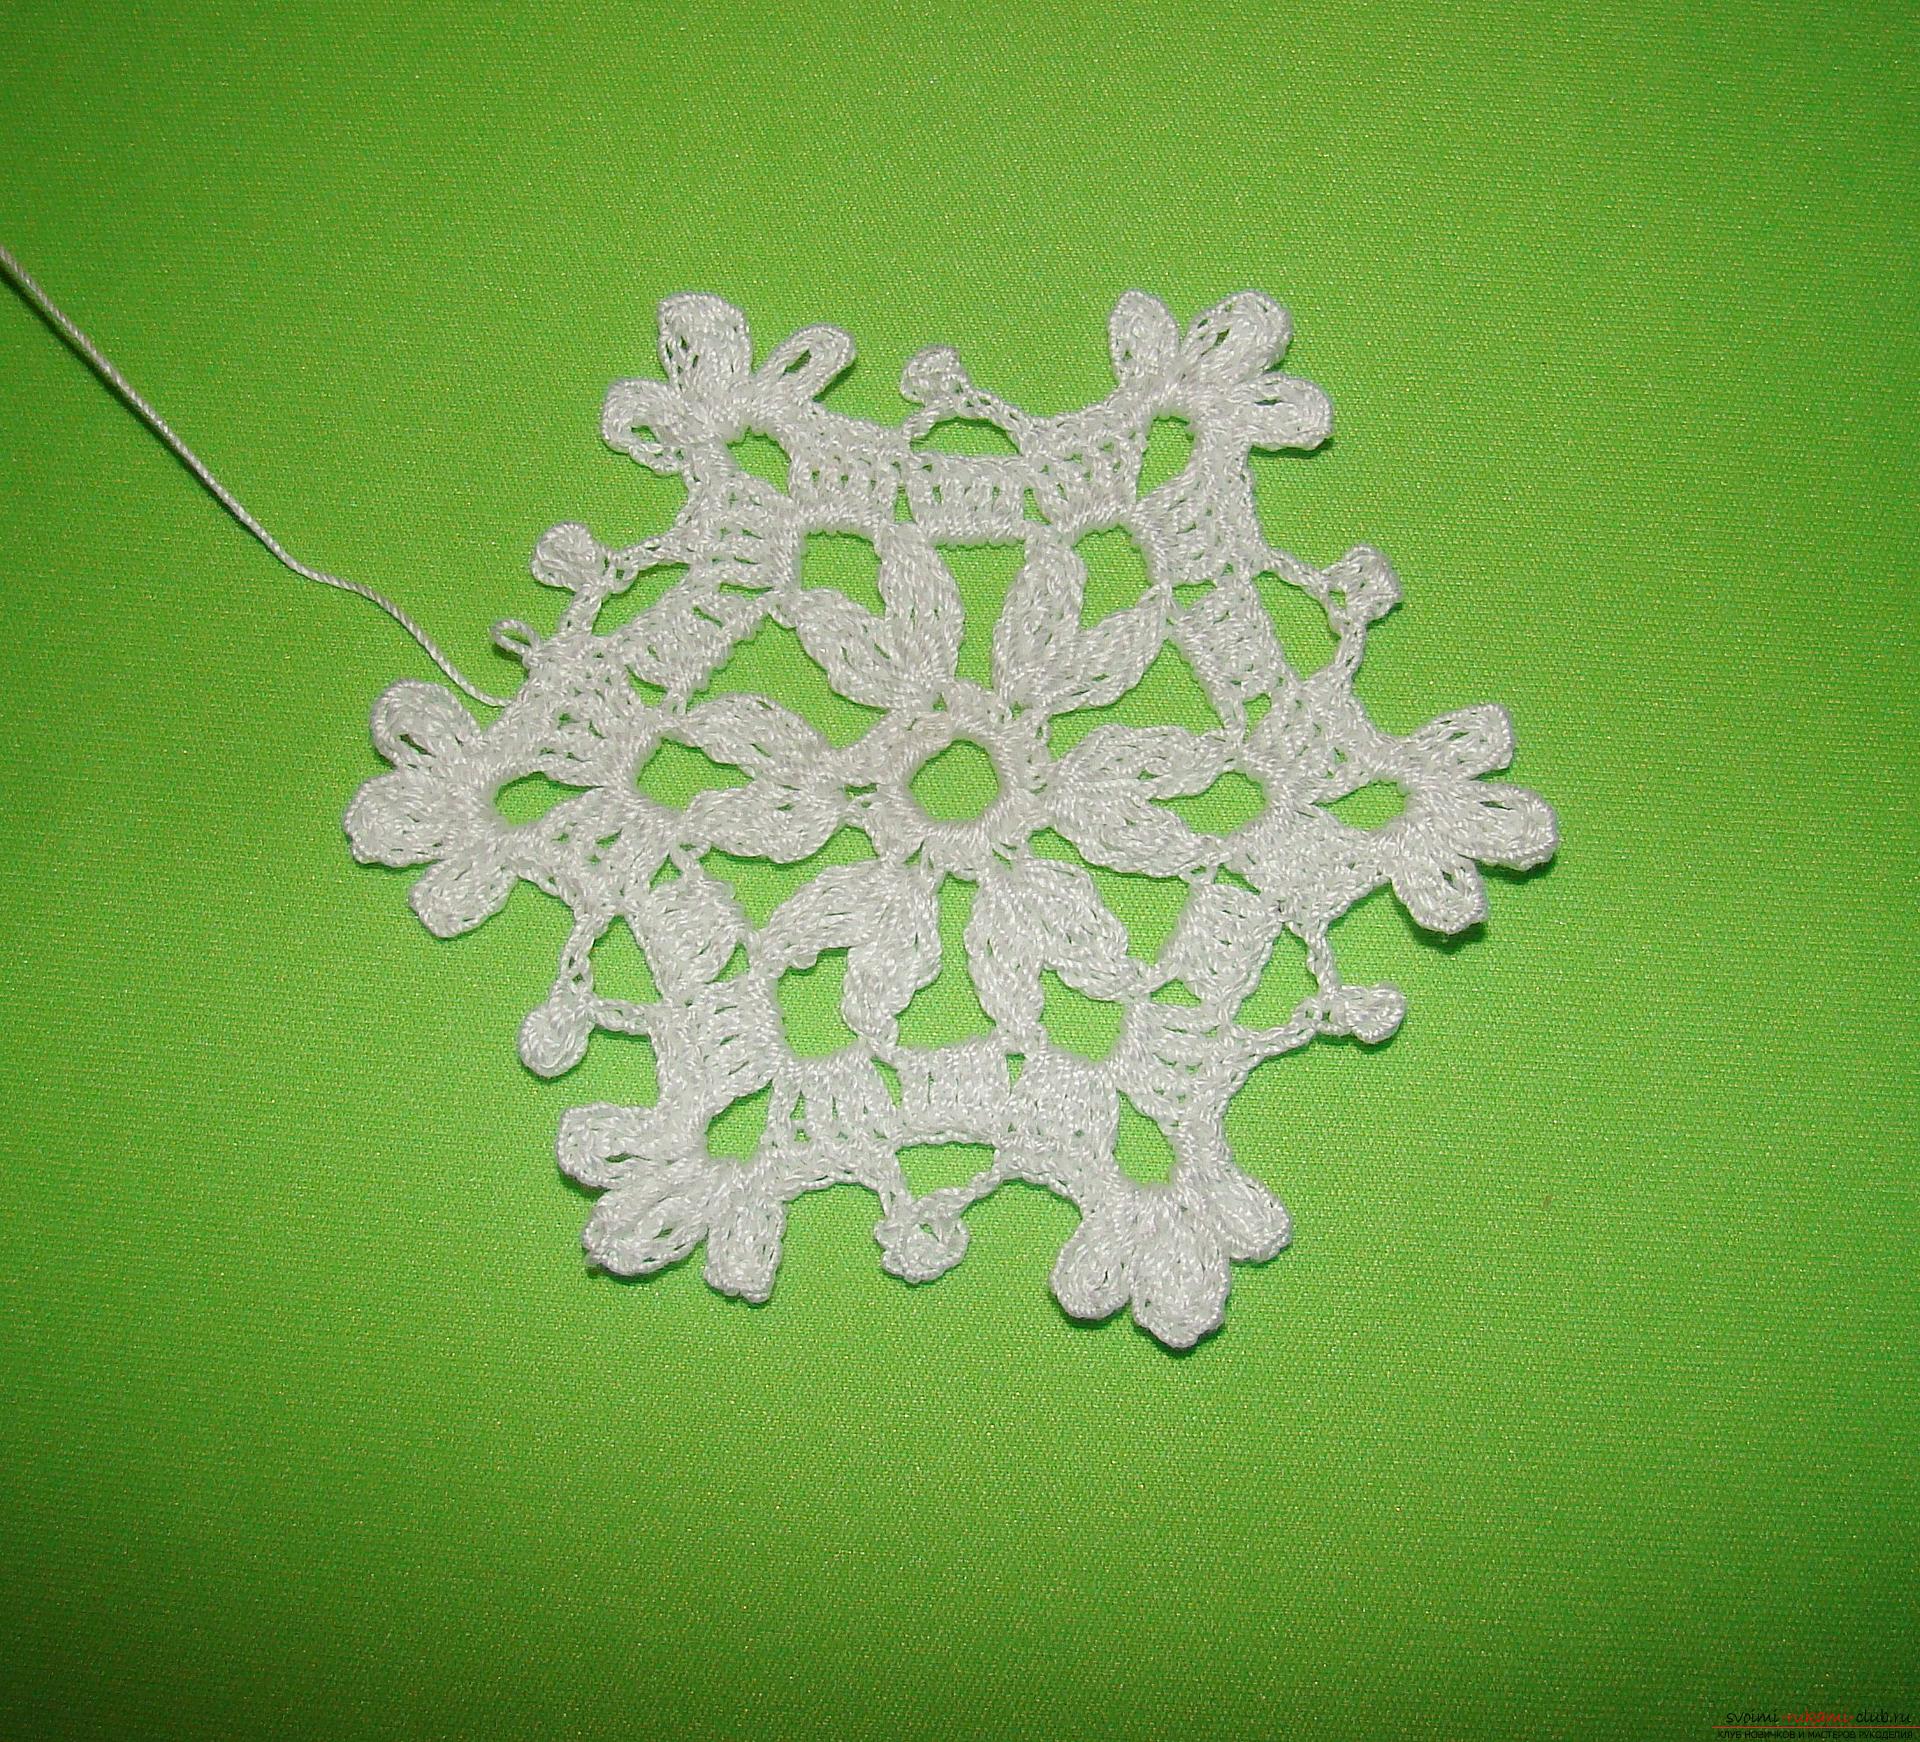 16. So we knit to the end of the series, we finish the series of joint ventures. Our snowflake is tied.
 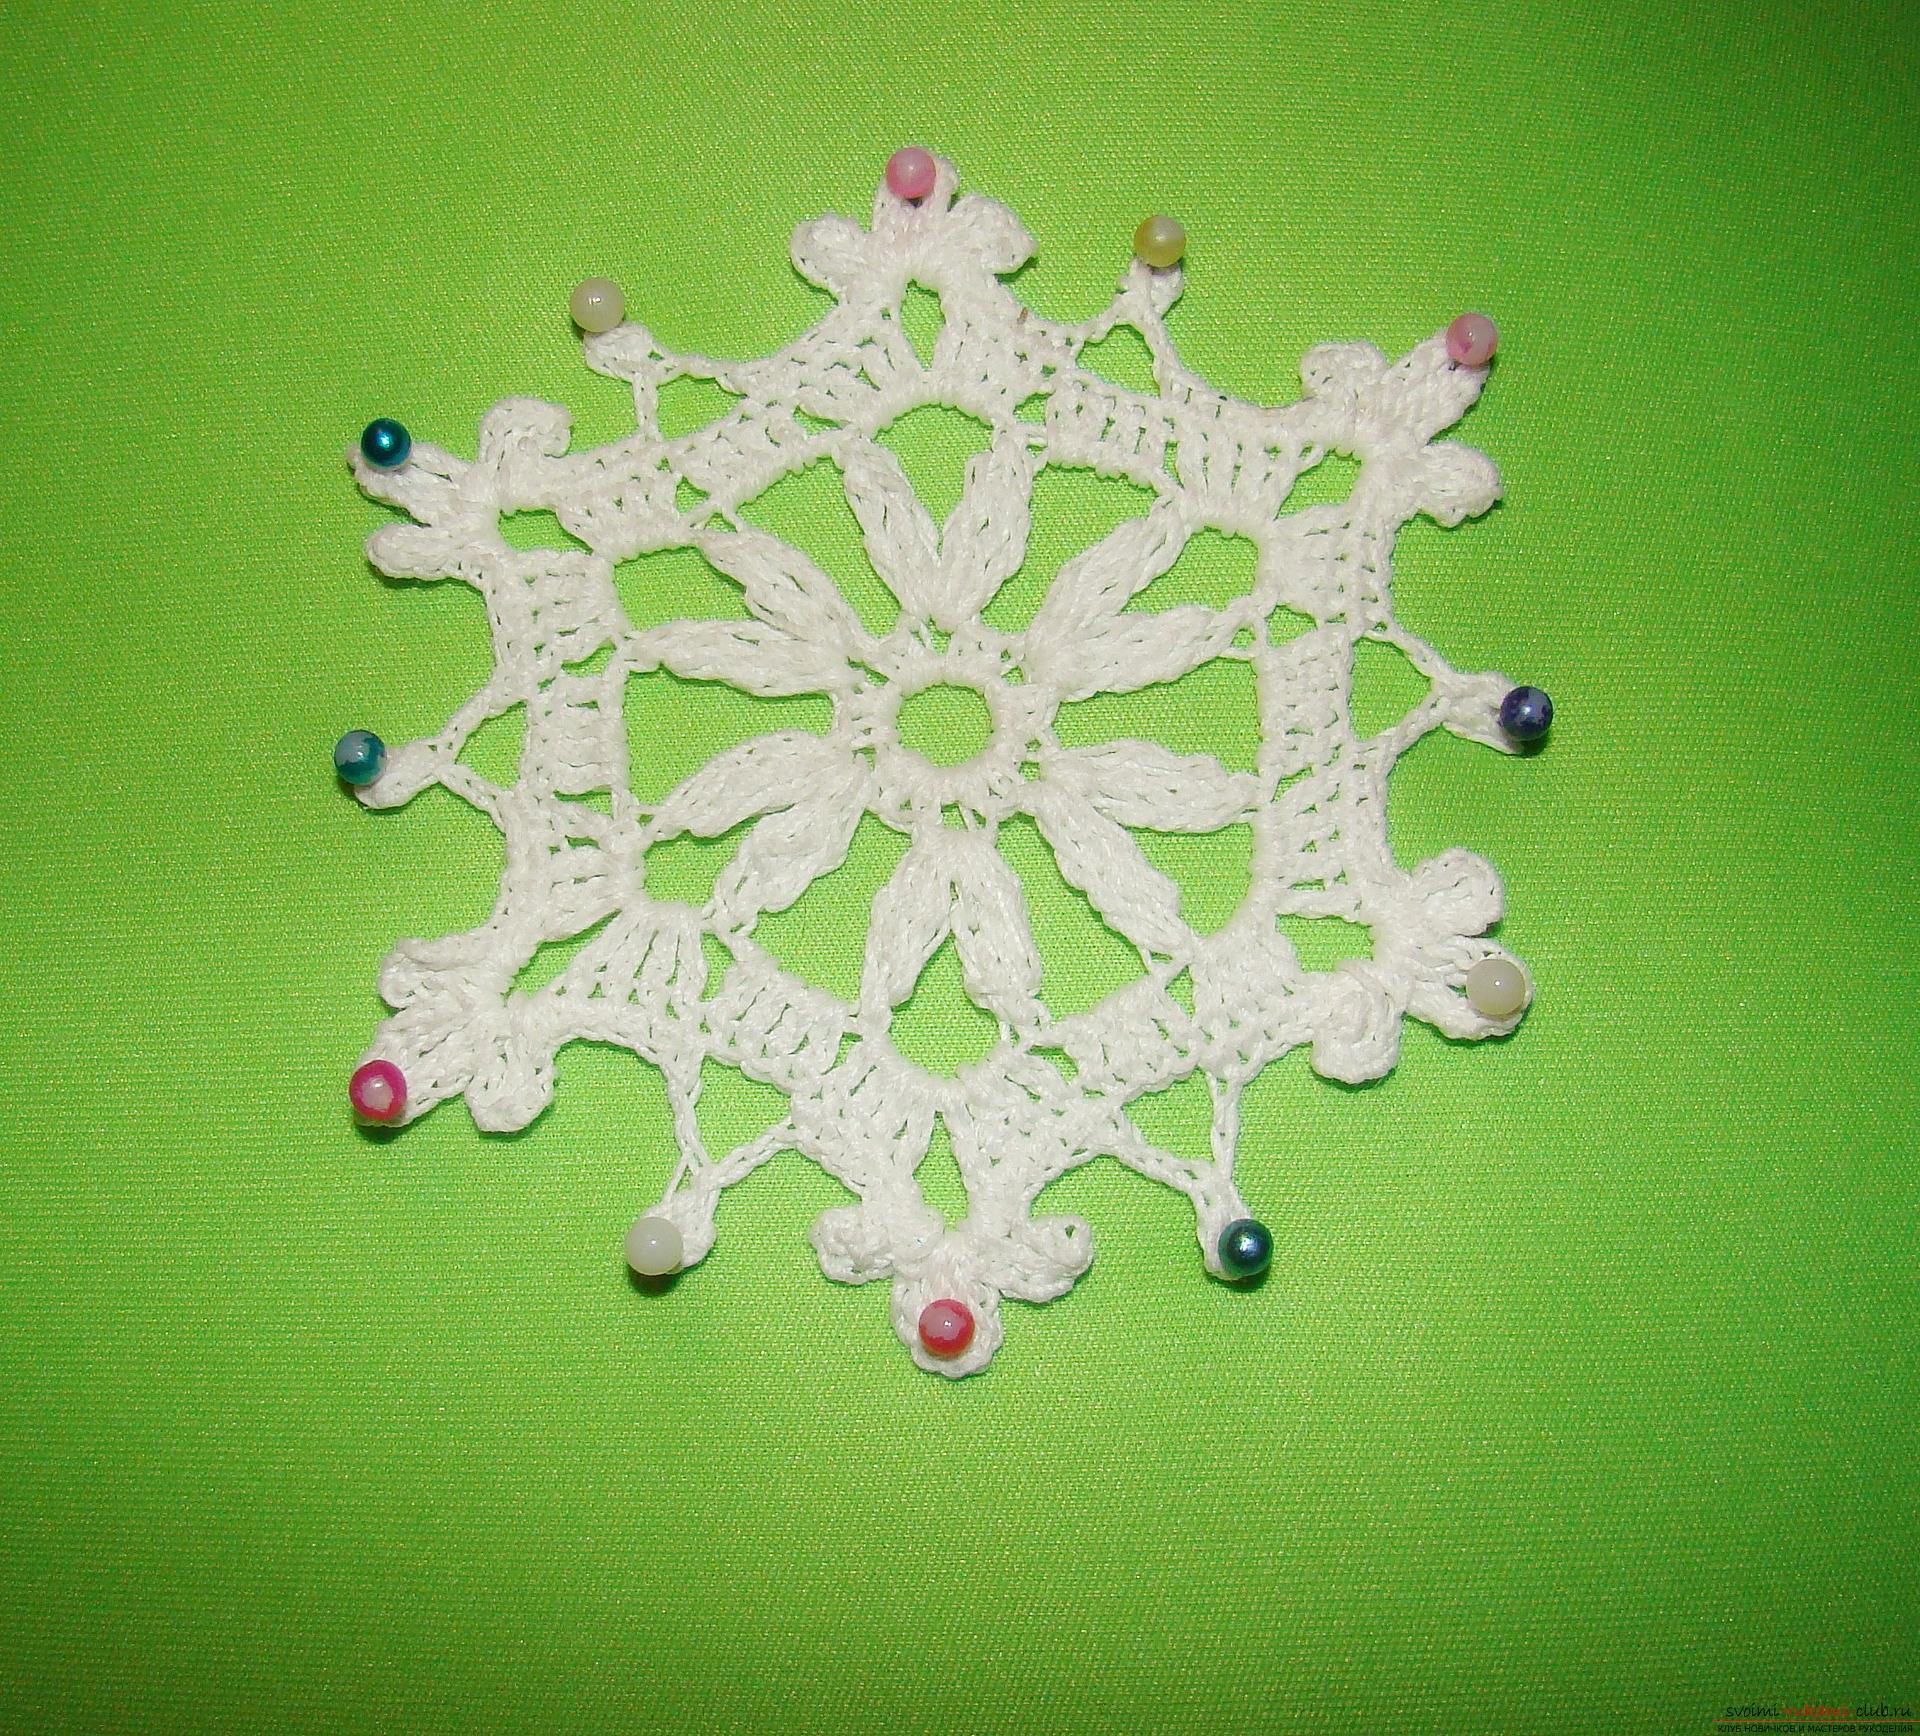 17. Now we need to give our snowflake stiffness, for this we take PVA glue, if it is thick, then you can dilute it a little with water. We dip our snowflake in the glue, squeeze it well and lay it on a flat surface. I did this on foam, so it was convenient for me to fix it with pins and leave it to dry completely.
 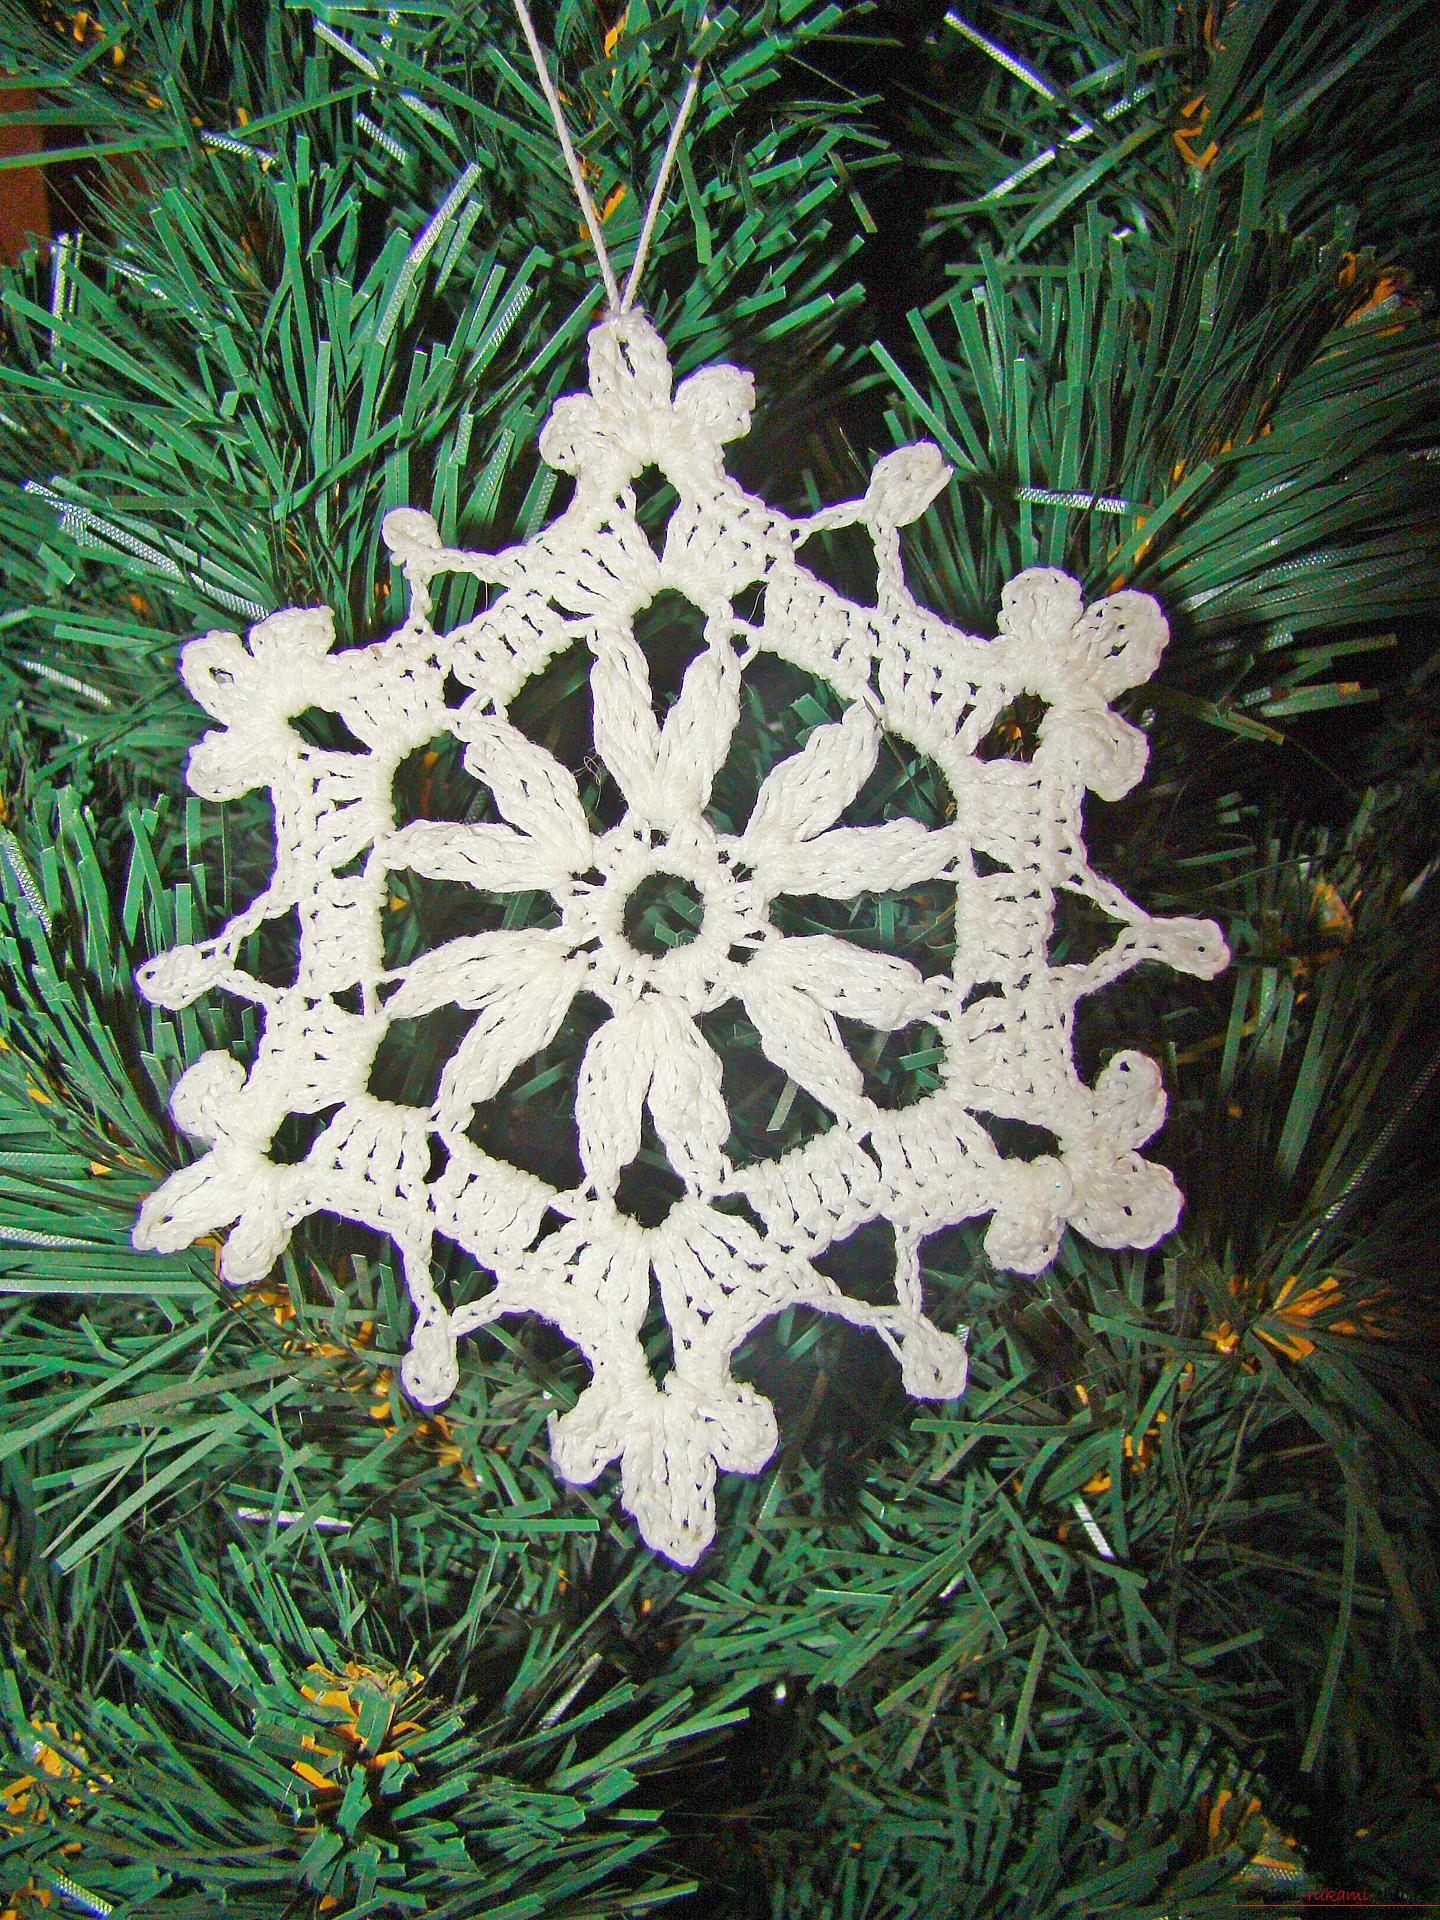 18. Our snowflake has dried up, thread one of its rays and make a loop, for which we will hang a snowflake on the tree. 19. Snowflake pattern.
Comments
Related posts:
 Master-class knitting with a diagram and a photo will teach crochet an openwork flower
 This master class of crocheting with a photo and diagram will teach how to tie a beautiful cat.
 This master class New Year crafts with their own hands with a photo and description will teach how to tie a Christmas tree crochet
 The master class will teach how to crochet a New Year's craft - a knitted garland on the Christmas tree
 This master class with a diagram and a detailed description will teach you how to tie an owl with a crochet.