Photo and cross stitch patterns
Content
- Modular picture with roses
- workflow
- Creating a picture
- How to properly place a modular picture
- Embroidery schemes for modular paintings
Modular paintings today are very popularElement of the decor of any room. Large images (quite often covering almost the entire wall) are placed on the wall in the most favorable perspective. Due to the fact that the photo is made up of several parts, it is possible to create such a product with your own hands. Modular pictures can be from two, three, four or more segments. And the names have the appropriate diptych, triptych and penaptych. Products consisting of more pieces are called polyanaptych.
And also different techniques and materials can be used: threads, ribbons, beads, and also
.

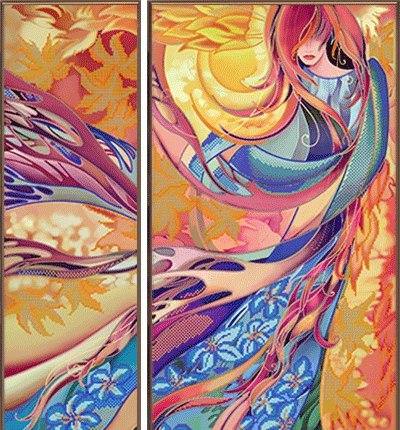


A feature of such pictures is thatThe modules are hung at some distance from each other. And with the correct location of such photos on the wall creates the illusion of a transition from one segment to another. Often, all parts have different sizes. But most often in the middle have the largest module. At the edges are smaller parts. This arrangement allows us to recreate a convenient perspective for the perception of a complete canvas. Therefore, anyone who considers modular paintings, feels the dynamics of movement. This effect is inherent only in modular paintings. Often these works of art do not have a frame or baguette.
Such artistic works have found theirDisplay and in needlework. Modular paintings, like any you can embroider a cross. These works look very natural and perfectly complement even the most extravagant interior.
Modular picture with roses
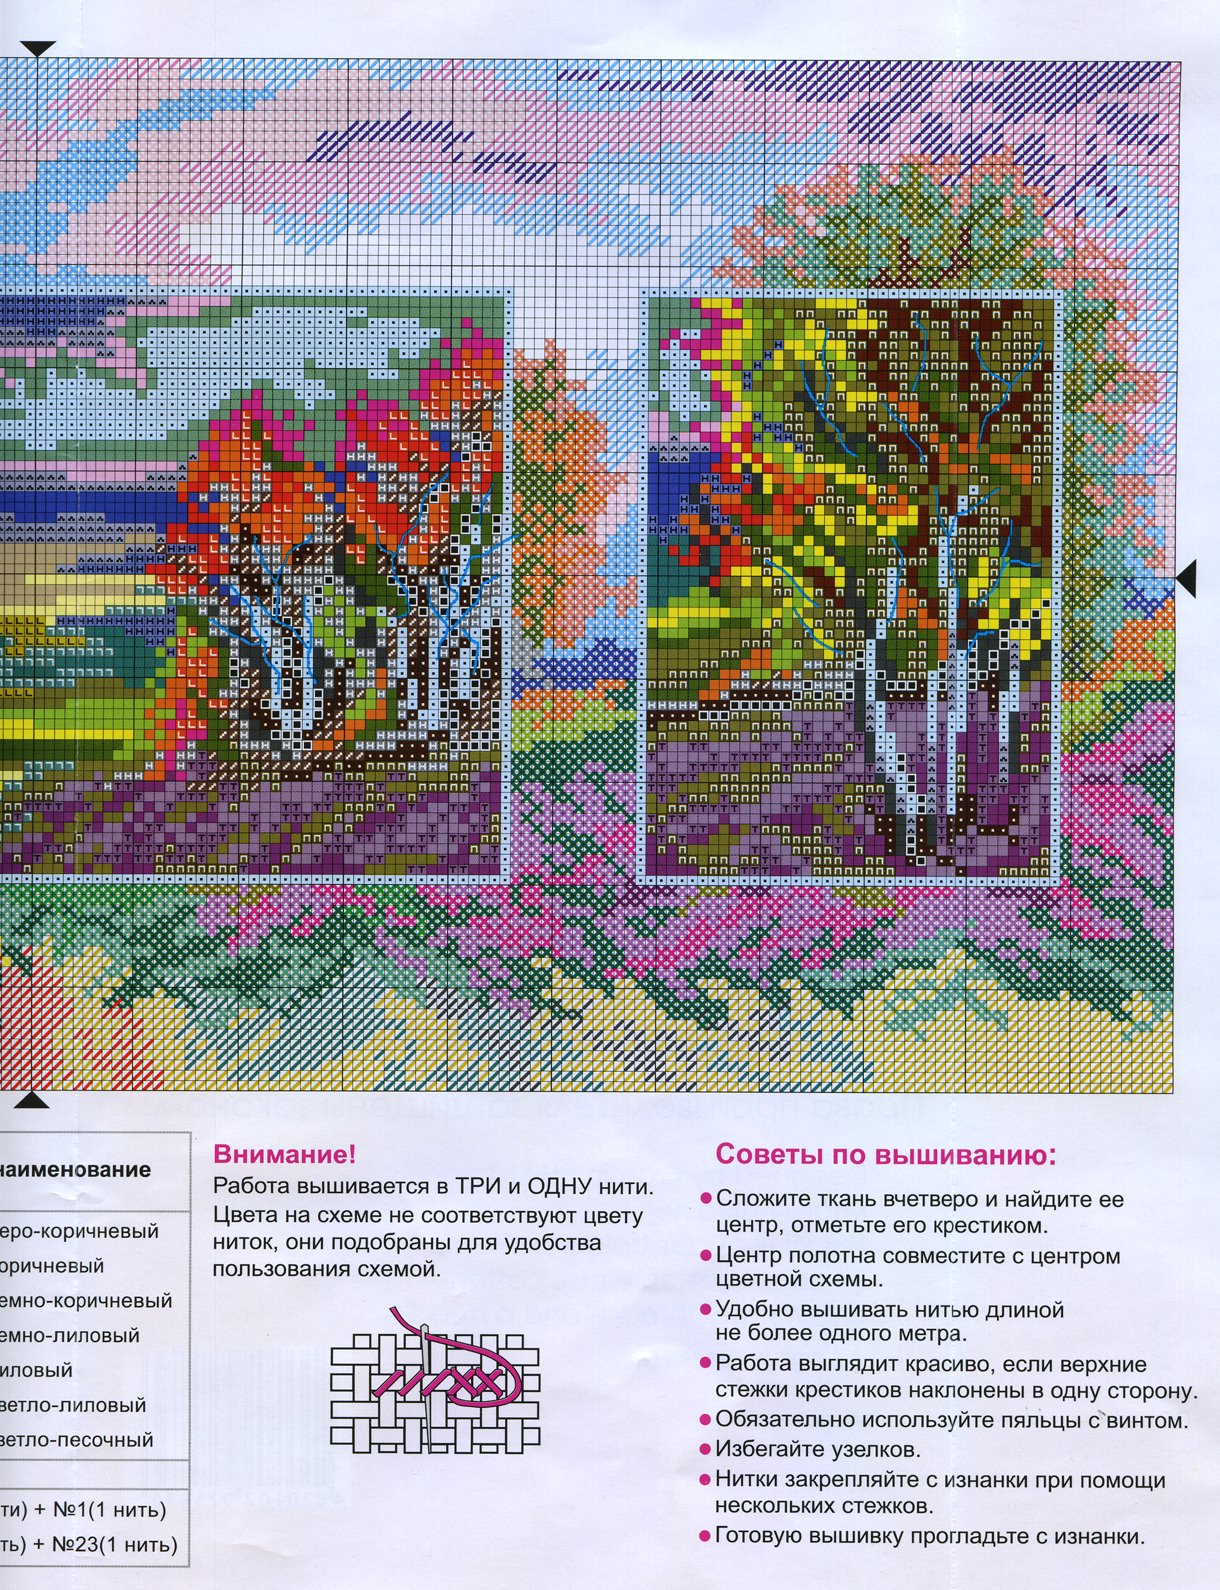
We offer a master class on embroidery of roses. This modular picture consists of three parts. Each has its own embroidery scheme.
For work you will need:
- Embroidery threads (exact number and shade have all the schemes);
- needle;
- scissors;
- Canvas (schemes have the size of the material);
- A device for pulling the thread into a needle;
- Embroidery frame.
workflow

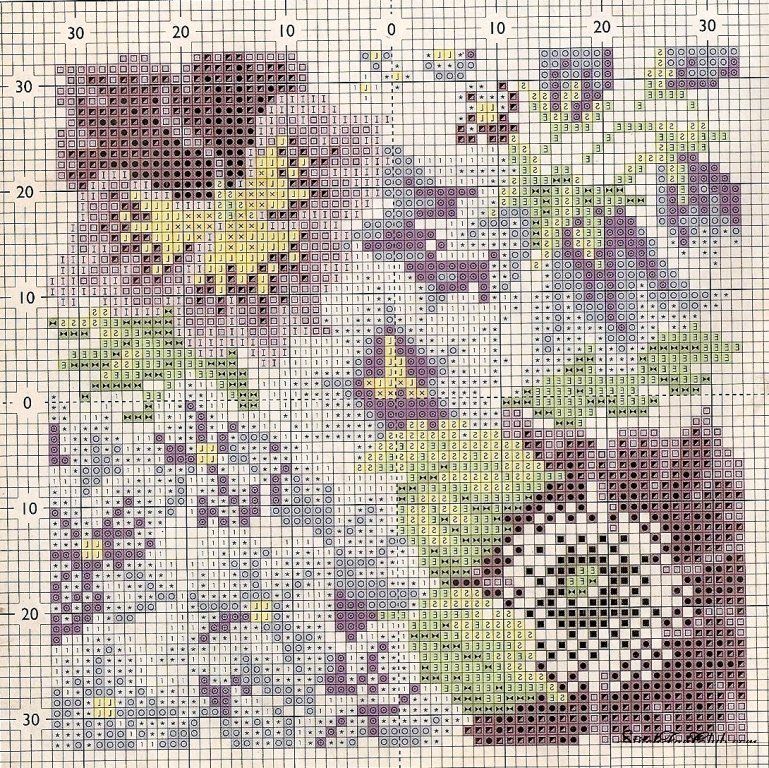
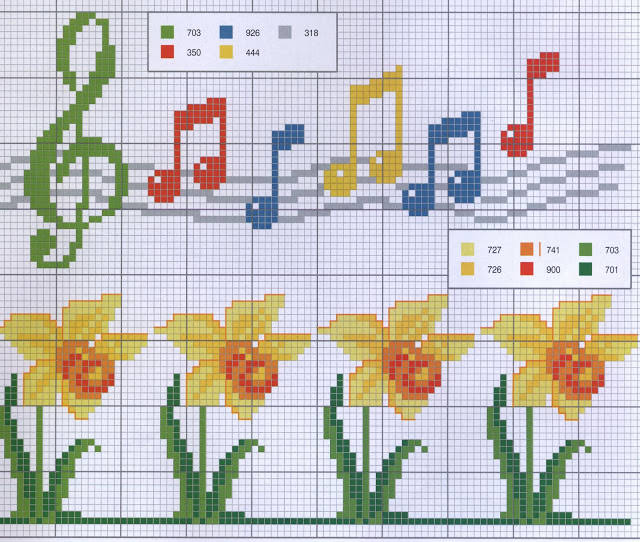
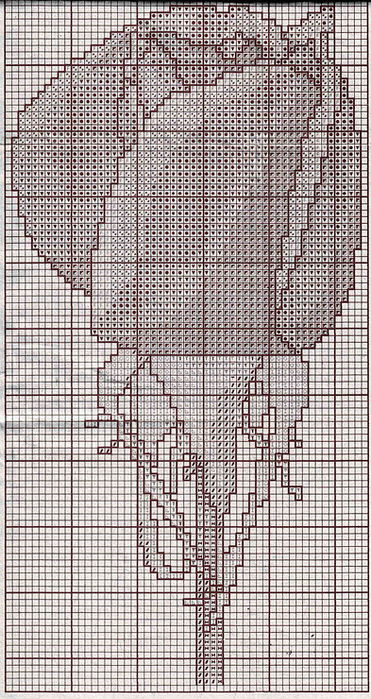
Scheme of the first moduleThis picture requires eleven shades of thread. The schematic diagram shows the corresponding symbols and threads of the DMC. Canvas canvas can also be seen in the photo.
Preliminary side of the canvas is better to sweep. This will prevent shedding. To do this, the material on each side is threaded. This can be done both manually and on a sewing machine.
Also, embroidery can be fixed with a nonwoven fabric. To do this, the fleece should be laid on the canvas and ironed with a warm iron.
Next, to begin to embroider a cross, you needDetermine the center on the material. This is very easy to do. You just have to fold the material twice. The point to which the four folds will converge is the center. Such manipulations are necessary, so that the cross-stitch embroidery is positioned correctly, and the drawing is placed on the canvas.
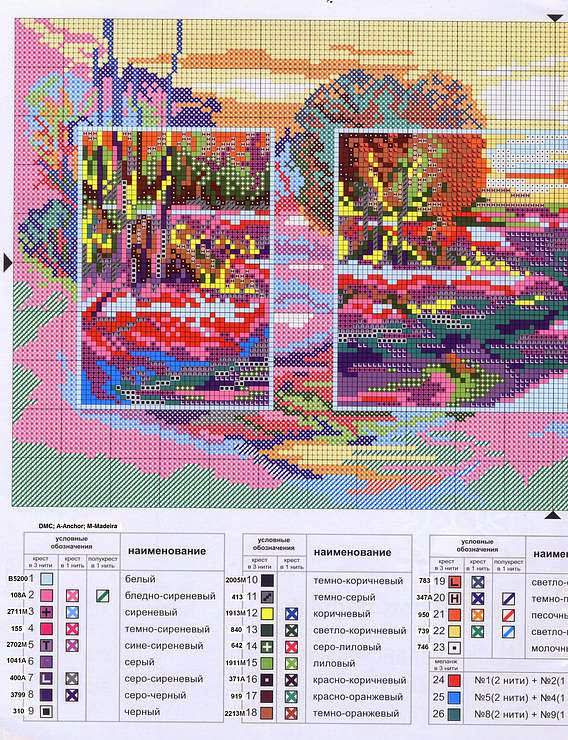
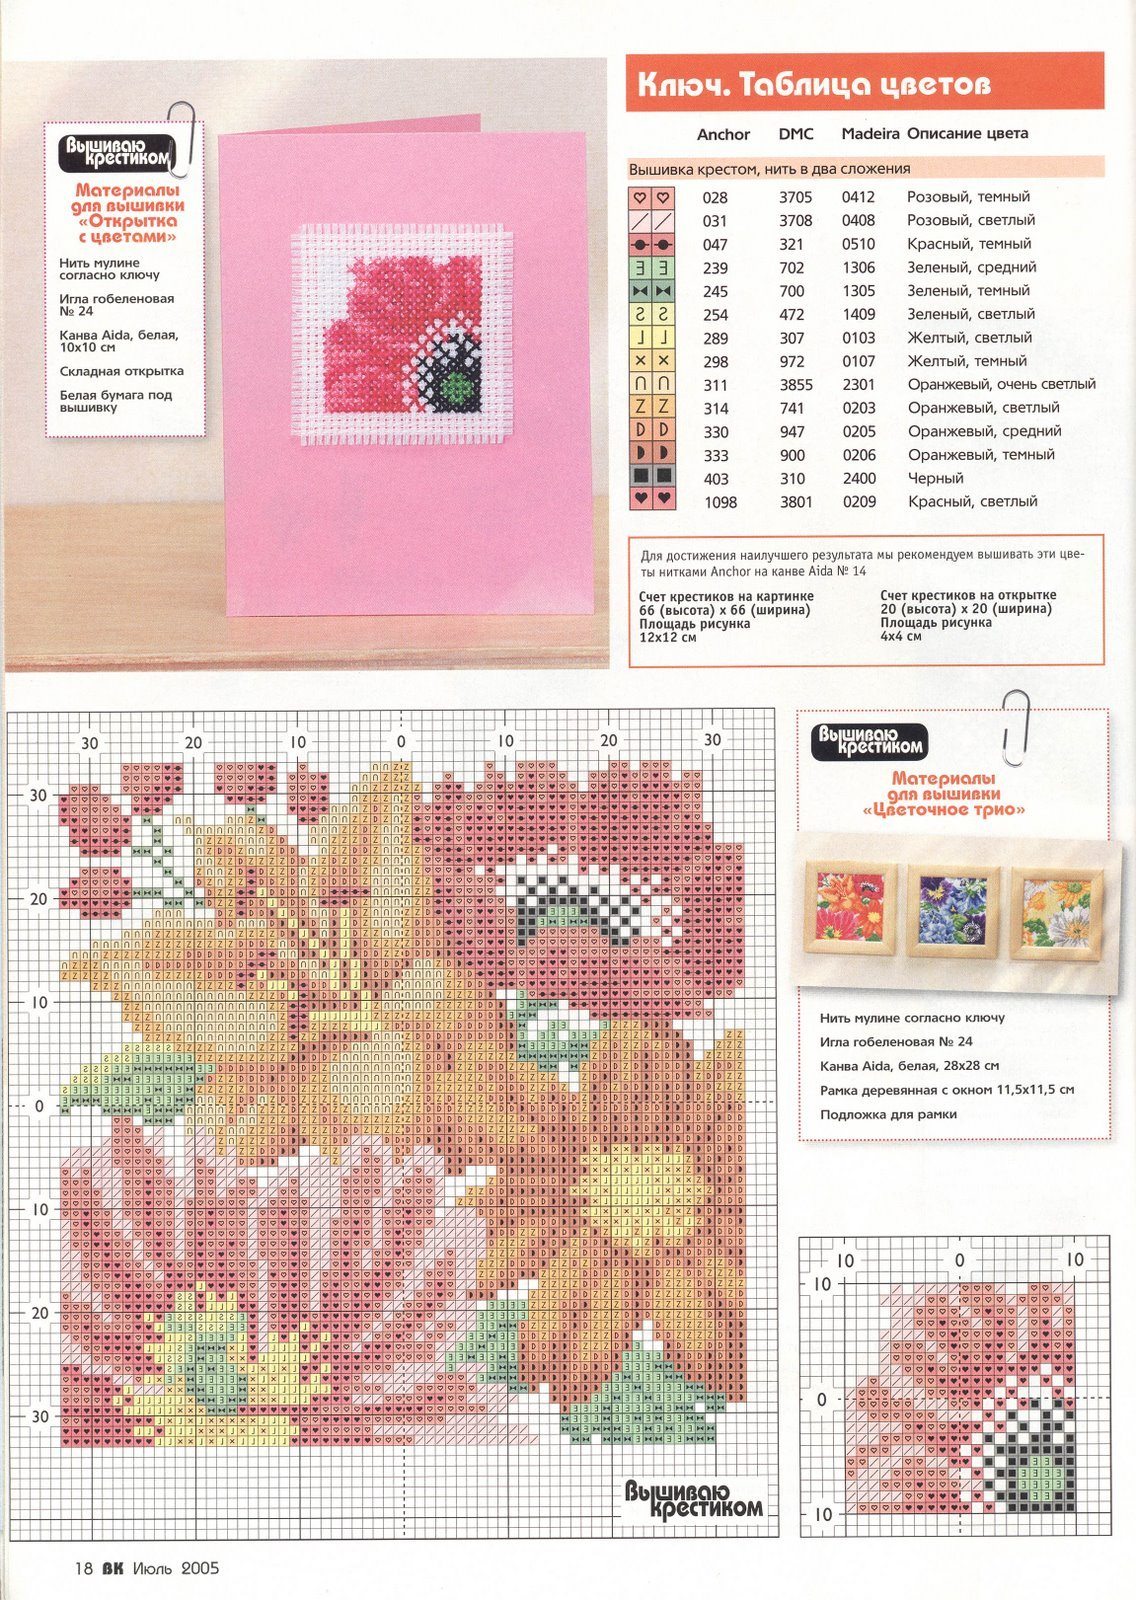
Scheme of the second moduleActually from the center. Of course, you can count the cells of the circuit from the middle of the canvas and start working from the edge of the picture, but in this case there is a big risk of making a mistake. Especially for beginners.
Next, the canvas should be pulled on the hoop. Arrange the material on a smaller hoop, and place a larger one on top. Tighten the canvas well and tighten the screw on the tool.
At the next stage we will begin embroidery of the first module of the picture. We start to work either from the center or from the edge where the beginning was marked.
We insert a thread of the appropriate color in the eye of the needle. Enter it in the lower left corner of the box. One thread of the thread must be left. It will serve to fix the end. The needle must be inserted in such a way that a small loop remains on the front side. And between her and the needle was one thread weave. The withdrawn tool must be pushed through this loop and tightened. The thread was fixed.
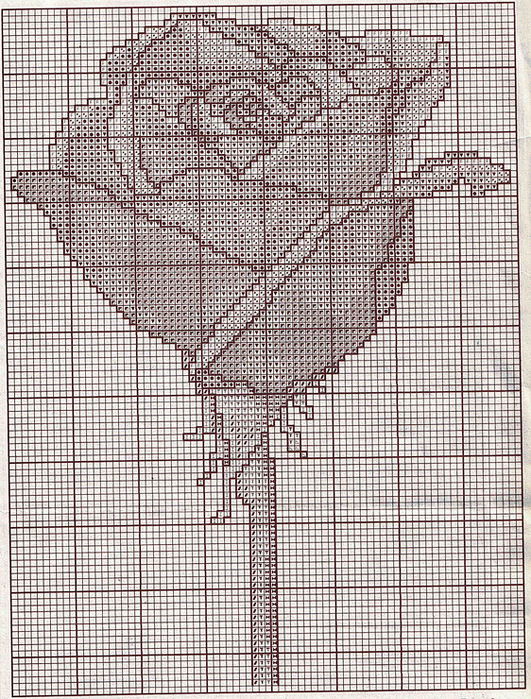
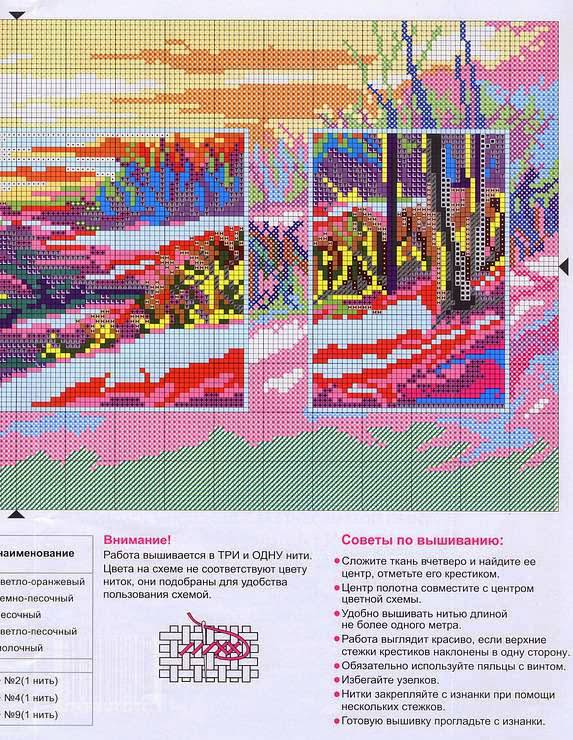
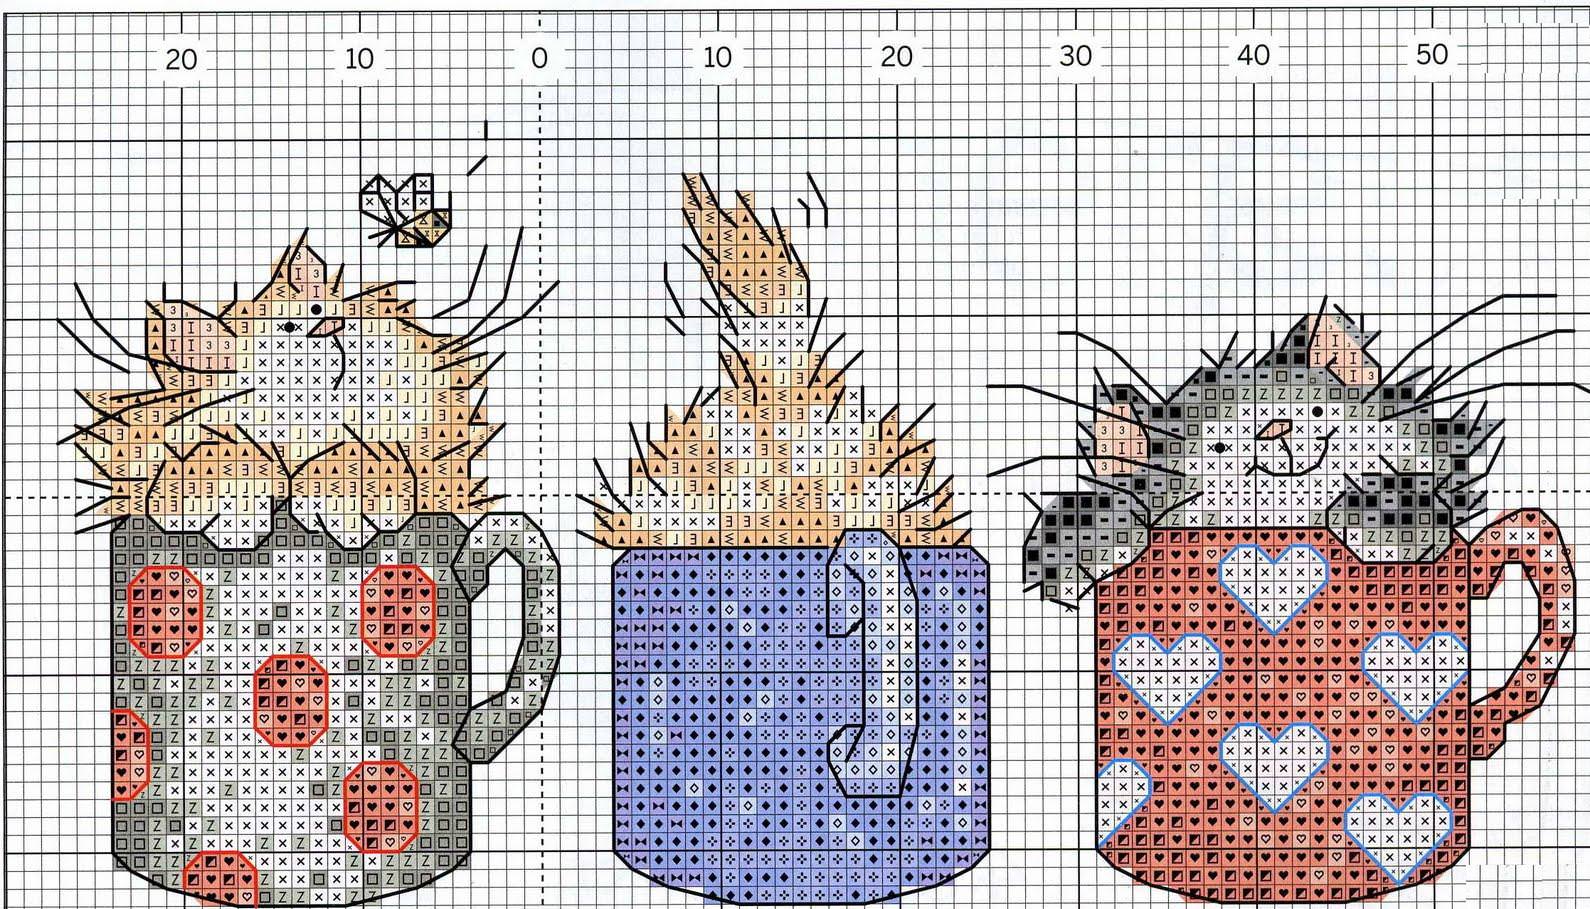
Scheme of the third module To disguise the nodule, you need to bring the needle to the wrong side through the bottom left hole of the square. Along with the thread, the knot will move inside out.
Check with the diagram. Each colored box of the scheme is one cross. The symbol in this box indicates the shade of the thread. If the cell of the circuit is empty, it means that it is not embroidered on the canvas. This nuance requires special attention. Since in the process of counting it is very easy to get down. Then the whole picture is distorted, and will not match the image on the photo and your expectations.
We embroider a number of single-colored crosses. That is, we do not do every cross of the scheme separately, but we sew by drawing the needle into the right bottom of the square corner and pushing it diagonally into the upper left corner, pulling the thread into the bottom left and then letting it pass to the upper right diagonally. We make such stitches necessary quantity (according to the scheme), and we go in the opposite direction. A number of crosses has turned out.

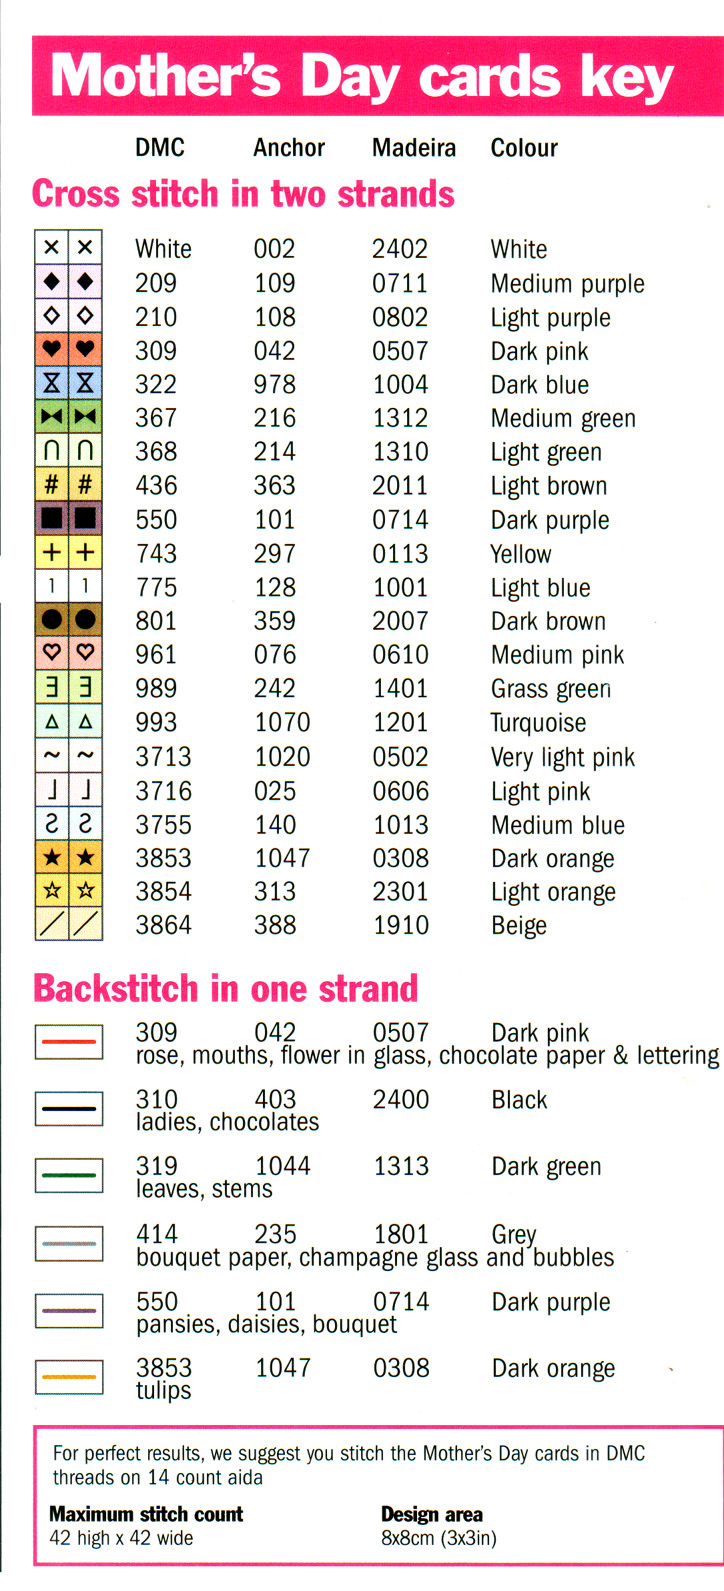
The key to the diagramEven with the same tension. Top stitches should always be in the same direction. Do not tighten the thread very tightly during work. Embroidery cross turns out ugly. Also, do not do long pulling threads. They can be illuminated.
The thread should be fixed in the last two stitches, removing the needle on the wrong side and pushing it under the previous strings. Uzelkov should not be done, as they can be seen from the front.
We continue to embroider the cross according to the scheme. Threads also change, as indicated in the photo.
This way you need to embroider all the modules.

Creating a picture
To work required:
- Styrofoam;
- PVA glue;
- Hooks;
- Wooden slats;
- scissors;
- A stapler;
- pencil;
- plywood;
- centimeter.
The production process It is not difficult to fold embroidered modular pictures. The basis can be purchased already finished, but you can create it yourself. You can create the basis for the module in two ways.
First option
From wooden plankochek make a stretcher as ona photo. To do this, you need to take two pairs of identical wooden slats, slightly adjust the ends and connect using a stapler, as shown in the photo. Reiki should be taken in such a length that the finished base corresponds to the size of the embroidery. From the underside of each stretcher, you need to attach pieces of plywood. Better than a triangular shape. This is necessary to secure the slats. To create a high-quality base for embroidery on a stretcher, you must tighten a dense fabric and fasten it with a stapler. Cross-stitch embroidery is placed on the stretcher in such a way that the material is sufficient to fasten it from the back side. Cross-stitch embroidery is evenly spaced and stretches well. This is a necessary nuance to avoid wrinkling and any crumbling.
Particular attention should be paid to the corners. First, the stapler fixes the sides, then top and bottom.
second method
Take a piece of foam and just attachOn it embroidery with glue. But the edge of the foam should be treated. This is the easiest way to create a picture module. It does not require a lot of material, and the picture is created quickly enough.
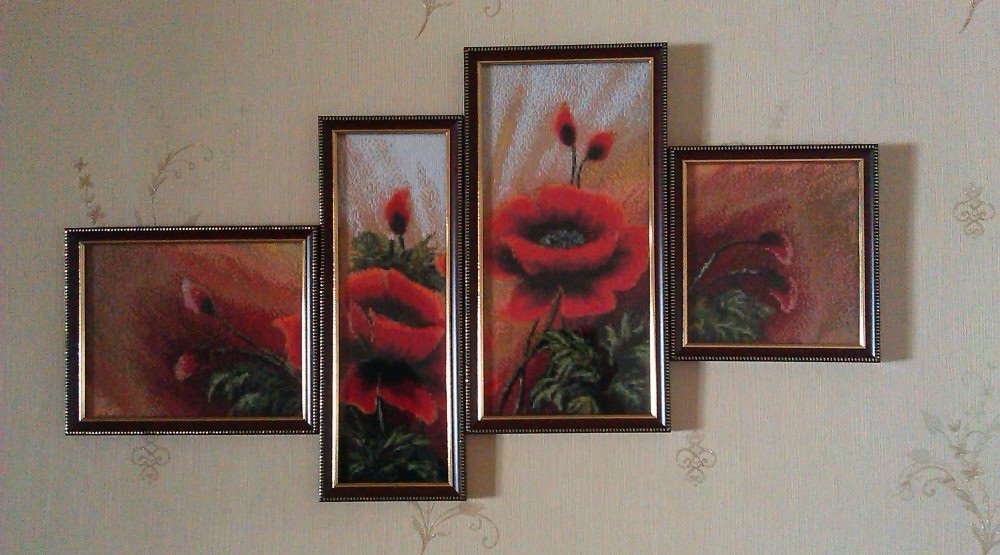
How to properly place a modular picture
To place embroidered modular paintings can be as inHeight, and depth. The first method is the usual arrangement on the bases of the same thickness. Depth - is that the image modules have a different thickness of the substrate. Therefore, with the correct placement on the wall, the embroidery turns out to be three-dimensional.
Modular paintings have been known since the Middle Ages. Probably, many saw in the ancient painting images in the form of diptychs or triptychs. Mostly such works were done for churches and churches. Therefore, the plot was mainly on religious topics. Hanged such works on the walls and framed a powerful frame.
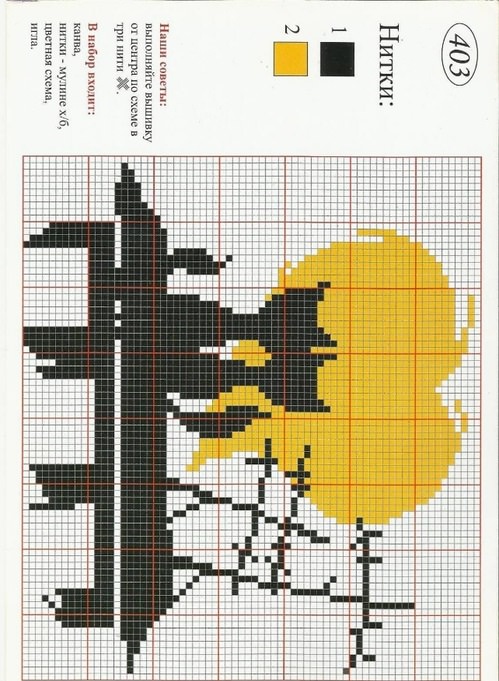
Embroidery schemes for modular paintings