
How to fold a nicely napkin or hand-made paper in origami technique, schemes for children of 8 years.
The art of creating figurines from paper (and notonly) a lot of fans around the world. Adults and children of all countries are happy to add handicrafts in the origami technique in the form of animals, birds, flowers, ice cream, clothes, houses or even dragons. For adults, this activity brings peace, pacification and relieves stress. For children, this hobby is also very useful in terms of development. Folding origami, children improve fine motor skills of fingers, learn to concentrate, develop logical and spatial thinking, solve non-standard problems using creative methods. For children who already go to school this is an excellent training and preparation for further school life. Babies at the age of 8 are already old enough to perform simple housework. For example, when preparing for a holiday, they can help the mother to spread napkins, and to ensure that household duties are not a burden for the child, origami art will come to the rescue. A beautifully folded napkin will delight guests at the feast, raise the self-esteem of the baby and inspire him to new accomplishments, both in helping with the house, and in the art of origami. Napkin "diagonal". 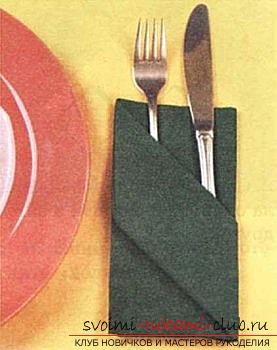 Fold the napkin horizontally in half, the fold line from above.
 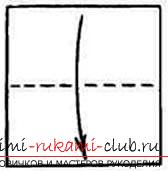 Bend vertically, the fold line to the left.
 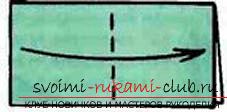 Turn counterclockwise 90 °. 4 napkin napkins are now located in the upper right corner.
 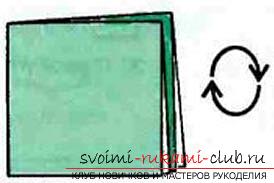 Bend and bend the right corner, outlining the diagonal.
 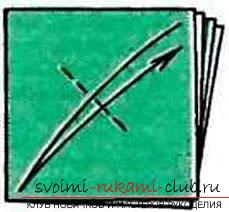 Bend one upper corner to the center.
 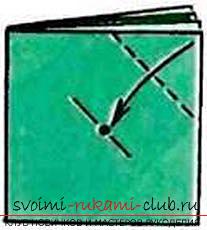 Turn the right edge again on the intended diagonal line.
 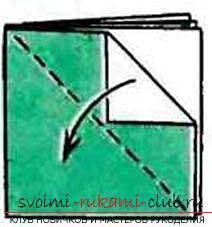 Reverse the right half of the napkin.
  The napkin is ready, you can put cutlery, postcards or cards for guests into the resulting pocket.
 Very rarely, children's holidays do without cake, funny caps and ice cream. All children love sweets, so you can offer kids to fold a slice of paper cake in origami technique.
 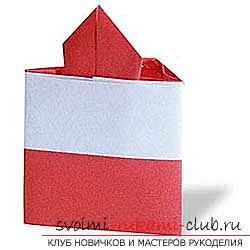 Bend and unbend a piece of paper horizontally and vertically to indicate the center lines. Bend upward 1/3 of the sheet from the bottom. Bend the upper corners to the center.
 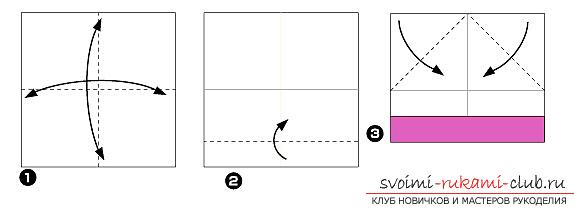 Expand the work. The upper corner is bent down along the central horizontal line. Partially bend it up.
 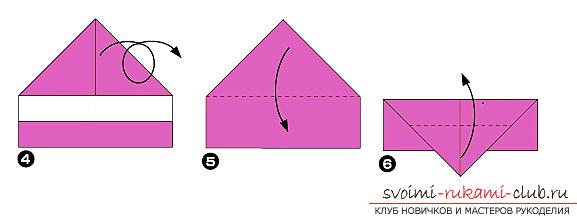 The right and left corners in the base of the trianglebend and unbend, denoting lines that do not merge along the central vertical. Bend and unbend these corners once more inward, indicating the fold lines above the crease lines from the point above.
 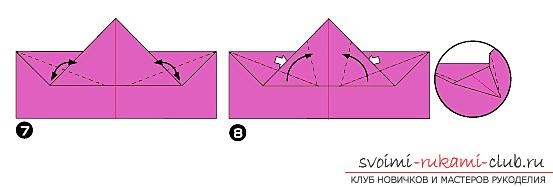 Bend the last received lines so that they become parallel to the central vertical line. Bend a little edge. Bend the right and left sheets by 1/3.
  Connect the folded edges. Another cake.
 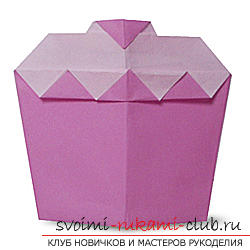 Bend and straighten the sheet diagonally. Bend the second diagonal. Bend line from the bottom.
 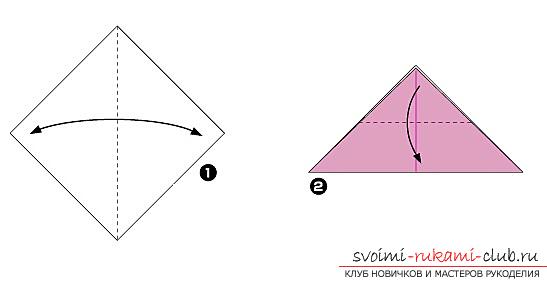 Unbend one side from the top half down. Bend the top corner approximately 1/3 of the bent in the paragraph above.
  Bend down the same corner so that the folds coincide. Bend the corner upwards so that the point touches the fold lines.
 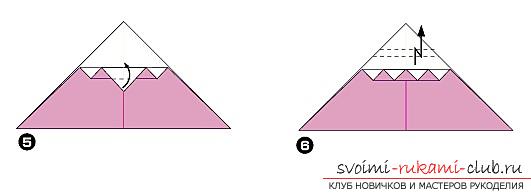 The second side will lay down at the level of the last two points. Rear small corner bend in front. Bend the bottom corners.
 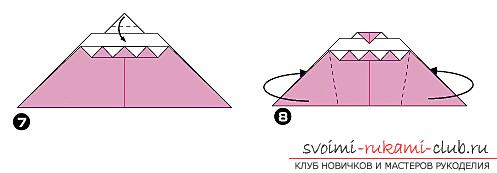 A little bend along the central vertical line.
 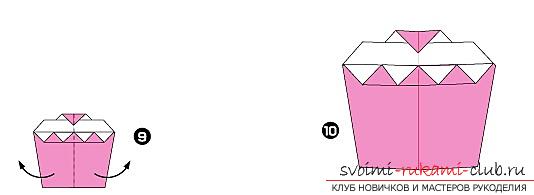 A funny hat. If you decorate it with multi-colored pieces of paper, or paint with colors, it will be an excellent option for celebrating a birthday or a New Year.
 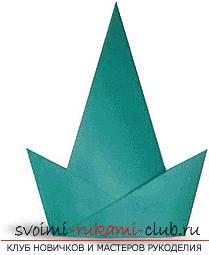 Bend the sheet of paper diagonally, the fold line from the bottom. Bend right and left corners crosswise. Lower corners bent upward.
 The hat is ready. Many babies love animals and, often, draw, sculpt and make crafts in the form of cute cats and dogs, but there are many more animals in the world. You can put in the technique of origami, for example, a funny snake or peacock and even paint his tail. Snake.
 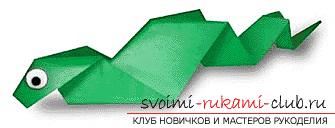 Bend and unbend a sheet of paper diagonally to indicate the line. Horizontal arrangement. Bend the same corners so that they touch the marked line from the point above.
 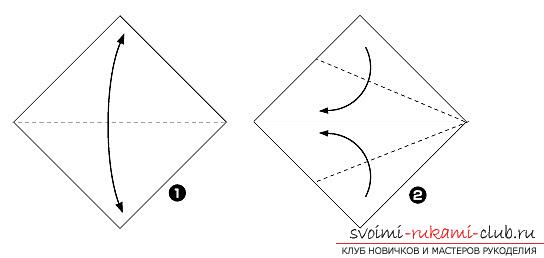 Upper and lower corner bend so that theytouched the same central line. Repeat with the newly formed upper and lower corners. On the right along the central horizontal line one sharp angle will be obtained.
 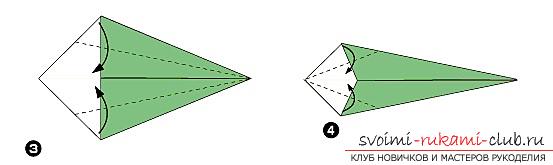 Turn the work. Along the midline, make up and down folds as follows. Expand the work with a wider end to yourself, point fingers to be positioned at an angle from the center line, with thumbs compress the sides (either up or down) on both sides so that the index fingers are on the fold line. The angle from the wider side should look up. This is the future head.
  Turn this corner so that it looks straightor a little down. To do this, you need to bend it along the center line and iron the center line of the fold once more (now it's at the top). Bend the tip of this corner inward.
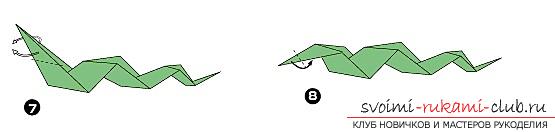
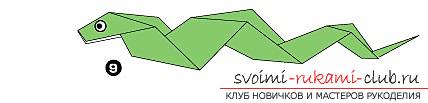 Attach the eyes and snake is ready. Peacock.
 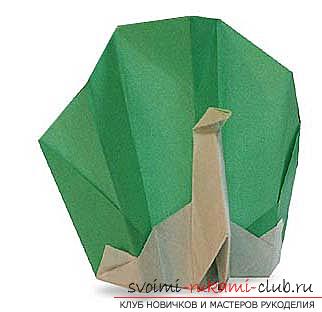 Bend and straighten the sheet diagonally. Place the front side up and bend the right and left corners so that their sides touch the central diagonal line.
  Unbend the inner adjoining corners. Bend the top of the sharp bottom corner, the fold line will pass in the middle. Bend down the sharp corner from the previous point so that one side of it becomes parallel to the fold point from the point above. On the central diagonal line, bend the right side of the structure back. Together with it, the back half of the corner from the previous point will bend. And its point will look to the right.
 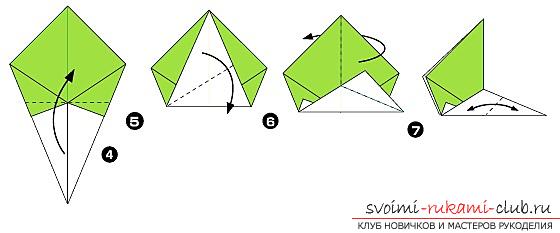 Turn this point upwards so that the sides,which were below, became parallel to the vertical central line. Unscrew the tip of the point perpendicular to the vertical center line. This is the head of a peacock. She's on the right.
 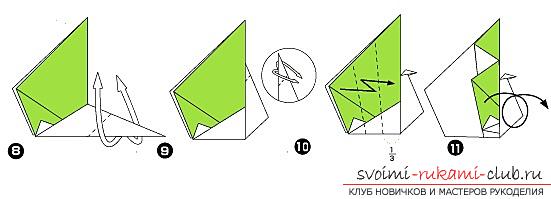 The left and right front and back pieces should be folded up and straightened slightly. The uppermost corner is folded inwards. Peacock is ready.
Comments
Related posts:
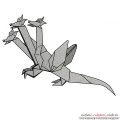 It is not difficult to make a three-headed dragon made of paper in the origami technique according to the schemes
 Making a swallow from paper in origami technique, which is easy to do according to the description, is not difficult to manufacture
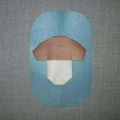 This detailed workshop of origami for children of 8 years will teach how to make an origami-mushroom from paper.
 How to make a paper tulip in origami technique
 How to make a cube of paper in the origami technique according to the finished scheme.