Sew a scarf from the fabric with your own hands for 10 minutes, detailed instructions.
Of course, in our time to buy a scarf of any color,size and density is not difficult. In shops and markets a huge selection of this accessory. But if you still want to sew a scarf with your own hands, boldly get down to business! You will not only save some money, but also get a lot of pleasure from the sewing process. I suggest to sew a scarf from a fabric with frills. As the basic material we take a chiffon. The scarf will turn out to be light, airy and romantic, complement your image and give a great mood! 1. For work we need a fabric (in this case chiffon), a thread in the tone of the fabric and a string-elastic.  2. Chiffon we need 70 cm. The width of the fabric can be any: 1.3 or 1.5. This is a big role will not play.
 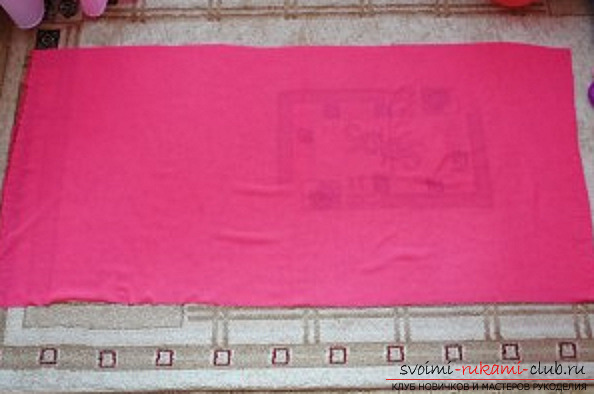 3. Cut the fabric in a width into two identical parts. These two halves need to be stalled.
 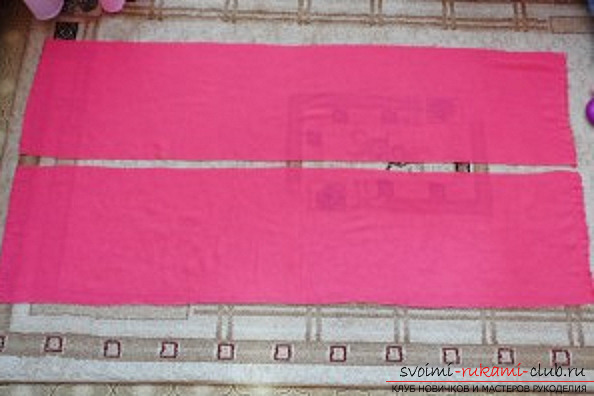 4. Fold the two strips of fabric face to face, with needles.
 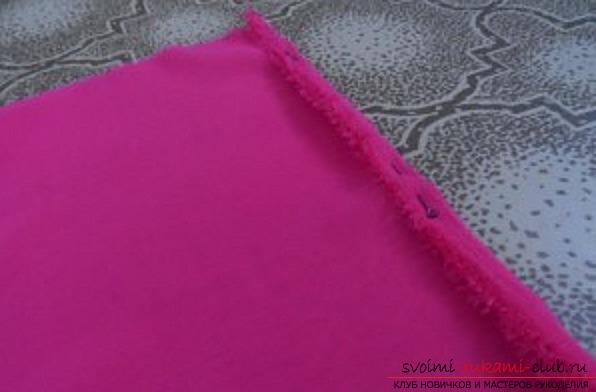 5. Stitch the line.
  6. Now add the fabric, as pictured in the photo, and sew one more line close to the edge. In principle, it was possible to skip points 4 and 5, and immediately fold the fabric in the necessary manner and stitch. But since chiffon is very "creeping", it is better to perform this method, so that everything will turn out neatly.
 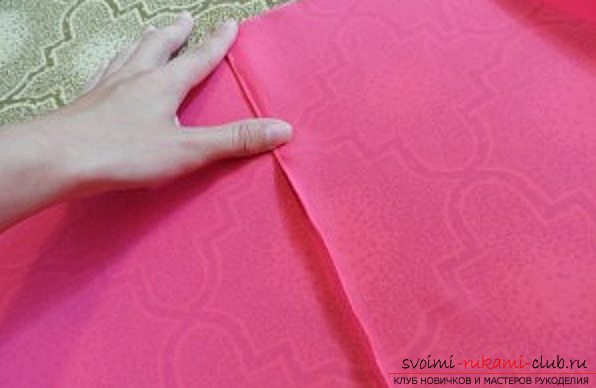 7. That's what it turns out. Seam allowances are carefully trimmed close to the stitch. 8. Now we will detach the seam, trying to sew on the previous seam.
  9. Two halves of the scarf connected! 10. Now we start to process the edges. The short sides of the scarf we have the edge. We leave it.
 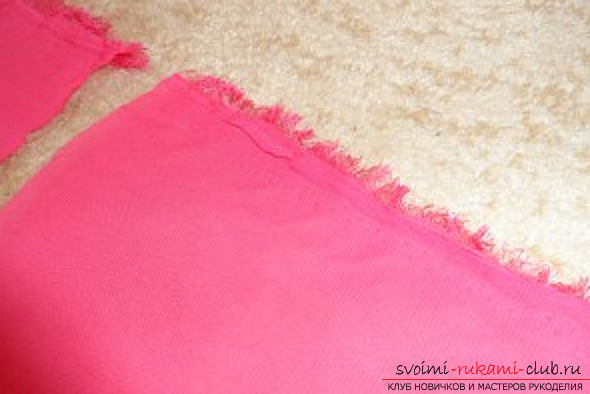 eleven. The long sides of the scarf are treated with a Moscow seam. To do this, on the wrong side, we fold about one centimeter of fabric and make a line close to the edge (within reason, of course). In the photo, this is clearly illustrated.
 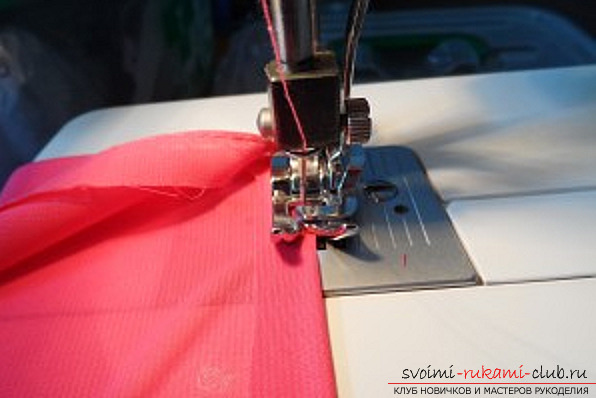 12. Then, cut the cuttings close to the line. For this we use a nail scissors.
  13. Now once again we bend the fabric and plot the line along the very edge.
  14. This is how the seam appears in the finished form: the purl and the front side.
  15. Stitch the seams so everything looks neat.
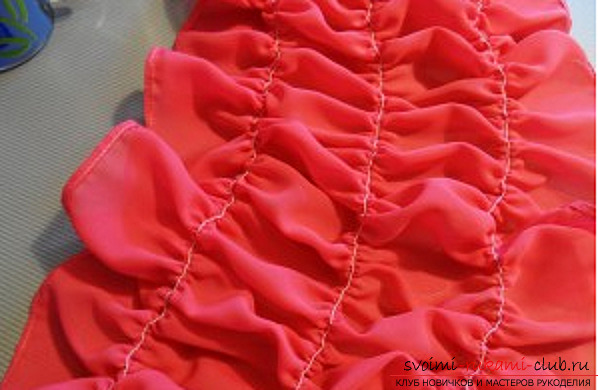
 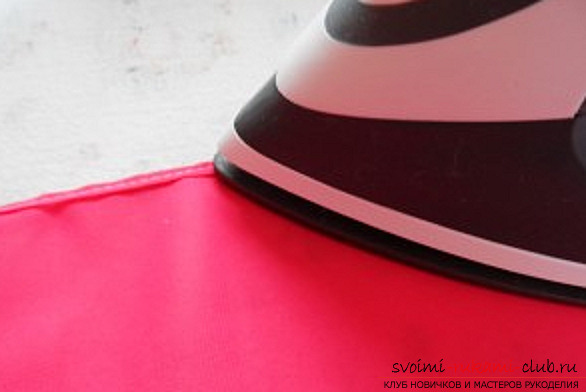 16. Now, along the entire length of the fabric from the front side, we draw with chalk three lines. We will sew on these lines with a string of rubber.
 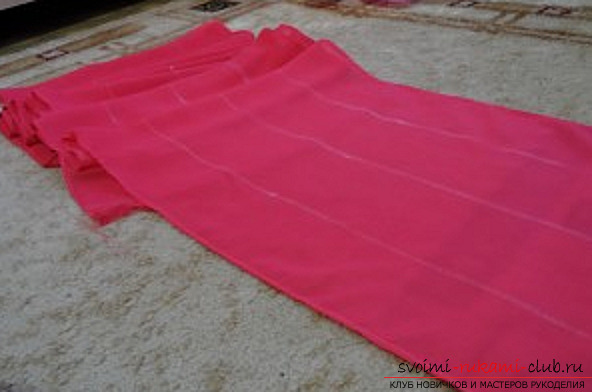 17. Manually wind the spool with an elastic string. Do not necessarily stretch it when winding. During sewing, the thread will stretch. It is necessary to stretch it only in order to reel a larger number. That is, the stretched thread will fit more on the bobbin than not stretched. 18. Now we are starting to do the most interesting! We start scribbling along the line we have indicated. The photo shows how the fabric will come to the back. After doing all three lines, do not forget to tie the edges of the thread so that the line does not bloom.
 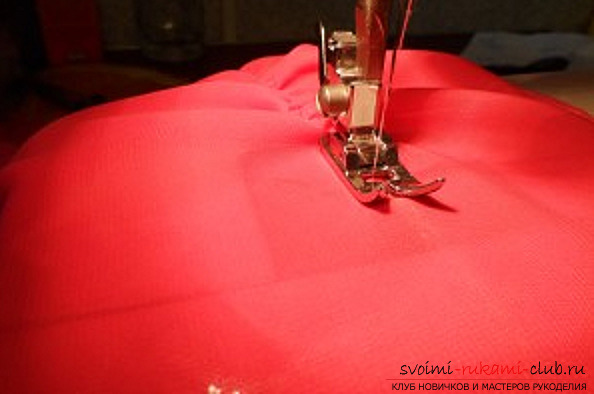 19. So it turns out.
 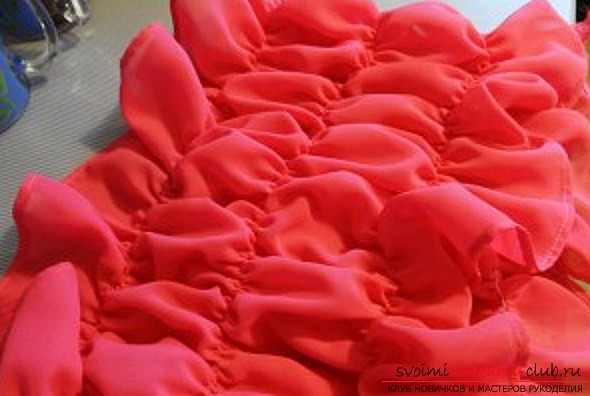 20. And this is how the wrong side looks. 21. Of course, you can sew a lighter model - you probably already figured out how to do it more conveniently. You can sew not only a wonderful scarf, but also a man's neck scarf - your loved one will be glad of such a gift! Moreover, it will be an exclusive thing, lovingly made by your gentle hands!
Comments
Related posts:
 How to sew a soft and cute hare from the plush fabric with your own hands. Professional pattern and step-by-step recommendation for tailoring
 How to build a pattern and sew the original, fashionable children's overalls with your own hands. Step-by-step instruction for tailoring children's overalls.
 How to sew a cute baby bag in the form of a lion. An original bag made of cloth will certainly please a small fashionista. Sew it is not difficult with your own hands
 Information on how to sew a fabric bag with your own hands
 How to paint a cloth at home, with your own hands. Step-by-step instruction and materials for painting the fabric.