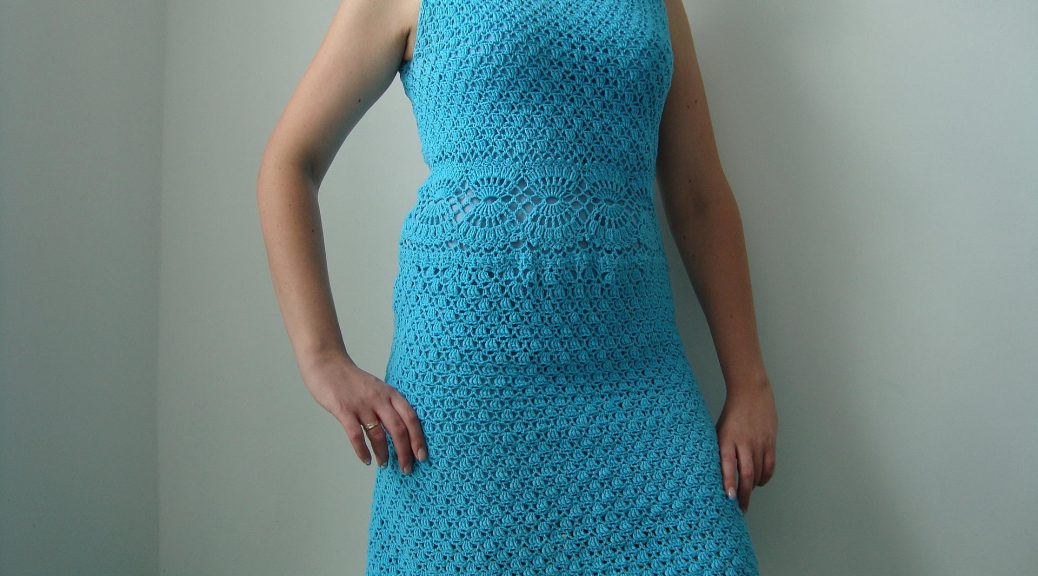
Turquoise crochet dress – step-by-step instructions with diagrams
To this day, things knitted with your own hands haverelevance and special value. It takes more than one week to knit a dress, but the length of time spent is paid for by the admiration that this thing is unique and almost unrepeatable. In this description you will find all the information on how to knit a stunning dress that looks great on any figure.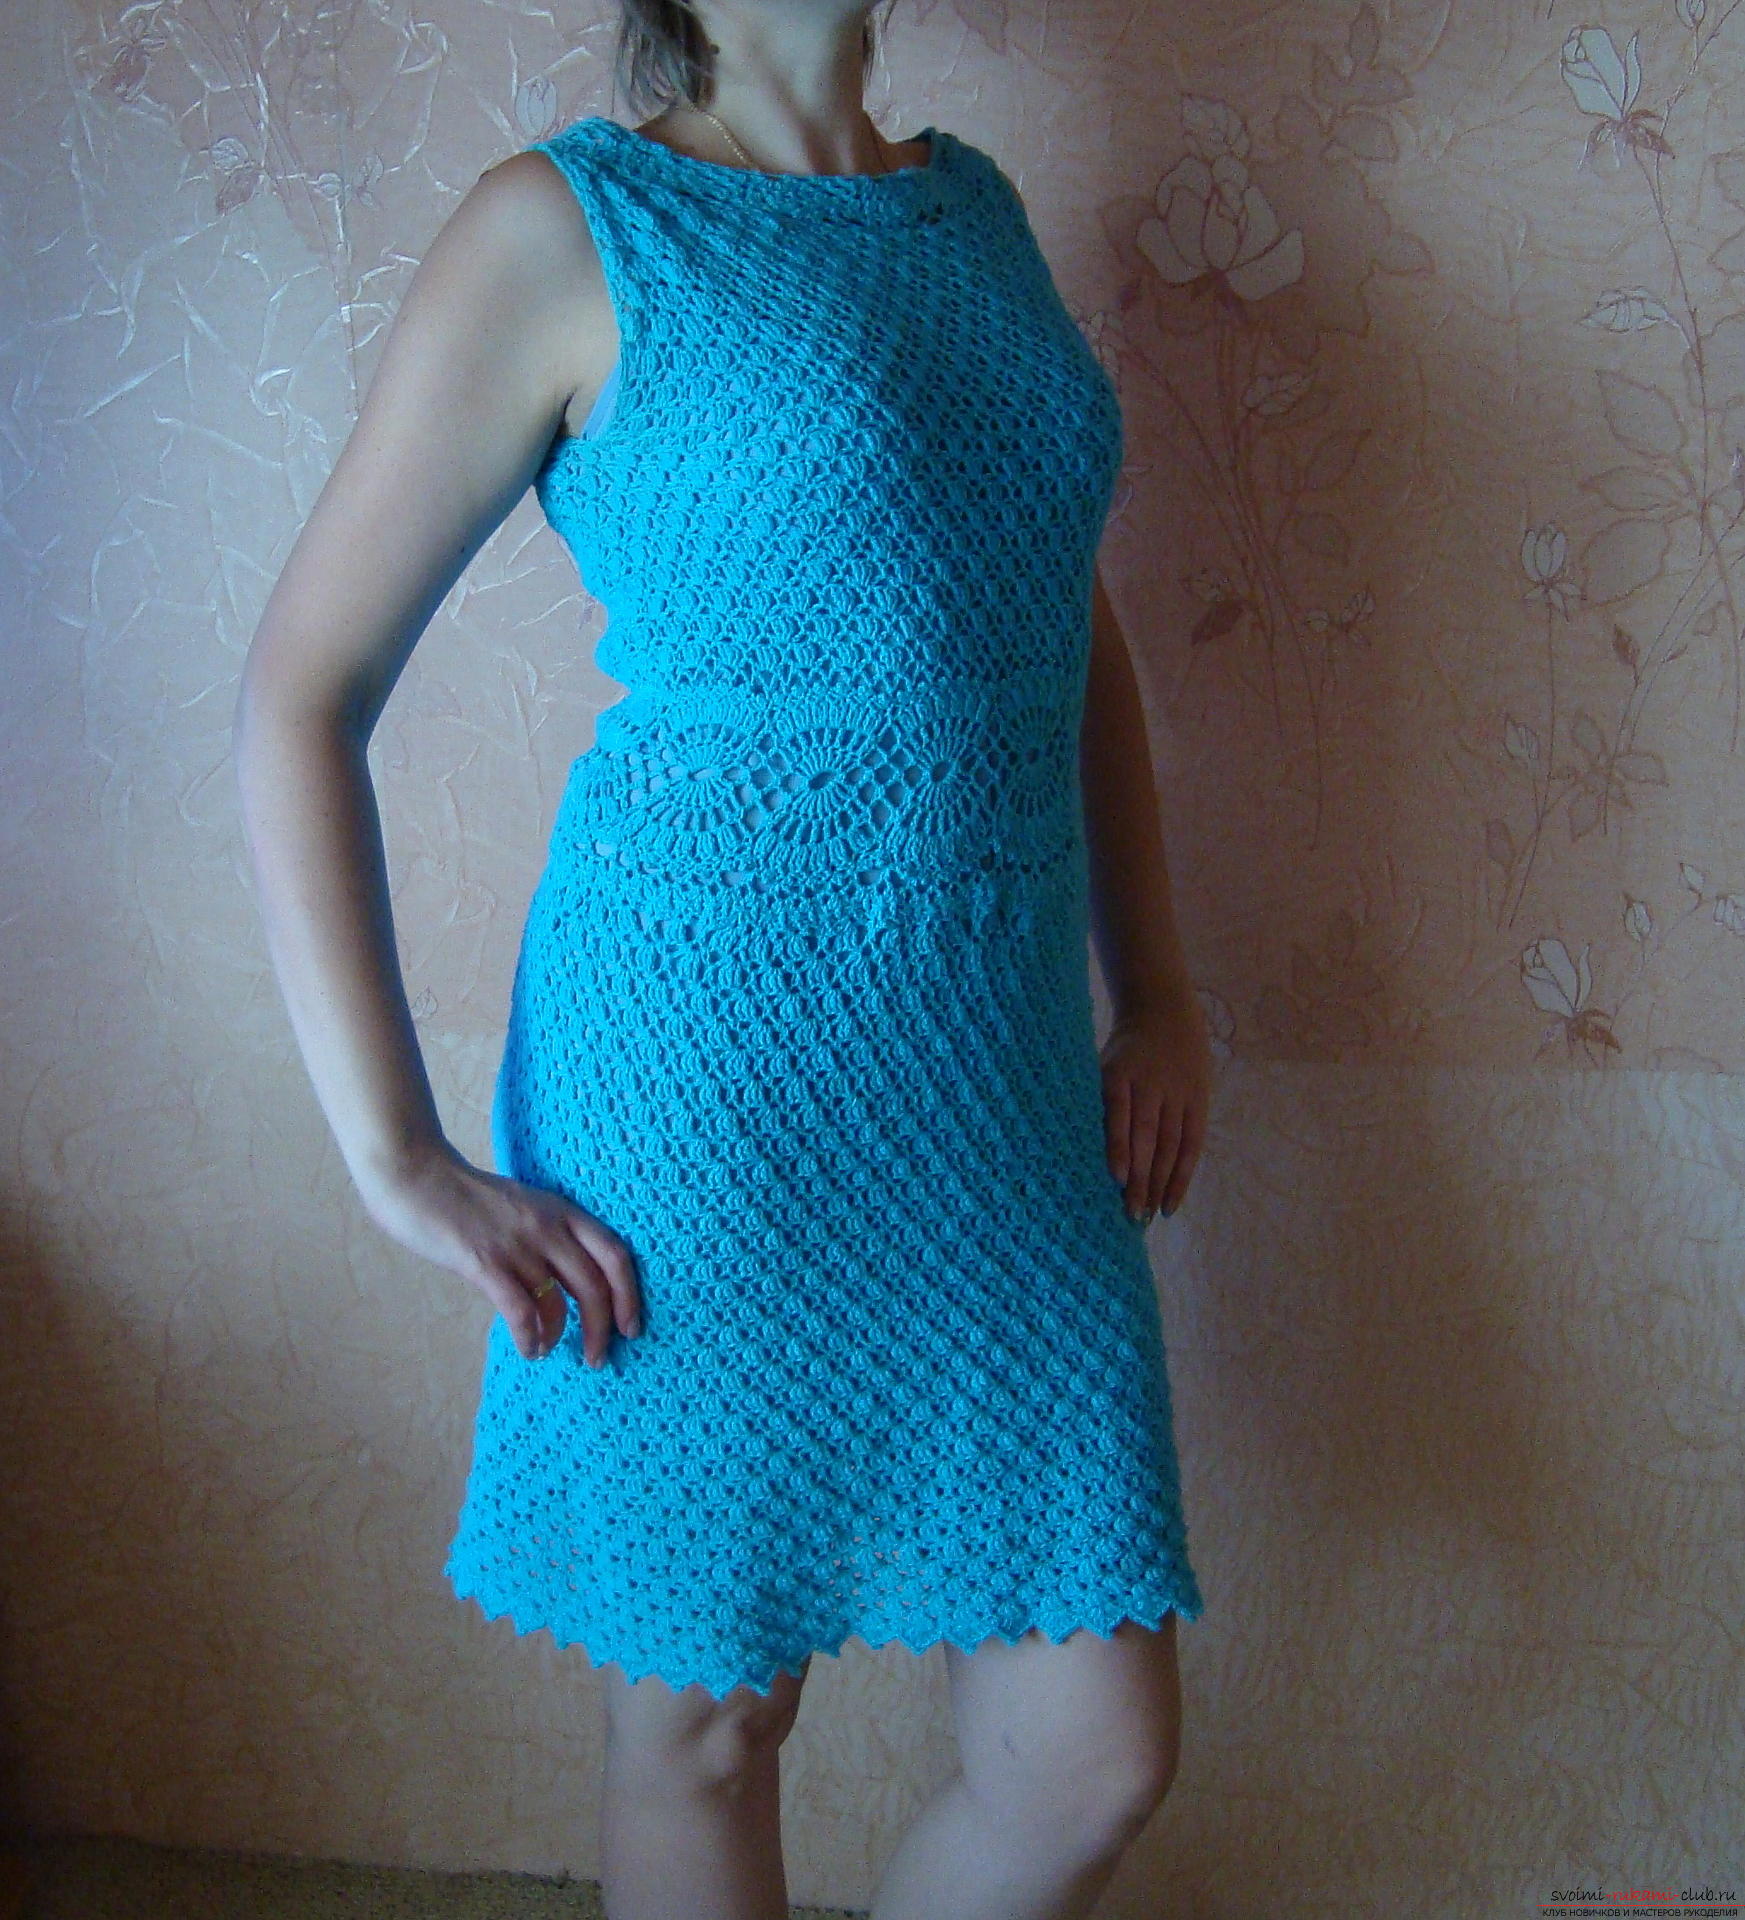
 When you decide to knit a dress, you need todecide in what period of time you plan to wear it. If it is winter, then the yarn should be with the addition of wool, this dress was created for spring, so the choice fell on the Turkish yarn Yarn Frt Jeans, it contains 55% cotton and 45% polyacrylic. This composition determines the properties of the product - it is "not hot", moderately stretches and maintains excellent quality during daily wear.
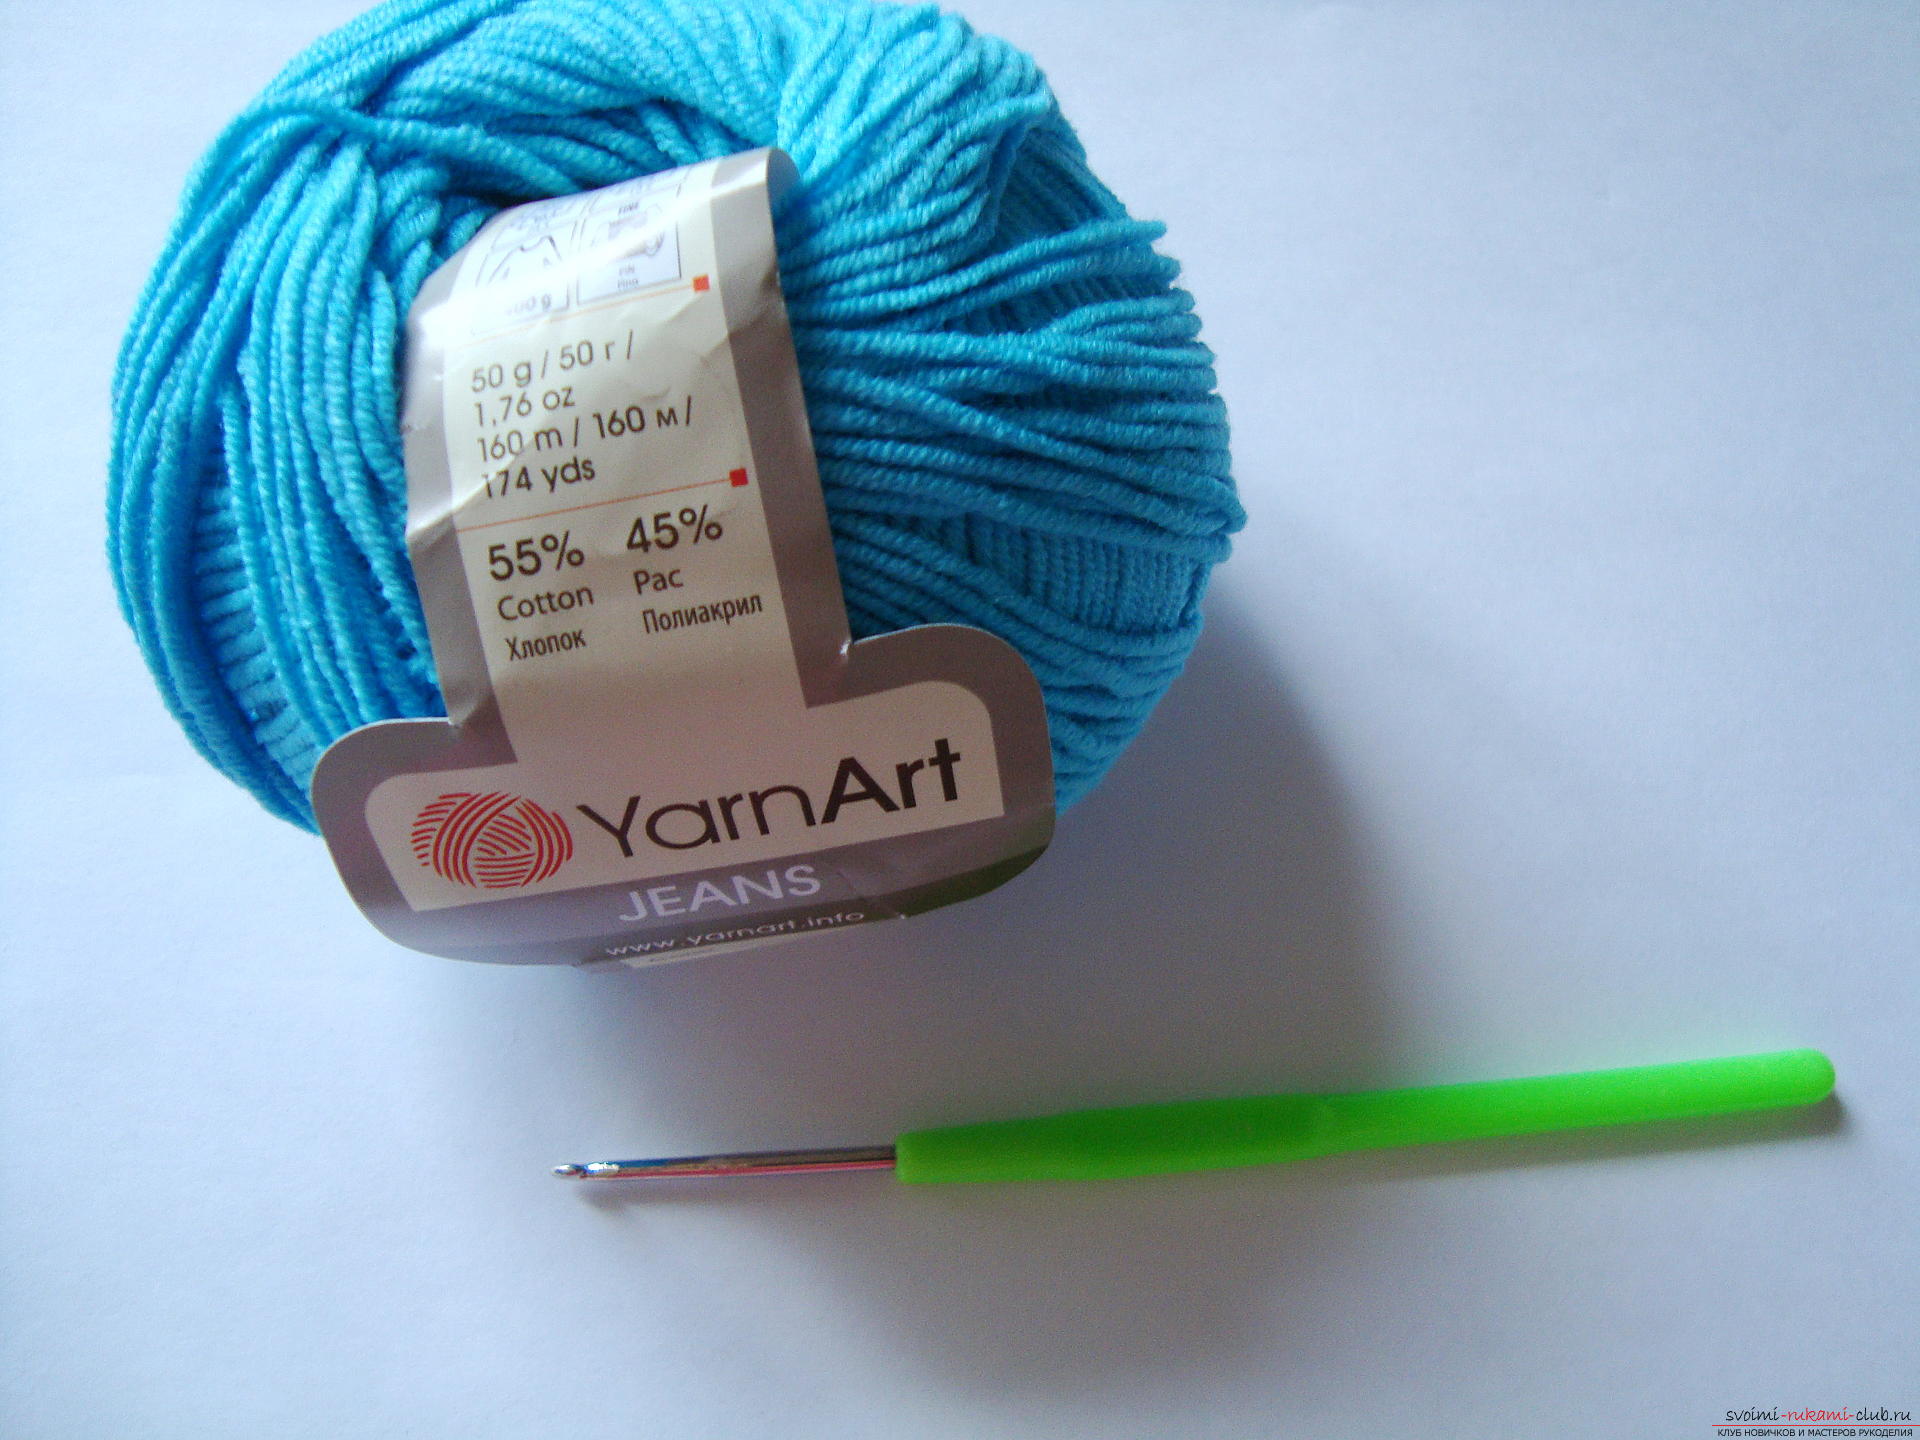 You also need to decide on the amount of yarn.This dress is size 48 and 10 skeins, or half a kilo of yarn, were spent on it. When buying material, it is better to take it with a reserve, since a lack of threads will lead to redoing the entire work or adding various contrasting inserts. The knitting principle of this product is unusual - the dress is knitted from the waist according to the first pattern. That is, the initial set of air loops will lie in the center of the waist, and the rest of the work is carried out down according to the second pattern and it is necessary to add loops, then a straight top is knitted with the addition of loops at chest level. A collar is knitted as a separate element, which duplicates half of the belt pattern and then it is sewn to the top of the dress. This model is sleeveless, if desired, you can create them by knitting openwork according to the first pattern.
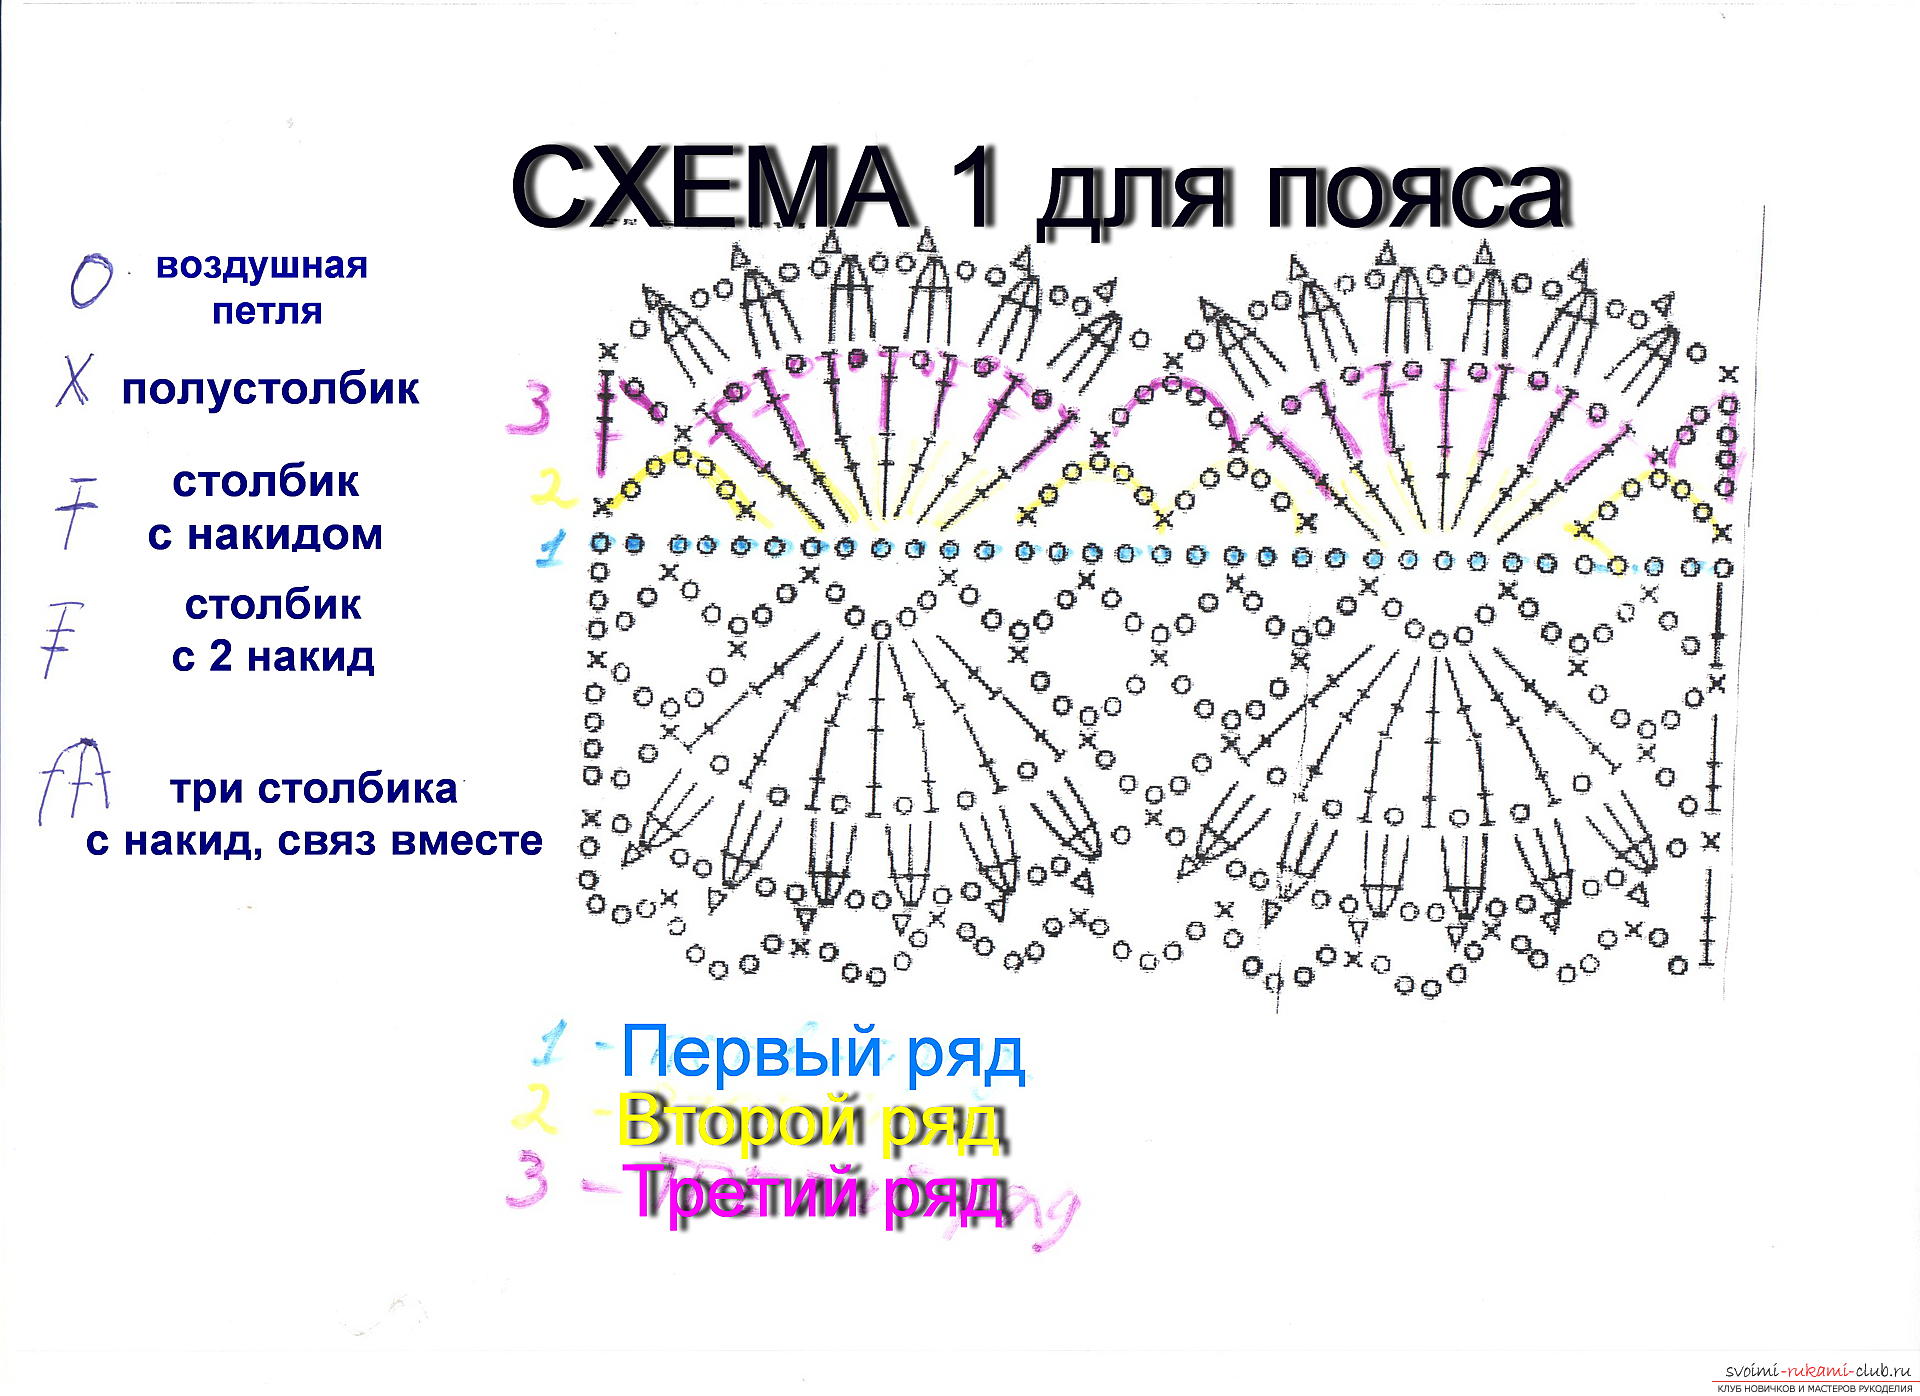 For an example and a full decoding of the drawingIt is necessary to knit a sample according to the pattern. First, dial 32 air loops plus 2 side loops. First, knit a pattern located down from the blue loops. Knit three lifting air loops and immediately two of the same loops for the pattern. Using a half-column, grab the loops to the third loop of the first row. Then knit arcs of air loops of 5 pieces, they cling to every fifth loop of the first row. The next two rows are identical both from the top and from the bottom of the pattern. It is the third row from the bottom and the second from the top that determine the center of the pattern. First, knit a regular arch of five air loops, fix it in the second arch of the previous row, and then knit five double crochets in the next lower arc. Then form two more arches of five air loops clinging to the lower convex parts, and then comes a set of seven double crochets. The fourth row on one side and the third row along the top of the pattern are knitted in a similar way, but when creating columns, dilute them with air loops, and only one arch is knitted between the wide parts. In the last row of this pattern, three connecting columns with a yarn are knitted, which are hooked onto the place where there was an air loop in the previous row. Small triangles in the pattern indicate three air loops, when knitting which the third is hooked into the base of the first and forms a small tooth. Both the top and bottom of the pattern are knitted with such figures. In the lower part, the arches of simple loops serve as the beginning for the second pattern, with the help of which the main surface of the dress is created.
 Try knitting a pattern on one side of the sample according to the second pattern, which makes up the main part of the product.
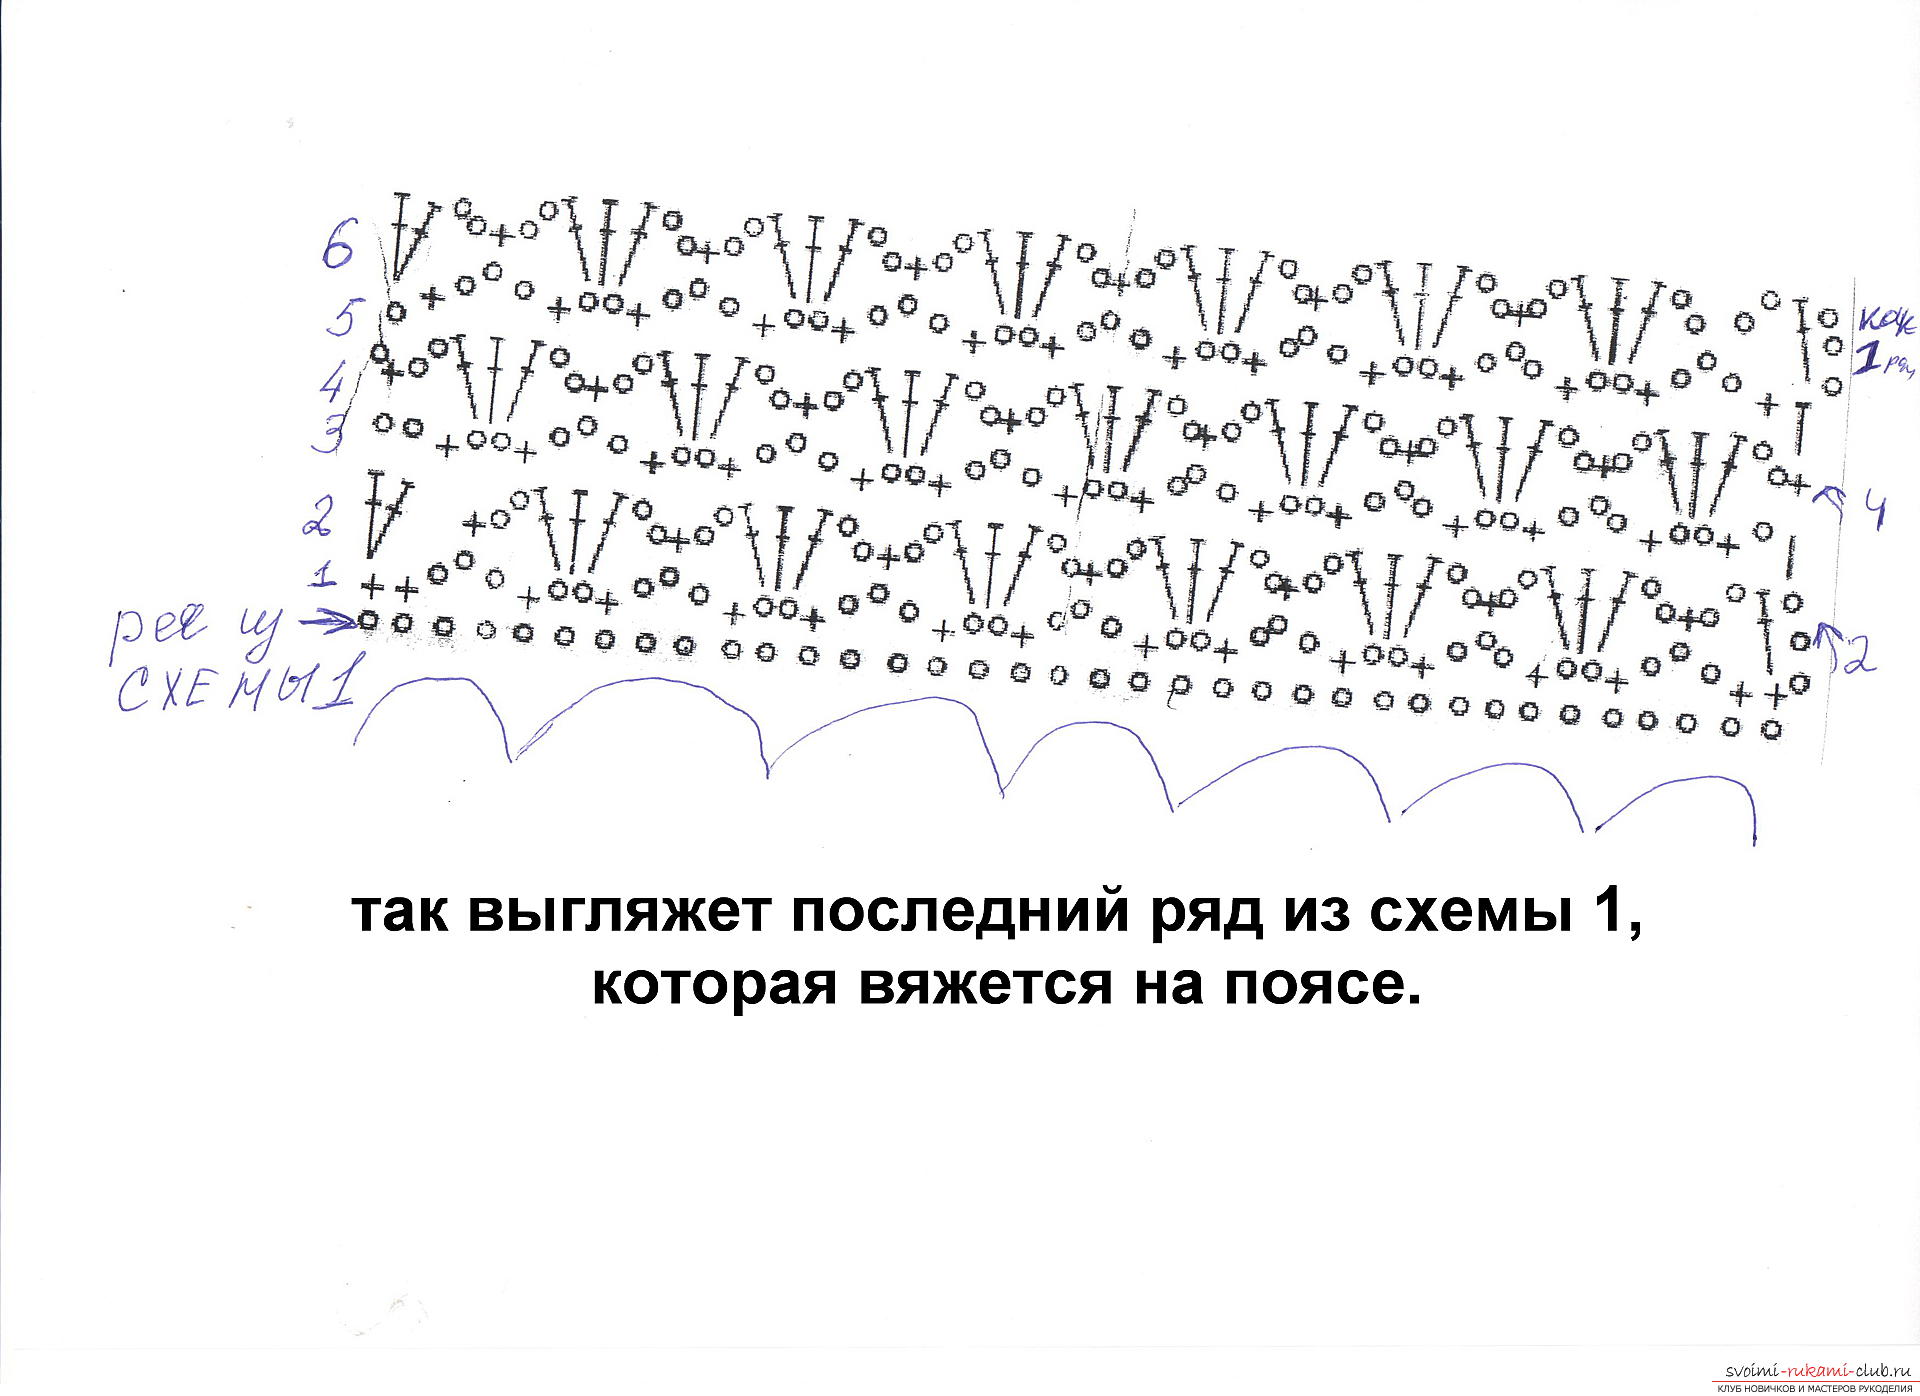 Here, arches of two andthree simple loops that are attached to the fourth and second loop of the bottom row. But using this particular yarn, you get a very large set of loops, so I knitted to the third and fifth loop.
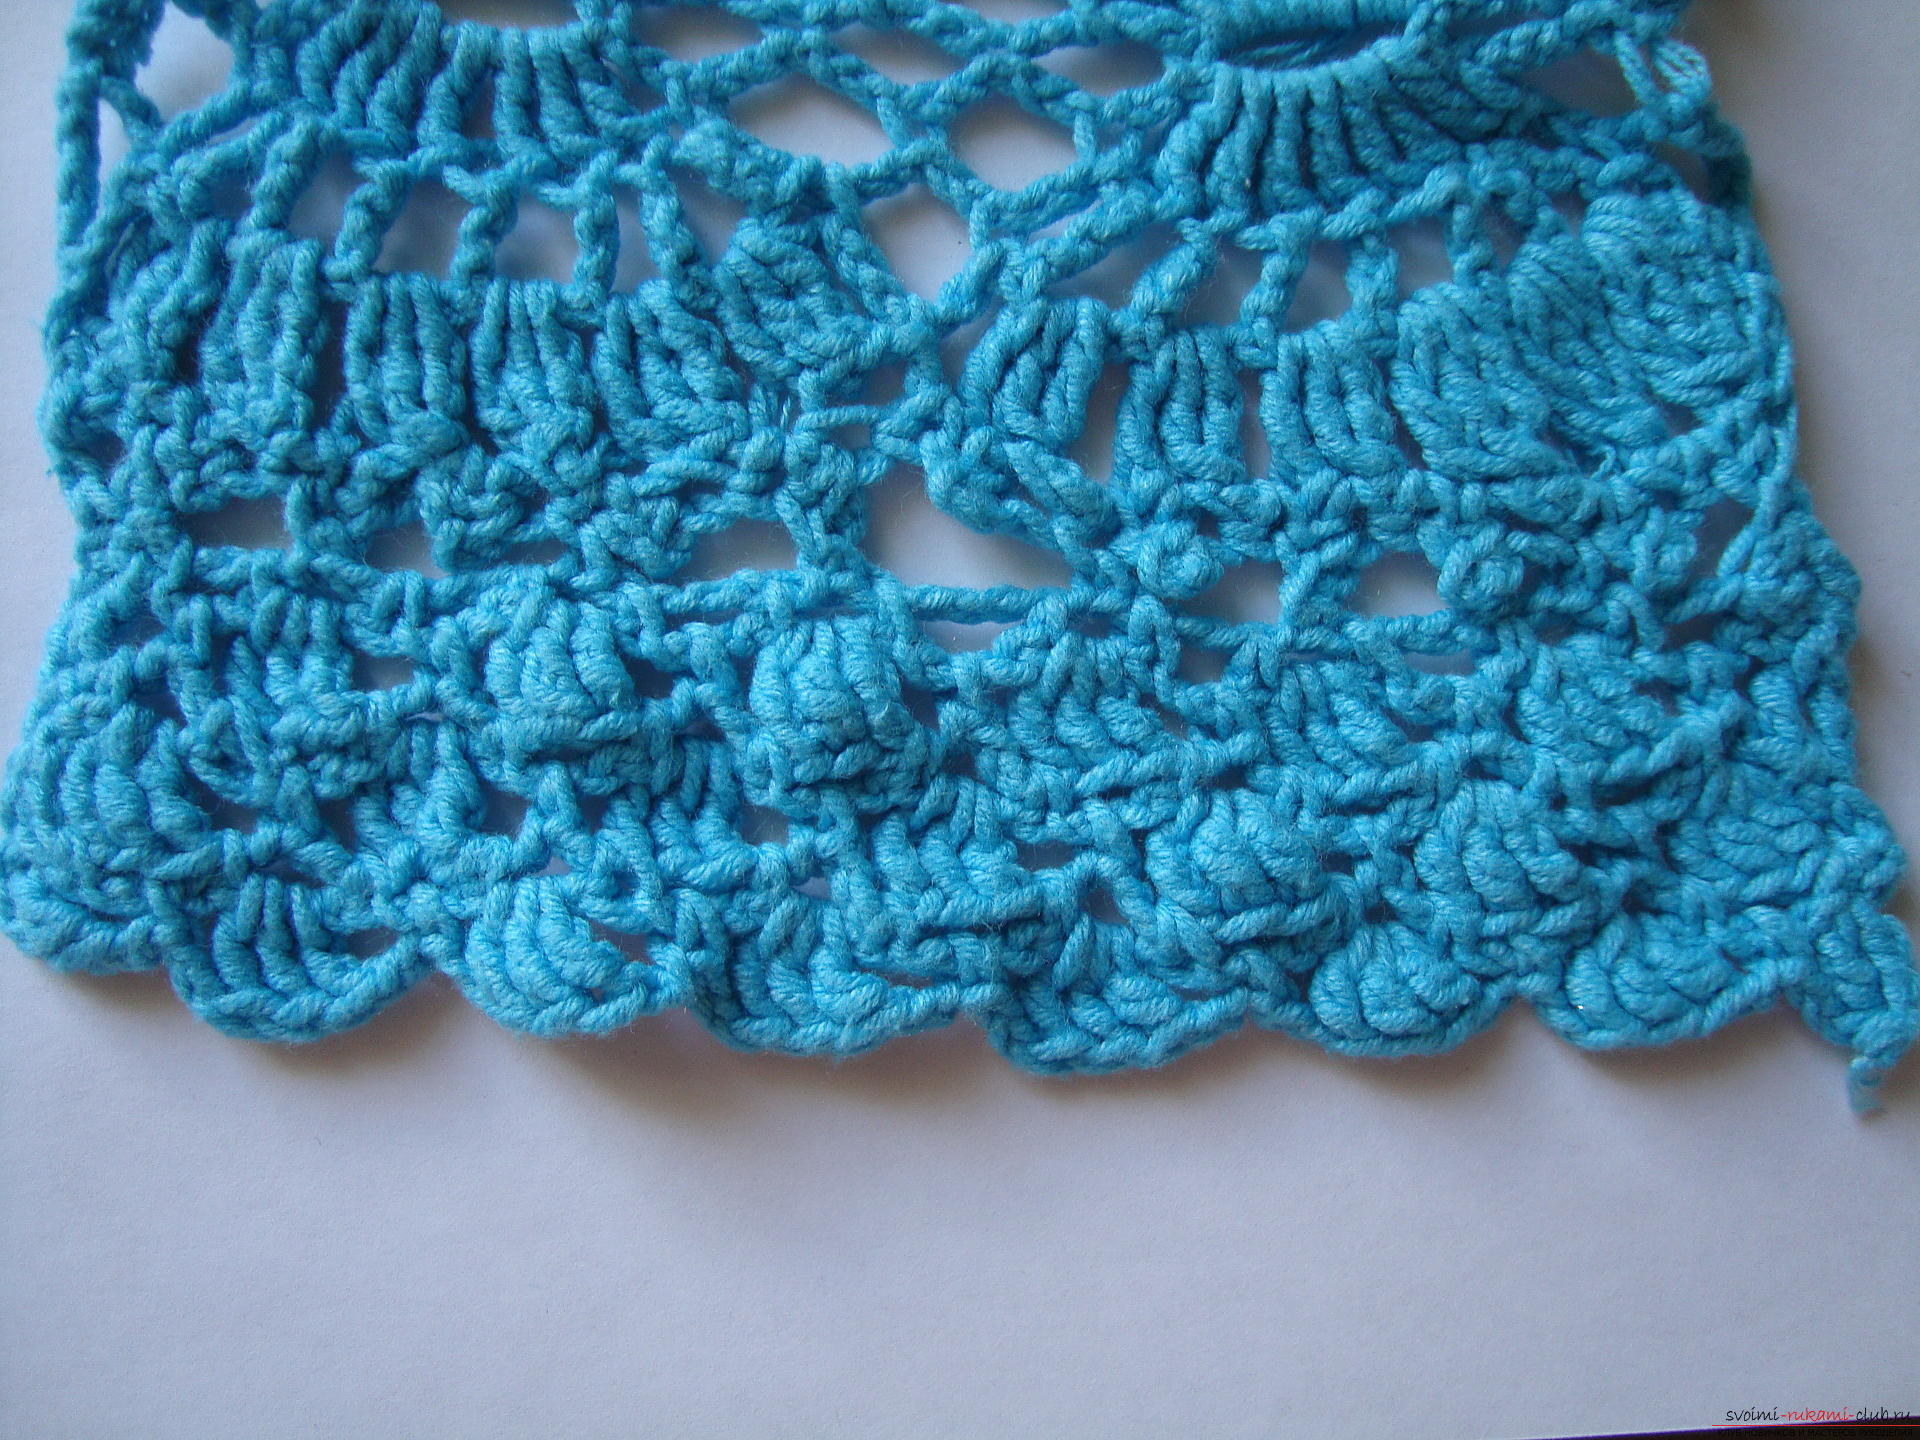 Measure the width of the resulting sample, and thenMeasure your waist circumference and calculate how many of these elements you will need. Remember that this pattern has two identical fragments, and each requires only 16 loops. Using simple calculations, determine the number of patterns along the belt and multiply them by 16, calculate the number of necessary air loops. Start knitting the dress from the belt, first completely knitting pattern 1 along the waist.
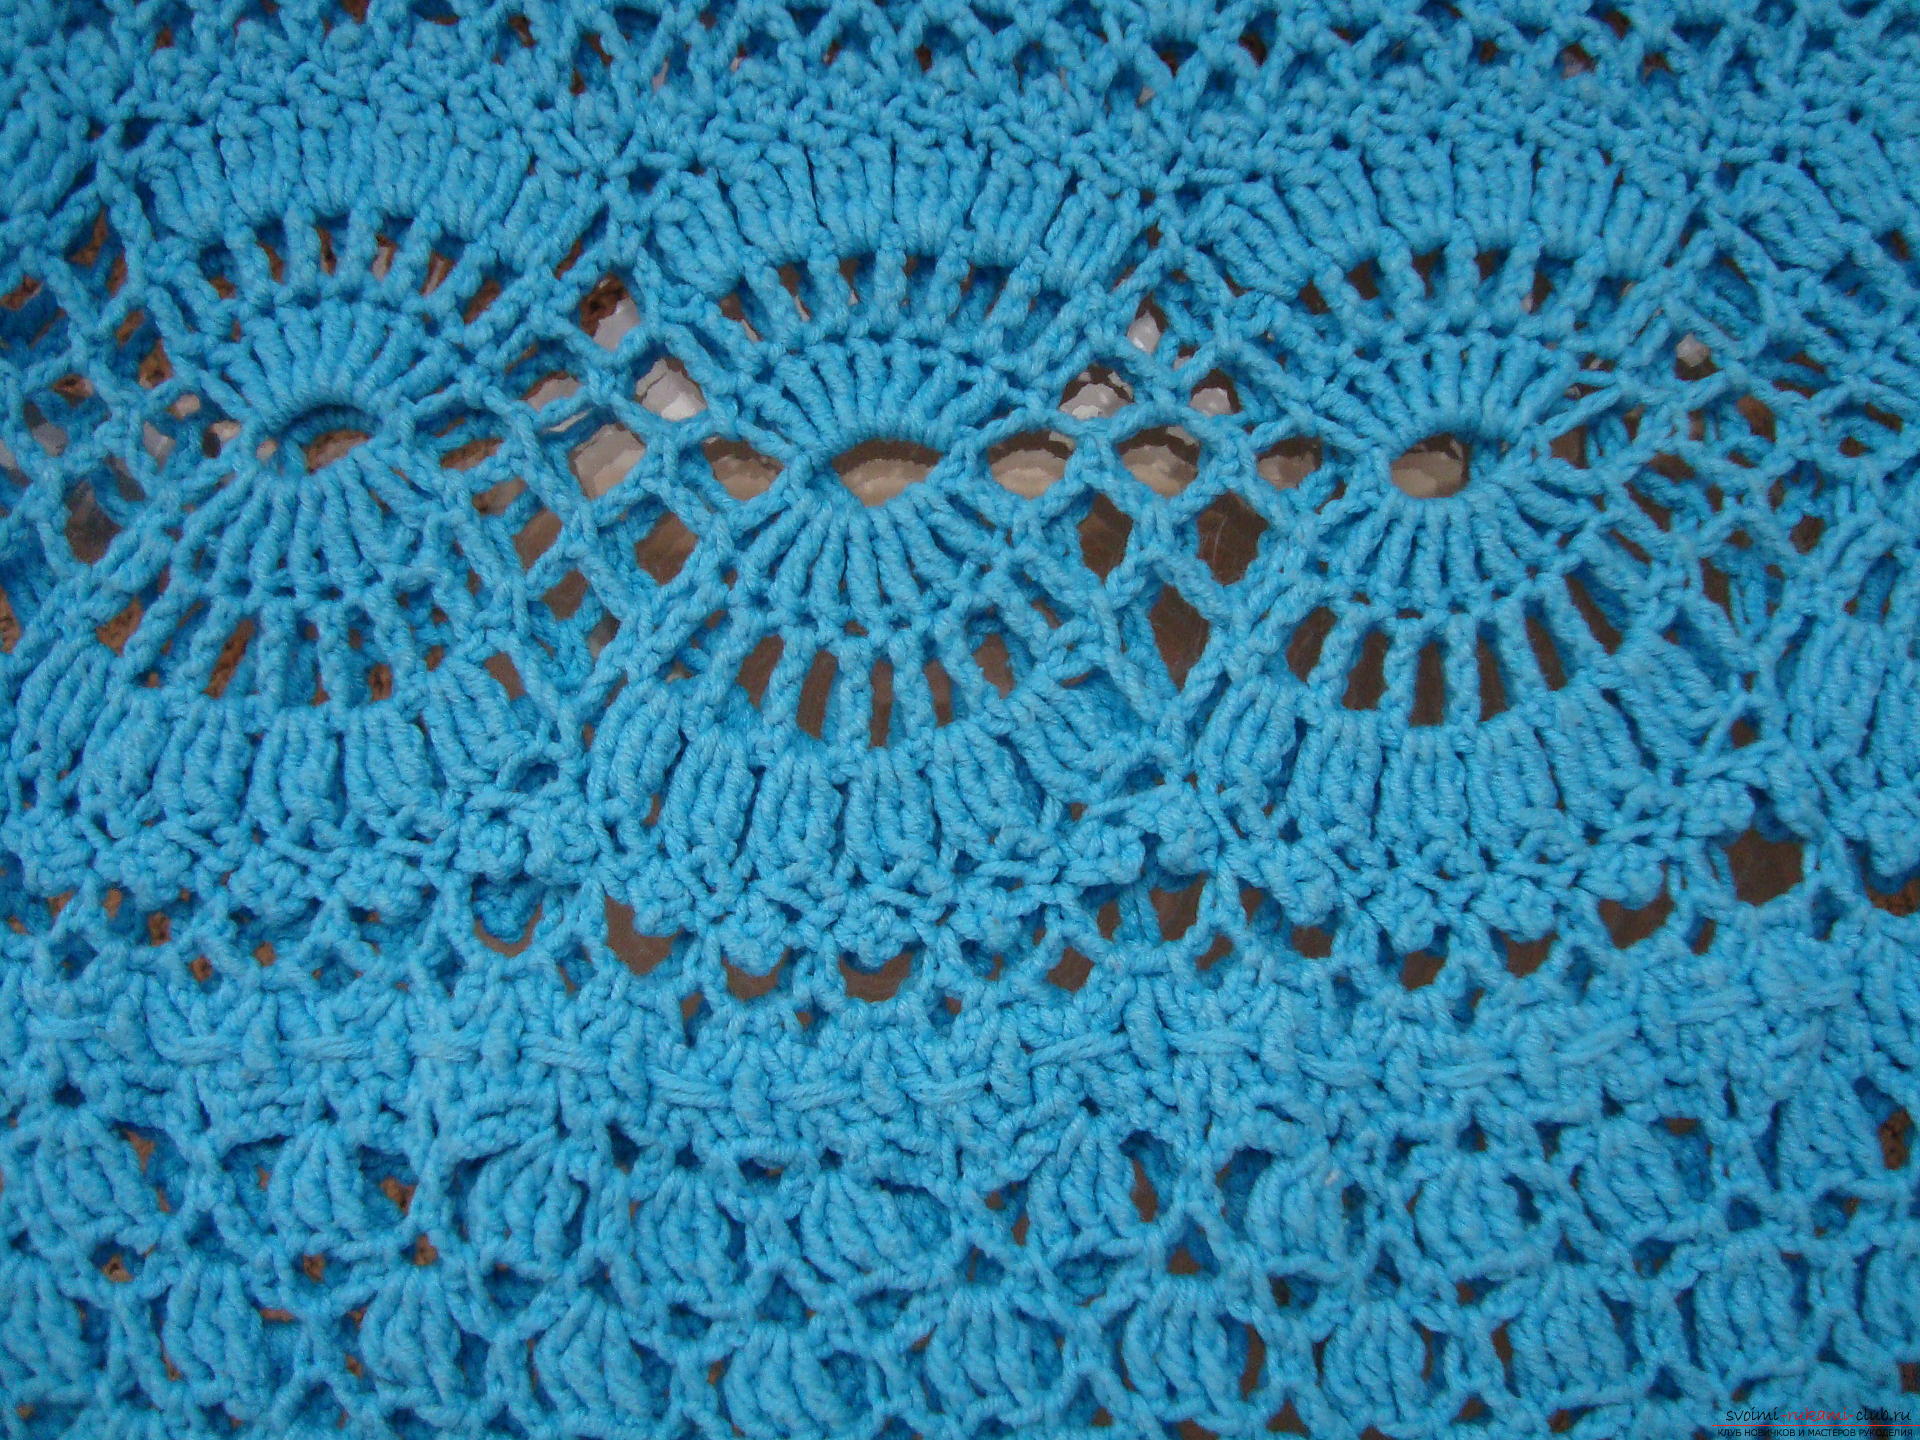 Then use the second pattern to create the skirt.When knitting the lower part, you need to remember about increasing the loops in the thigh part. Therefore, add loops on the sides (since the knitting is circular, determine the sides in advance by tying bright pieces of other threads to these places, like marks). Starting from the fifth row, add a double knitting in one loop on the right and left, knitting it according to the pattern (for example, an extra double crochet, but you do not need to add an extra yarn in the arch, this will only increase the size of the hole in the openwork pattern, and will look out of place). When 3-4 extra loops are collected, then knit them as an independent full-fledged element with columns and an arch. You will have to increase the number of elements of the pattern five or more times, depending on the size of your hips. Circular crochet is convenient in that you can always try on the product and determine further tactics for increasing the width of the product.
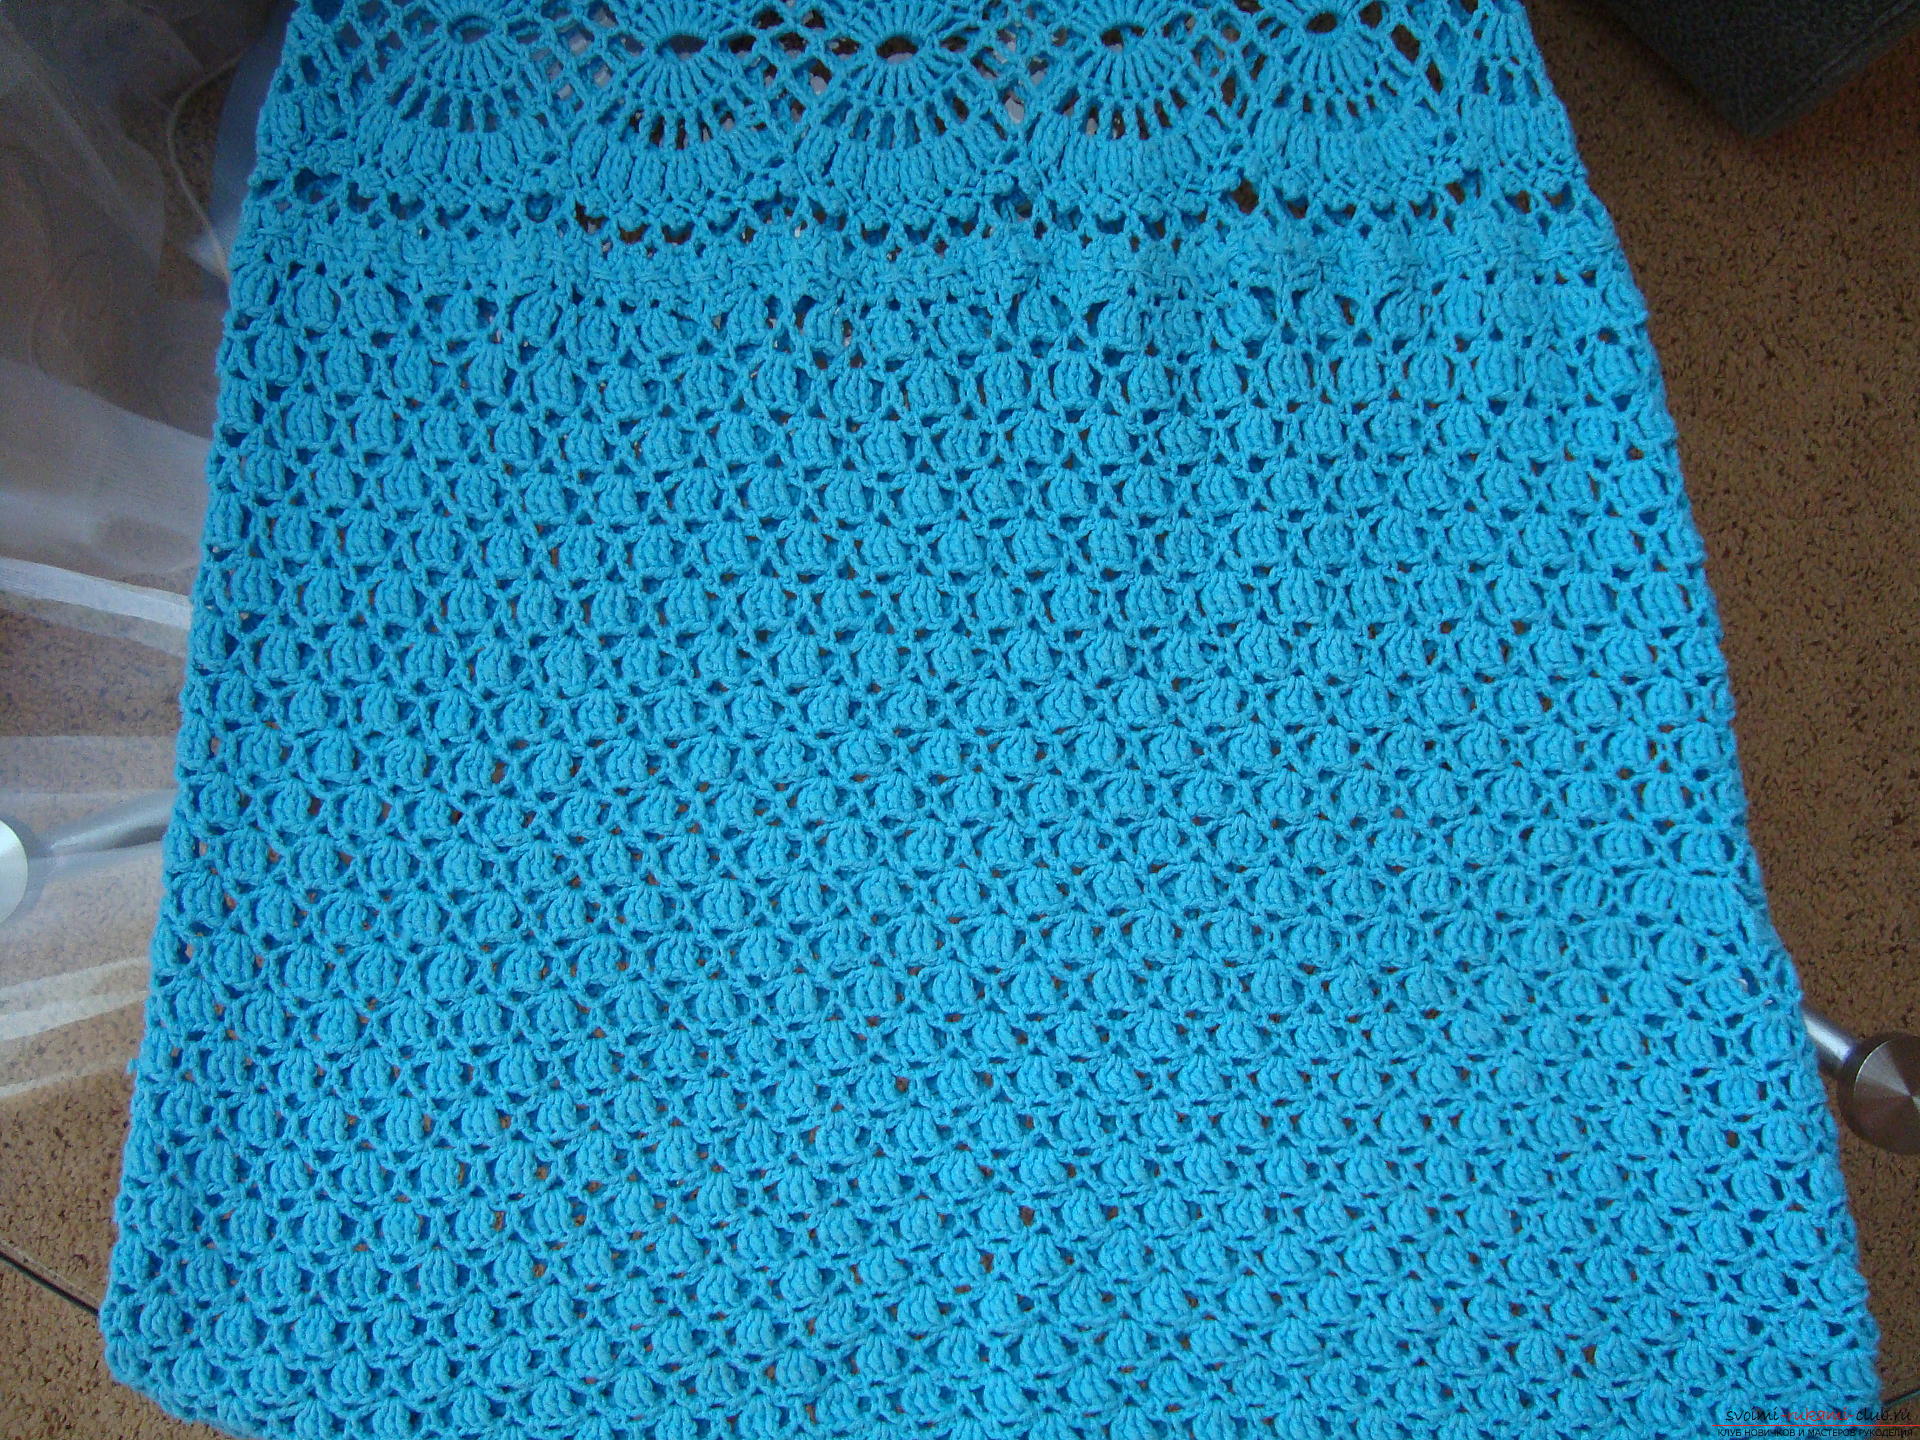 The bottom of the product is tied with triangles.Each such tooth is formed by seven loops that cling to one arch and go in increasing order - a column, a column with a yarn over twice and the peak of the tip is a column with two yarn overs, then the knitting changes in decreasing height.
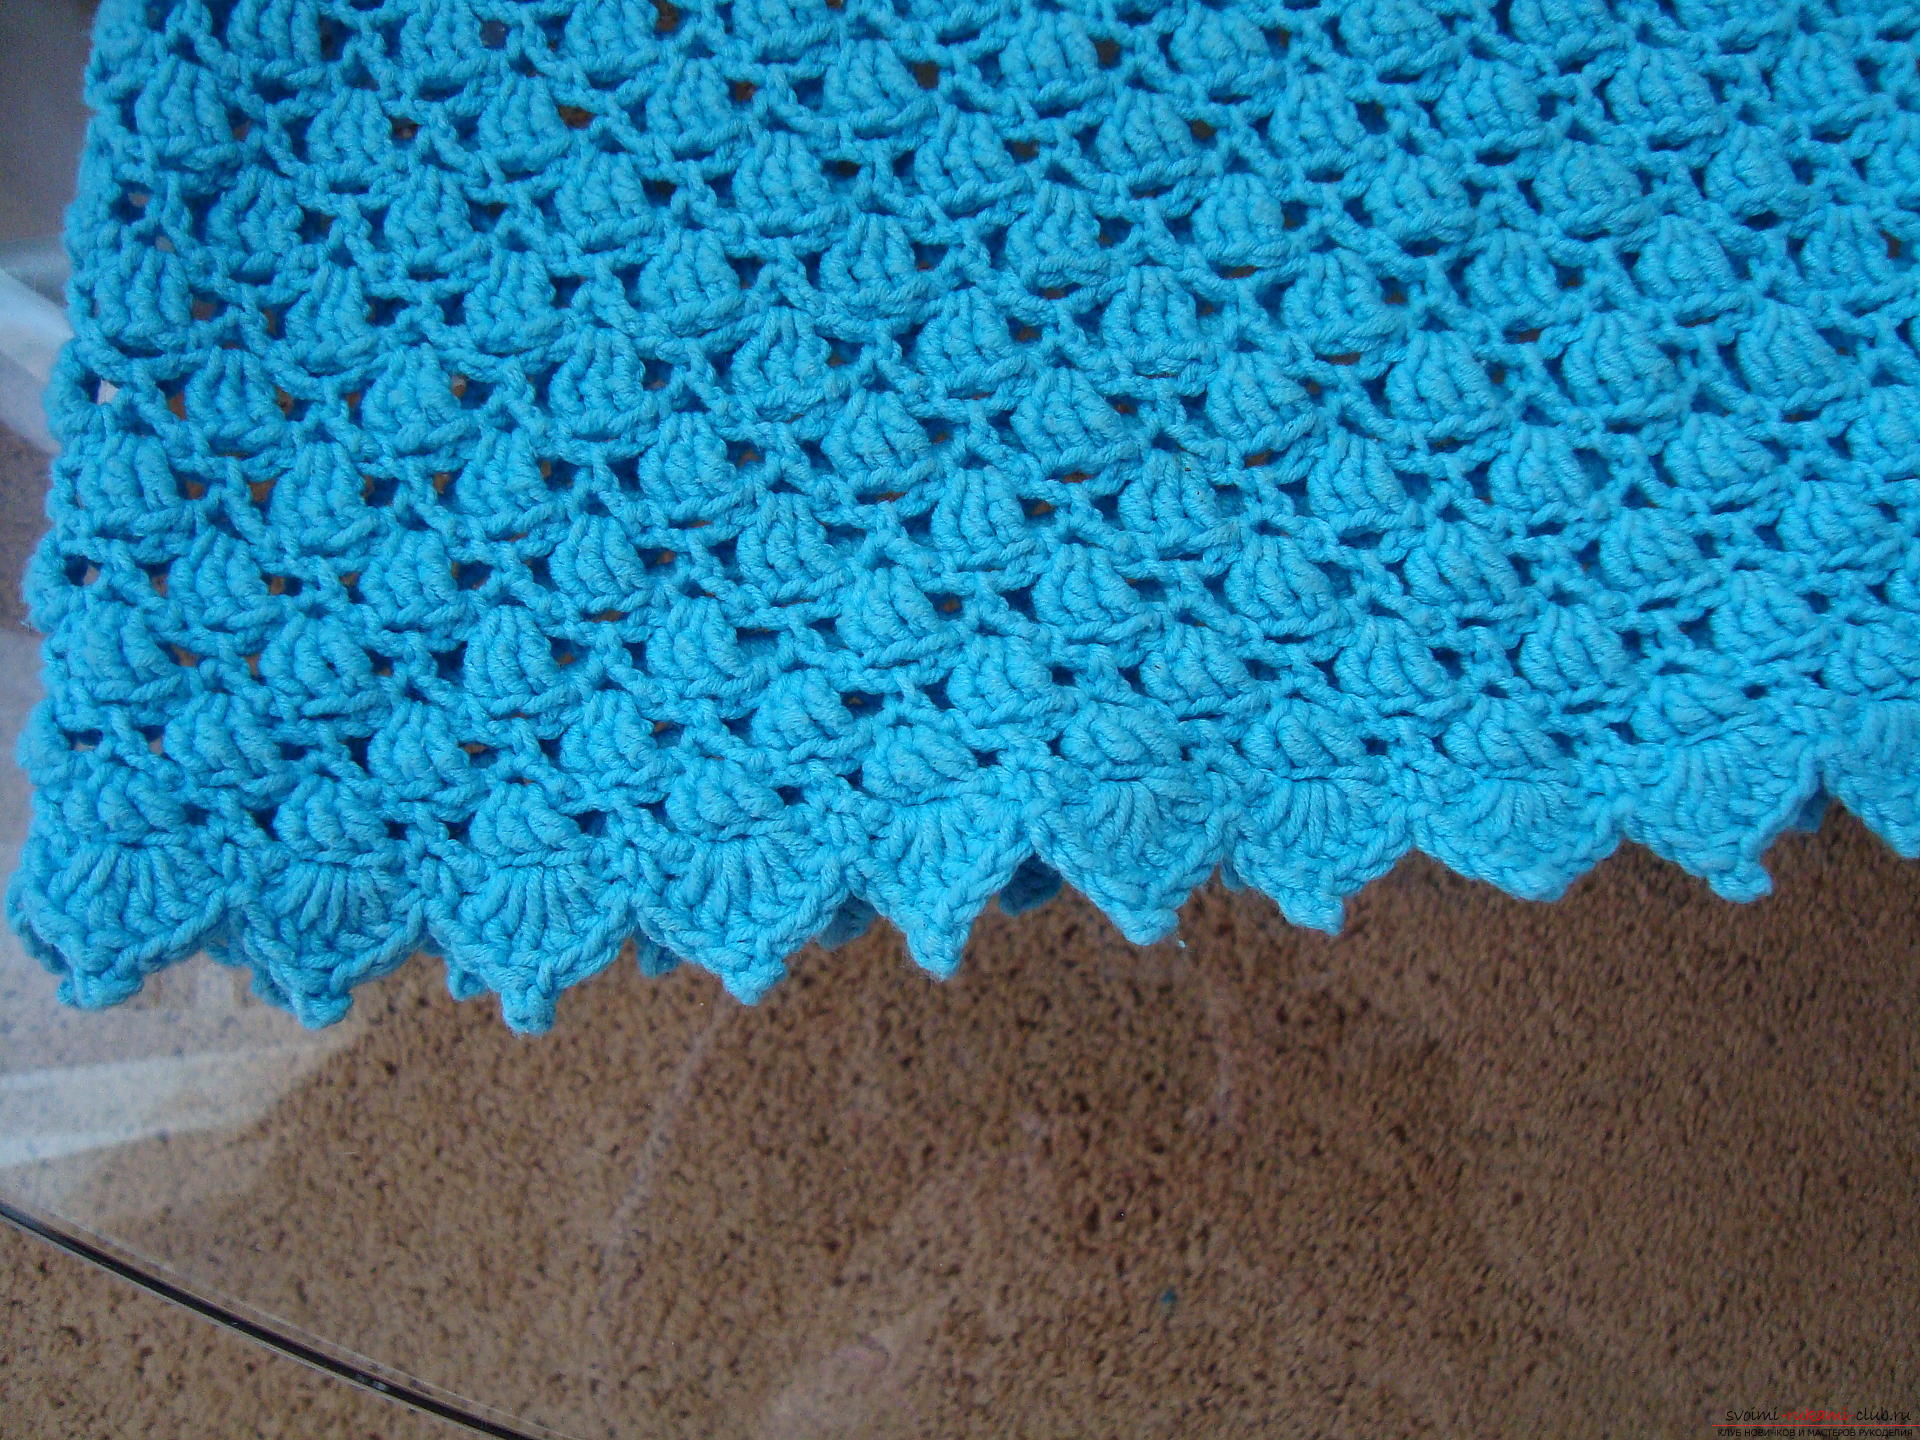 Above the knitted belt we begin to create the upper part of the dress, for this the work is simply turned over.
 For the sleeves, leave a straight armhole, markit can be done by trying on the product. Try to lower the armhole with a margin so that there is no discomfort during further wearing. At this stage, you can increase the number of loops on the front side for the chest, the pattern on the shoulder blades side remains unchanged. To finish the neck, you need to knit the upper part according to pattern 1, but only from the middle down, and the upper part is not knitted. Since it does not lie evenly on the tapering part to the neck. This collar is sewn separately with a needle and the same threads.
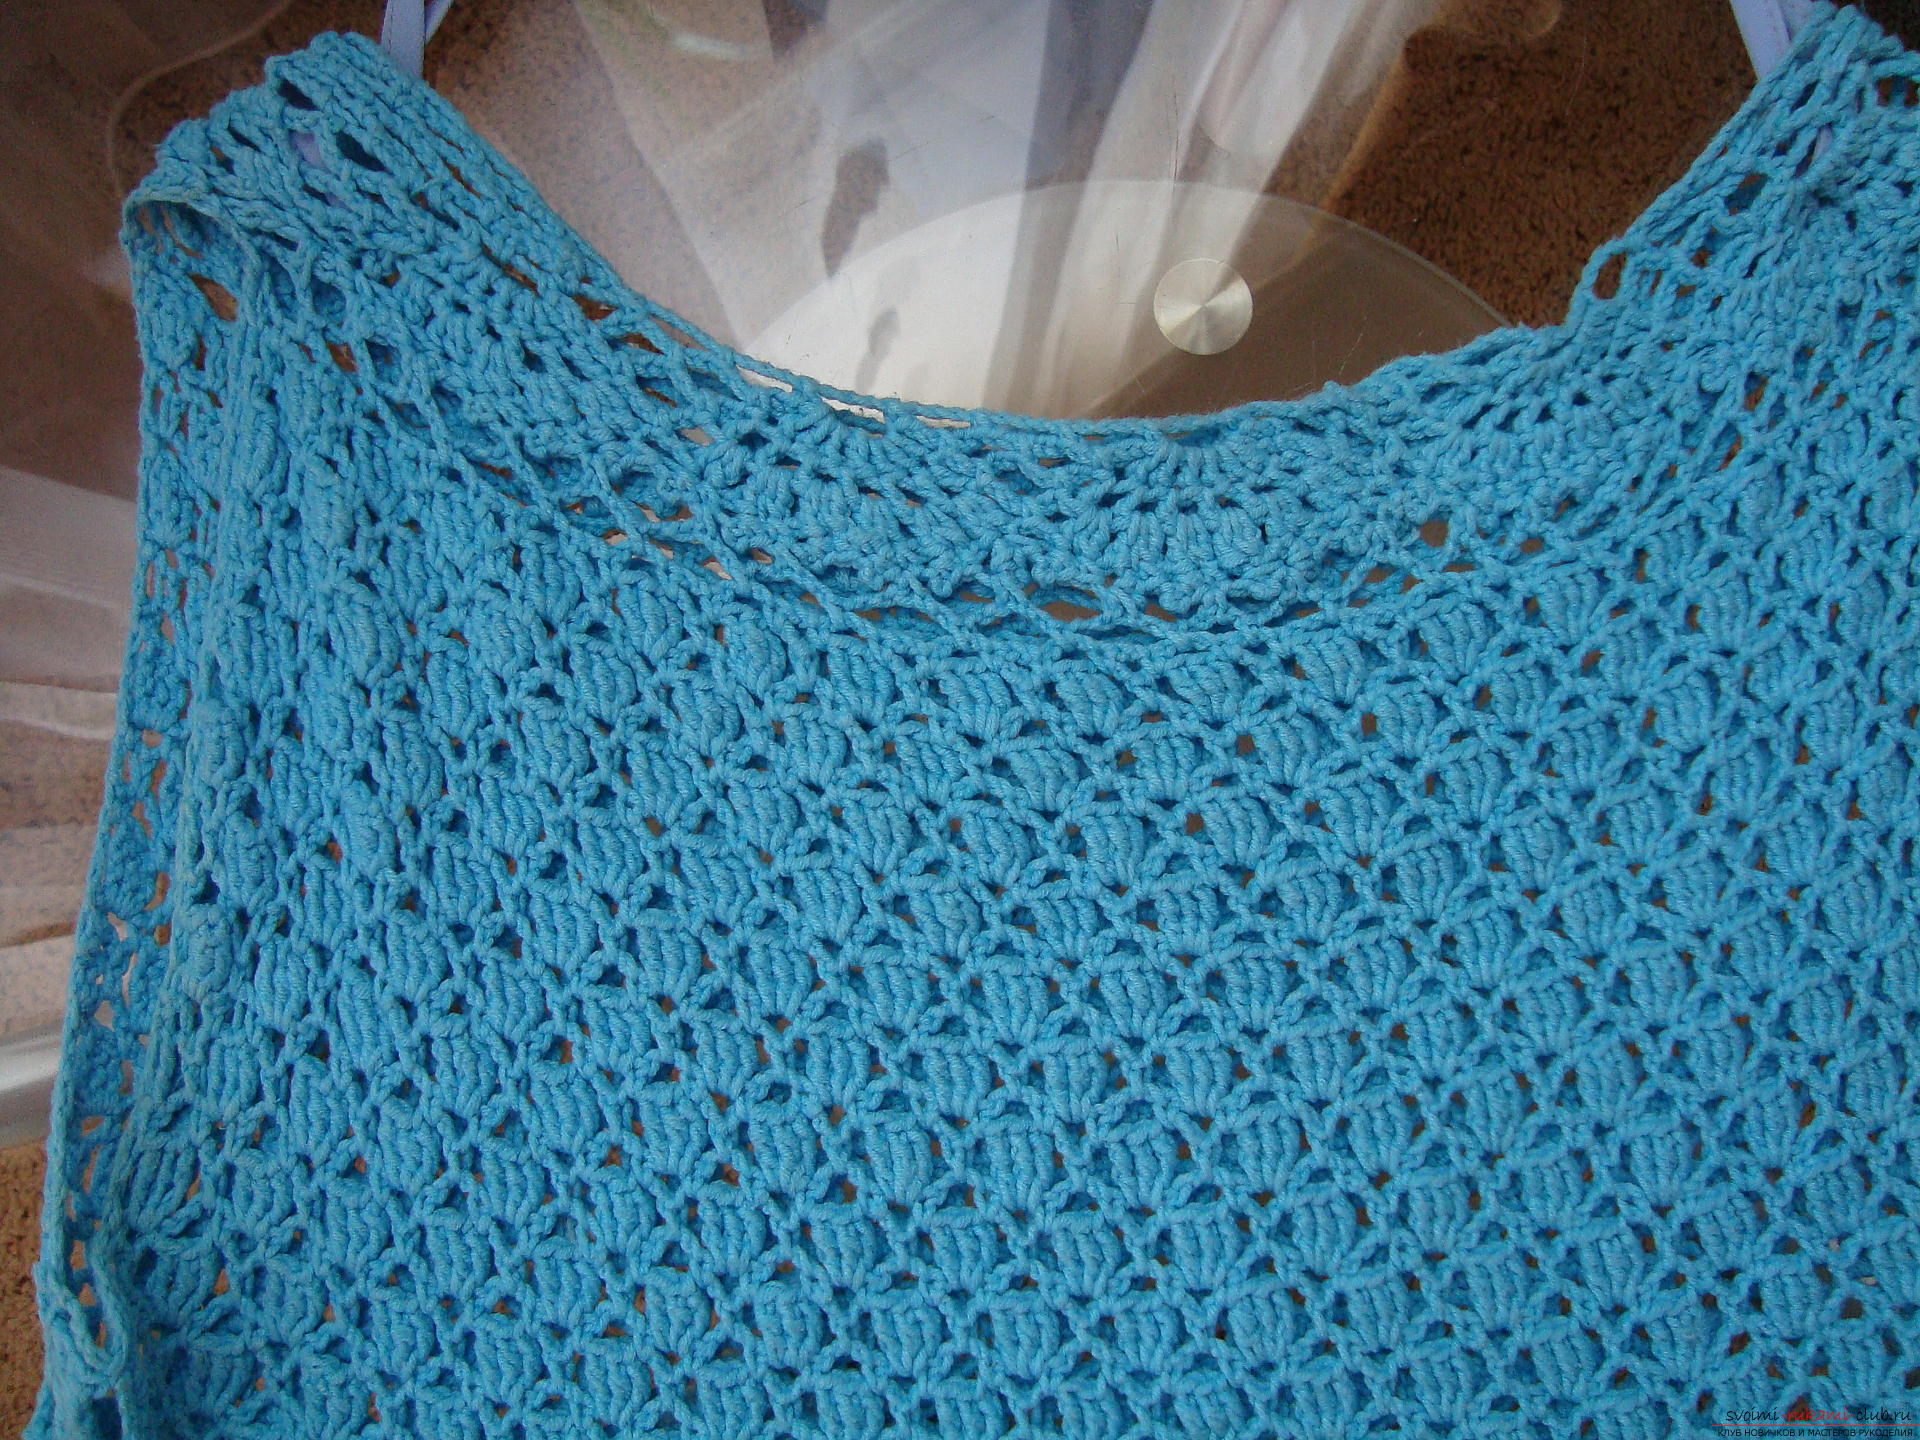 In places above and below the waist pattern, you can go over it with a stitch that will not allow the item to stretch too much when washed and worn for a long time. The stitch should be no more than a centimeter in a step.
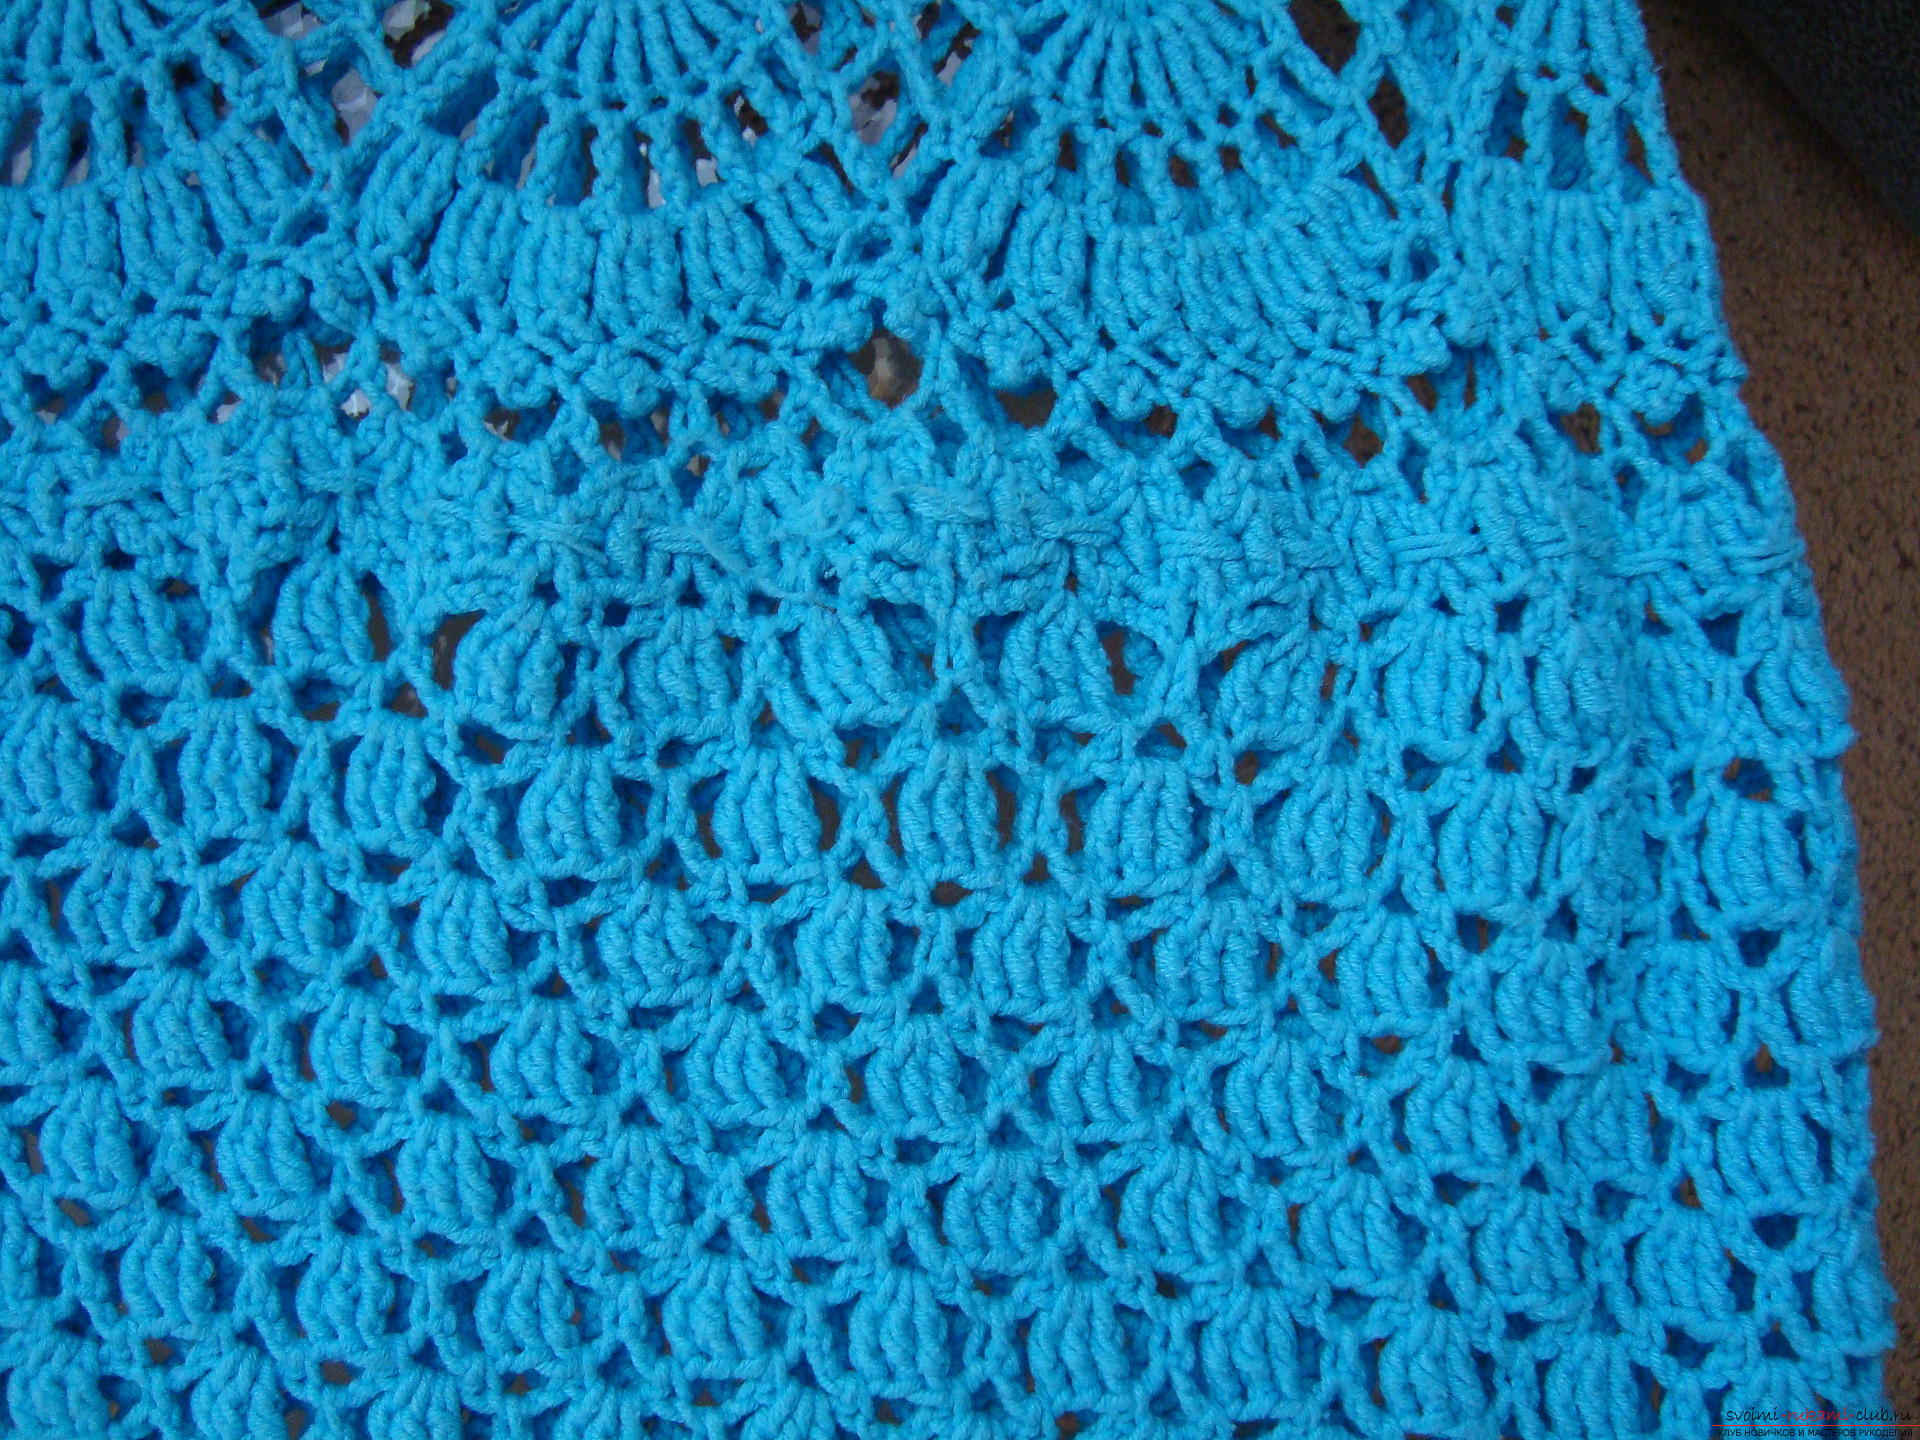 The dress turns out to be very transparent andIt is more convenient to wear with a cover, which is sewn from thin fabric. If you are not a sewing master, then order a cover from a studio so that it matches the size of the dress and is easy to put on over your head.
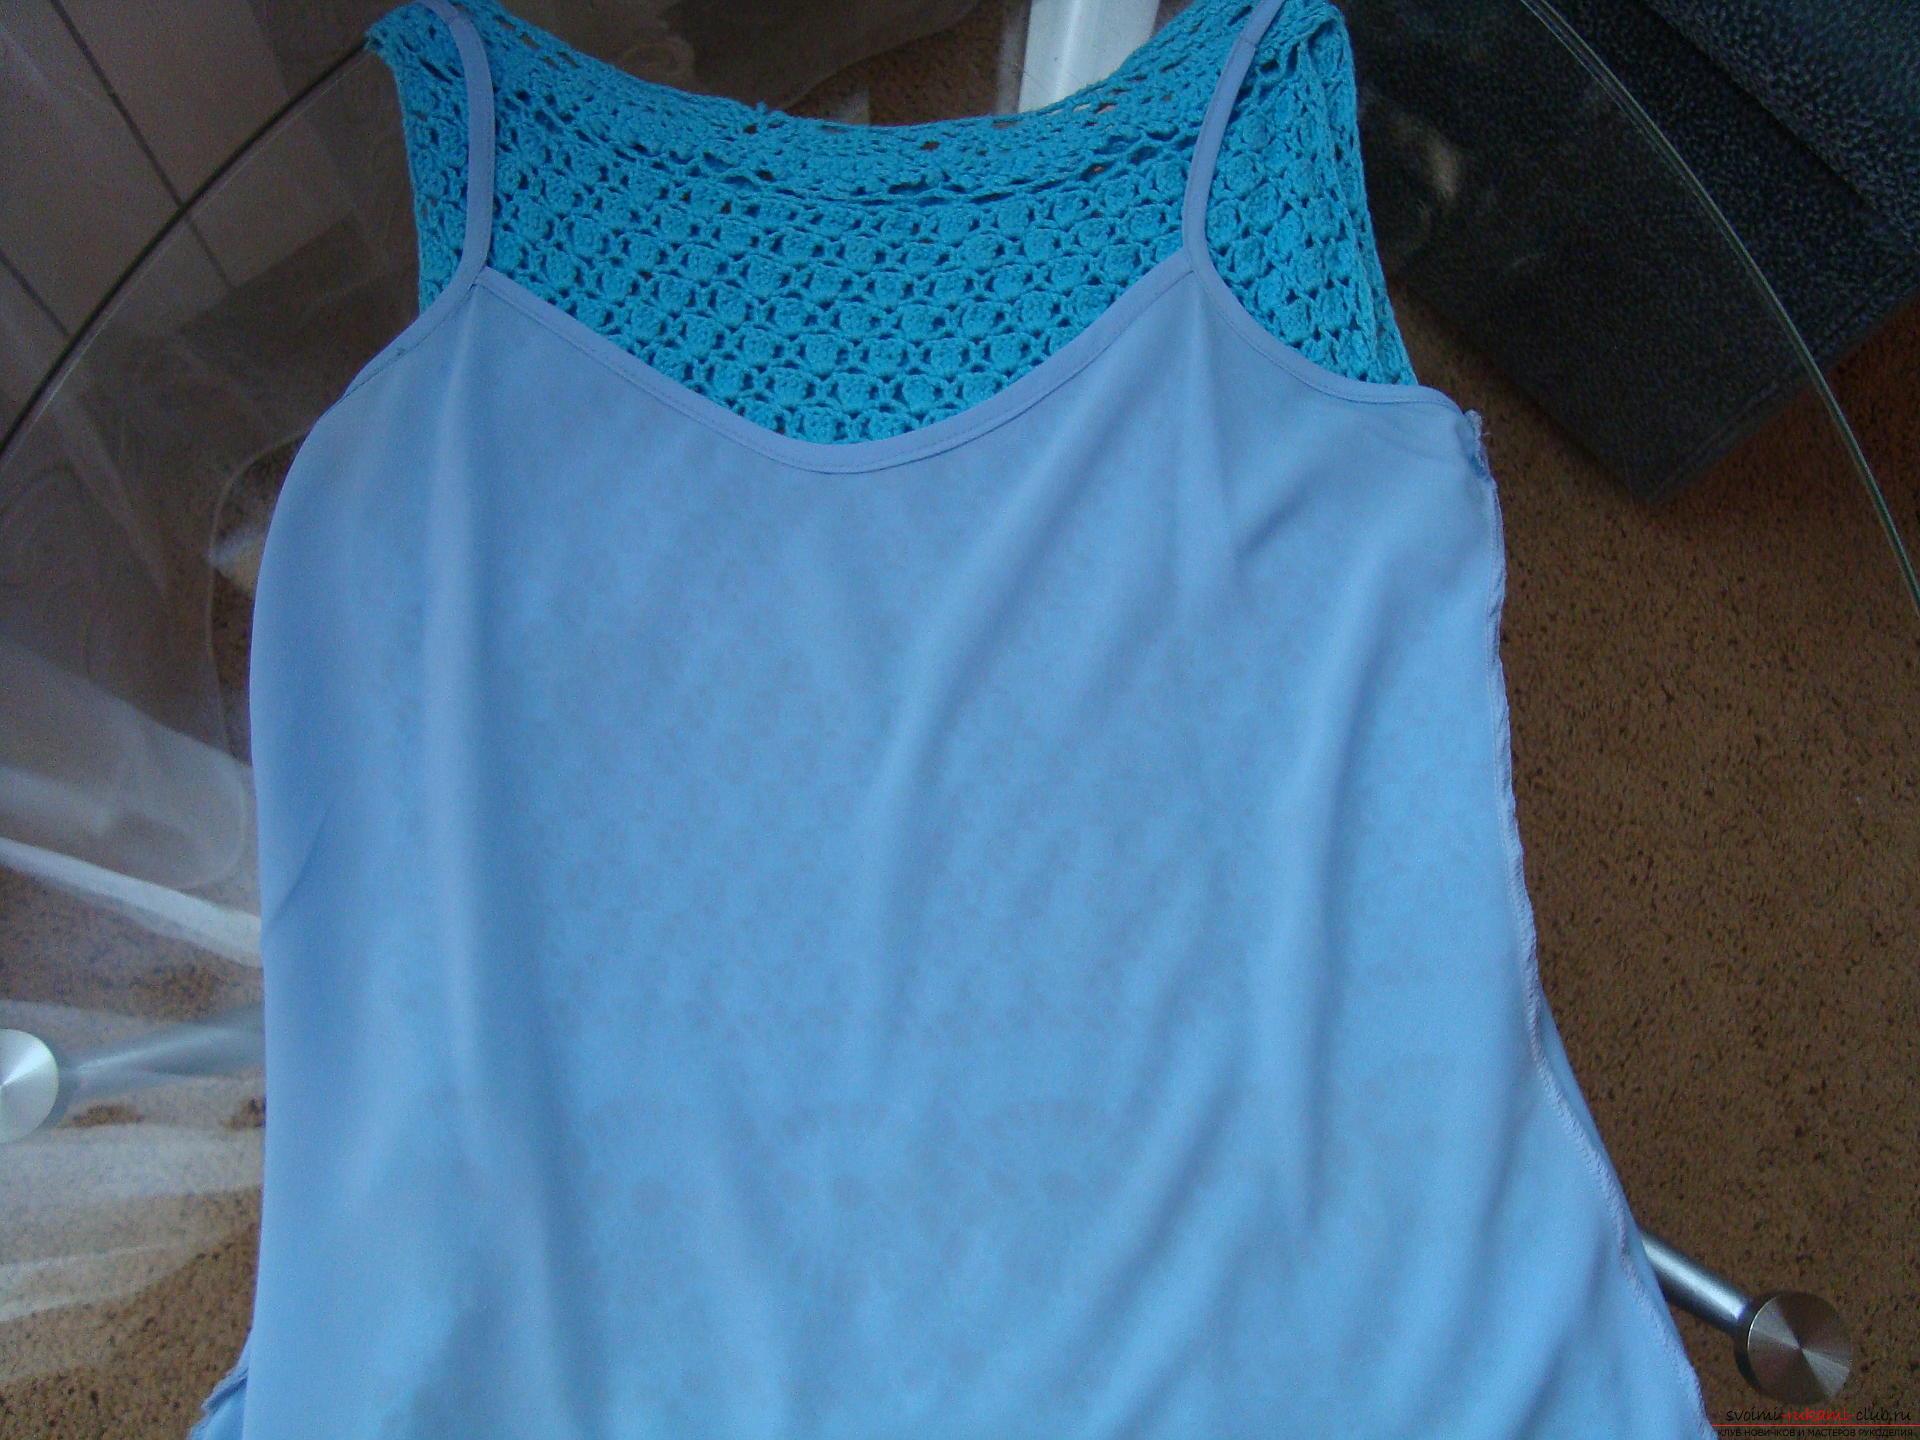 Just a month of work and a great dress is ready. It goes well with a leather jacket in cloudy weather or with a light cape in a spring breeze.
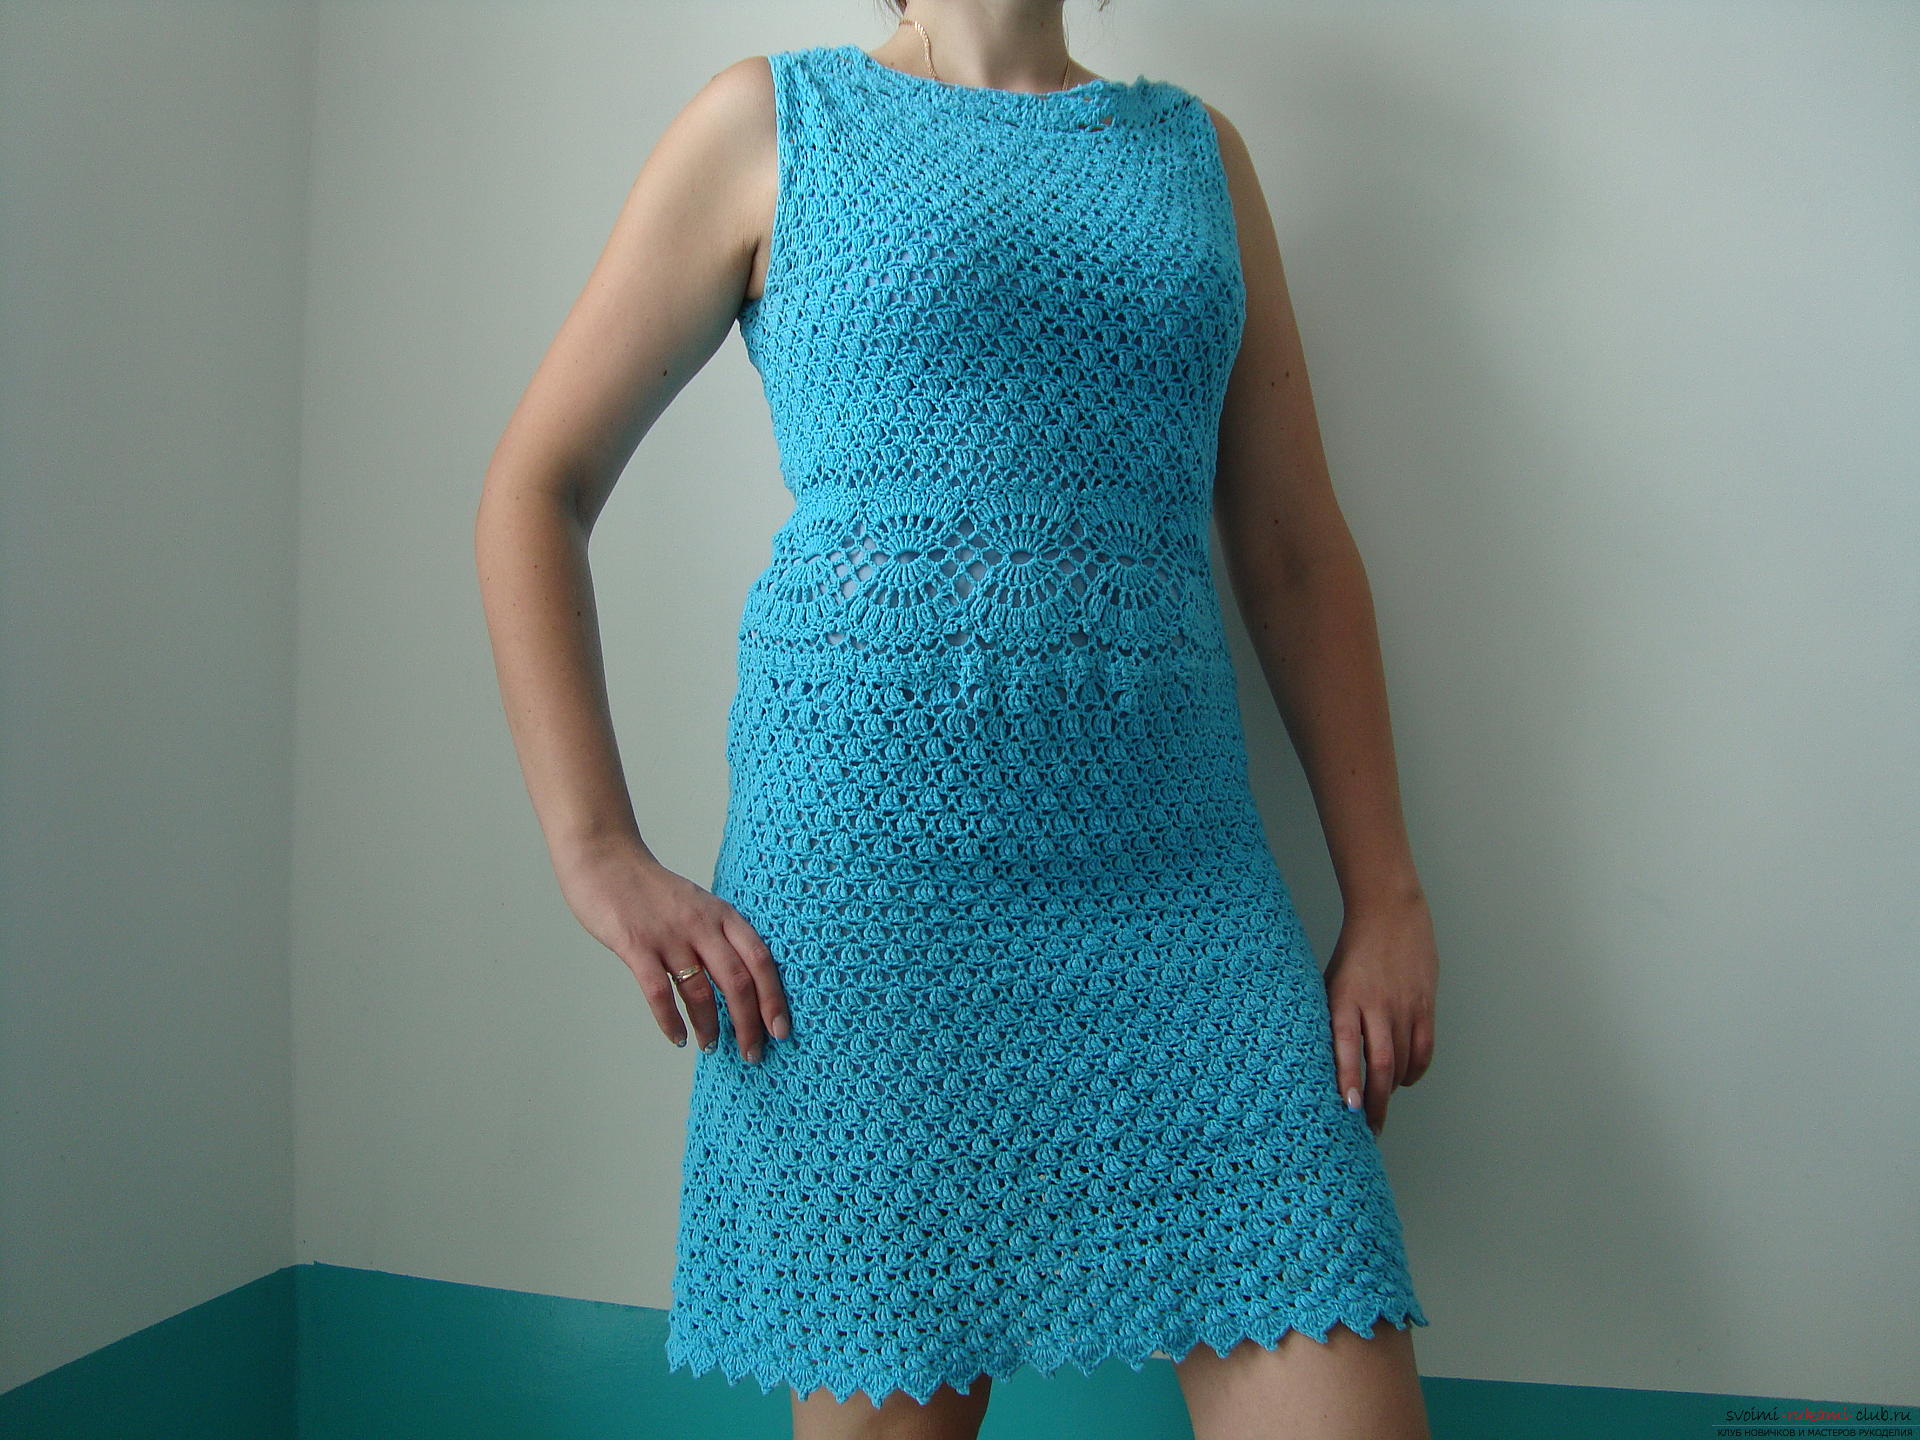
Comments
Related posts:
 We knit a dress for the girl on a photo and video lessons with schemes
 We knit the shirt with knitting needles: a step-by-step instruction and patterns of patterns
 How to make a frog out of paper – step-by-step instruction.
 How to make a paper steamer – step-by-step instruction
 How to make a paper boat – step-by-step instruction