To mold your own flowers from polymer clay is not difficult. To do this, it is enough to carefully study the recommendations given in our master class with a photo
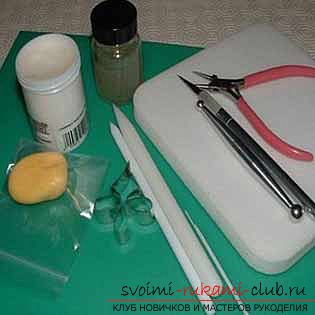
We mold orchids from polymer clay with our own handsPolymer clay was first used by Germans for the production of dolls in 1930. It was widely used since the 1960s. XX century. Now from this material convenient in work it is possible to make original enough crafts, sculptures, artificial flowers and ornaments. Recently, flowers and whole bouquets created from this material have become fashionable. There is nothing easier than to start independently to mold flowers from clay and for this purpose to have a special education or to be a sculptor is not necessary. It is much more important to have patience and perseverance, as well as a sense of style, well, and a little to know the basic rules of modeling. Making flowers and bouquets is best of self-hardening clay, since it does not require additional exposure. Unlike it, baked polymer clay is intended, basically, for those items from which higher strength is required, for example, ornaments. With the help of molds from clay it is possible to blind a beautiful orchid phaselis, or as it is also called - "butterfly". The absence of molds should not be an obstacle to your hand-made, because they are used to give the petals a natural look of textures. Smooth, without veins, the petals do not look too much like orchids, but their elegance will not be greatly affected by this. Having made a bouquet of artificial flowers from polymer clay, you can surprise your close women with an original presentation to the International Women's Day. To get started, the following tools and materials will be needed:
- paints (with a brush);
- clay (polymeric);
- wire;
- knife;
- gloves (latex or rubber);
- Stroke with a rounded tip;
- rolling pin;
- molds;
- flat plate;
- patterns for the core.
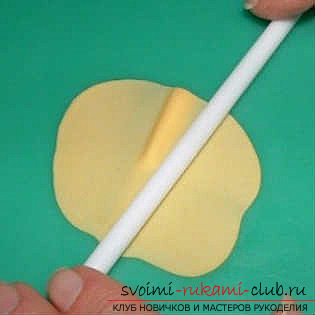
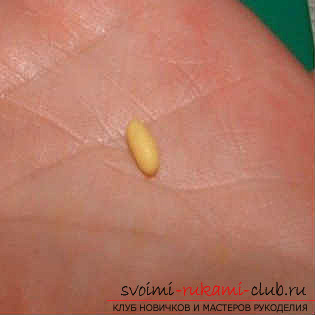
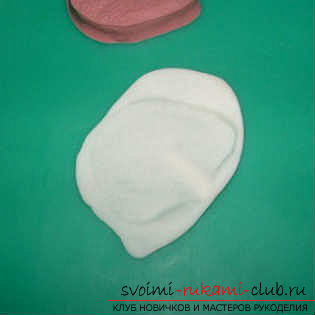
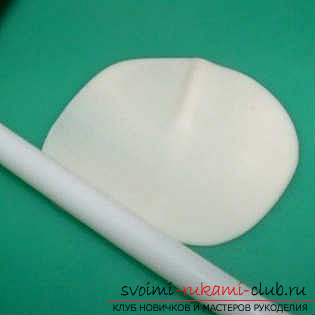
So, we begin. Take a small piece of clay and level it with a rolling pin, leaving a small bulge in the center, as is done in the illustration. 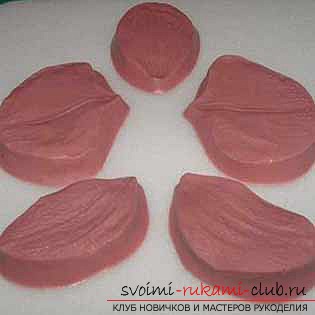
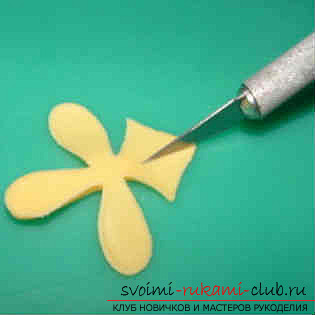
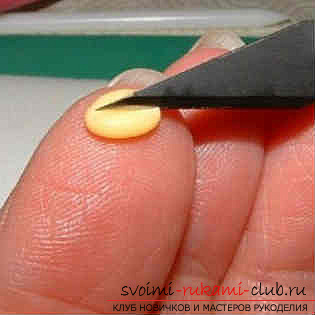
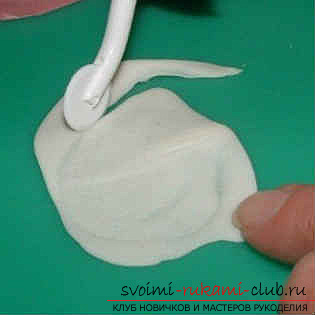
 After that, put the clay on the clay in the formCross and cut with a knife the core of our orchid. In the language of florists it is called the "lip". In the absence of such a mold, you can draw it on a polymer clay and then carefully cut it. Before proceeding to the next step, you need to cut the bottom of the workpiece.
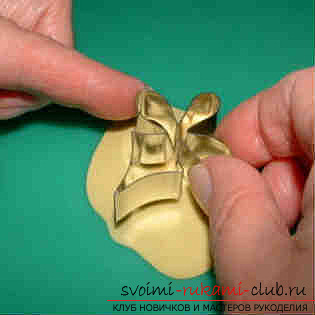
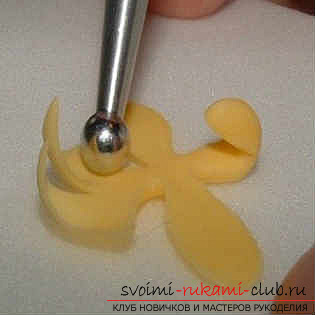
 Formation of the core. After cutting out of clay, take it in your hand and gently bend the top inward. Using a stitch with a rounded edge, pozaginayte remaining parts inside.
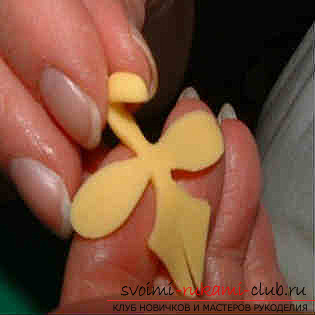

 Next, take a small piece of wire and bend underright angle one edge. Spread this edge with glue and fix on it the core. From a small piece of polymer clay, create a middle of the "lip". This can be done by sloping into clay like an elongated grain and slitting with a knife. After that place the "seed" in the center of the "lip", attaching it to the wire.
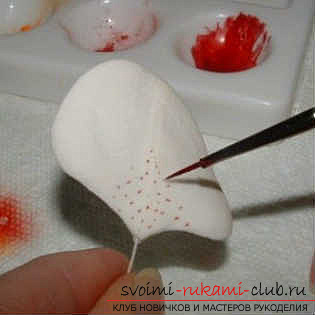
 To give more naturalness to our orchids, color her "lip".
 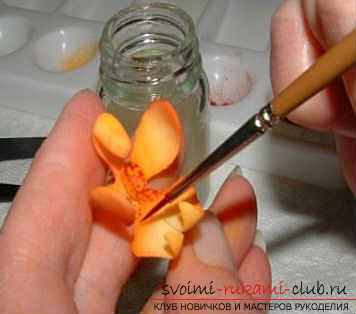 Next comes the turn of making petals. Pre-roll the clay, the like we did with the core, leaving in the center of a small mound. We put the clay on the mold, press firmly, and then remove all unnecessary with a knife. To the base of the resulting petal we attach the wire.
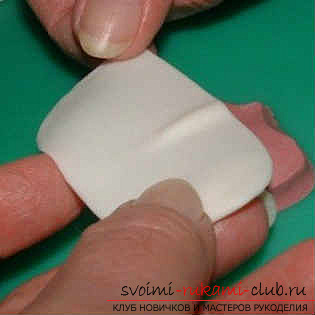
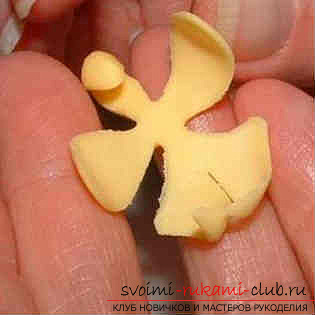
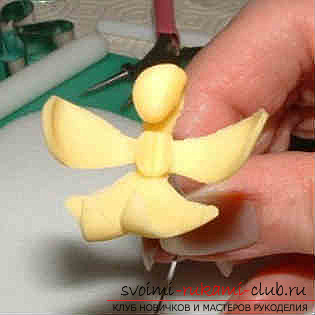
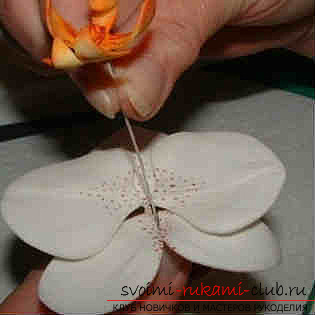
 Further by analogy we make still petals,which, like a real orchid, should be 5 pieces. Dots paint all the petals, picking up the color at your discretion. In the end, we arrange the petals and the "lip".
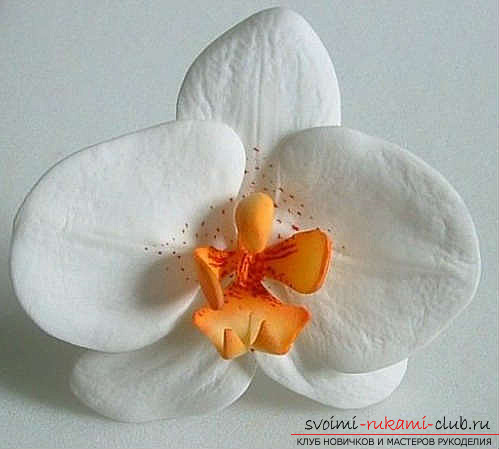
 If you did everything right, your polymer clay orchid will look the same as the picture below.
Comments
Related posts:
 This detailed master class with photos will teach you how to make your own necklace of polymer clay.
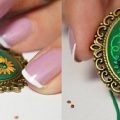 How to make a pendant or suspension from polymer clay with your own hands, master classes with photos
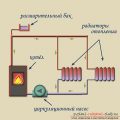 Make heating private homes with their own hands can anyone who carefully examine the recommendations posted in this article with photos.
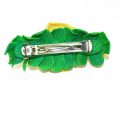 This detailed master class with photo and description will teach you how to make your own flowers from polymer clay for hair clips.
 The English rose with your own hands - flowers from polymer clay and a master class