Napkins made of beads, weaving scheme and turn-based master class
Content
- Master class on weaving napkins from beads
- Schemes for weaving napkins from beads
- Video: Plaid napkin from beads and large beads
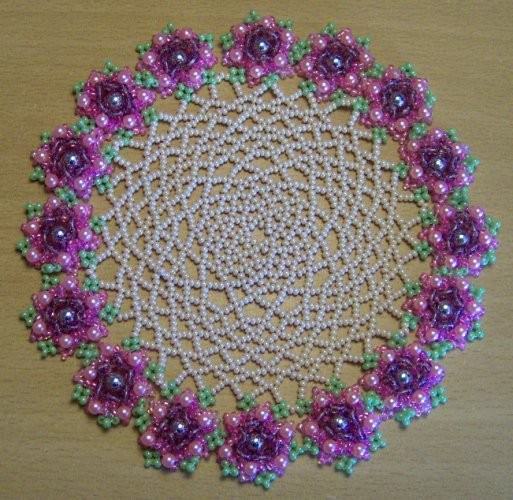
Not long ago, one of the most fashionable elementsVarious openwork crocheted napkins were considered to be the most important decorative elements. They could decorate coffee tables, lie under flower carts or under candy bowls. This decorative element created a unique feeling of coziness and spoke of the hostess's good taste.
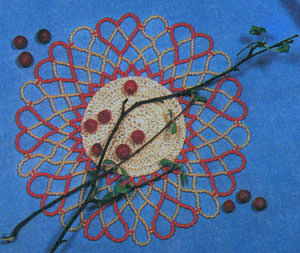
But times change, and with them, so do trends.The crocheted napkin has been somewhat transformed under the modern influence of fashion. Therefore, it is not surprising that today many people make this simple, but incredibly sophisticated decorative element from beads. The weaving patterns for napkins mostly have the same pattern as their crocheted counterparts. But, such a product is much easier to make. In addition, it has its own undoubted advantages, which include:
- There is no need to periodically wipe the napkin, since it does not completely settle the dust, and it is almost impossible to stain it;
- The principle of weaving products is as simple as possible, even for beginners;
- The spectacular appearance of an openwork napkin that no crocheting method can replace;
- This napkin will be cheaper.

Master class on weaving napkins from beads
What will be required for weaving napkins from beads
- white beads;
- Beads blue;
- Golden seed beads;
- Silk strong thread for beading;
- Needle for beadwork.

You can weave a napkin using thin fishing line.But in this case, the product will not resemble real lace. If you take a thread for weaving, it should be white, and strong enough to withstand the weight of all the elements of the napkin.
As a rule, white is the predominant color in beaded napkins, because it contrasts well with almost any furniture.
Let's start the master class.
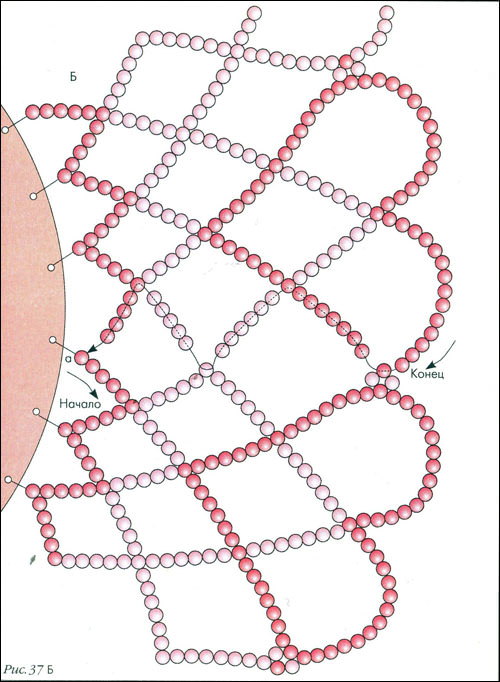
How can a lesson on making a napkin showmaking a napkin from beads, the work patterns are quite simple. This applies not only to this master class, but also to most napkin weaving patterns.
The principle is taken from the patterns for knitting napkins with a crochet hook. Those who have previously made openwork knitted items may notice the similarities between these types of work and the ease of production.
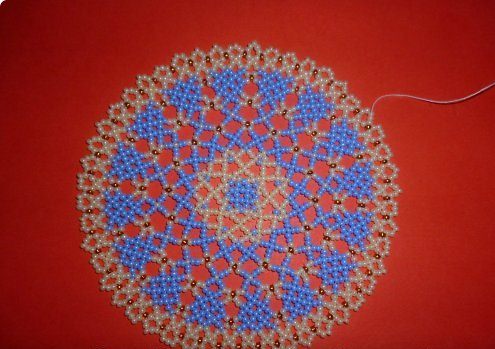
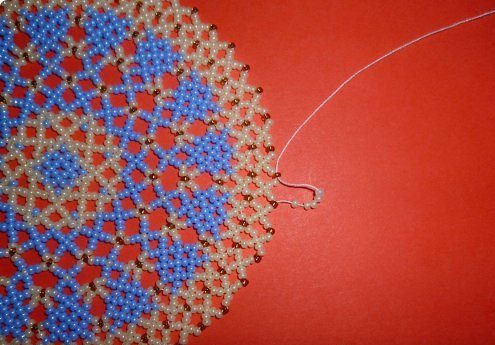
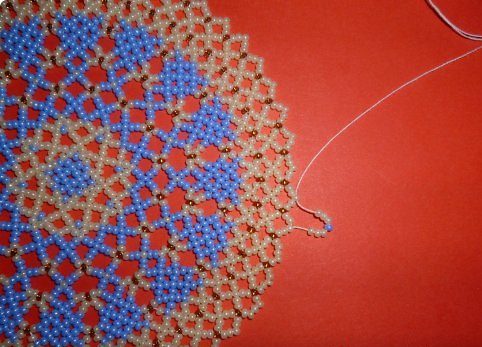
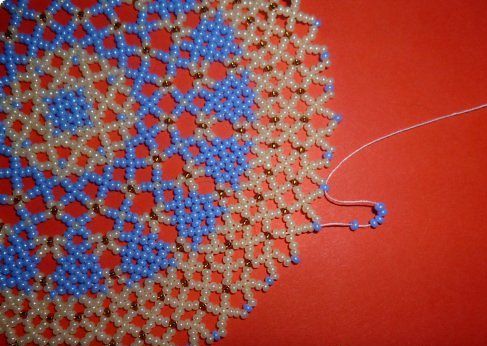
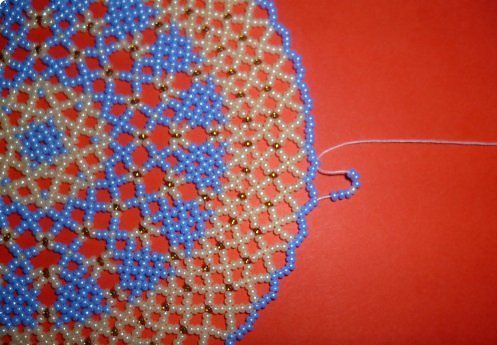
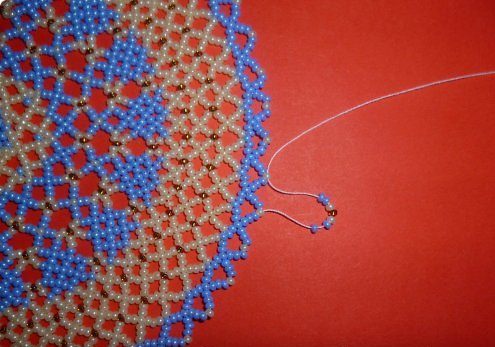
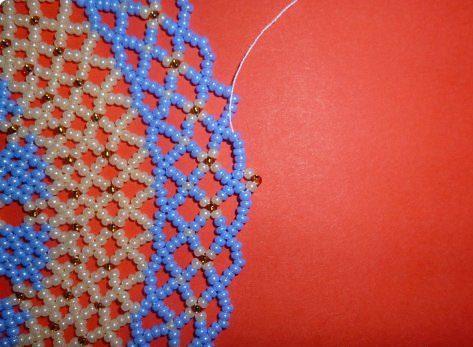
We start weaving from the central part andgradually move to the edges of the product. In this case, you can independently determine the diameter of the napkin, increasing the number of beads in the arcs. This means that weaving can be continued literally until this process gets boring. Or - until the beads run out.
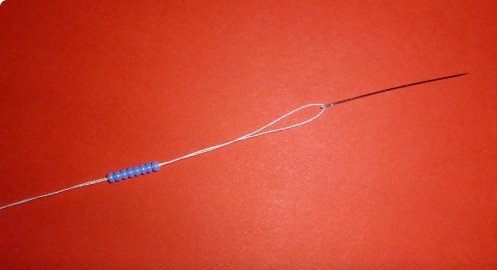
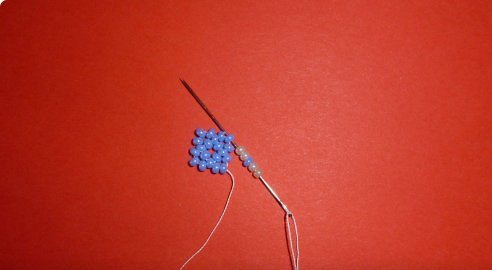
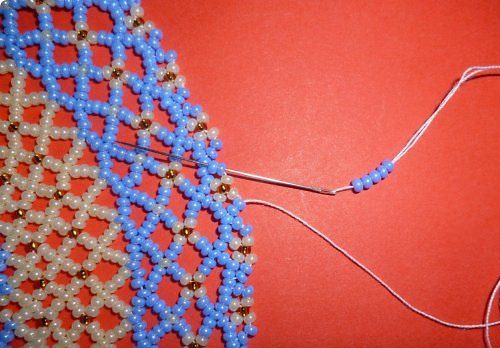
So, we weave the center of the napkin.To do this, prepare a needle, thread it and string 8 blue beads. Thread the needle again through the first 3 beads. Thus, we get a small triangle of blue beads.

We string 3 more blue beads onto the needle andwe thread it through the bead that is located one bead away from the one from which the free thread departs. We get a small arc of three beads. We make 3 more of the same arcs in a circle. The core should be in the form of a rhombus.
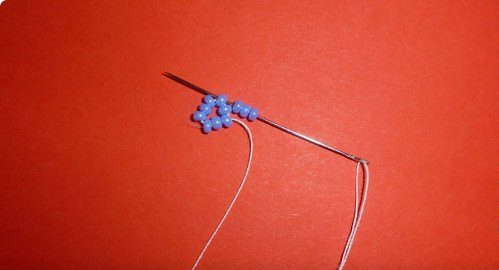
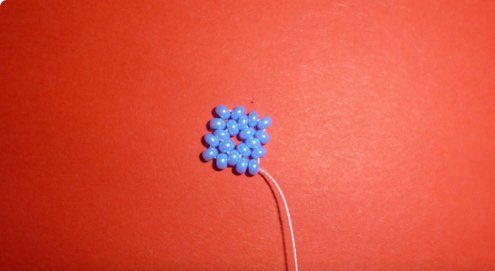
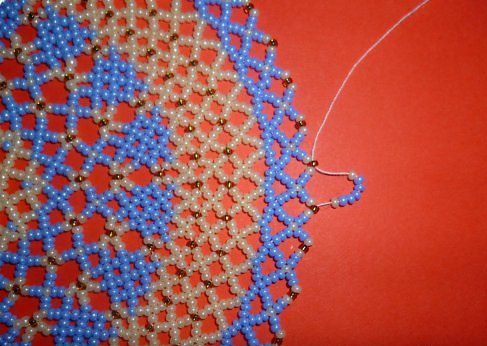
Let's make the next row.It will also consist of four arcs. Now we string 5 beads on the needle, 2 of them will be white, and the middle one will be blue. We fix the arcs by passing the needle through the most protruding bead in the figure. As a result, we already have something like a small flower with four petals.
We pass the needle through 2 white beads. The thread should come out in front of the blue bead.
We start the next row. To do this, we make an arc of three white ones above the blue bead and thread the needle into the next white bead after the blue one. We get an arc of three new ones above one bead.
Now you need to string 5 white beads on the needle andsecure them by passing the needle through the white bead that is in front of the blue one. Above it, make an arc of three white beads again. This cut will alternate arcs of three and five beads.
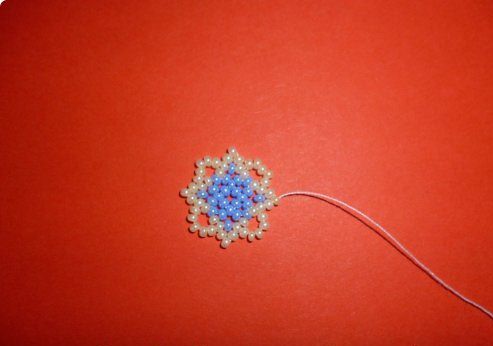
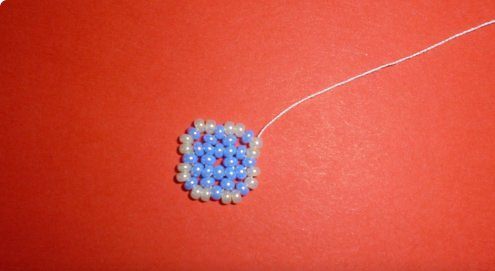
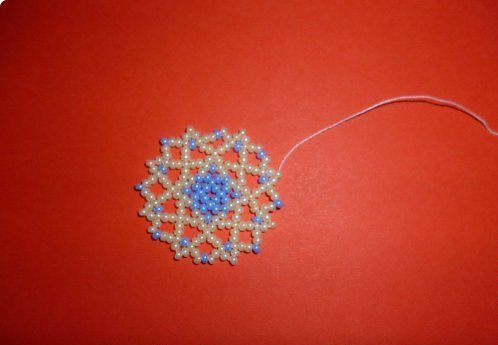
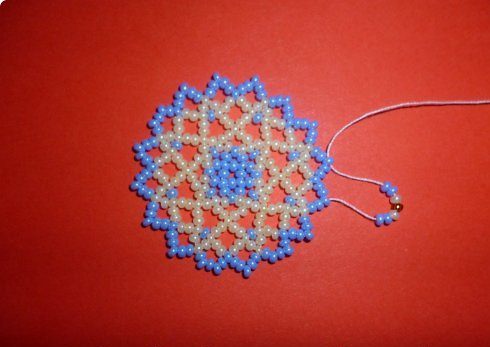
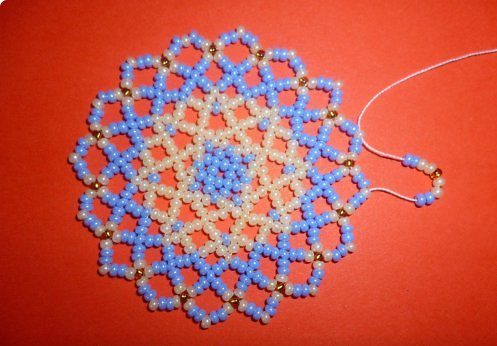
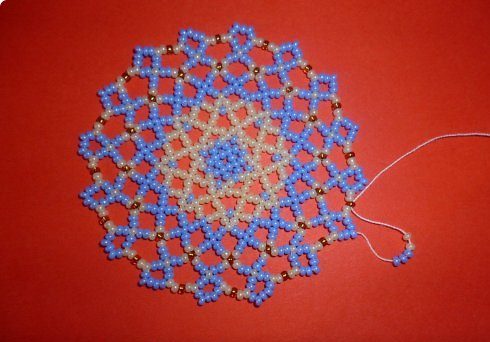
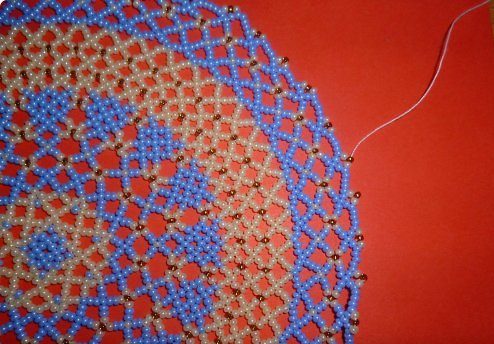
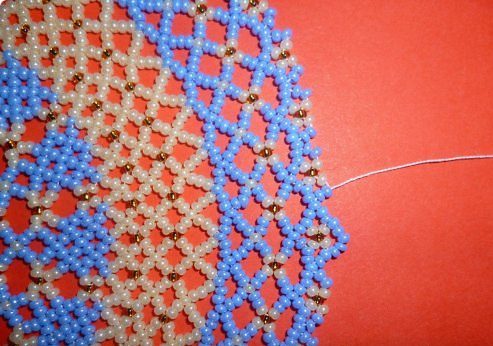
This time you will get a star with white rays.and a blue center. If desired, you can also do it using thin wire and hang them as miniature snowflakes on the Christmas tree. But, now we are making a napkin, so we proceed to making the next row. In the future, the master class shows weaving rows of beads, as a result of which the diameter of the napkin will increase. The number of rows can be increased or decreased in the future.
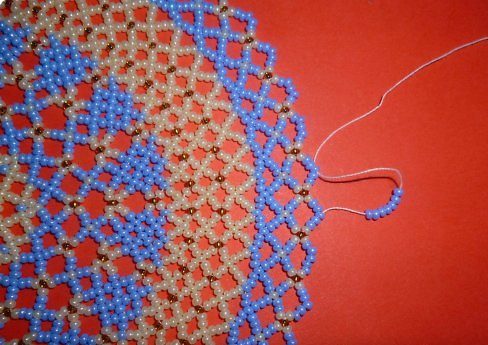
We pass it through two beads of the small arcneedle, and the thread will end up coming out of the top of one of the rays. Now string seven beads. Of these, there will be 6 side white ones and one central blue one. We make each of the arcs of this row in this way.
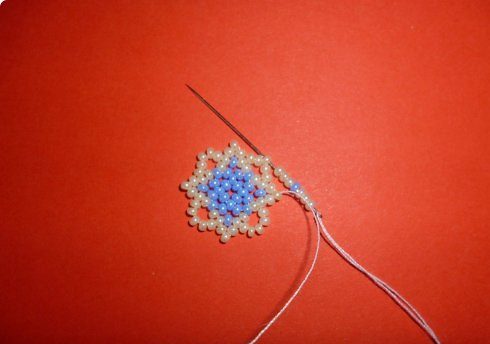
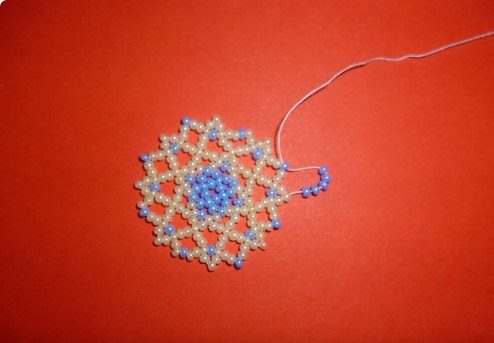
Having finished this row, we pass the needle through 3 white beads and bring the thread out in front of the blue bead. Above it we make an arc of three white beads. We again get white beads above one blue one.

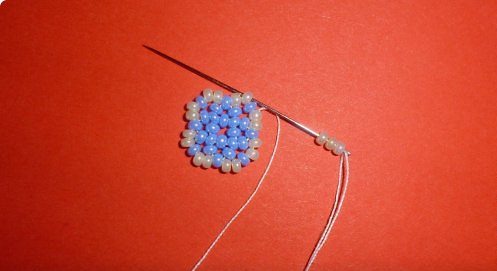
Next, we pass the needle through 5 beads:2 white, 1 blue and again 2 white. We bring the thread out in front of the blue bead. Again we make an arc of three white and continue according to the same pattern, as the master class shows, to the end of the row. We get 16 white and blue rays.
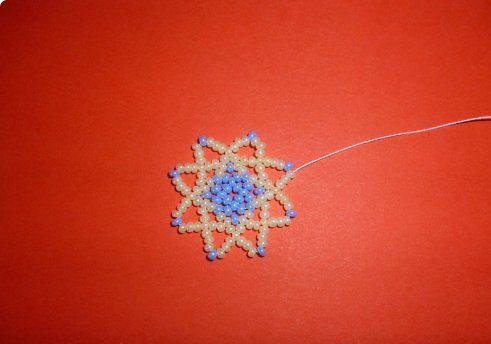
Next, we make the entire row from blue beads. We pass a thread through the top of each of the rays, on which 5 blue beads are strung.
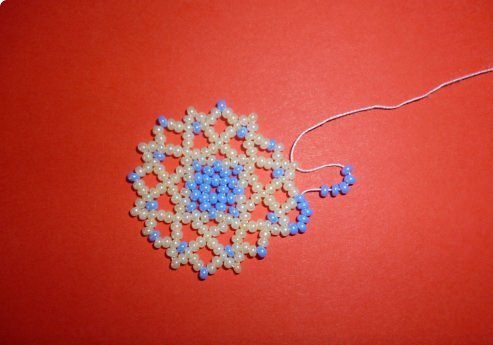
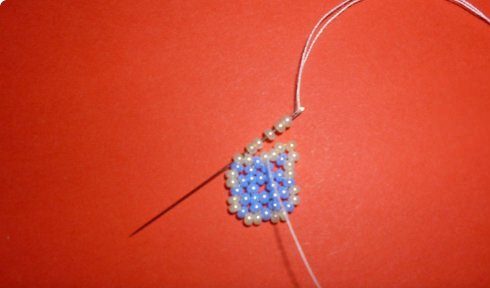
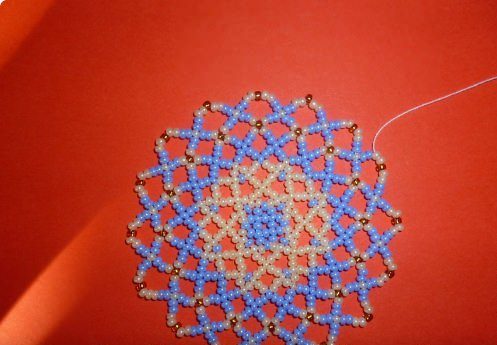
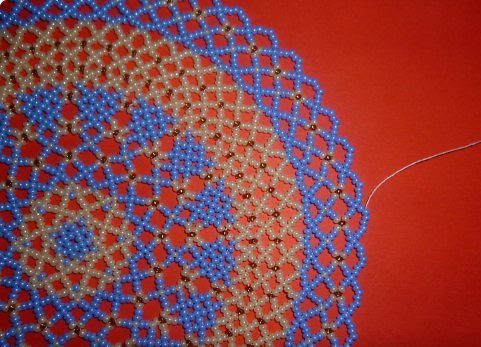
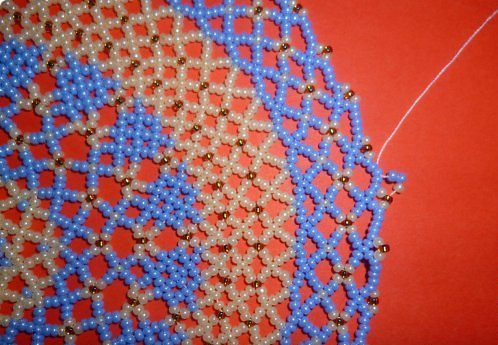
At the next stage we start adding little by littlegolden beads. To make the pattern of the arcs of the next row, string 2 blue beads, 1 white, 1 golden, white and again 2 blue. As a result, each arc will have 7 beads, in the center - golden inclusions.
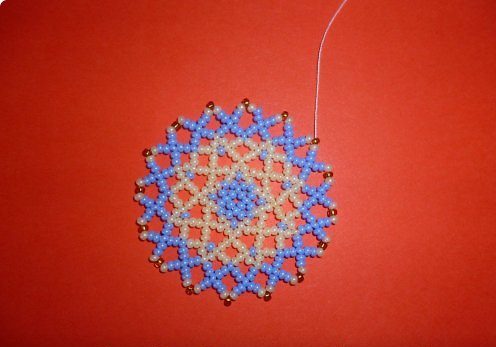
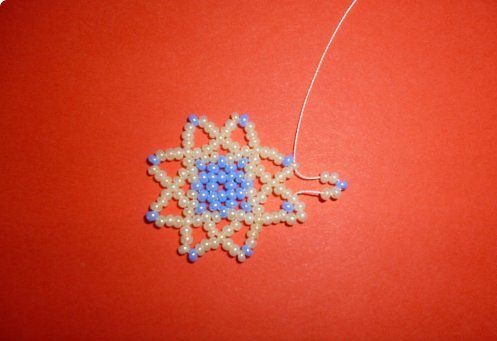
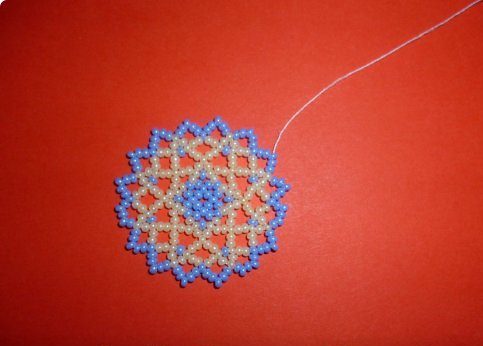
The next row will also have 7 beads, but in the following order: white, 2 blue, white, 2 blue, white.
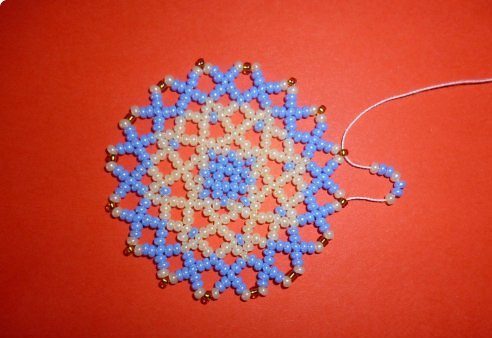
Another row will be made from arcs of 9 beads: 2 blue, 2 white, 1 gold, 2 white, 2 blue.
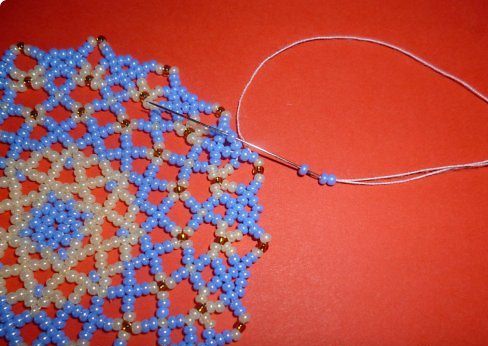
Now we make arcs only between the beginning and the end of the white elements. We simply thread the game through the blue and golden beads, without using them in the weaving. We make arcs with 5 blue beads.
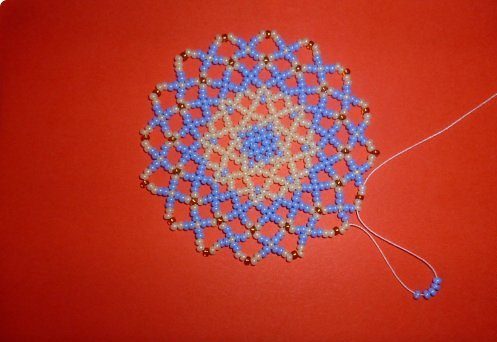
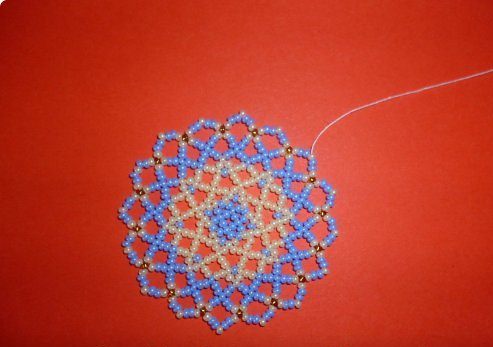
Now we will pass the needle between the arcs inthe top of the blue arc and into the golden bead. We make the arcs themselves in this way: 3 blue, 2 white, pass the needle through the golden bead. Again - 2 white and 3 blue, then 2 blue, 1 white, 1 golden, 1 white and 2 blue and so on in a circle to the end of the row.

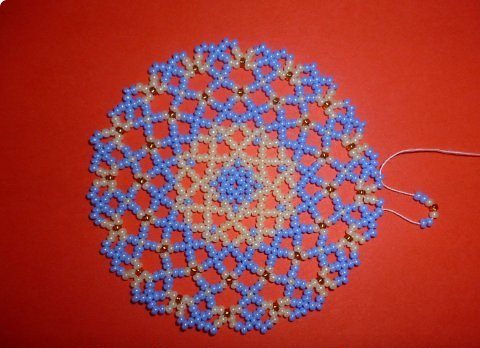
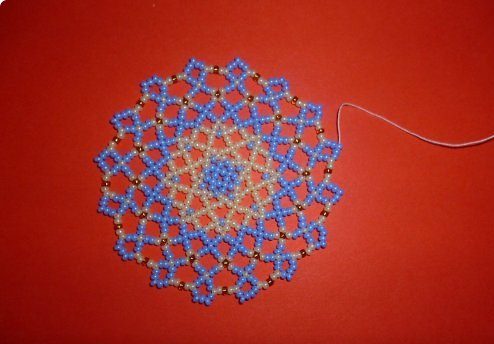
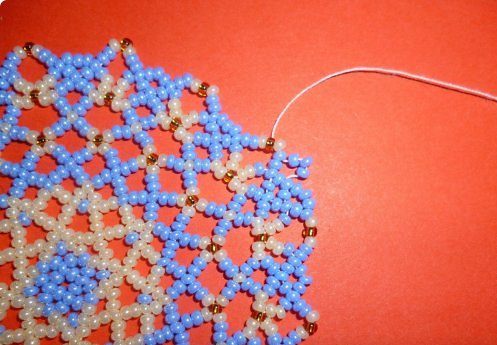
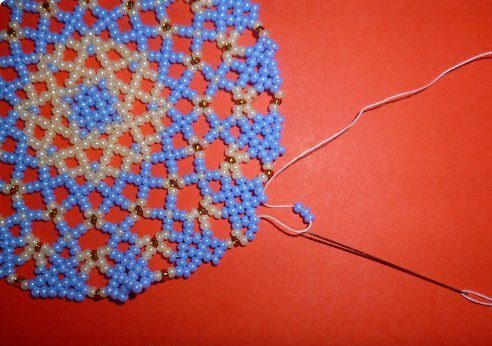
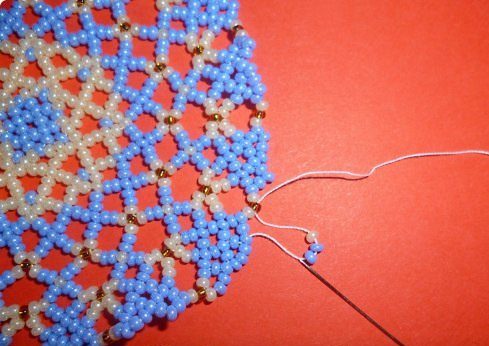
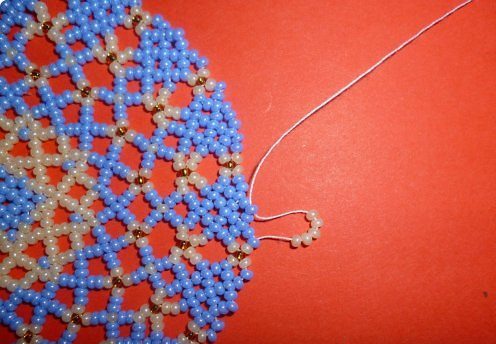
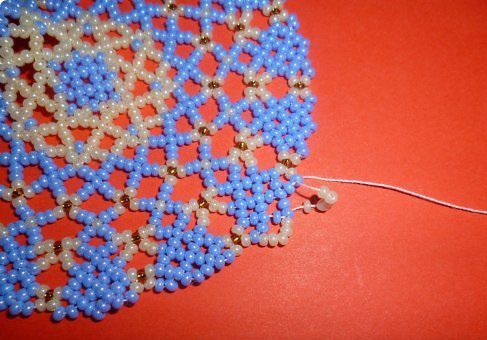
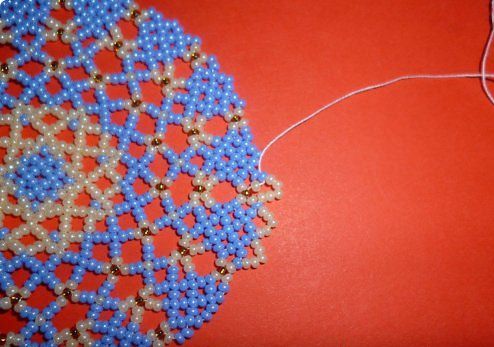
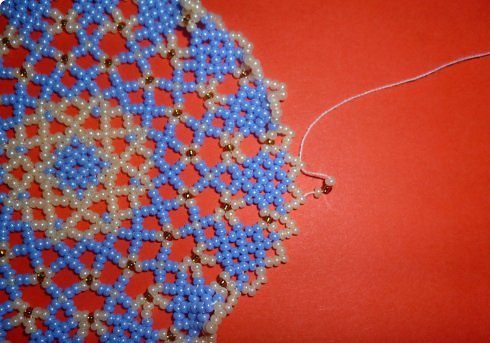
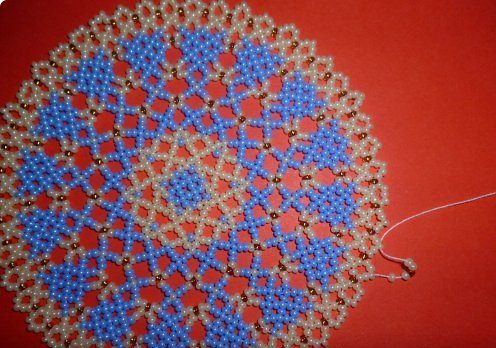
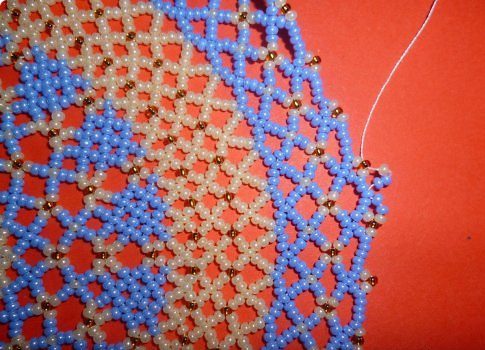
Next, we will use the upper beads from the formed arcs and thread the needle through them to form the following elements.
To perform the following actions it is quitethe picture provided by this master class will be enough. The order and color of the beads at this stage presupposes the inclusion of personal imagination to a certain extent. You can weave the napkin in the future so that the colors form rays. This master class is described for such a pattern. You can - emphasize the circular elements. The main thing is to add arcs the number of beads so that the napkin is perfectly round, and its edges do not begin to bend inward.

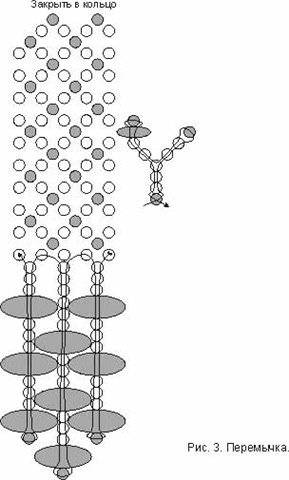
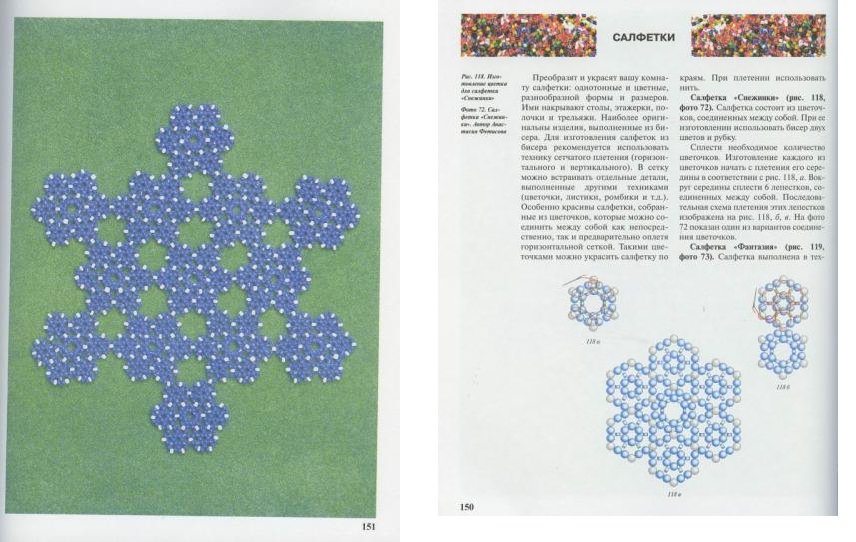
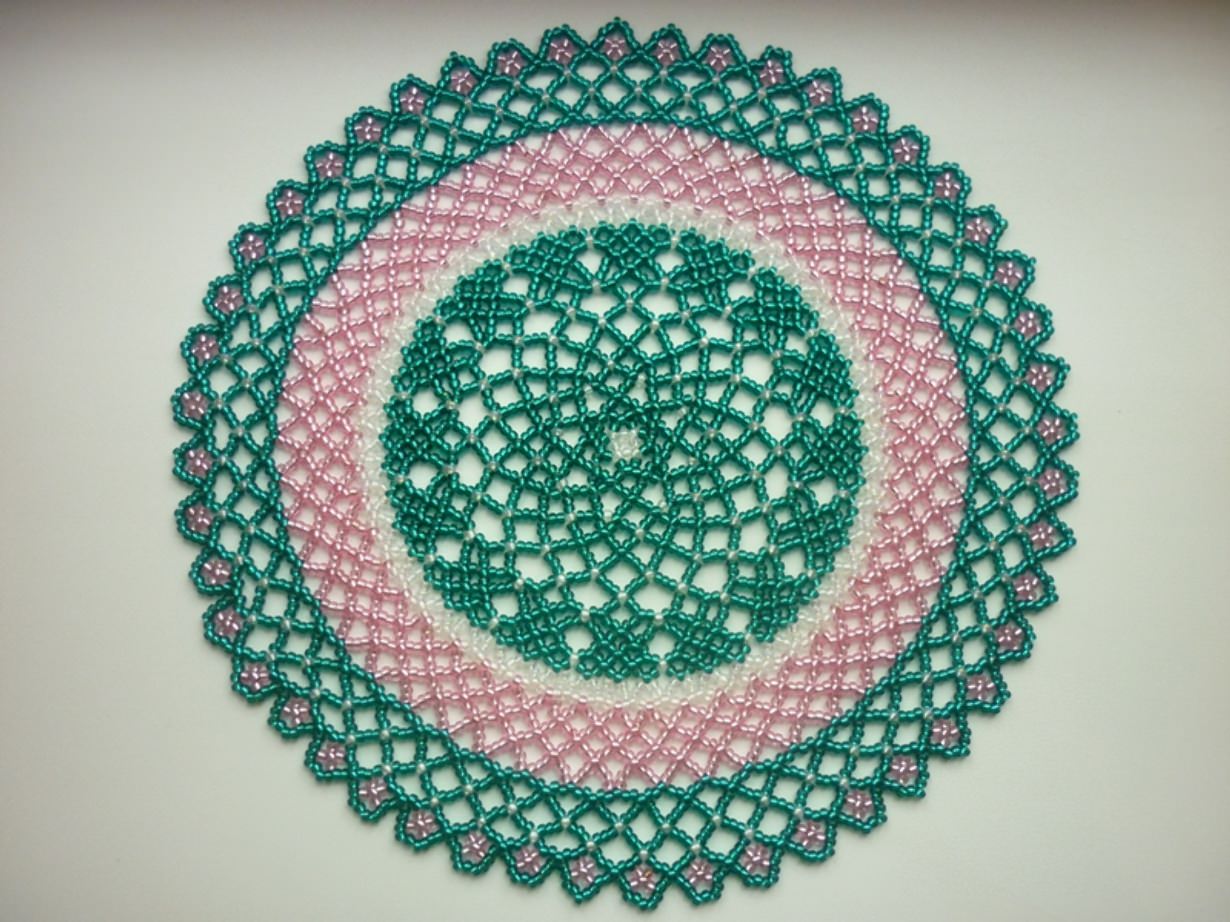
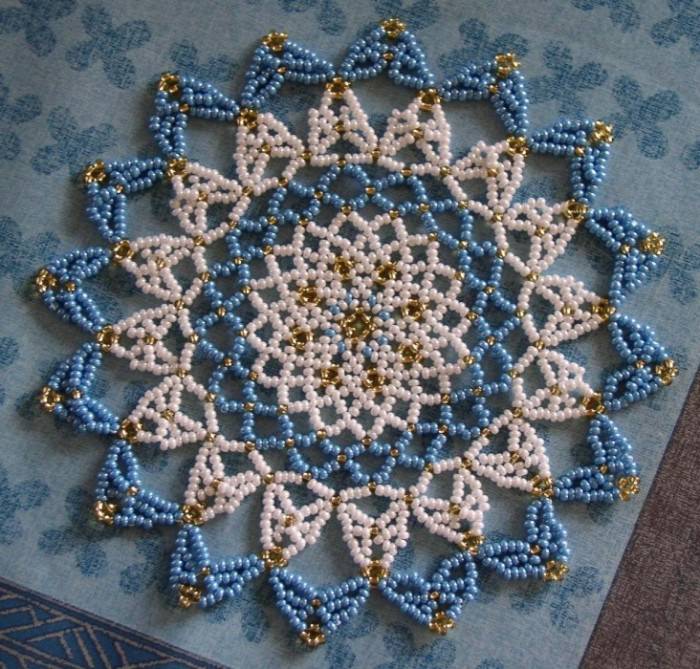
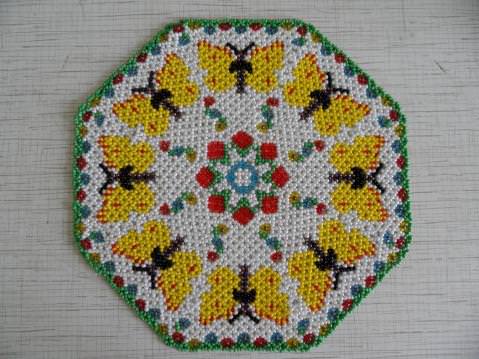
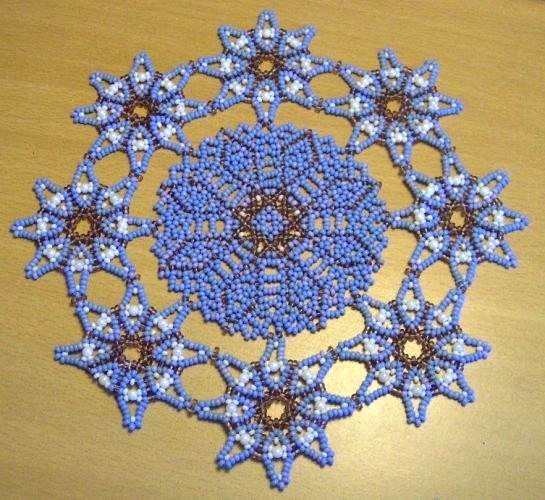
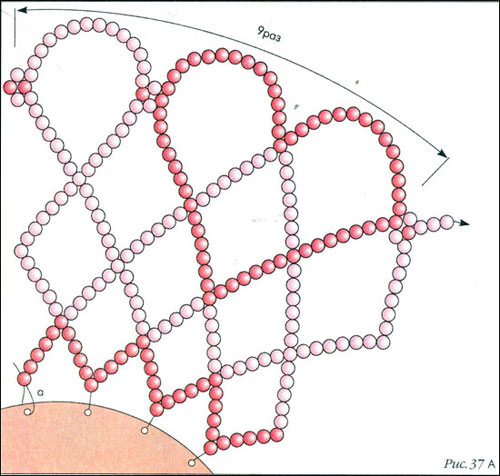
Schemes for weaving napkins from beads


Video: Plaid napkin from beads and large beads