Guitar from beads: weaving of bulk craft in the master class
Content
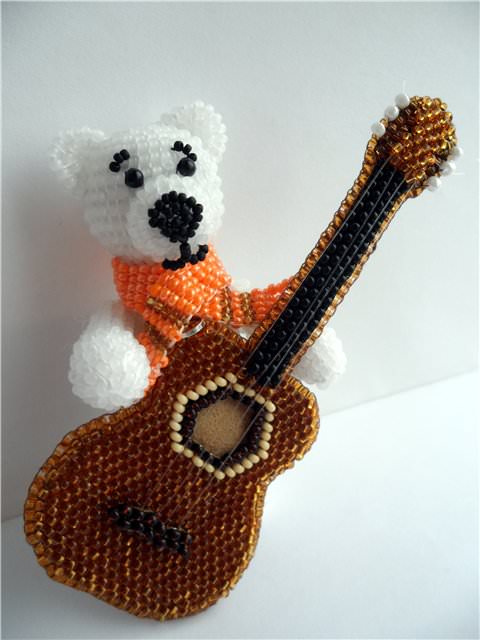
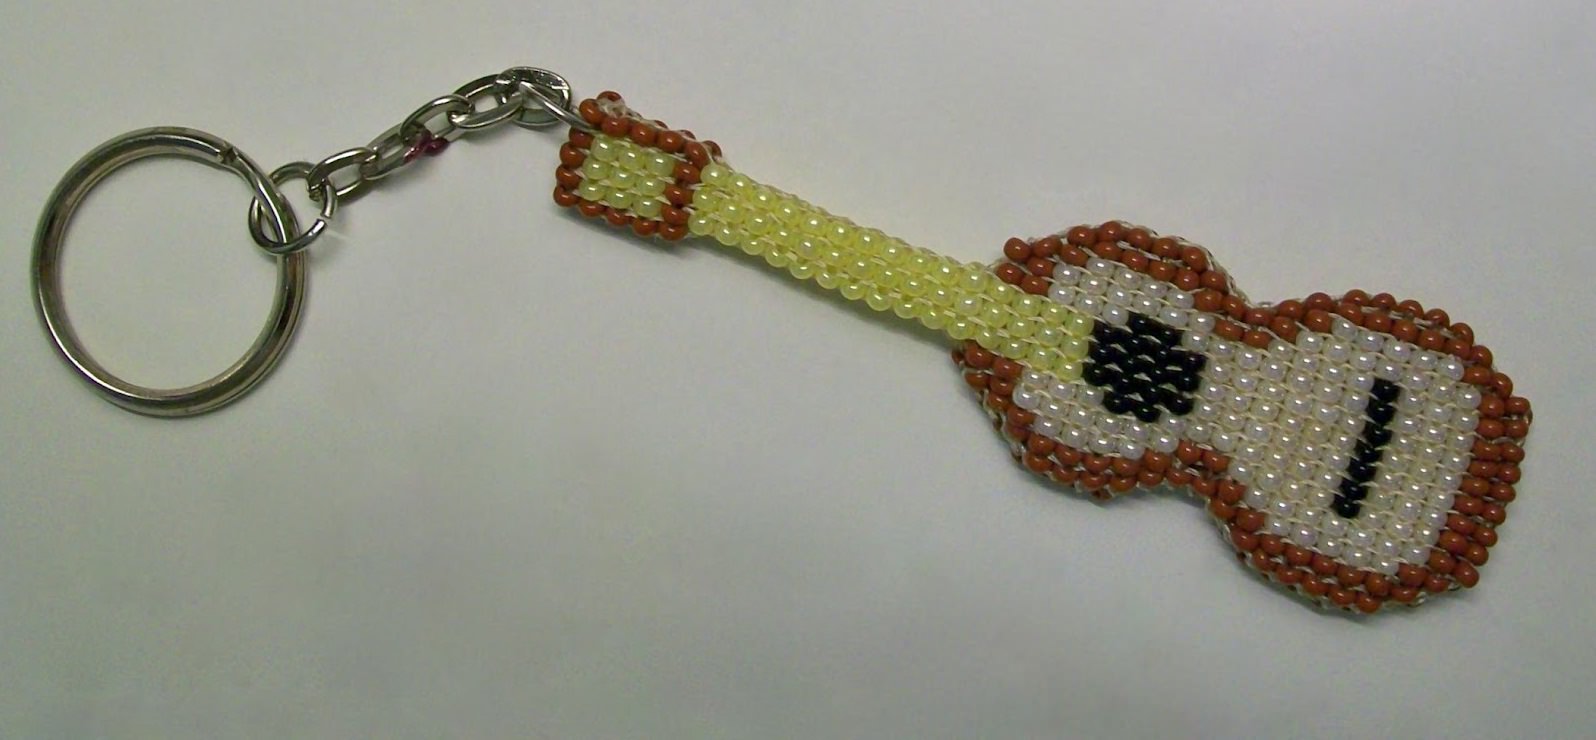
Guitar from beads - a great idea forOriginal gift. Such an article from beads can be done in two ways on the basis of our master class and a video lesson and present as a keychain.


How to weave a volumetric guitar from beads
To make such an article you need the following materials:
- Czech beads (black, yellow, white);
- scissors;
- Thread black and needle for beads;
- double sided tape;
- Guitar schemes.
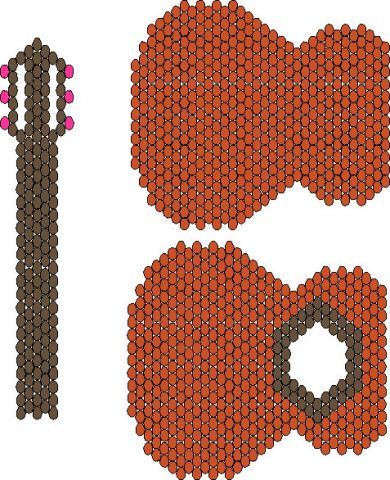
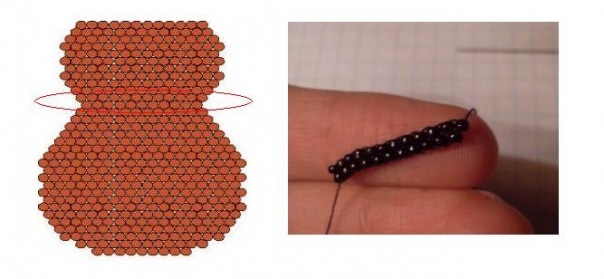
Before weaving a guitar - we recommend that you print out this scheme of the side of the craft. So it will be more convenient for you - to mark on the paper the woven rows (see the diagrams below).
With the help of a brick stitch, we begin work. To do this, you need to take a thread with 2 needles at the ends.
Weave the 1st row (vertical column according to the scheme from 1 to 2).
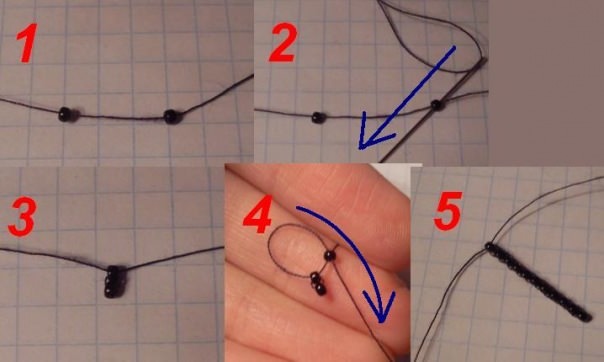
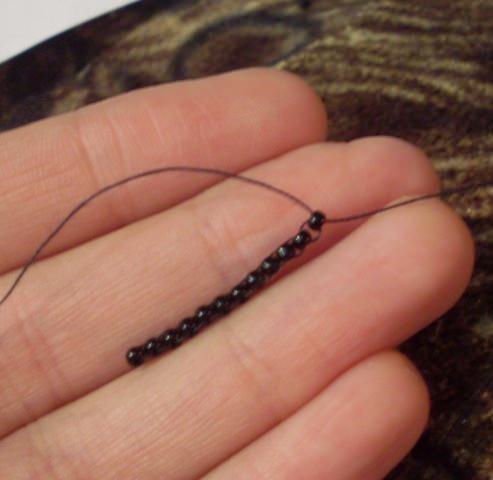
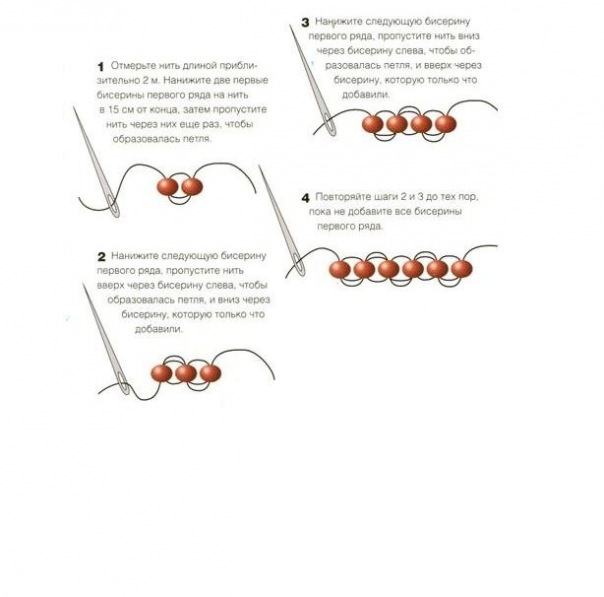
We begin beading: use the right end of the thread to dress 2 beads, placing them on the middle.
Then use the right end of the thread with the needle1 of the dressed beads (from left to right). You tighten the threads and trim the tips. For convenience, you can fasten the upper bead to the fabric with a pin (see diagrams).
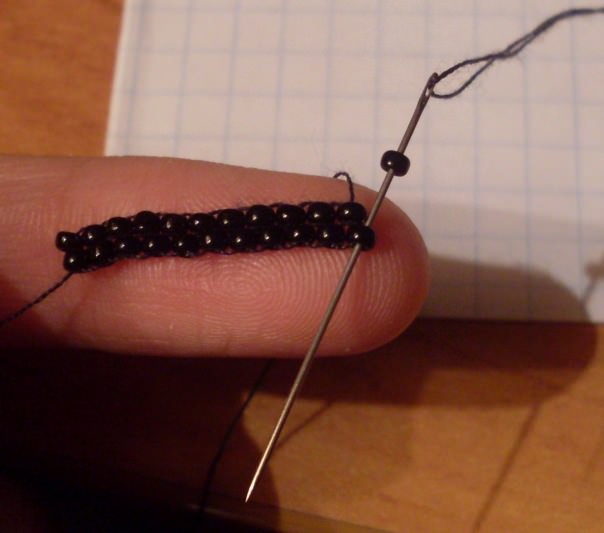
On the right thread string a bead and with the help of the left needle pass through it from the left to the right. Pull up. After that we continue the weaving (see below).
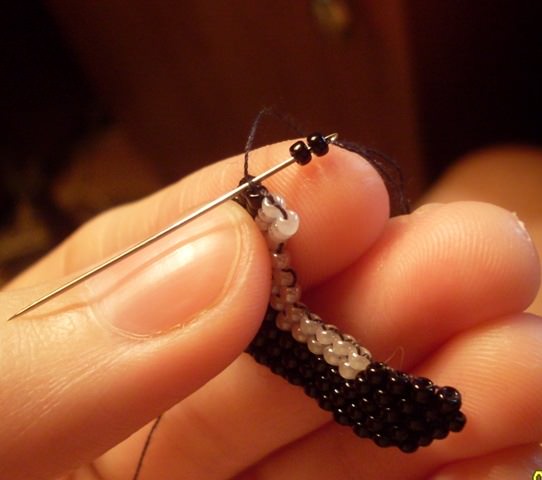
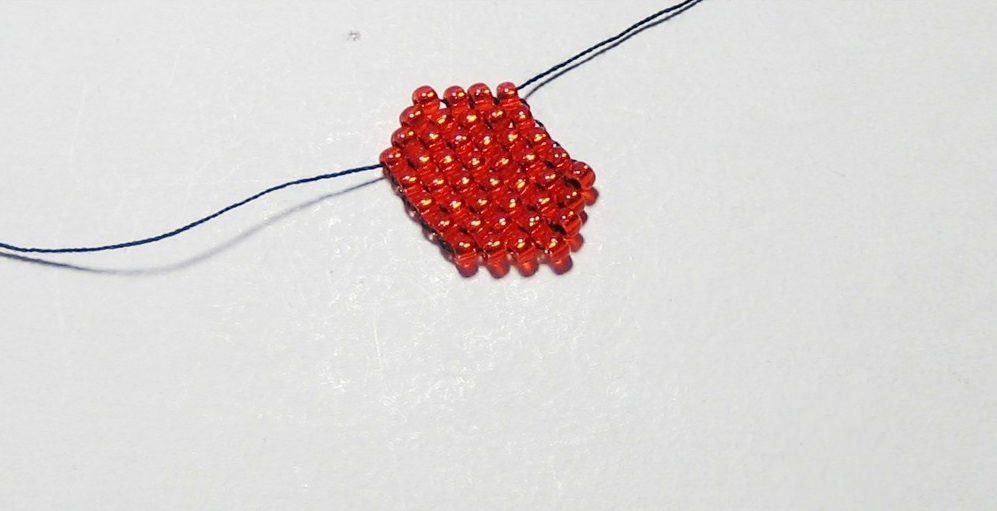
This is what the work looks like in practice:
Then we work exclusively with a needle with one thread, do not touch the other thread.
Continue the master class - weave the first half of the guitar. The second half will be weaved with the thread that you left hanging out.
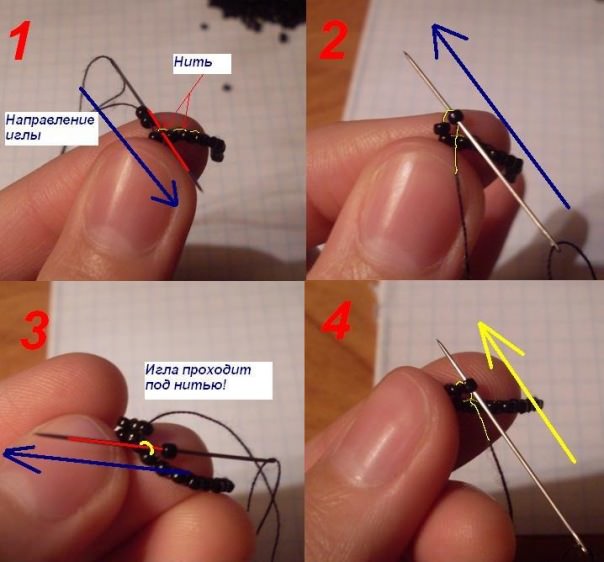
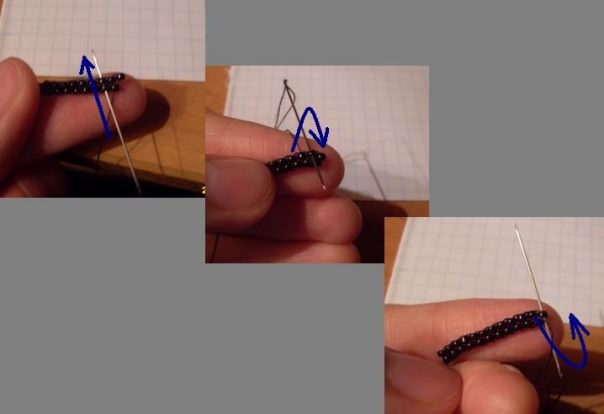
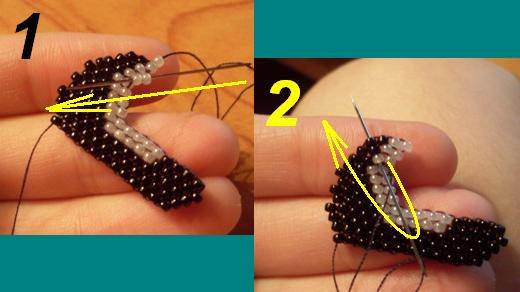
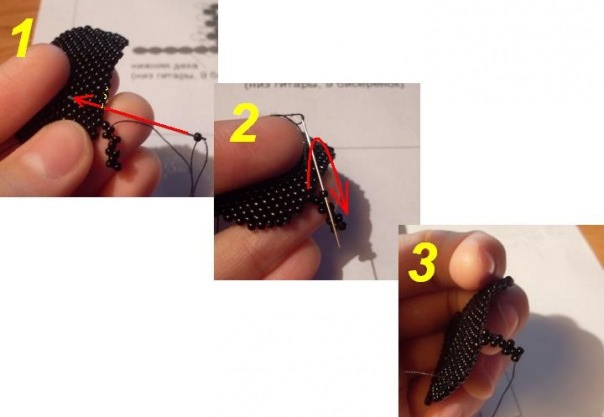
On the thread you put 2 beads, pass a needle underThread, connect the last two beads of the previous row. Then again, go through the clad bead from the bottom-up. Tighten the string (see the guitar from the bead circuit below).

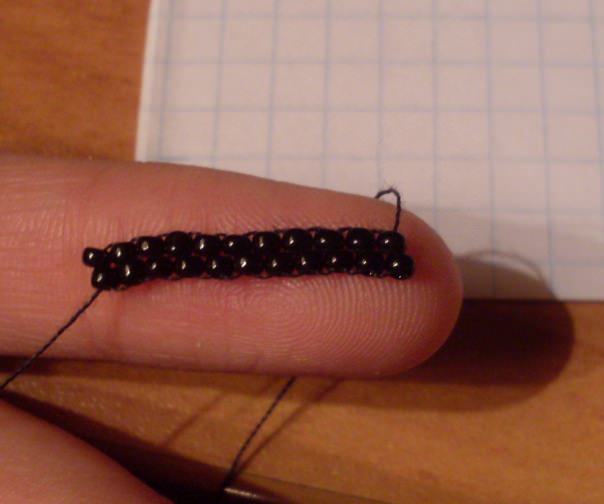
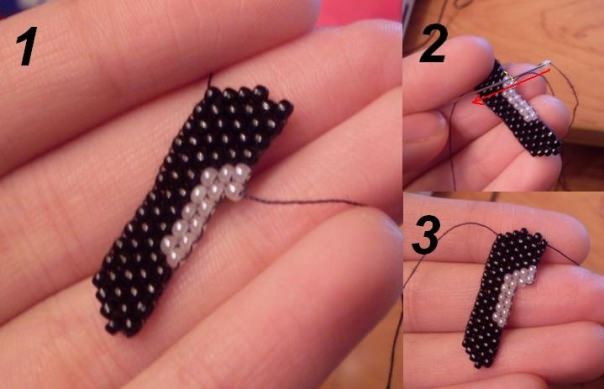
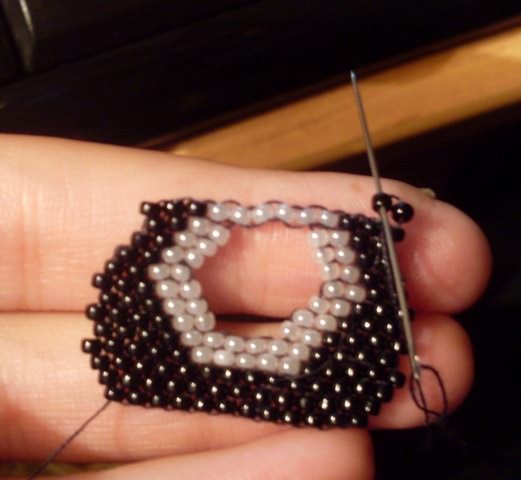
This is how the work looks in practice.
You should get the following: 11 beads in the 2nd row, and there you add another twelfth (see photo).
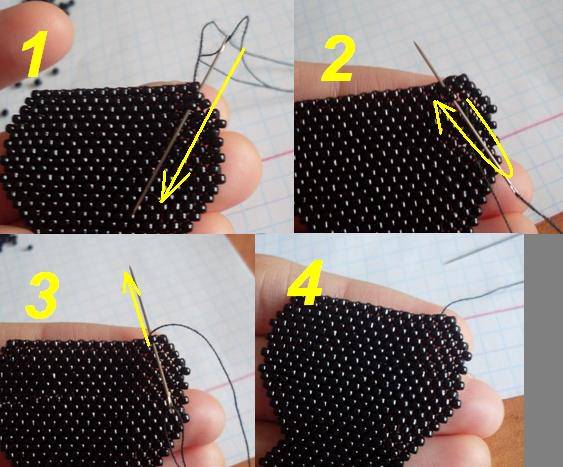
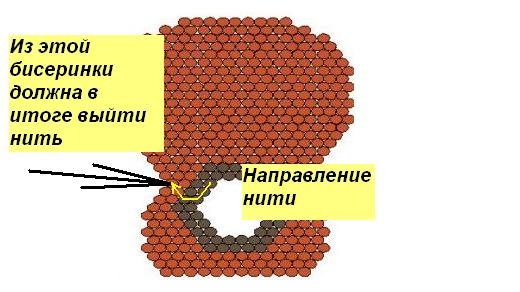
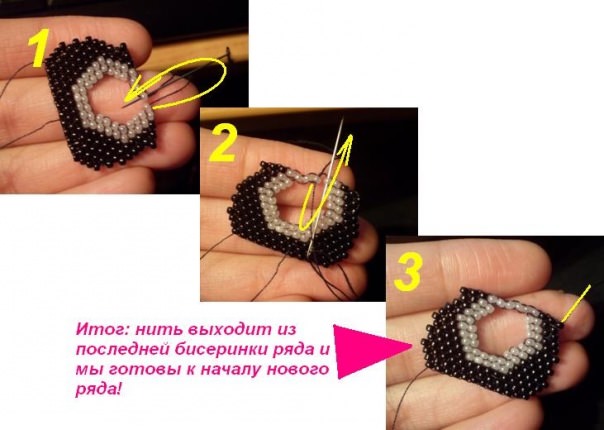
String one bead and pass the needle through the 1st bead of the 1st row. Then we hold a needle with a thread through the neighboring beads along the line in the photo and remove it from the newly clad bead of the 2nd row.
Try to do so that your thread in the end came out of the last bead.
As a result, you should get 2 first rows (see the guitar from the bead circuit).
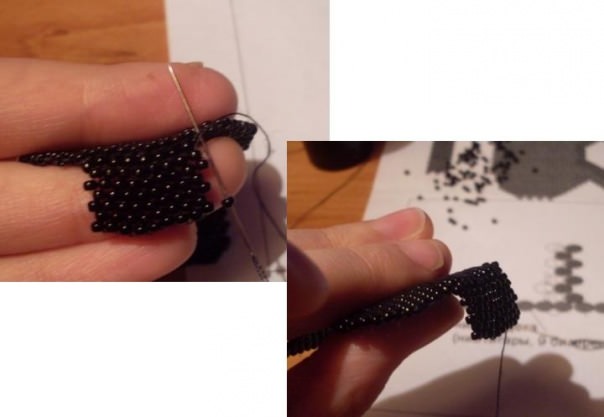
Adhering to the schemes, we continue to weave. Remember: that it is necessary to add the beads at the beginning of the row not always. The marked rows must be weaved from the 1st bead, and not from the 2nd. When you finish the weaving in these rows - you do not need to add 1-beads. We also make sure that the number of beads in the rows of the scheme coincides with your number.

Continue the master class: When you will be ready for the second half of the guitar - it is necessary according to the marked series in the scheme - to make a new line from the second bead of the previous series, but not from the first as it was before.

That's how beading looks at work. Redirect the thread into the second bead.
Next, dress the row as usual - according to the scheme. As a result, you get to make a flat wall of crafts. With what we congratulate you!

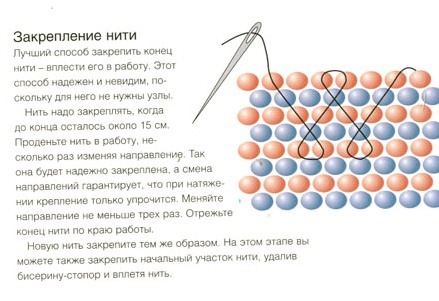
Fasten the threads. To do this, you need to wipe it inside the canvas (see the diagram below). This is how the manipulation works.
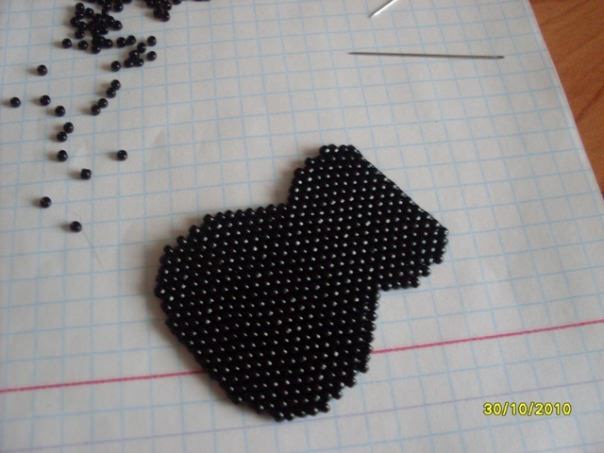
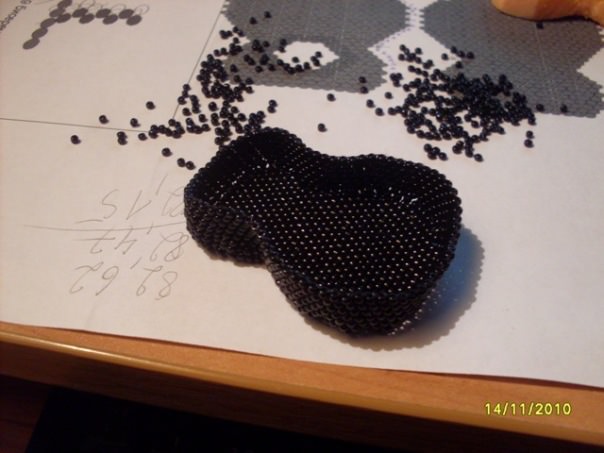
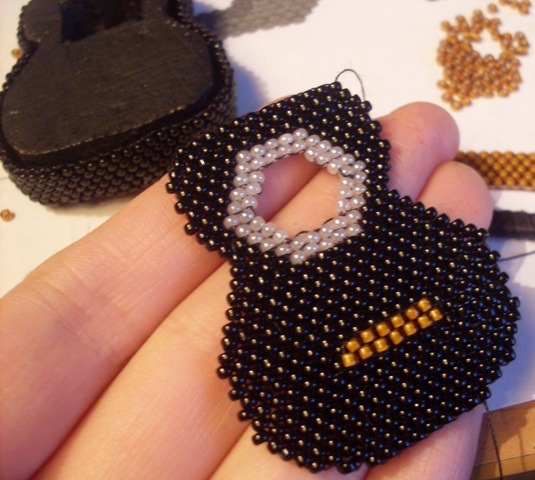
So you get the finished first half.
Begin the beadwork of the second half of the product - just like you did with the first half.
Next, the master class goes on to create the second half of the craft.
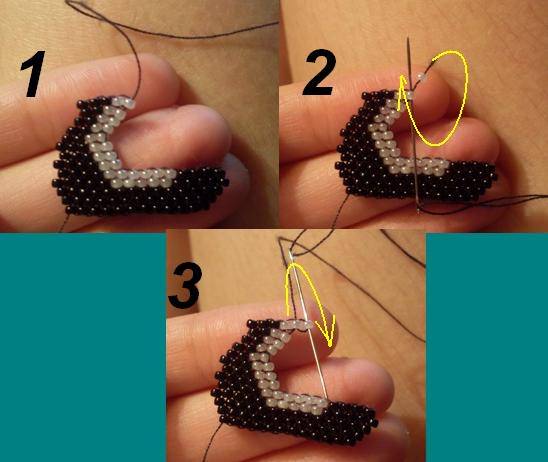
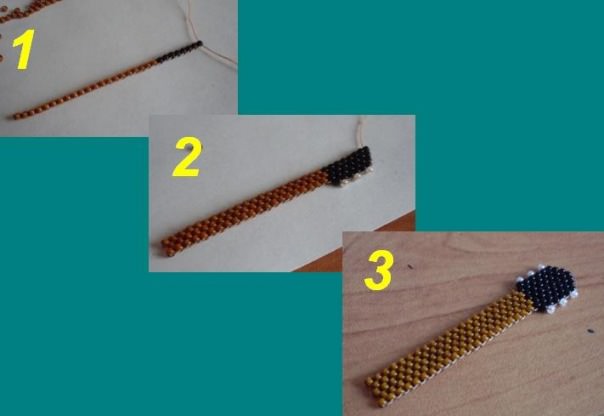
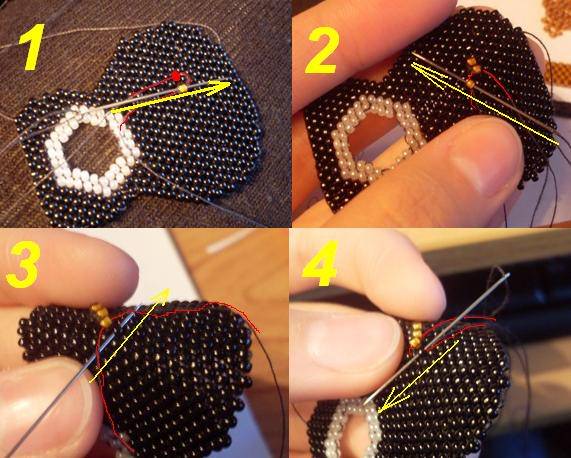
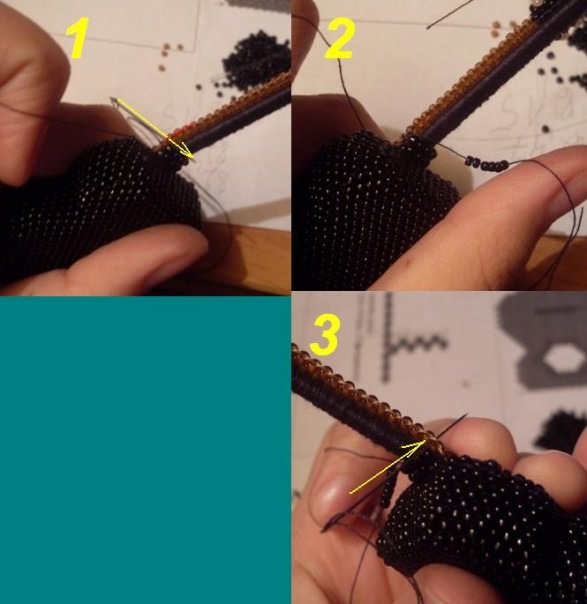
Start work from the top (with a hole, in the guitar it is referred to as a socket). So, you'll get to the opening of the hole. Do not add this row, but go on to the next one.
Next go the weave according to the schemes of the first half of the hole.
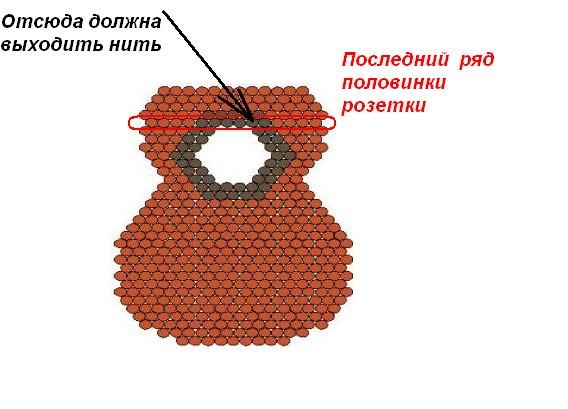
When you reach the row that you previously marked in the diagram - you will need to stretch the thread in such a way that it comes out of the last bead from the beginning of the outlet.
The above mentioned manipulations in the work.
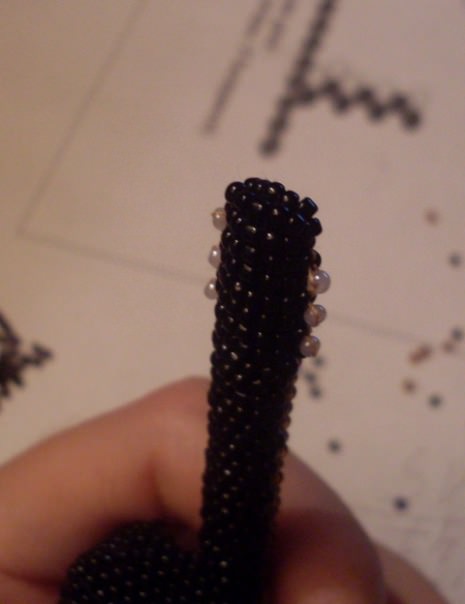
A shawl last ryadochek, which will be the finishing touch in the manufacture of rosettes.
The same series continue to make a chain in the air (see diagrams).
Below are the manipulations in practice.
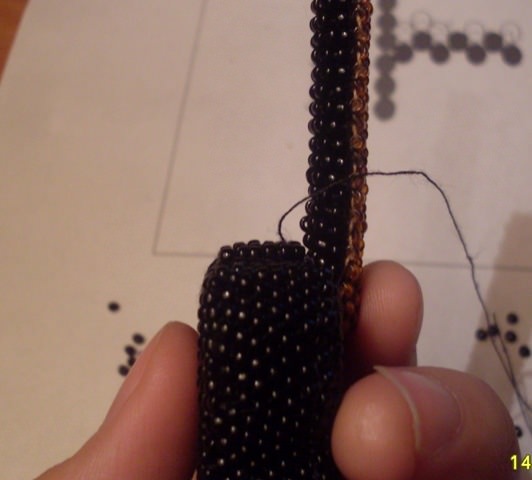
Weave from below a new thread and do not forget to fix it so that it does not fall.
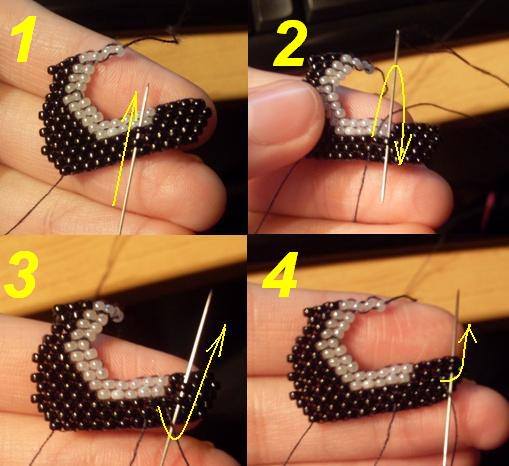
Next go the weaving of the other side of the guitar socket, according to the schemes. Do, like the first.
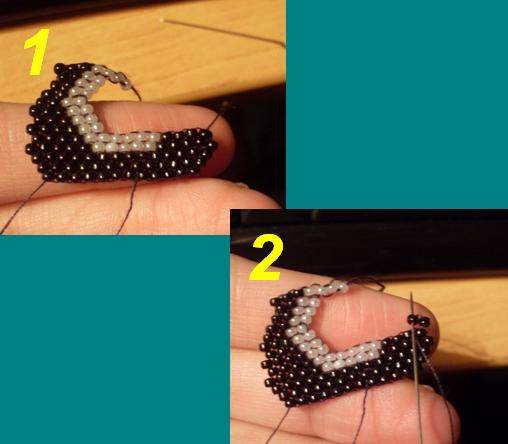
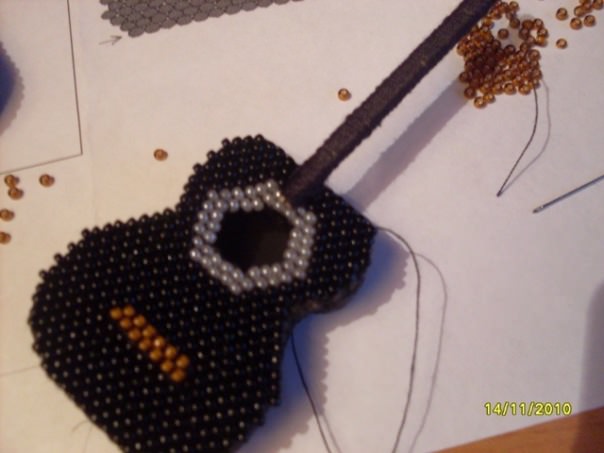
Connect the edges of the hole with your own hands - rosettes, as in the diagram.
After you guide the thread into the extreme bead of the row. These actions are necessary in order to start the weaving of a new and a large number.
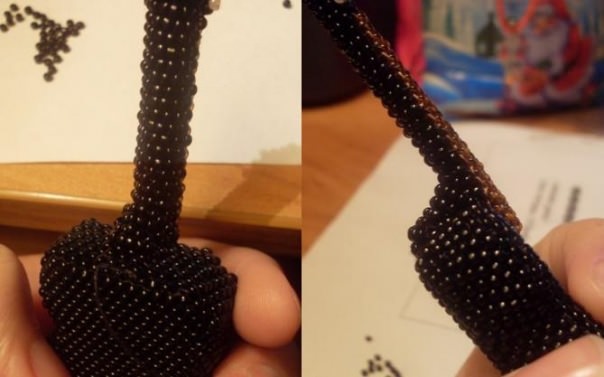
Then you add your own hands according to the schemes - the second flat part of the guitar.

On the lower row of the flat part of the craft, weave the 1stRow of sides. Here, we use the technique of a mud-plaiting to squat the ridge to the guitar deck. Boka crafts weave mosaic. Be guided by this scheme:
Make 1st row perpendicular to the deck.
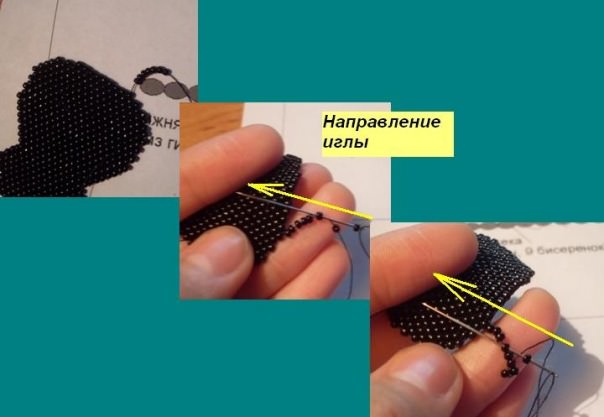
Thread the thread through the string, which is between the beads.
Continue the weaving of the deck.
Make sure that the number of rows does not increase and it is = 7. On the side of the guitar, the rows should go in parallel (see diagrams).
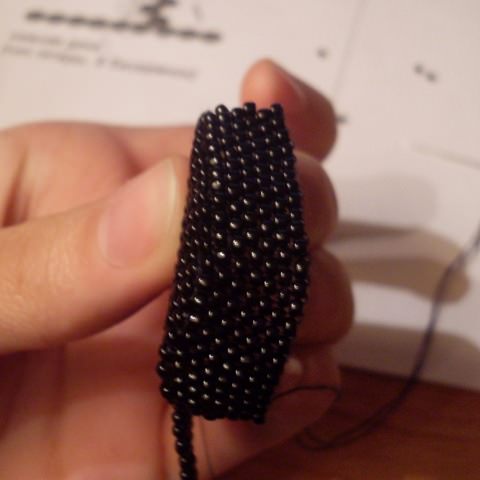
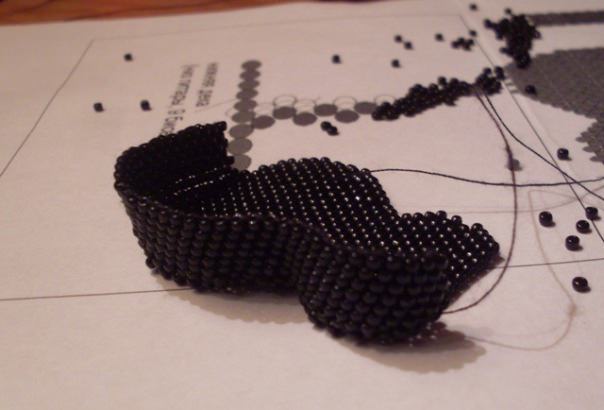
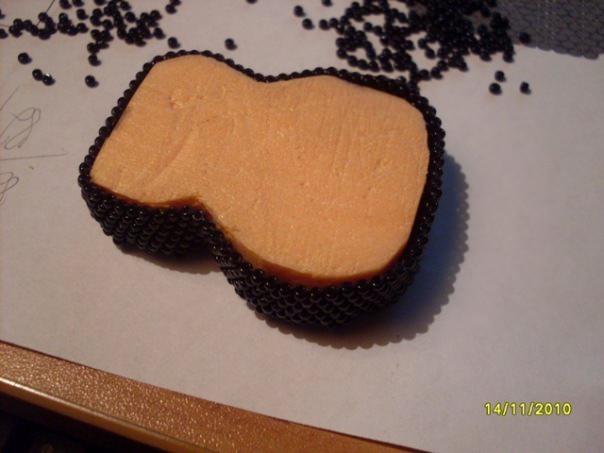
When you twist half of the side - fill.
In order to make the filling, you need foam, from which you will cut out the foam core.
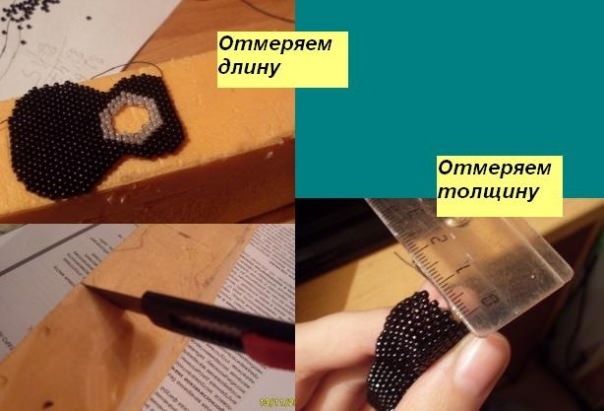
You twist the side of the craft with your own hands.
Sample the frame filling from the foam. Superfluous defects cut off and paint in black.
We simulate the neck of the guitar (see diagrams): the first will be the central row.

Griffin modeling with the help of brick technique, as well as you did parts of the guitar.
Take 2 toothpicks and wrap them yourself with the appropriate color.
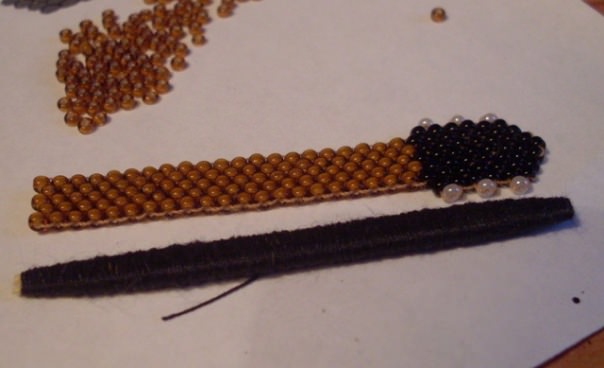
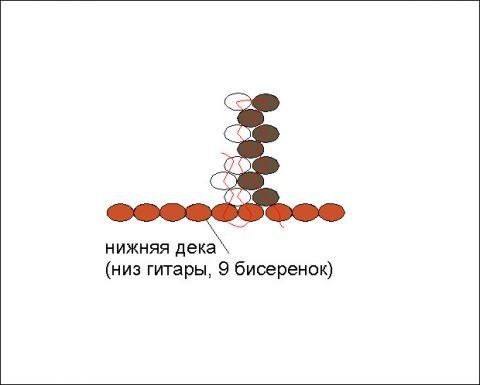
Do the bottoms of the bottom. With the help of a red bead make a mark where you will be fastened the first brown beads. Carry out similar actions according to the 1st row. Then you wore just a string of beads, now you need to weave this line parallel to the existing row, right on it.
When two lines of nails are ready - pass the thread through these 2 lines together, connecting them.
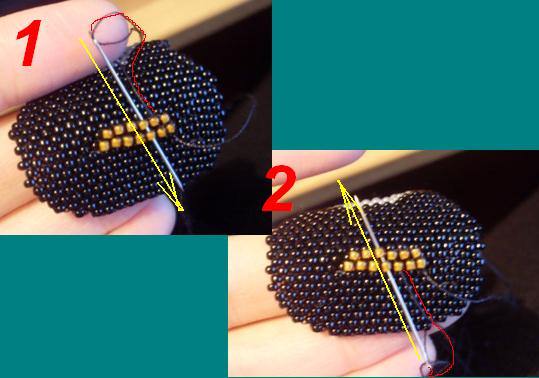
So you get the front of the guitar. Now you can start to fasten the parts.
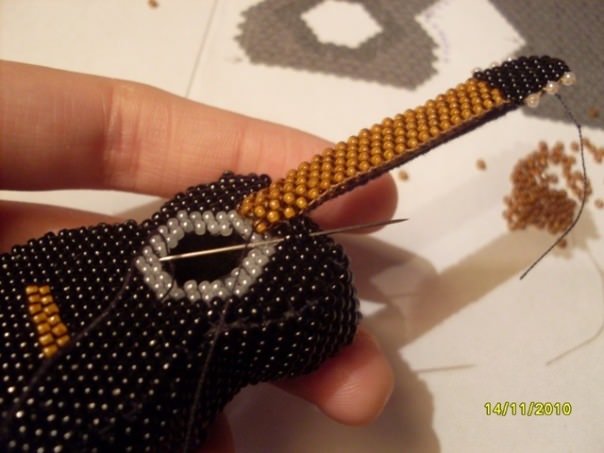
Apply in front of the guitar to the frame ofFoam. Then put the toothpicks wrapped, they also sew properly to the base of the foam (see diagrams). Toothpicks sew through beads decks. The core is pierced through. Toothpicks should be strictly standing and not bending down.
Connect the guitar parts (for beginners should be clearly adhere to the schemes and MK).
So you have to get out this guitar with stitched edges. For beginners, we strongly recommend using the schemes.

You paste a double-sided beaded neckerchief on the cattle to the toothpicks.
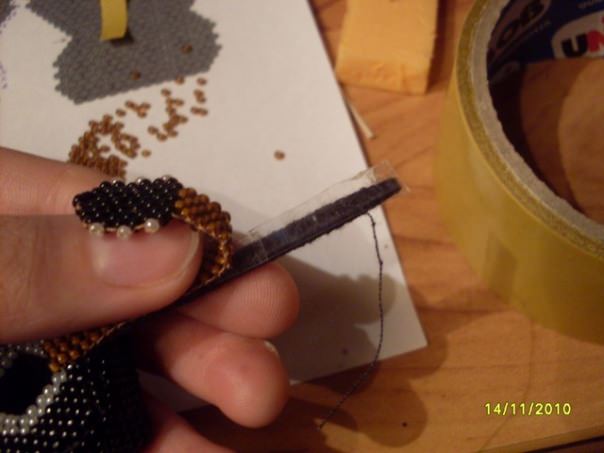
Sew the bottom of the neck to the craft, fix the thread.
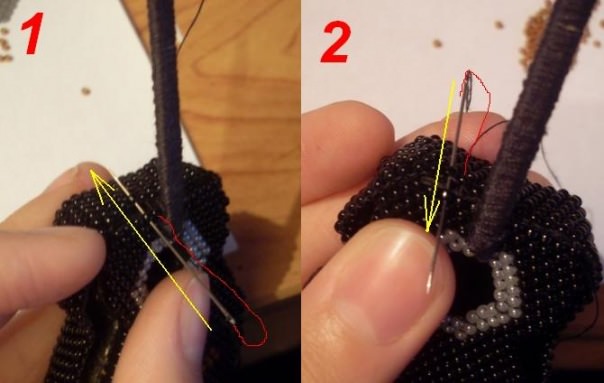
Model the back side of the neck: Dial 8 beads (the number of beads will depend on the thickness of the toothpick). You dial and pass through the thread of the opposite side (see diagrams). After you pass on the same side for the next thread and again put on the beads on the other side. So flatter the whole neck.
Next comes the master class, where the lower back part of the neck fuses, where you mount to the body. To do this, do on this place a number of parallel.
Next - throw the parallel rows, form the form of fixing the neck, as in the photo. If you want to get a smooth transition - do one or two rows of each other.
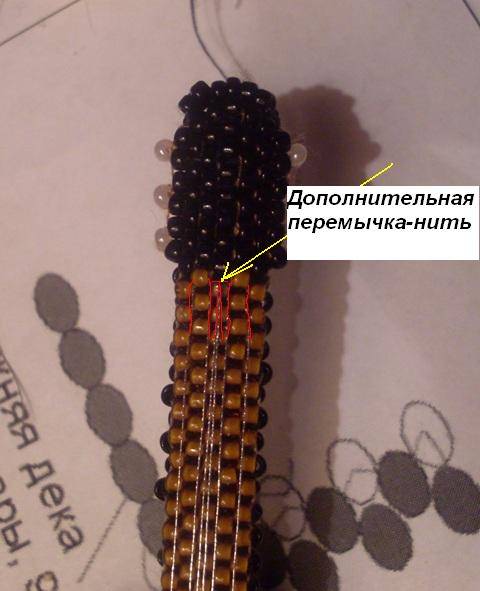
Simulate the strings: you start to fix on the photo (6 strings).
The secret: how to fix the strings. To be able to evenly distribute them - make a jumper from the threads between the 2 beads with your own hands. Do it separately. Through the jumper you throw a thread and get 2 central strings.
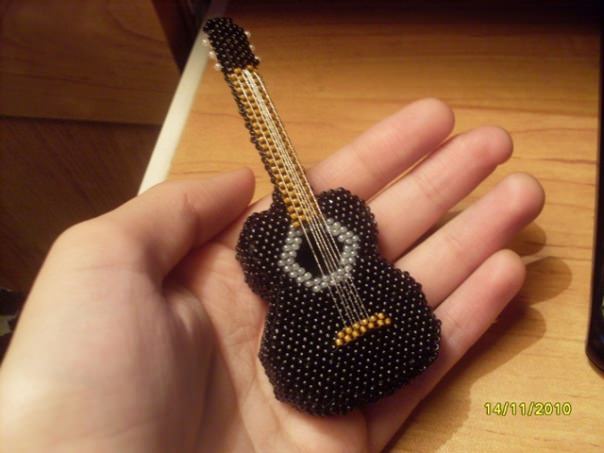

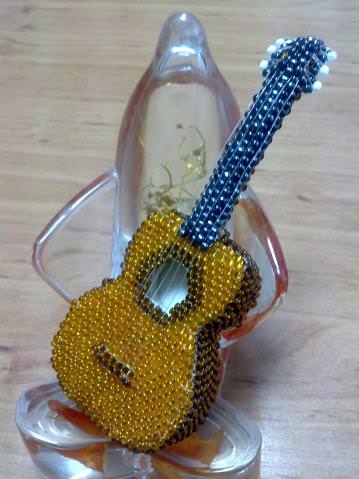
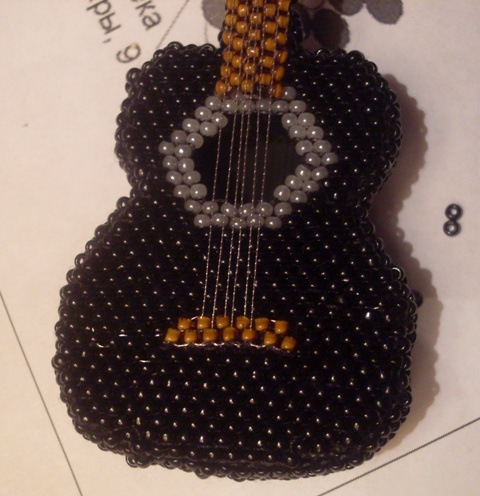
Upon termination of work at you it turns out here such beauty a guitar from beads. As you can see quite a long process, but it's worth it.
The scheme for creating a lighter version of the guitar from beads is presented in the next video clip with the master class.
Video: Flat Beaded Guitar
Comments
Related posts:
 Brick weave beads for beginners to master-class (video)
 Raspberry from beads in the training master class (photo)
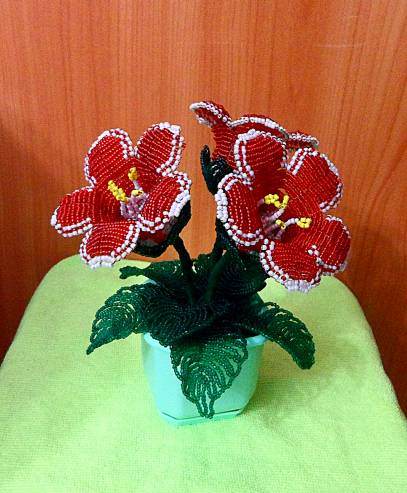 Gloxinia from beads in a step-by-step master class (photo)
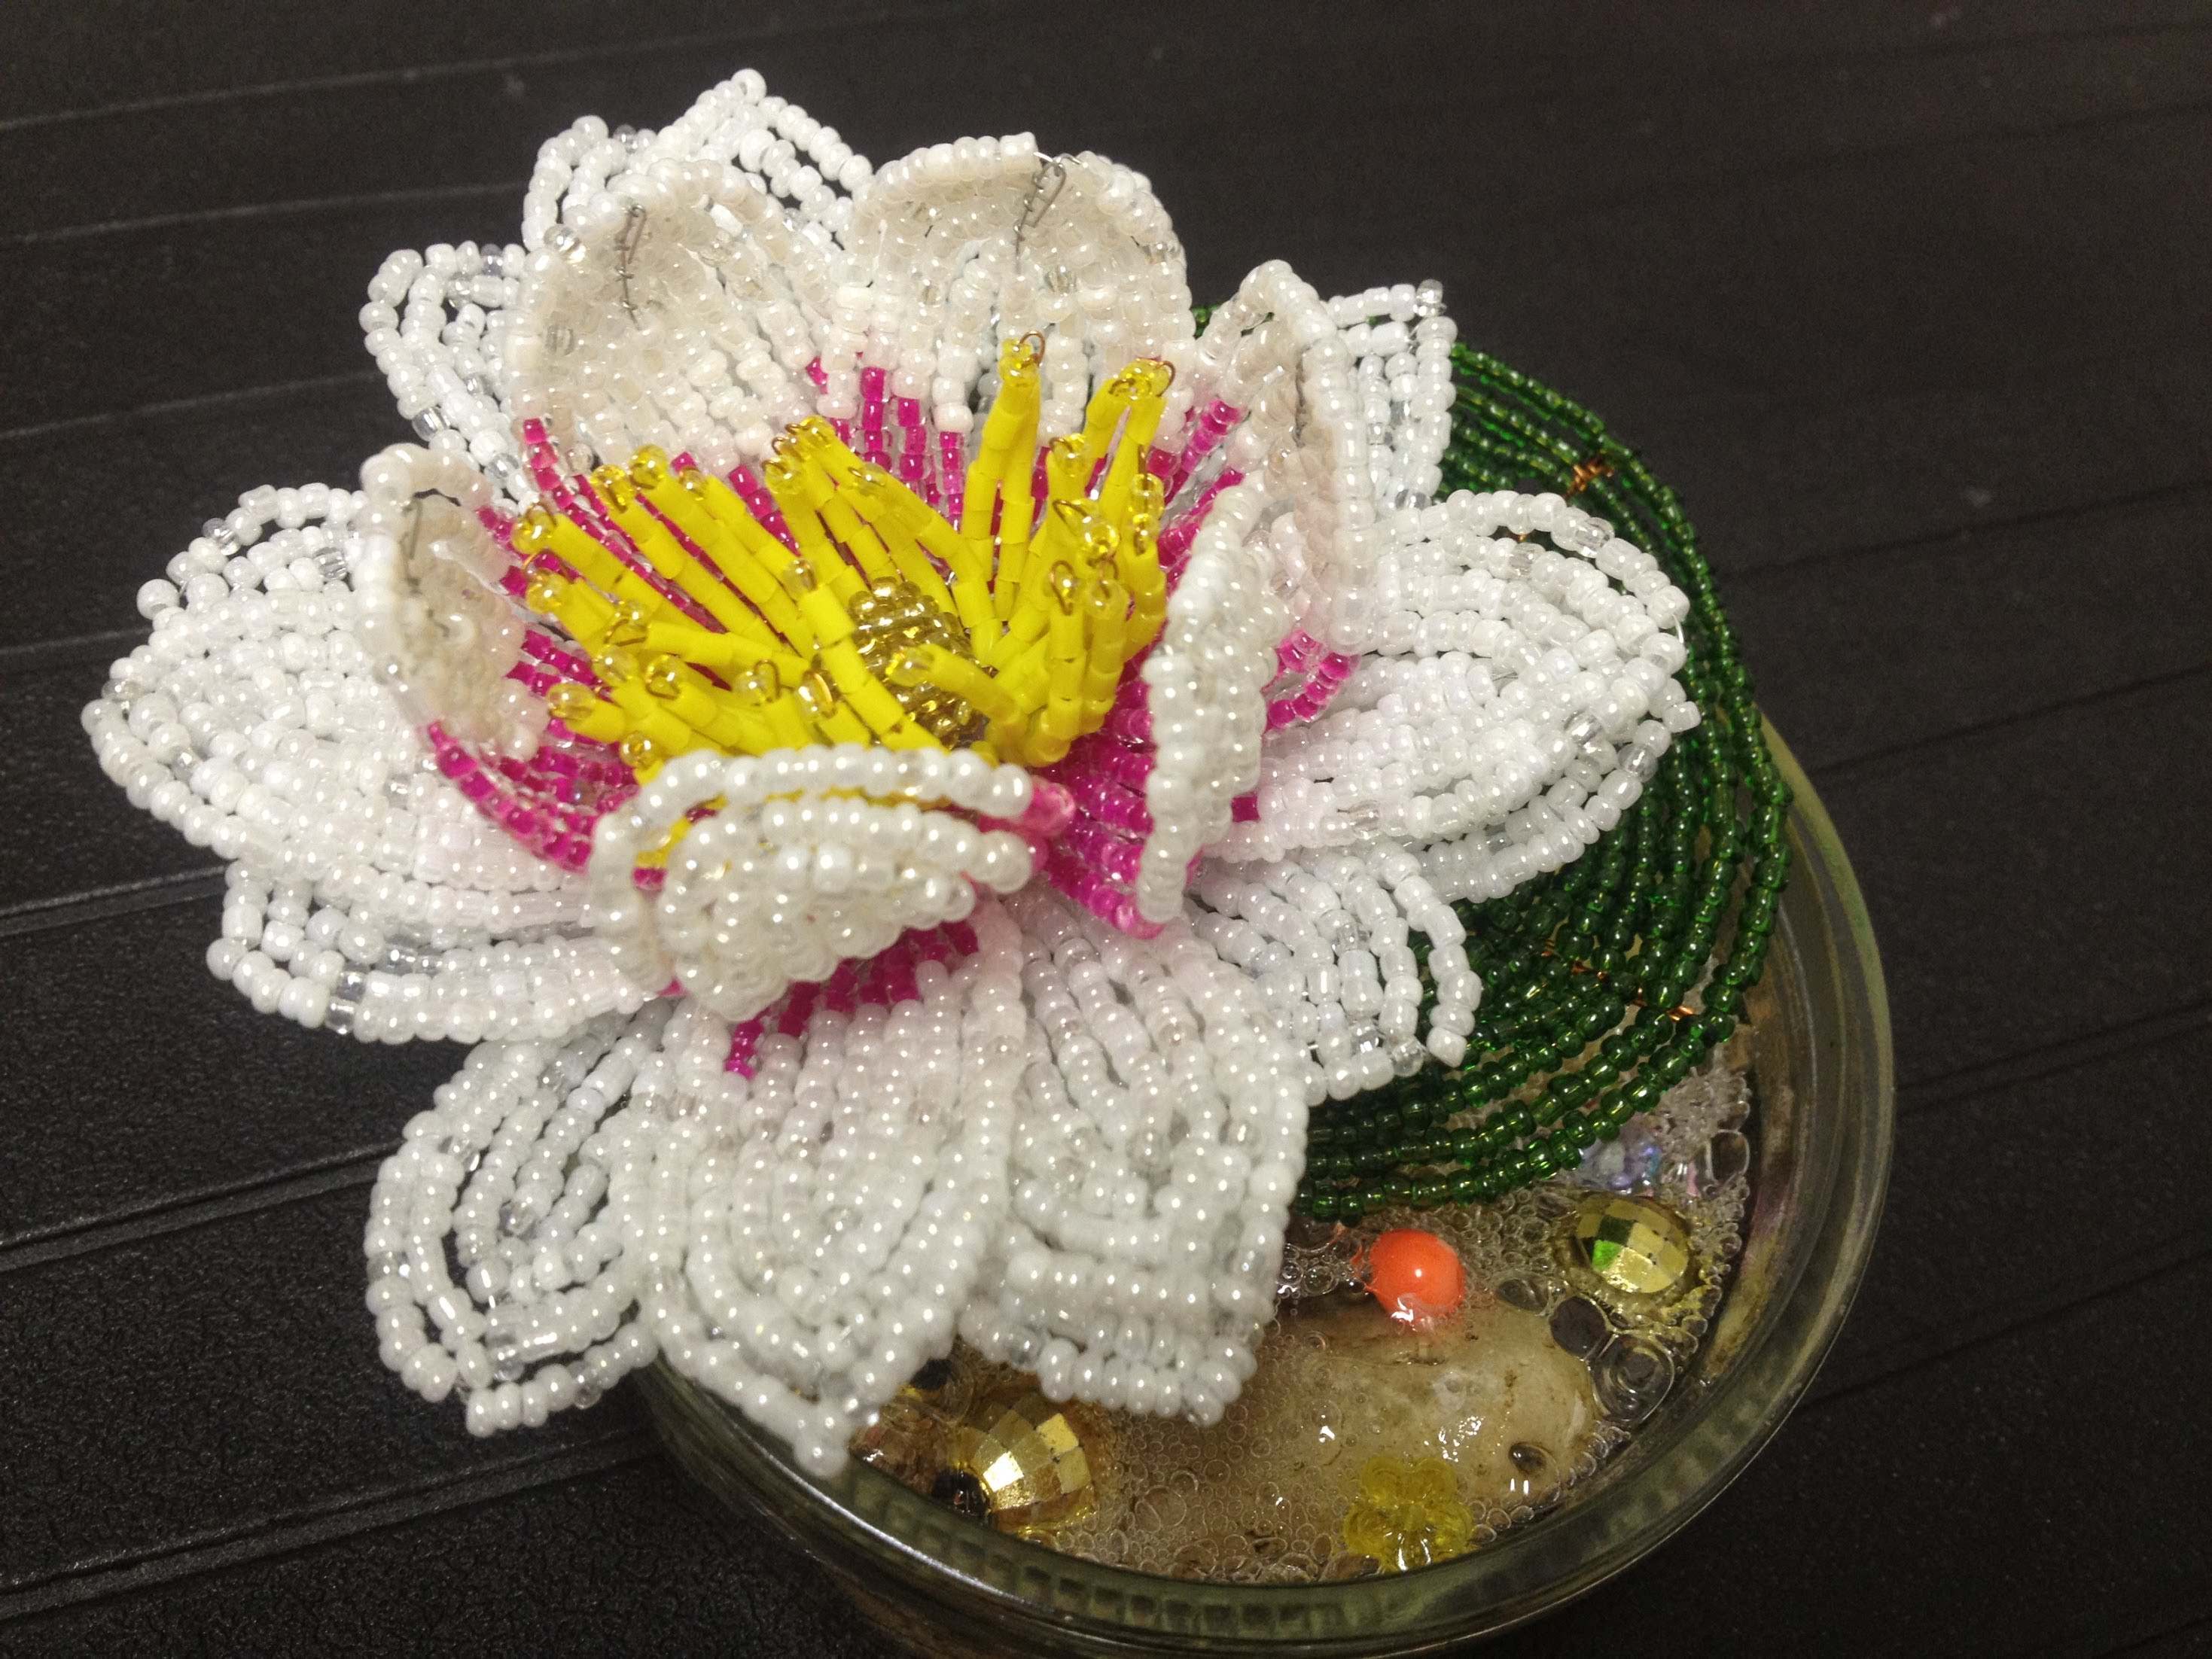 Lily of beads with your hands in the master class (video)
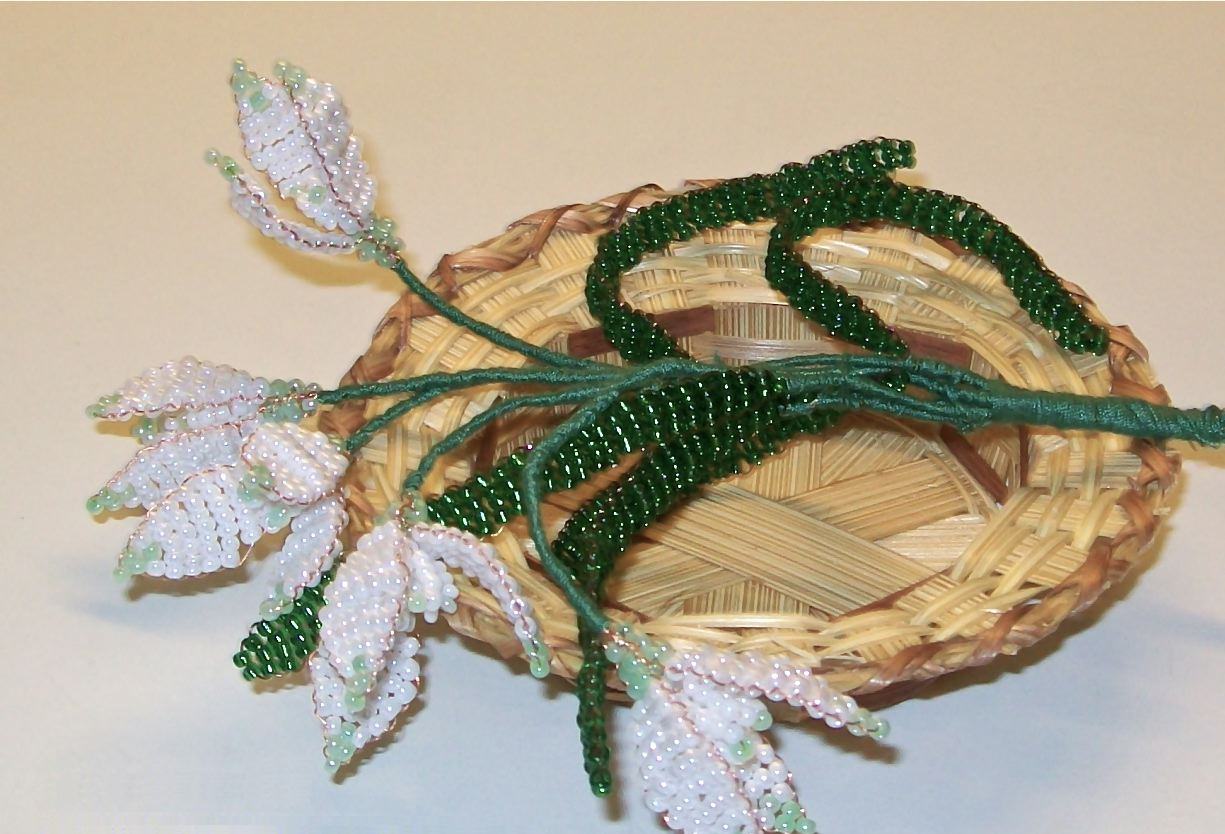 Snowdrops from beads with their own hands in the master class (photo)