Decoupage Wallets: decor items with their hands (photo)
Content
- Housekeeper in a house
- Video: Decor housekeeper
- How to decorate a perpetual calendar
- Converted kupyurnitsa
- Decorate a wooden comb
- Video: Decoupage accessories
Probably everyone at least once in their lives,constantly losing the house keys or car. Or again, with you it is such that in his apartment, you can not find a bunch of keys, but it's what you do not have the housekeeper, which reliably protects against loss of such important items.
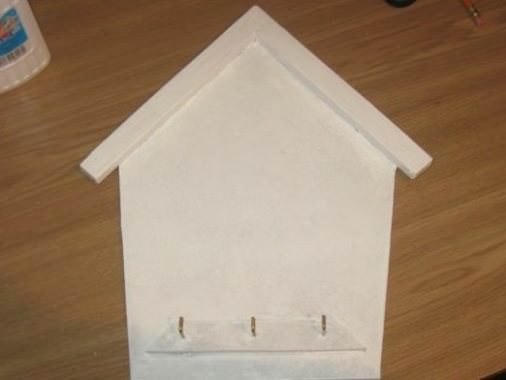
Options housekeeper, presented in a shop,often look monotonous. But there is a method to create with their hands, the original housekeeper for the house, namely, to make decoupage housekeeper. This essential detail of the interior is made of wooden elements with metal hooks, which are, in fact, hung up the keys. Decoupage housekeeper master class will demonstrate how to do it correctly.
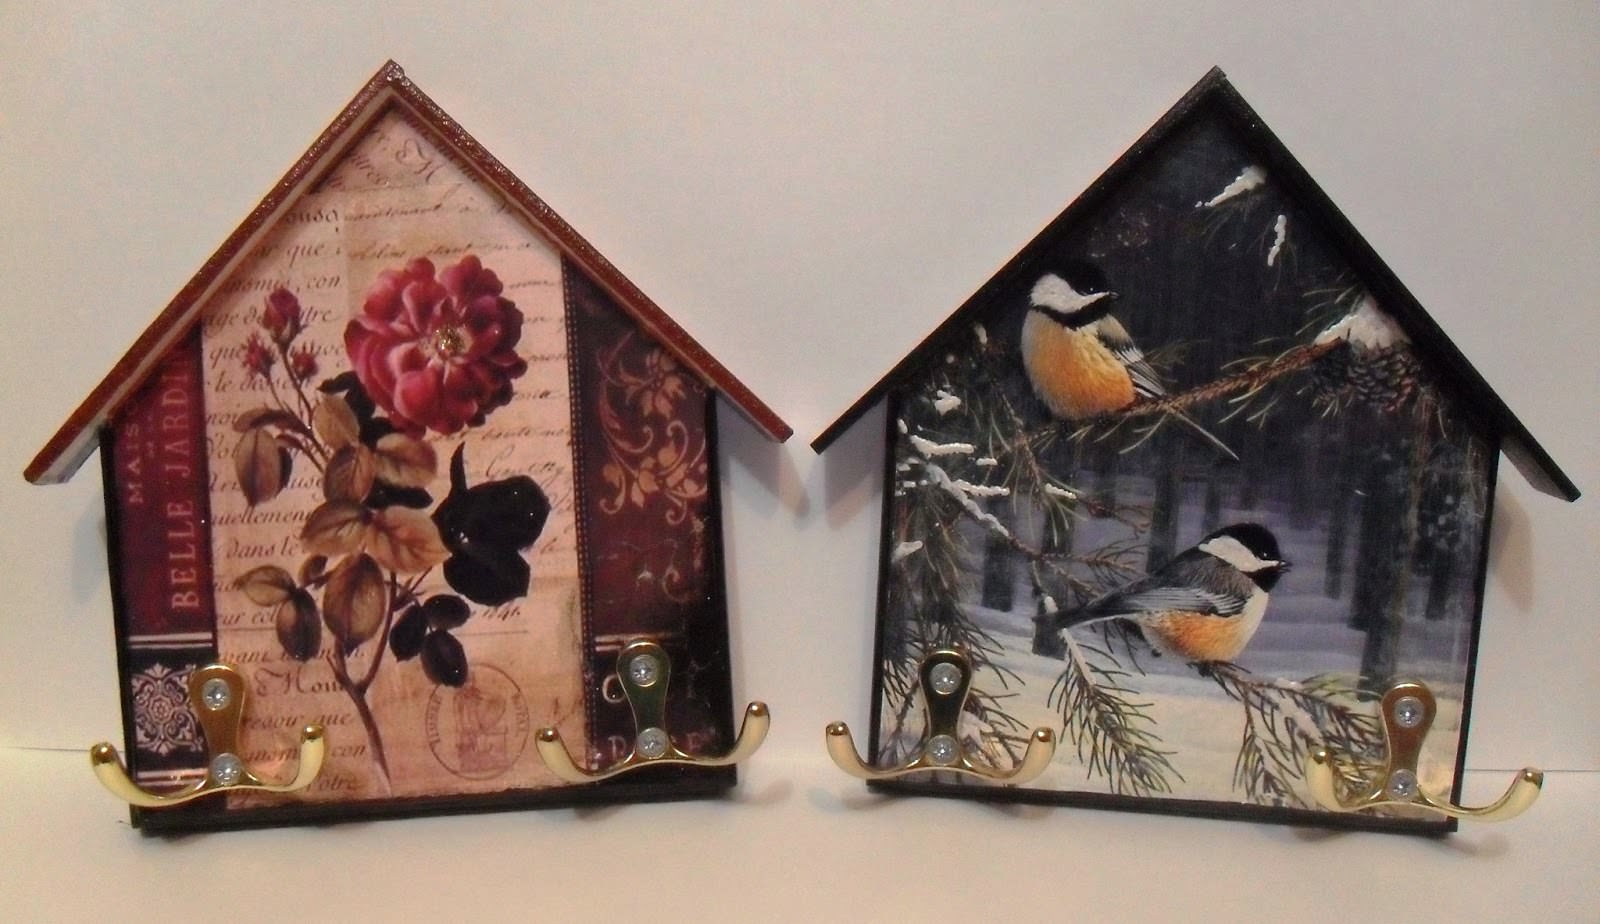
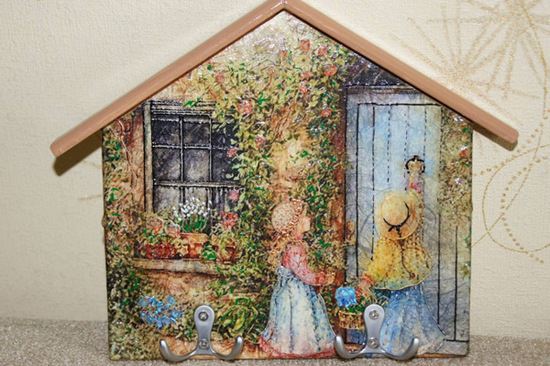


Housekeeper in a house
This master class (microns), will demonstrate how to make the housekeeper, like a house, and is decorated in decoupage technique. To do this, you need this hardware:
- wooden blanks, similar to a house and metal hooks;
- acrylic lacquer;
- lacquer with 3D effect;
- acrylic paint, suitable colors;
- PVA glue;
- decoupage card;
- craquelure.
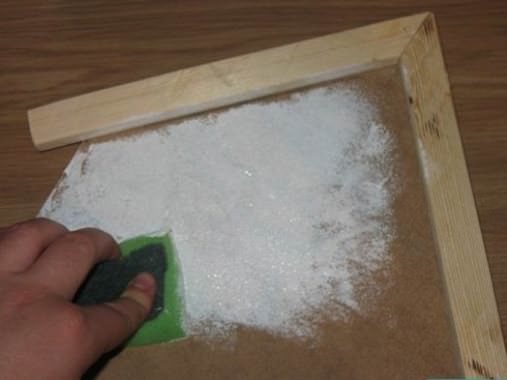
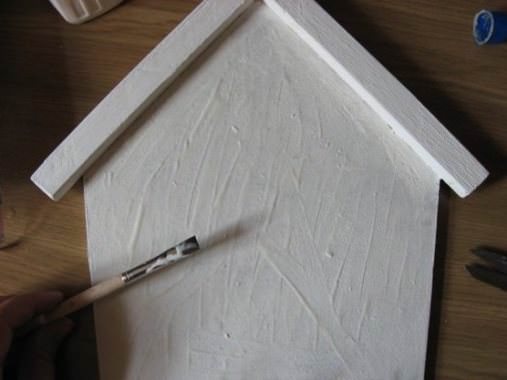
Prepare your hands, blank house forhousekeeper, namely, wash them, and degreased with alcohol and leave to dry. Then, coloring components, these acrylic paint. When the first coat dries, bear the following paint layer. Paint over all but the hooks are easily wiped with a solvent.
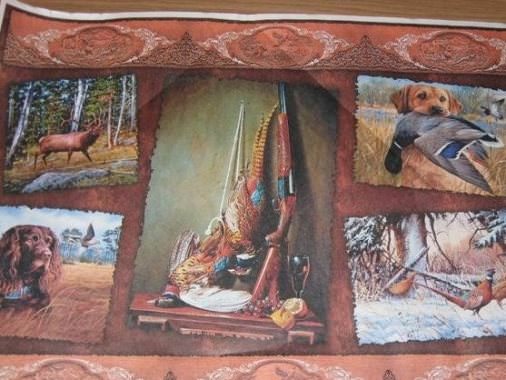
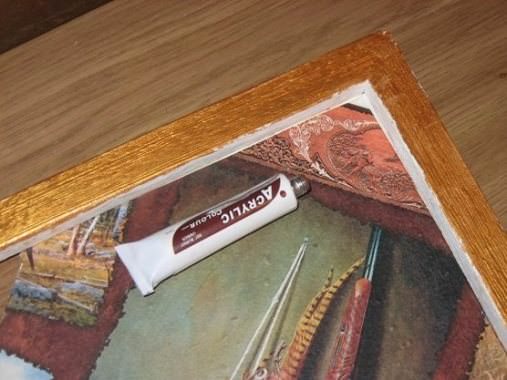
In order to make decoupage housekeeper house, choose
On a hunting theme. In any case, we advise you to choose the pictures that fit the interior of your home. For beginners, we recommend, use cards, but if you're an experienced master in this business, then use towels with you liked the image.
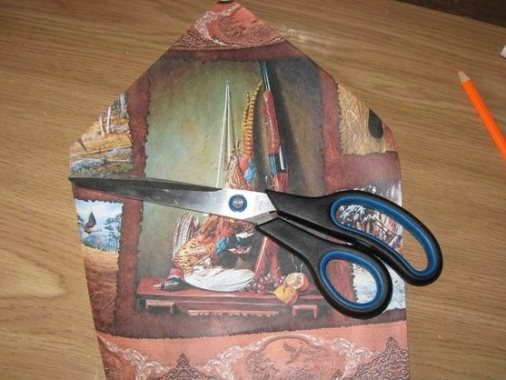
Attach a picture to the housekeeper, and move circuits. Using a pencil and a ruler, draw around them in order to stay on course.
Cut the workpiece along the planned lines and make it a fitting on the housekeeper.

Prepare a container of warm some water and immerse the selected pattern to soak it.
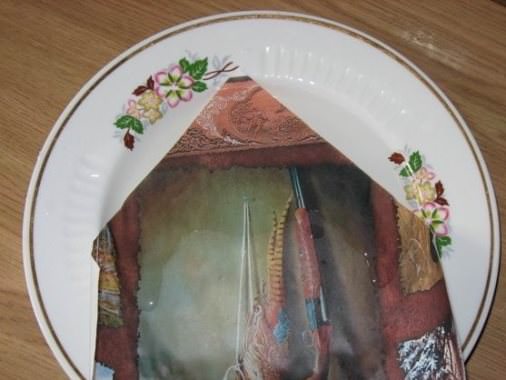
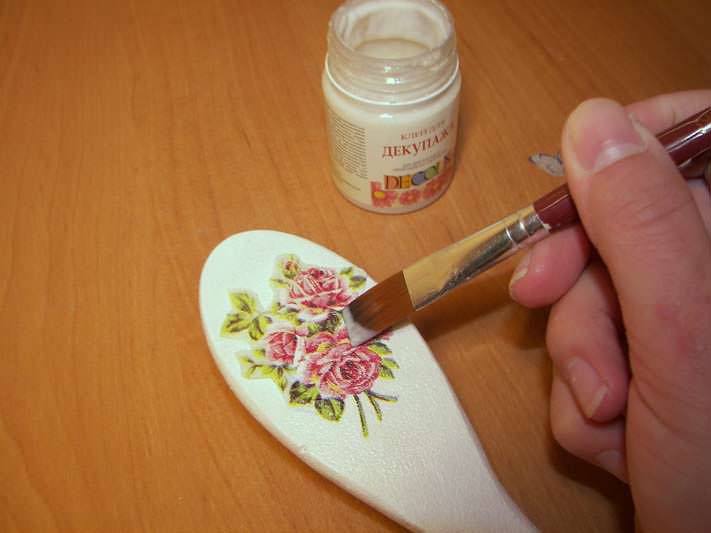
At that time, when your card, soak in water, promazhte PVA glue the entire surface of the housekeeper, as in the photo.
Place the card on the plane decoupage, gluing it evenly.

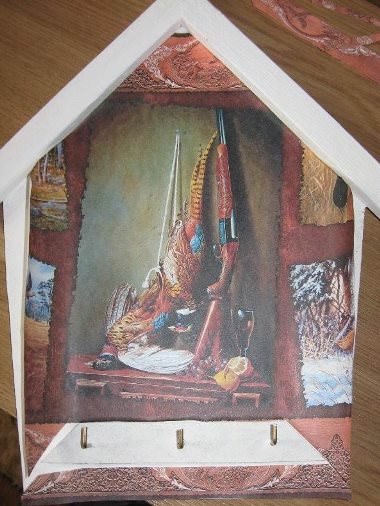
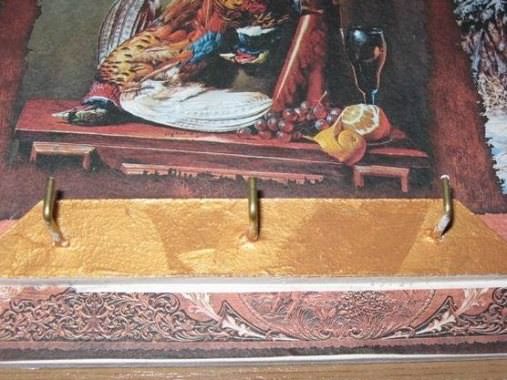
In our picture, best suited acrylic gouache, golden hue. She crafts and cover the roof bar, which will be placed metal clips holding the Keys.
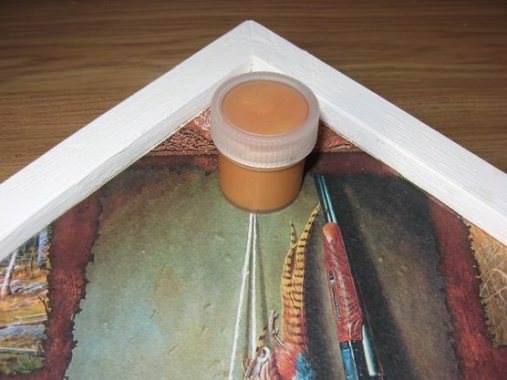
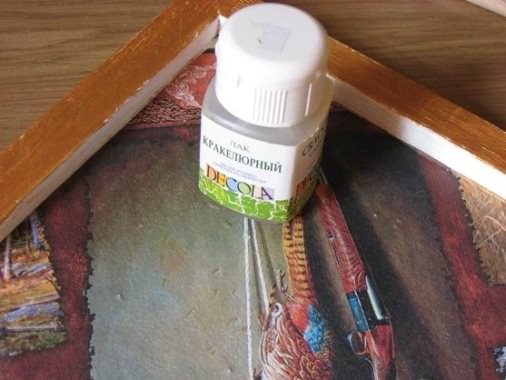
Two hours later, after the paint has dried, coat the surface of the base object, a dense layer of craquelure. Most importantly, this is done uniformly and in one direction.
After a while, when the previous material has dried, apply paint, contrasting to the first tier.

The next stage, which is a master class (microns), is the application of acrylic lacquer, one layer to dry completely. And then, one more time to paint.

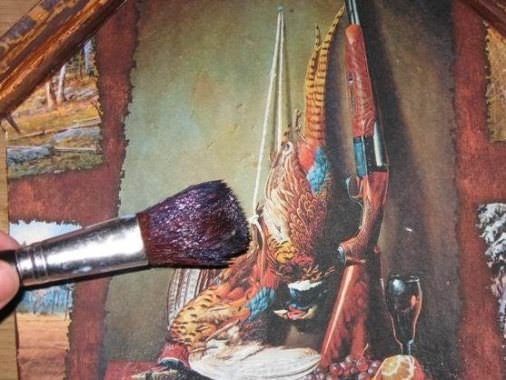

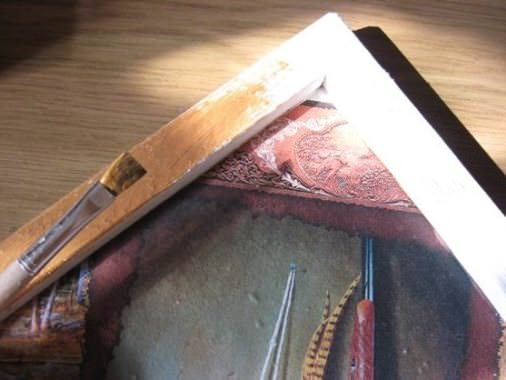
Now, a very interesting point. Begin to apply dark shade paint, and watch as large cracks are formed. Allow time housekeeper, a good dry, but in the meantime, apply golden paint on some elements of the picture, for more of their allocation. Look at the photos, it looks like.
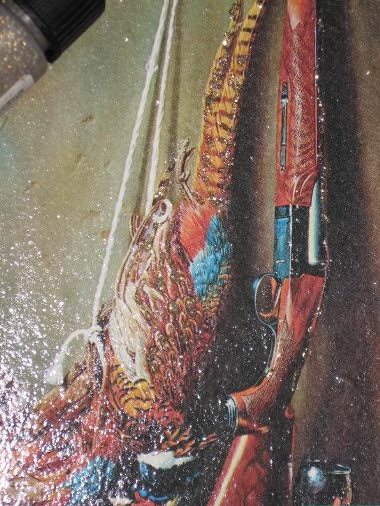
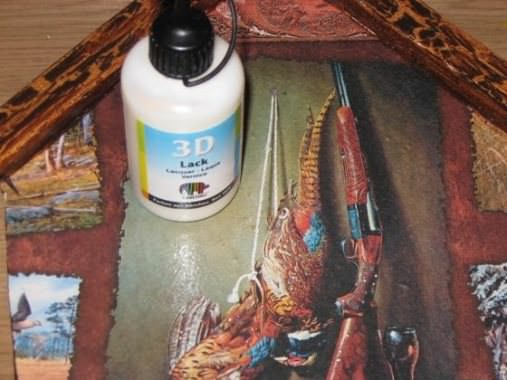
This Master Class (MC) is ongoing andwork begins with a 3D lacquer. In this figure, there is a picture of some fruit, cover them with lacquer surround, as well as gun and cup. Finally, cover the same paint, get cracking on the edges.

This wonderful and interesting master class, finished look, a housekeeper turned decoupage.


Video: Decor housekeeper
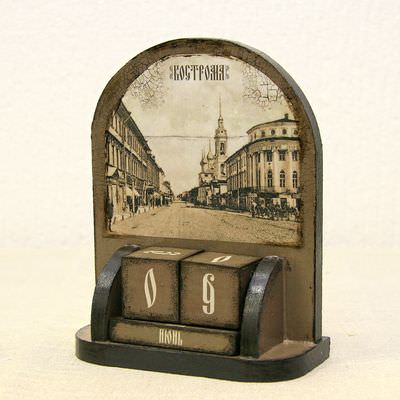
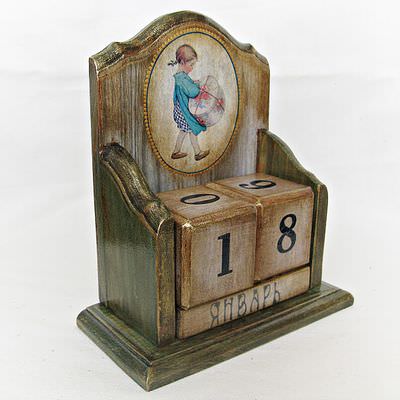
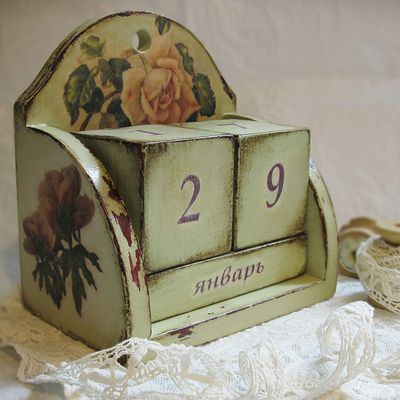
How to decorate a perpetual calendar
This unusual thing made in the technique of decoupage,It will become a non-trivial part of the interior of any room. How to create it, you can learn by repeating this master class (microns). Completing materials can make any man, and if that is not possible, then purchase goods online store or where goods are sold for needlework and creativity.

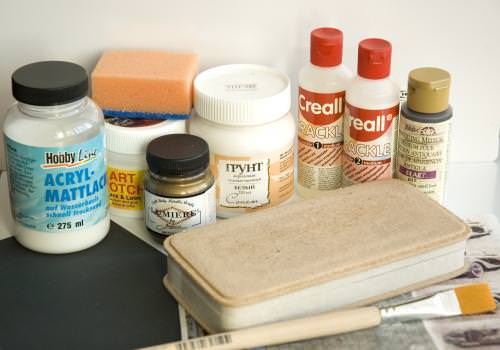
For, in order to conduct presented a master class, need such accessories:
- wooden accessories;
- paper with small figures;
- acrylic paint and a lacquer;
- brush;
- decoupage glue;
- sandpaper.
This perpetual calendar will have a strict form, if there is a great desire to turn it into the edge of the shaped products.

First, cover the black paint the whole eternalthe calendar. Advantages of acrylic is that the preform before, does not need a primer finish. The design should be dry and then clean up her face, sandpaper.

Cut a square of paper figures, of which the scale is slightly smaller than the faces of cubes.
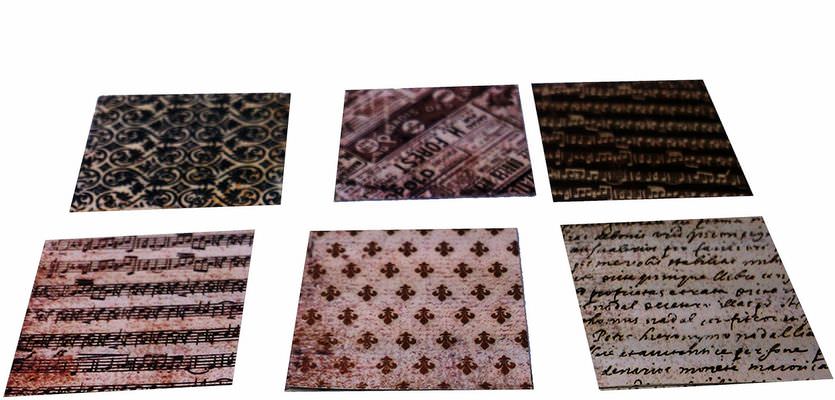
Cubes glued over patterns, but with different sides, the images differ from each other.
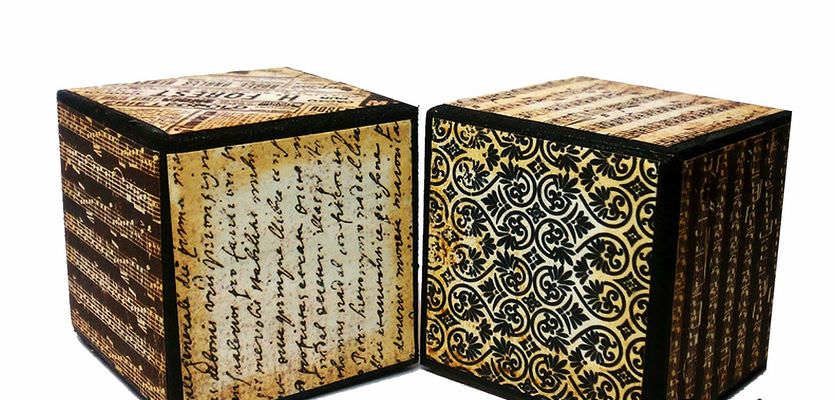
The number and name of the month is done with paint and a stencil or print them on photo paper. Cuba will be represented by the date, and the bottom bar will be visible month.

Obkleyte special paper frontal, rear andside edges. Attach on the frontal side of a small clothespin, in order to be able to change the image of the pictures. If your household, festive date, you will be able to put his photo as a reminder.
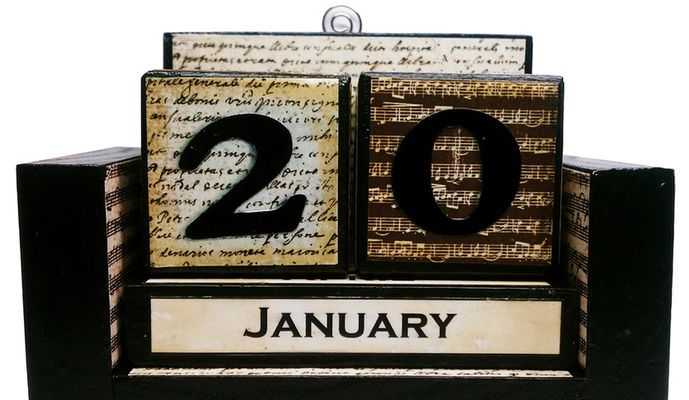
Having mastered the perpetual calendar, you will be able in the future to create analogues in different styles, such as perpetual calendar in a retro style, it looks very interesting and touching.
Look at the photo, a few examples.

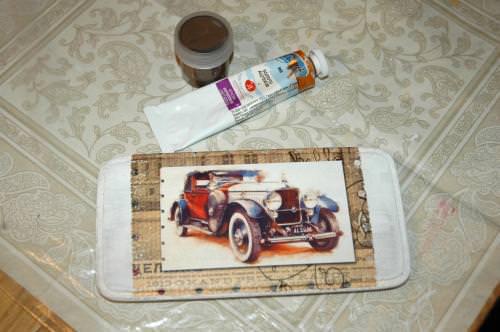
Converted kupyurnitsa
If you want to surprise a man unusual gift, then make his own decoupage kupyurnitsy. It will be a great gift, and most importantly very necessary that much important.
So, in order to repeat this workshop, we need some materials that are sold in every specialty store:
- kupyurnitsa without pattern;
- sandpaper;
- decoupage card;
- primer;
- Antique medium;
- acrylic paints;
- decoupage glue;
- acrylic lacquer;
- craquelure;
- brush and sponge.
Getting the first stage of the master class, namely the priming kupyurnitsy entire surface, and after it has dried, the skins of her.
Cut out the required pattern to its scale corresponds to the size of the cover. Soak card in warm water, and then, remove the extra layers of paper.

Glue the wrong side of the picture and attach it to the cover kupyurnitsy.
Using the acrylic shades, the color of bronze and gold paint kupyurnitsu using a simple washcloth.

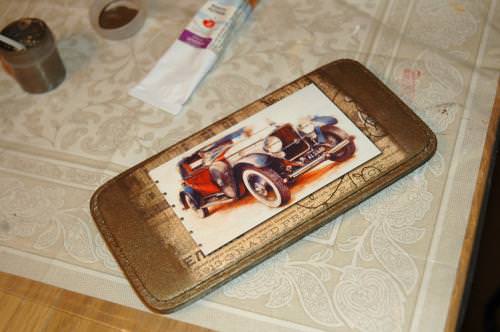
How could you make such an accessory, veryto easily make their own hands. It does not take much of your time, and the result will be pleased with the person who will own such a thing.
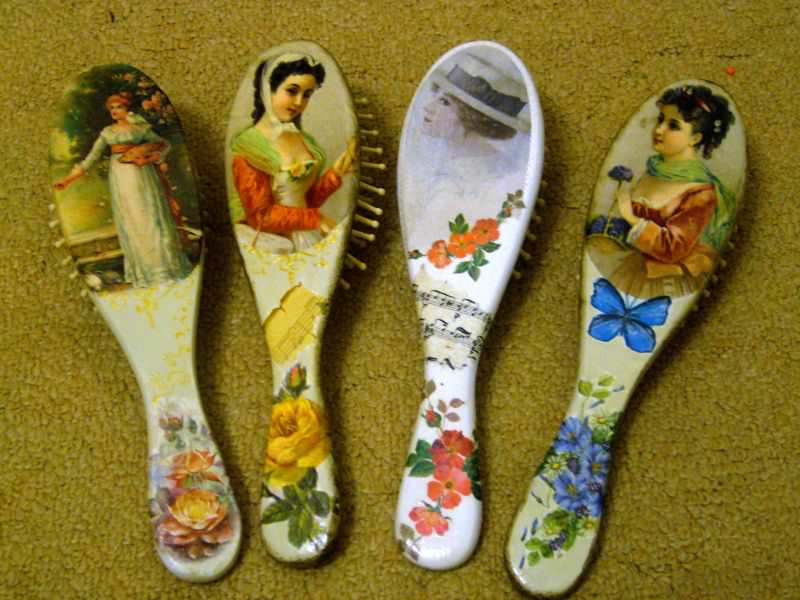
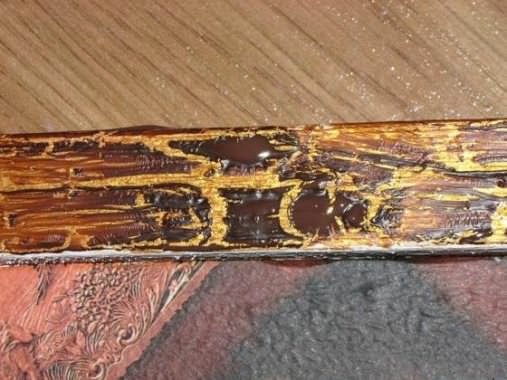
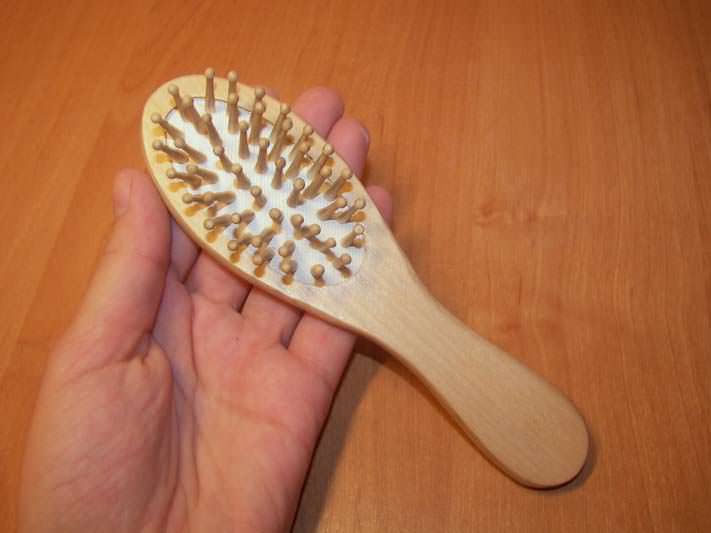
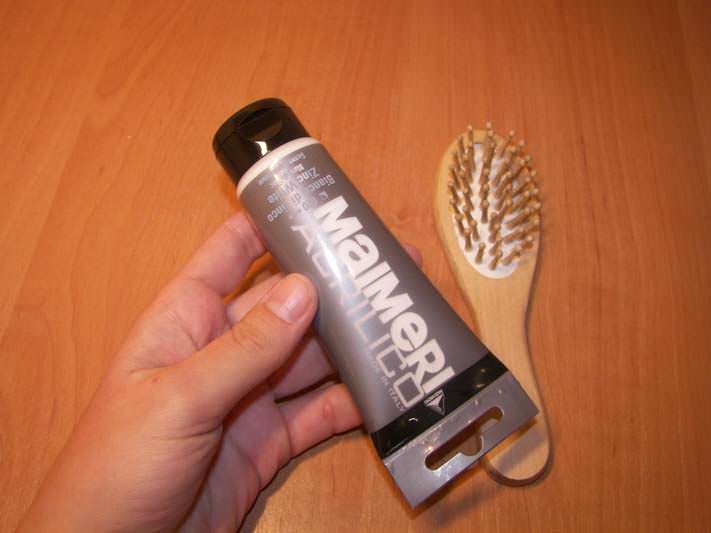
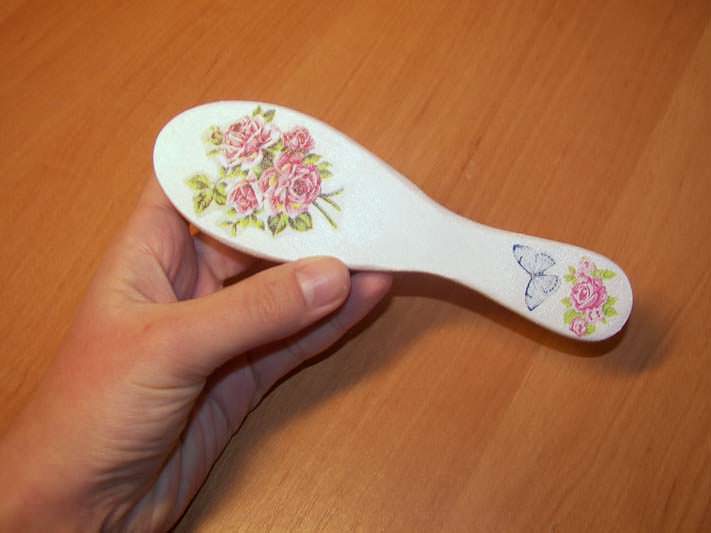
Decorate a wooden comb
Before you buy a comb, we long itchoose. We want it to be of good quality, and that much important, beautiful, with some pattern or design. But often, combs of the same type and monochrome. In this article, you will learn how to make your own hands, exclusive comb with unique ornaments, and even in decoupage technique. Decoupage combs, takes you a little time, but the expected result will impress you undoubtedly.
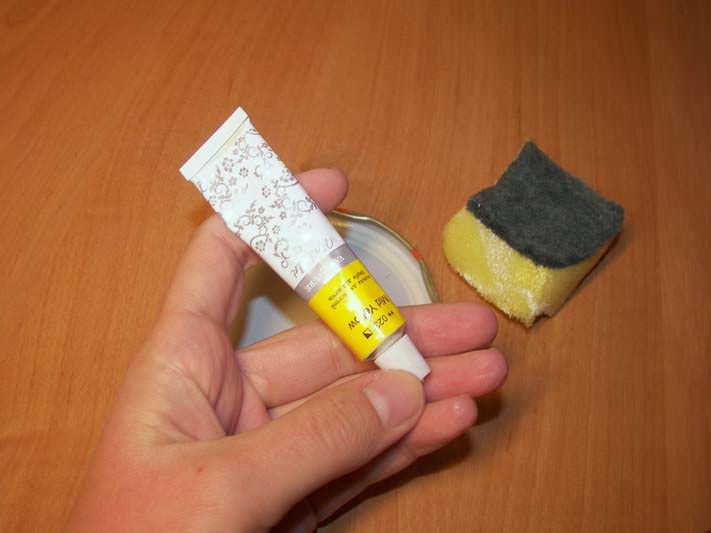
We need such materials, which are, in almost every home, and if not, they can be purchased anywhere. We need such a list:
- wooden comb;
- acrylic paint in white;
- cloth with the selected ornament;
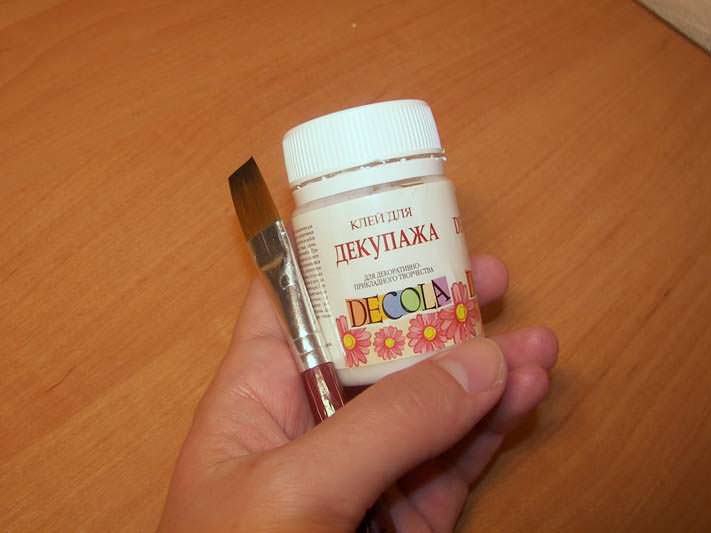
- decoupage glue;
- yellow acrylic gouache;
- acrylic lacquer.
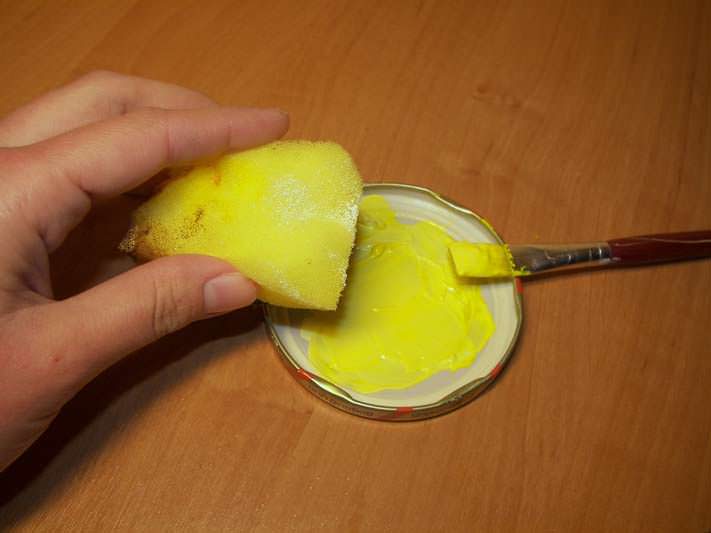
First of all, a wooden comb will be covered by a white base, which is applied to the entire surface, except for the part where the teeth for combing.
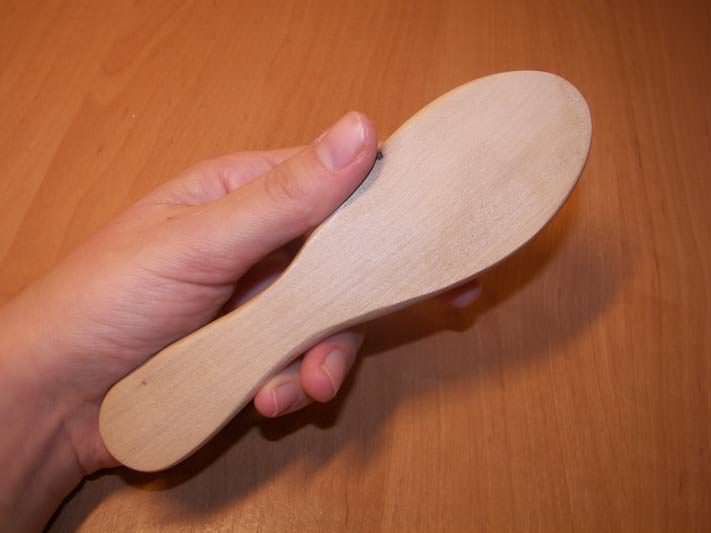
The paint should not be thicker consistency, thenit will easily fall on the surface of our object. Apply it will, with the help of ordinary sponges, which washes the dishes. Pour some of the liquid into a small container, it mockney sponge and lightly, put on the object plane.
It is desirable to apply the solution several times, giving, after each layer to dry. Each tier drying for 4 hours.

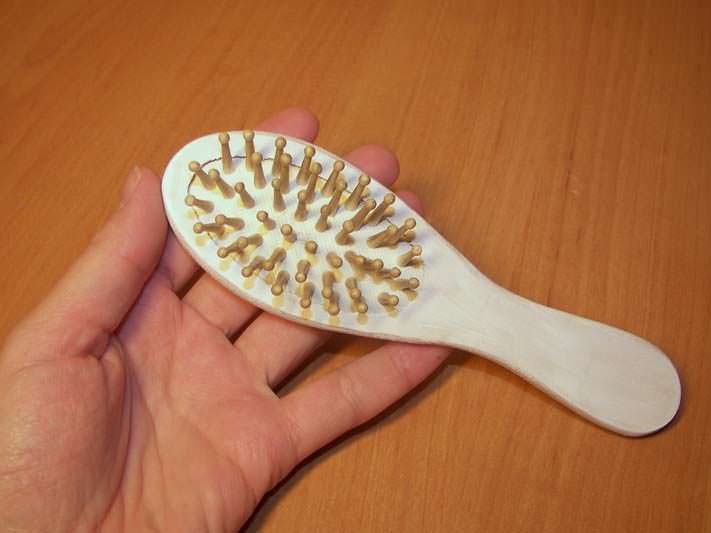
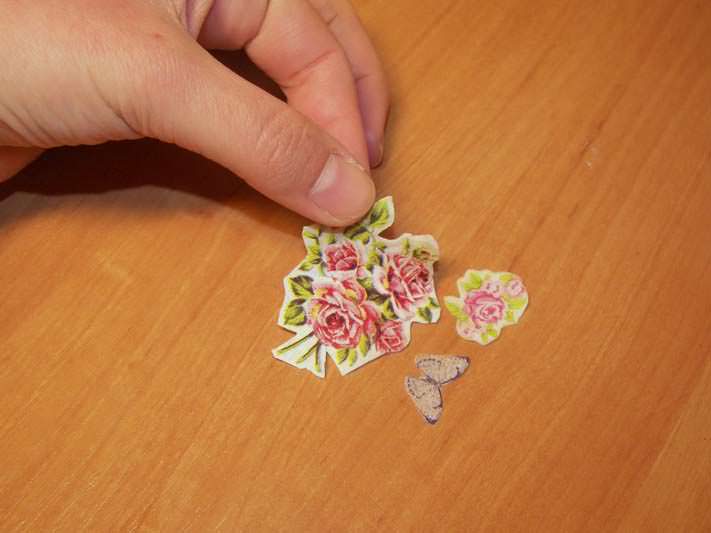
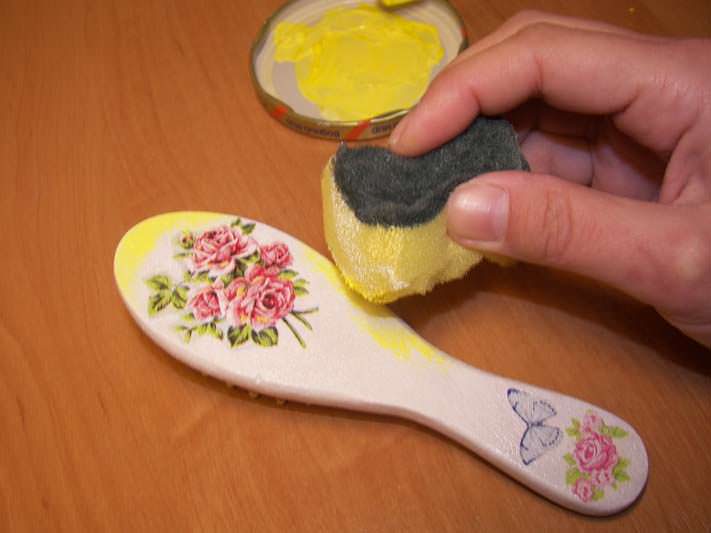
Now, we move on to the crest of the decor. Workshop recommends choosing cloth with the image of a flower bouquet.
Using scissors, cut out those patterns, with which you have decided. Separate extra layers of paper, and leave only the color print to be used.
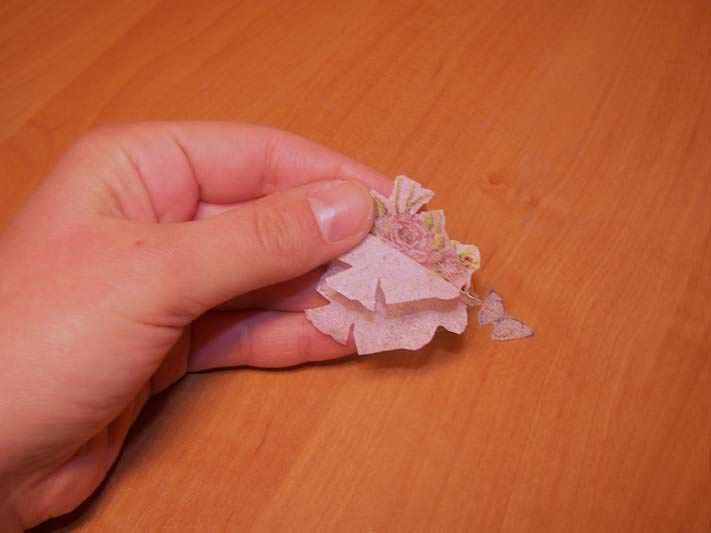
Matched clippings Fasten the comb, using Decoupage glue. Place the workpiece on the outer part of a comb and a brush, apply glue. Dries hack should, for 6 hours.
When such a thing is completely dry, circular pattern, applied yellow acrylic gouache. She dilute pale appearance, this accessory and make it brighter. Once left to dry for four hours.
After all done manipulation, coverdecoupage lacquer comb. Apply it with a brush, the general shape and protects the surface from unwanted and unforeseen scratches and gives a beautiful shine. Now, the work is completed and the product remains dry during 8 hours.
Make a decoupage of various small items,everyone can own hands. Even the people who have never done it. Importantly, do not forget algorithm technology cards for decoupage or napkins. We must not forget to fix the varnish every creature, so that it has not lost its appeal over time.
This is a very interesting technique that likeeven children. You can invite them to make decoupage small wooden blocks or decoupage coasters pencil. This is a fun technique that permanently take them. On the Internet, there are many lessons for beginners that will suit even the younger generation, as well as experienced artists, whose art can already afford to do more complicated things decoupage and large scale. Use of the master-classes and pick up for themselves something interesting and that you easily, do your own hands. As you already know, decoupage technique is versatile and there are many ways to decorate its surrounding things. This hobby can be profitable even if to do such a thing seriously, having studied all the methods of decoration. Do not wait, start to work right now, especially when on the eve of holidays and you need to make gifts to their relatives and friends. If you try, you can create an exclusive thing that will not remain visible around. This can be useful things in everyday life, in the style of decoupage or just souvenirs for interior decoration.
Video: Decoupage accessories