
DIY book binding scrapbooking – equipment and master class for work
Regardless of what technologydecorating paper surfaces you will have to work on, it is quite likely that in many cases - you will need to make a binding. This is suitable for various albums, for decorating notebooks or - for creating your own books. Bindings can also be used to decorate files and, of course, to create full-fledged objects with a three-dimensional appearance.
DIY book binding scrapbooking – equipment and master class for work
Therefore, the presence of knowledge and skills in technologyscrapbooking for working with binding - a special plus for the master and a unique opportunity to realize their potential, to show their capabilities specifically to process the surface and make it more beautiful, noticeable. Most often, the binding is used to emphasize the external advantages of the book and, of course, simply to decorate the product. Binding is especially important for items where it is necessary to connect a certain number of packs with sheets. Thus, it is possible to realize your idea and recreate a truly interesting and unique item with your own hands. Bookbinding design for a book or album!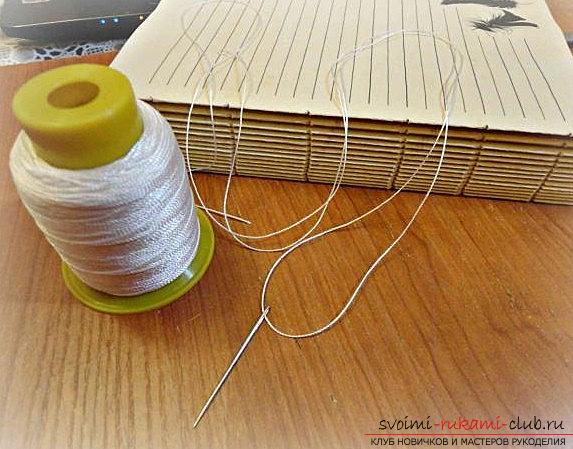 Binding work may requirea wide variety of items. Everything depends on the master's method and, of course, the approach to work. It is for these reasons that you should study our list in order to transform the future spine of a book, notebook or album, as well as organize a high-quality and beautiful version of the future blank with your own hands.
- Be sure to prepare the sheets you will be working with (in our case, these are aged versions of new sheets)
- You will also need a thread from the capron (preferably, more)
- Take also and prepare a needle with an eye
- Also, you need gauze to work
- Should take cad
- Prepare the glue moment
- Also, take clerical clamps for the future press
- A dense version of cardboard will be required
- Prepare the fleece
- Take a stiff tape with a glued main
- You will also need a pencil-glue
- Take the scrapbooking paper
- Prepare the fabric for the cover
This design method will work equally wellfor a variety of techniques. In particular, on the one hand, you will be able to get acquainted with a diverse list of improvements for a book or notebook as a whole. For example, for designing your own cover or improving it. Forming a binding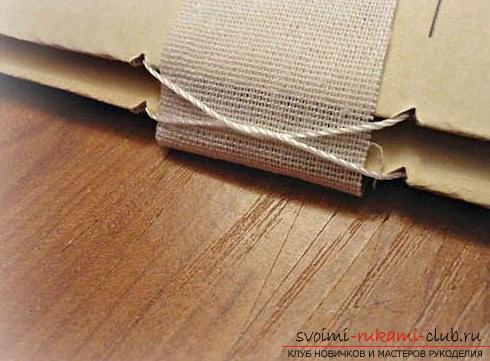 We prepare our stack, then we need to clamp itsheets of paper using two thick cardboards and paper clips. First, we form a layout using cardboard specifically to make holes. Using a file, we cut holes, the depth of which will be approximately 1.5 millimeters. After that, the clips need to be removed. Then, get ready to stitch the sheets together. We must not forget about the pieces of loose fabric, with which our binding will have a strong and reliable base. Thus, we begin the main work.
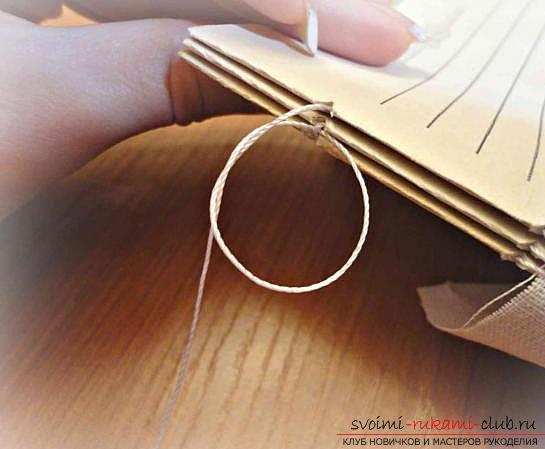 First, you need to flash the firmwarethe first batch of leaves, leaving a tail of thread so that later you can secure the bottom and top of the leaves. Then, we do the same with the second part. In those places where we have fabric, we make a weave from threads. Then, we tighten the threads and tie a bow at the base of the thread.
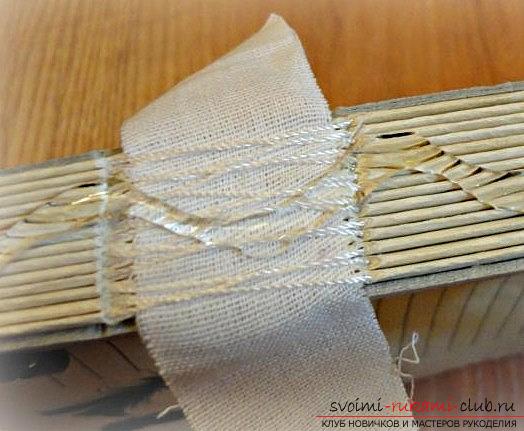 Afterwards, you need to add the third row of leaves,which is also stitched in the same way as the previous two. At the end, a knot is formed, after which it is necessary to thread a thread between the batch of the first and second sheets. After you have stitched all the sheets that you have, you will get the main solution. Next, you need to clamp the blocks again using clamps. After that, glue the spine using an adhesive base. The glue should be smeared along the perimeter of the entire spine, using a piece of cardboard so that the glue is in all the cracks. Next, on the side of the spine, you need to glue pieces of tape that will imitate the headband.
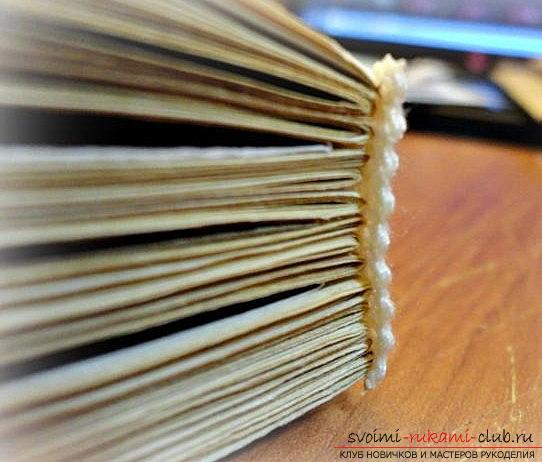 Forming the cover To create the cover,It is necessary to cut out a variant of three parts for the front and back of the cover from cardboard. They should be larger than the dimensions of the book sheets, by 1 centimeter. Also, be sure to measure the thickness of the spine. You can get a soft cover using a part made of fleece. We also form it using the size of a regular cover part, fix it using double-sided tape. The blank is pasted over with fabric. The cover is usually sewn from three pieces. They should be the same color. The fabric will be larger than the blank by 4 centimeters.
Comments
Related posts:
 Scrapbooking books and covers for a wedding book with your own hands - master class
 This master class will teach you how to create your own hand notebook in the scrapbooking technique
 Postcard bears – DIY scrapbooking craft and master class
 DIY Christmas tree bow – DIY bead weaving technique and master class
 DIY scrapbooking Christmas cards – scrapbooking master class