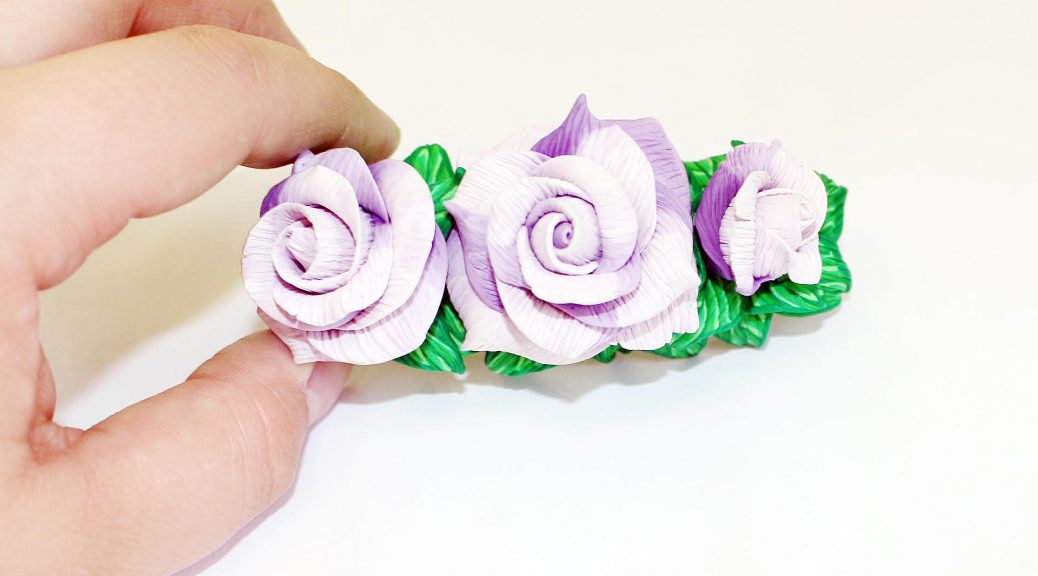
This master class with a photo and description will teach you how to make flowers - roses - from polymer clay in texturing technology.
Used techniques: texturing, creating a keine, creating a gradient (smooth) color transition using a rolling pin, modeling colors. 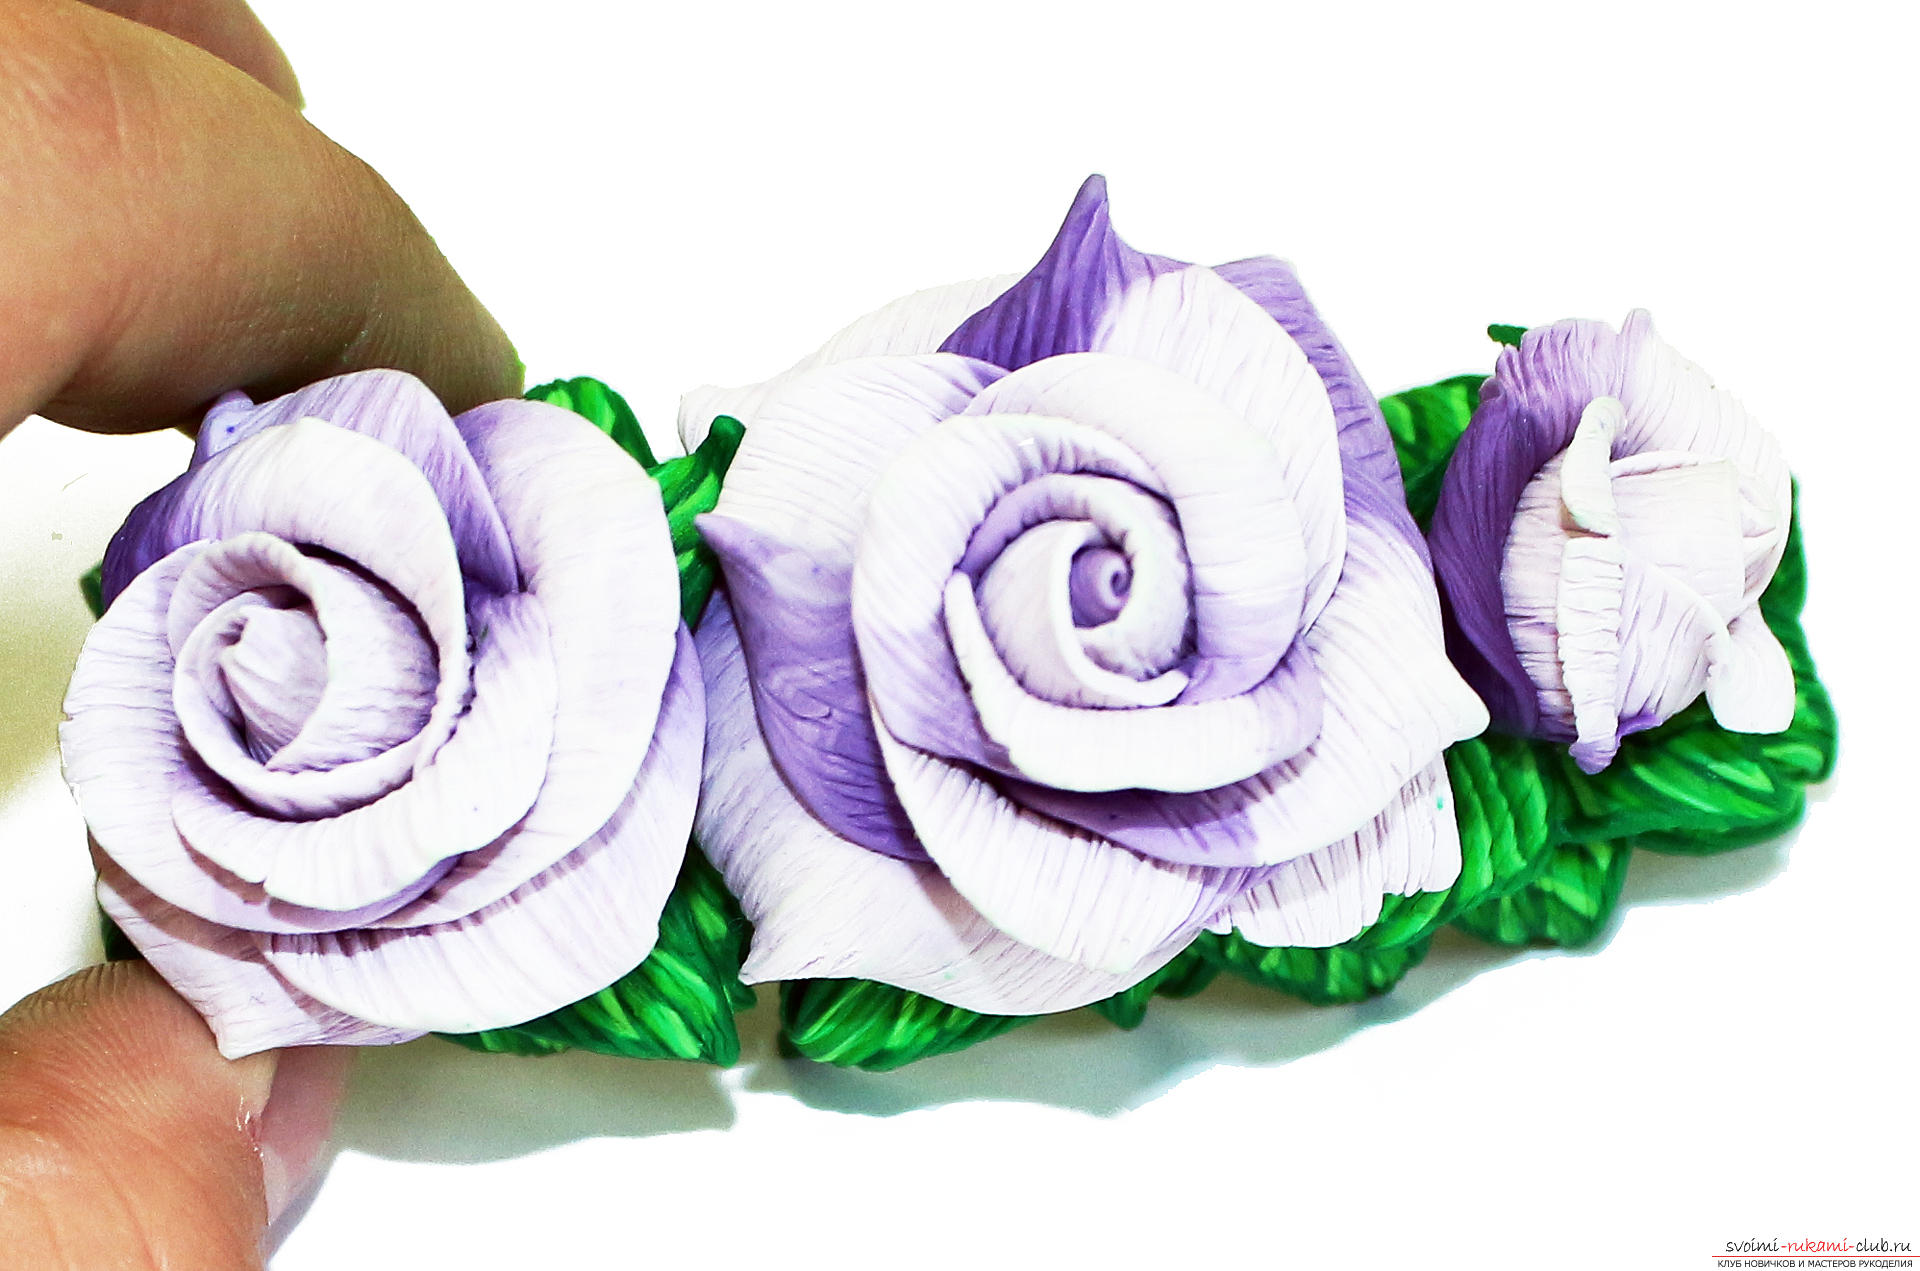 In order to make flowers - roses - frompolymeric clay will require: - Polymer clay white and violet for roses - PG of three shades of green, or dark green, green and white for leaves - Basis for barrette - Liquid plastic (Fimo gel) - Corrugated paper - Small piece of cardboard - Skalka
  From the violet and white colors, form two triangles, connect them as in the picture.
 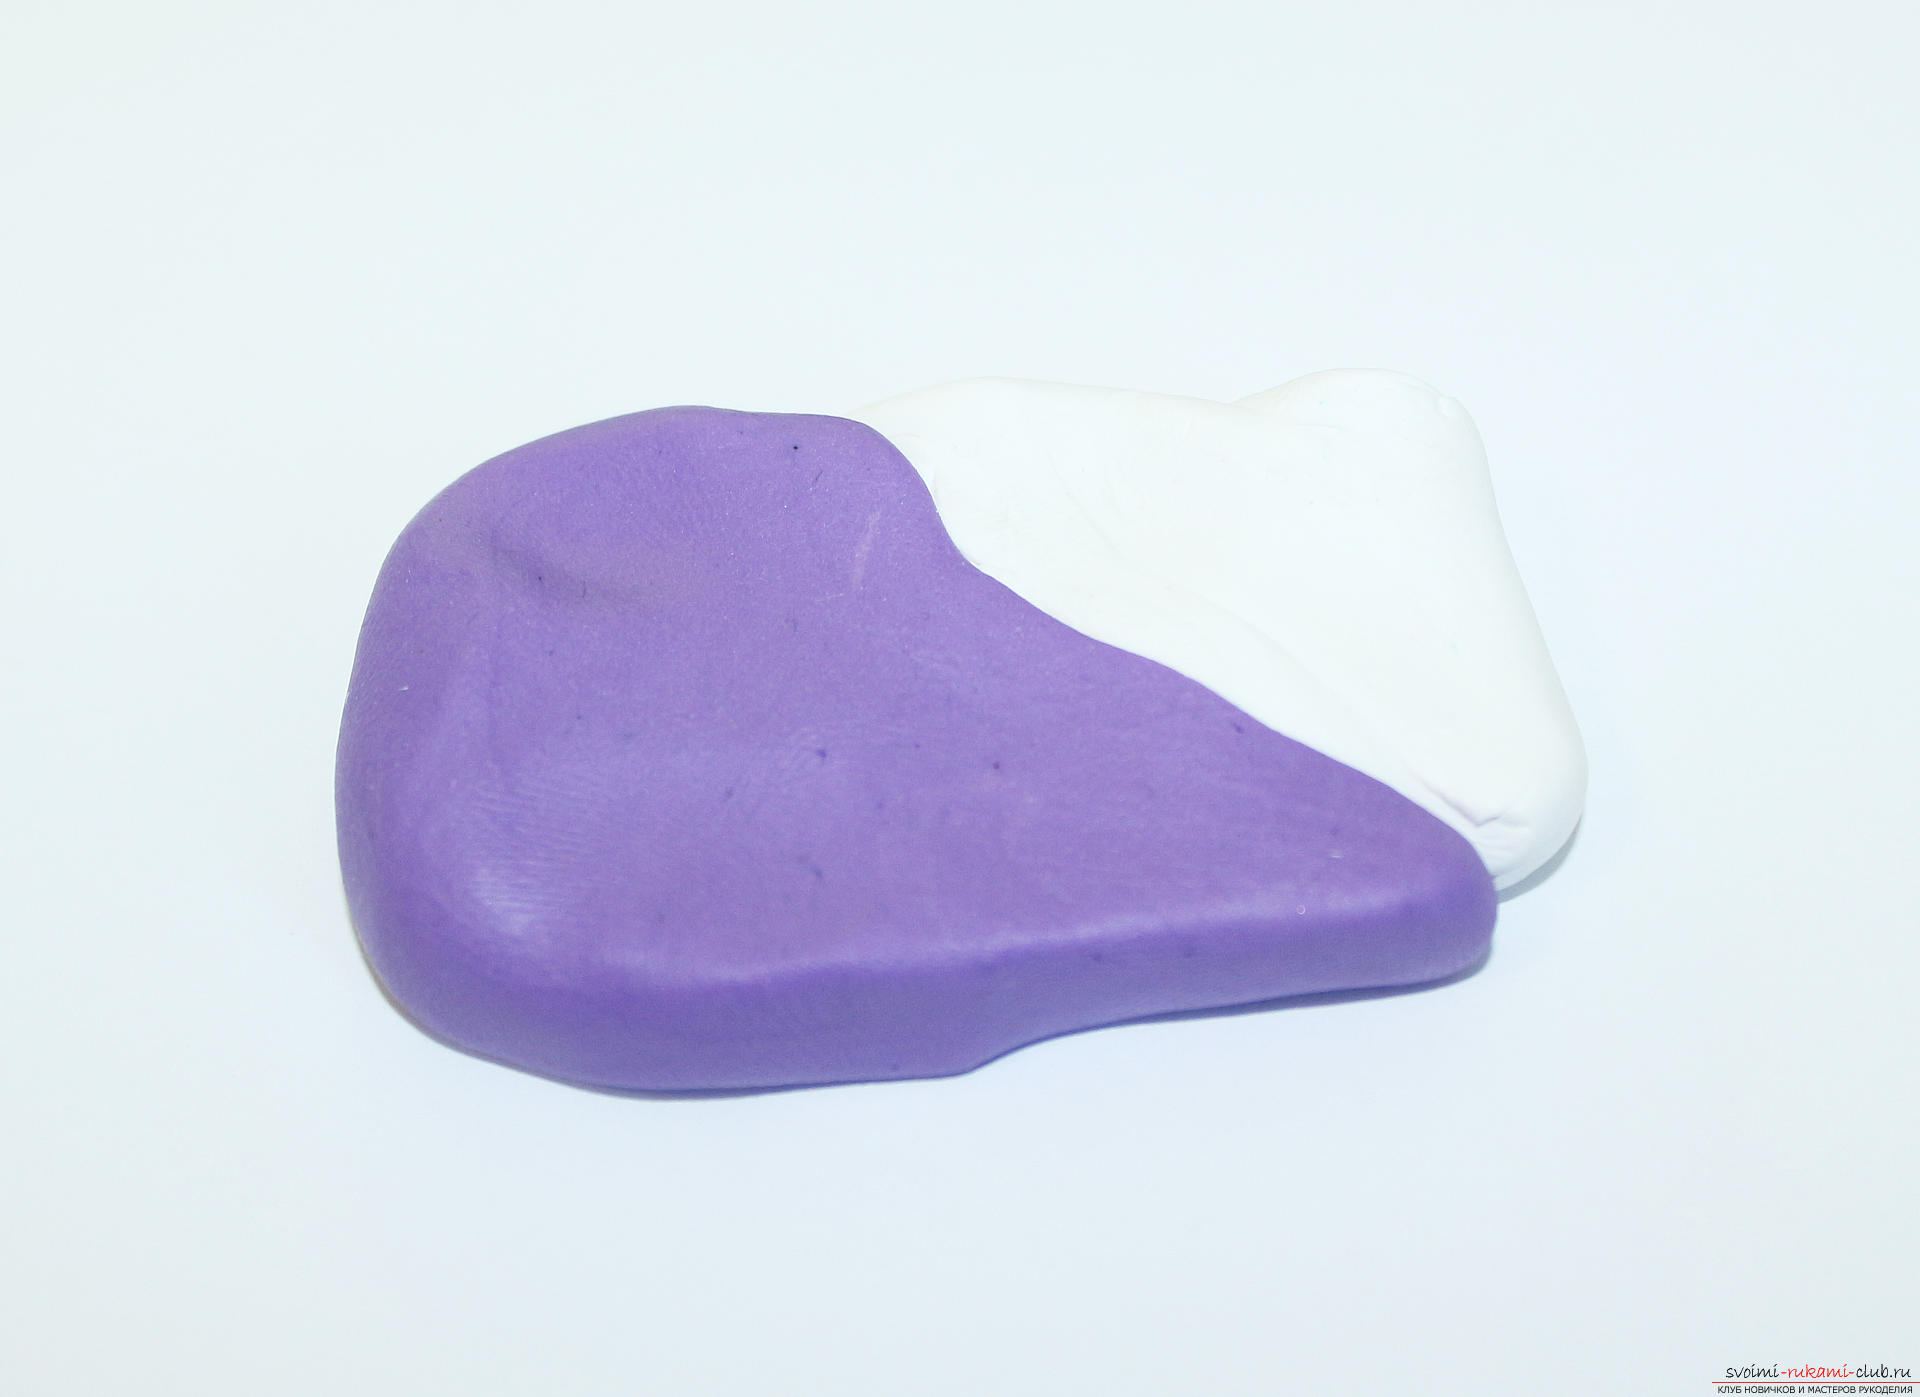 Roll the elements with a rolling pin into a single layer.
 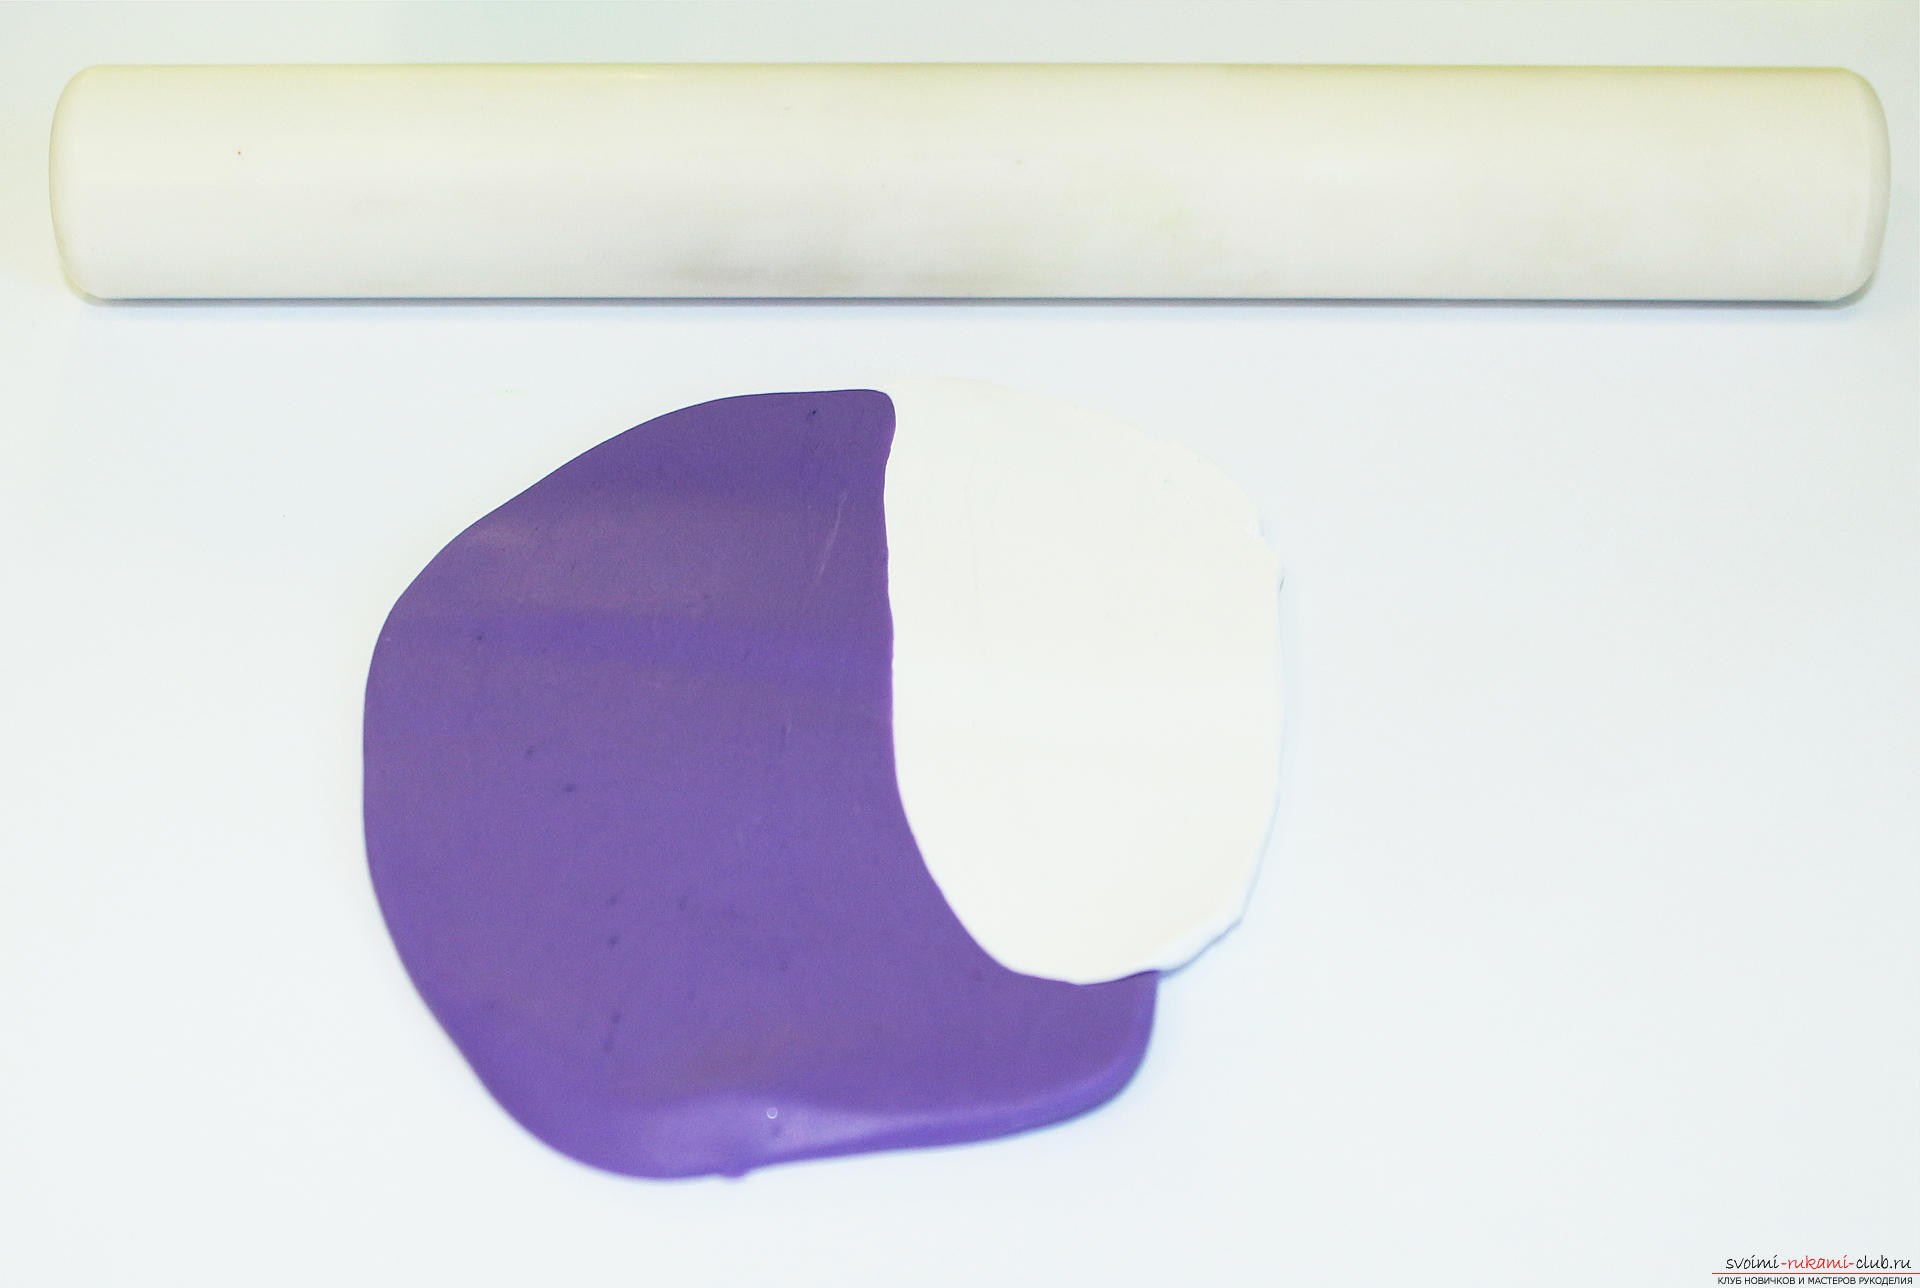 Fold the resulting layer in half. To do this, raise the near edge and bend in the middle in the direction of "from yourself."
 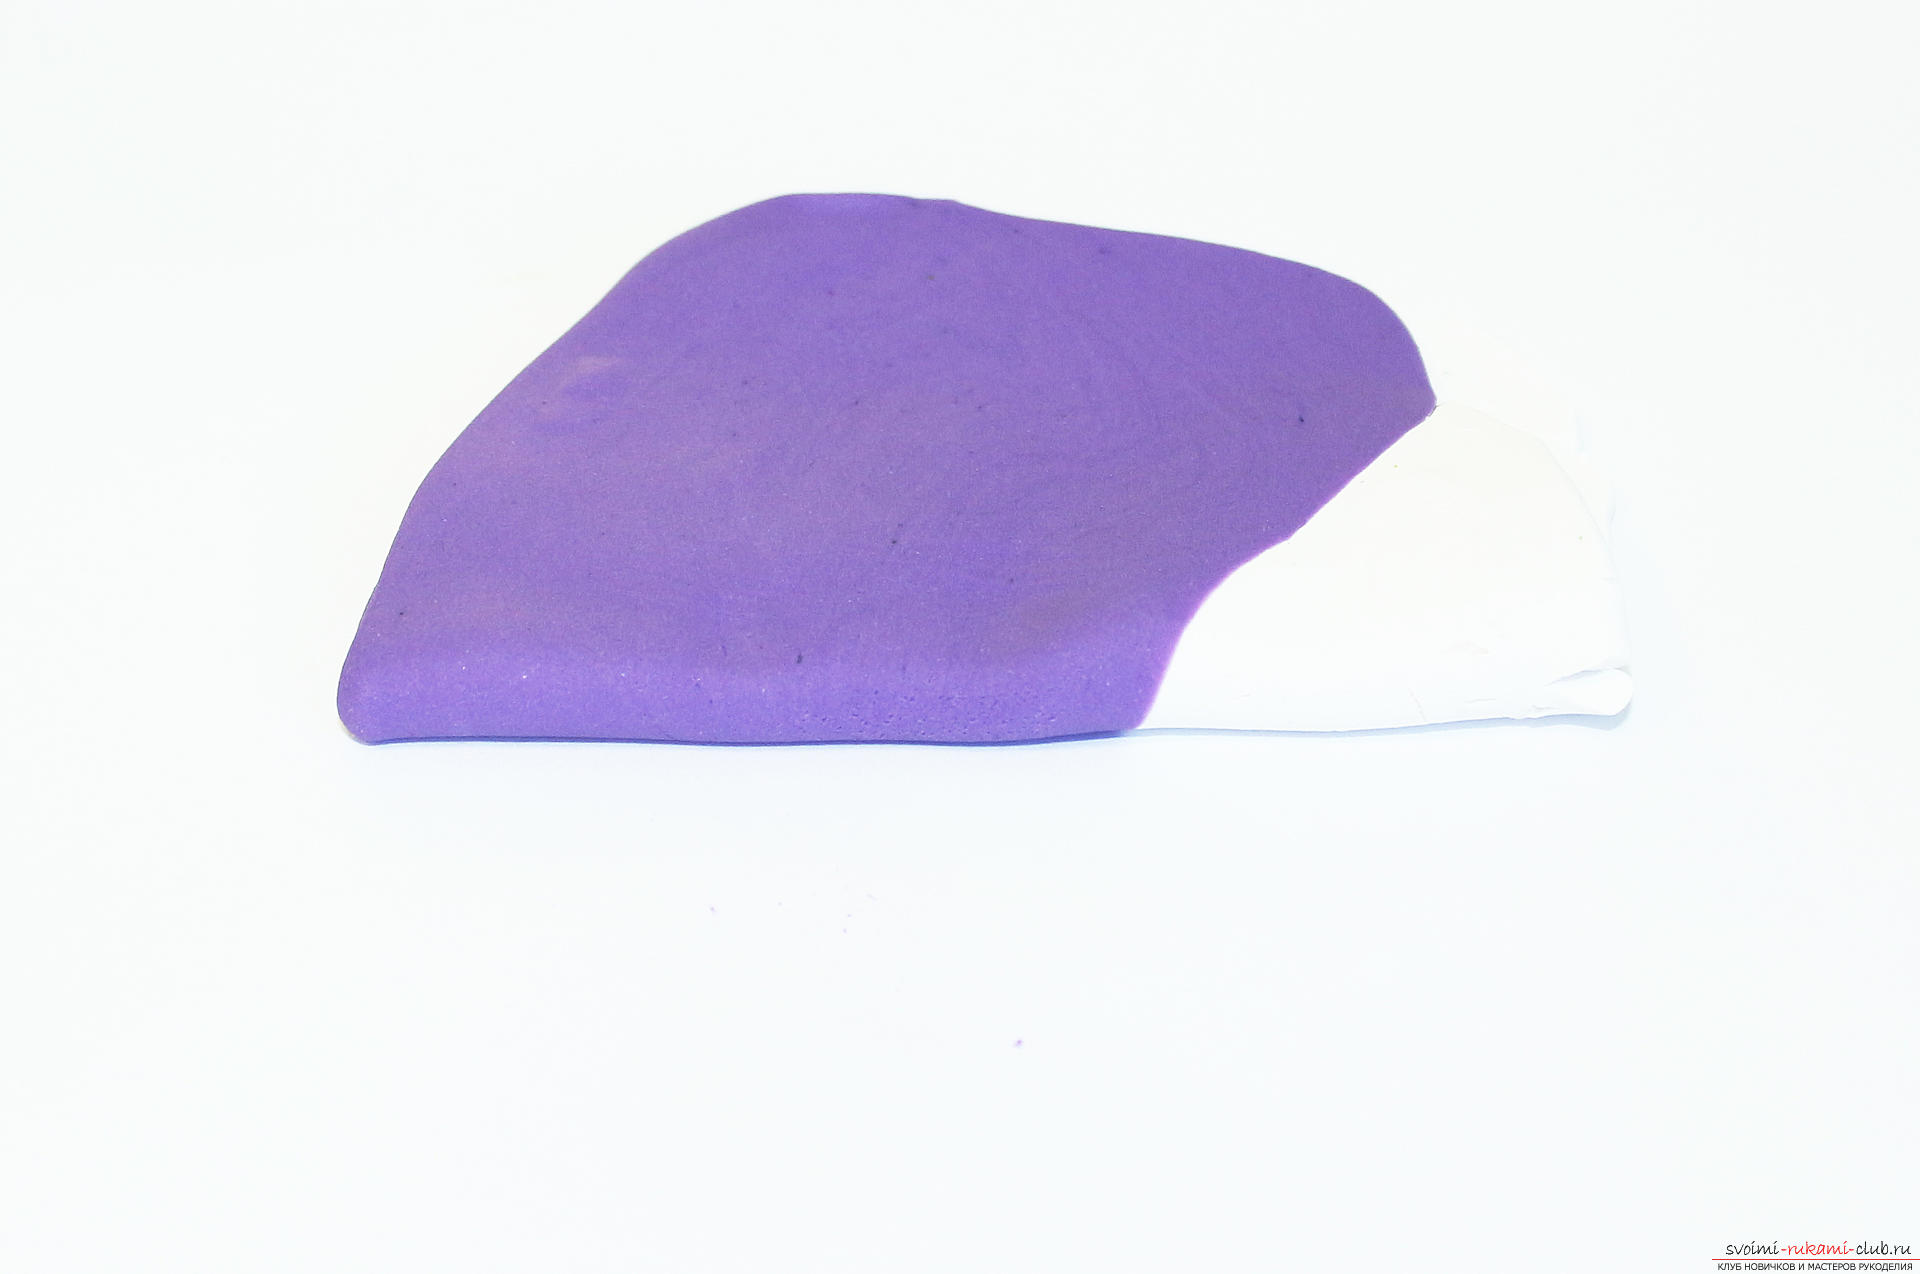 Again roll out the layer.
 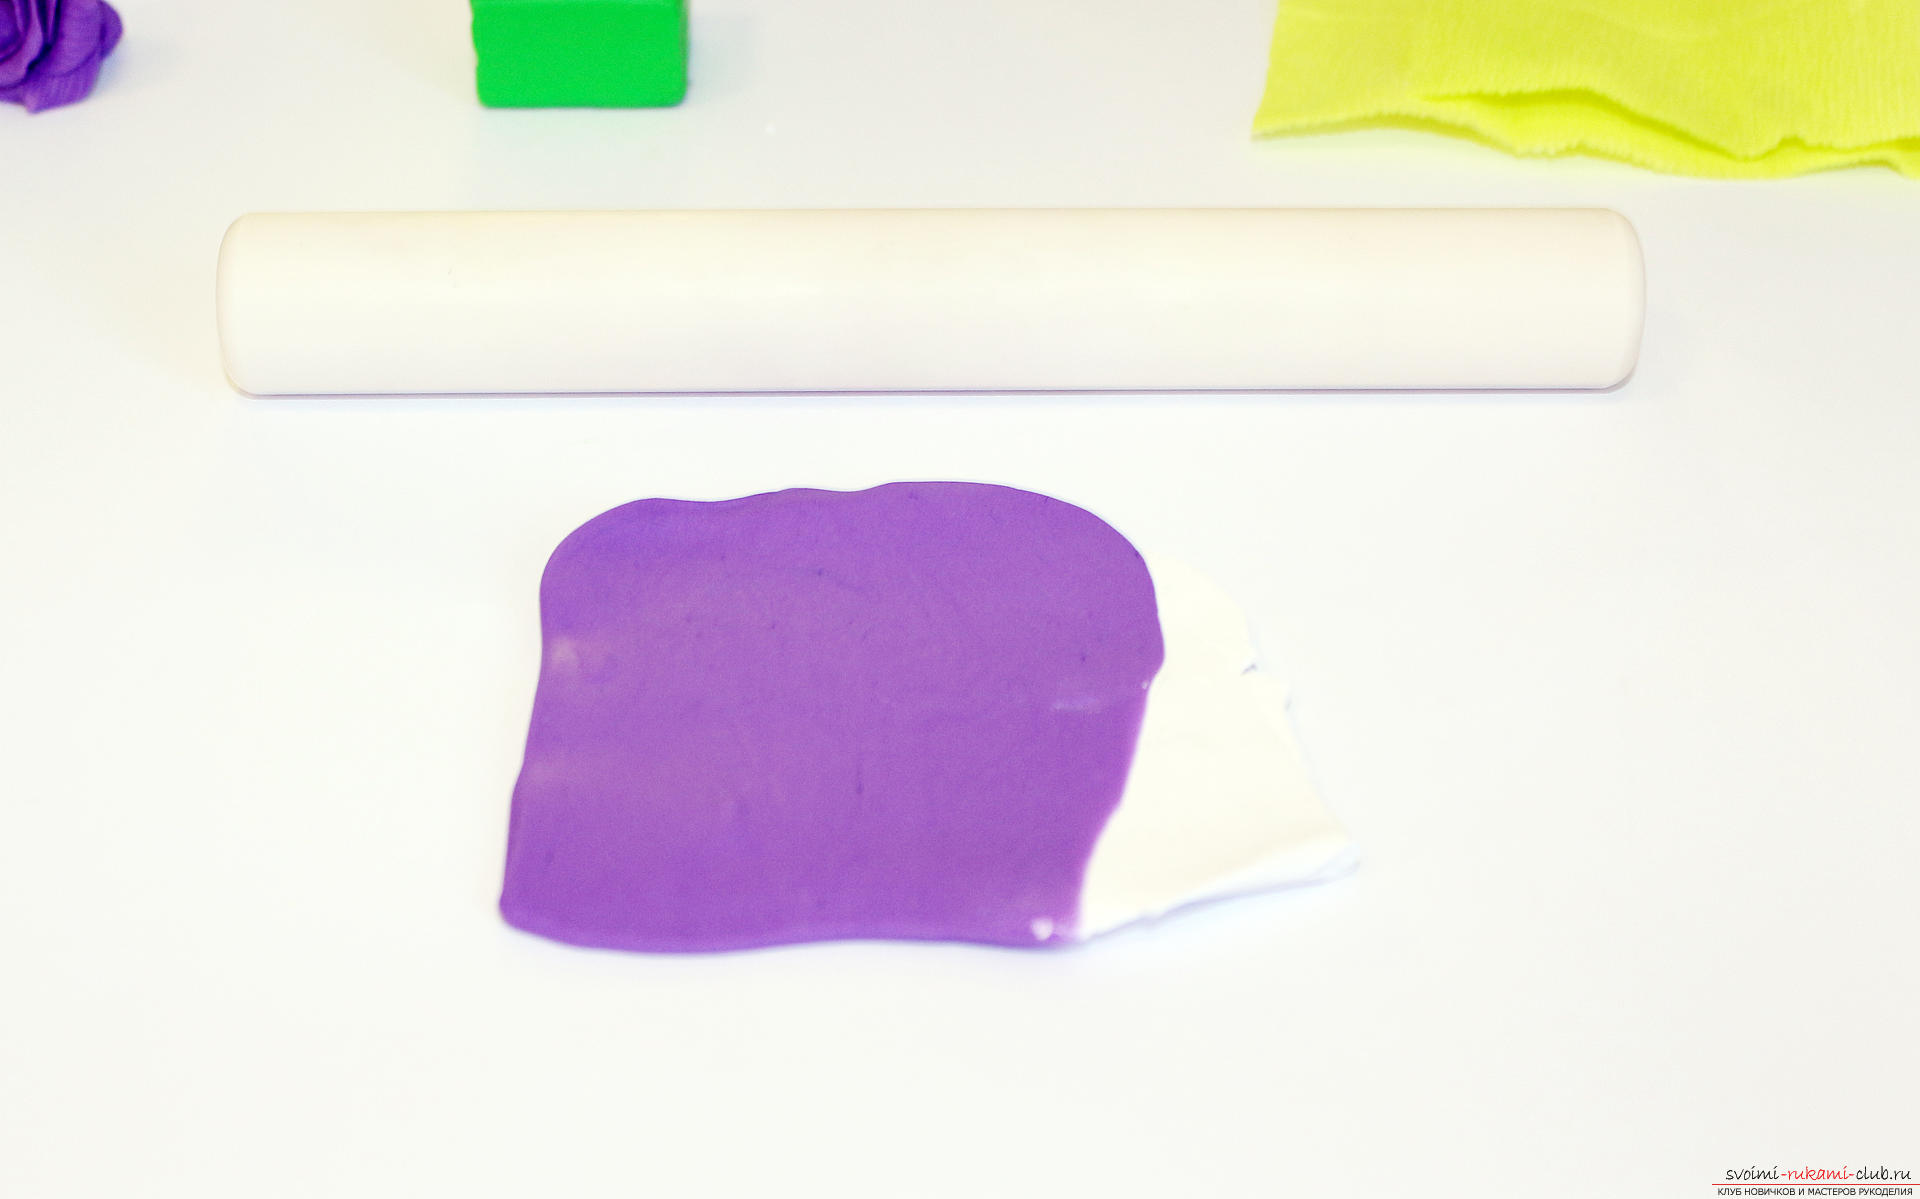 And again bend in half.
 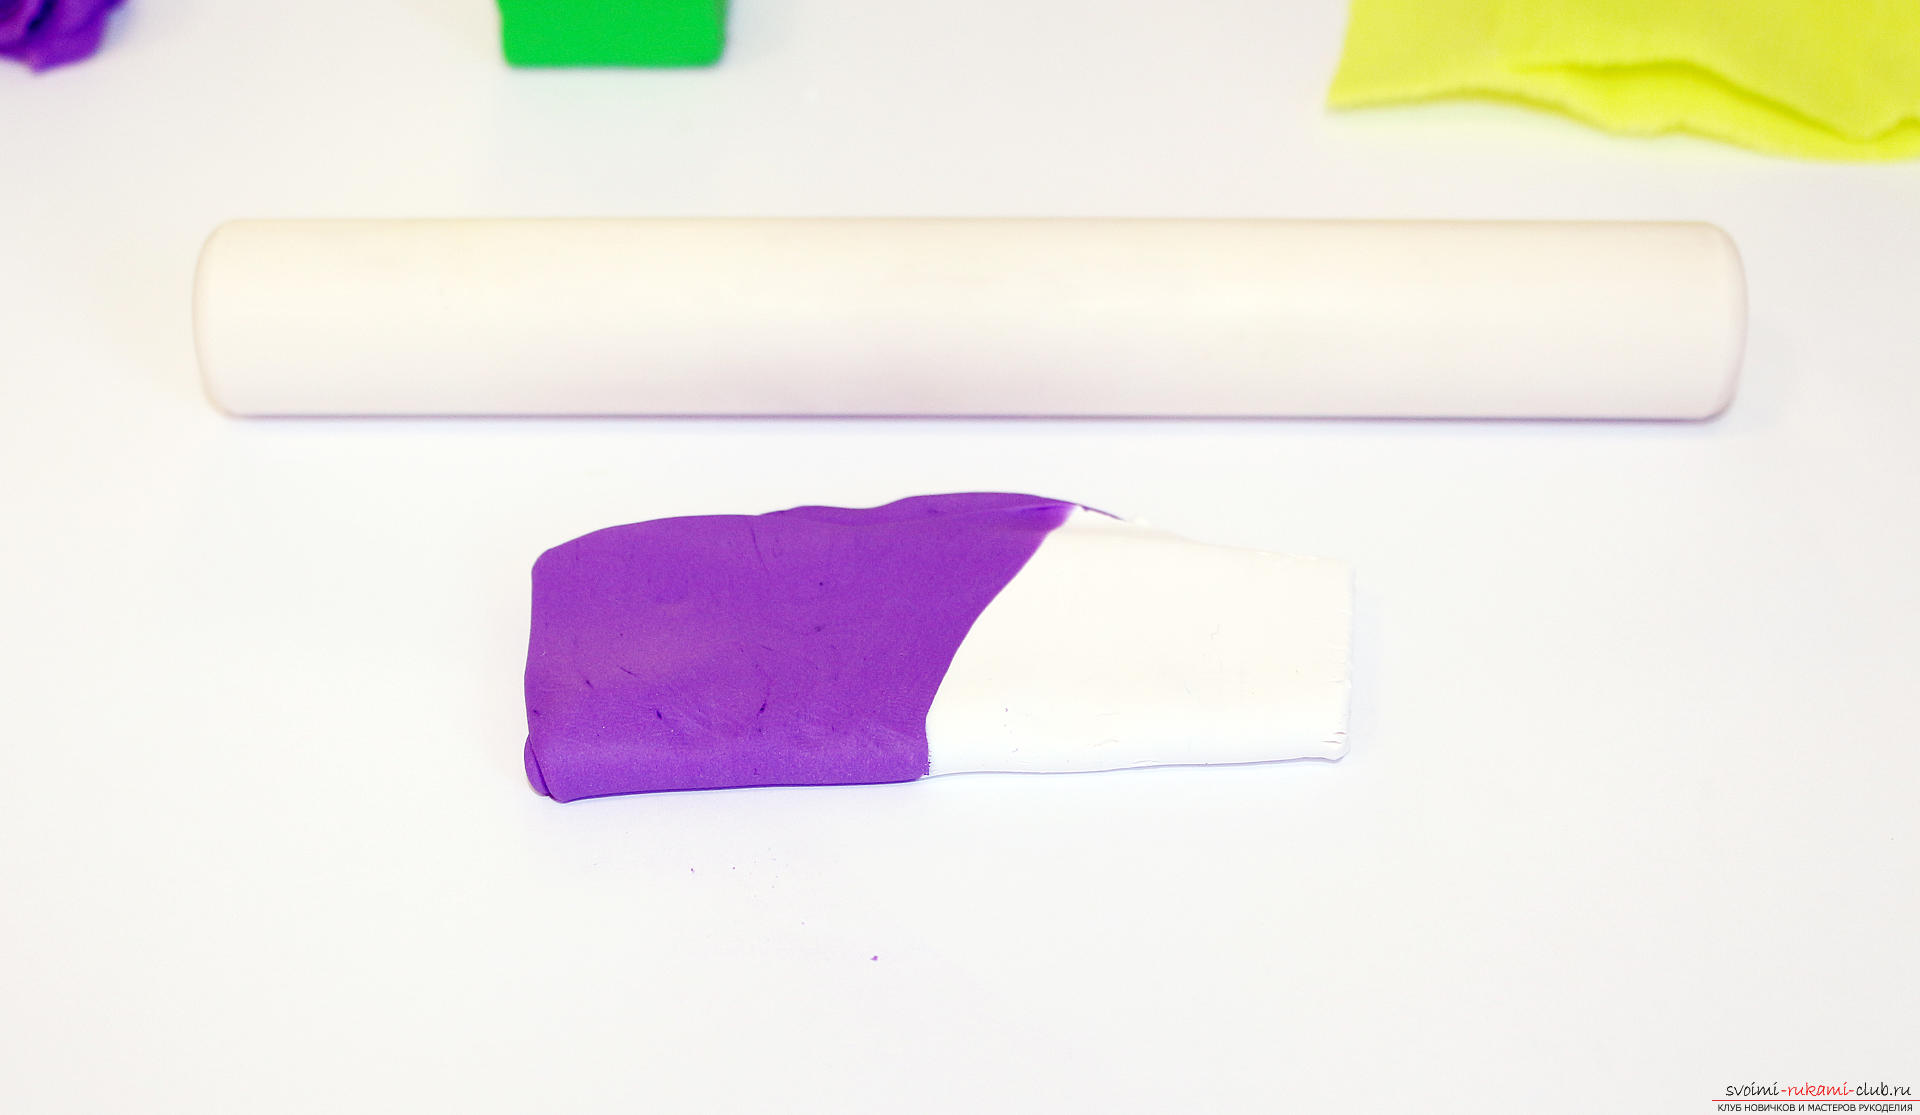 We repeat folding "from ourselves" (the direction can not be changed) and rolling until the transition of the color at the junction is smooth.
 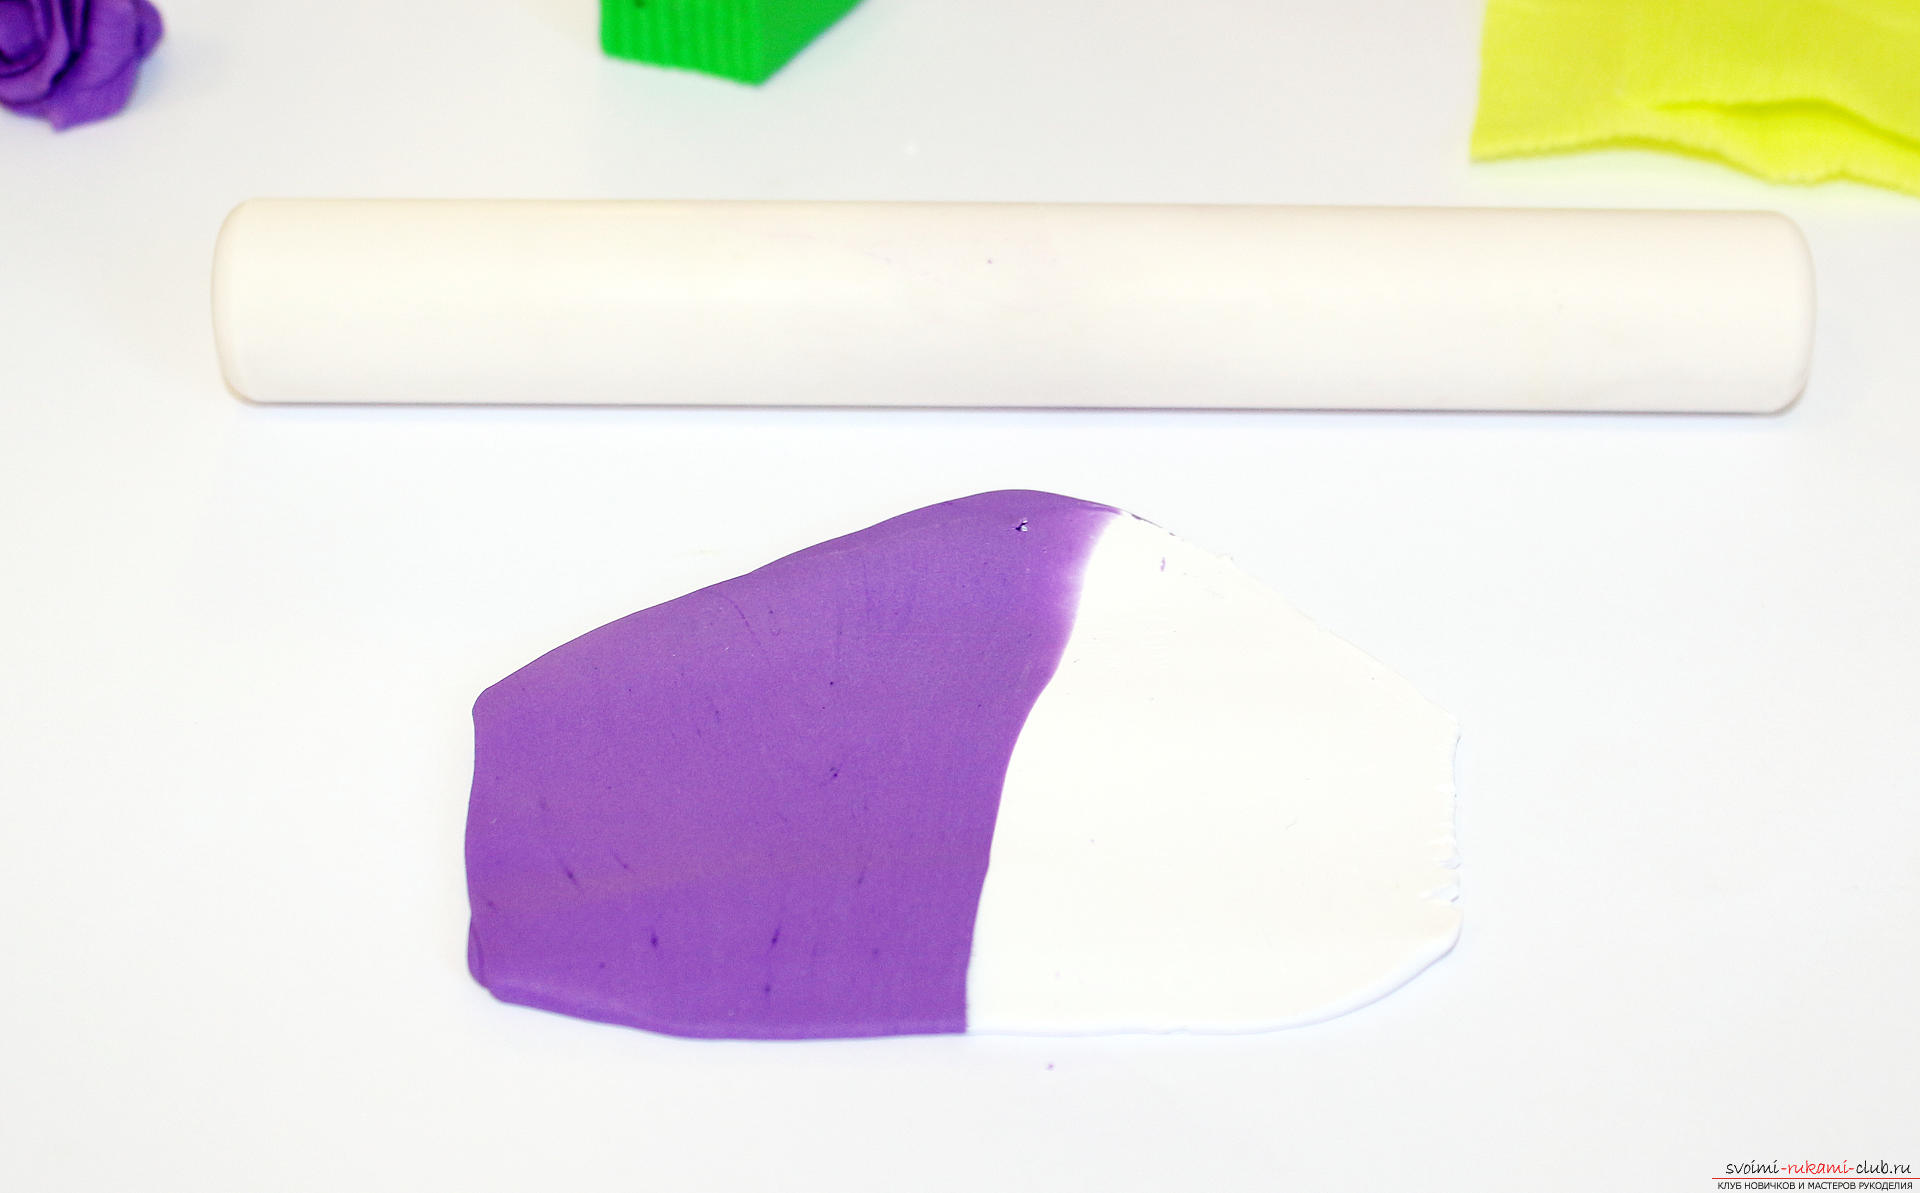 First, white stripes appear on the purple background, and on the white - violet, this is a sure sign - it means everything is done correctly. We continue the process.
  After a while the layer will acquire a gradient color transition, this is what we need.
 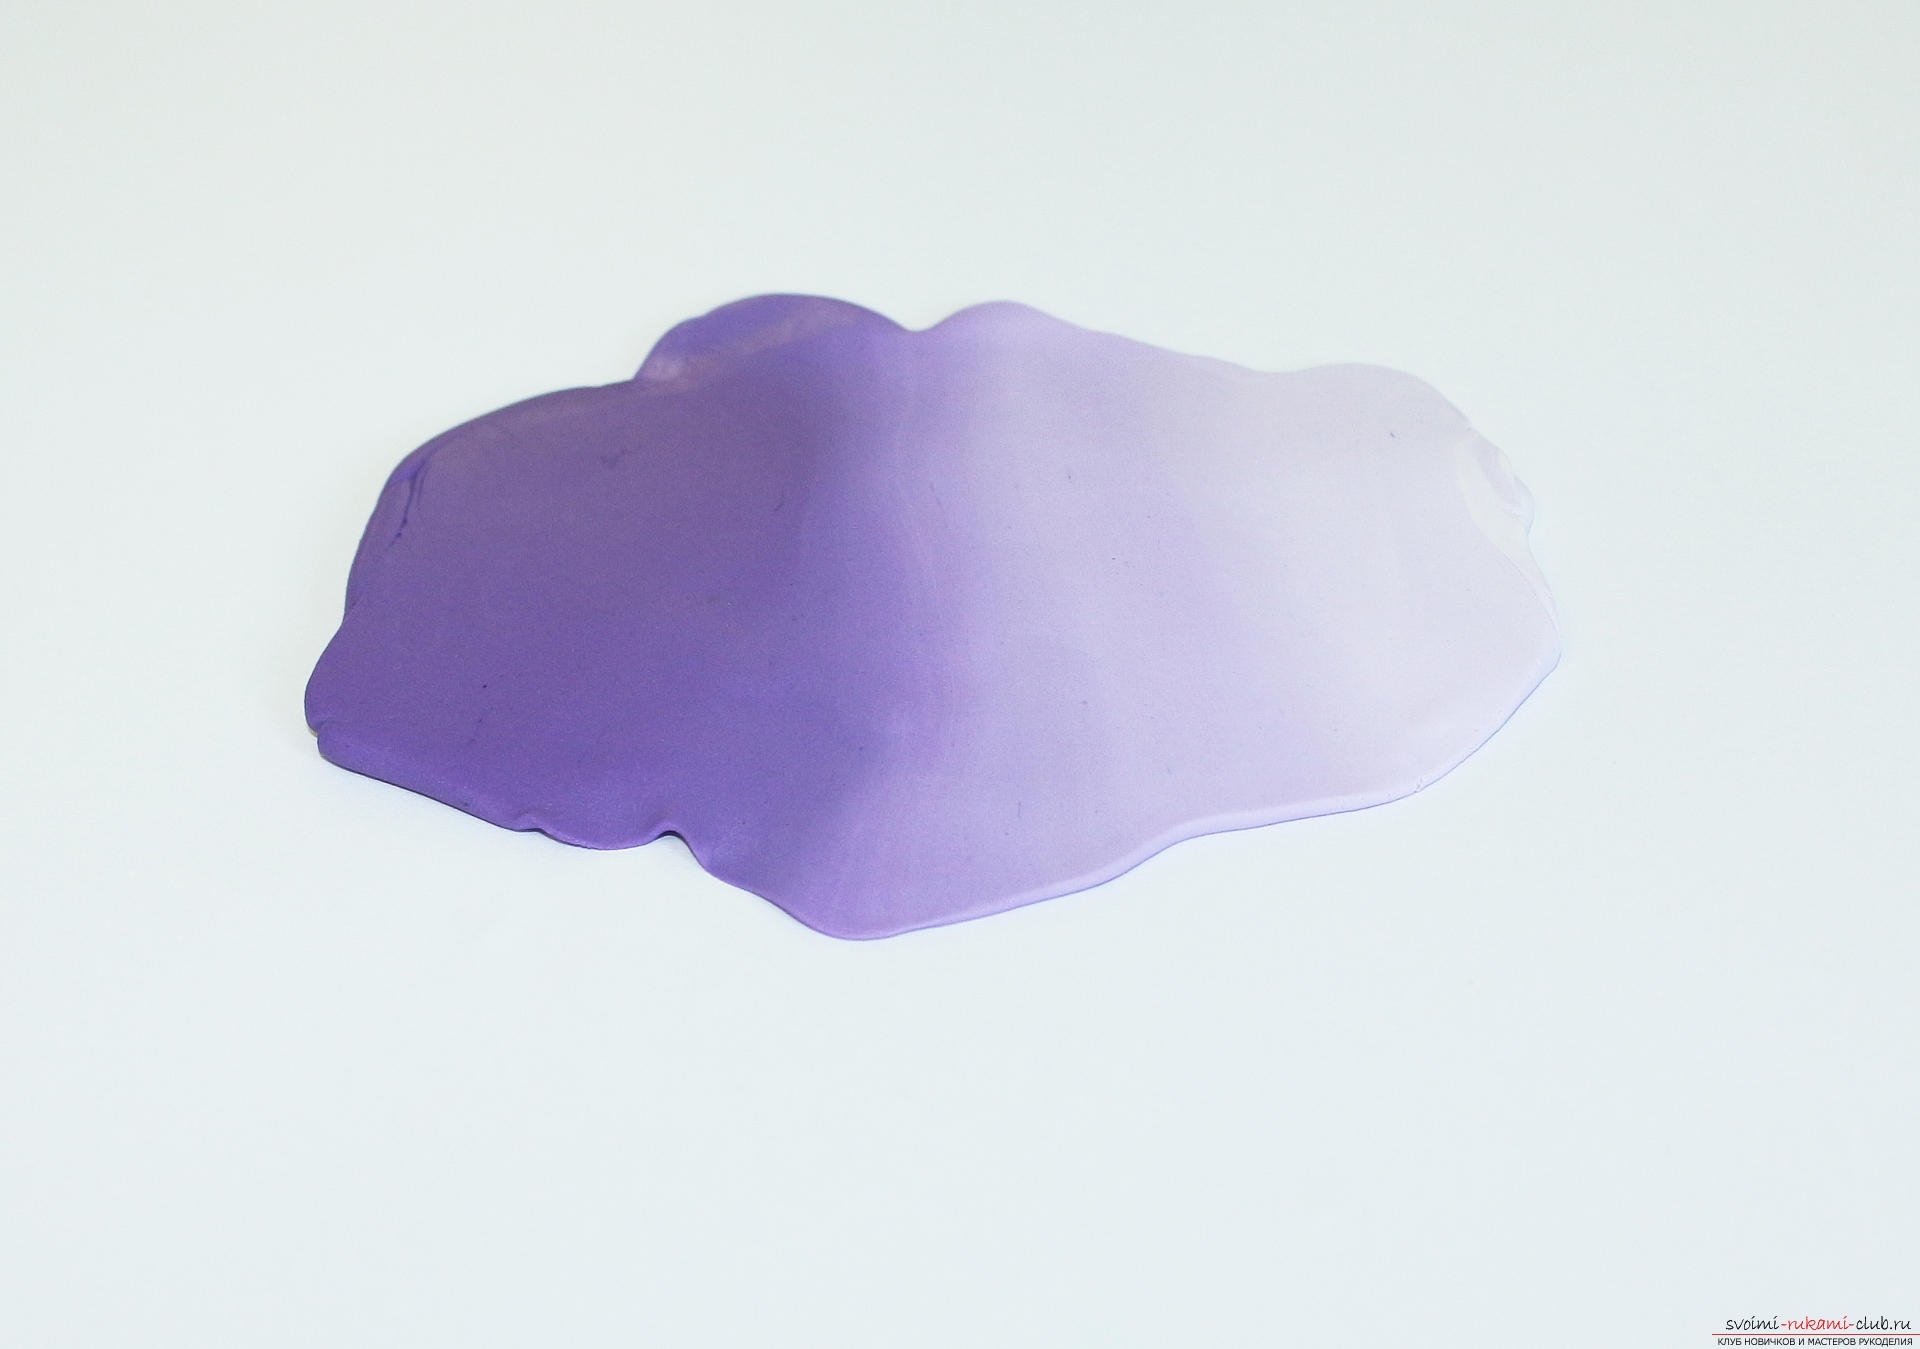 Fold the resulting layer in the tube.
 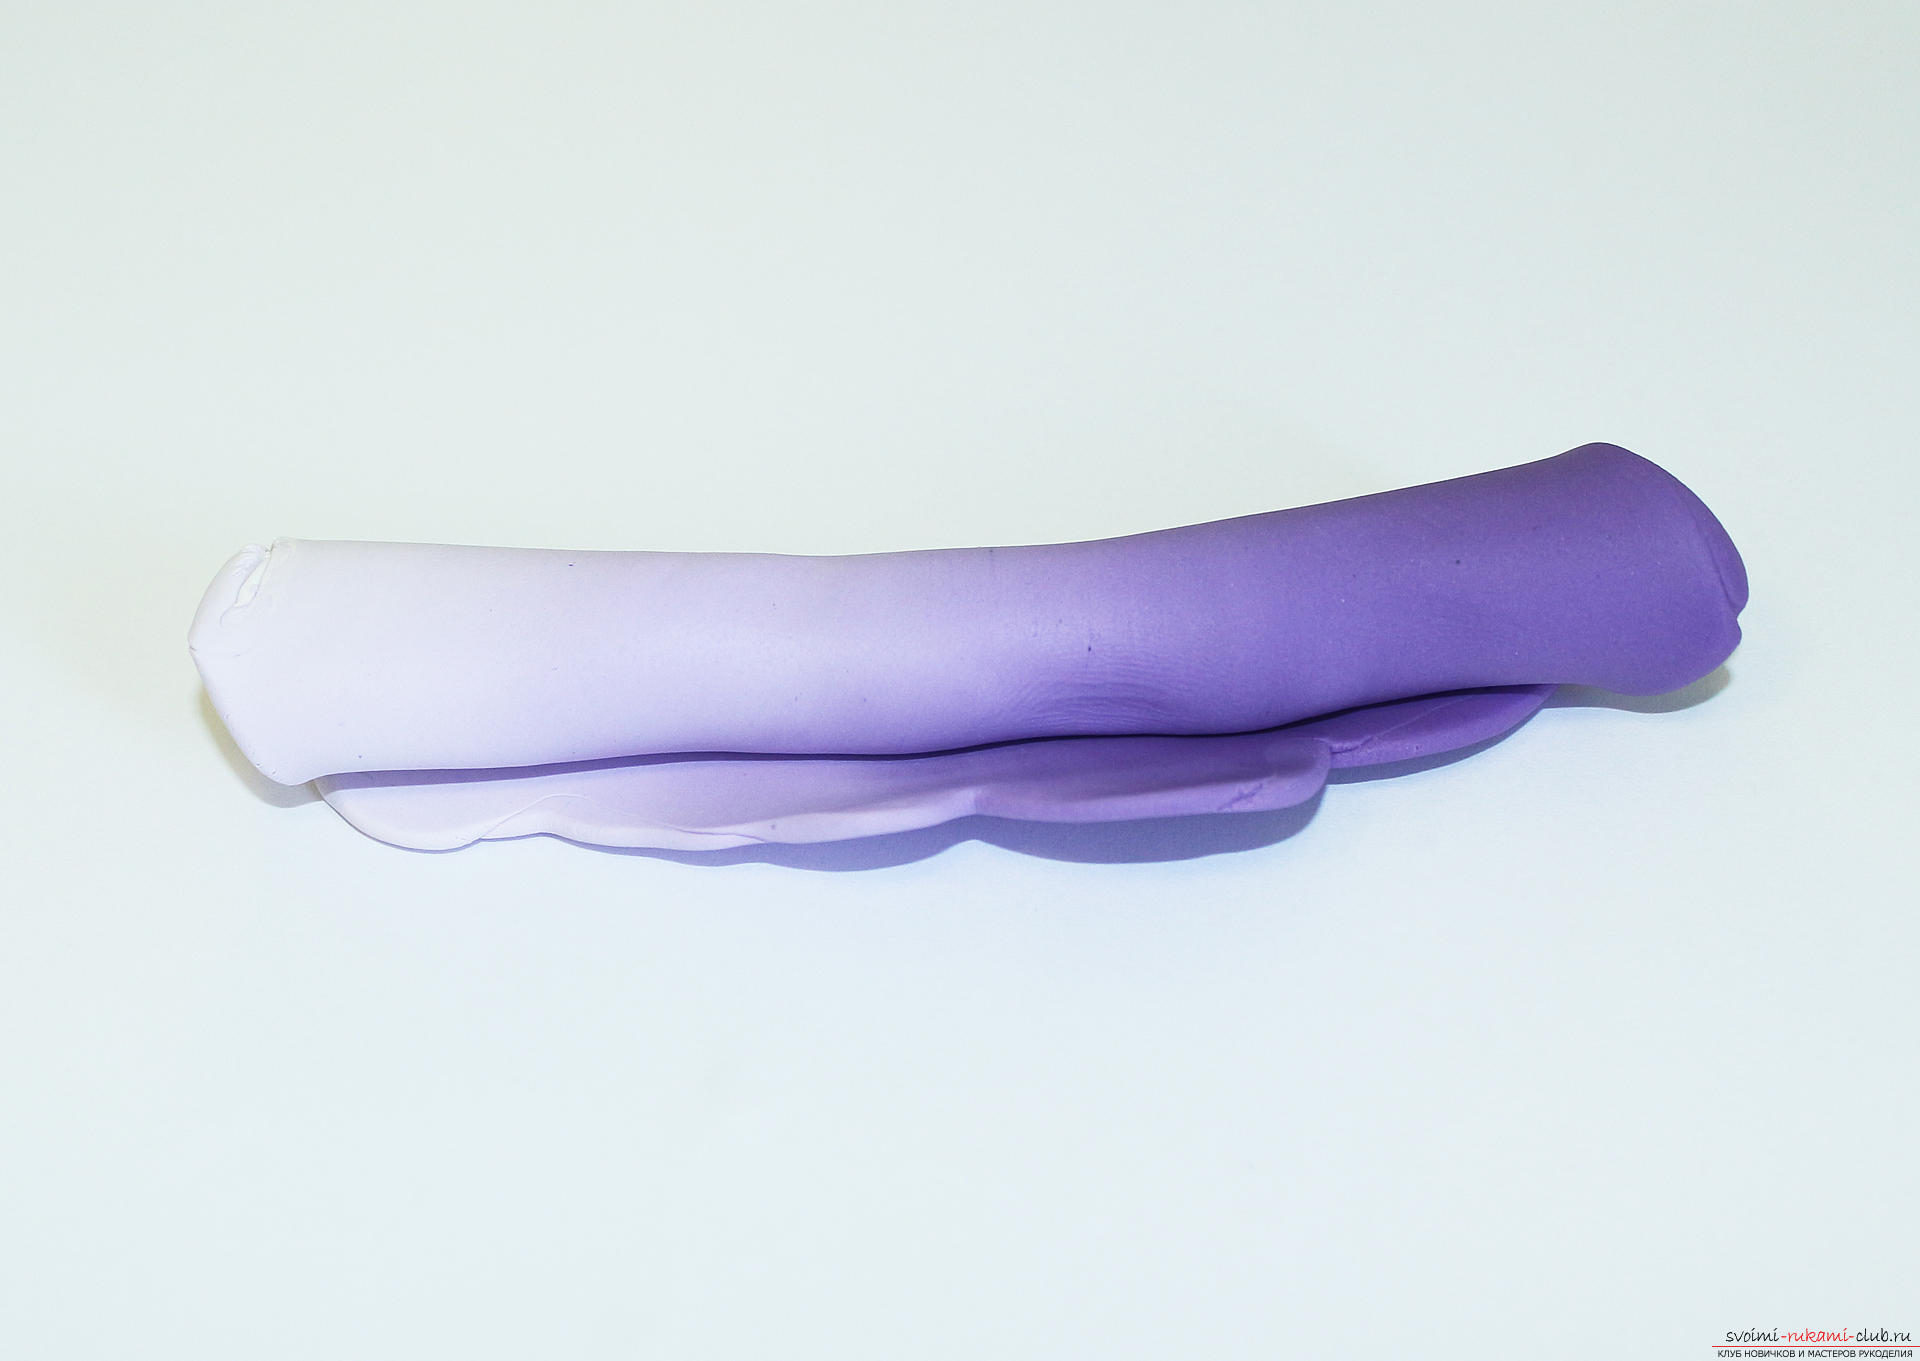 We squeeze the tube until tight.
 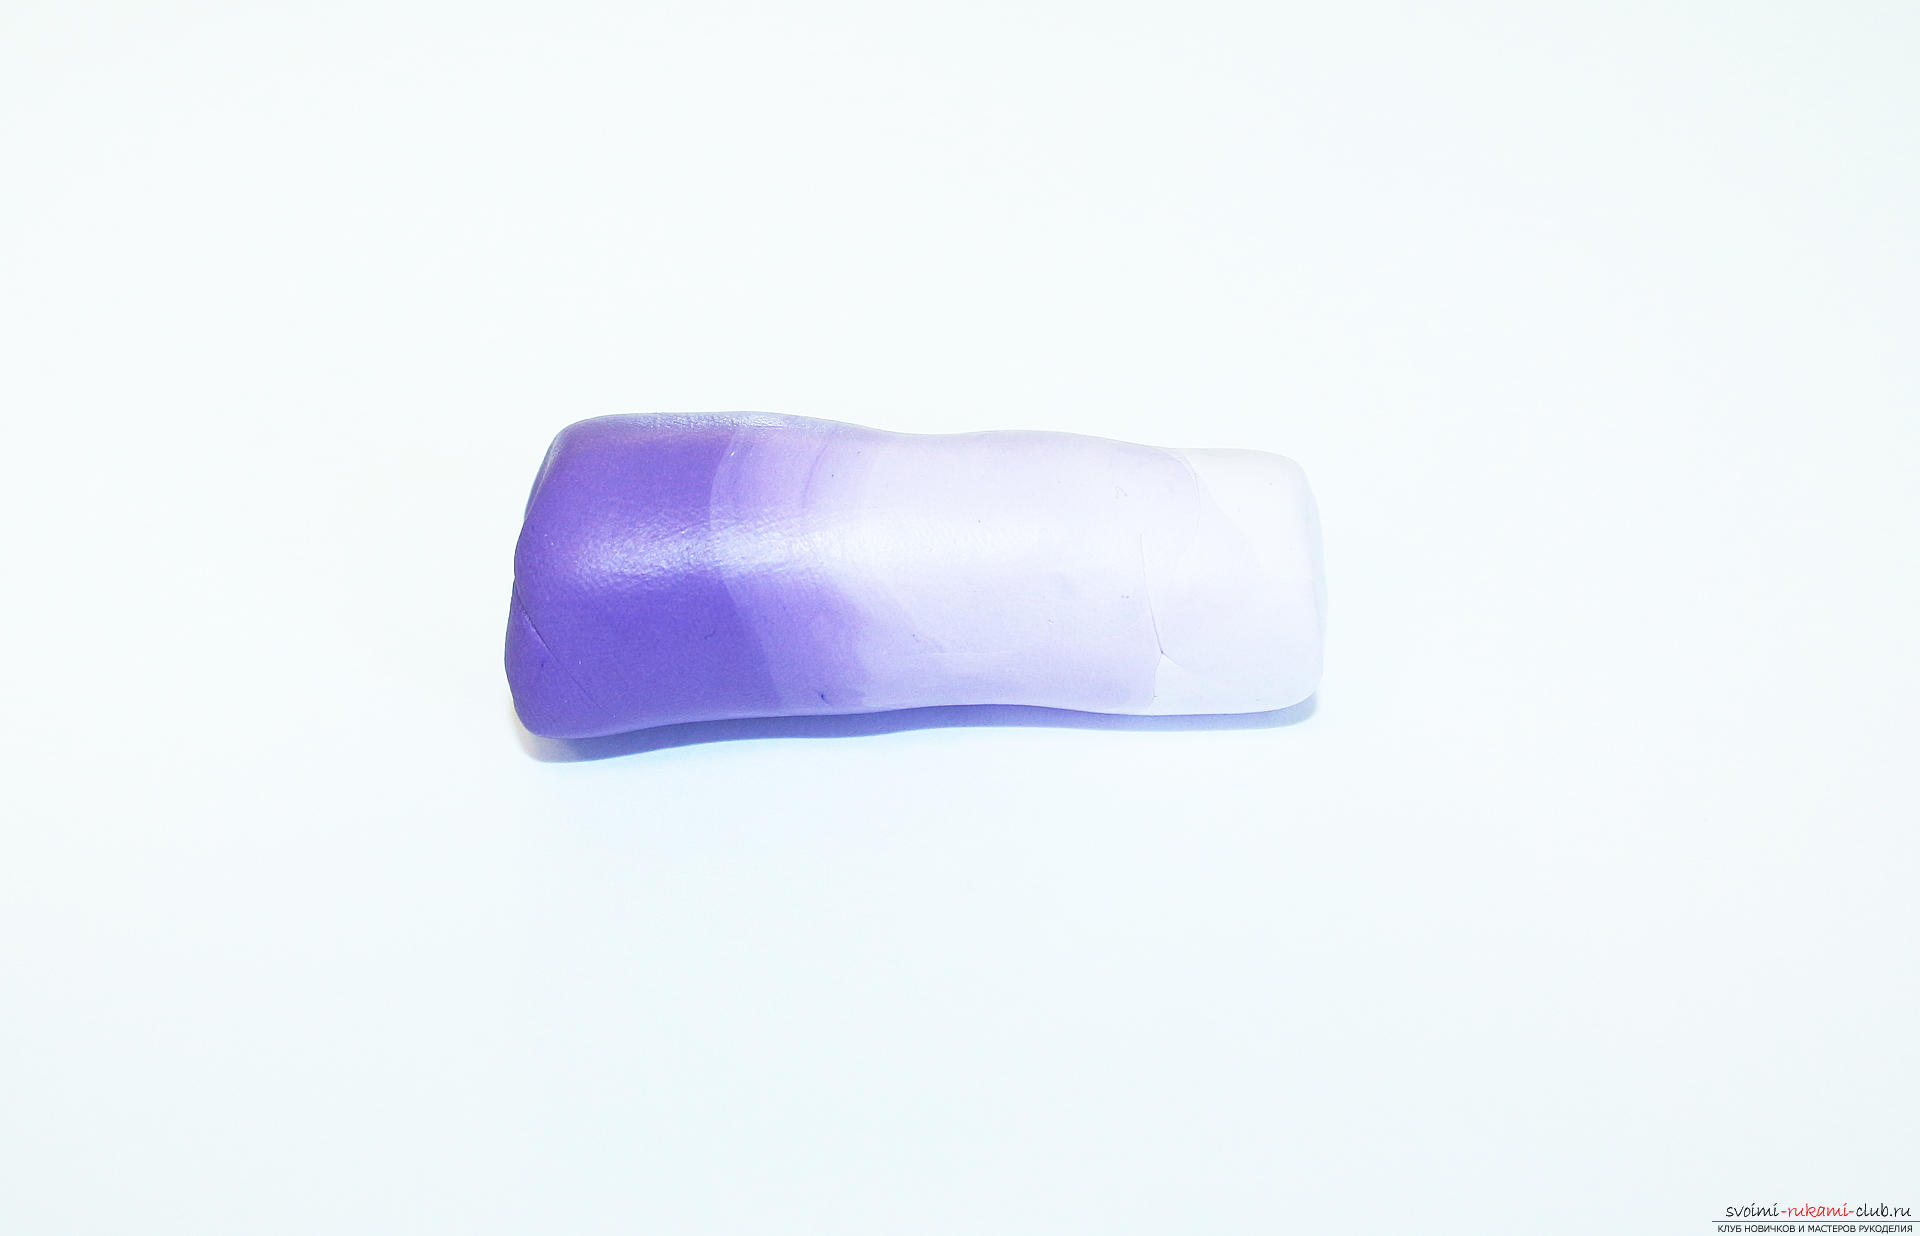 We squeeze the PG to the minimum size and roll it into the sausage, and the sausage should have a clear light and dark halves.
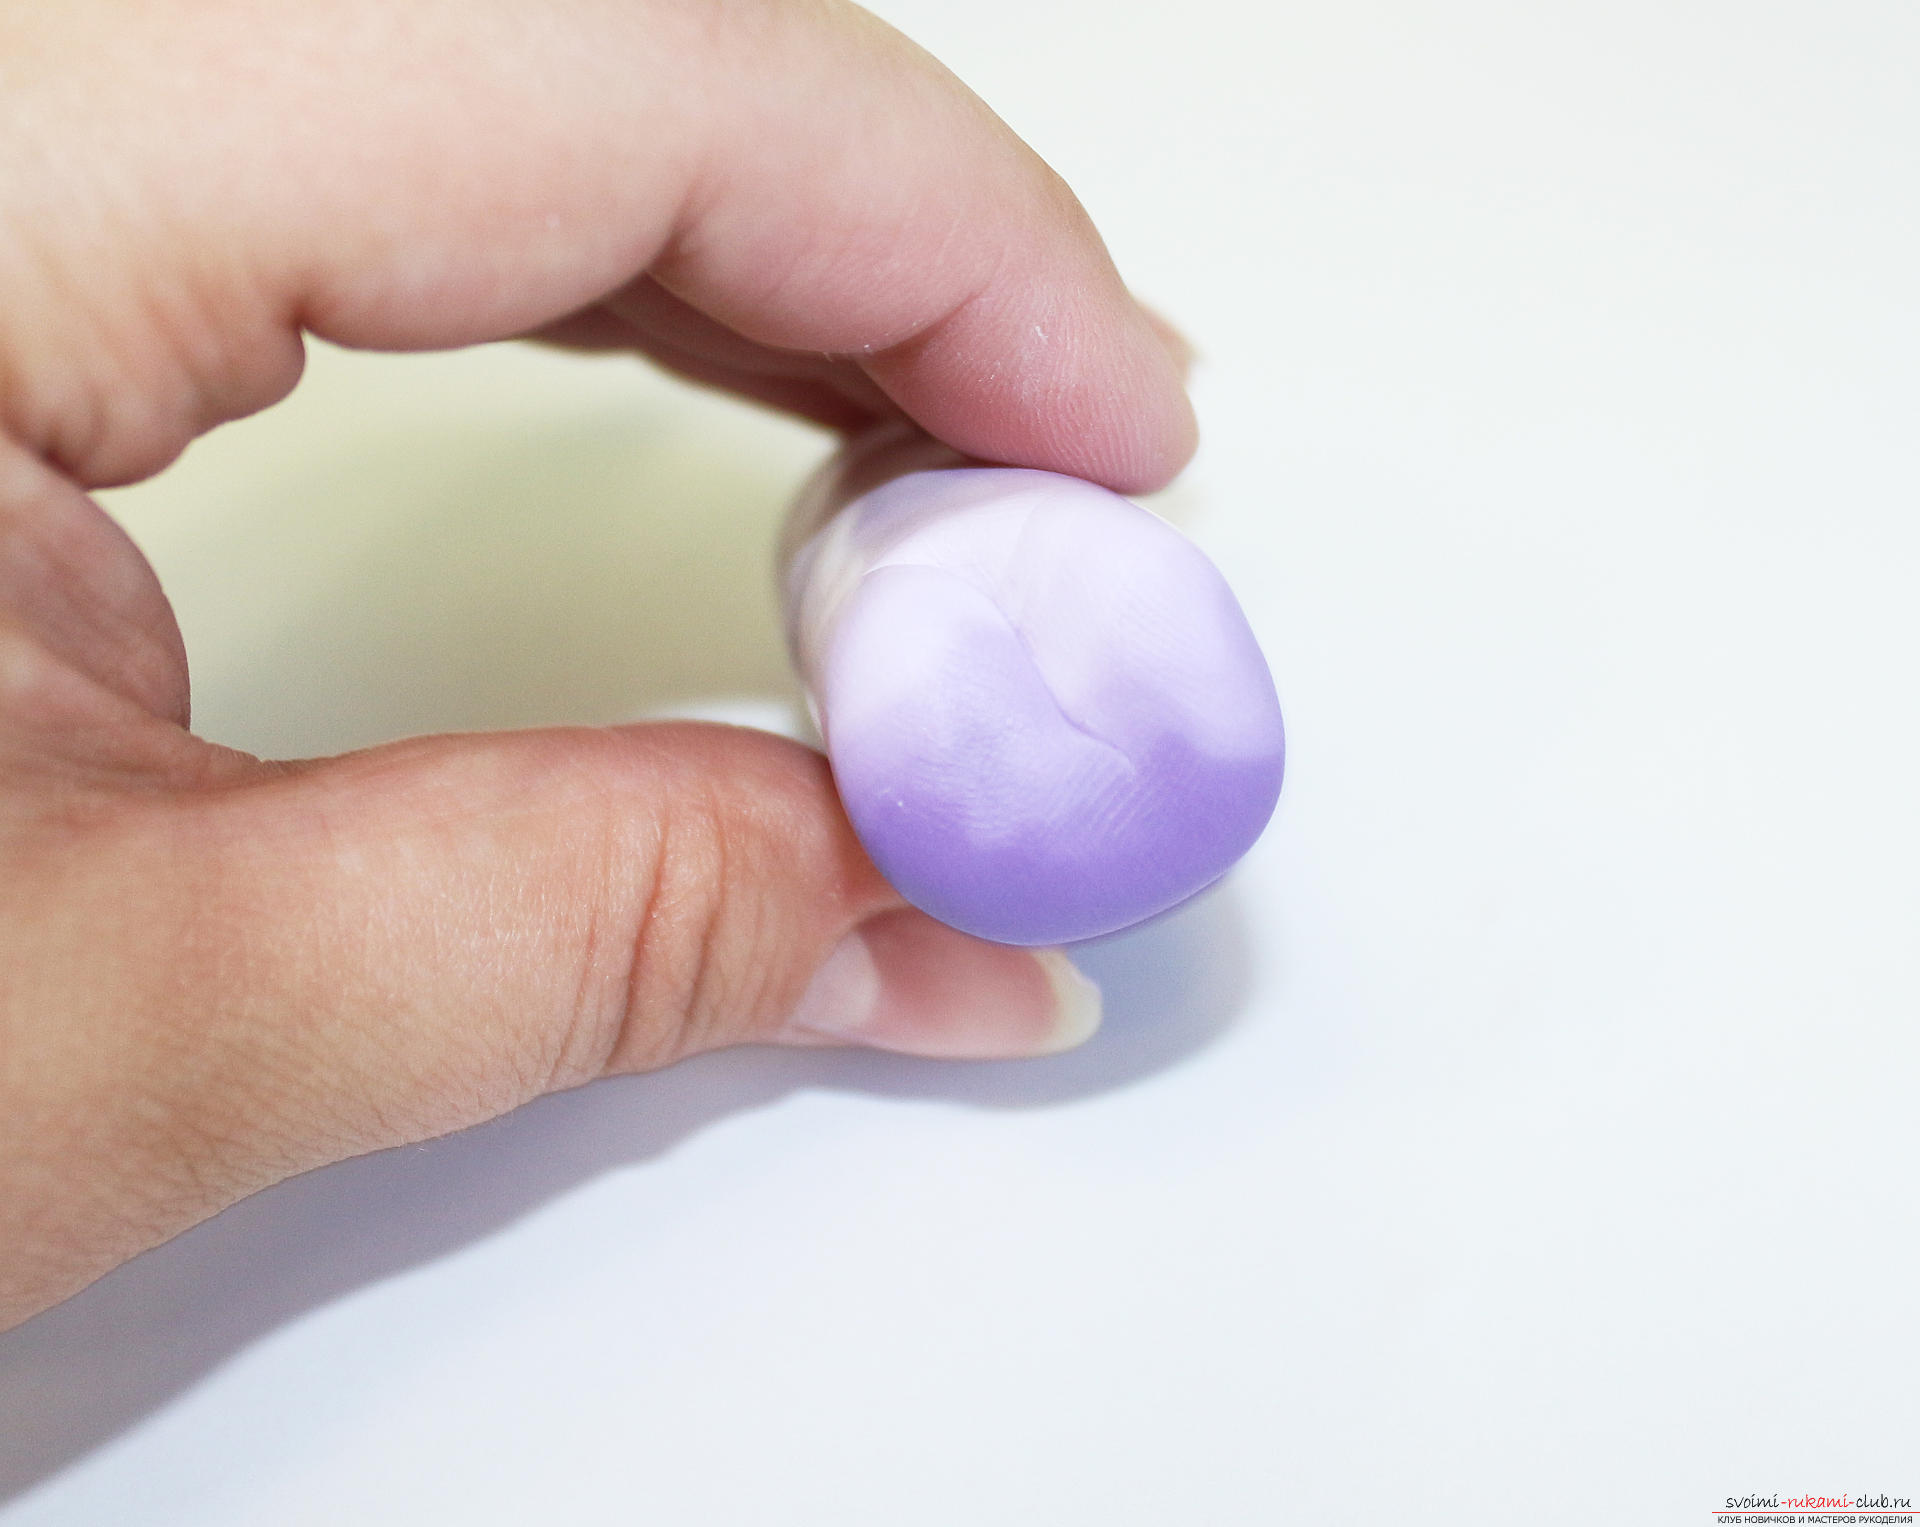 In the compressed state, the color transition is not so noticeable. We cut the sausage into delicate petals with a blade.
  Each lobe is shaped like a circle.
  Spread the mugs on the corrugated paper.
 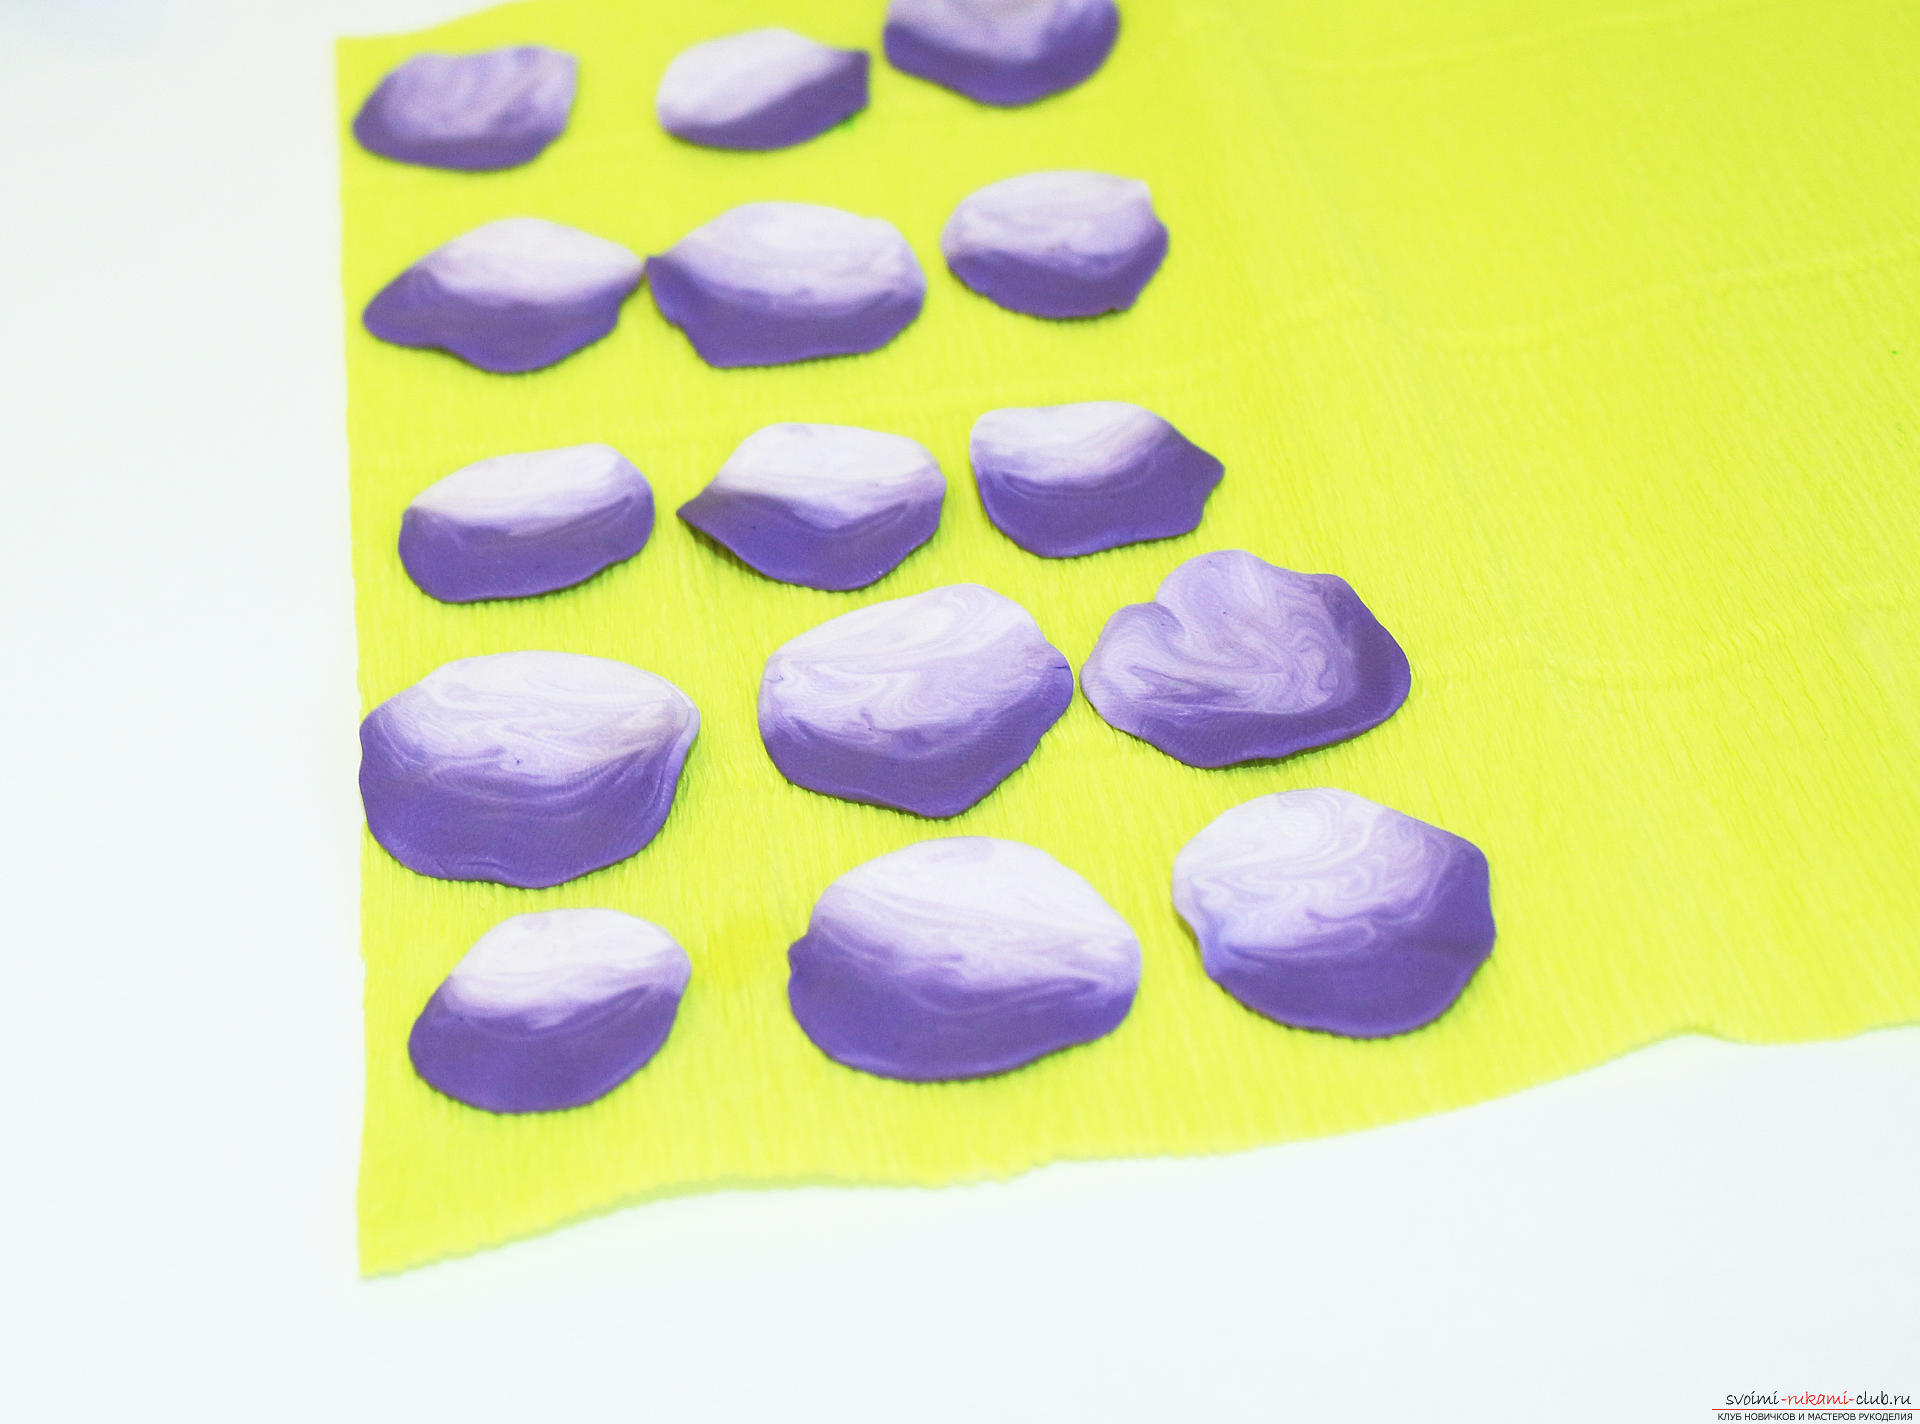 Cover them with a layer of paper on top.
 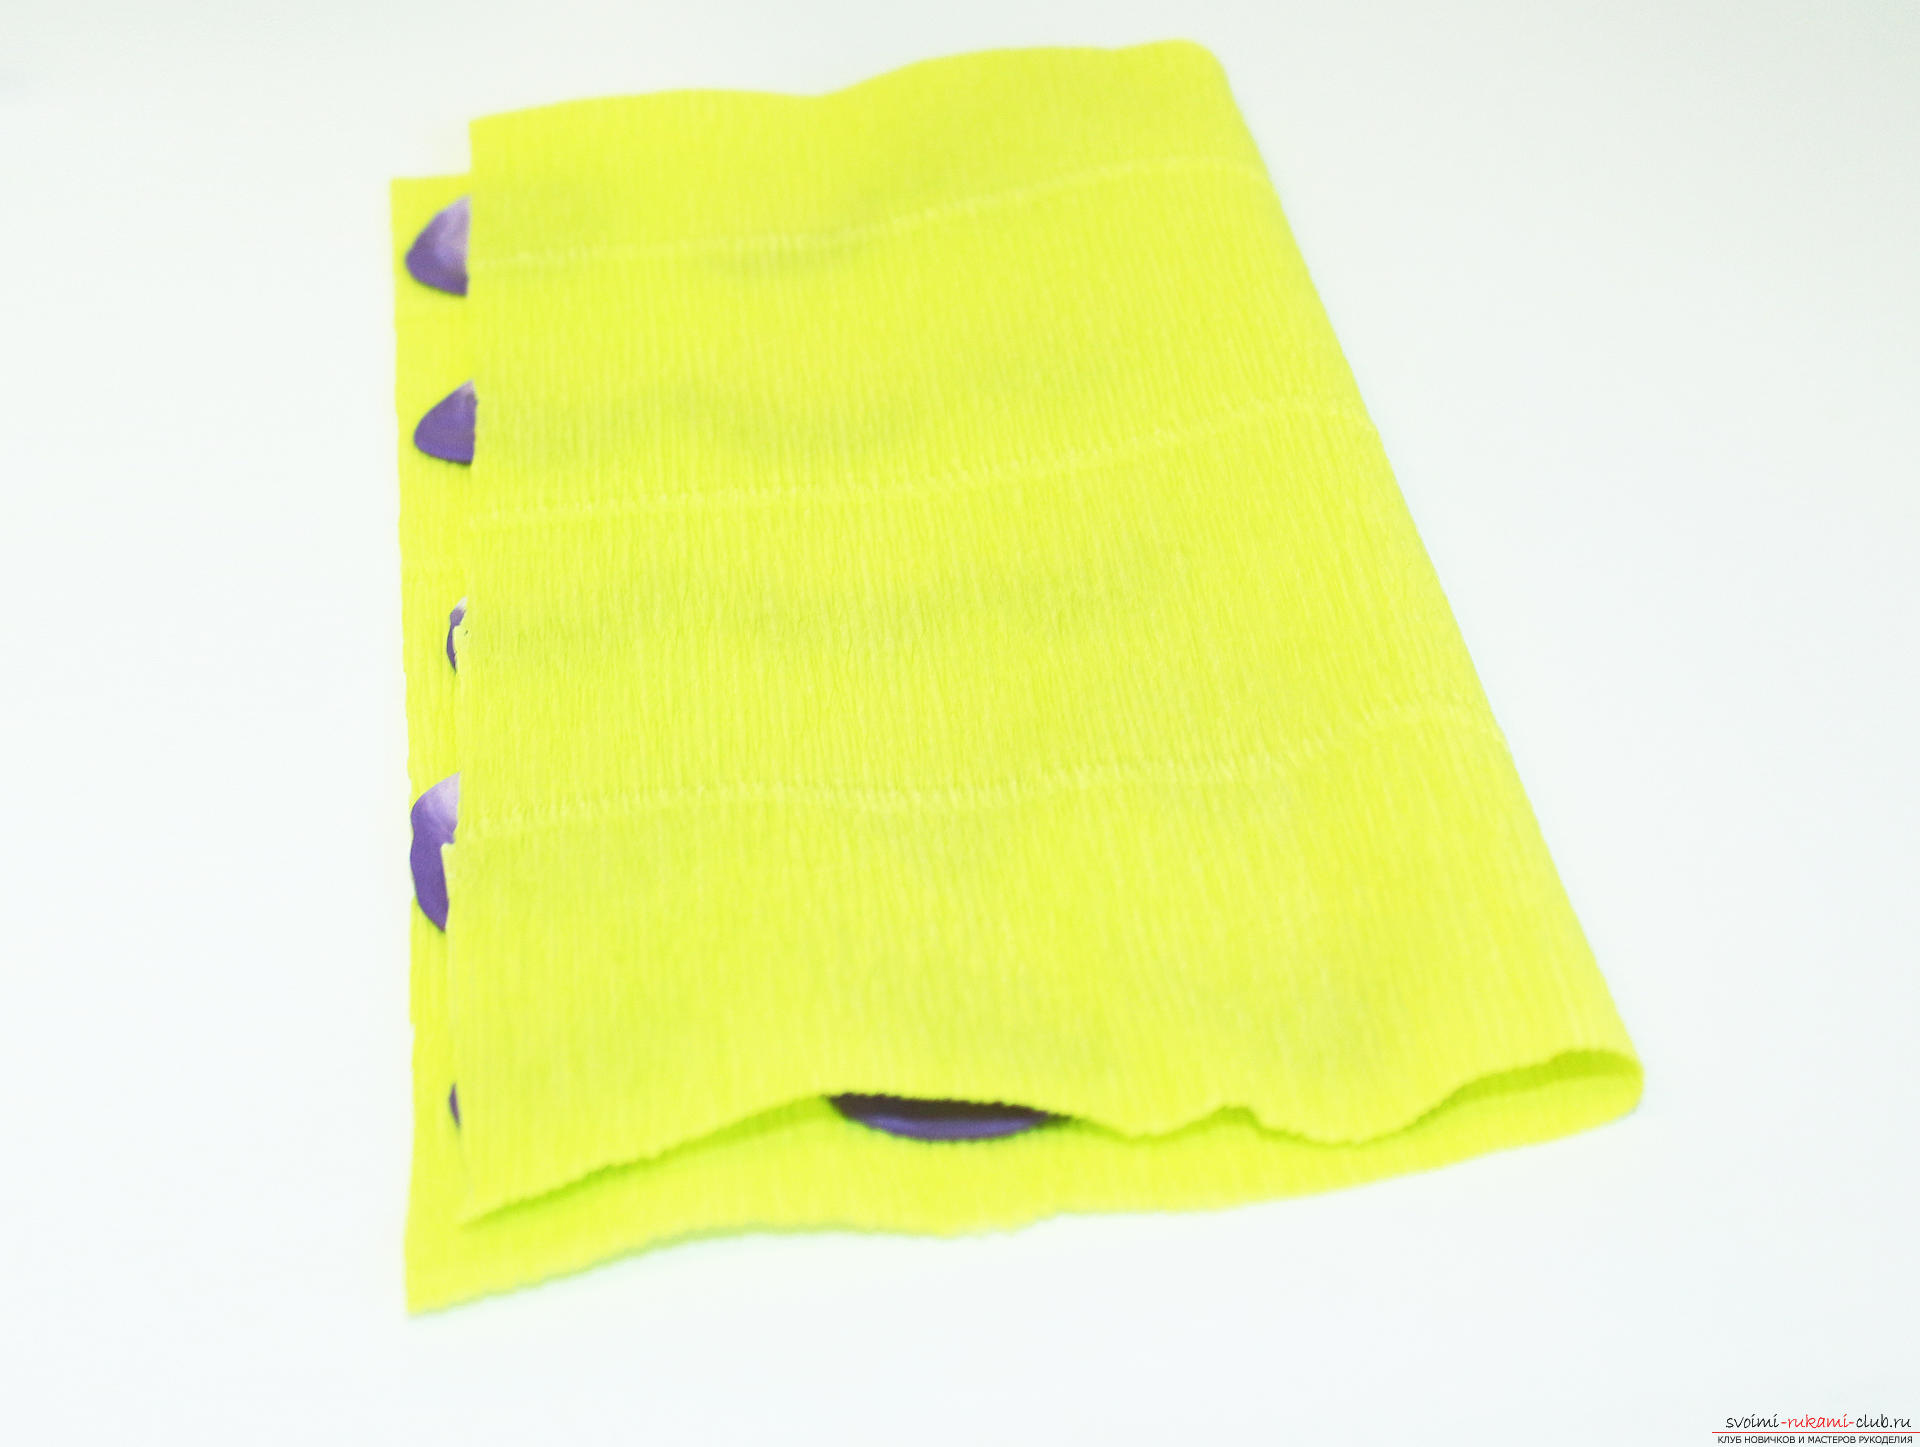 Roll the rolling pin on the paper so that the texture is imprinted on the petals.
  Carefully detach the top layer and admire the texture.
 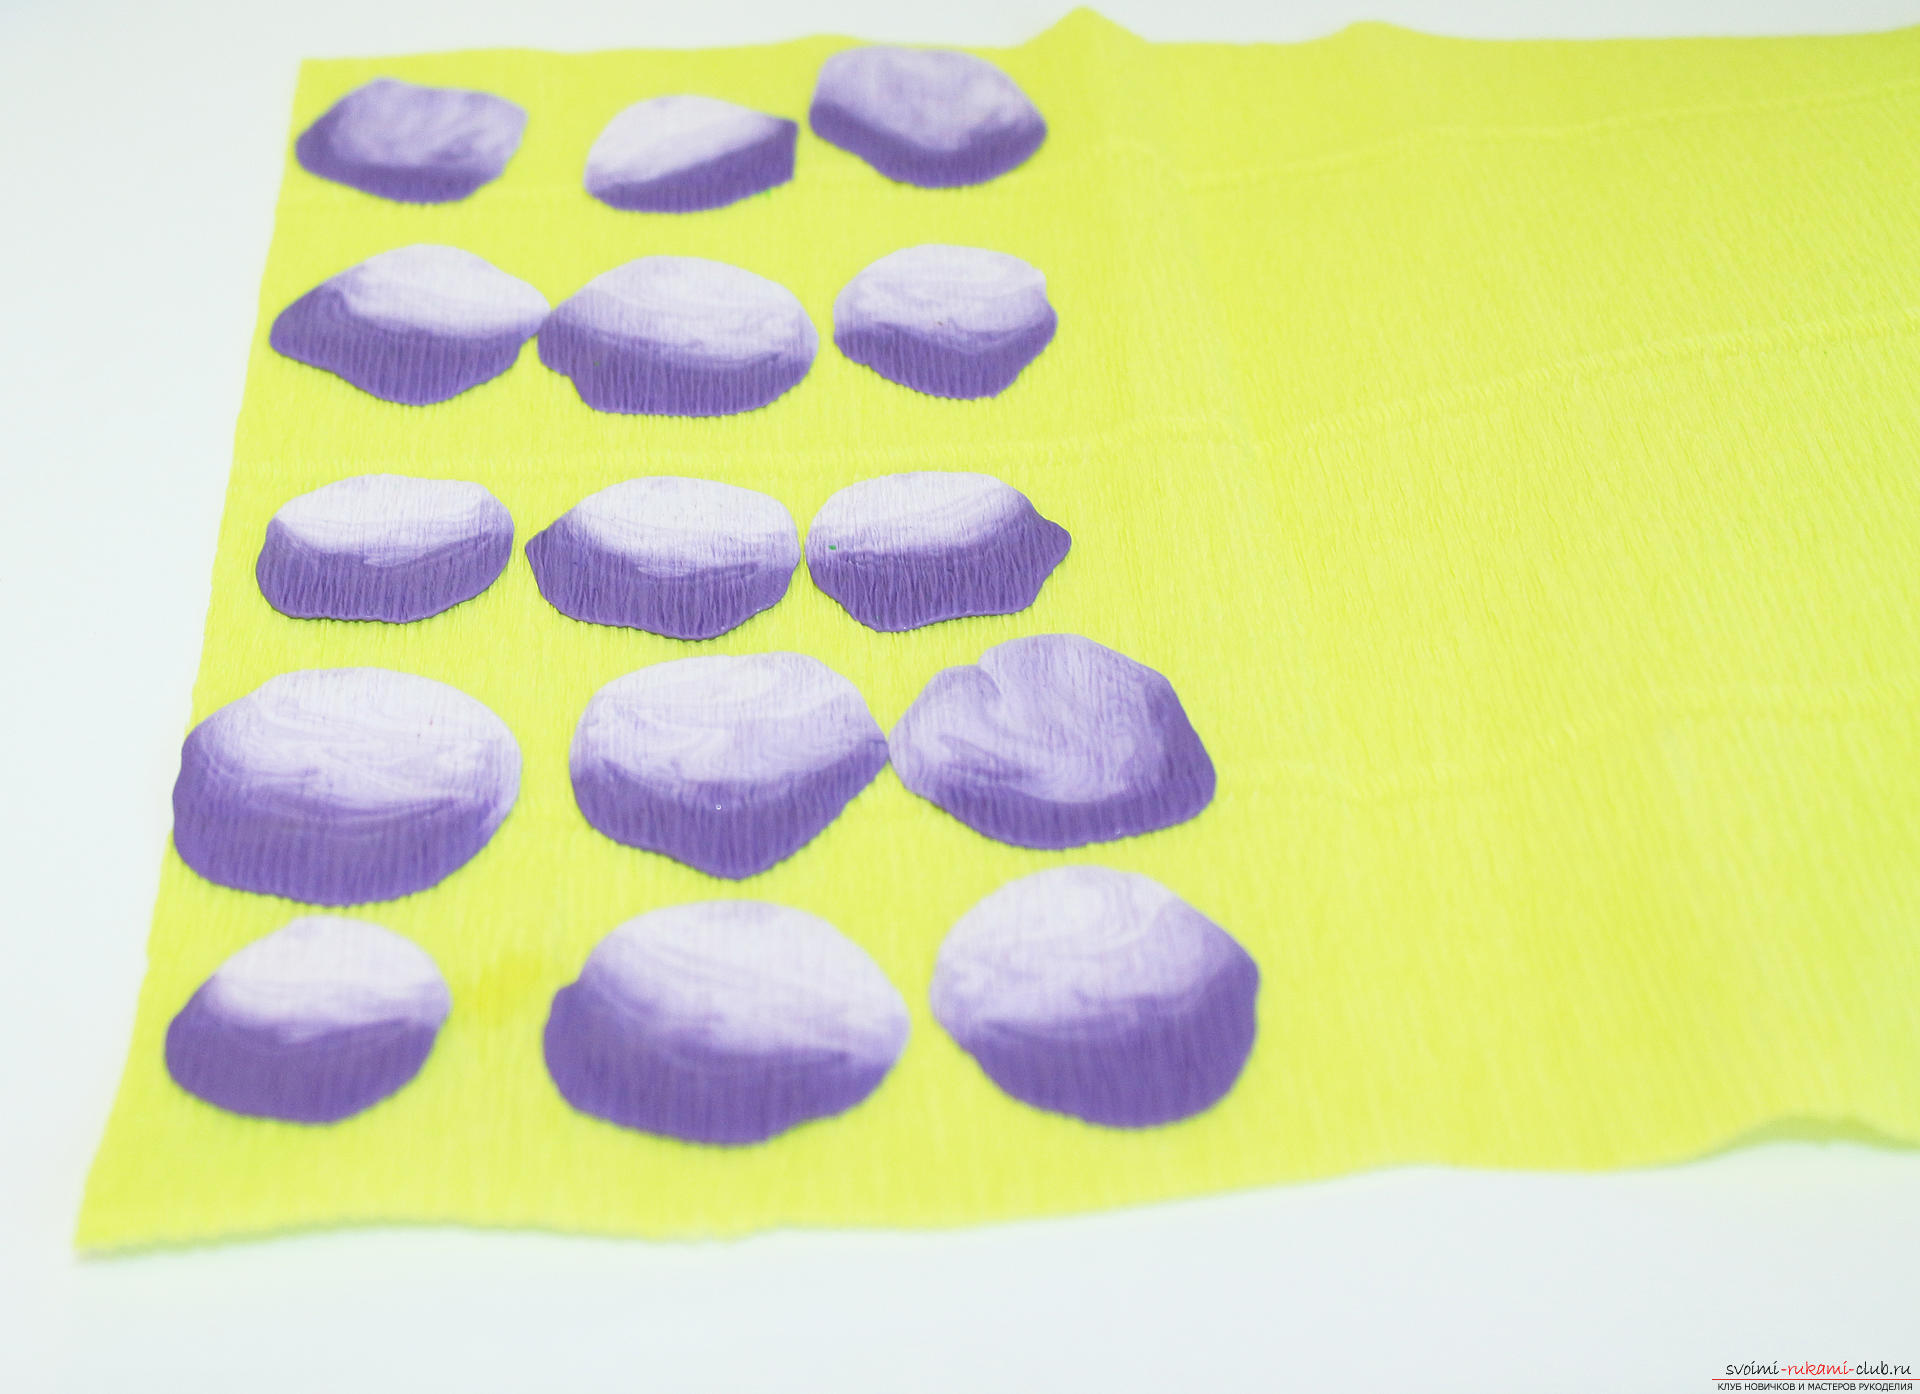 We remove the petals from the paper, we try not to damage the texture.
 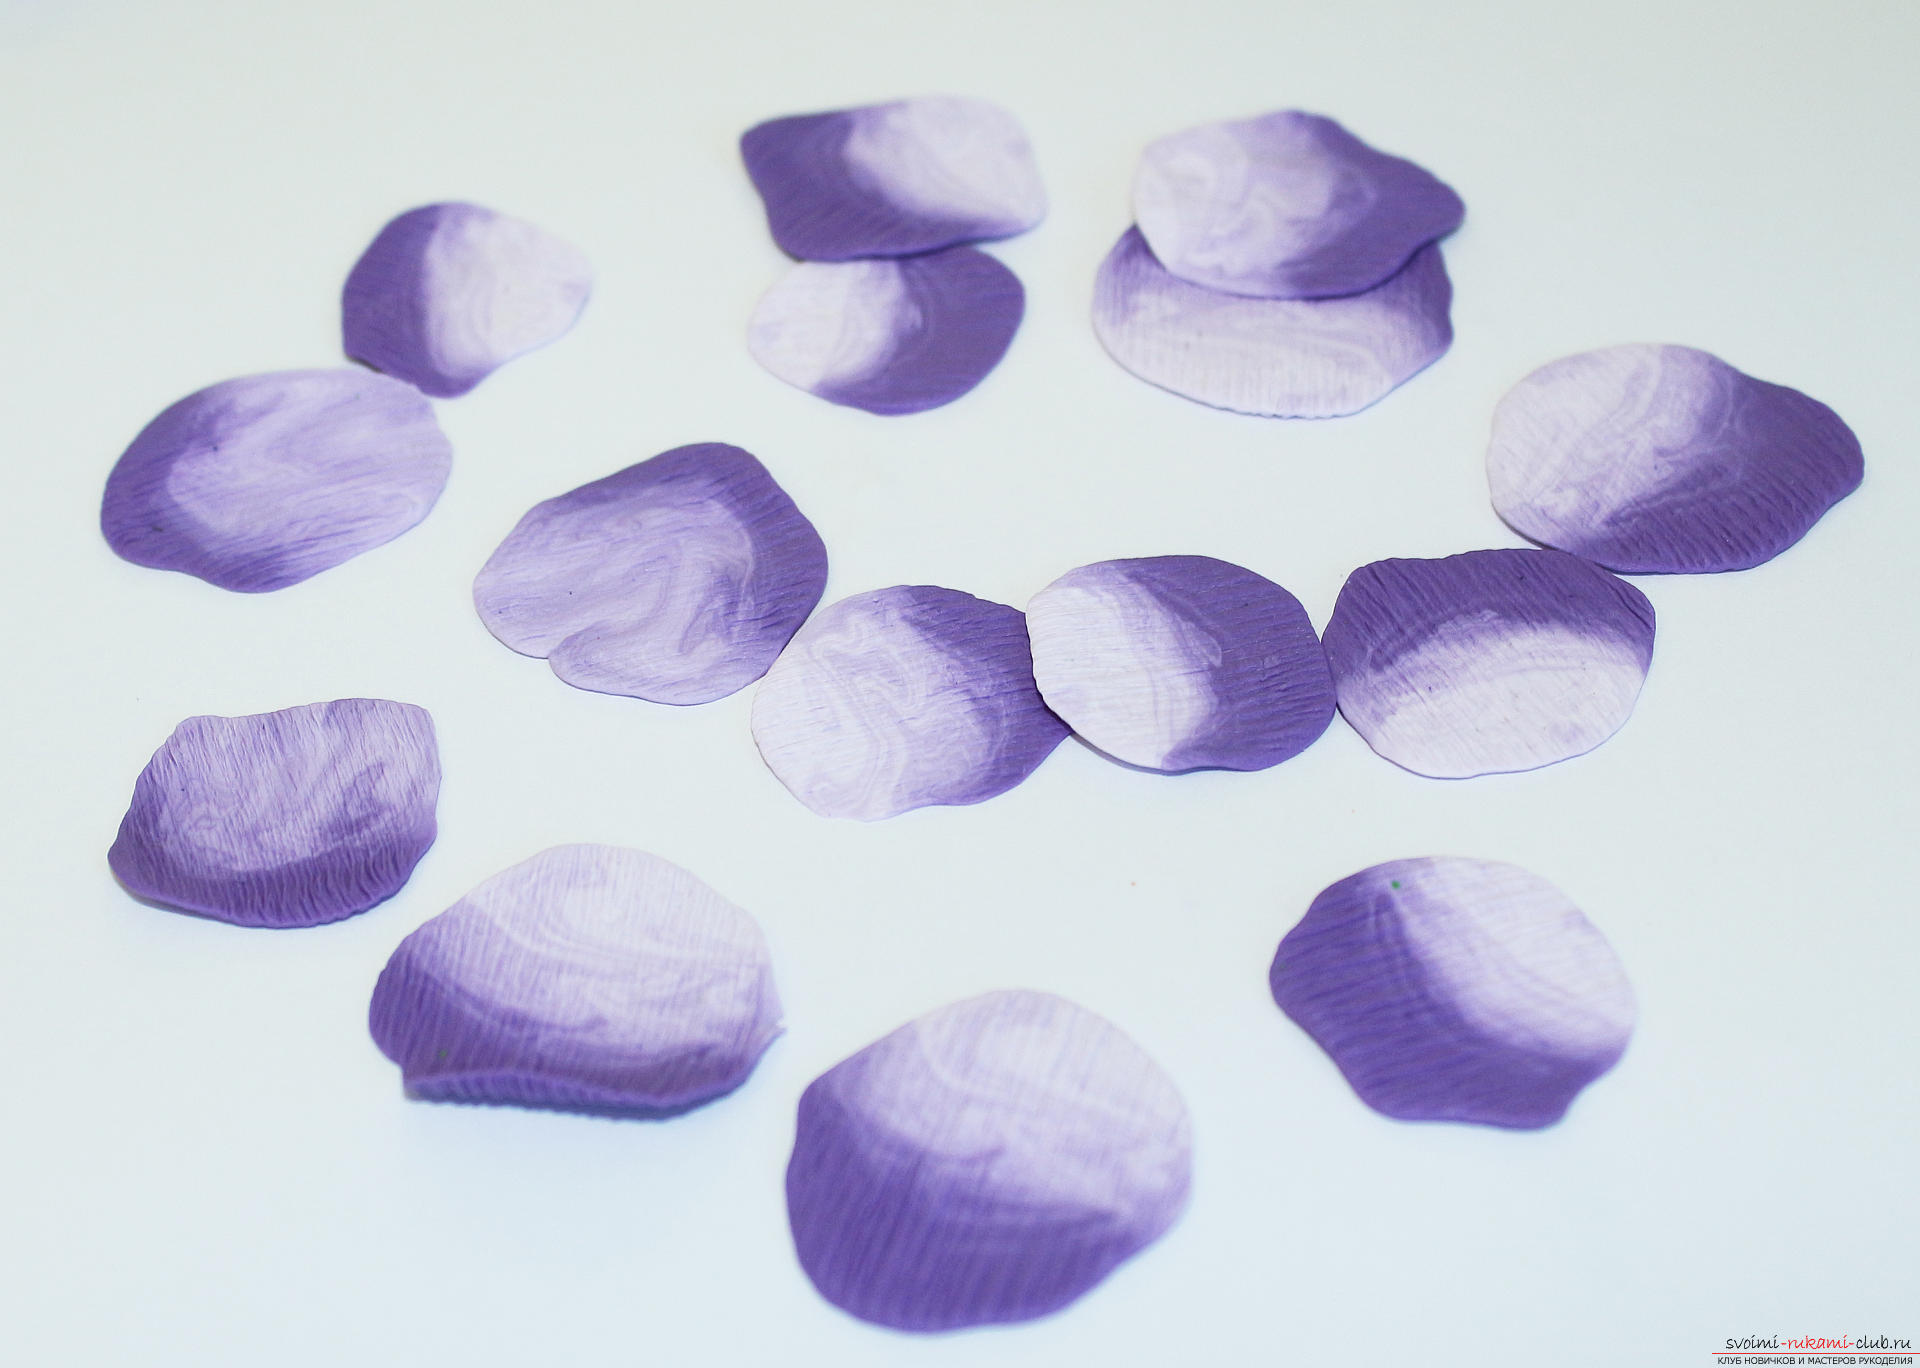 Fingers slightly bend the edges of the petals, they will turn out convex and more realistic.
 We cast a droplet of the remains of the material.
 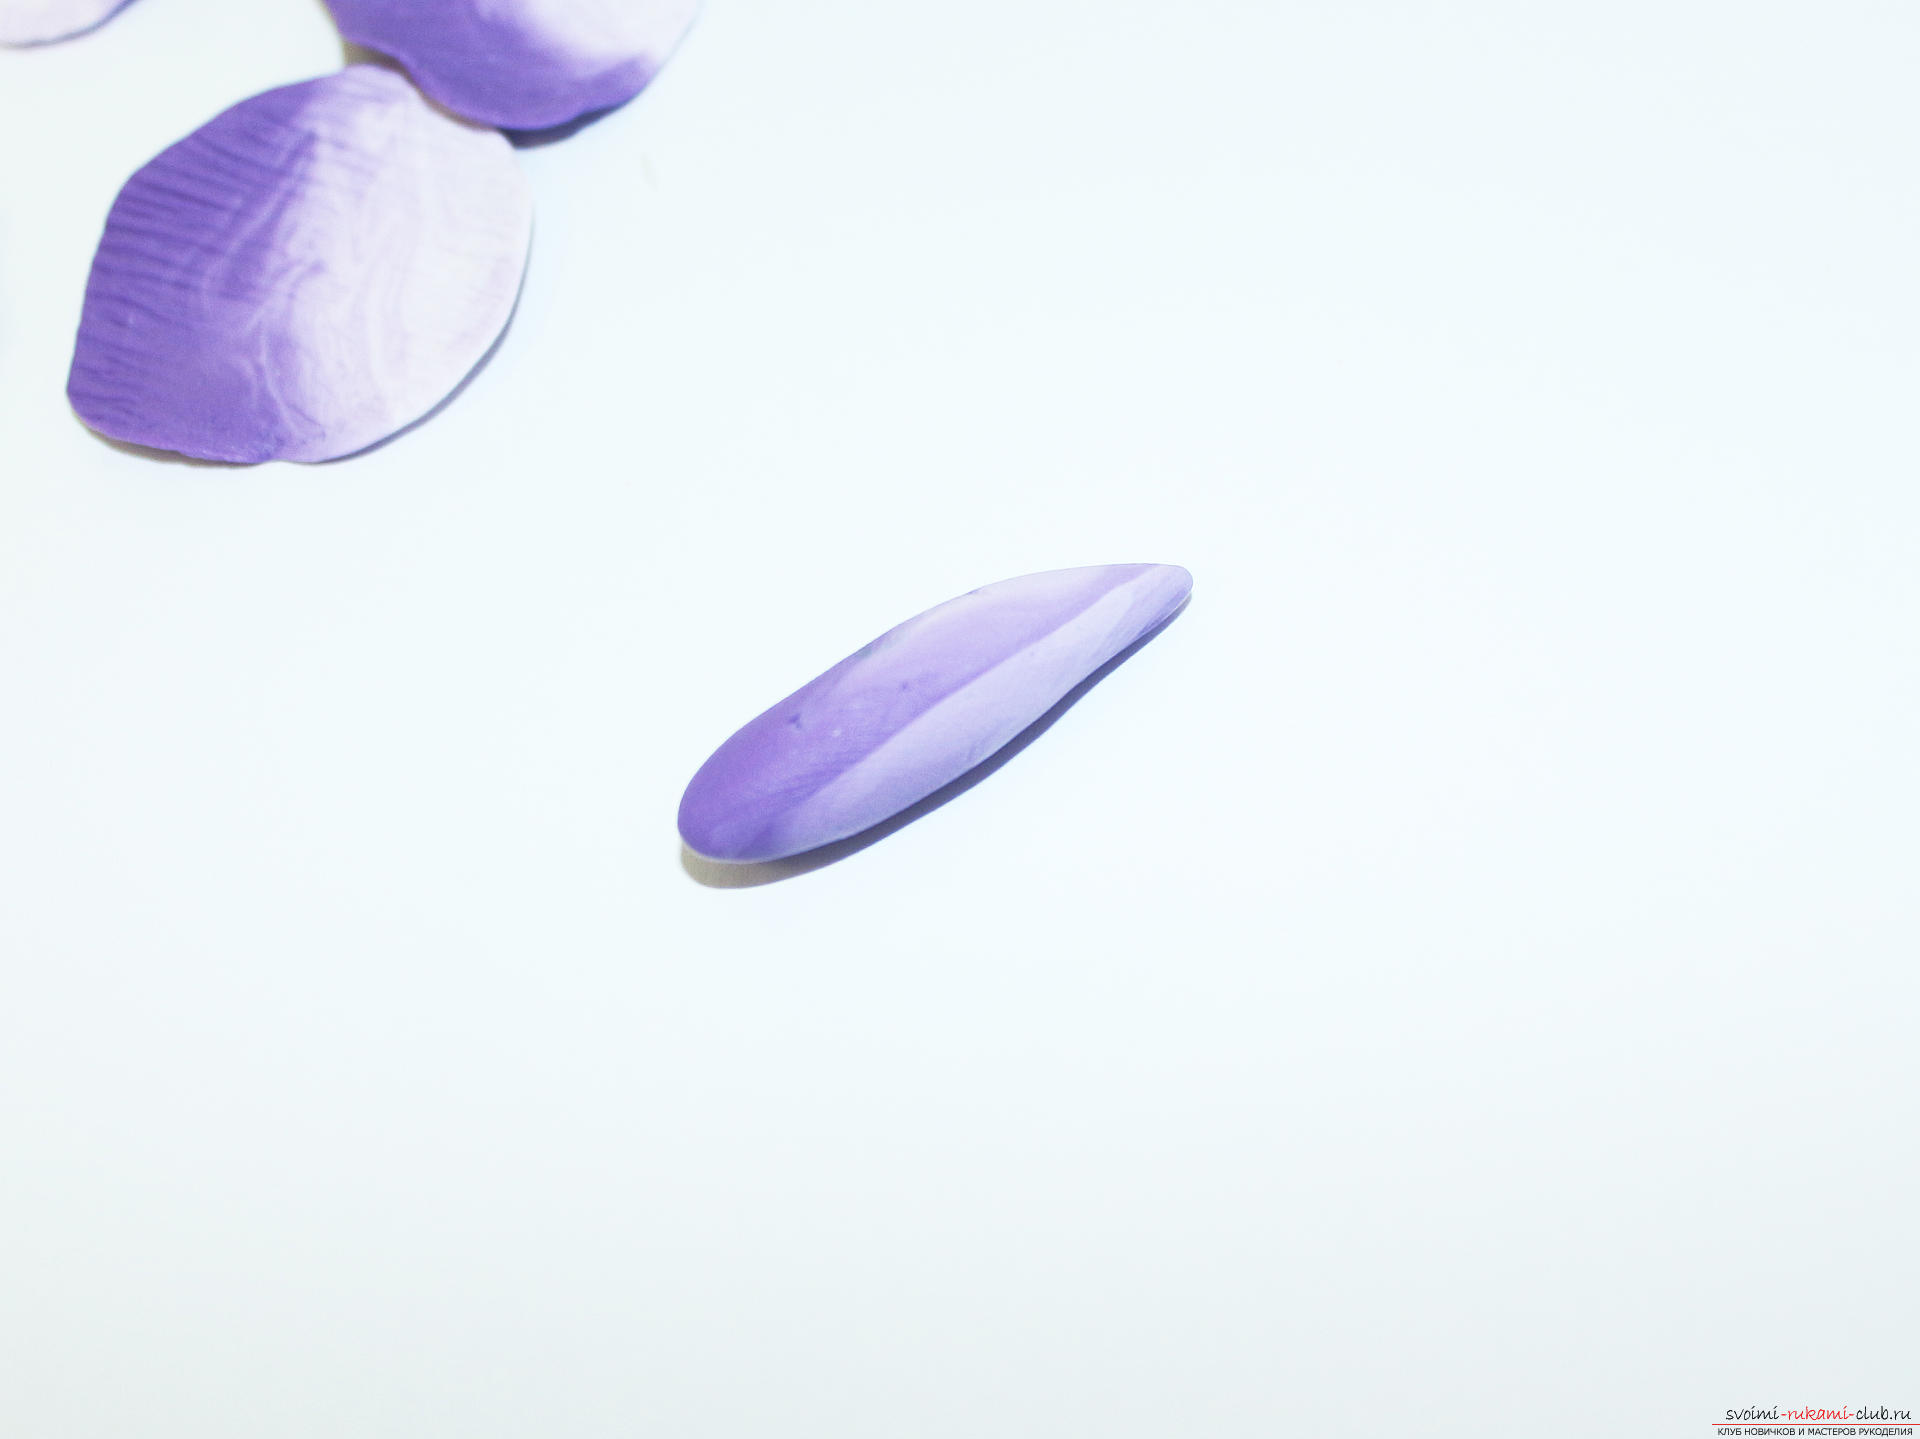 Choose a smaller petal and put it into ita little bit. The edges of the petal should be above the sharp part of the droplet-base. At the same stage, you need to decide which part of the petals will be inside the flower, and which - from the outside.
 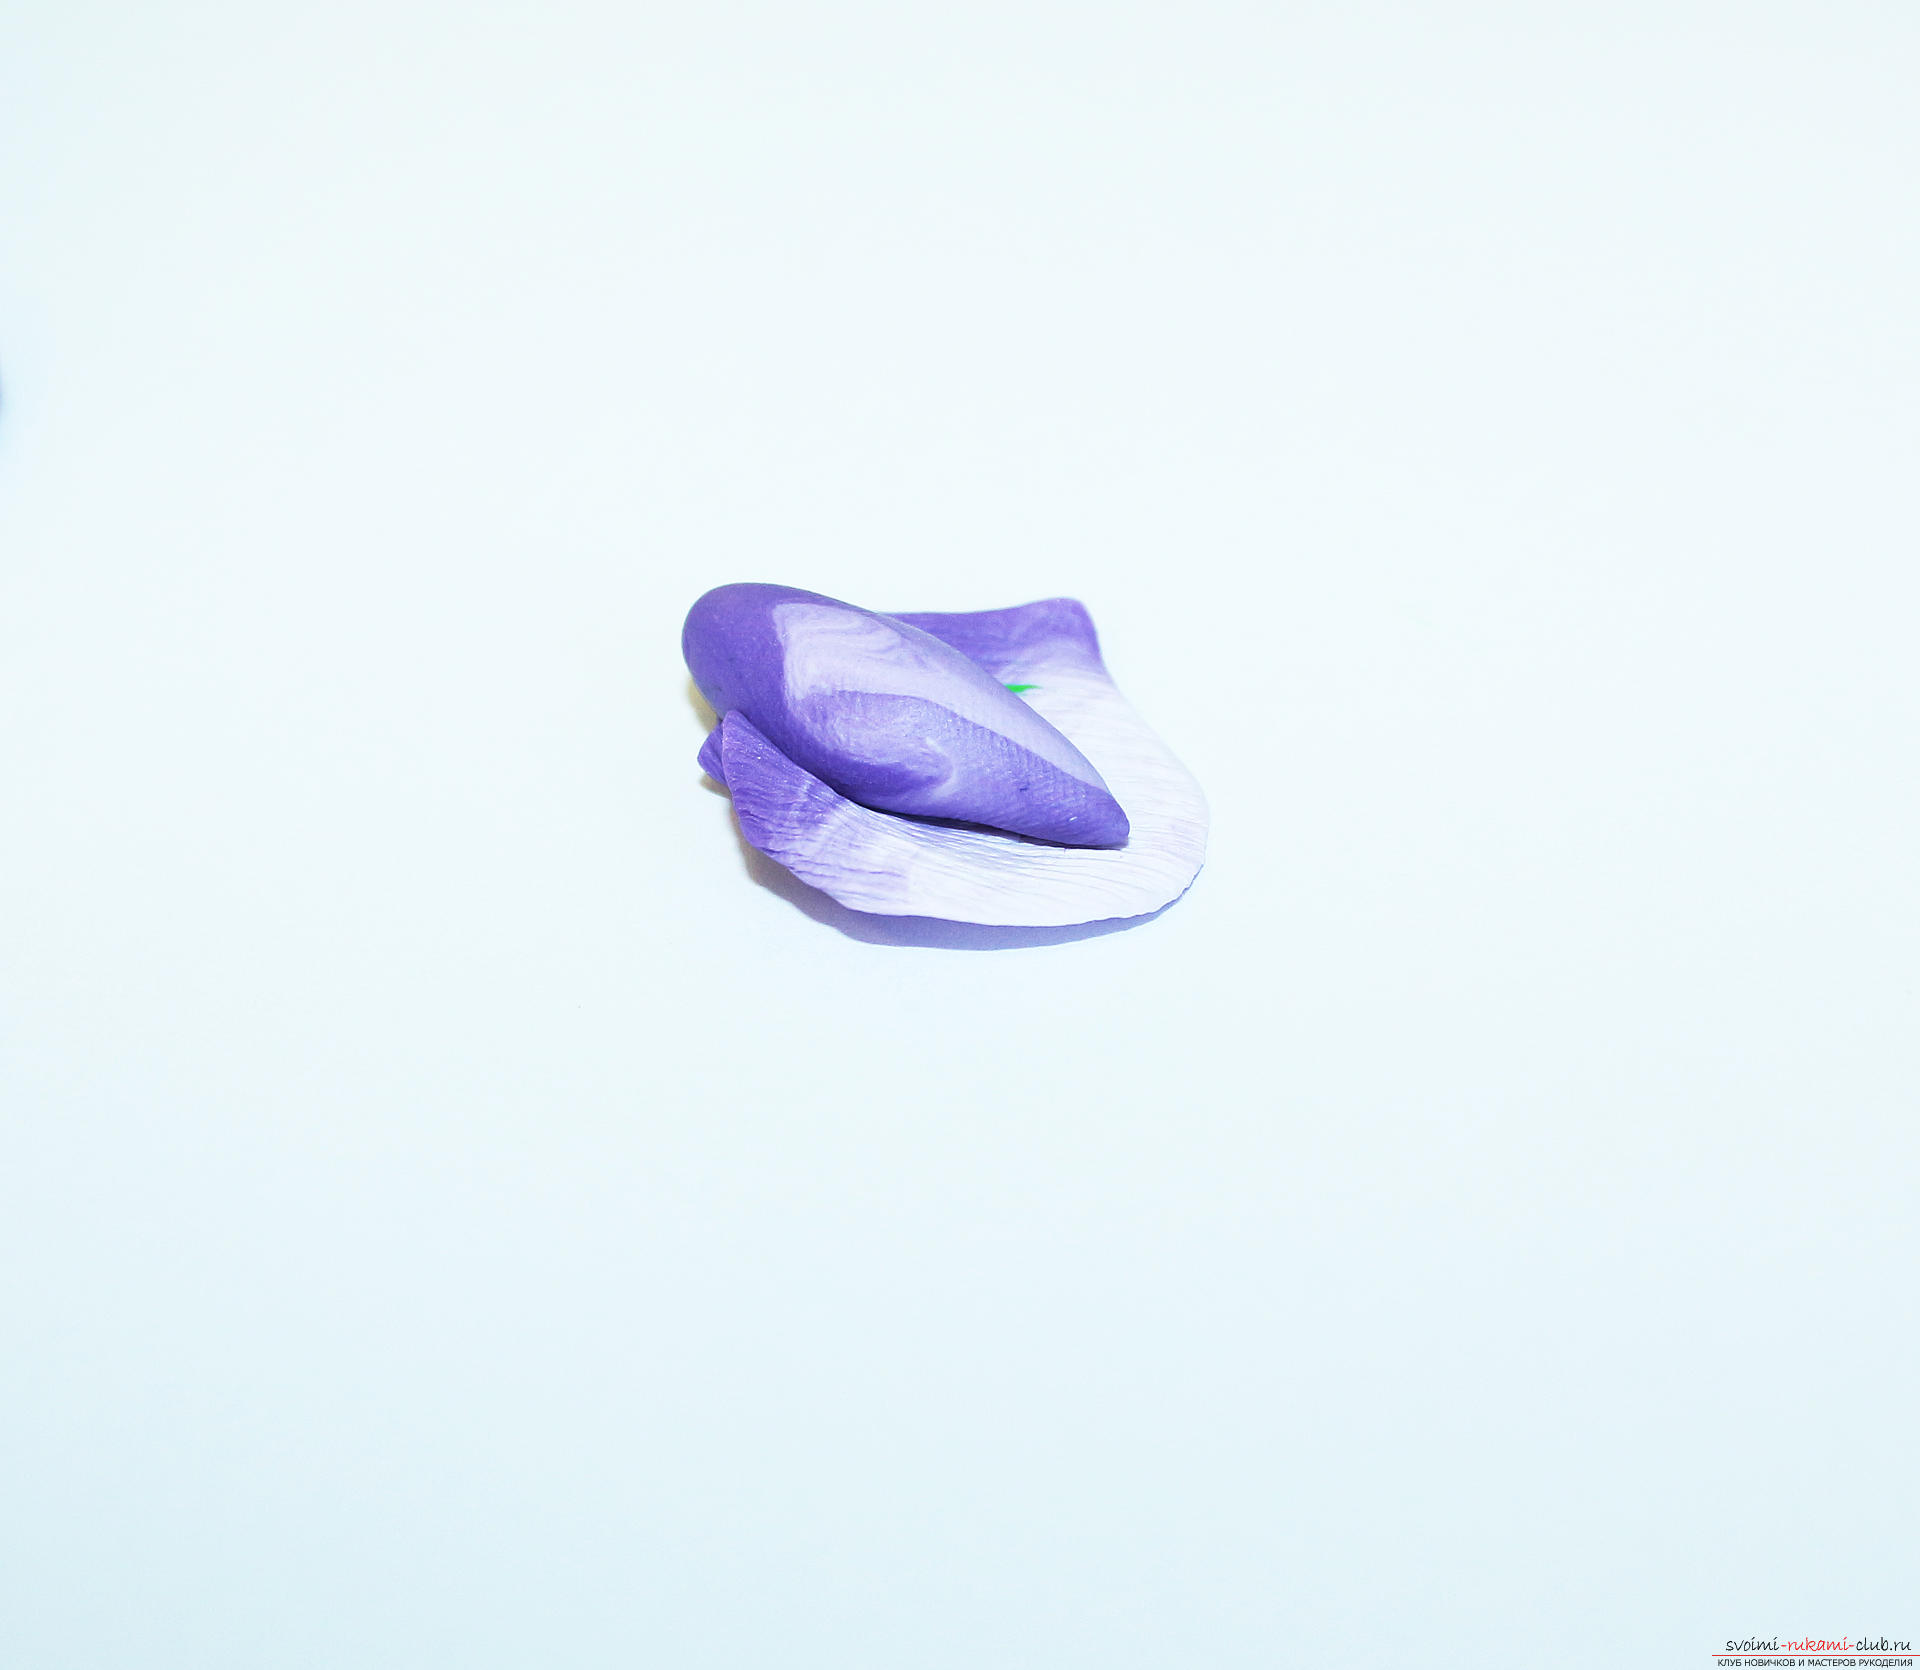 We wrap the petal with a drop of a base. The bright edge completely covers the base.
 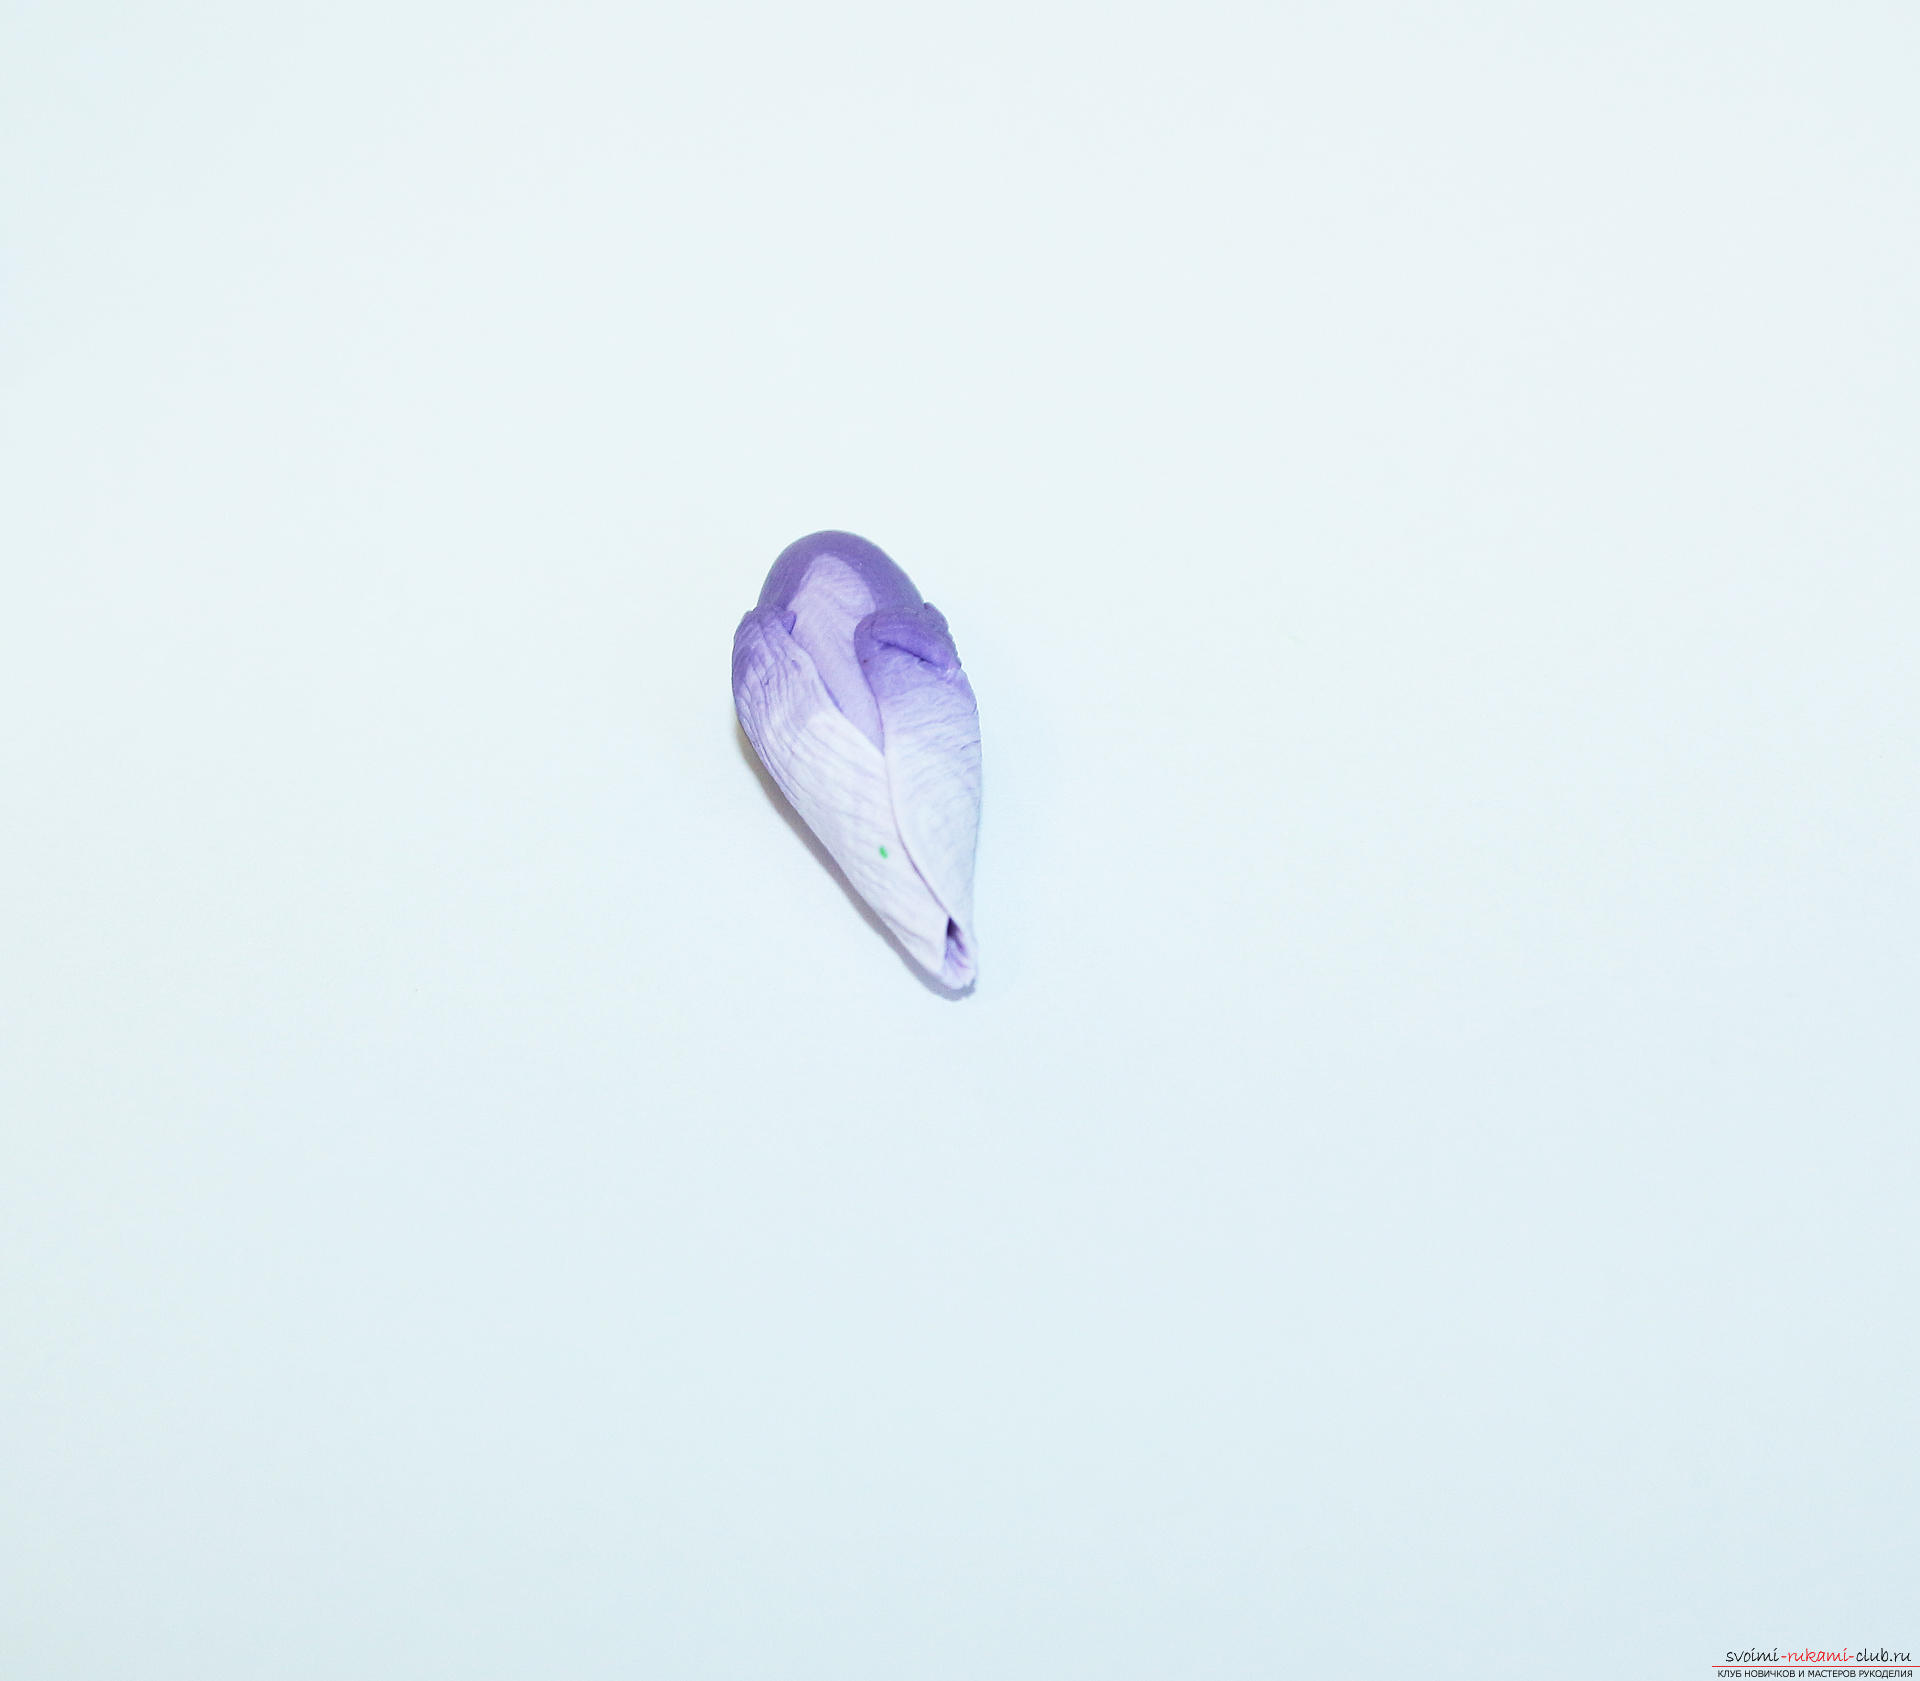 We cook two more petals and glue them to the base. The outer edges of the petals should be flush with the core. Petals glue lapped each other. Slightly bend their fingers to the outside.
  We form the bud a solid stem of superfluous plastic.
 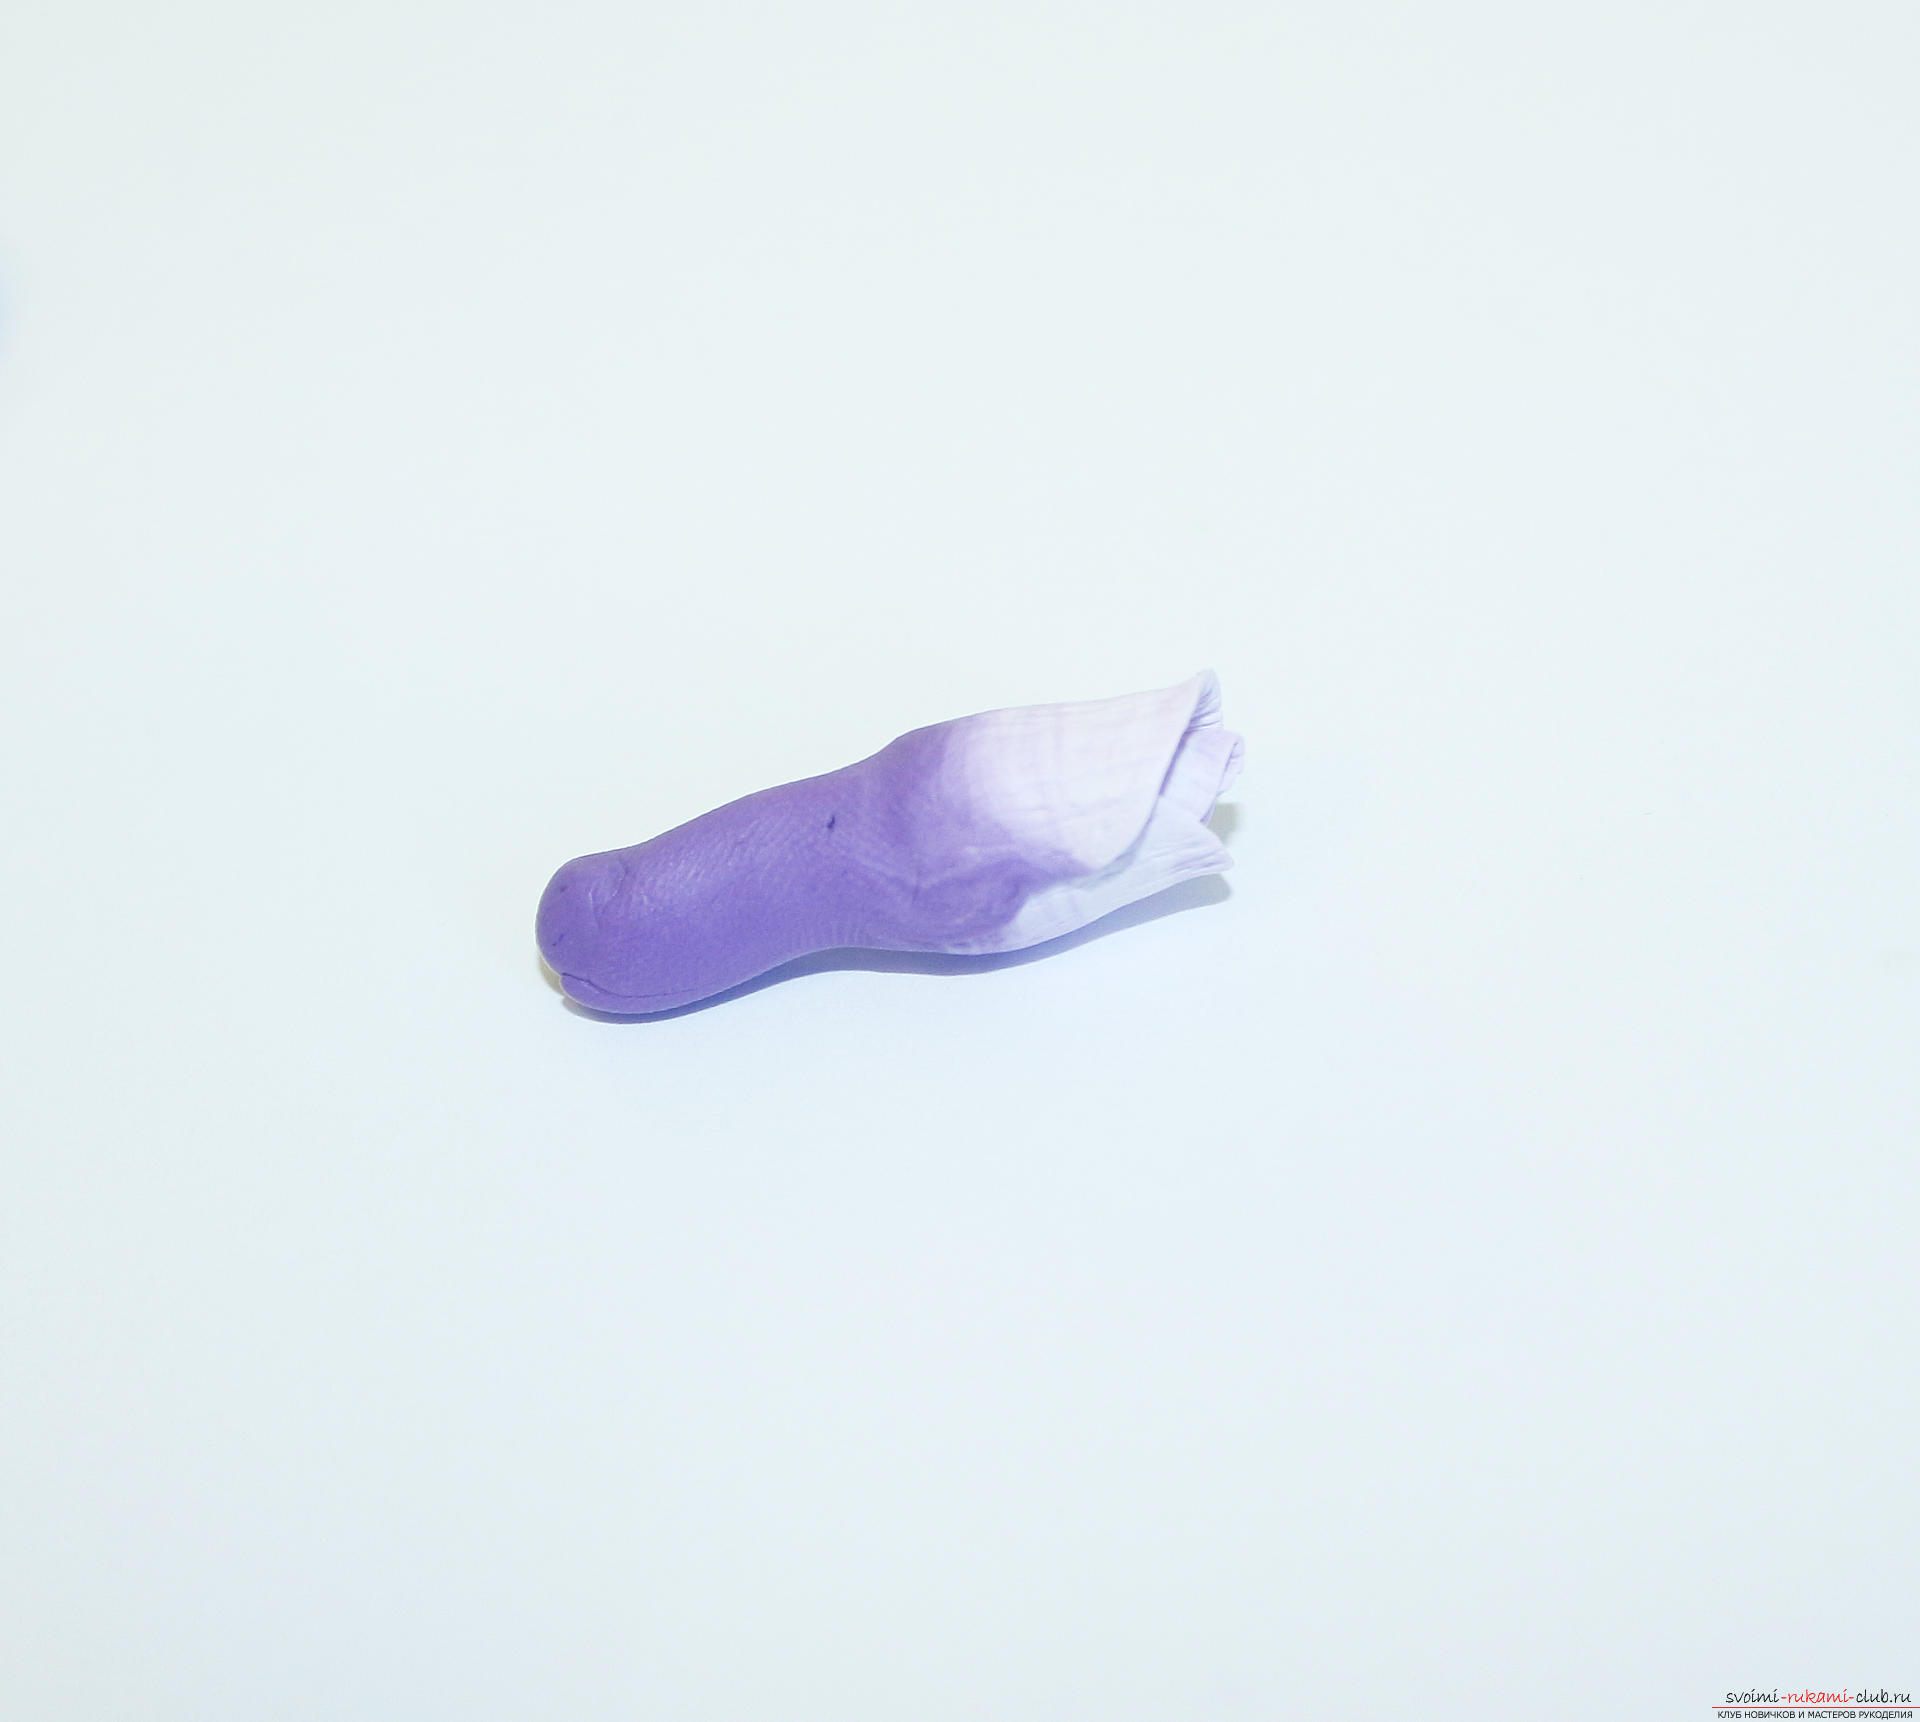 We lay the bud on a new petal. The junction of the previous petals should coincide with the center of the new petal. The outer edges of the new row of petals should be flush or slightly lower than the core.
  We put a new petal in the previous one. Add so many petals to completely wrap the bud. I have 3 petals.
 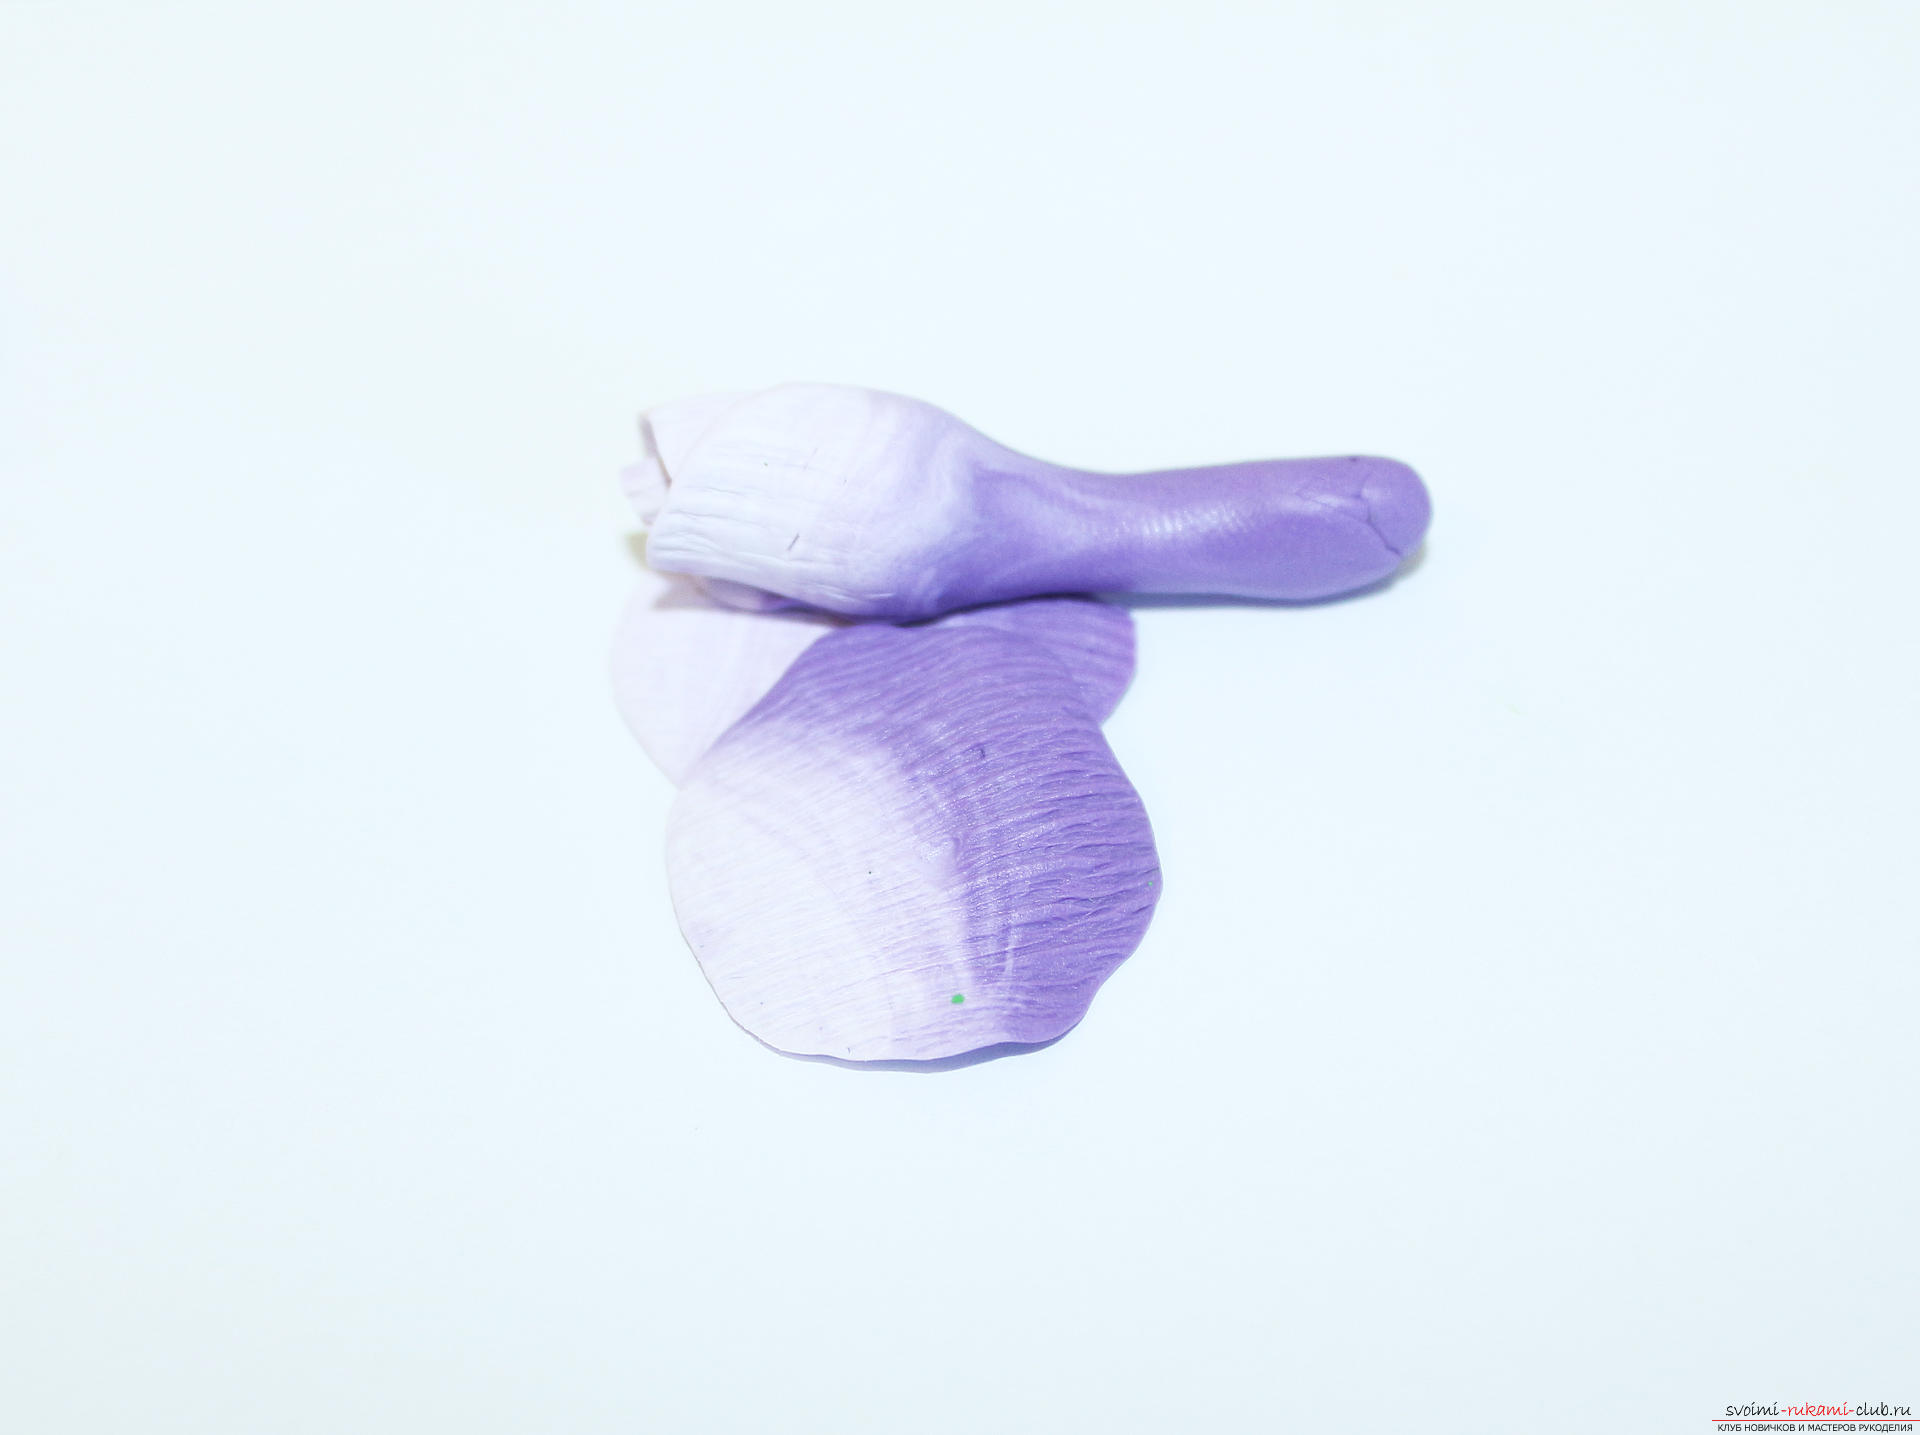 Raise the bud and wrap it with petals. The edges of the last petal cover the edges of the first.
 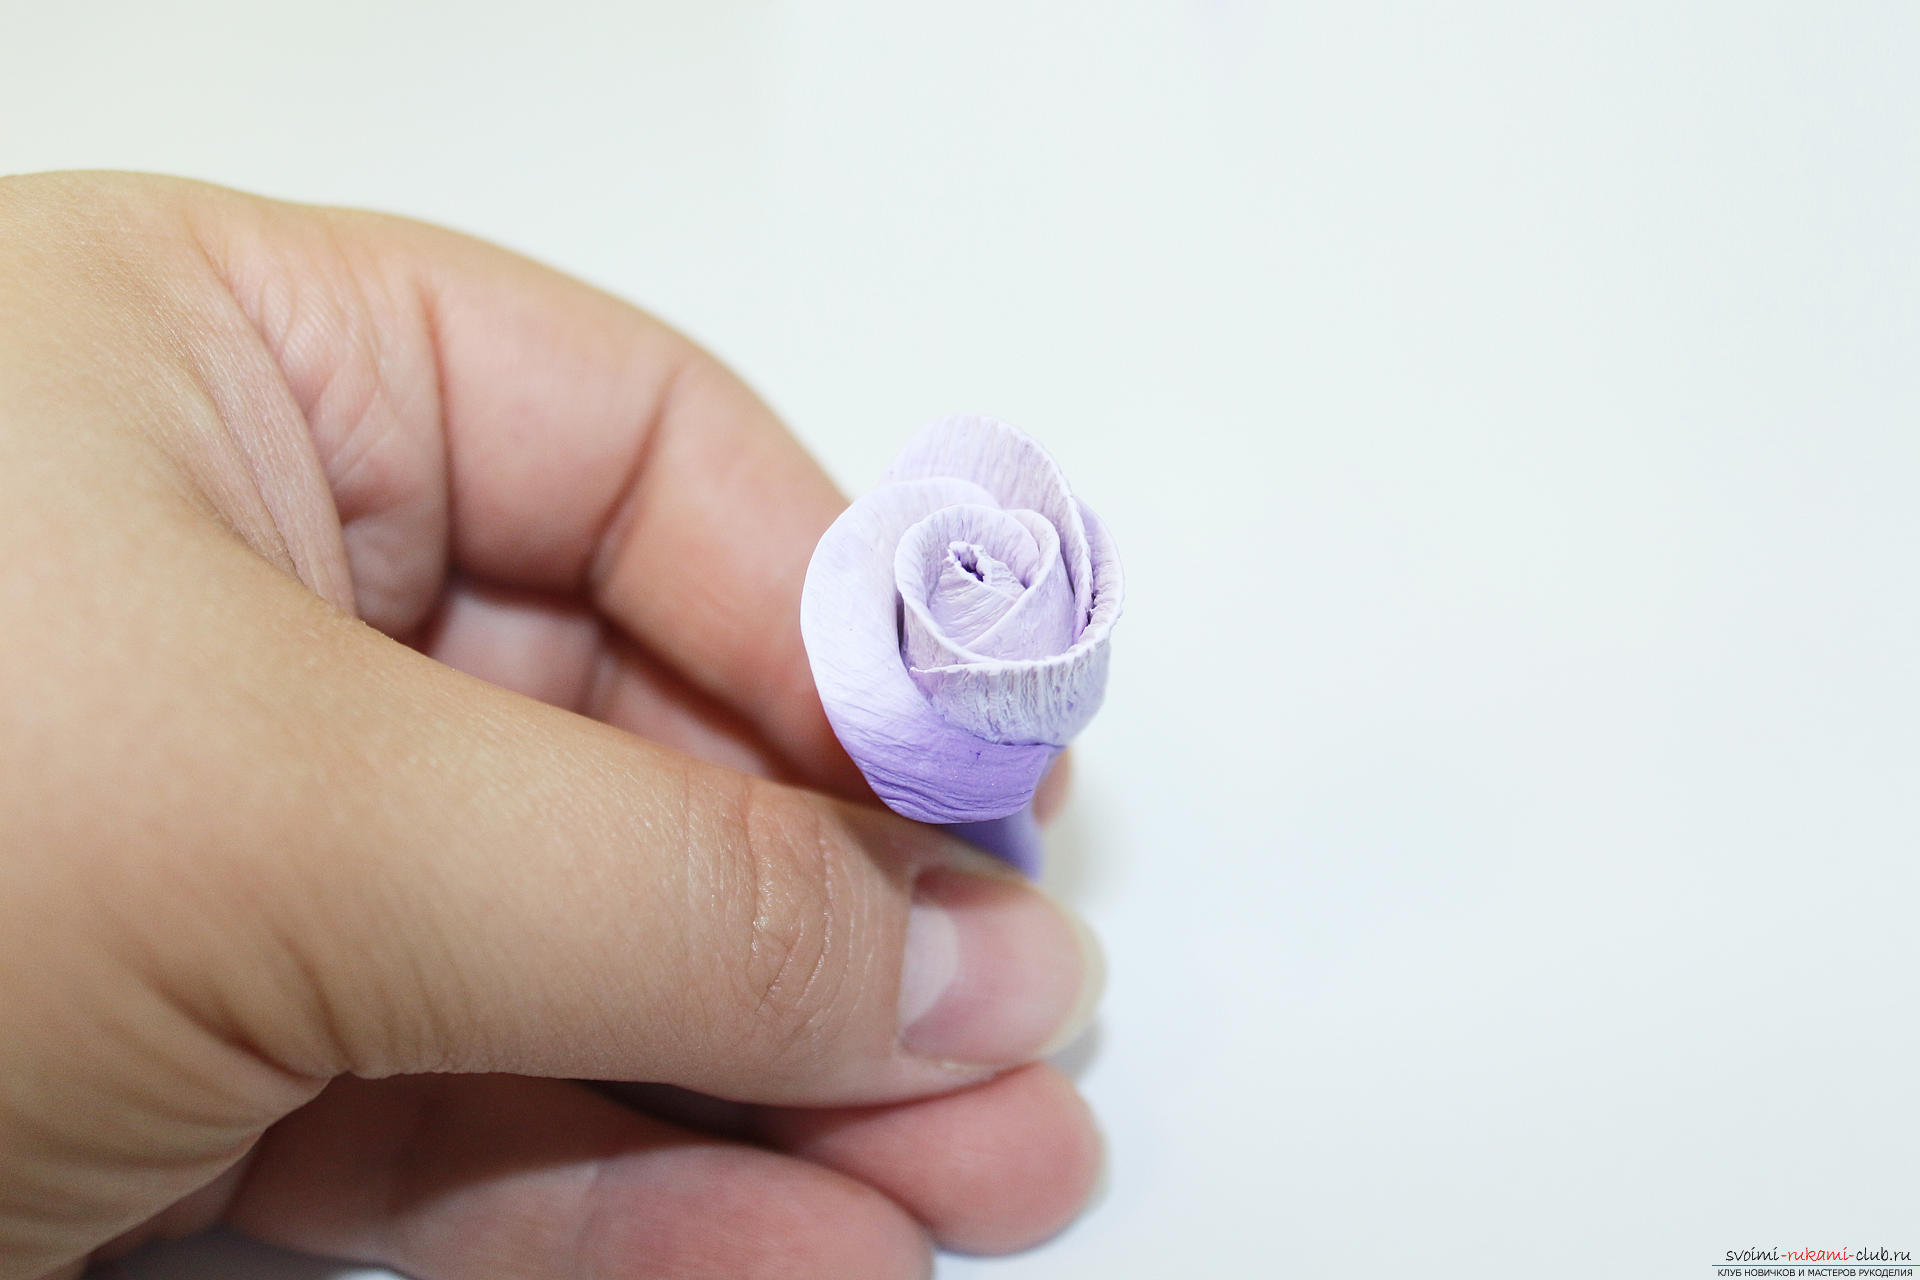 We unfold the petals outwards.
 By the same principle we add one more row of petals.
 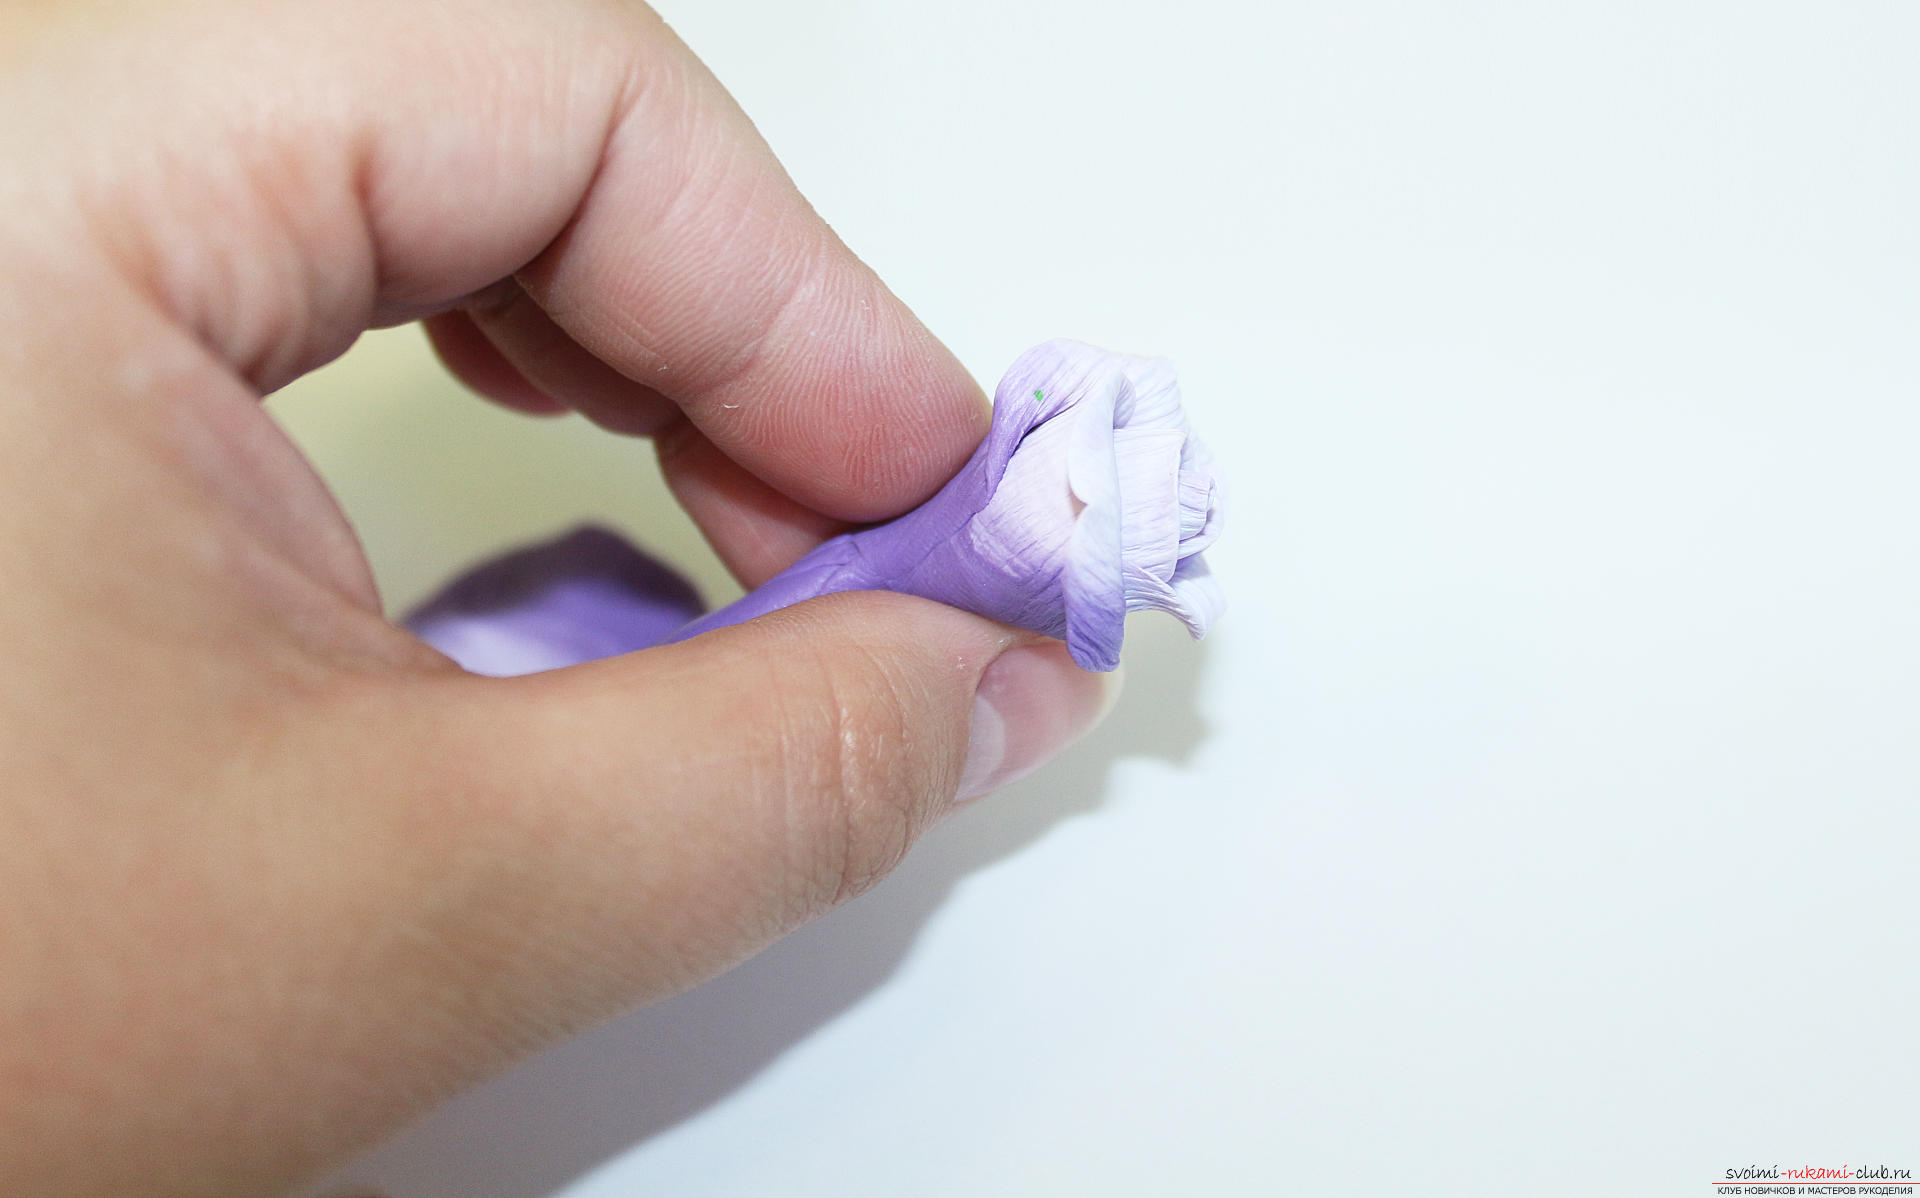 Fingers squeeze the base to make it more like a bud.
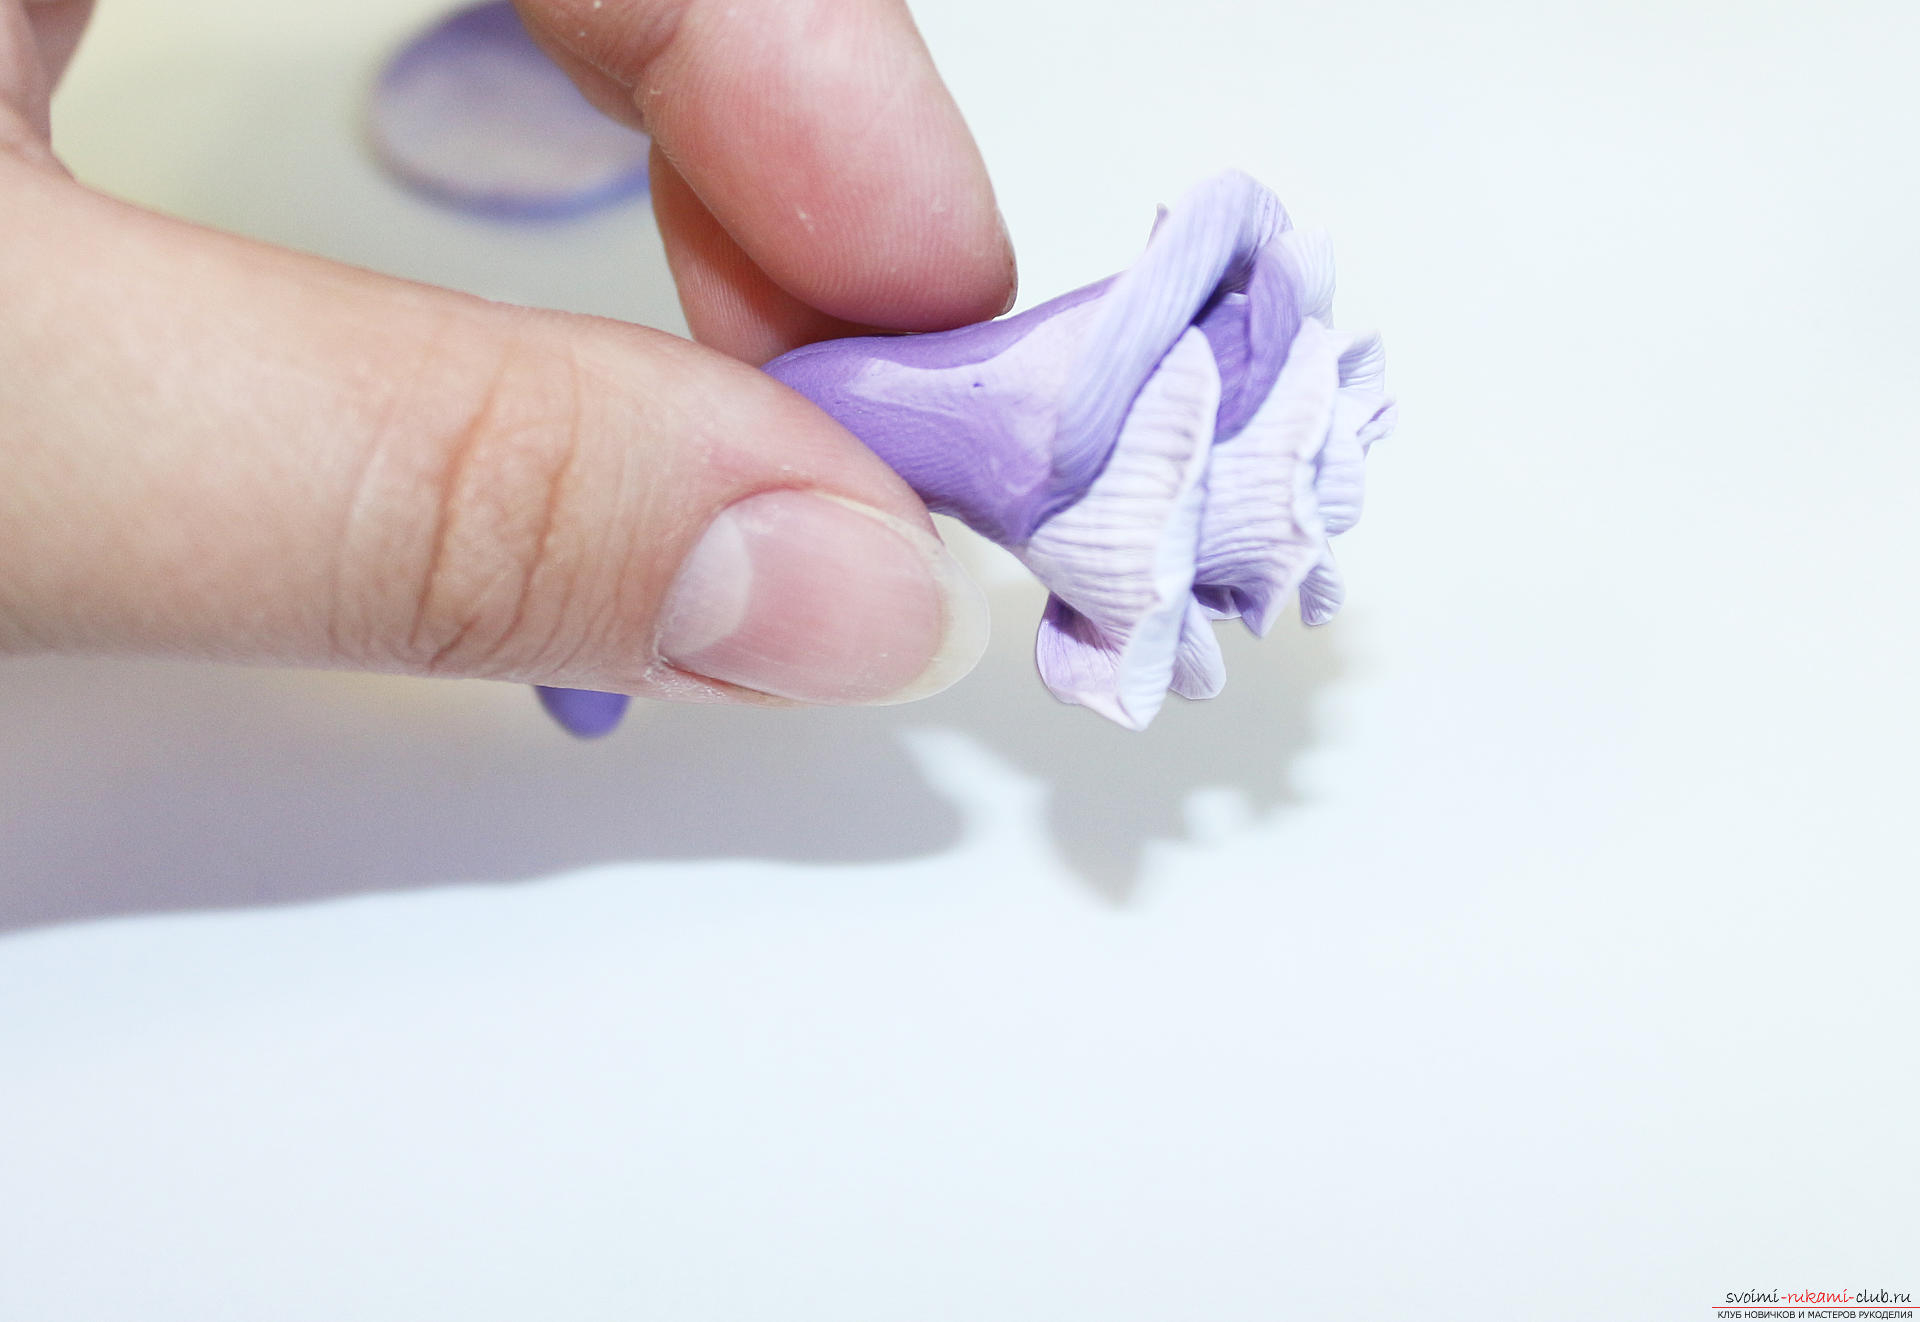 Each petal unfold and bend. The petals should lie airy and not stick together.
 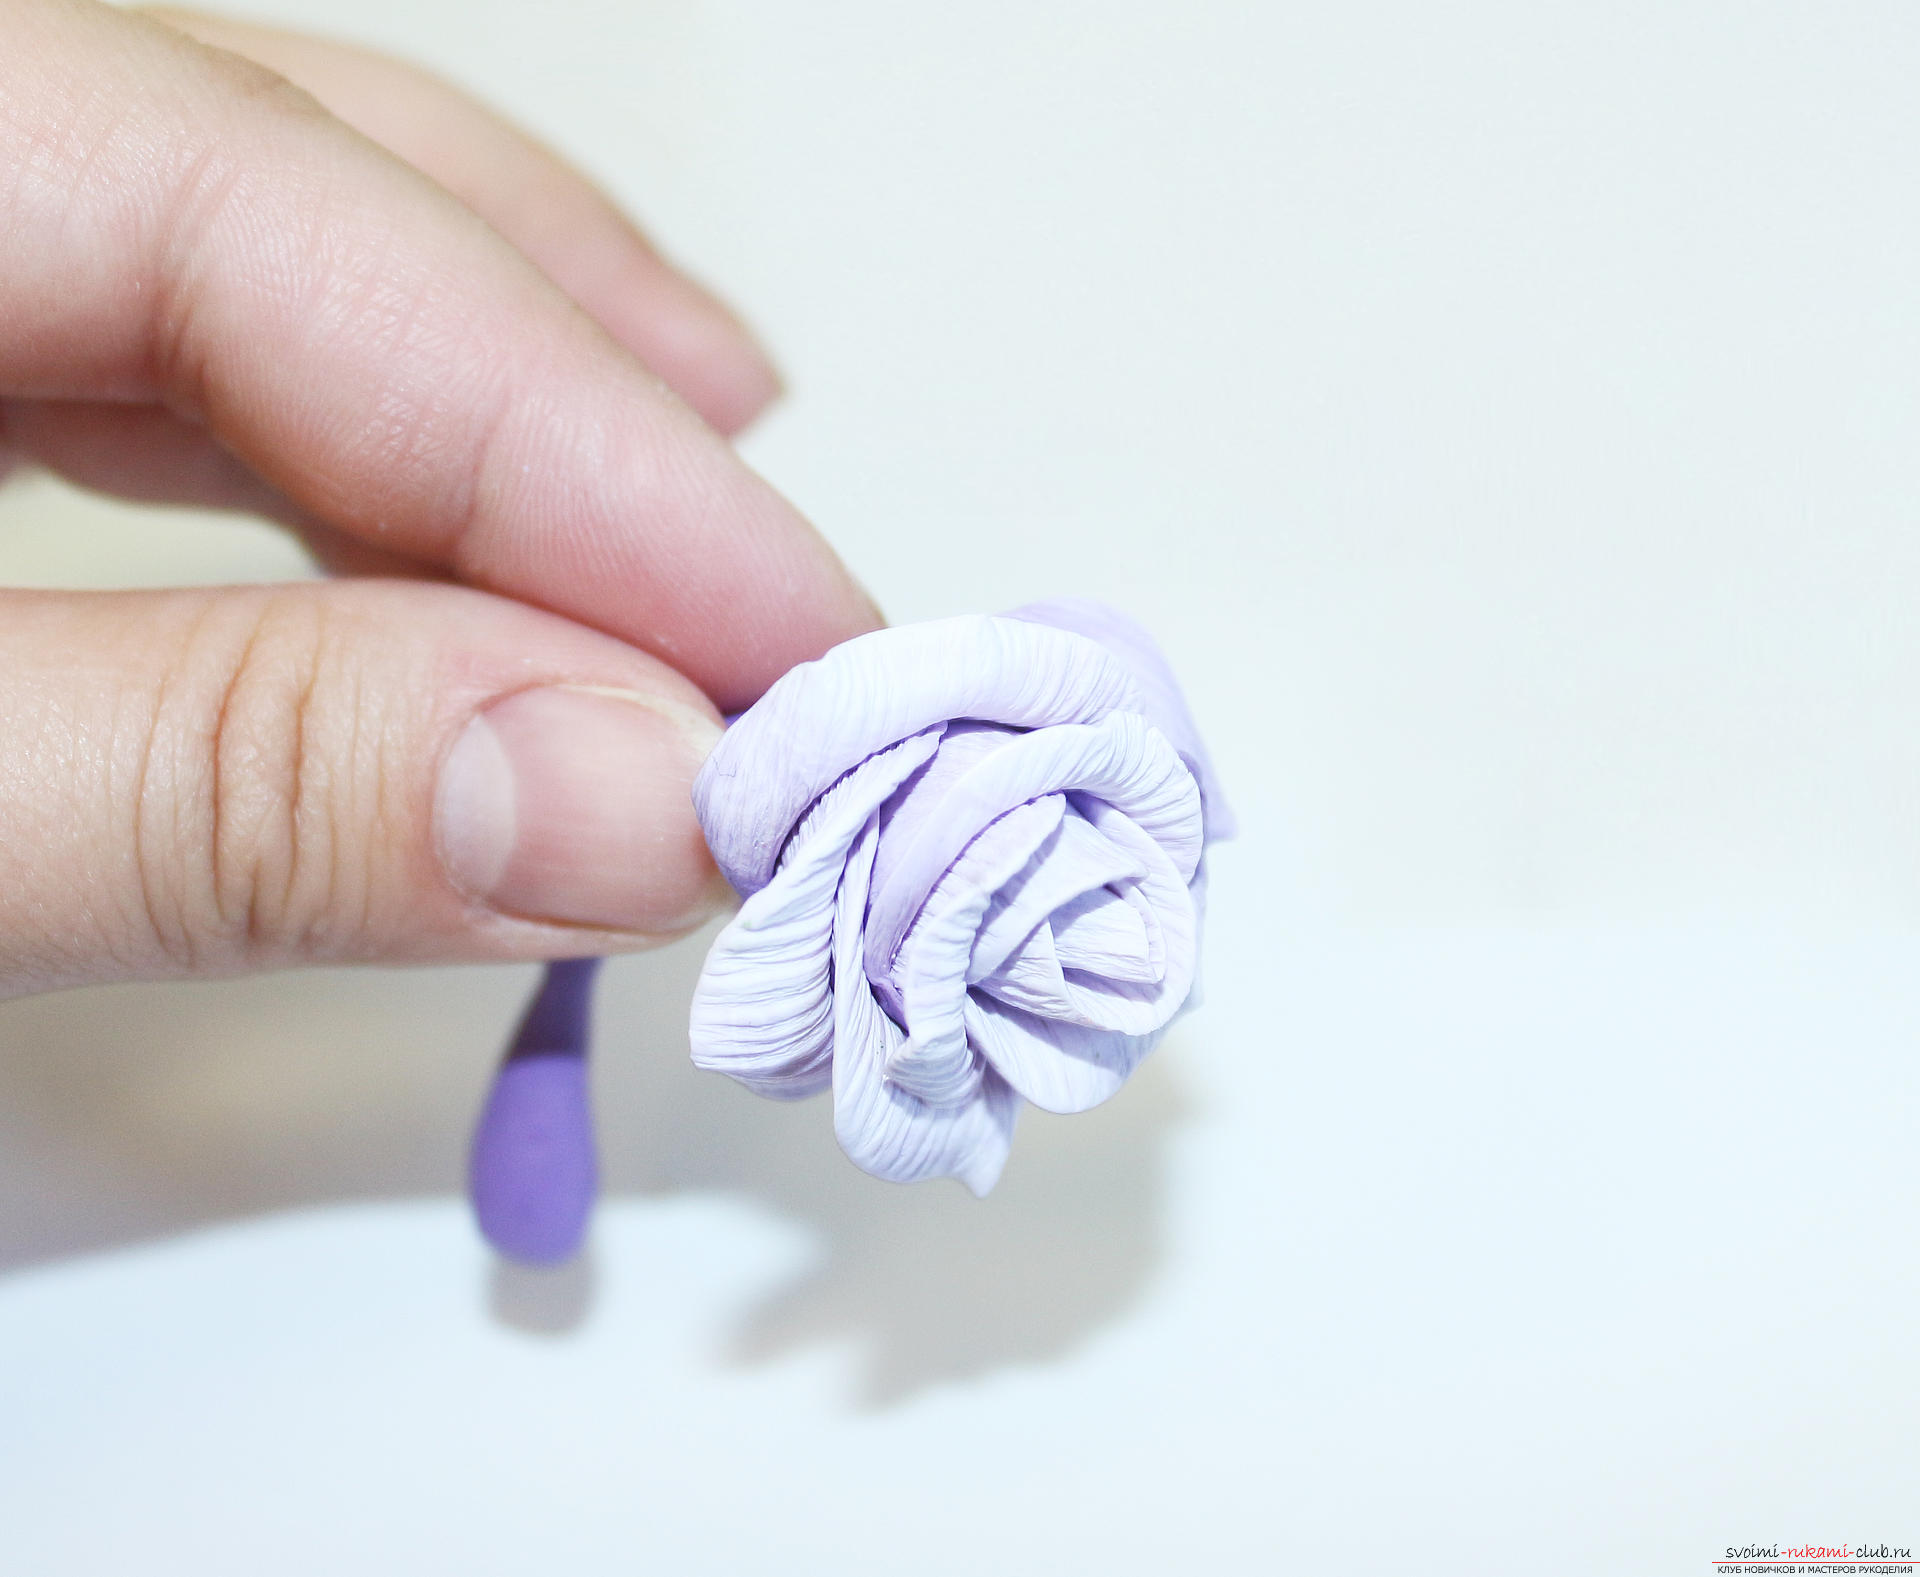 In the center of the outer petals you can make a crease - to do this, pinch the edges of the petal.
 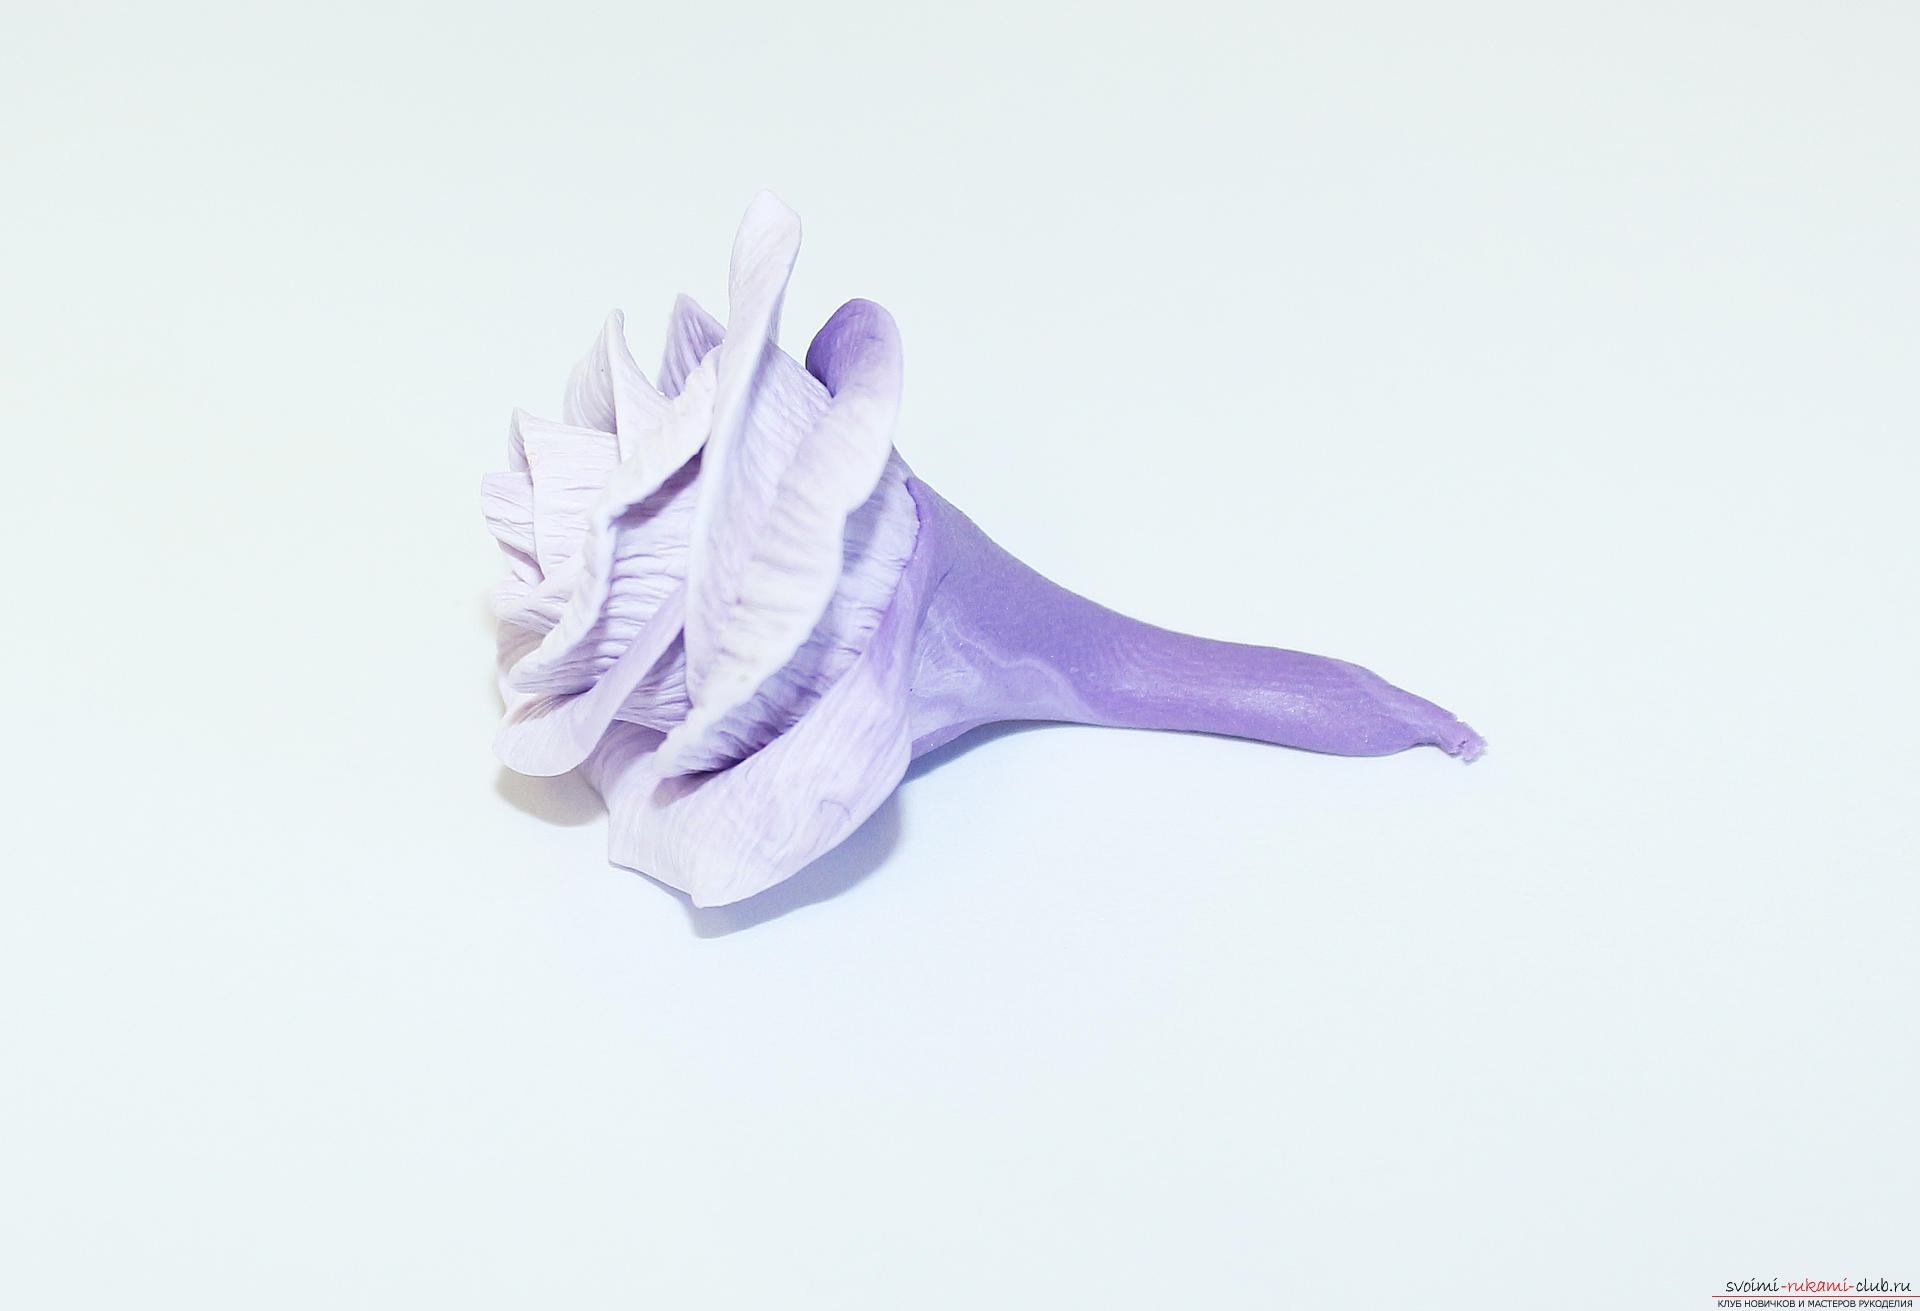 We cut off the leg with a blade.
 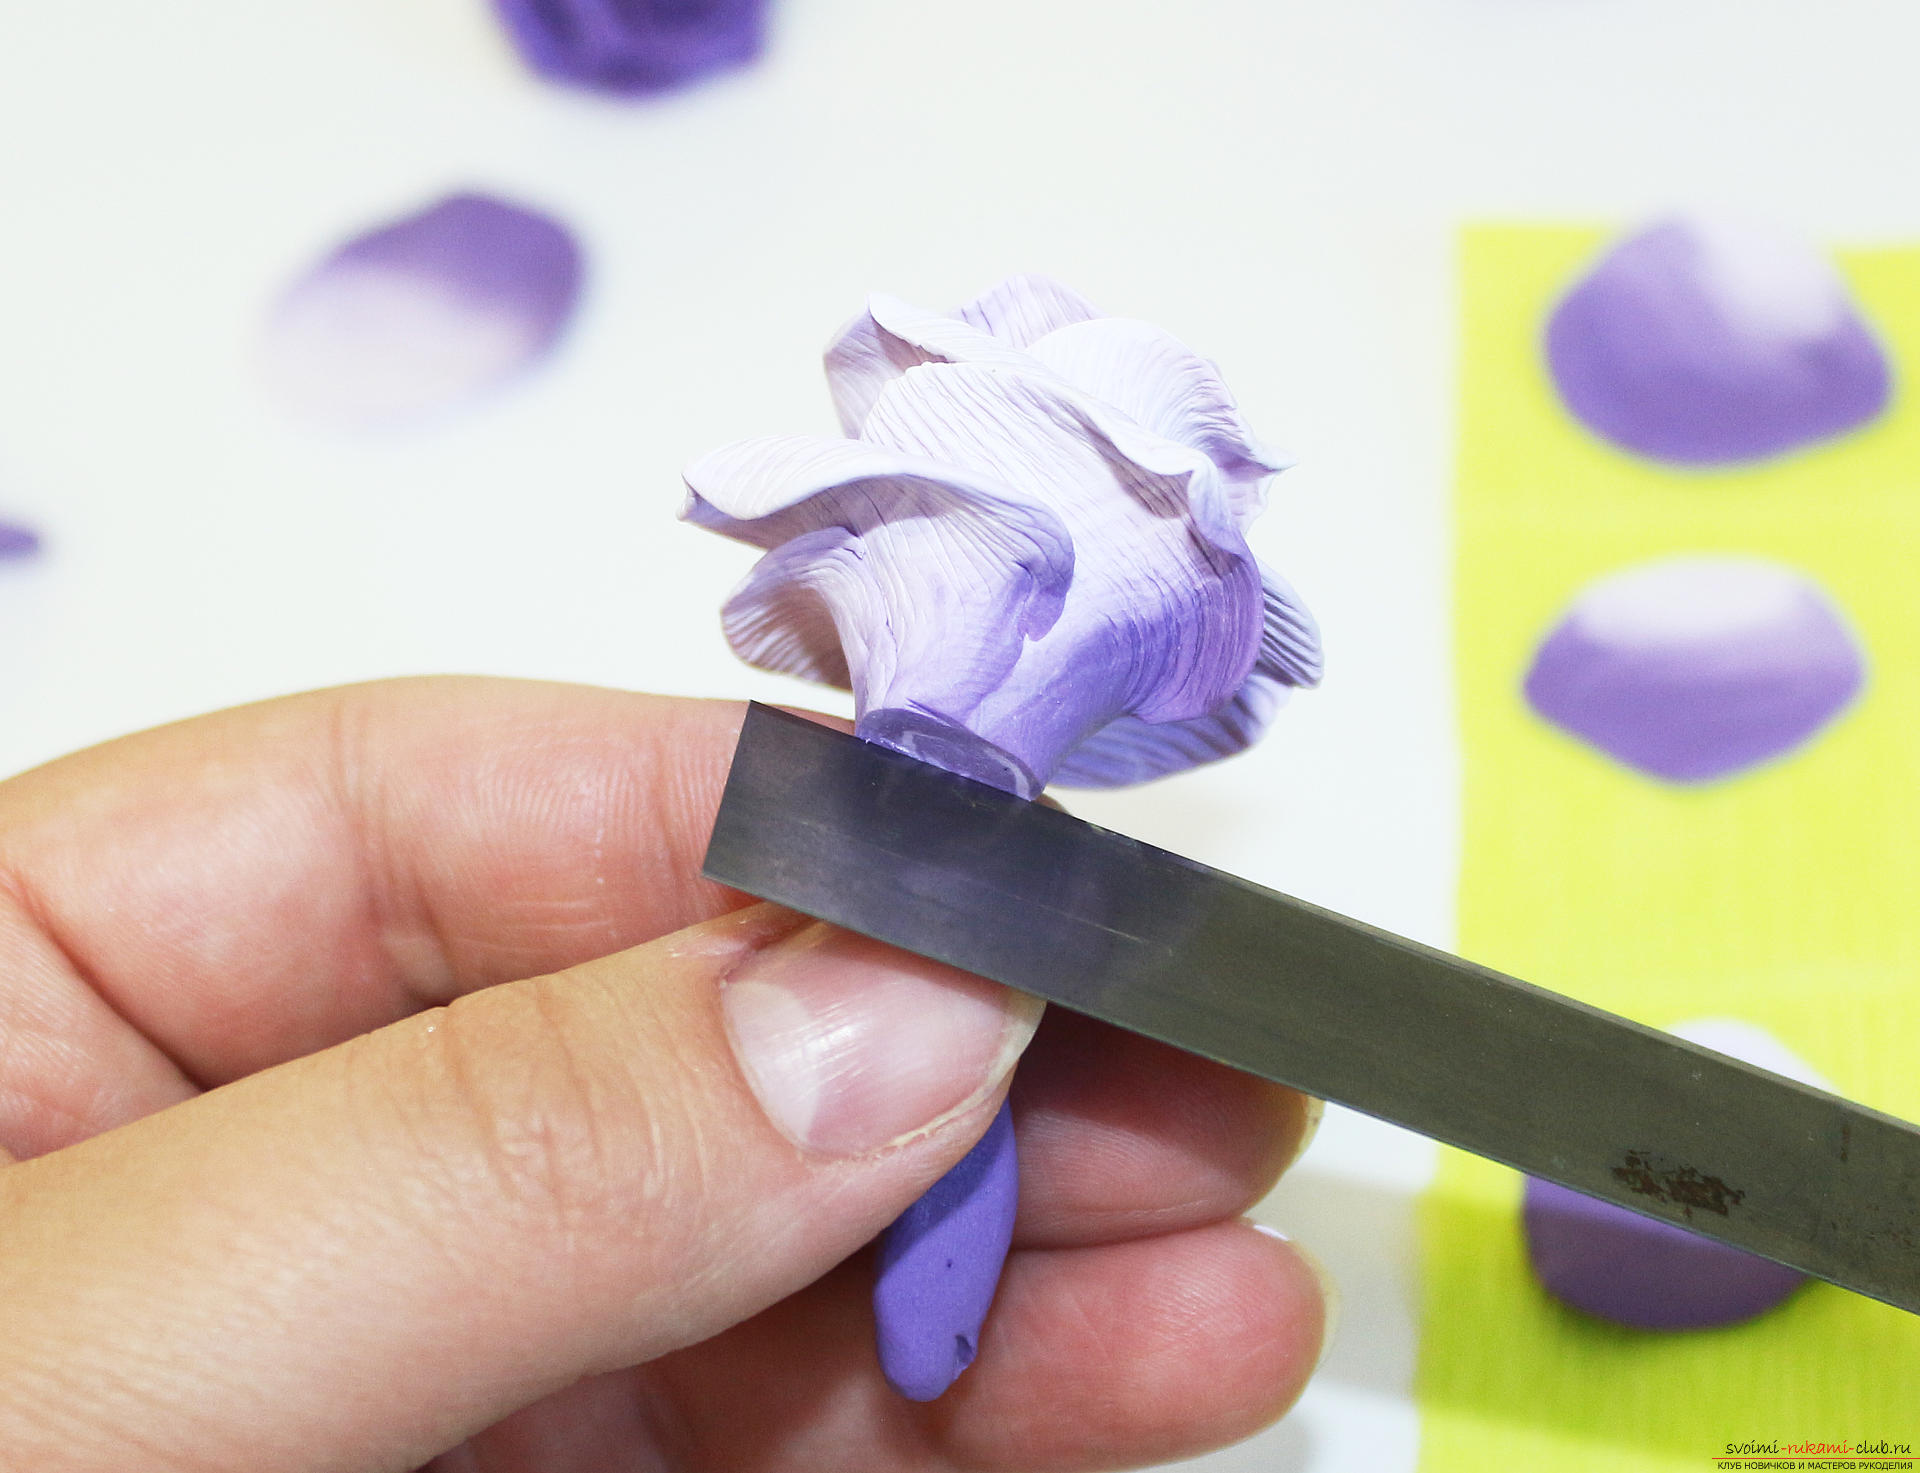 We cook on this principle at least 3 flowers. "Cut" flowers placed on a cardboard box and baked.
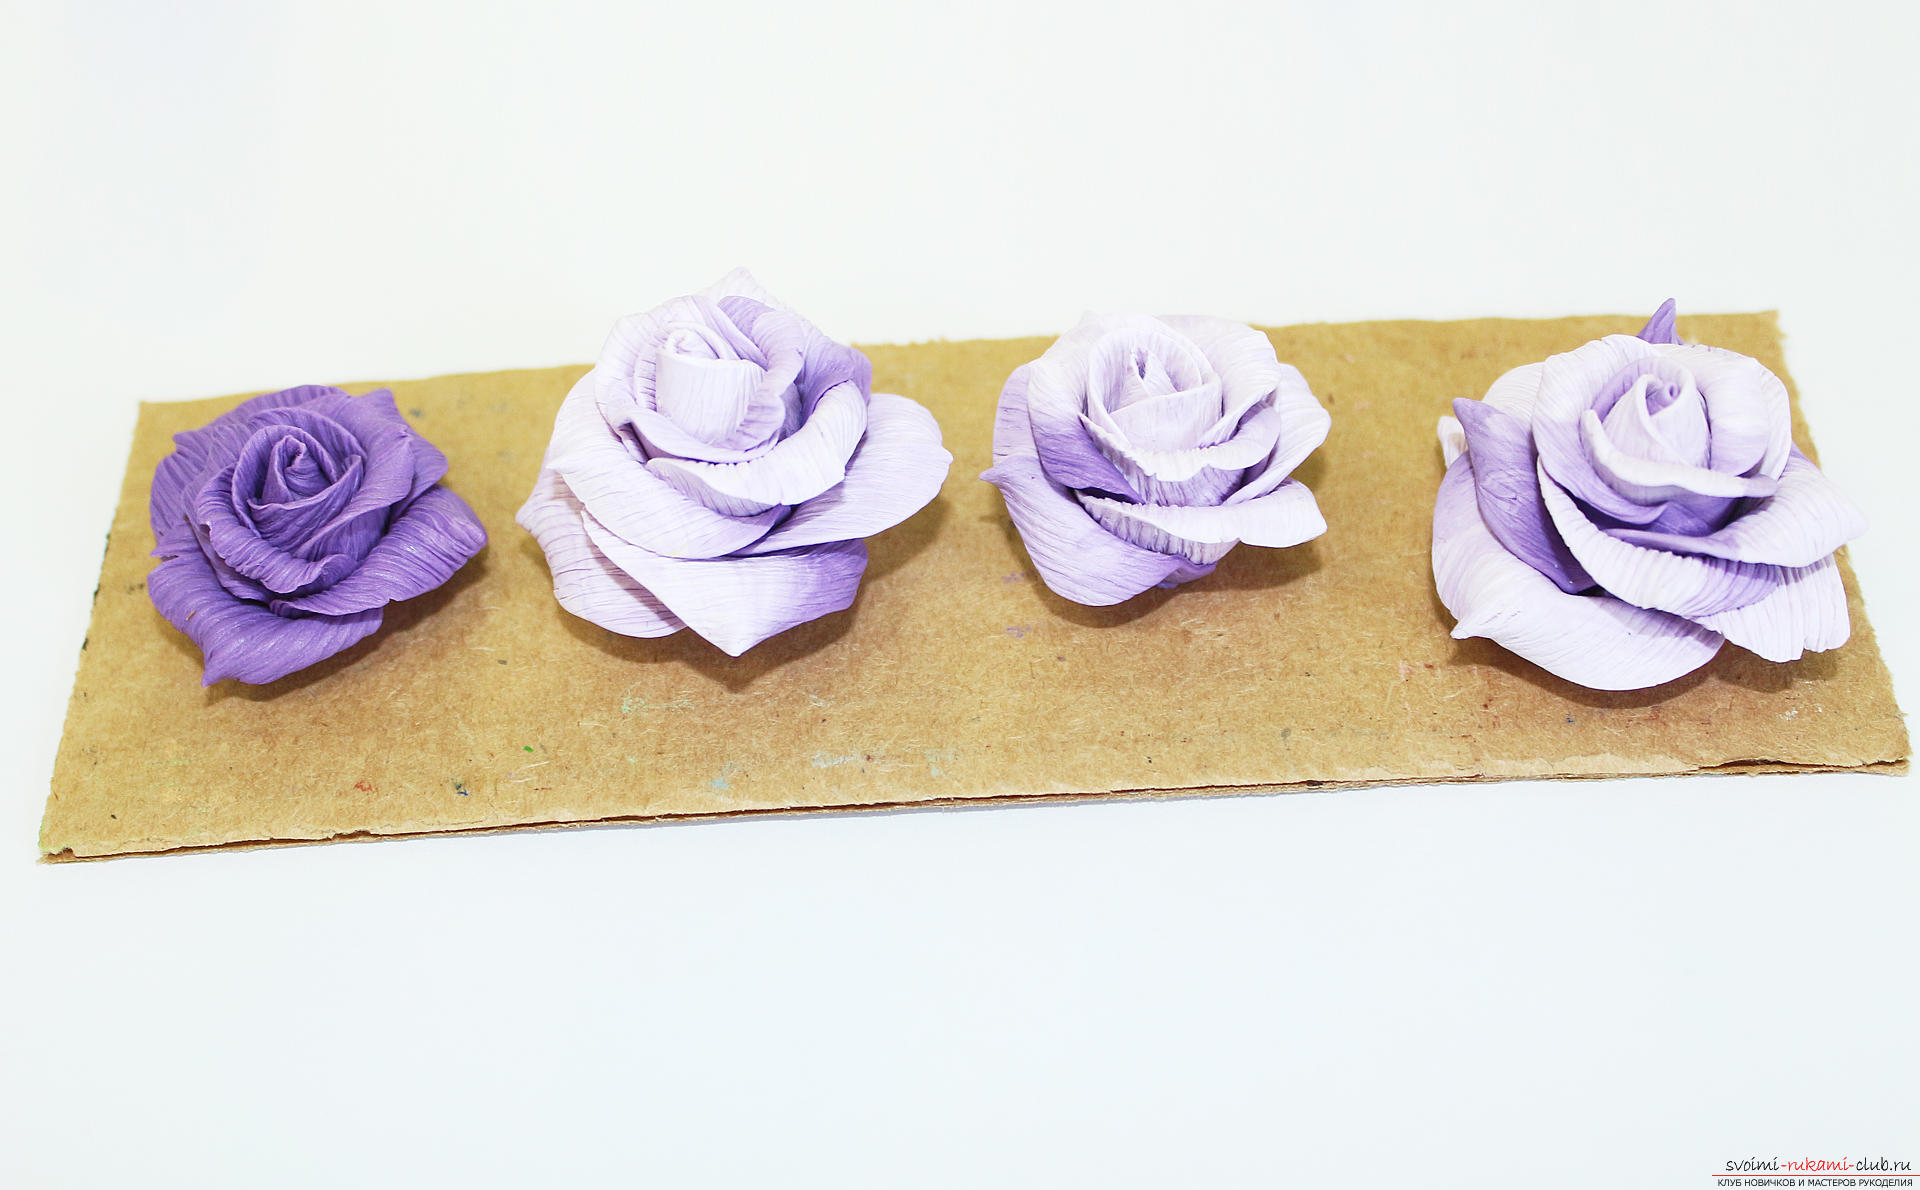
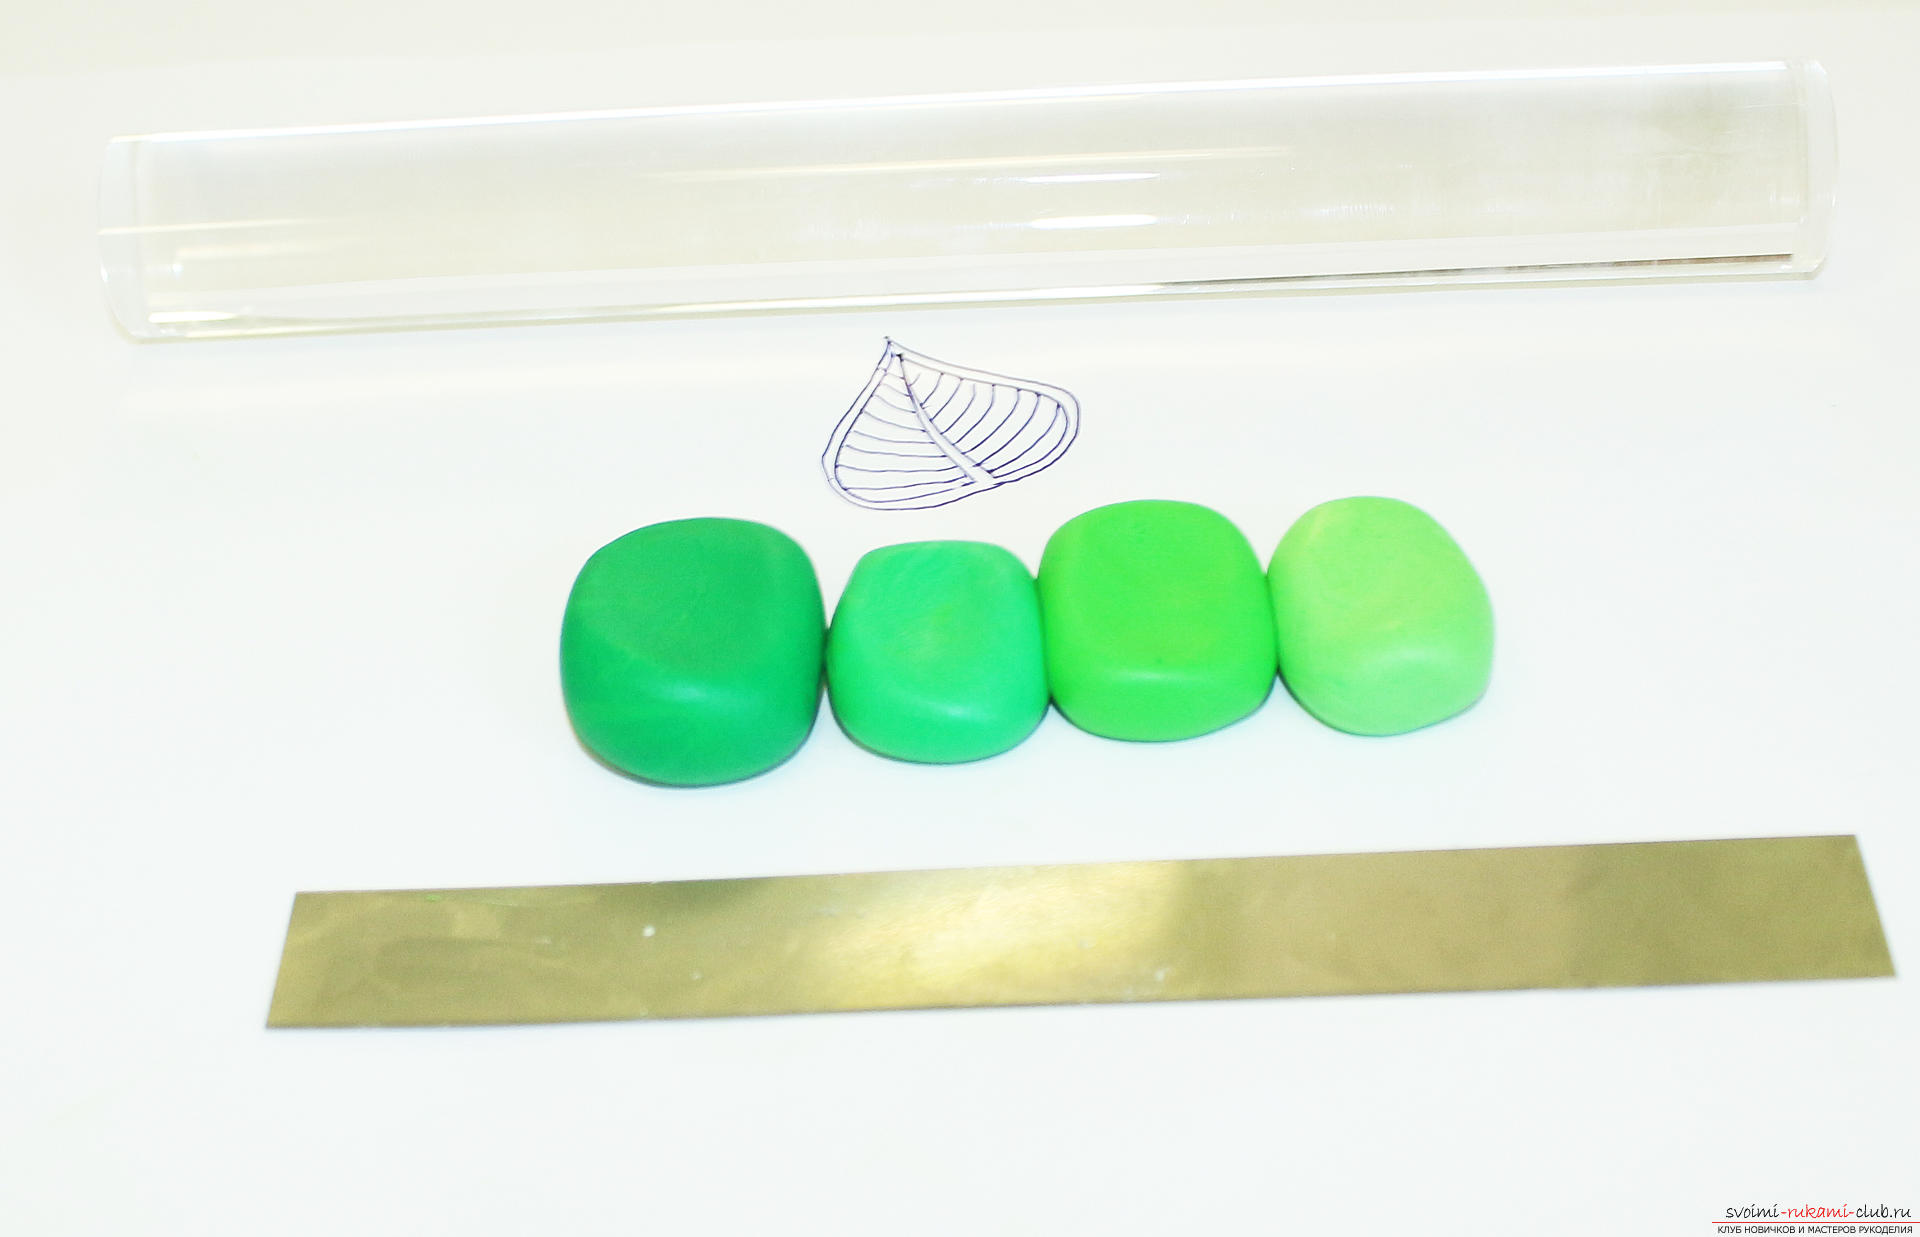
 While baking roses, create for themworthy leaves. To do this, we form a Keyn list. We will use dark green color, green and white. Just need to draw a rough sketch of the future leaf.
 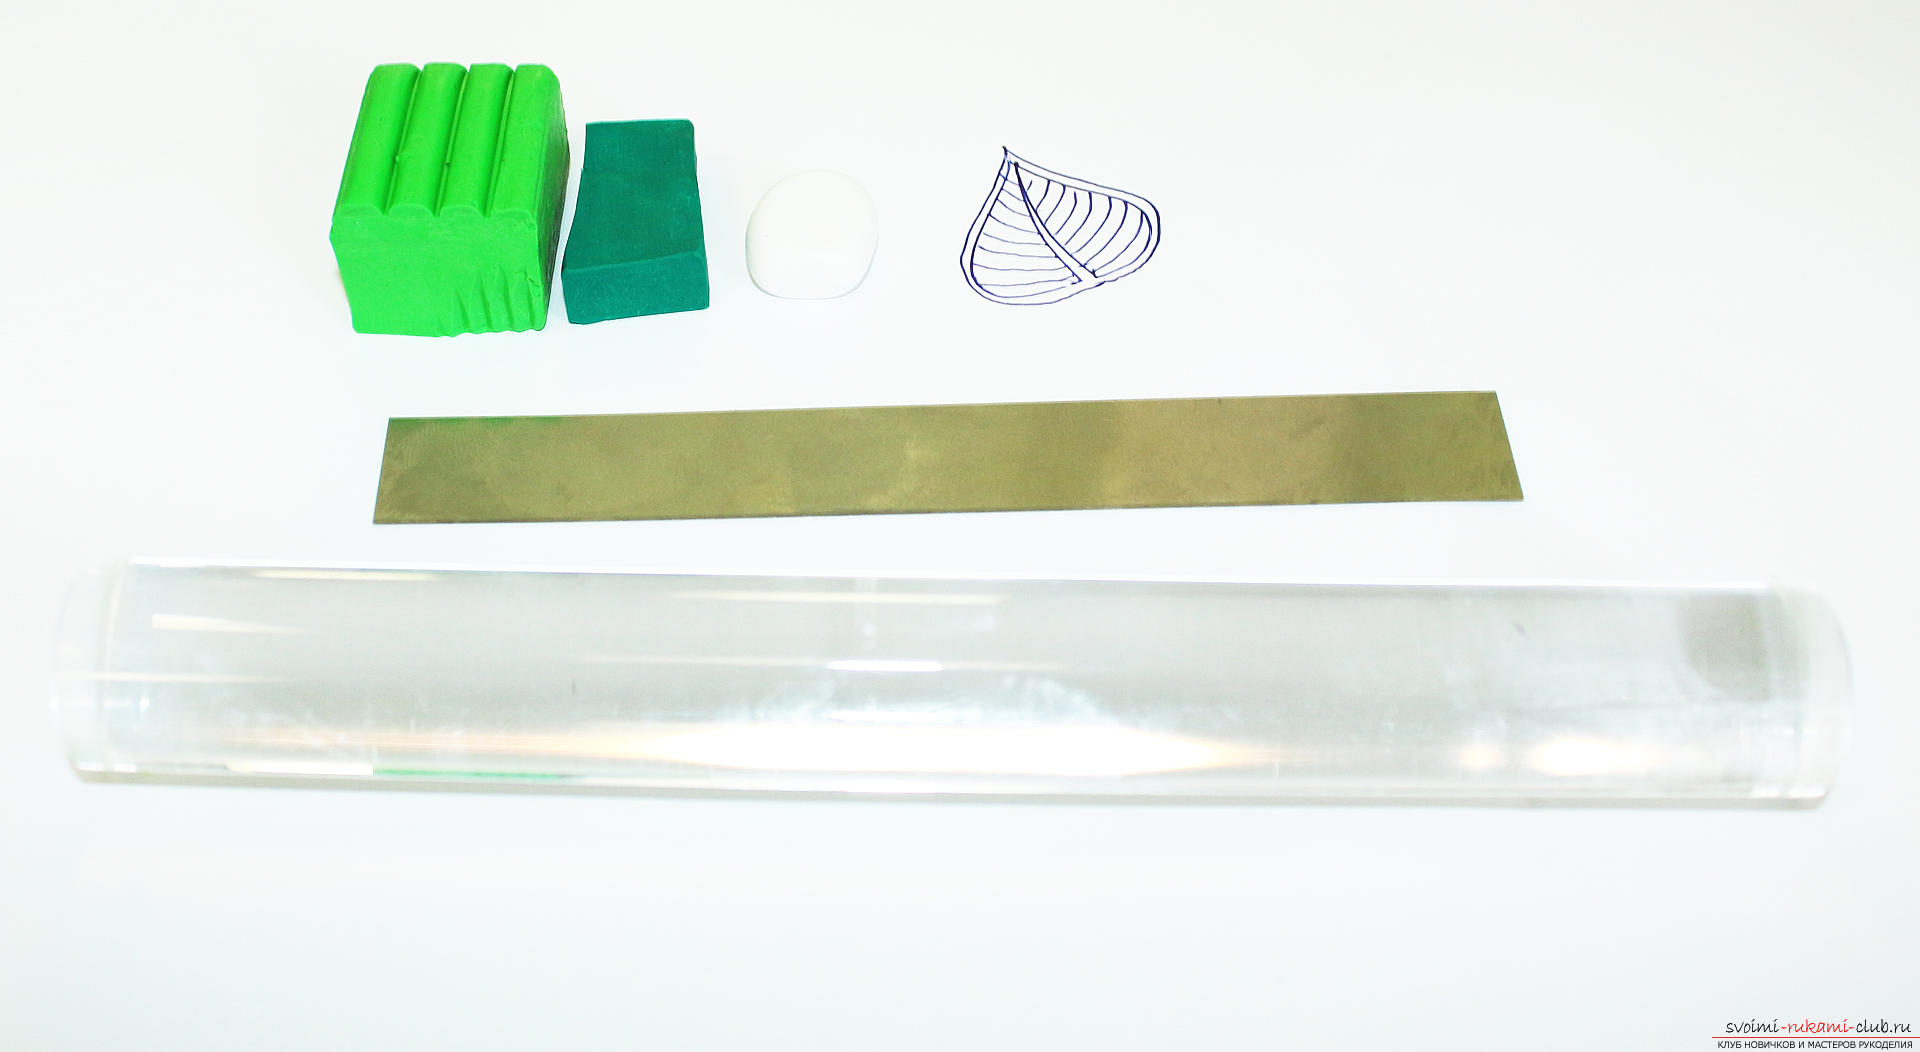 Mix the colors to get four shades of green.
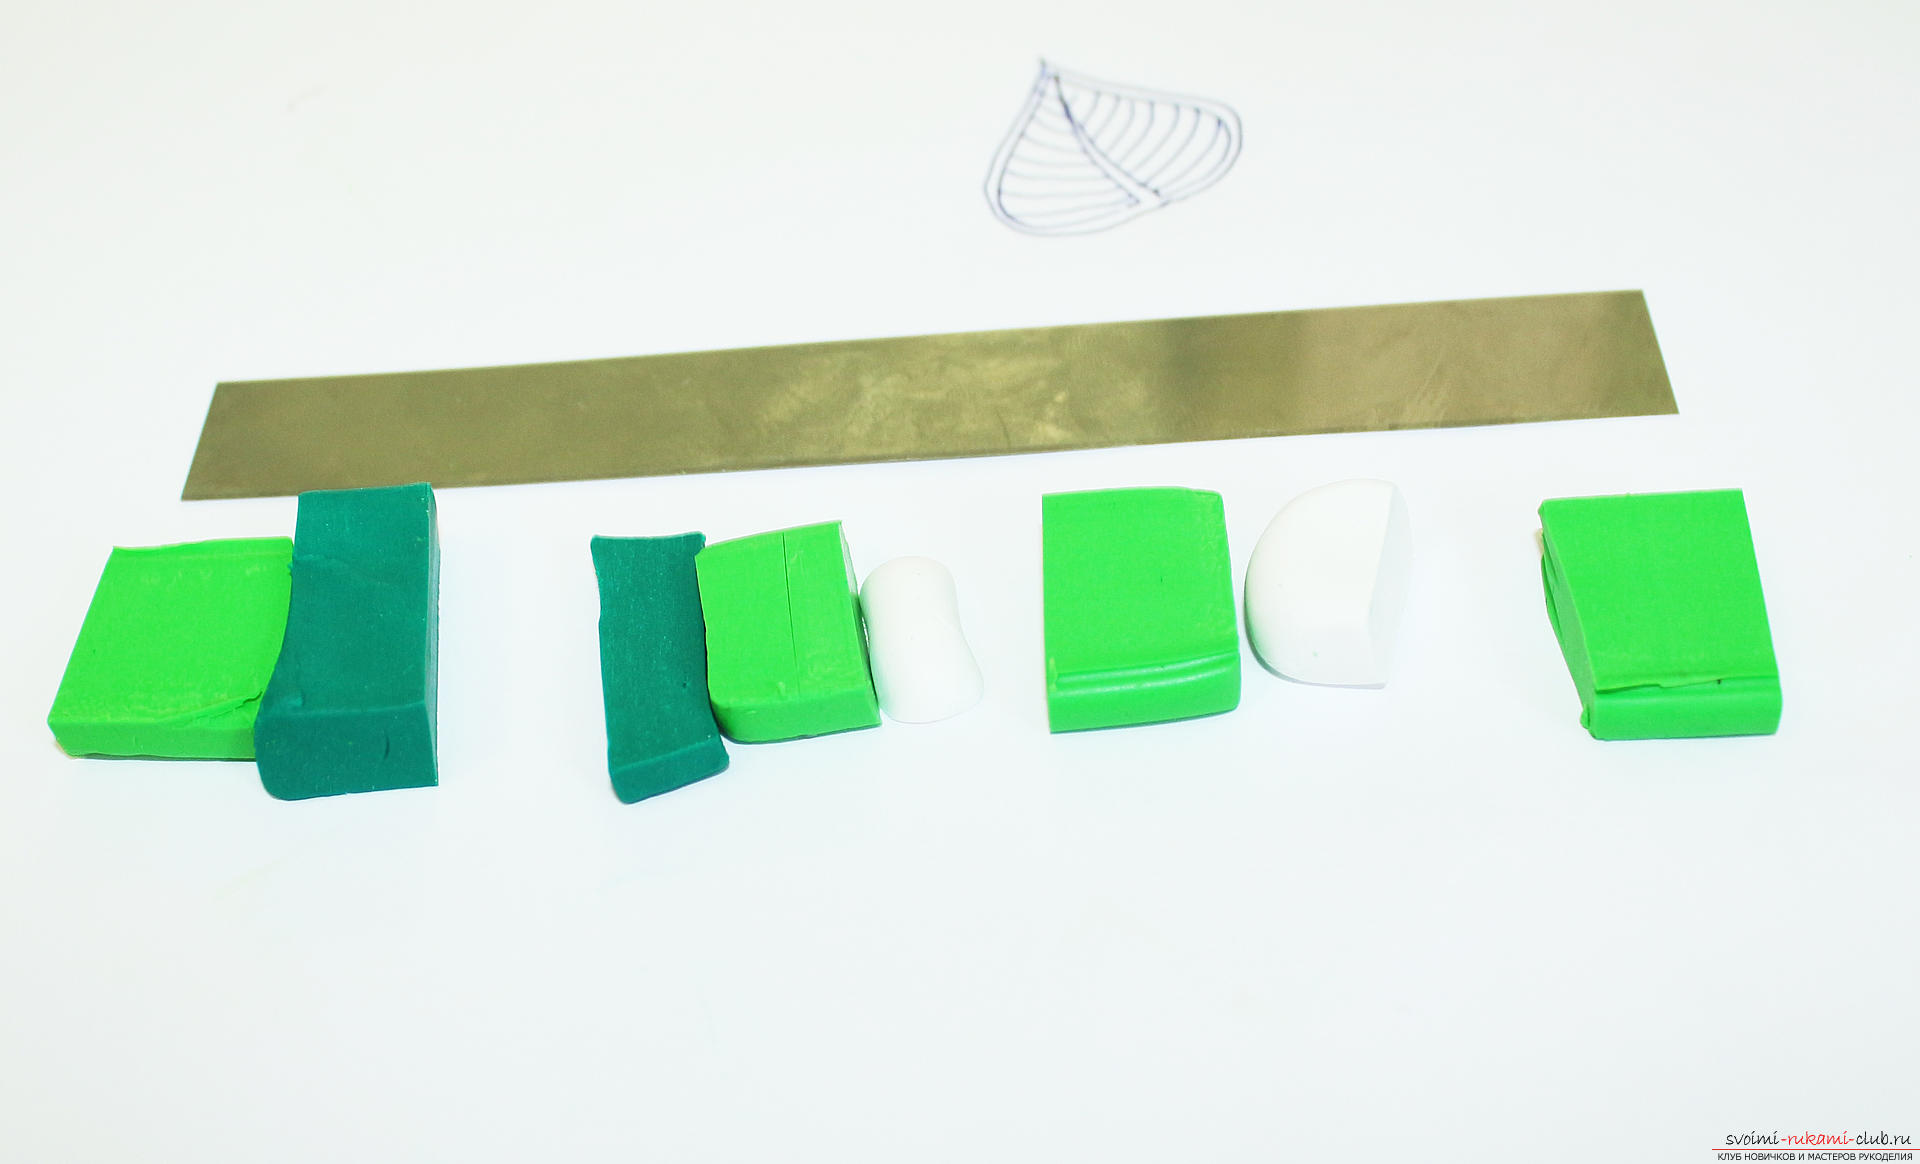
 We roll them with a rolling pin. The darkest is rolled out a little thinner, so that the surface of the bed is about twice as large as the rest.
 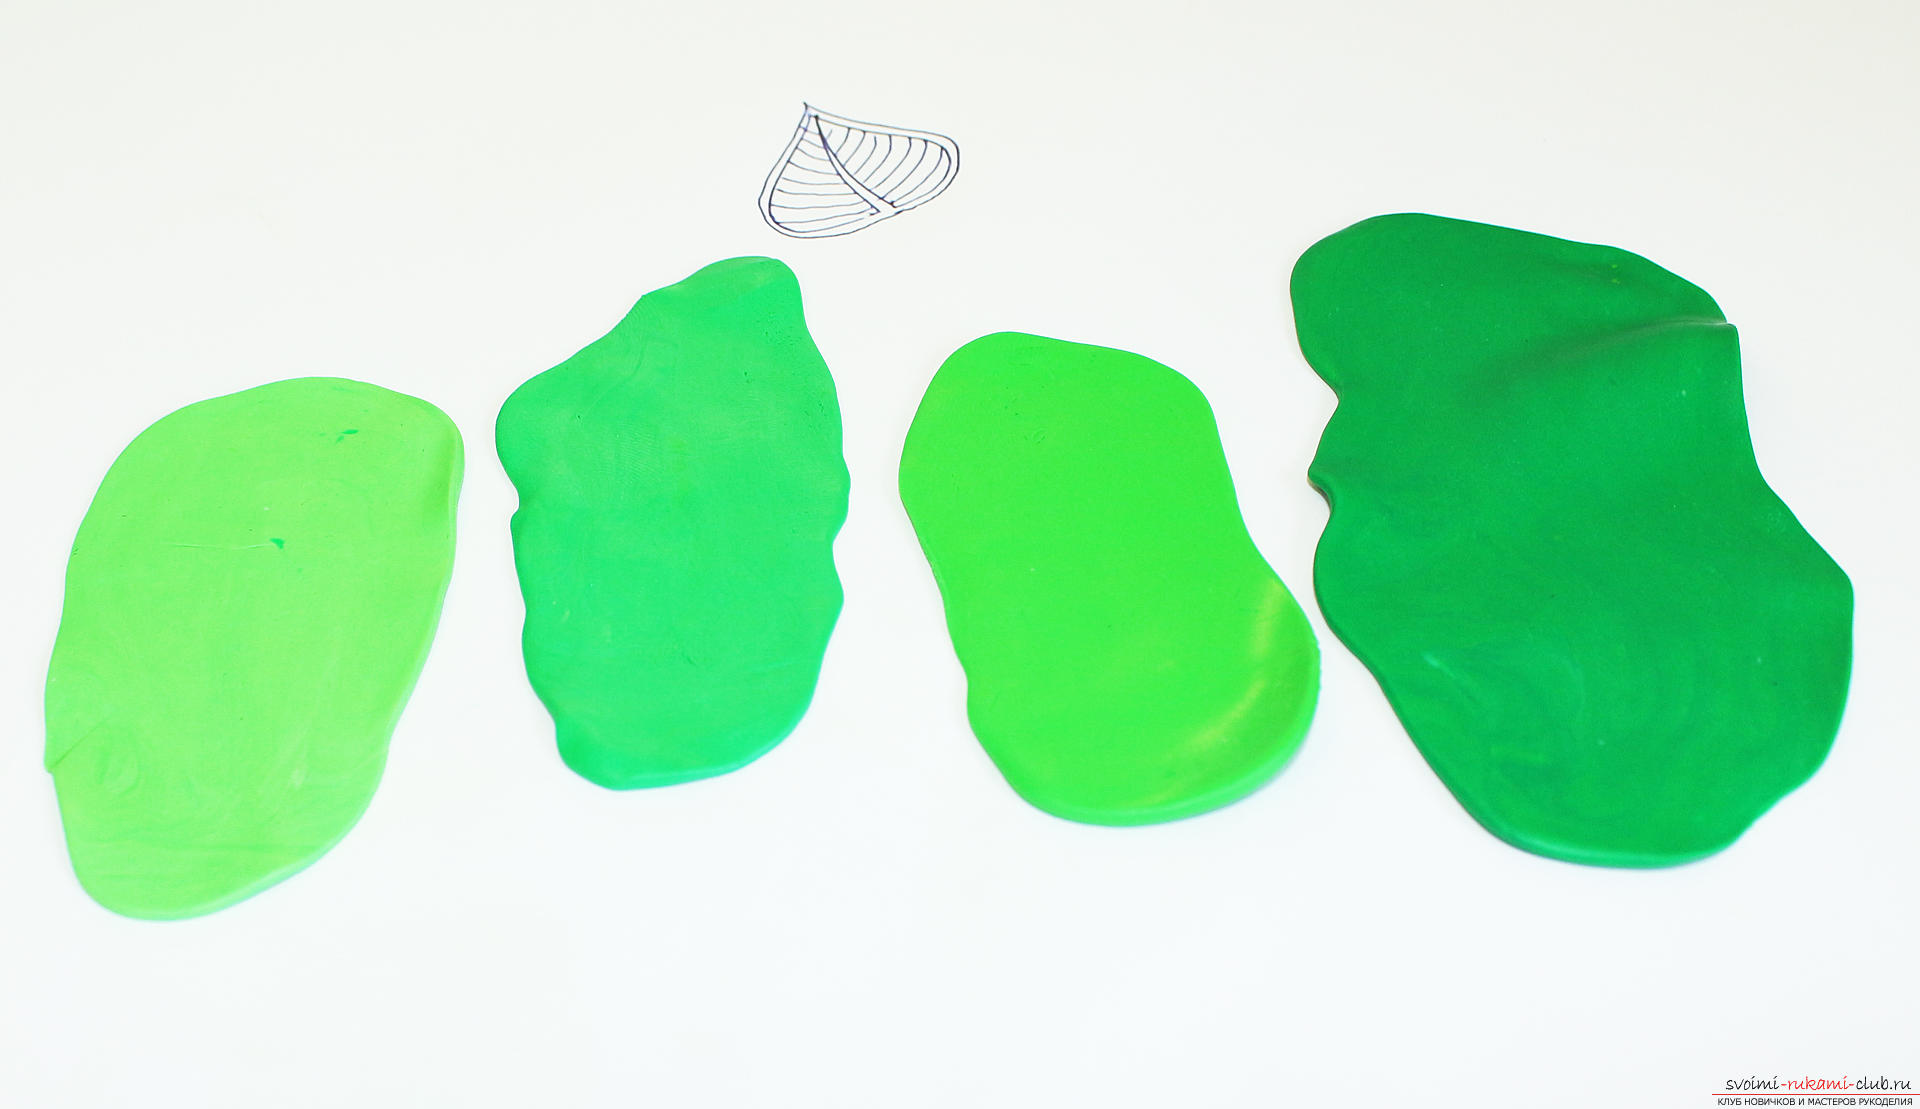 We spread on this large layer the rest, against each other, across a large bed, occupying no more than half of it.
 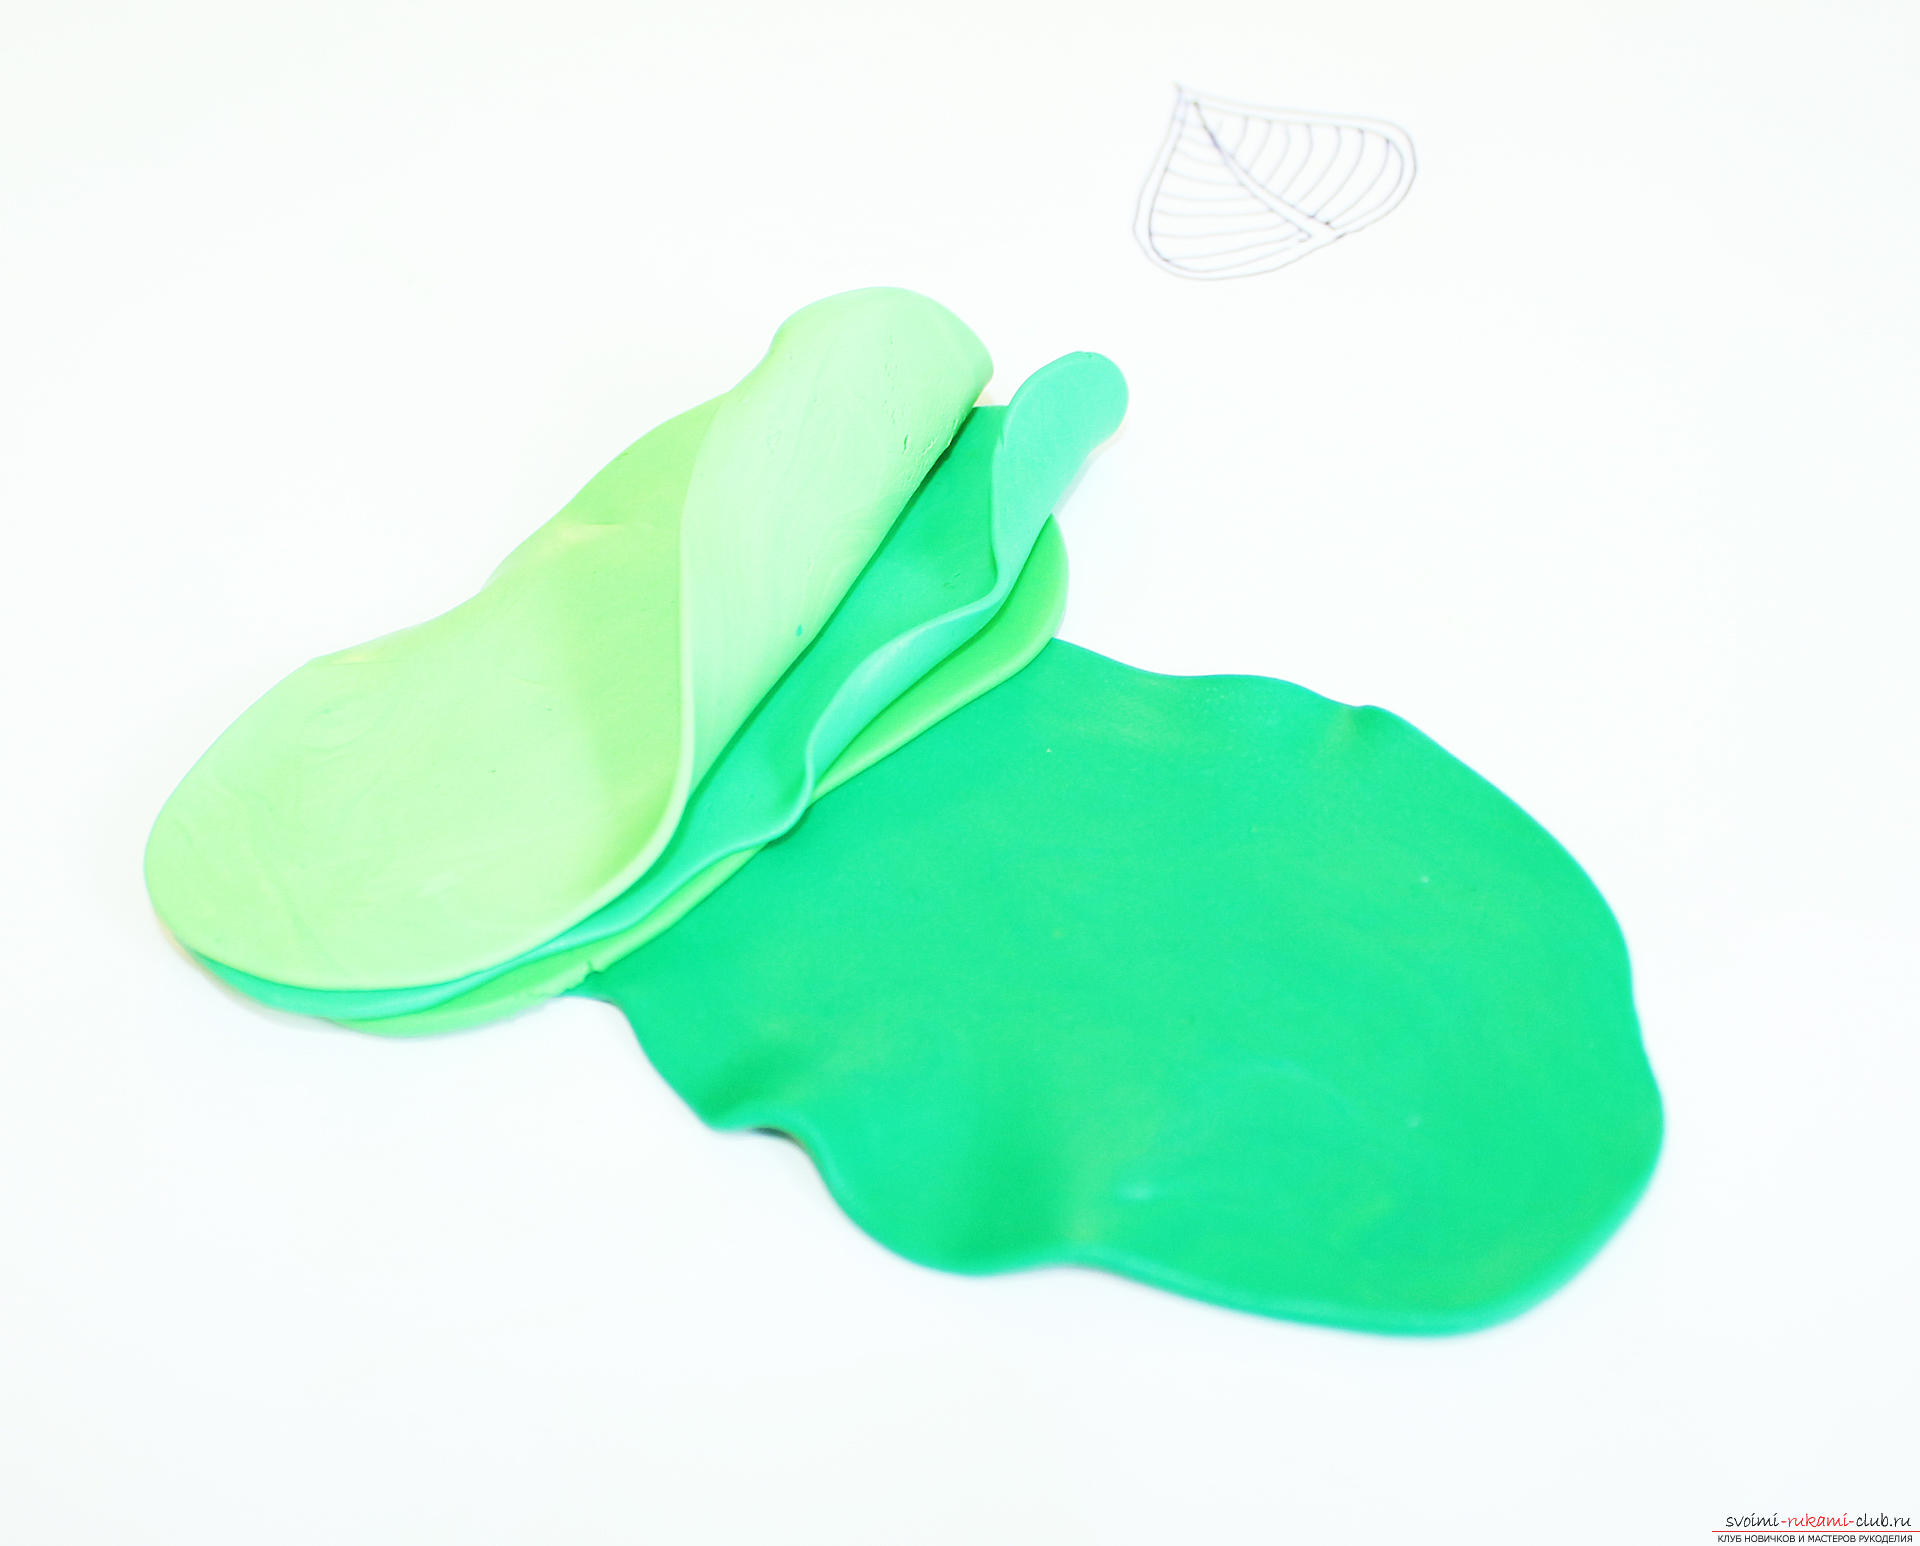 We cut off the extra half, and slightly roll out the second striped half with a rolling pin.
 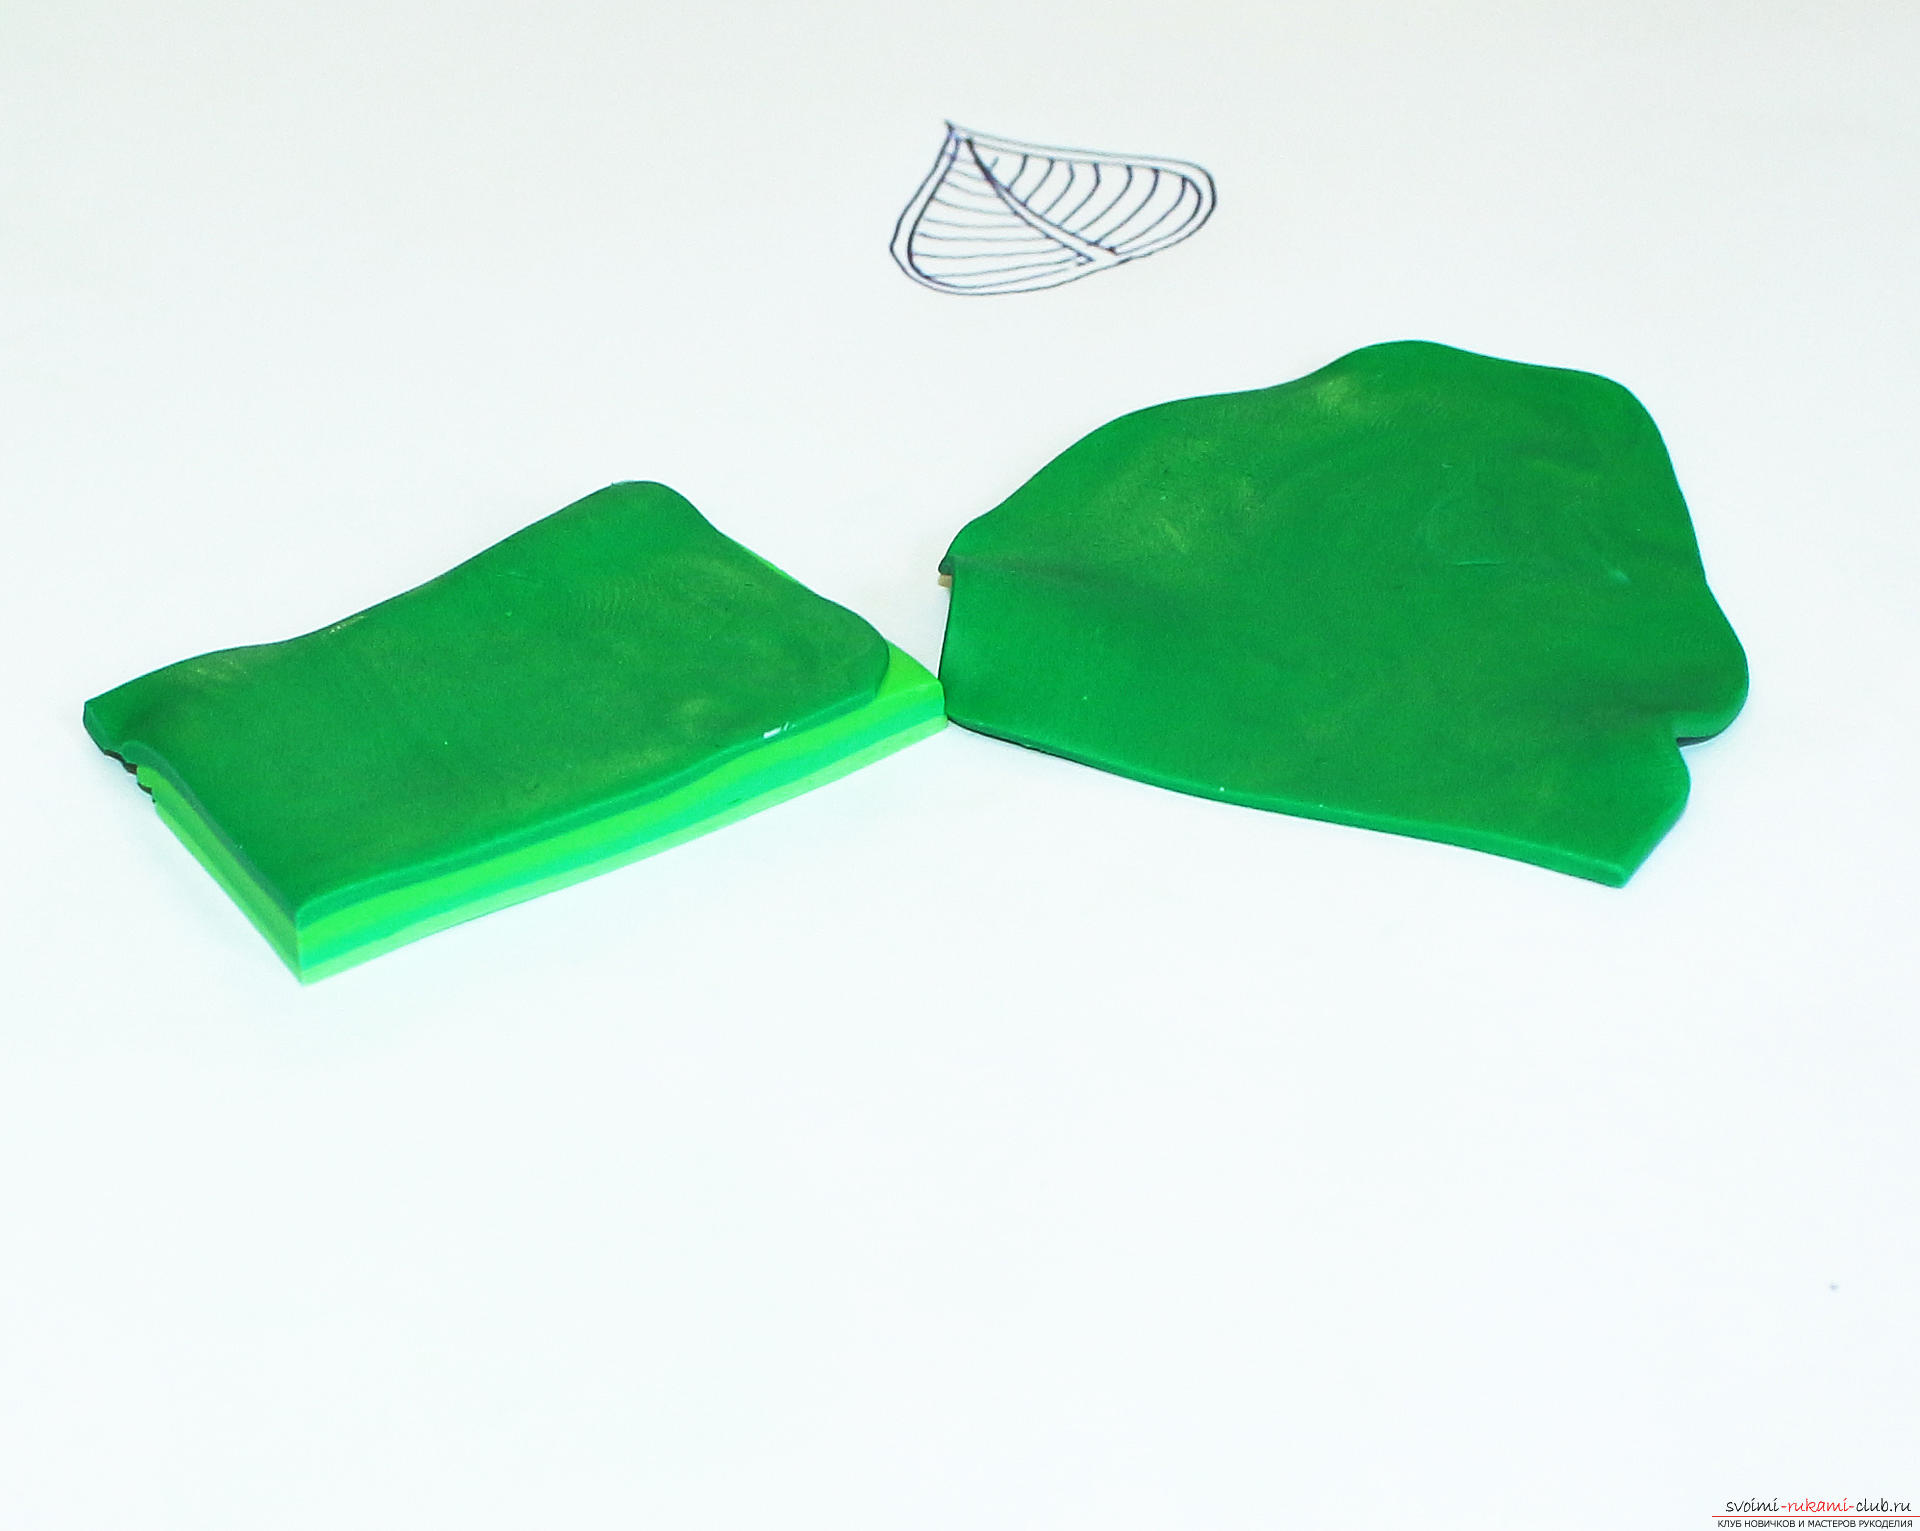 We cut the striped part in half, fold the halves on each other.
 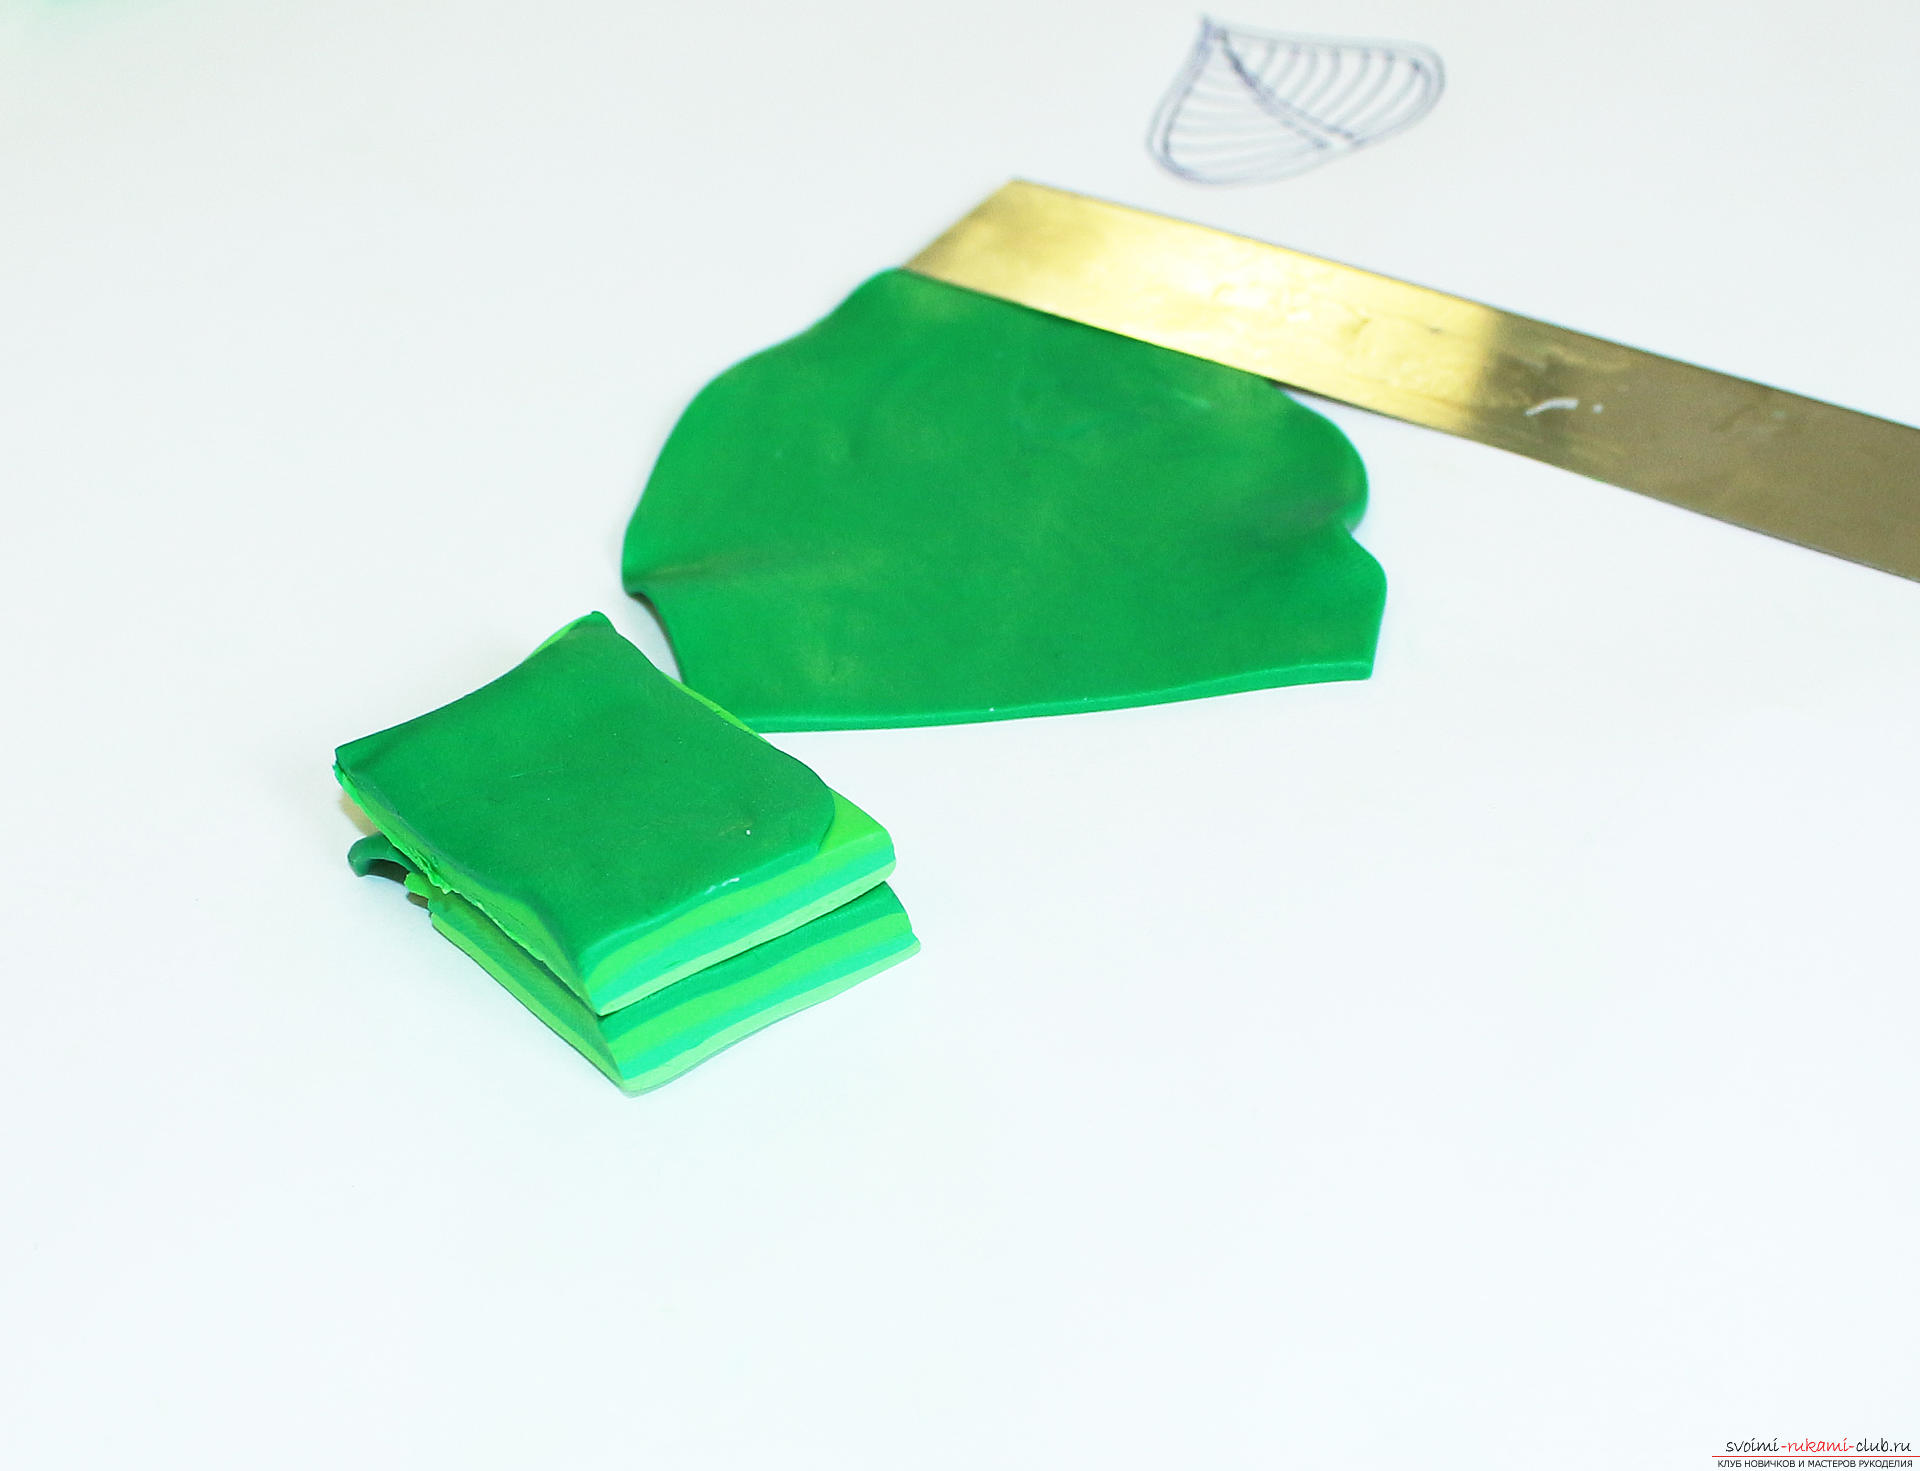 Again roll out, cut and fold.
  We compress the resulting layered "brick" so that all the layers are glued together. Blade cut the layers across at a slight angle.
 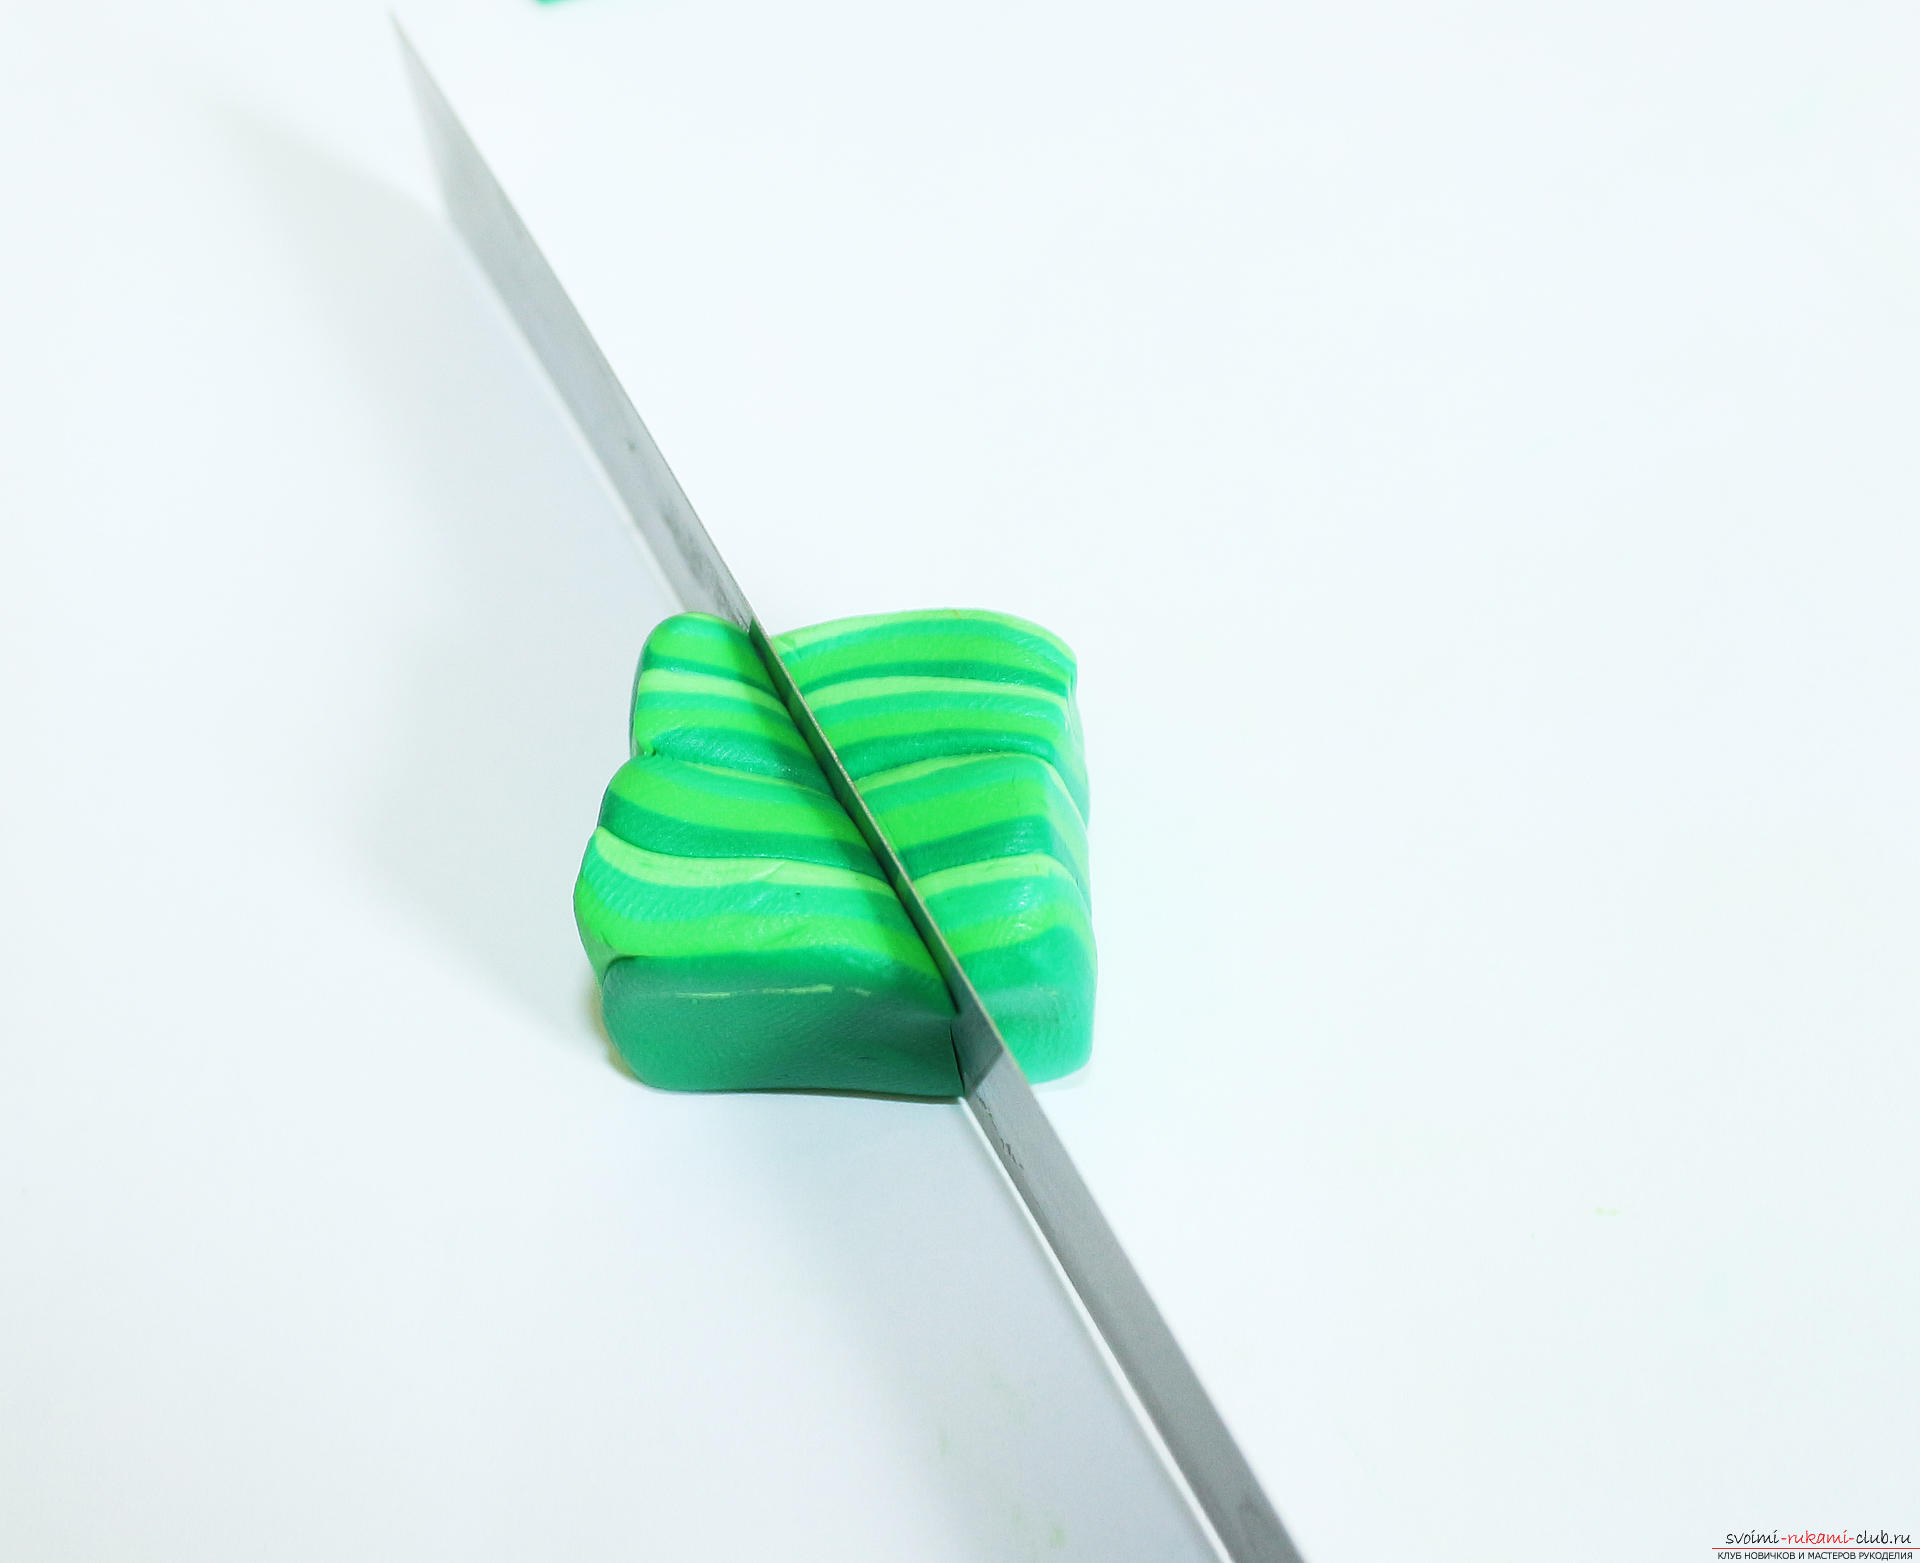 One of the halves is unfolded and applied to the other. If the halves turned out to be similar, you can continue, if not - you need to cut off excess plastic to bring Keyen to mind, as in the picture.
  Cut out a thin strip of green plastic on the width of the half of the sheet and glue the half on it.
 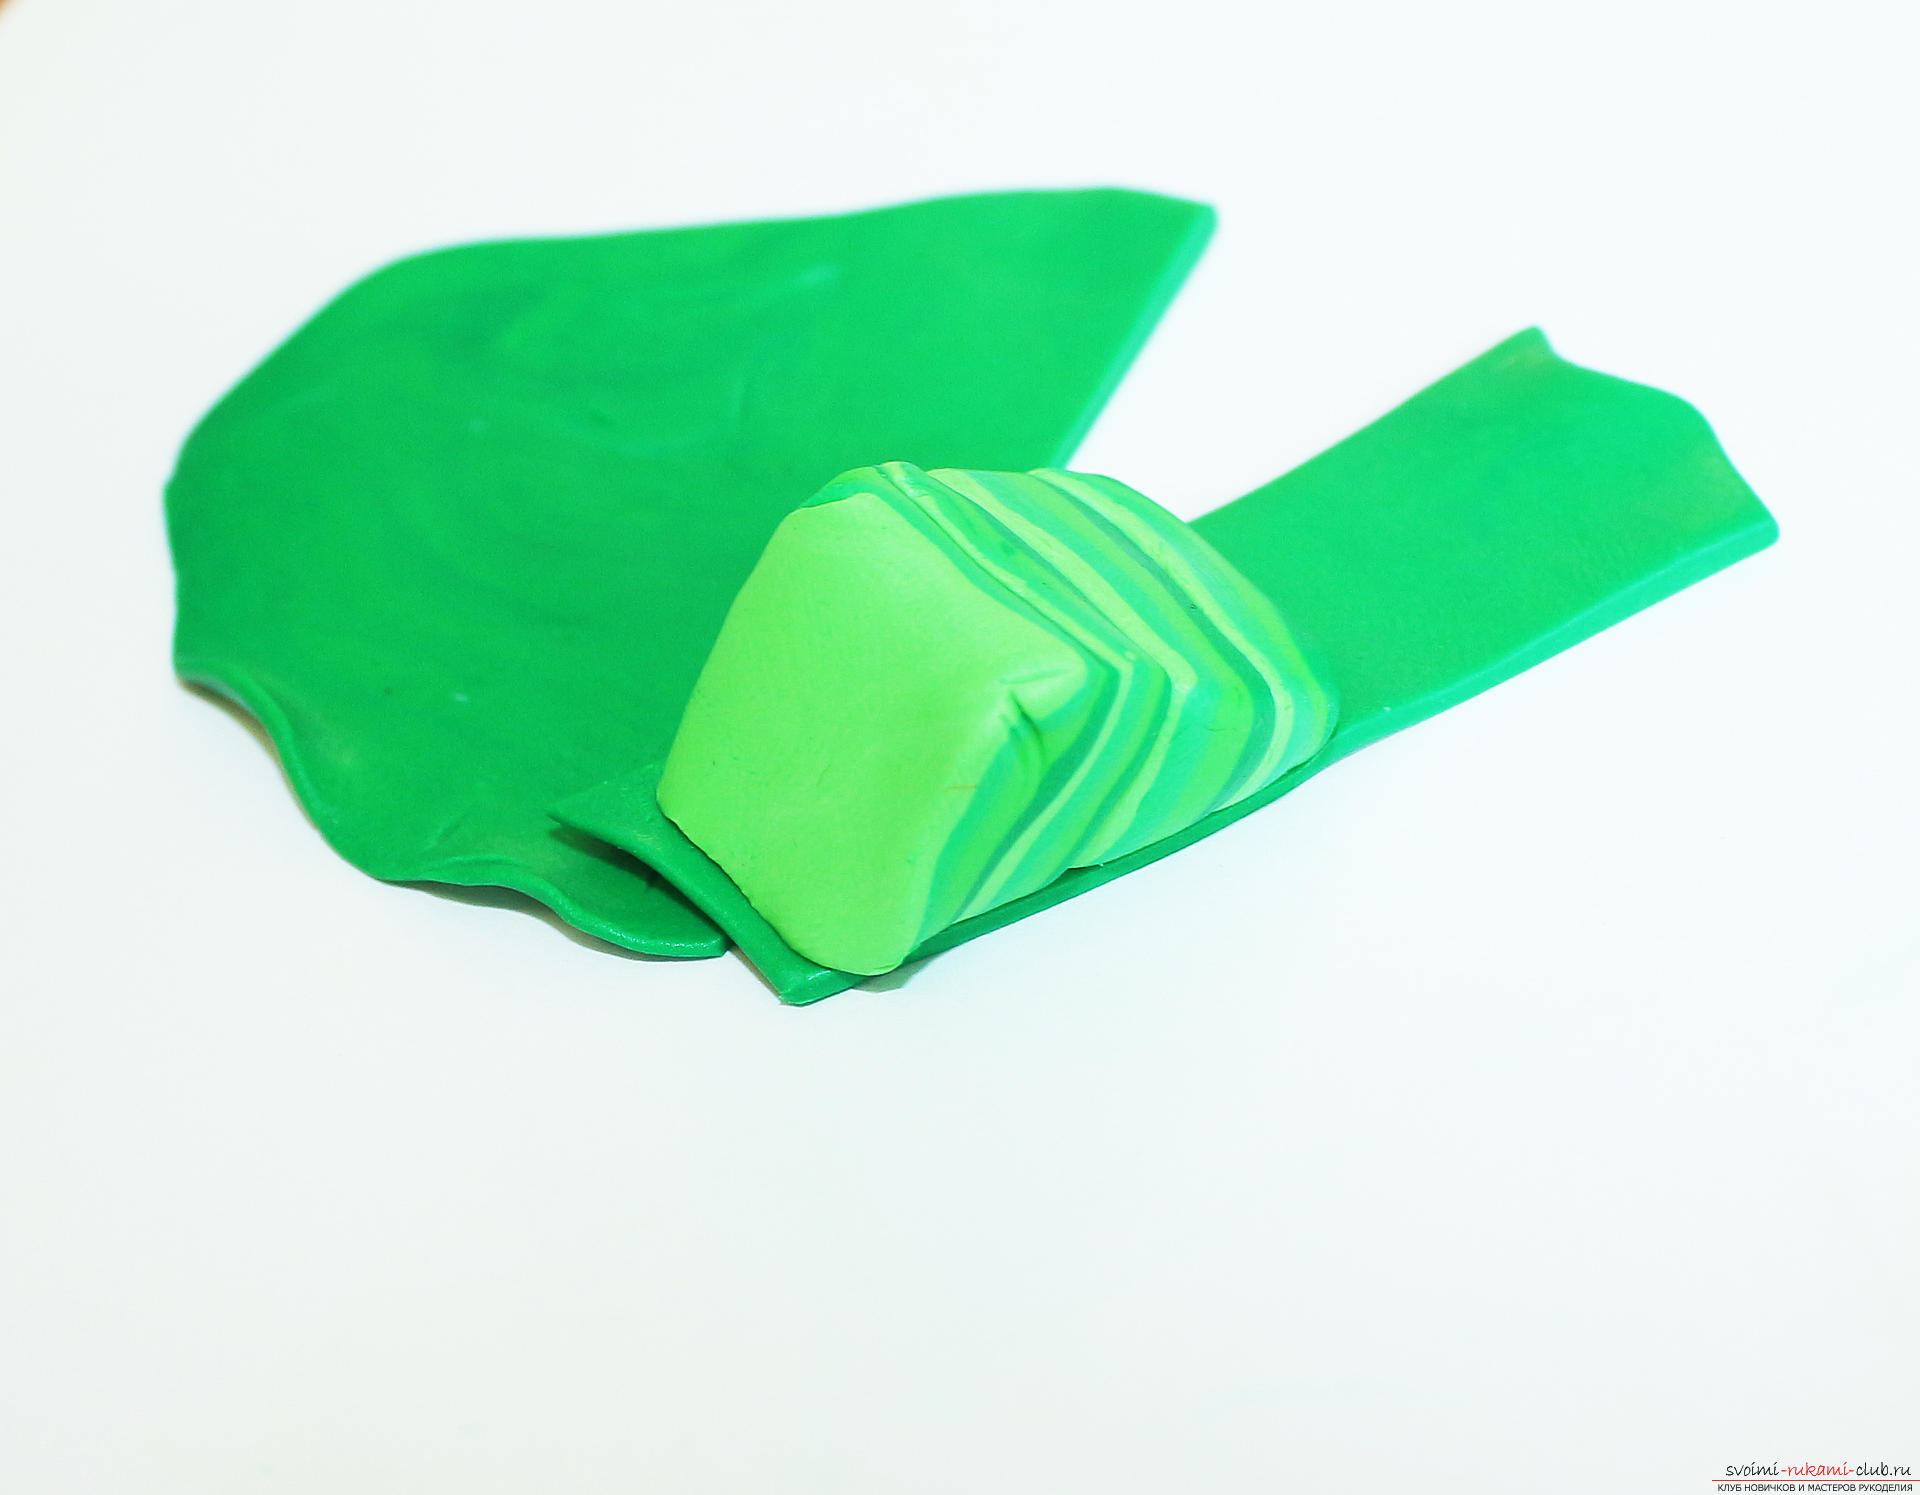 We glue the second half. The strip should be in the center of the sheet.
 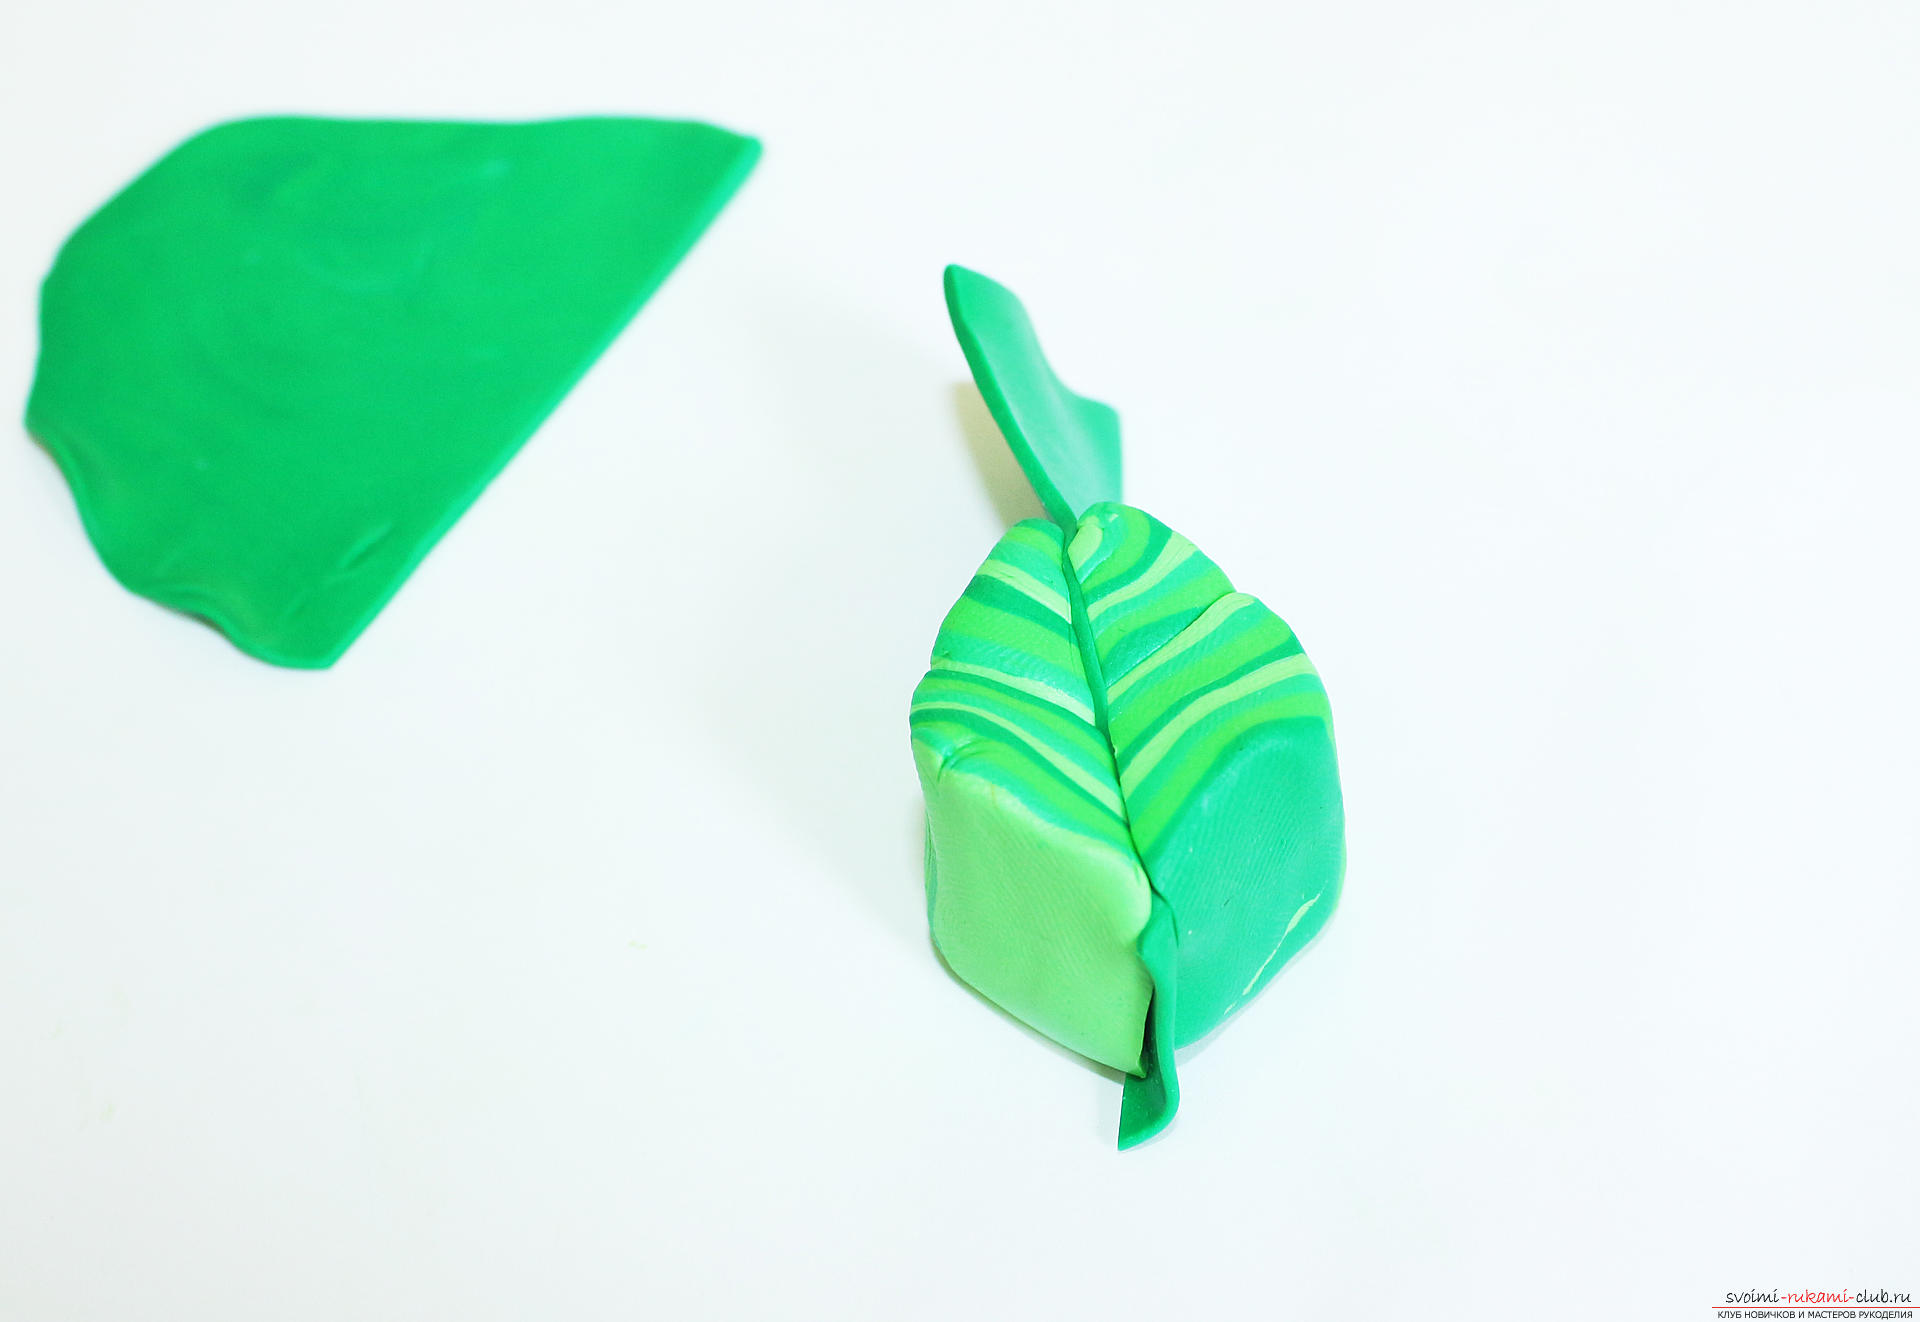 We cut the excess plastic from above and below.
 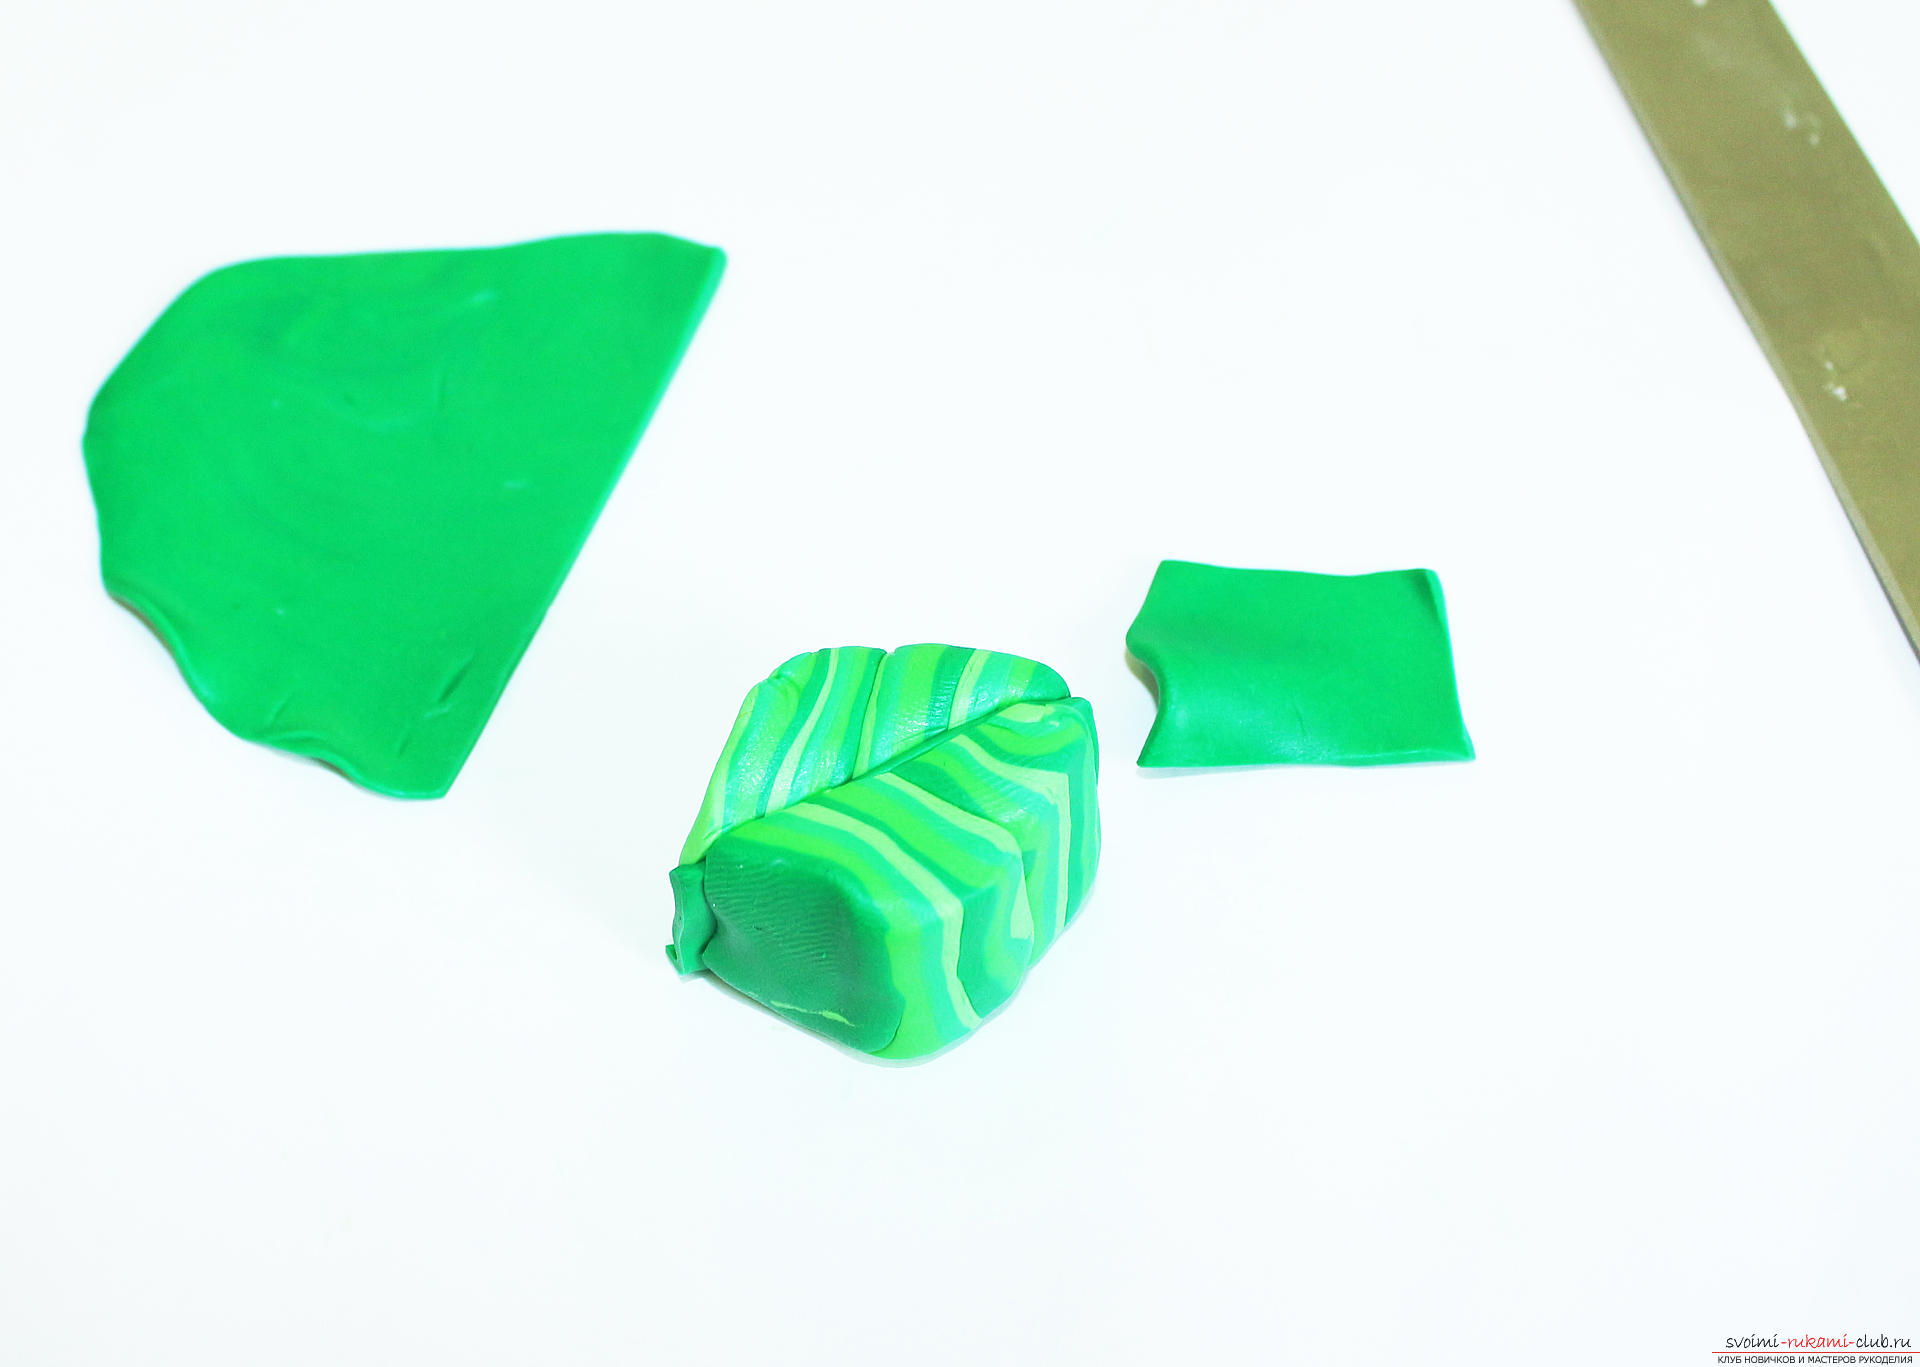 Remains of plastic wrap the sheet, tightly pressing the top layer to the center.
 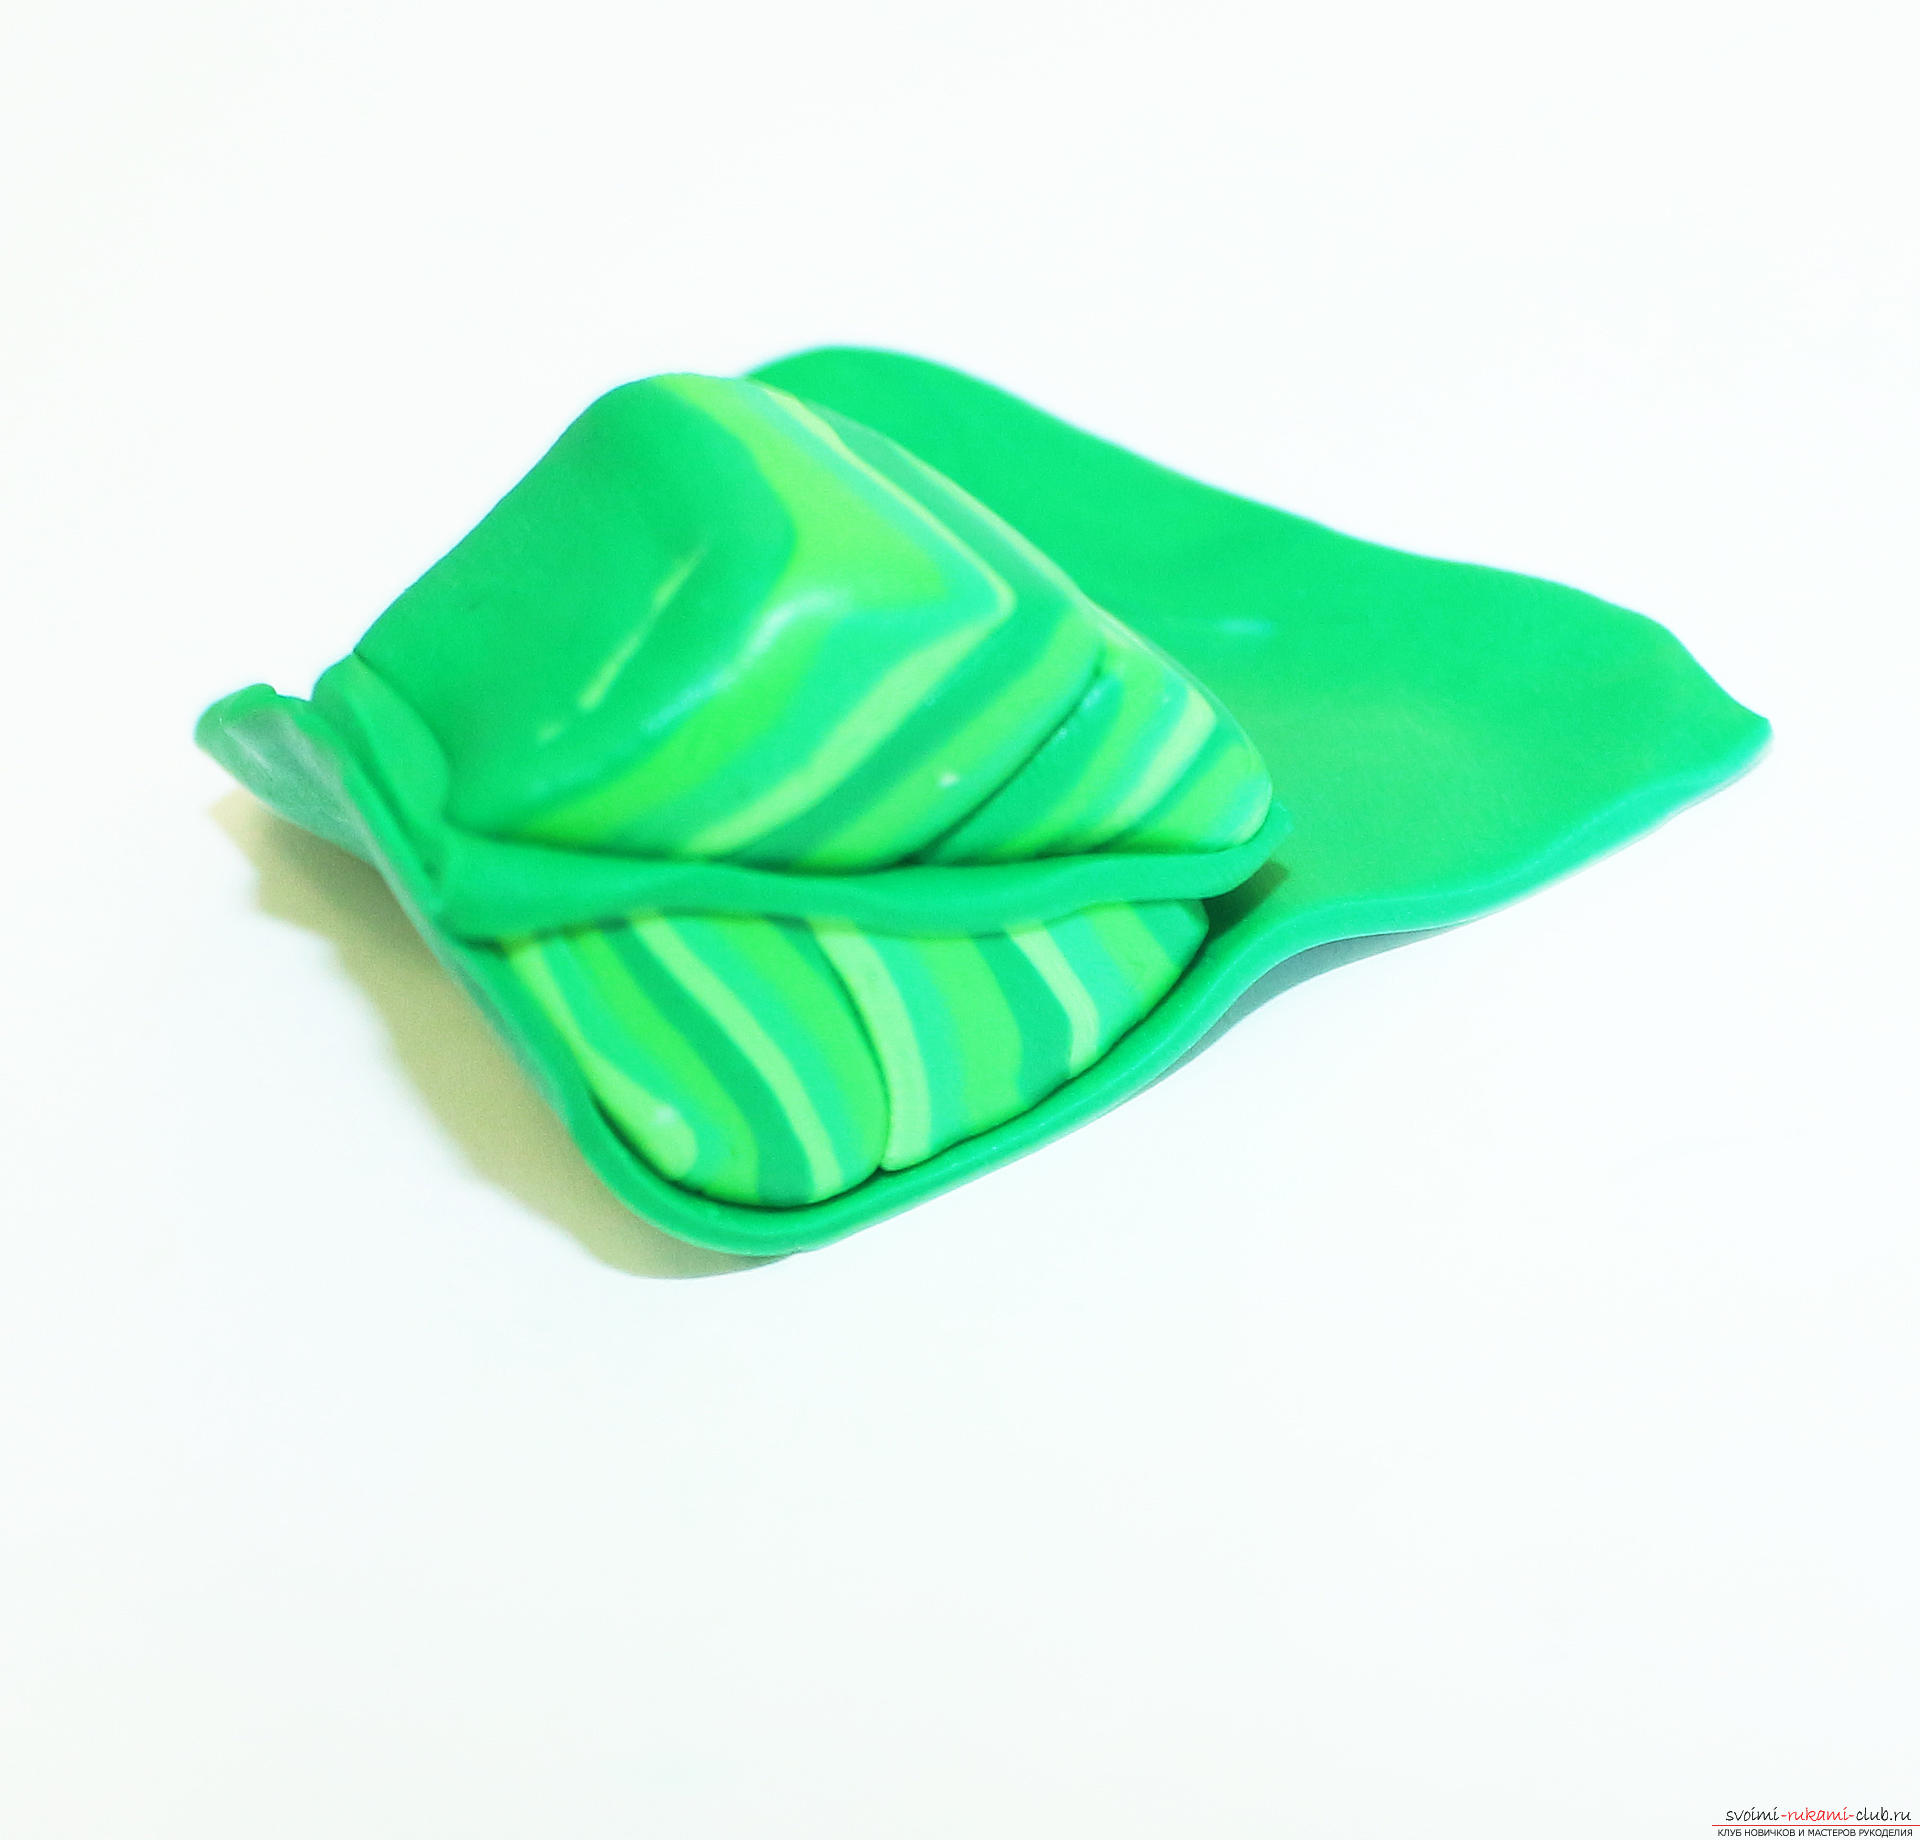 We close the top layer of plastic in the same place as it started. Surplus cut.
 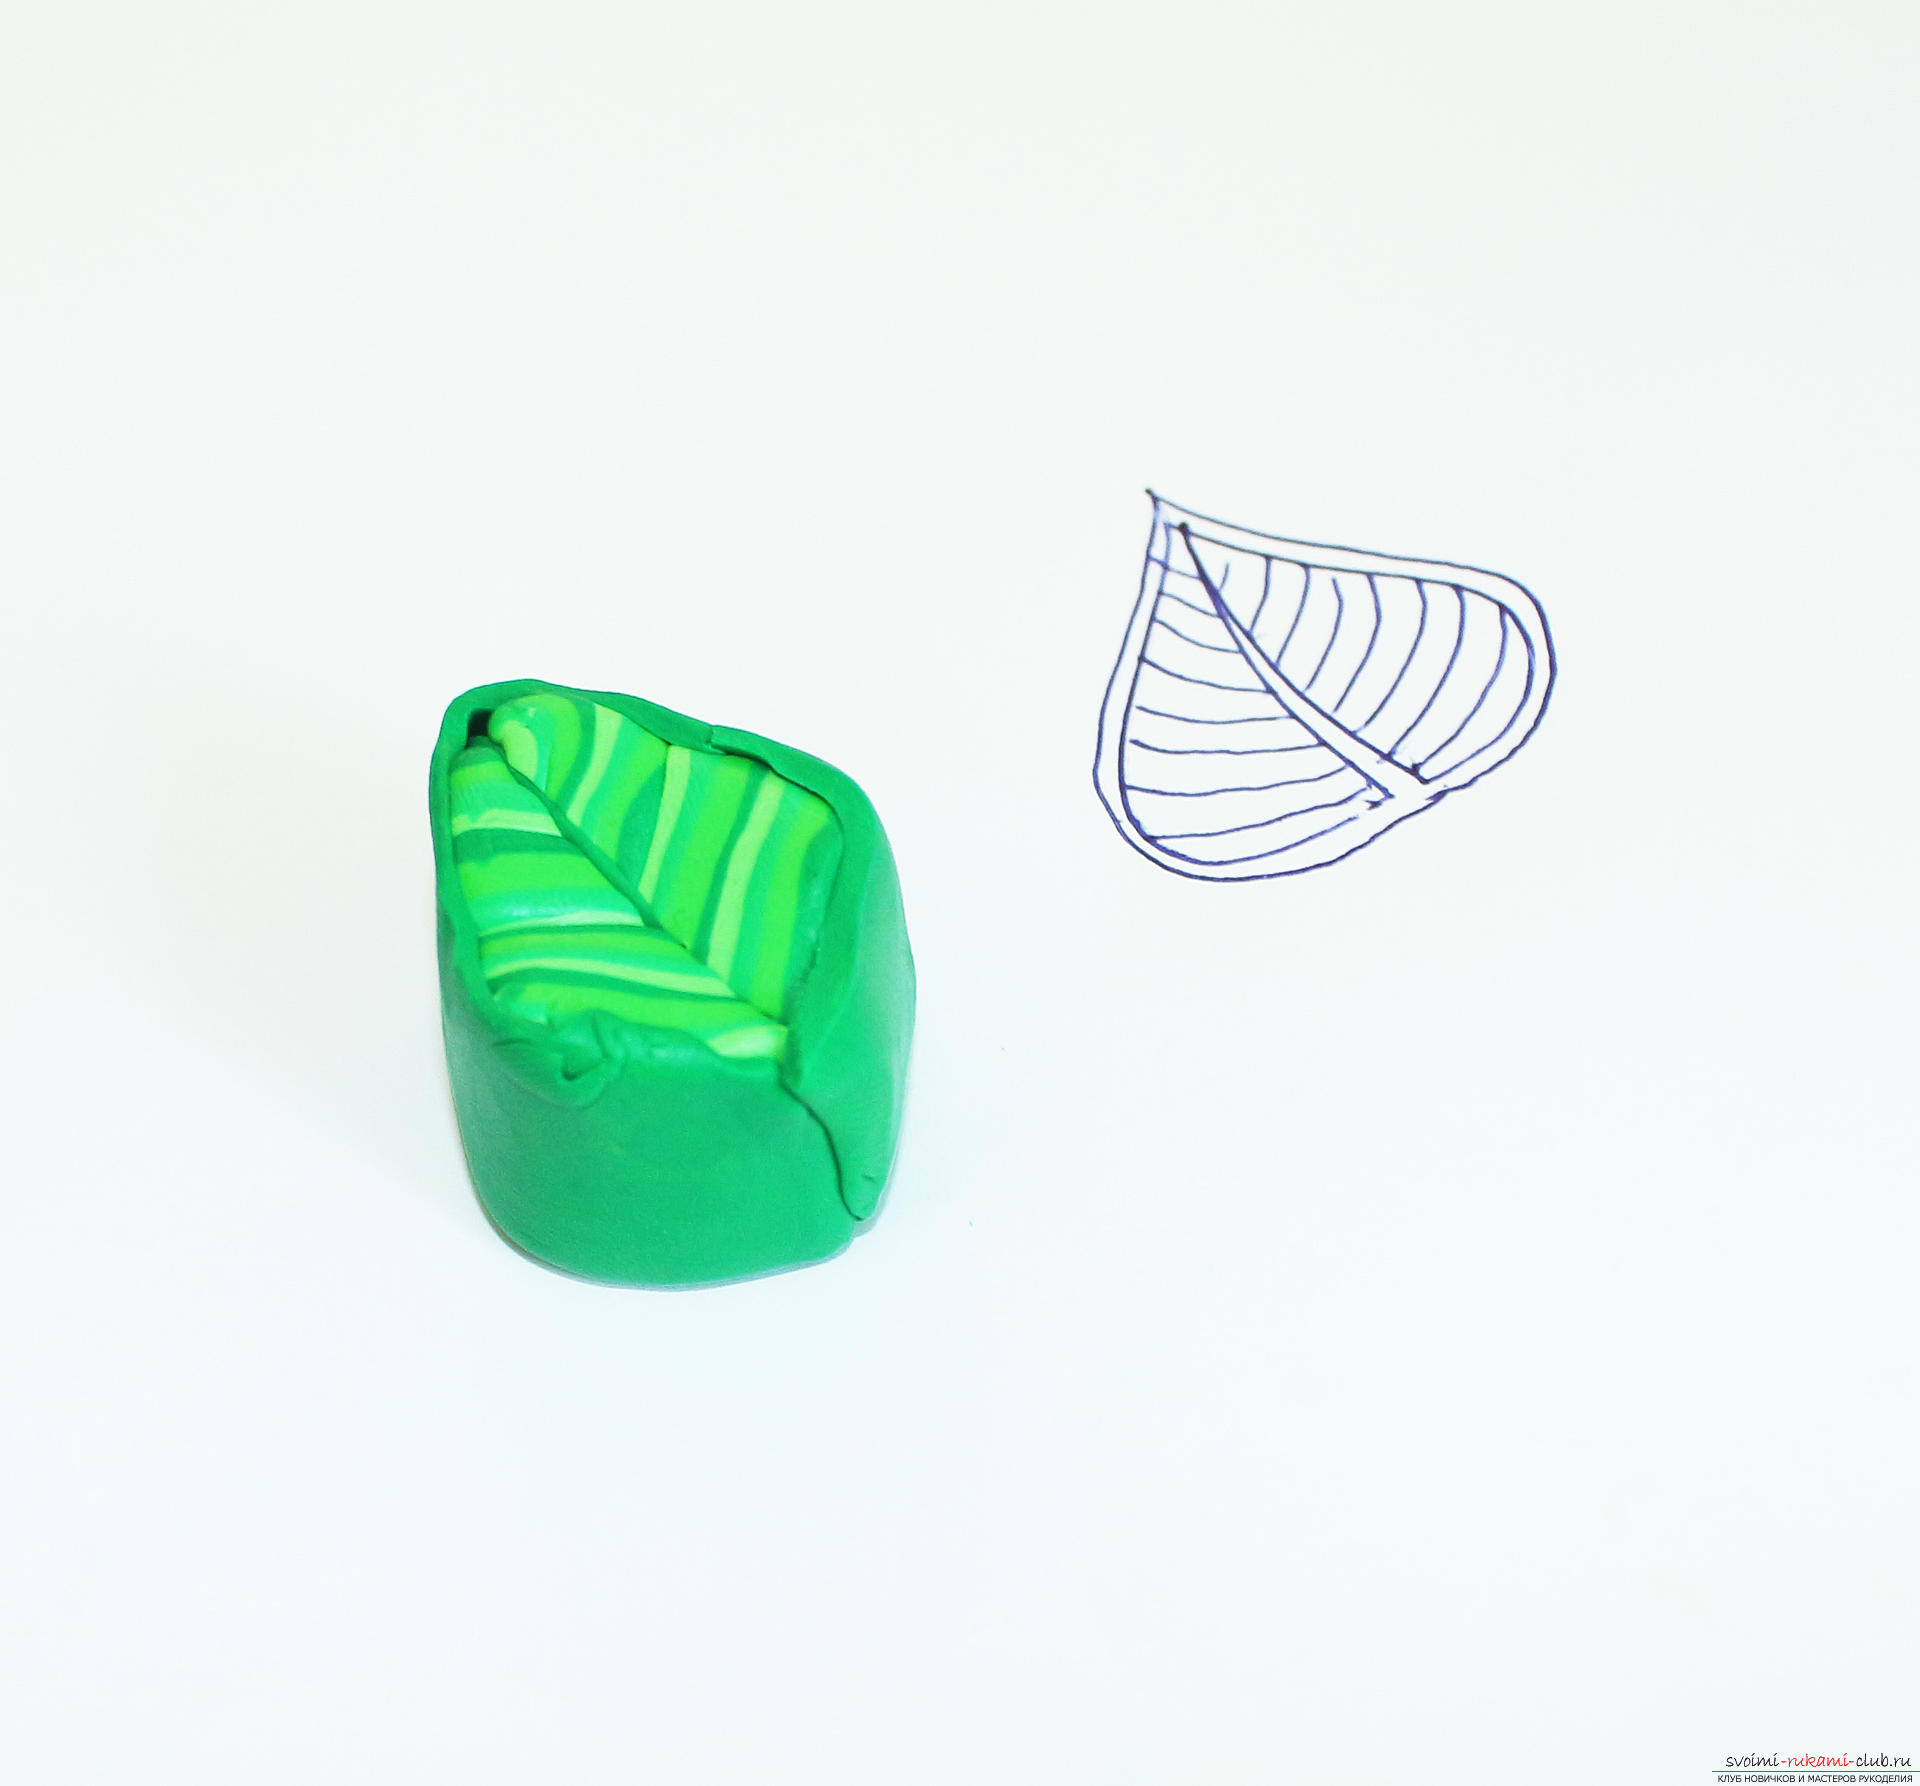 Slightly squeeze Key from all sides, giving it a conceived form.
 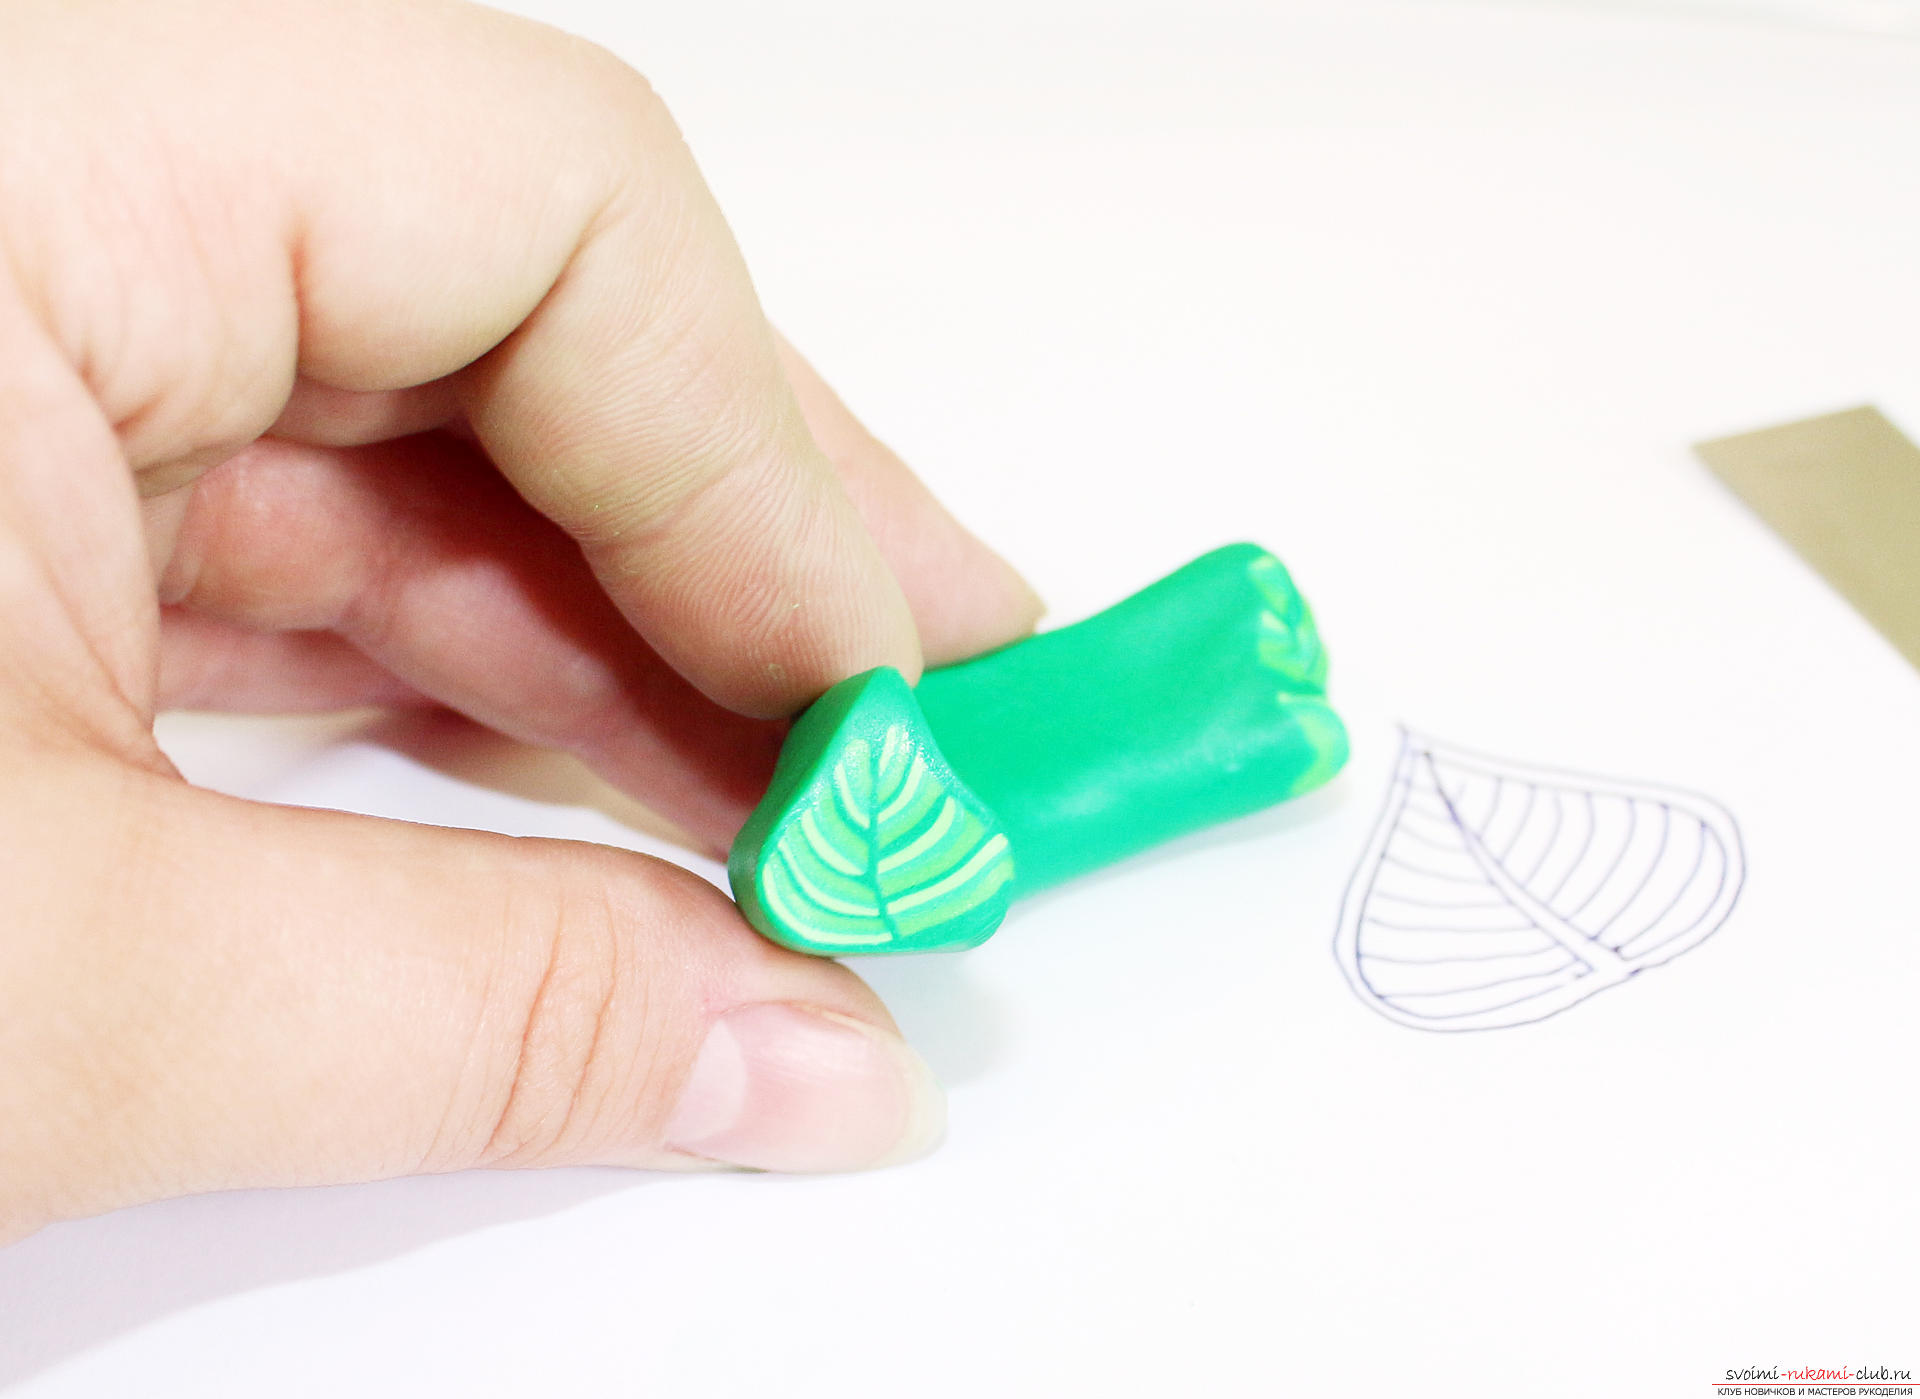 We cut it into a set of thin leaves.
 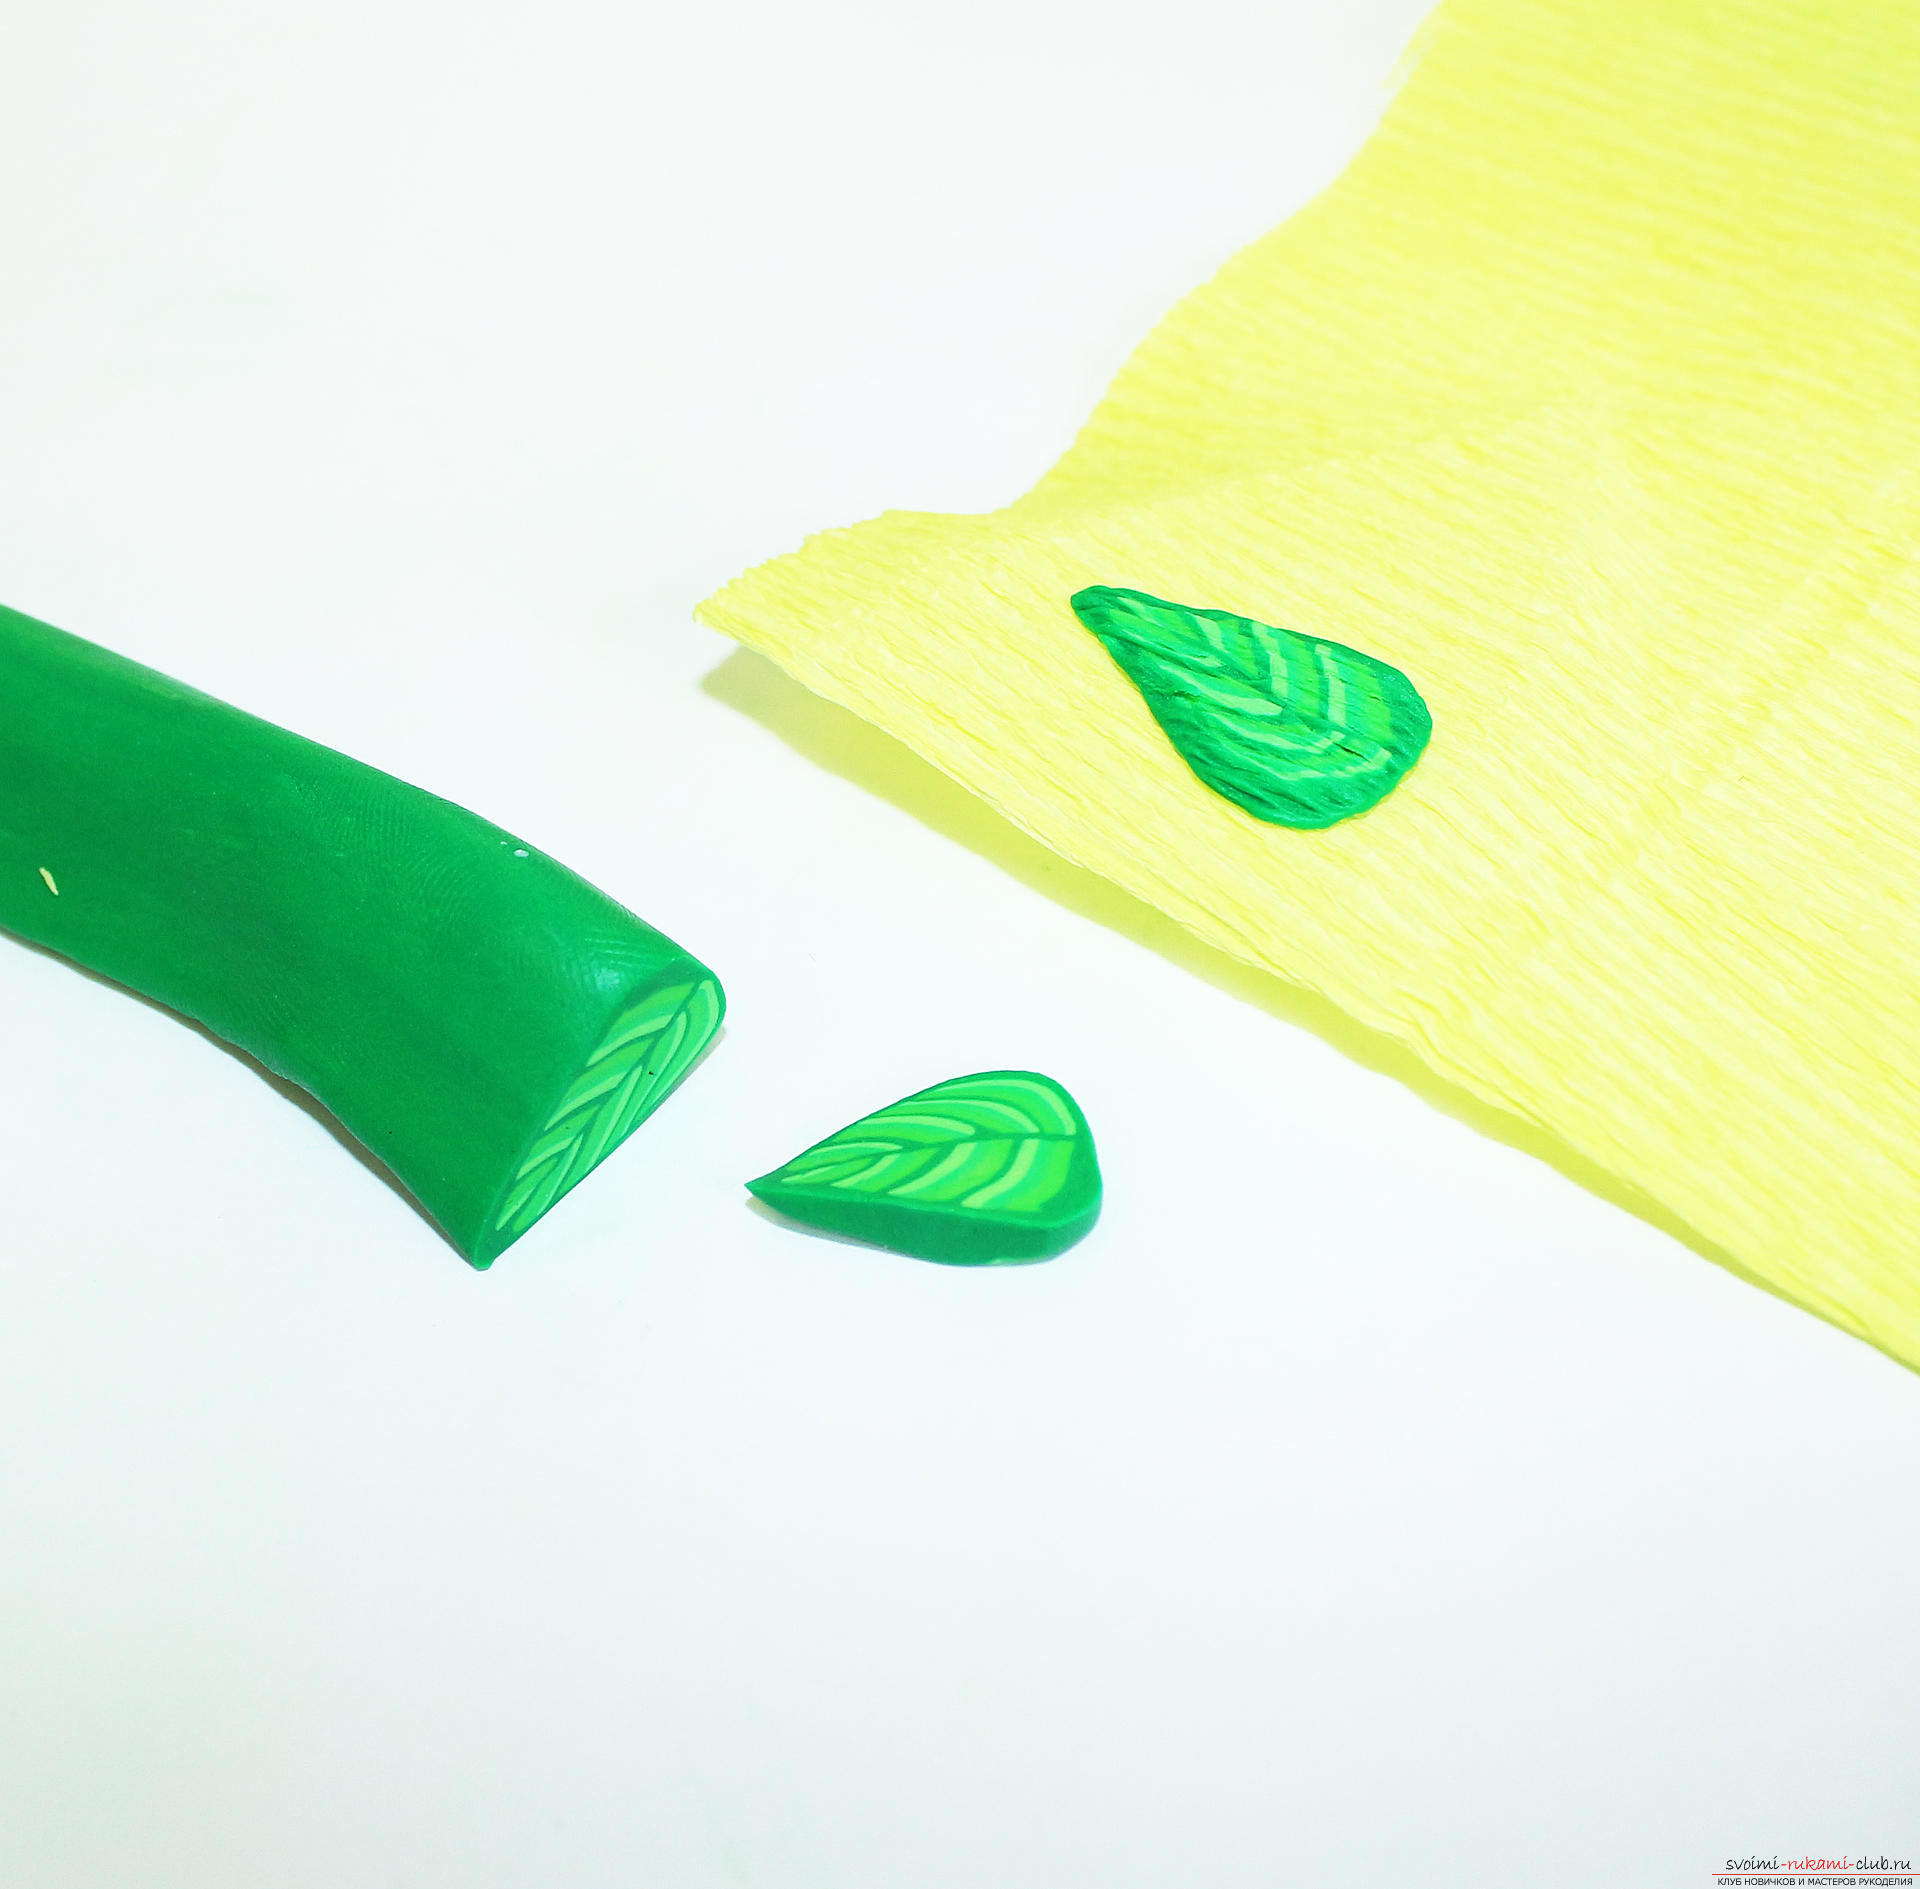 Texturize them with corrugated paper, like petals.
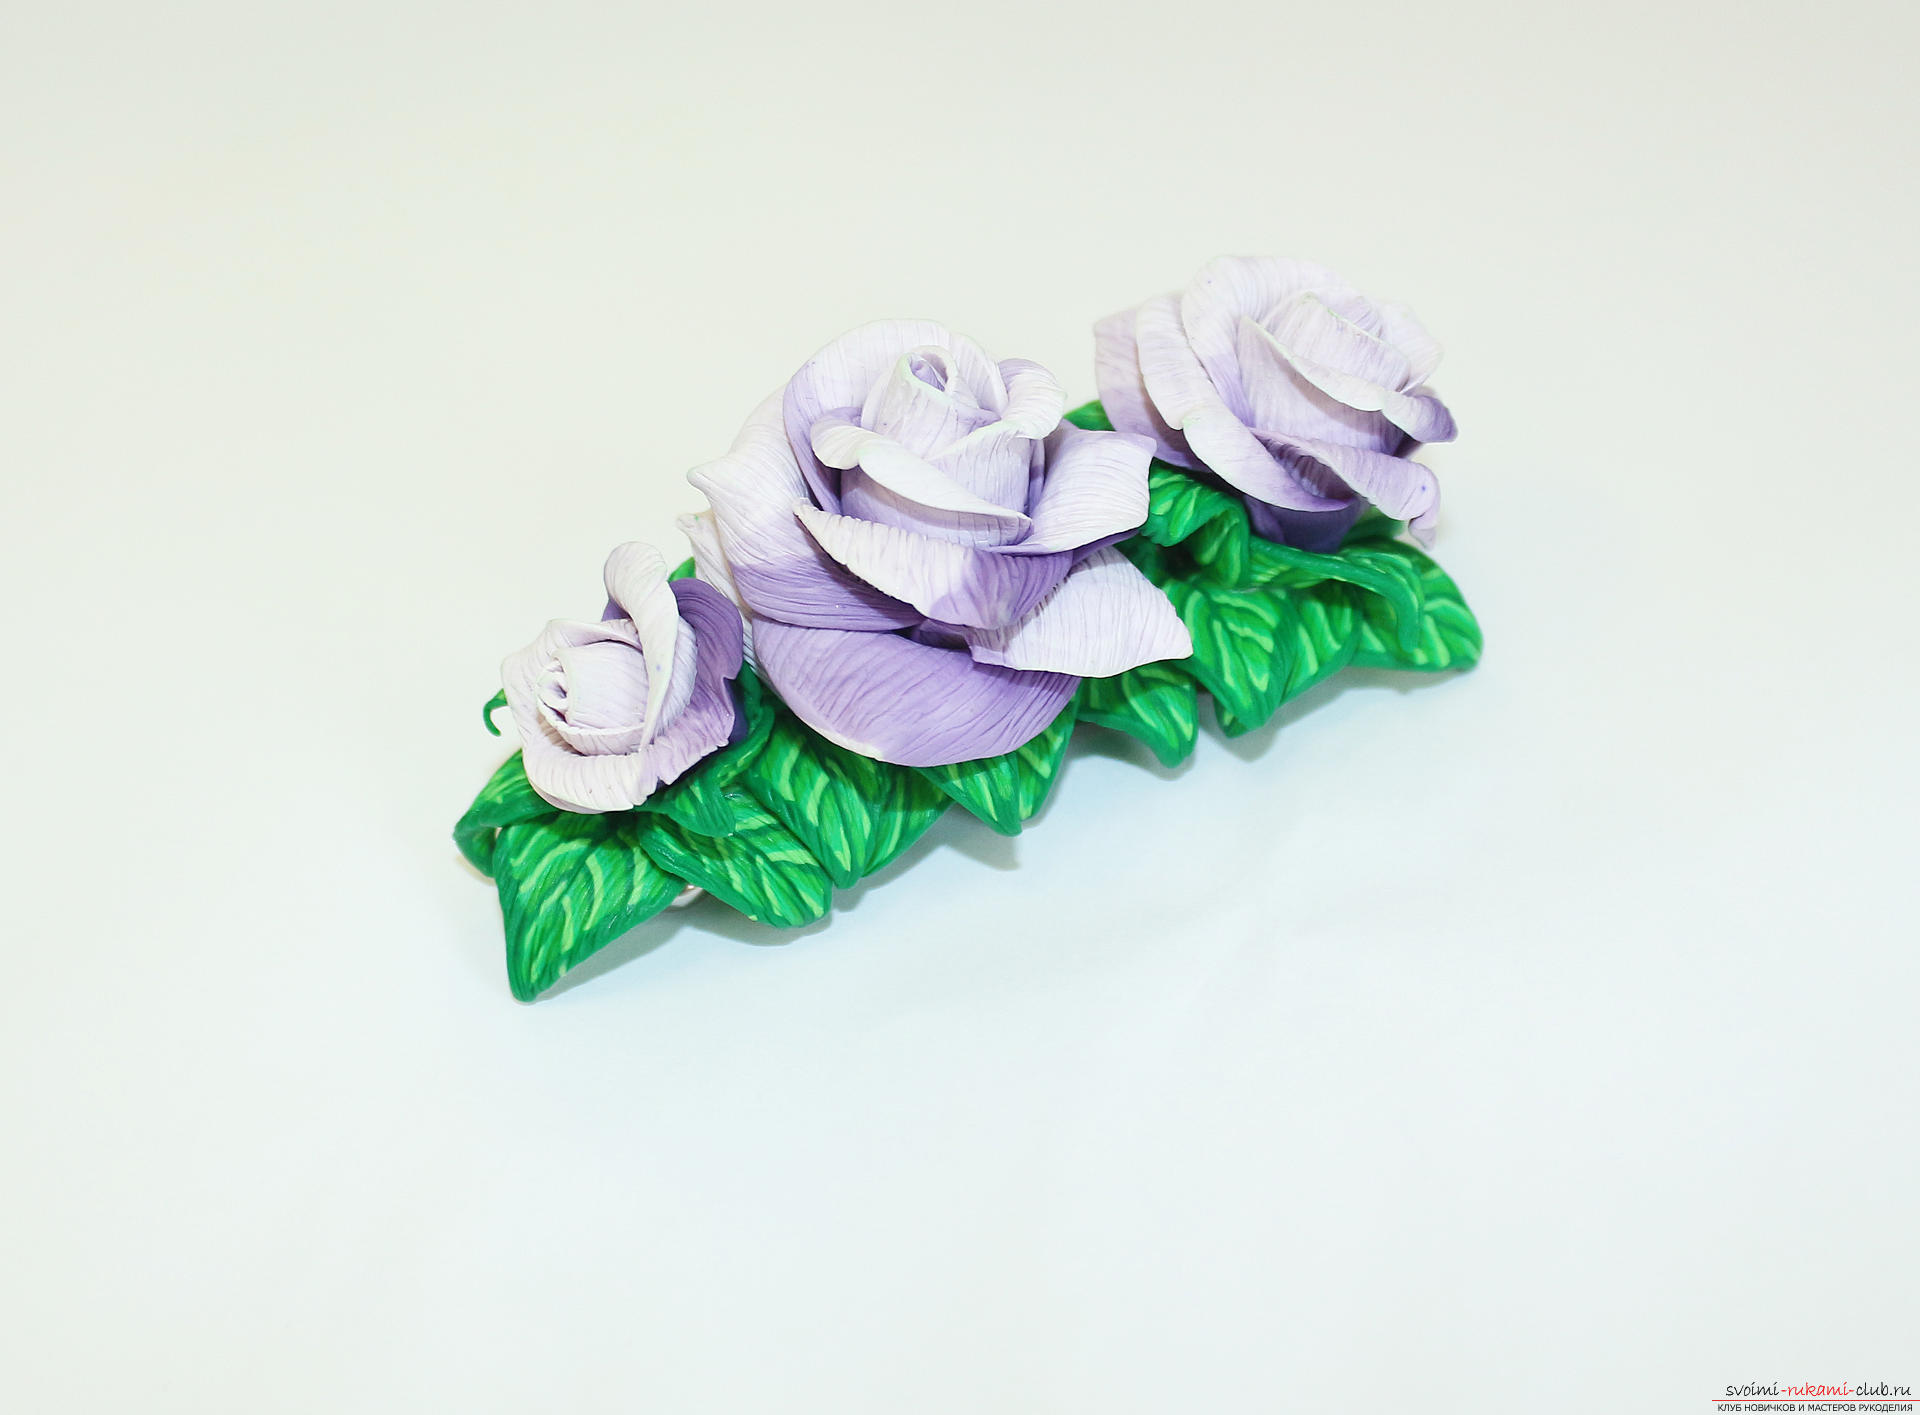
  At this stage, we got a few baked (solid) roses and a lot of unbaked leaves. It's time to prepare the basis for the barrette.
 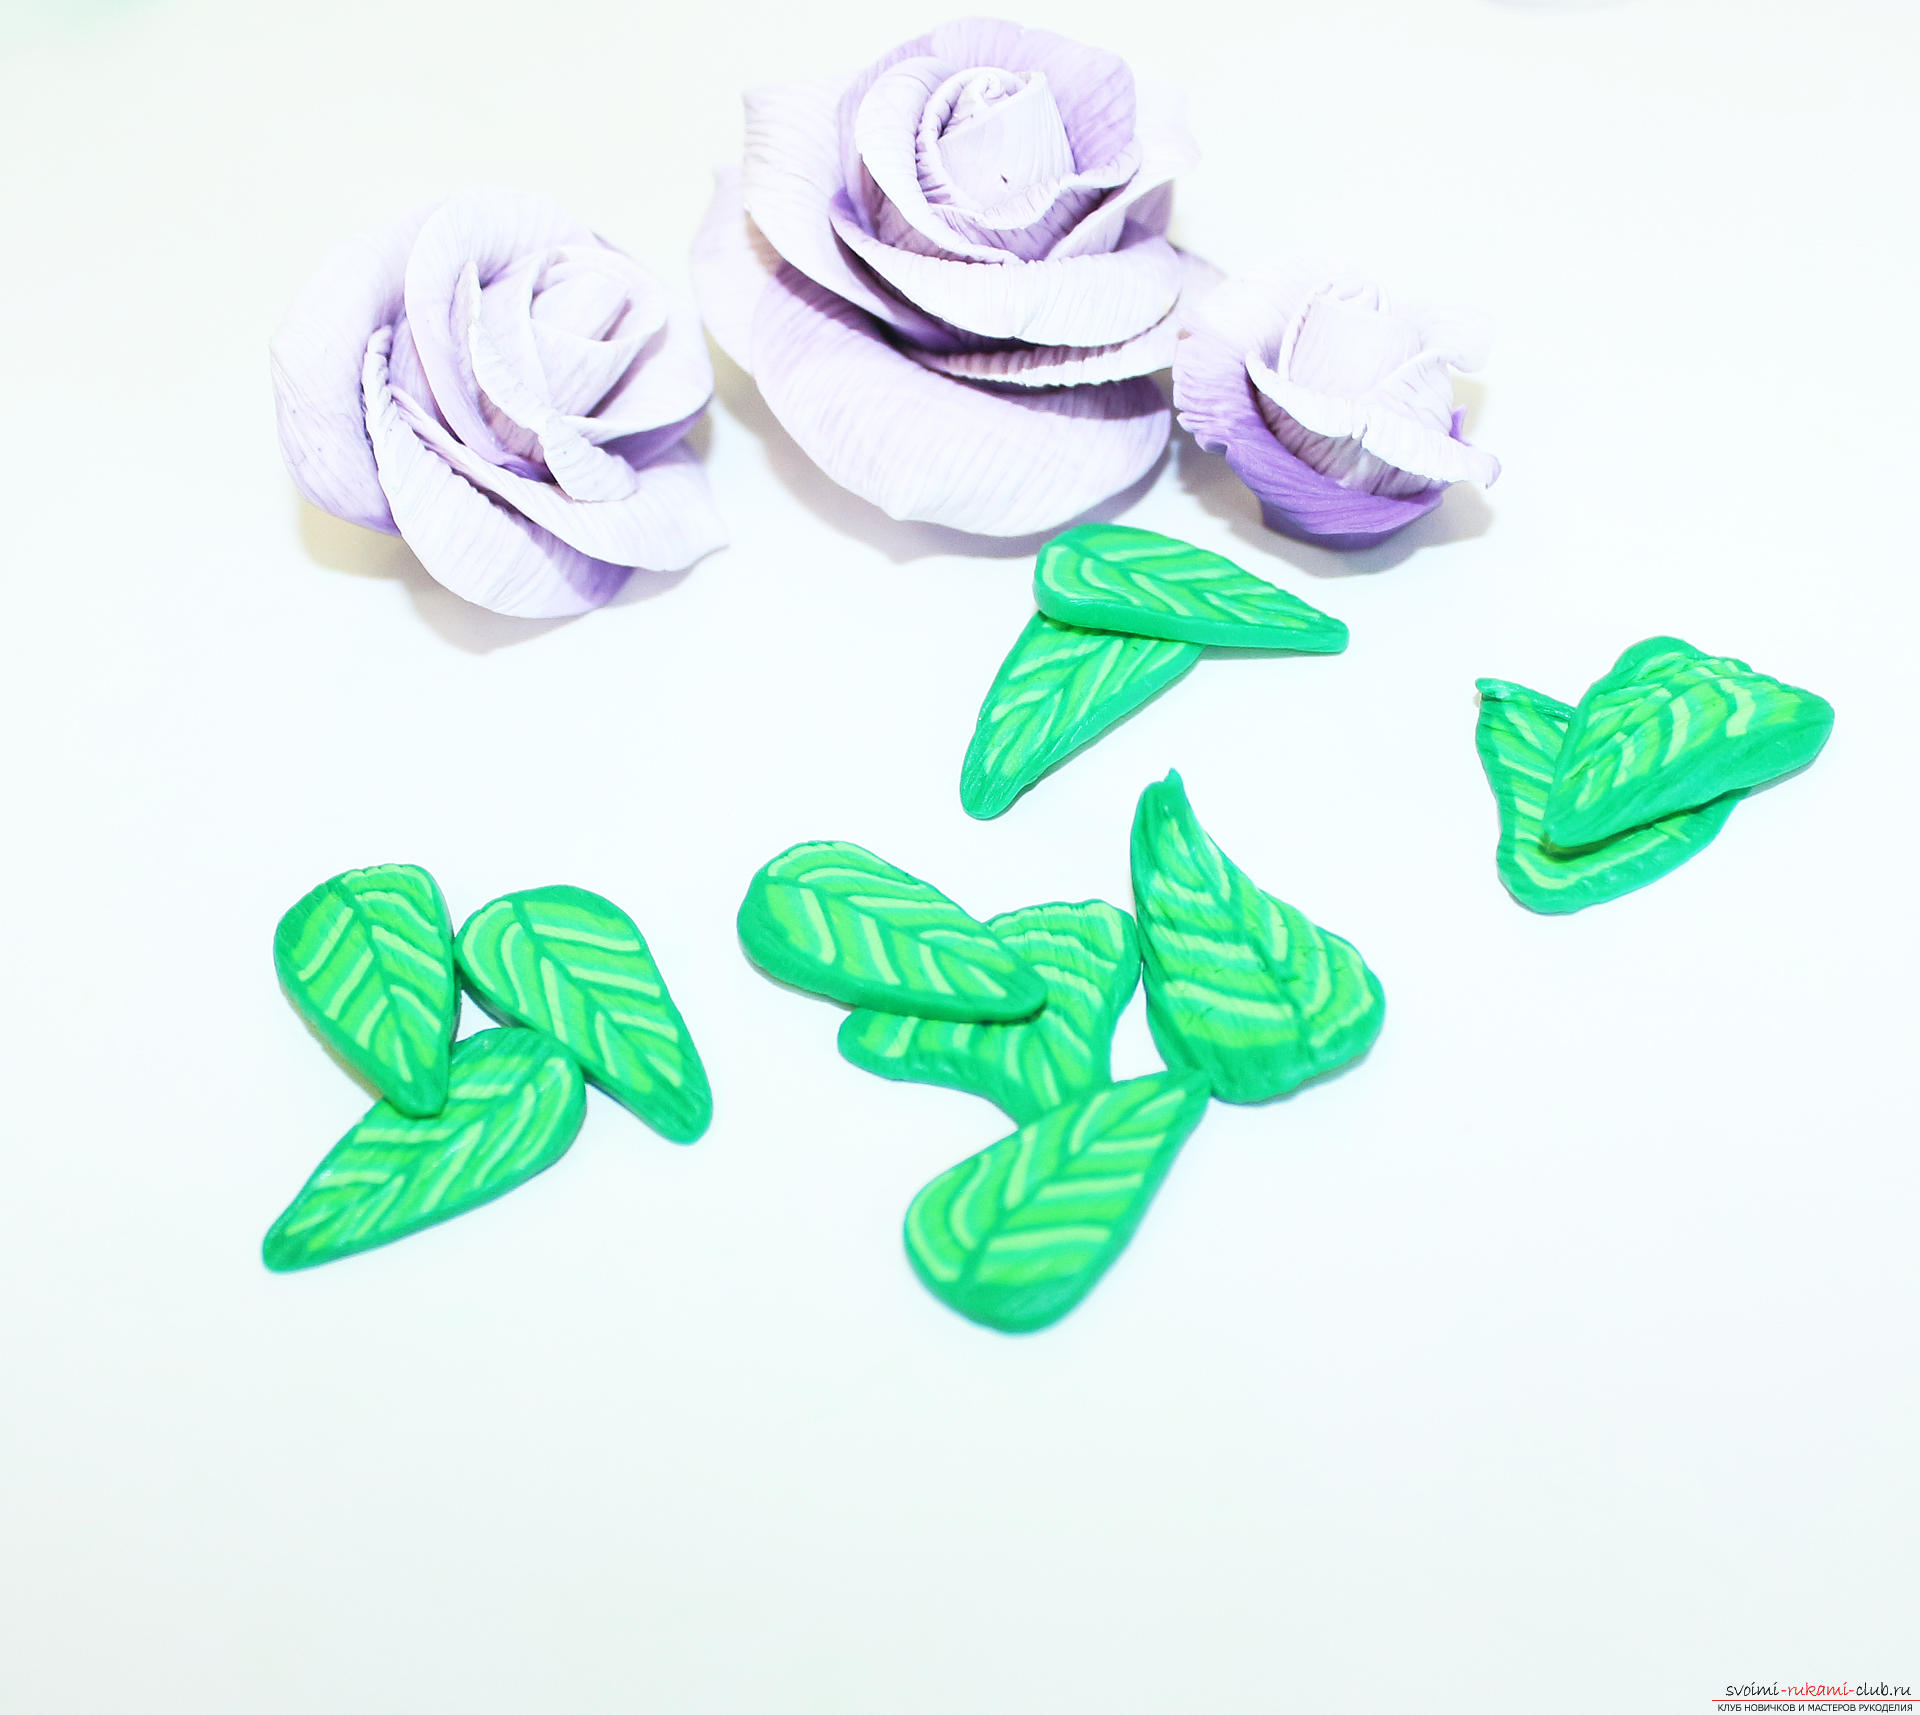 We use a small base for a hair clip. Roll out a small sausage and flatten it.
 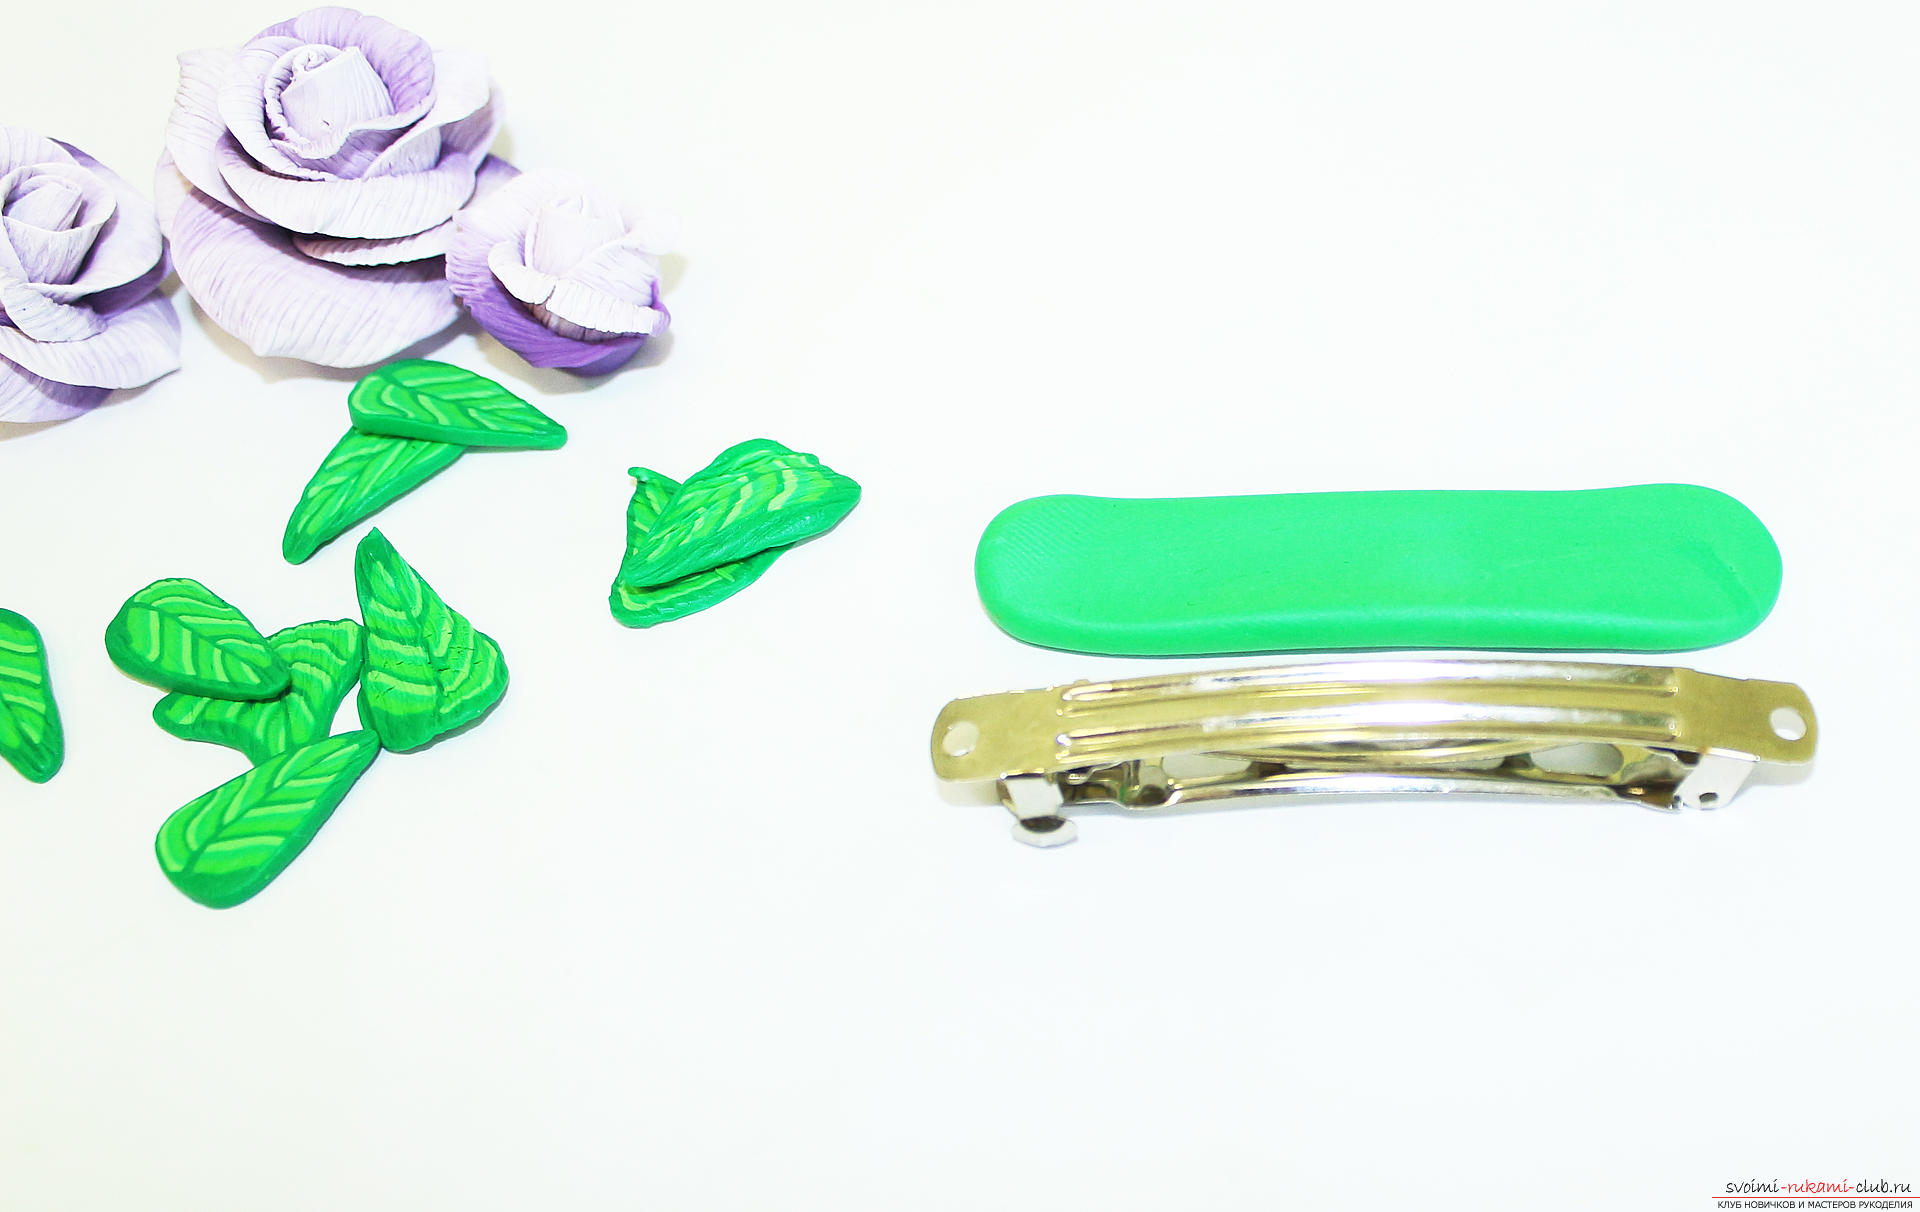 We begin to glue the base for the barrette with plastic.
 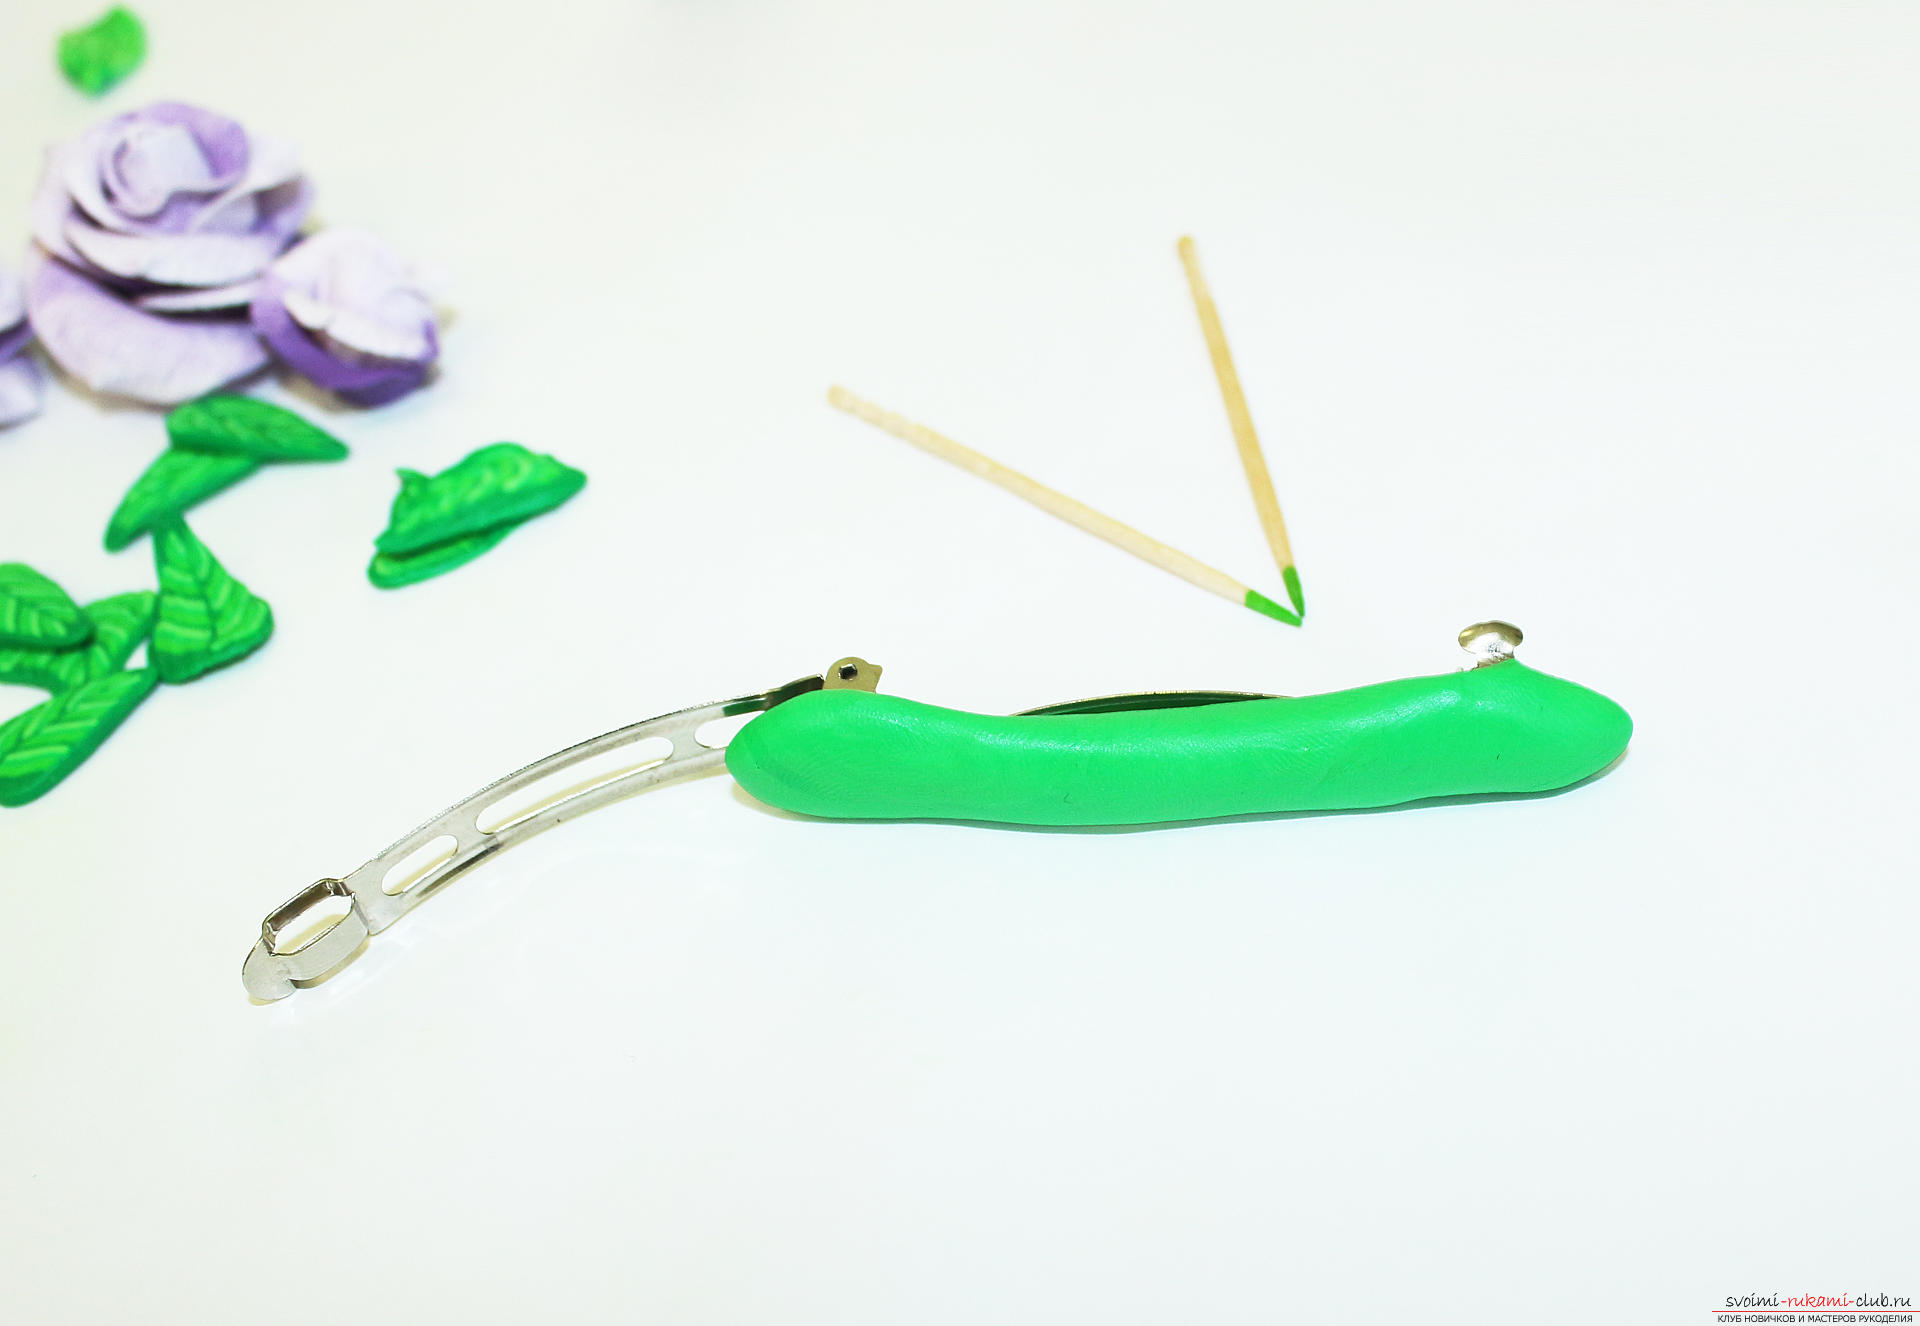 Plastic should close the entire metal platform.
  We bend the plastic inside.
 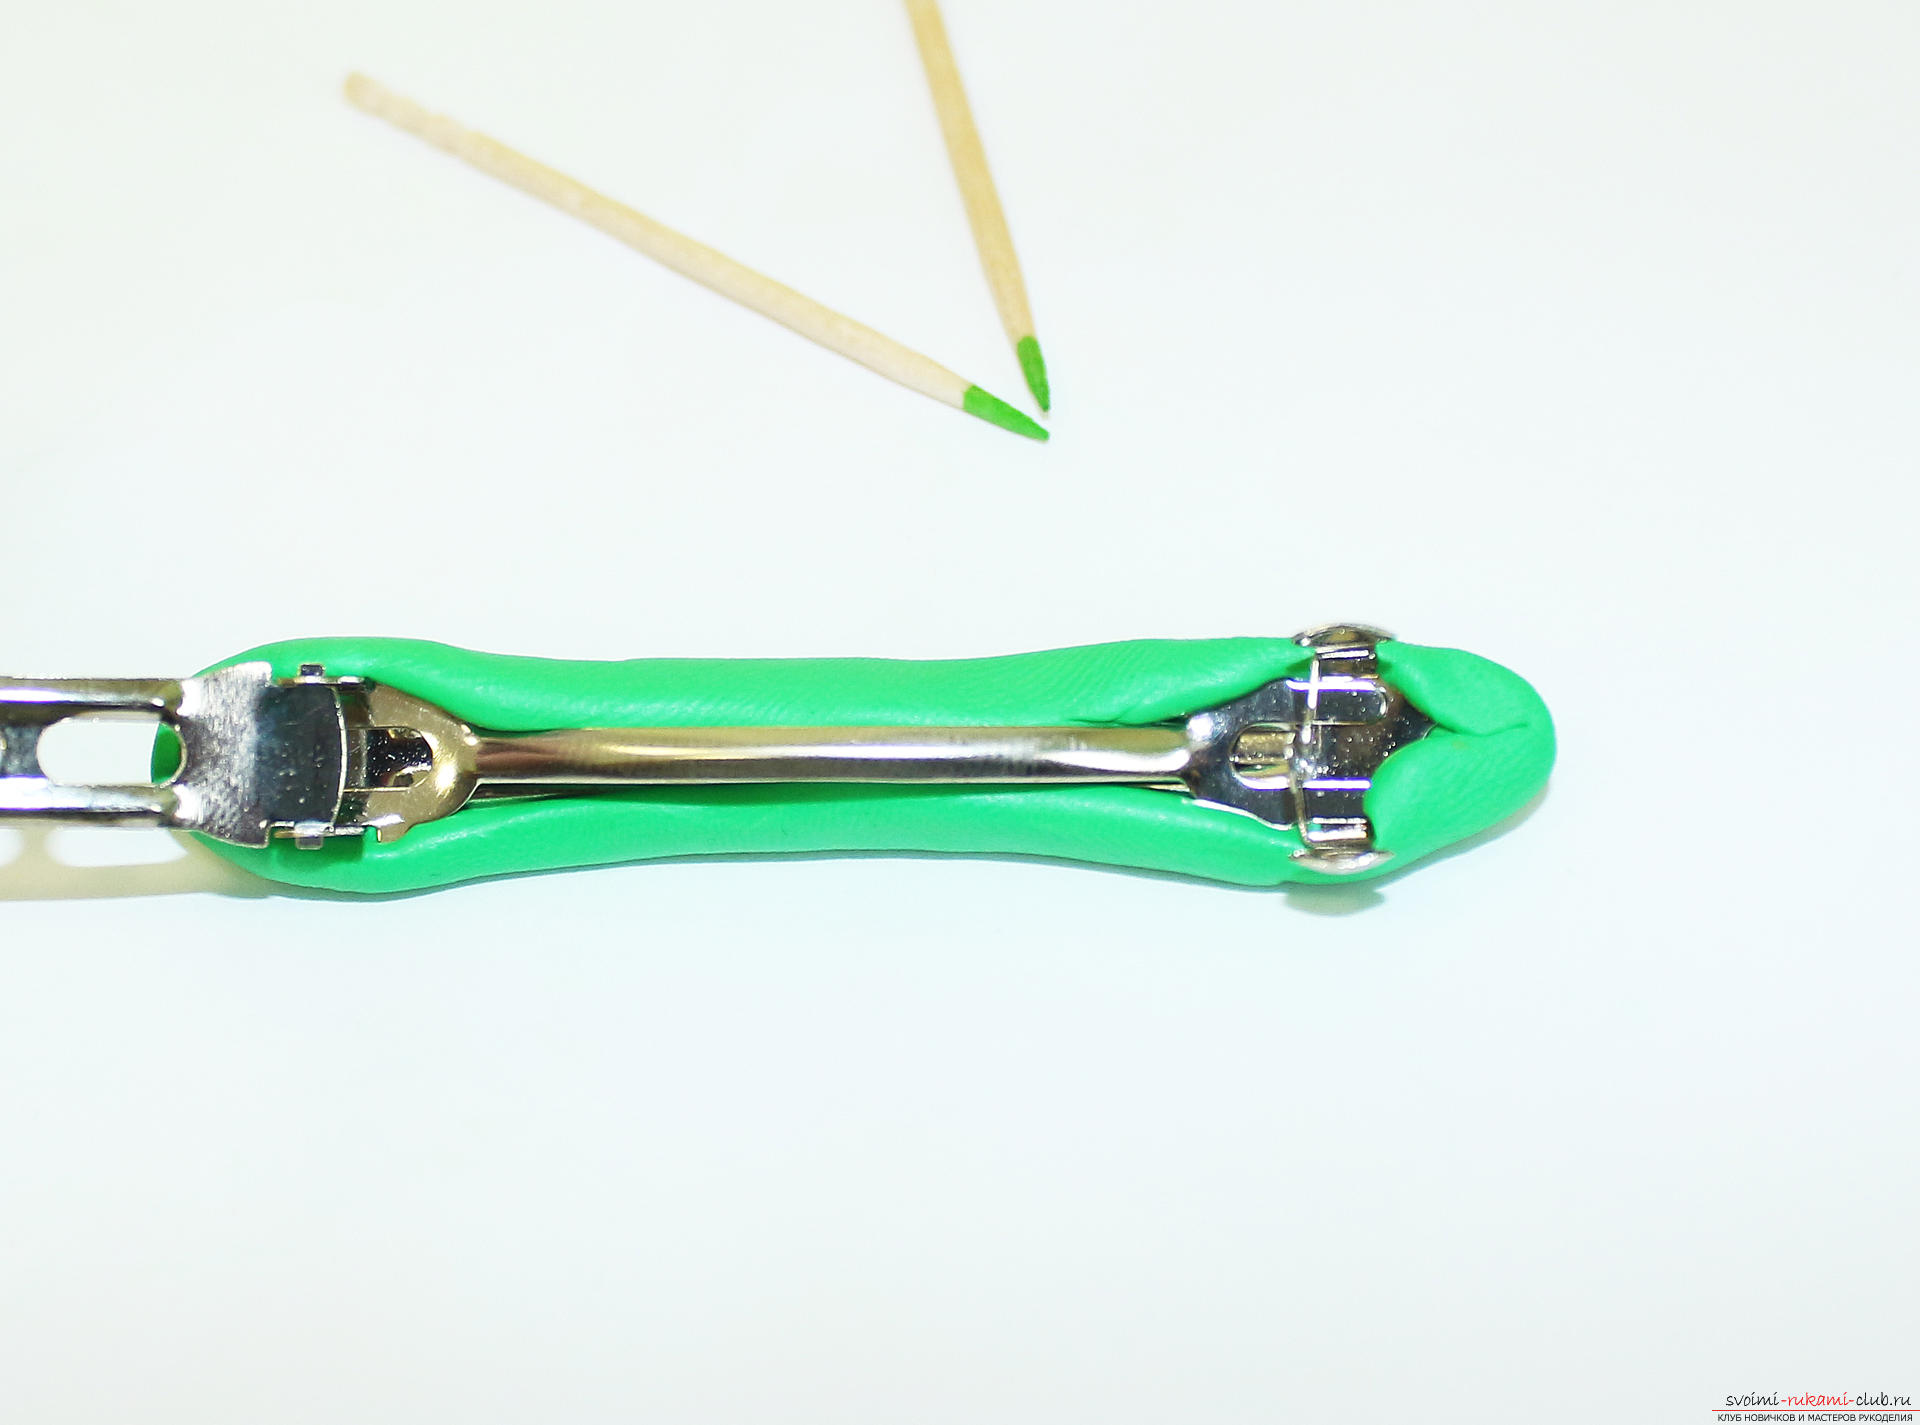 With a toothpick or a modeling tool, we smooth the joint of the plastic.
 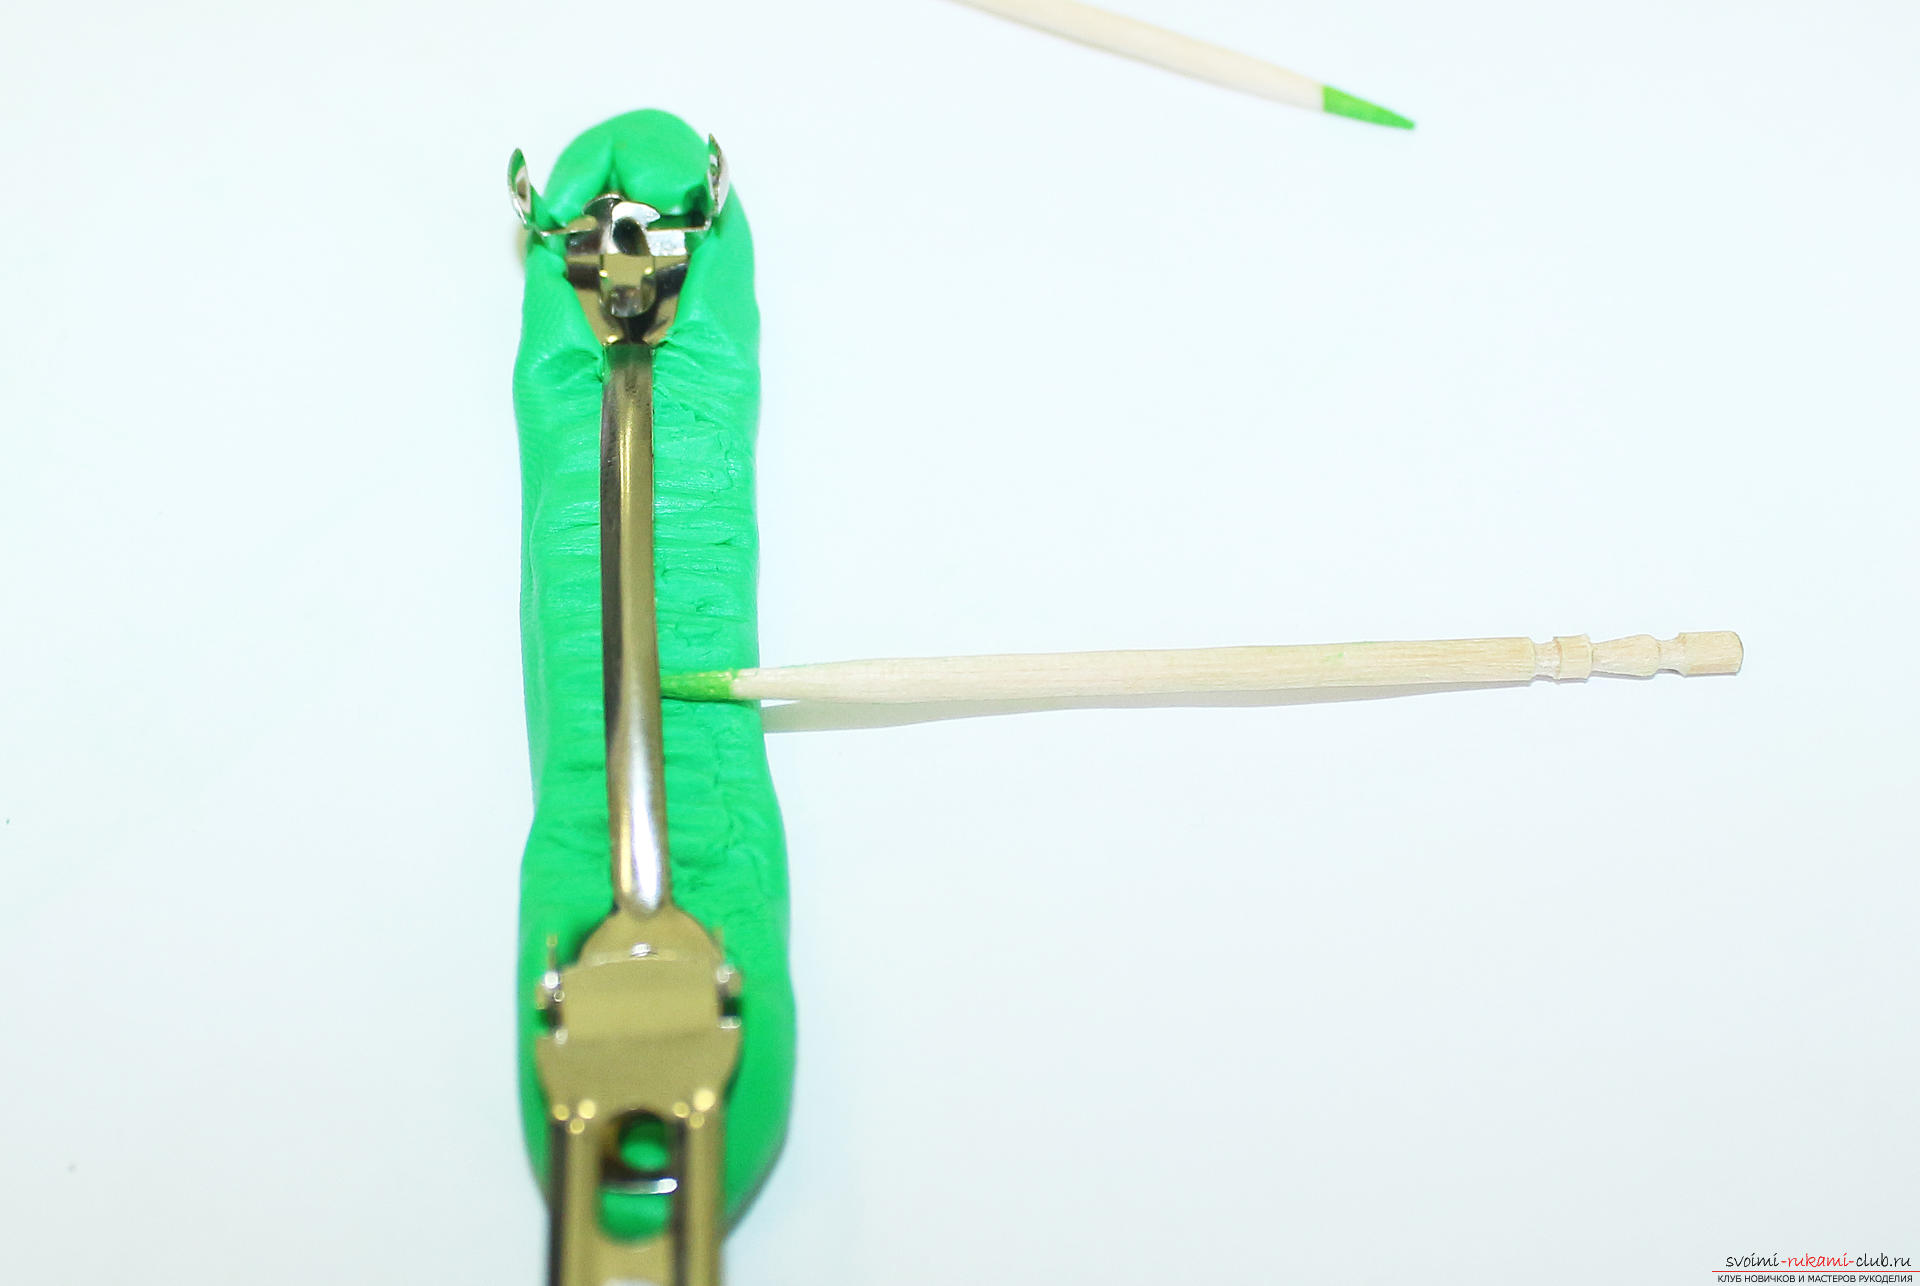 We take out the "spring". Use a rolling pin to roll the layer from the inside.
 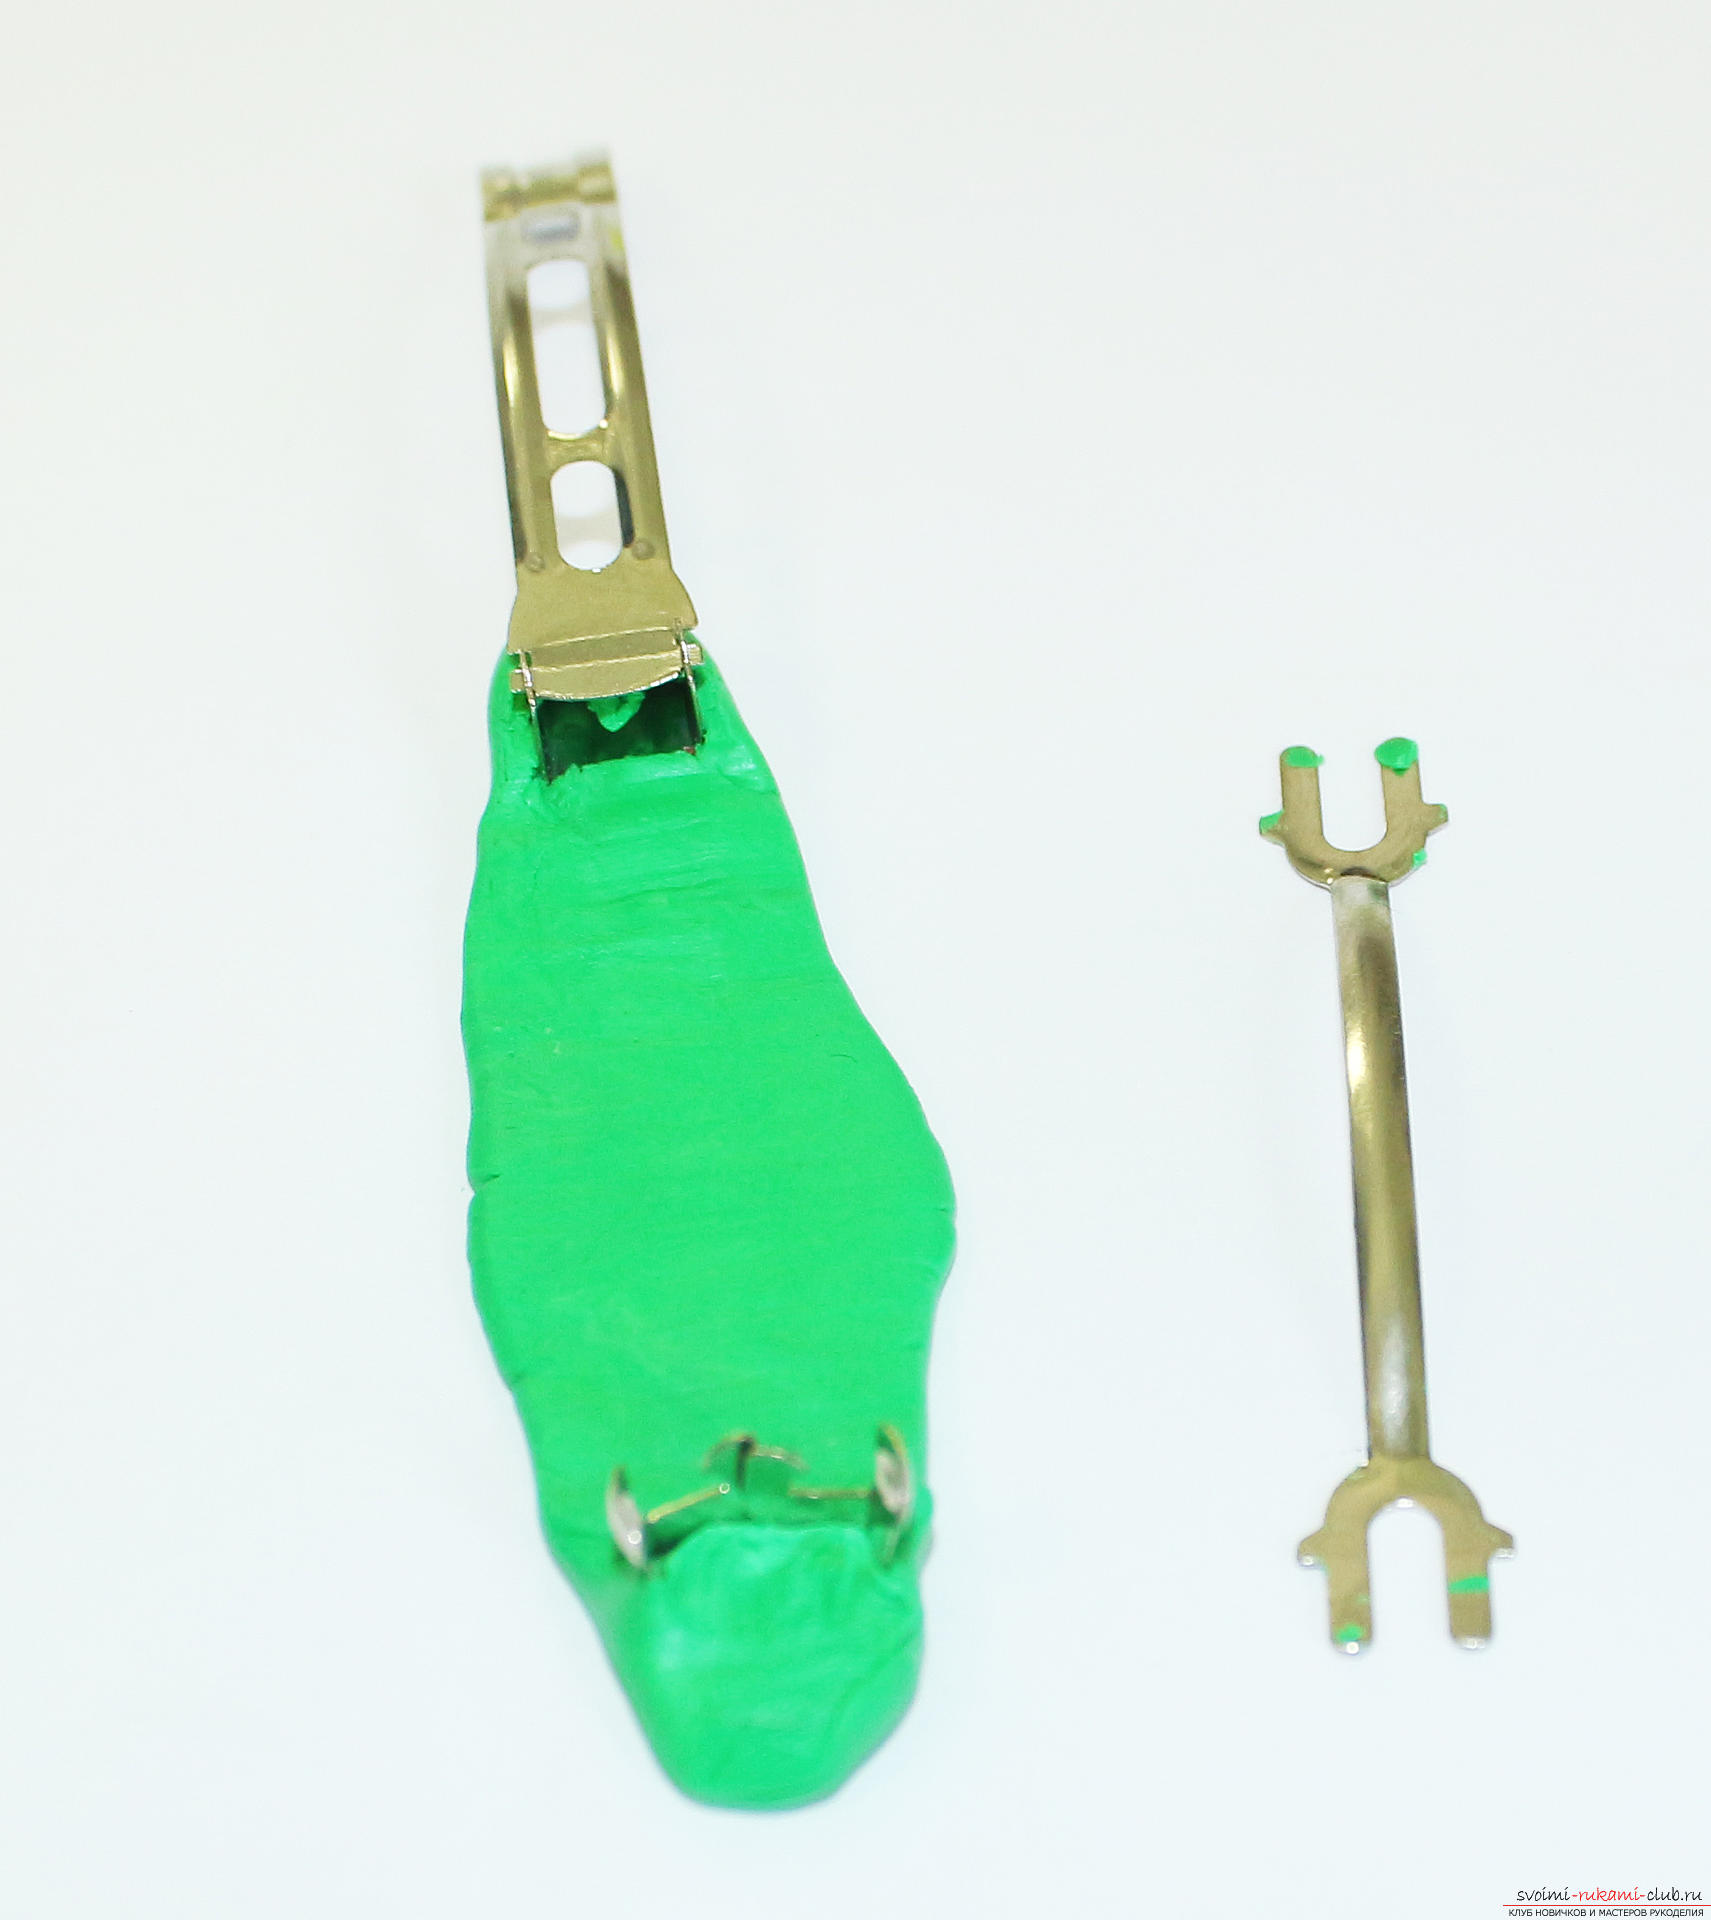 Cutting off excess material with a blade, the base metal must remain hidden!
 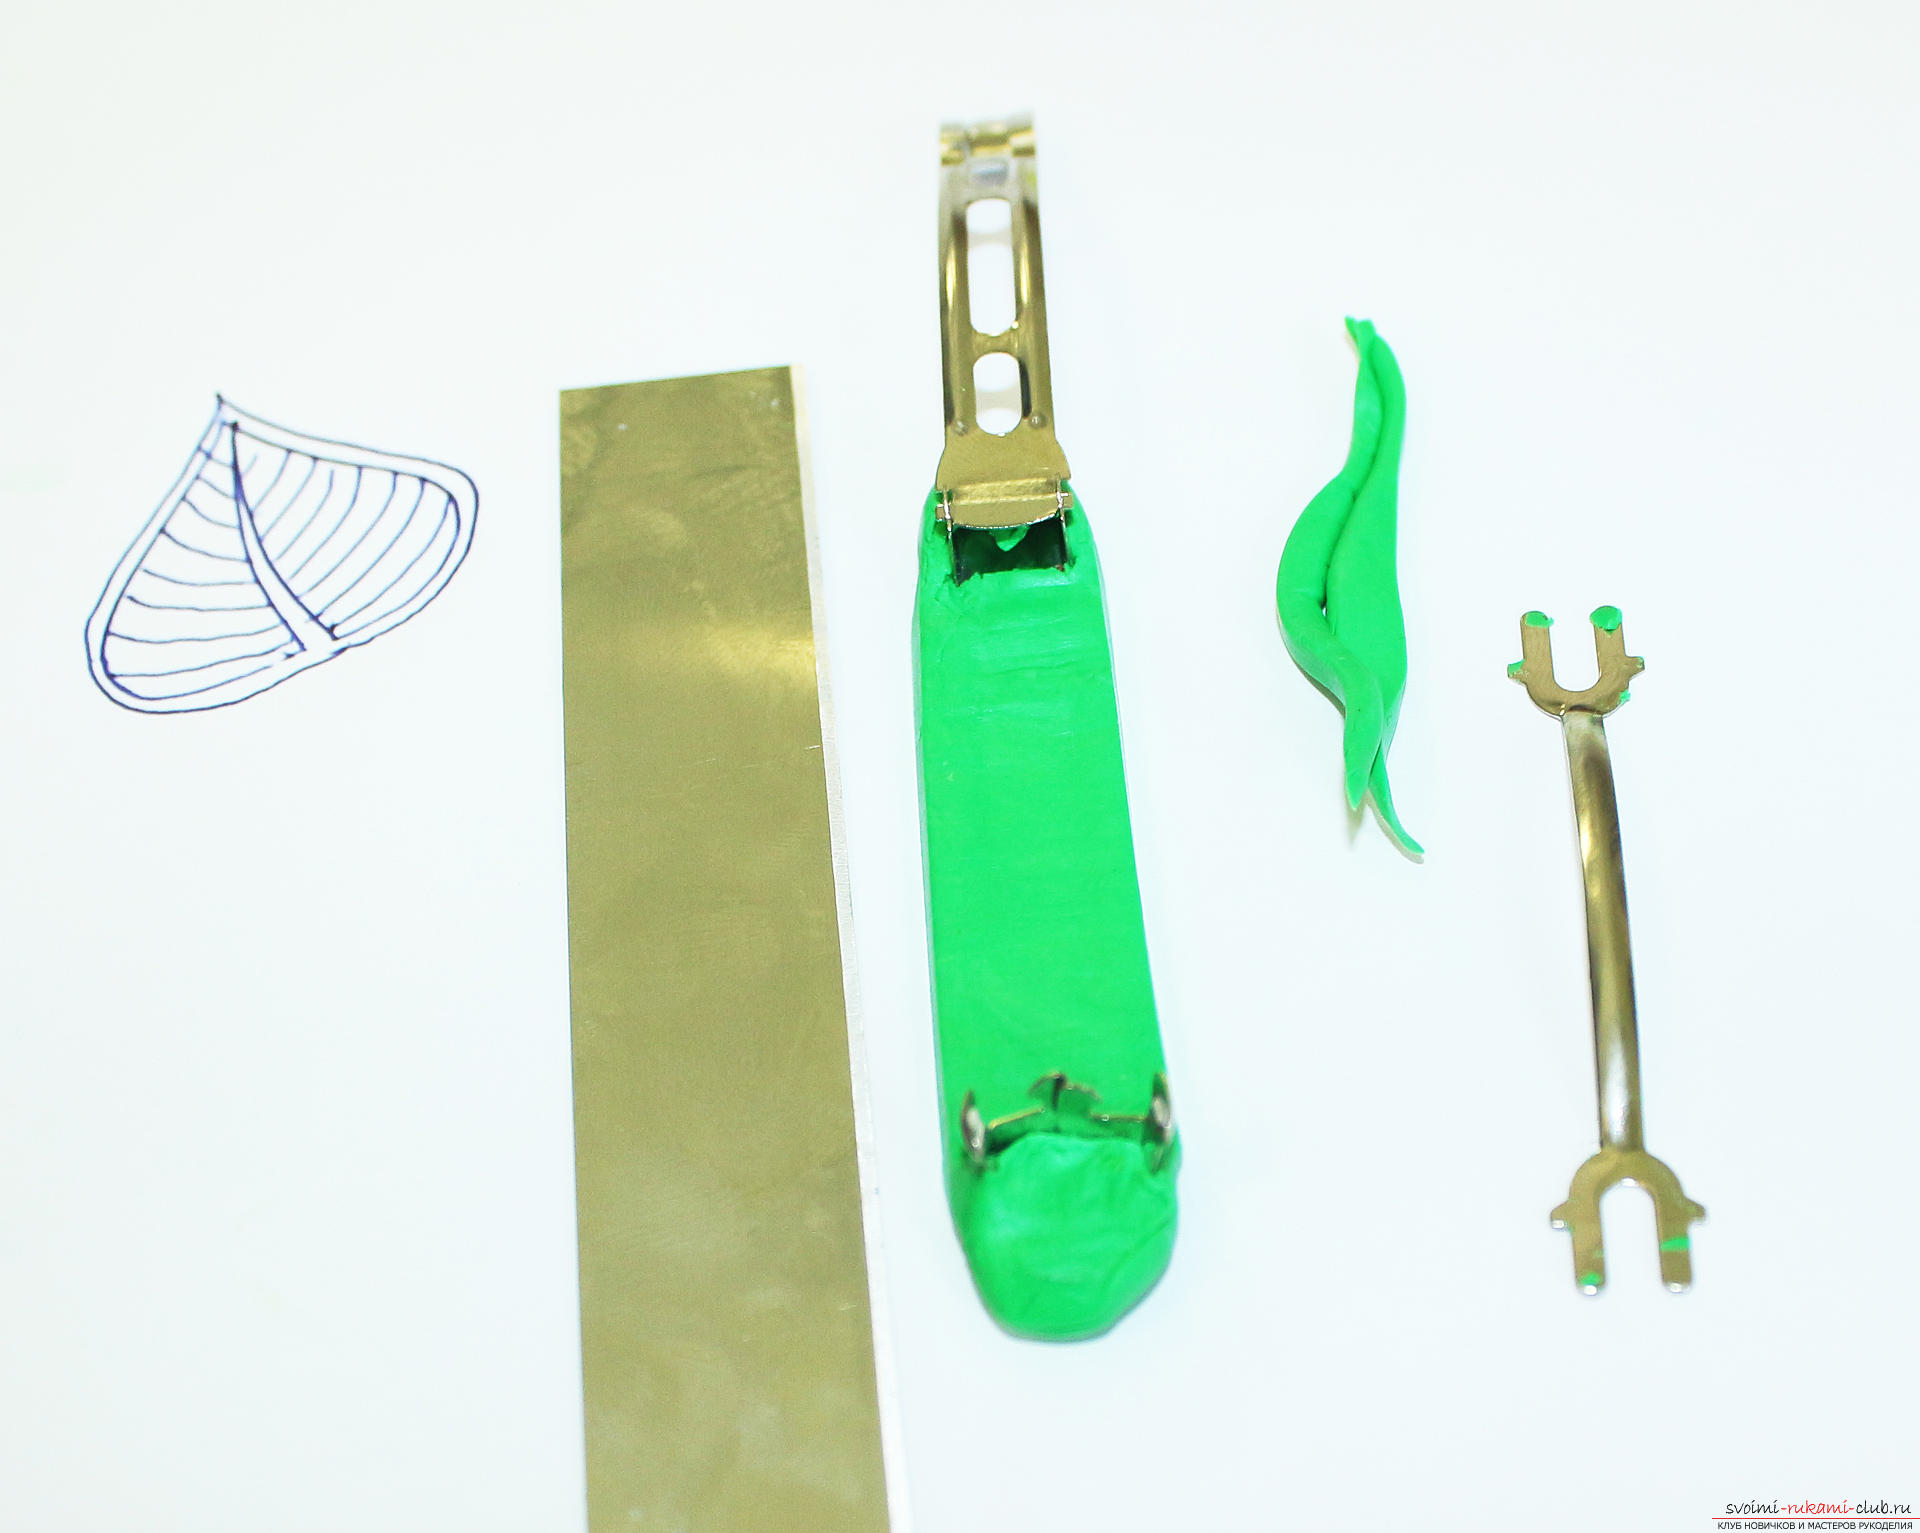 The base now has a very presentable look.
 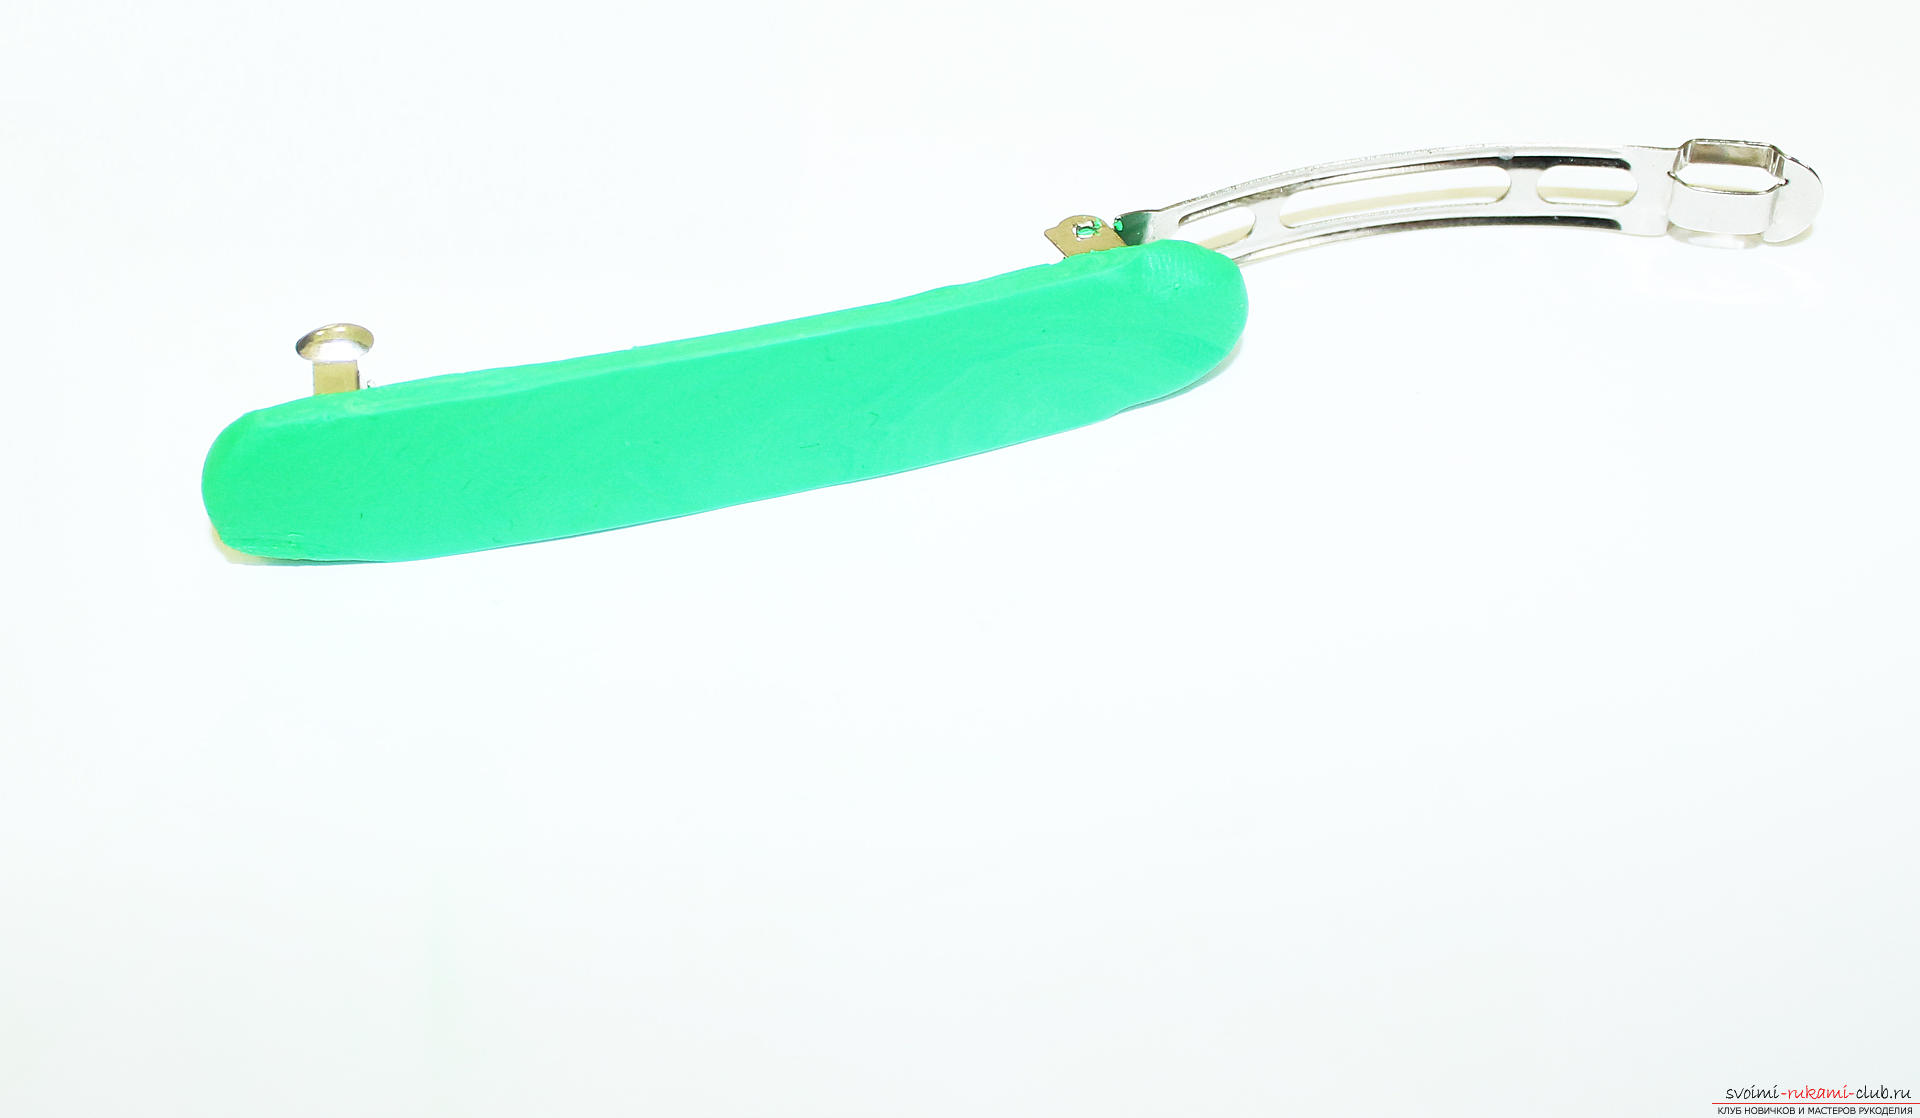 We put the "spring" back.
 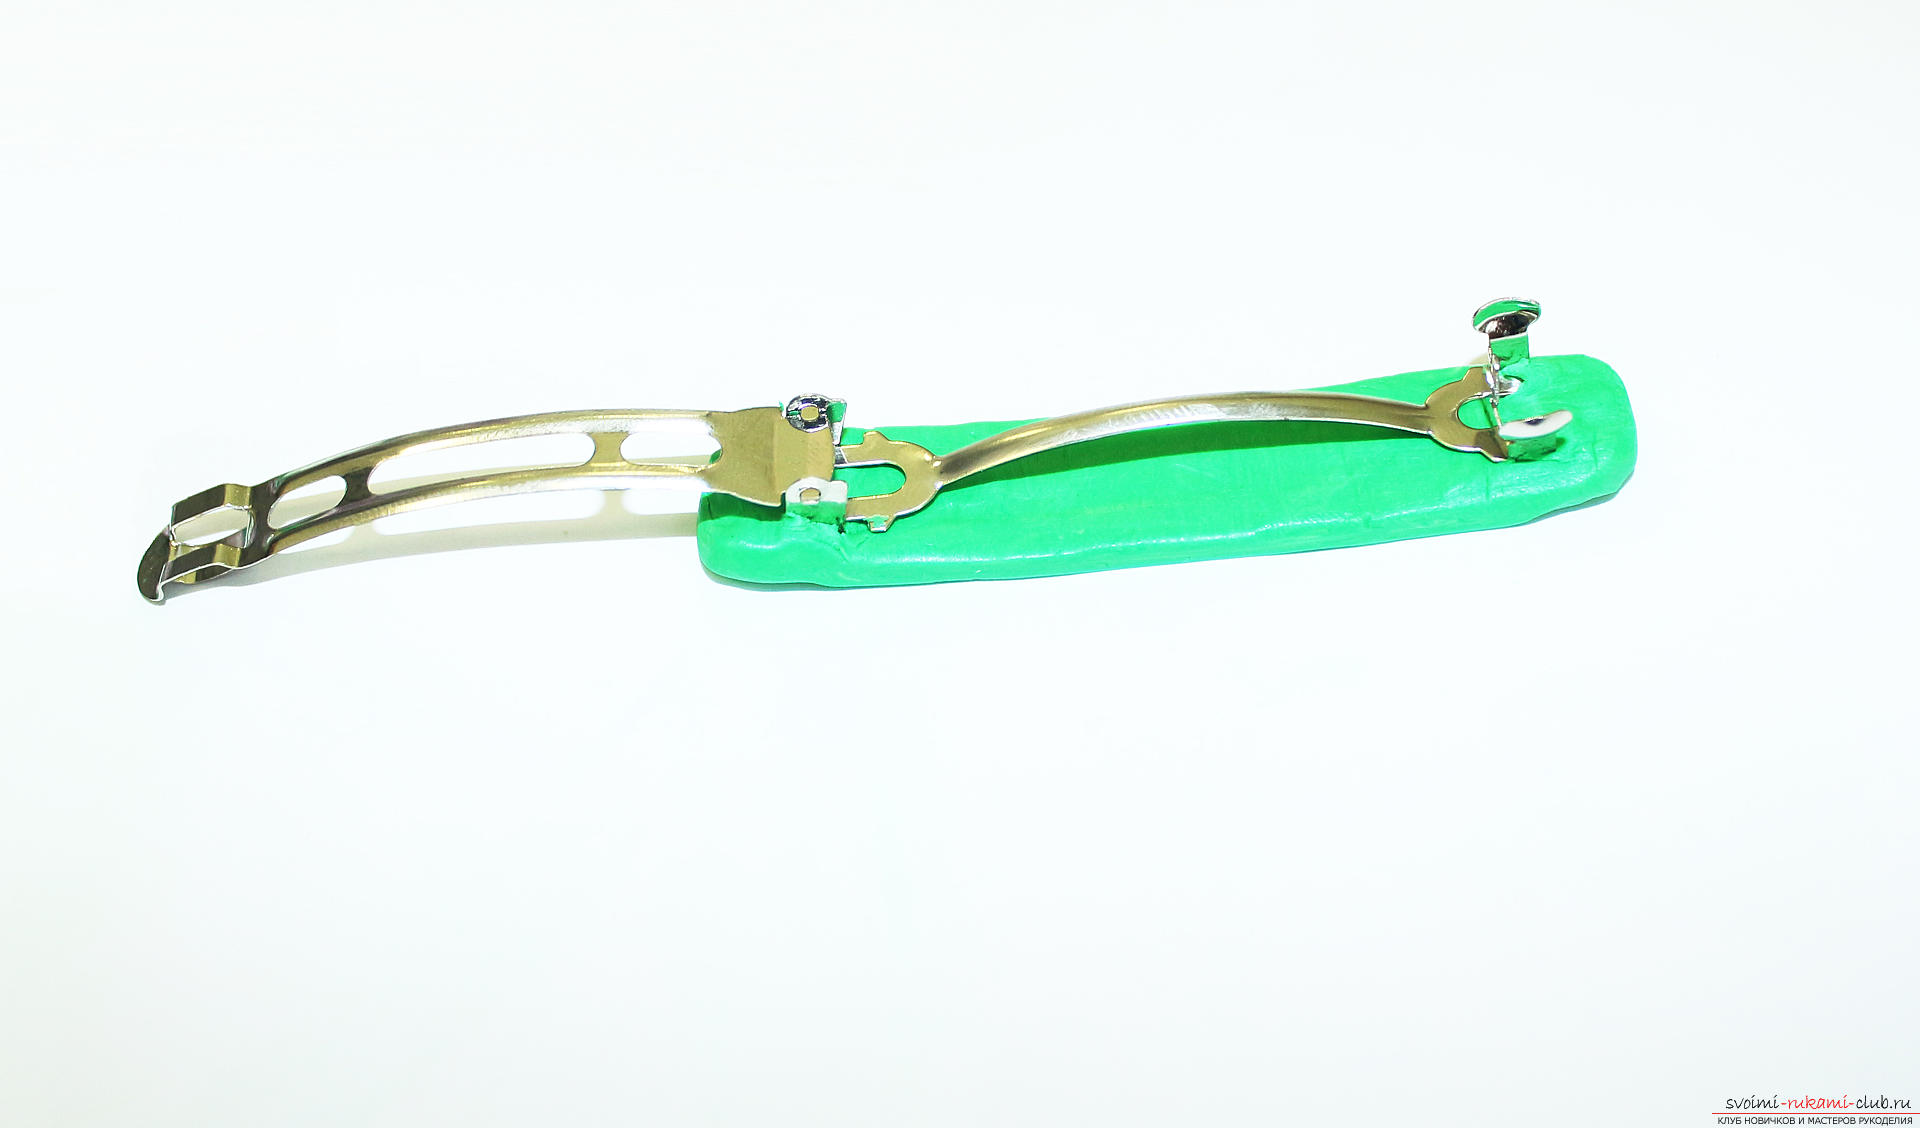 Drip the liquid plastic on the base of the rose.
 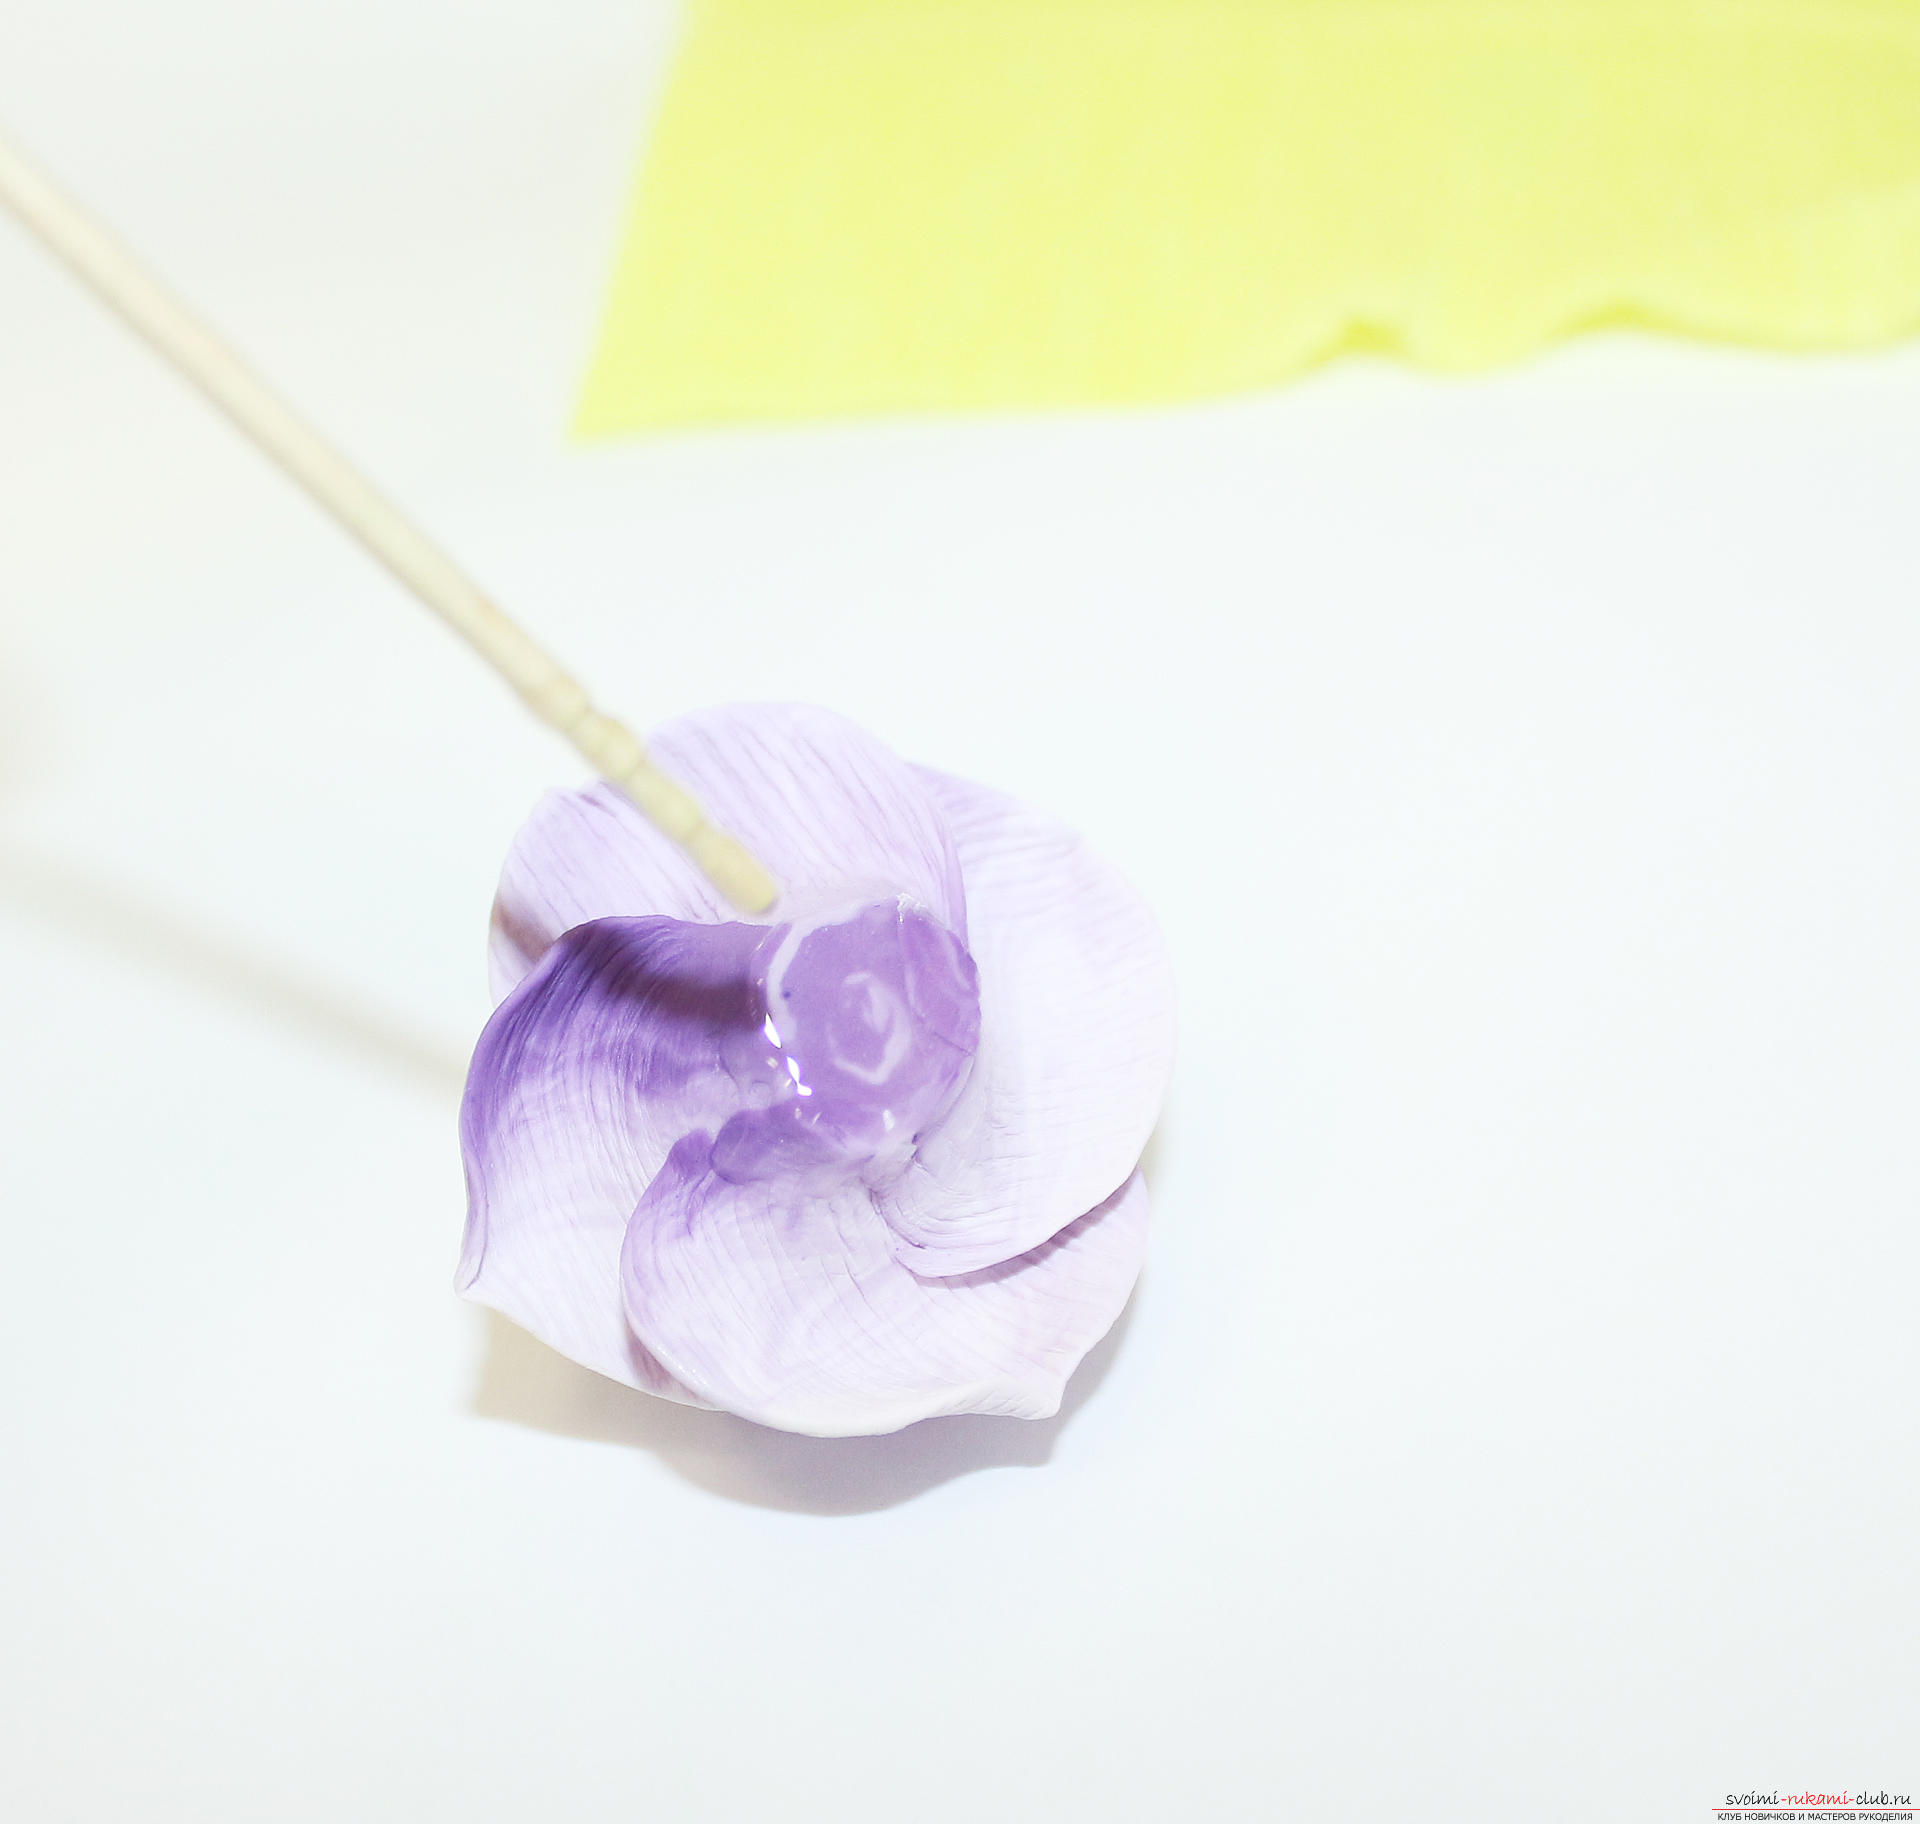 We glue several leaves to each rose, closing its cut.
 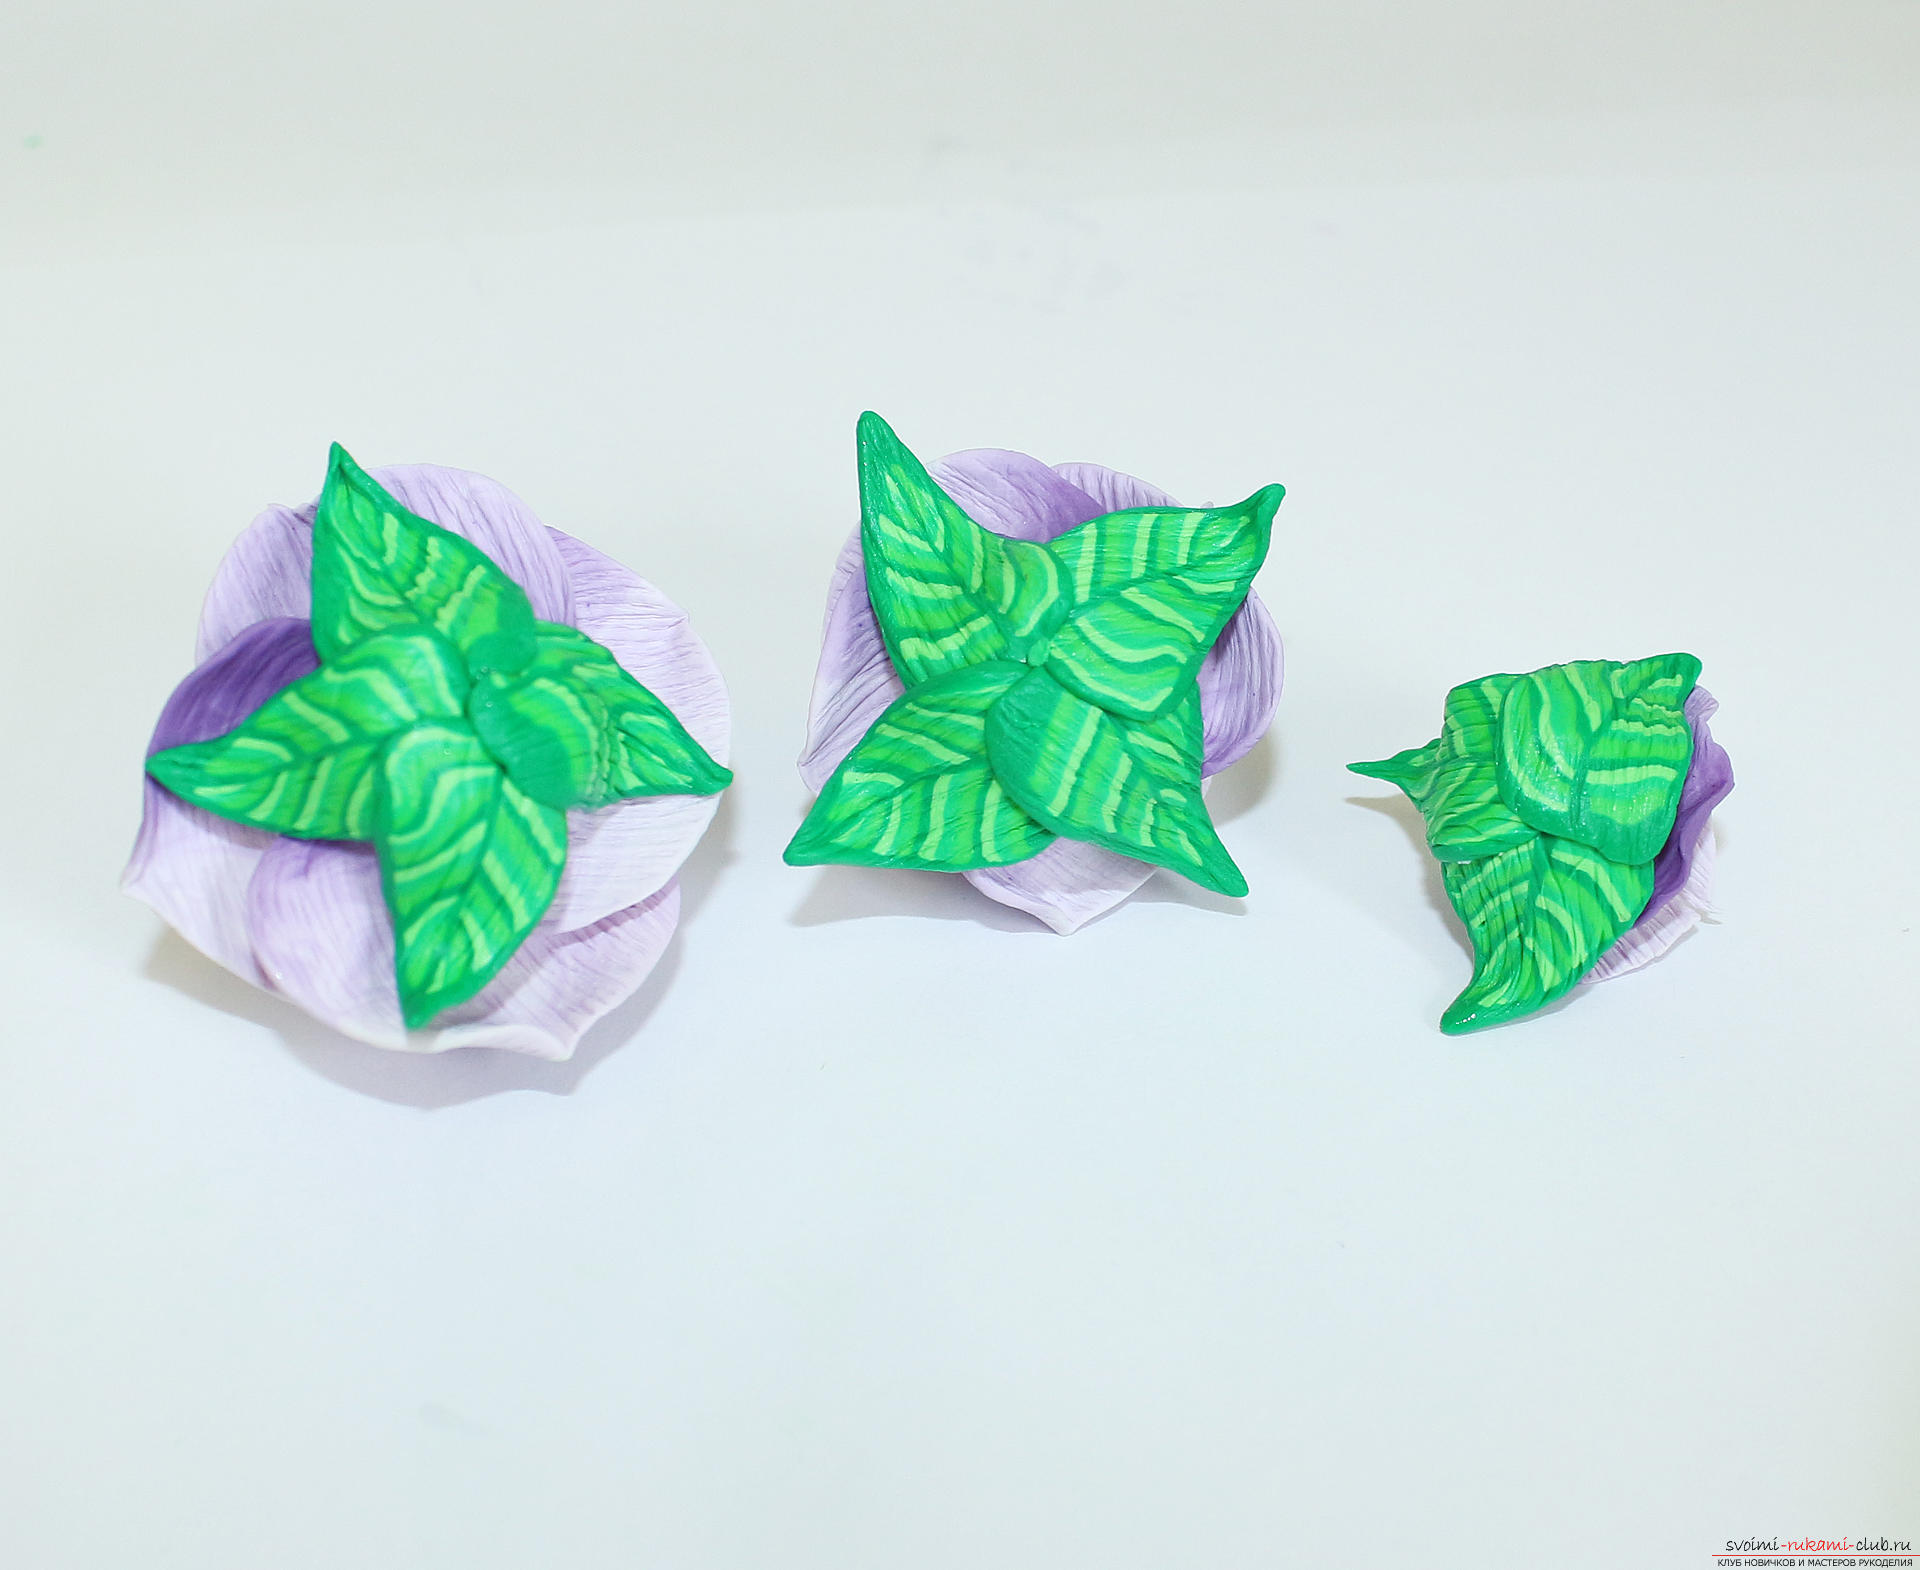 We glue the leaves to the base, beginning with the edges.
 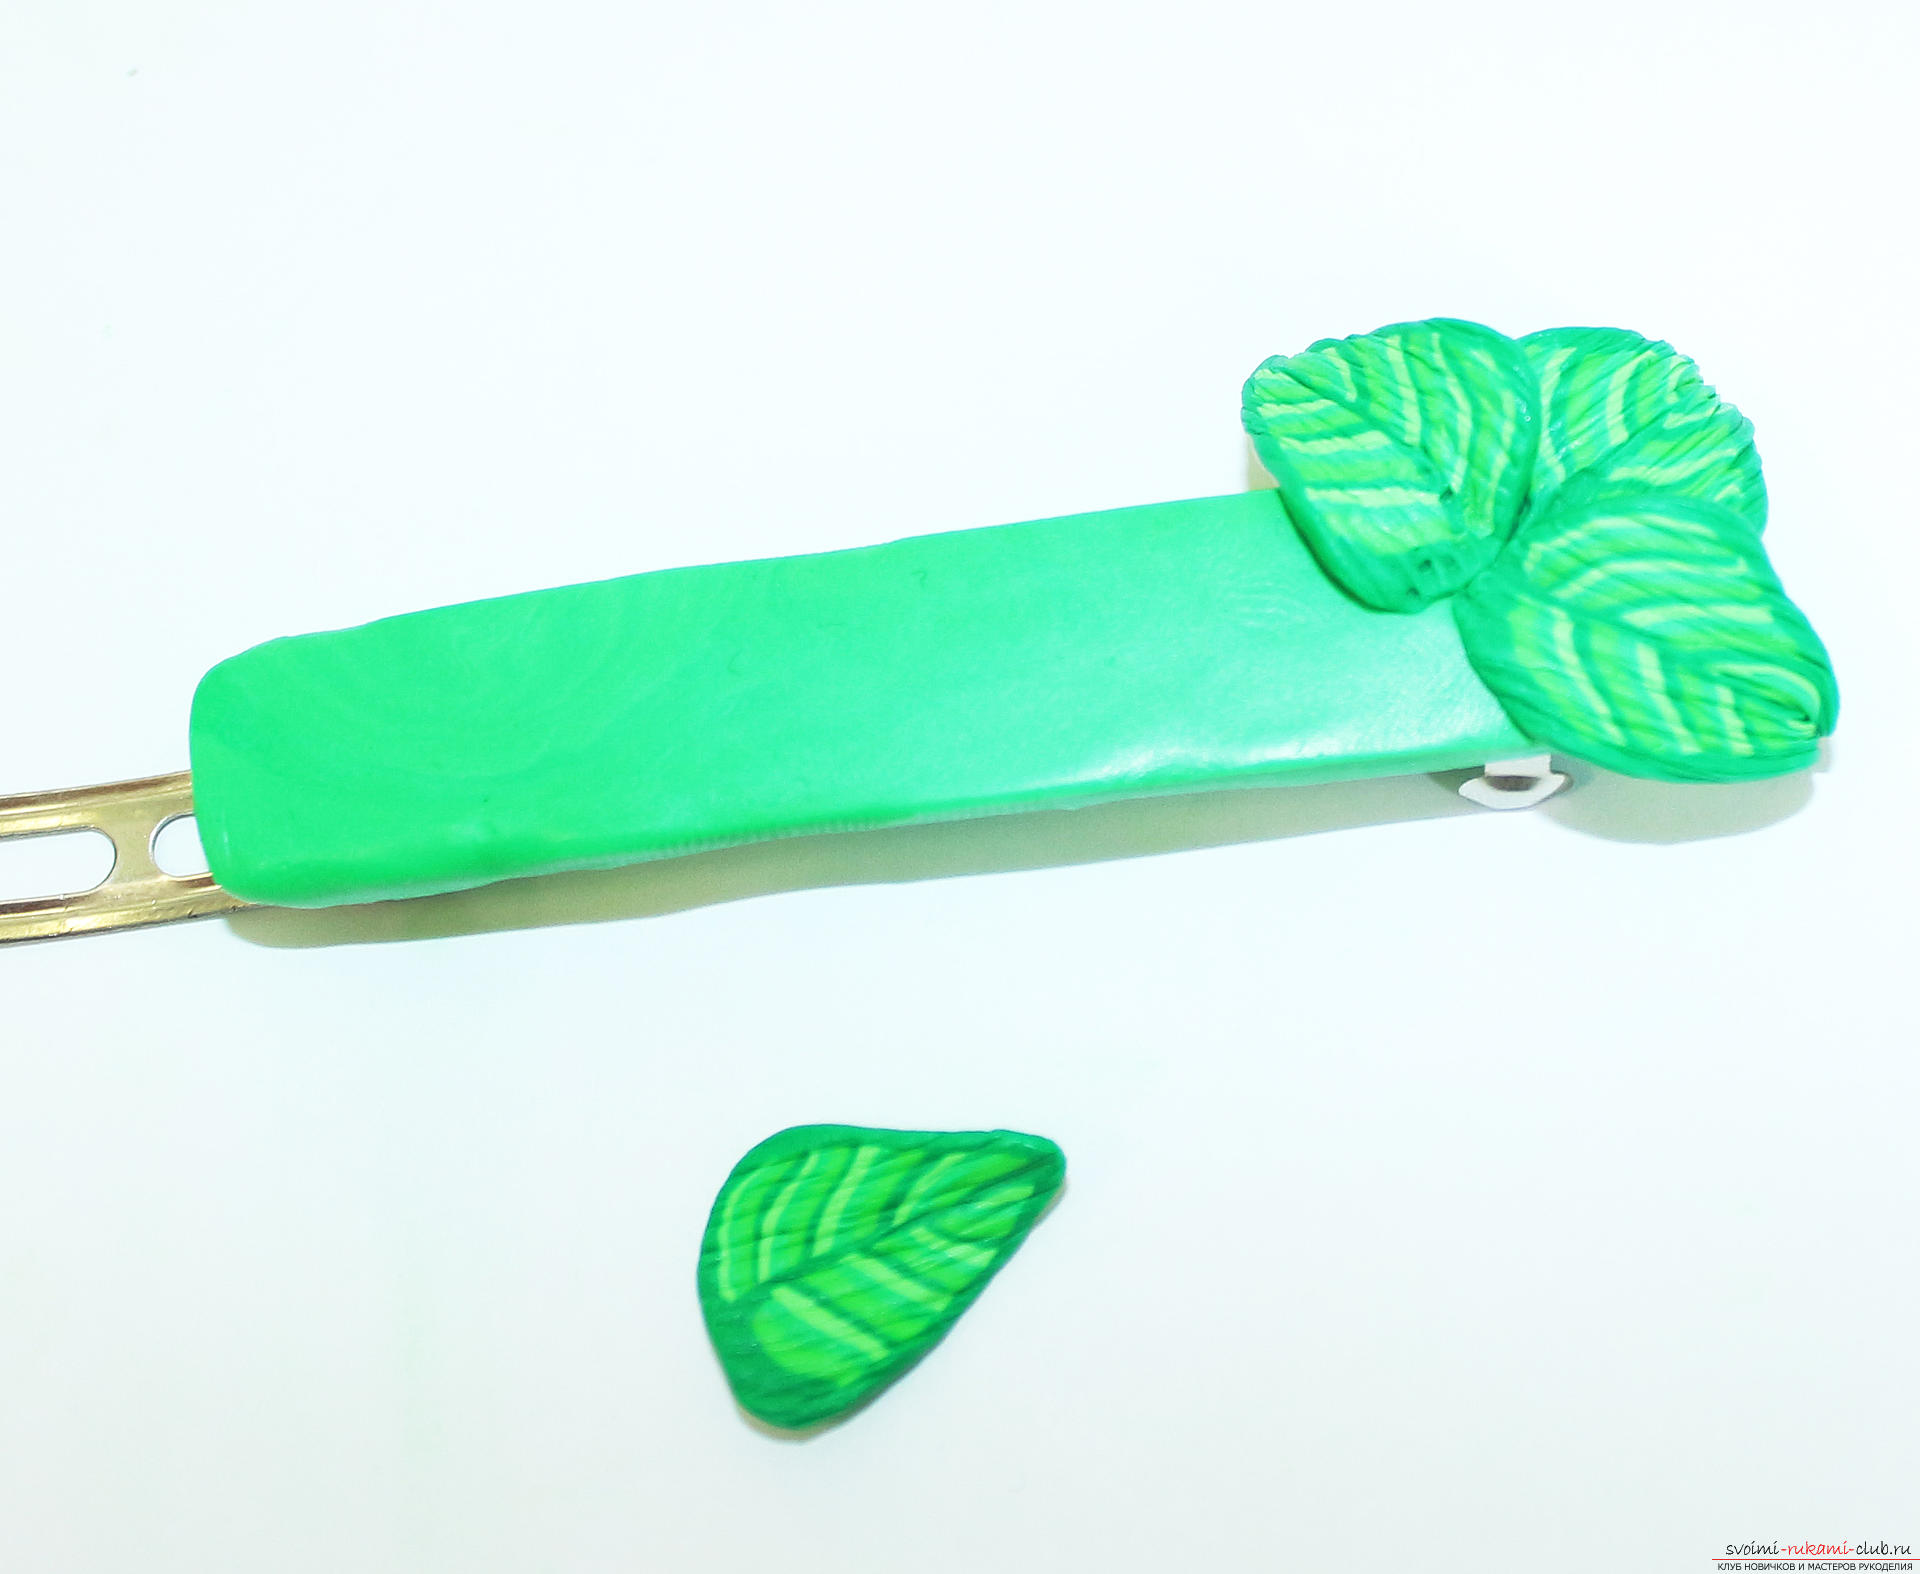 Alternately glue the leaves on one side or the other.
 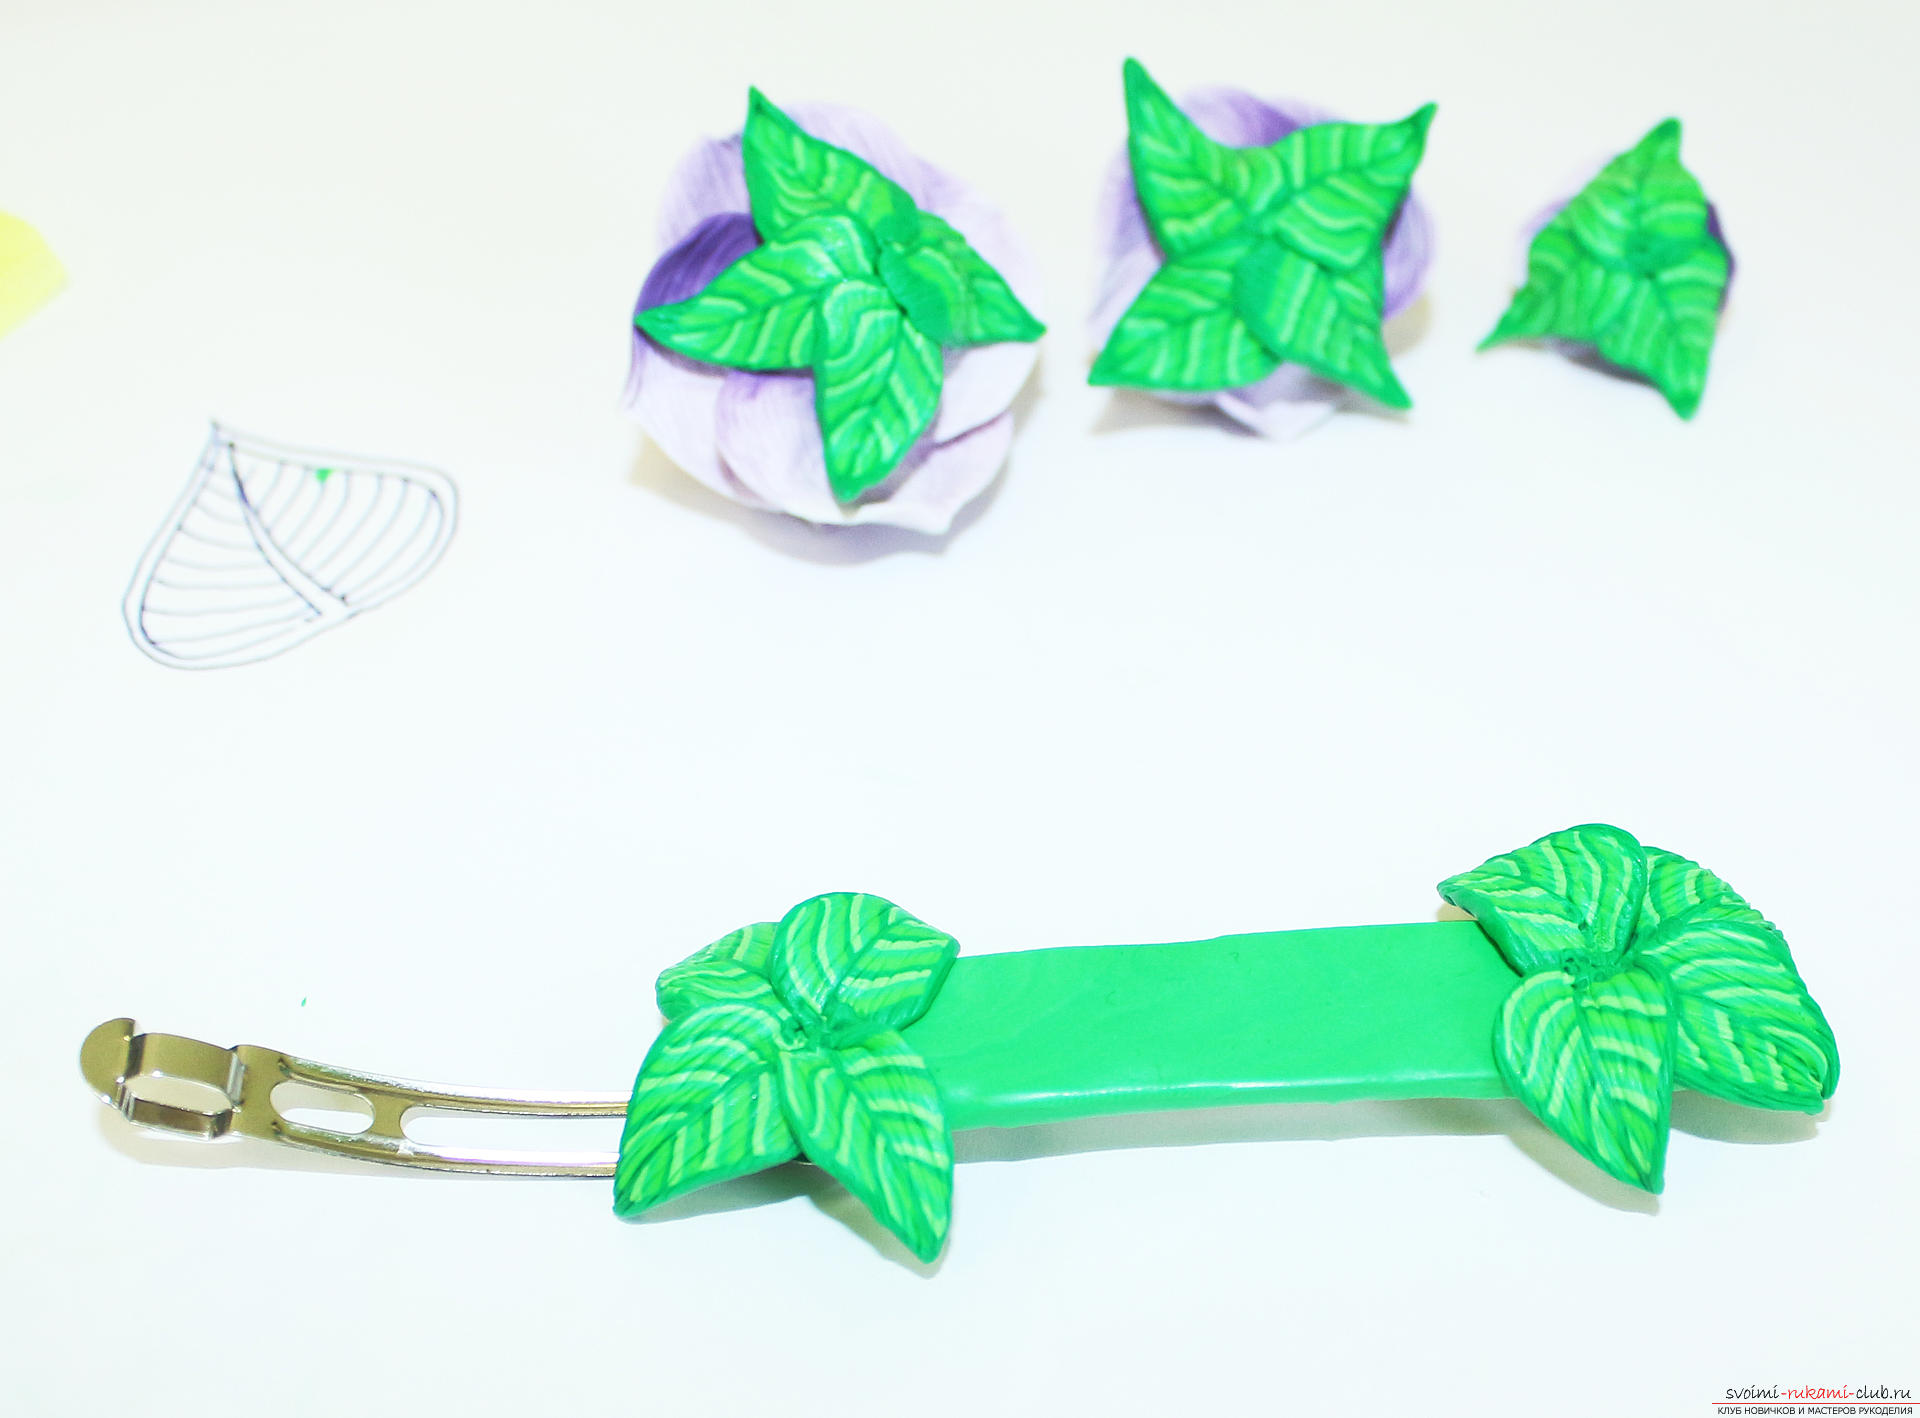 Gradually move to the center.
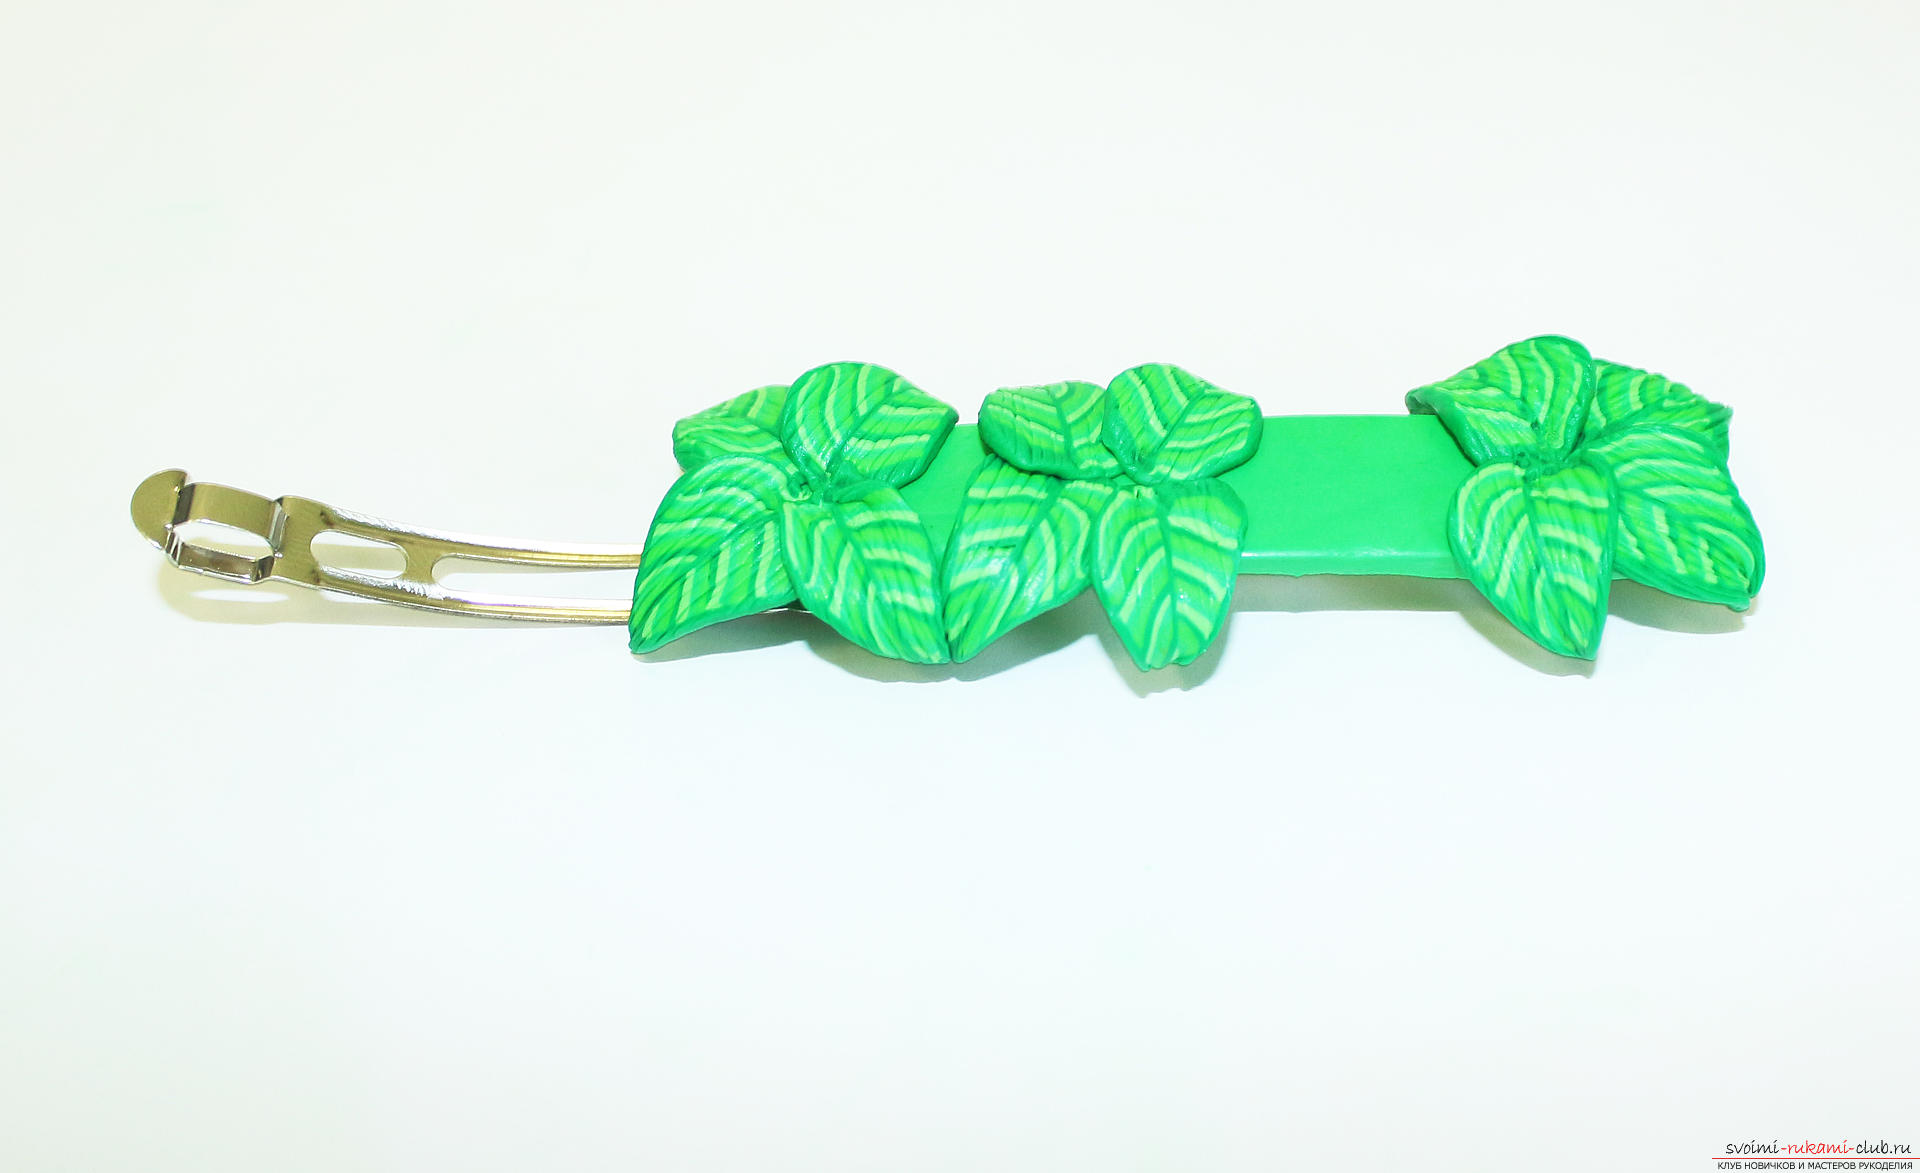
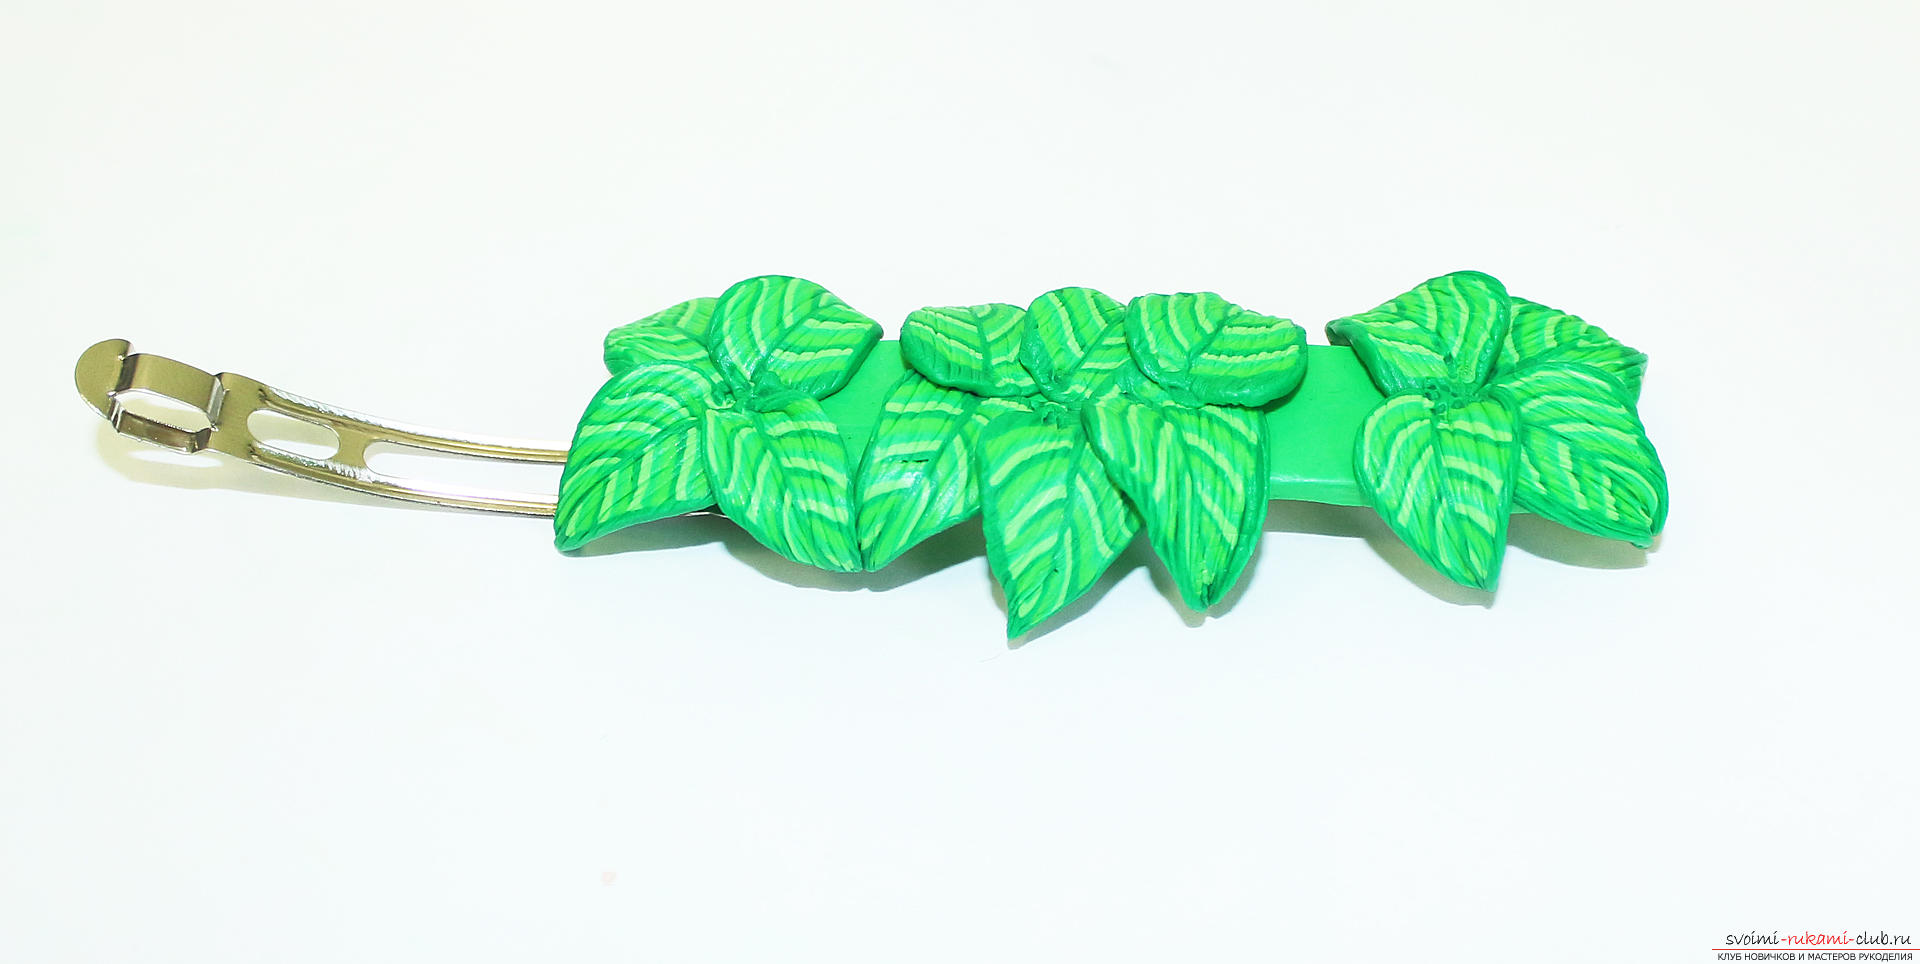 Each leaf is pressed against the base by a toothpick.
 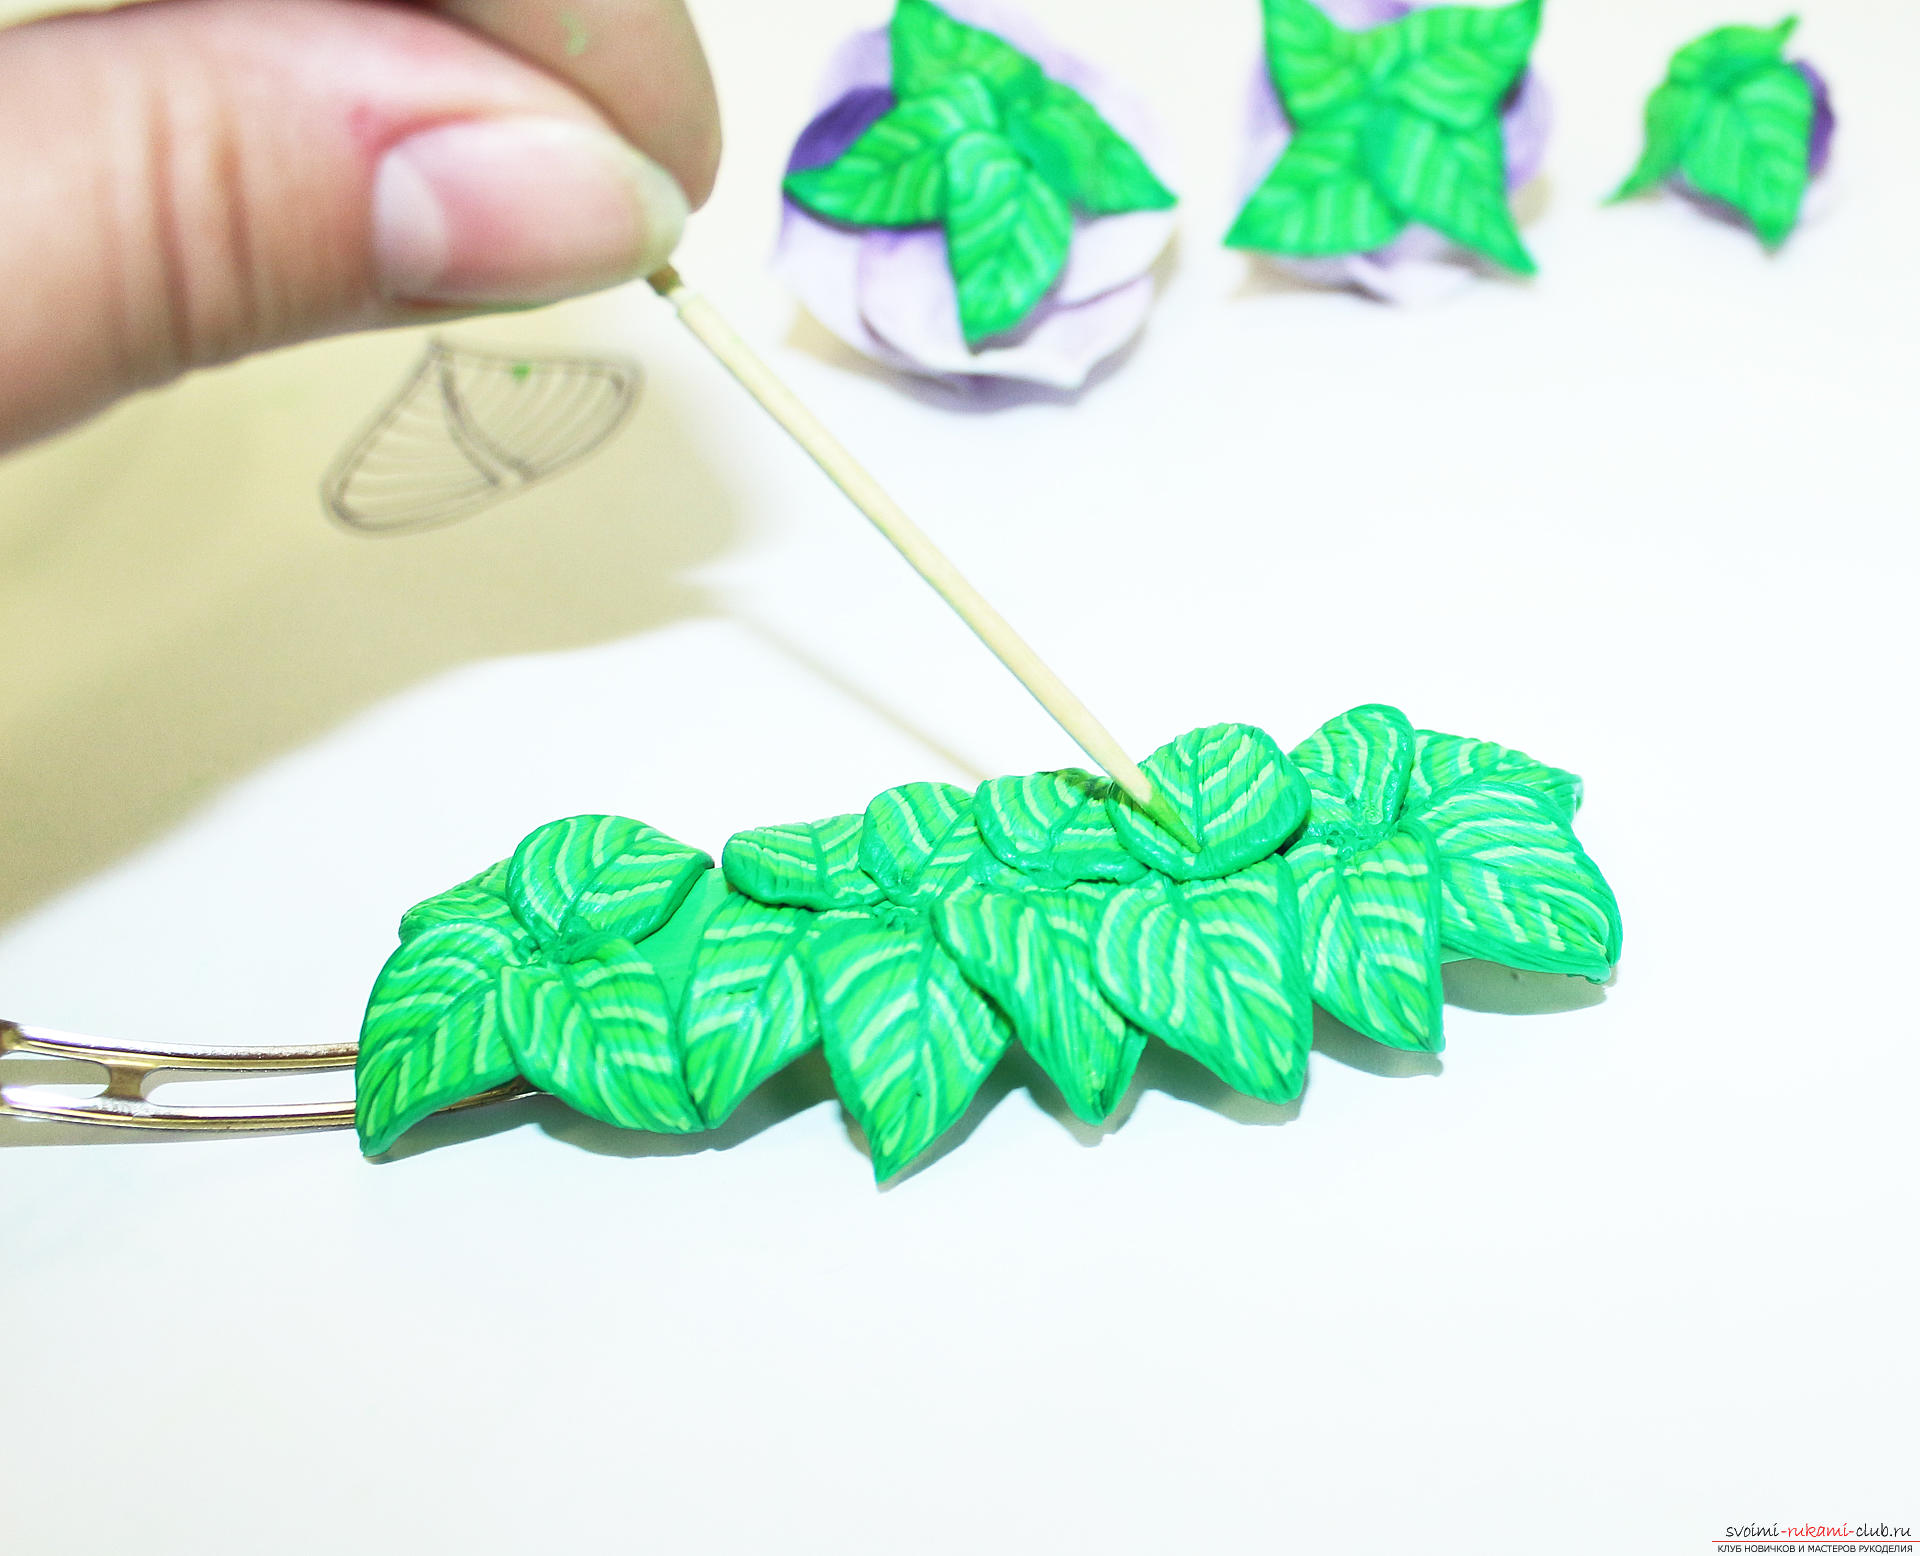 When the base is filled with leaves, drip a little liquid plastic in the center.
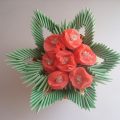
 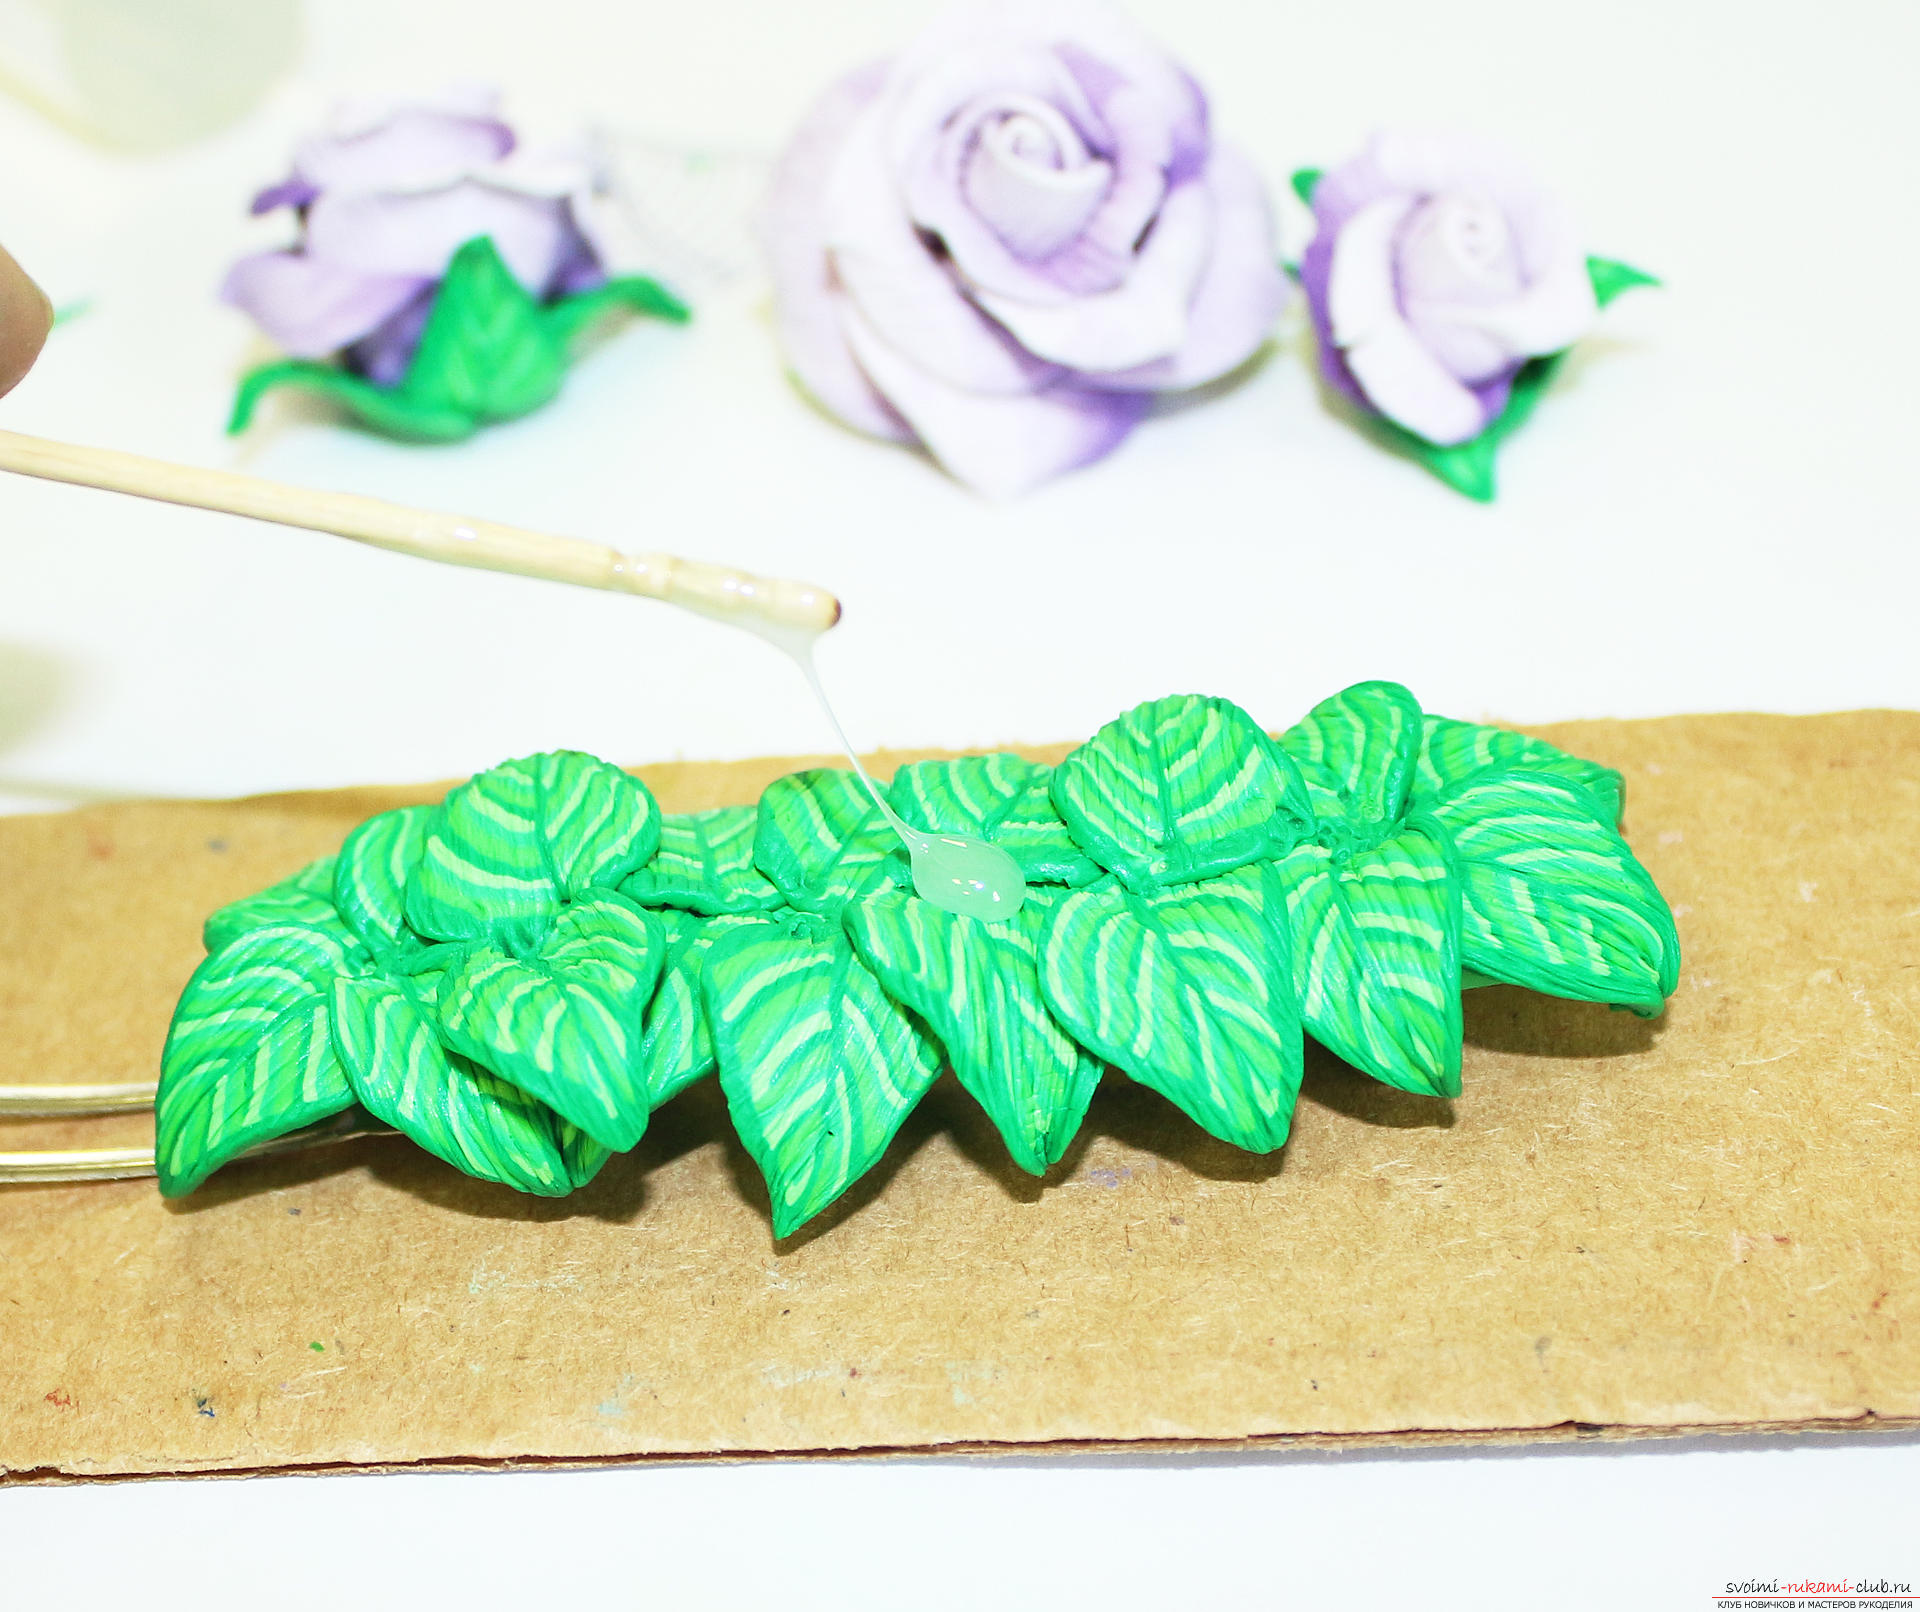 And we place the largest rose in the center of the hairpin.
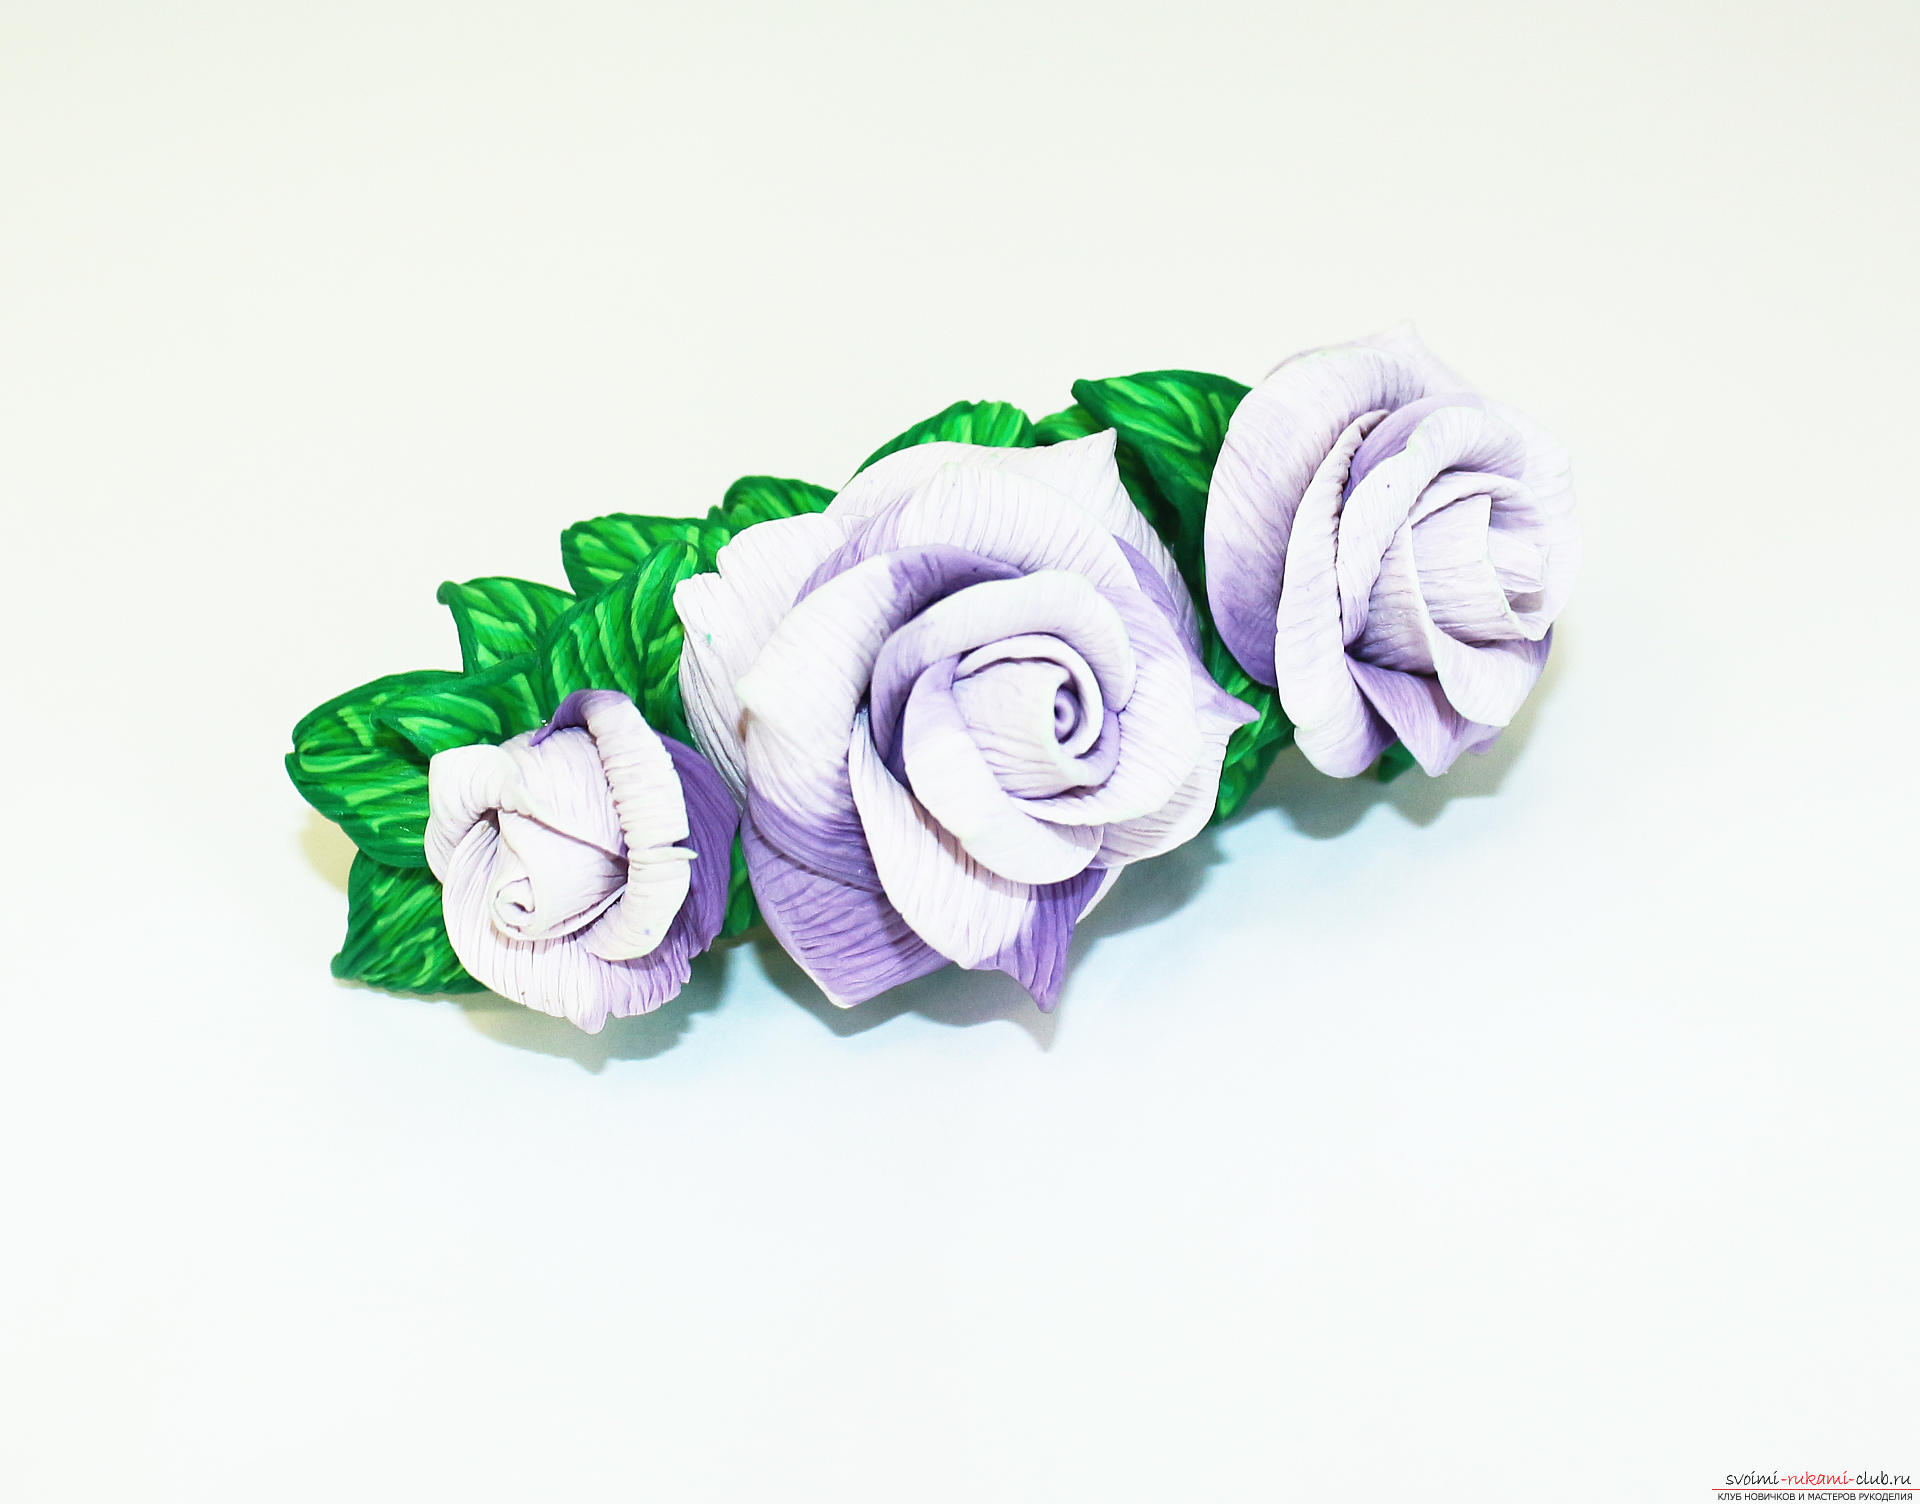
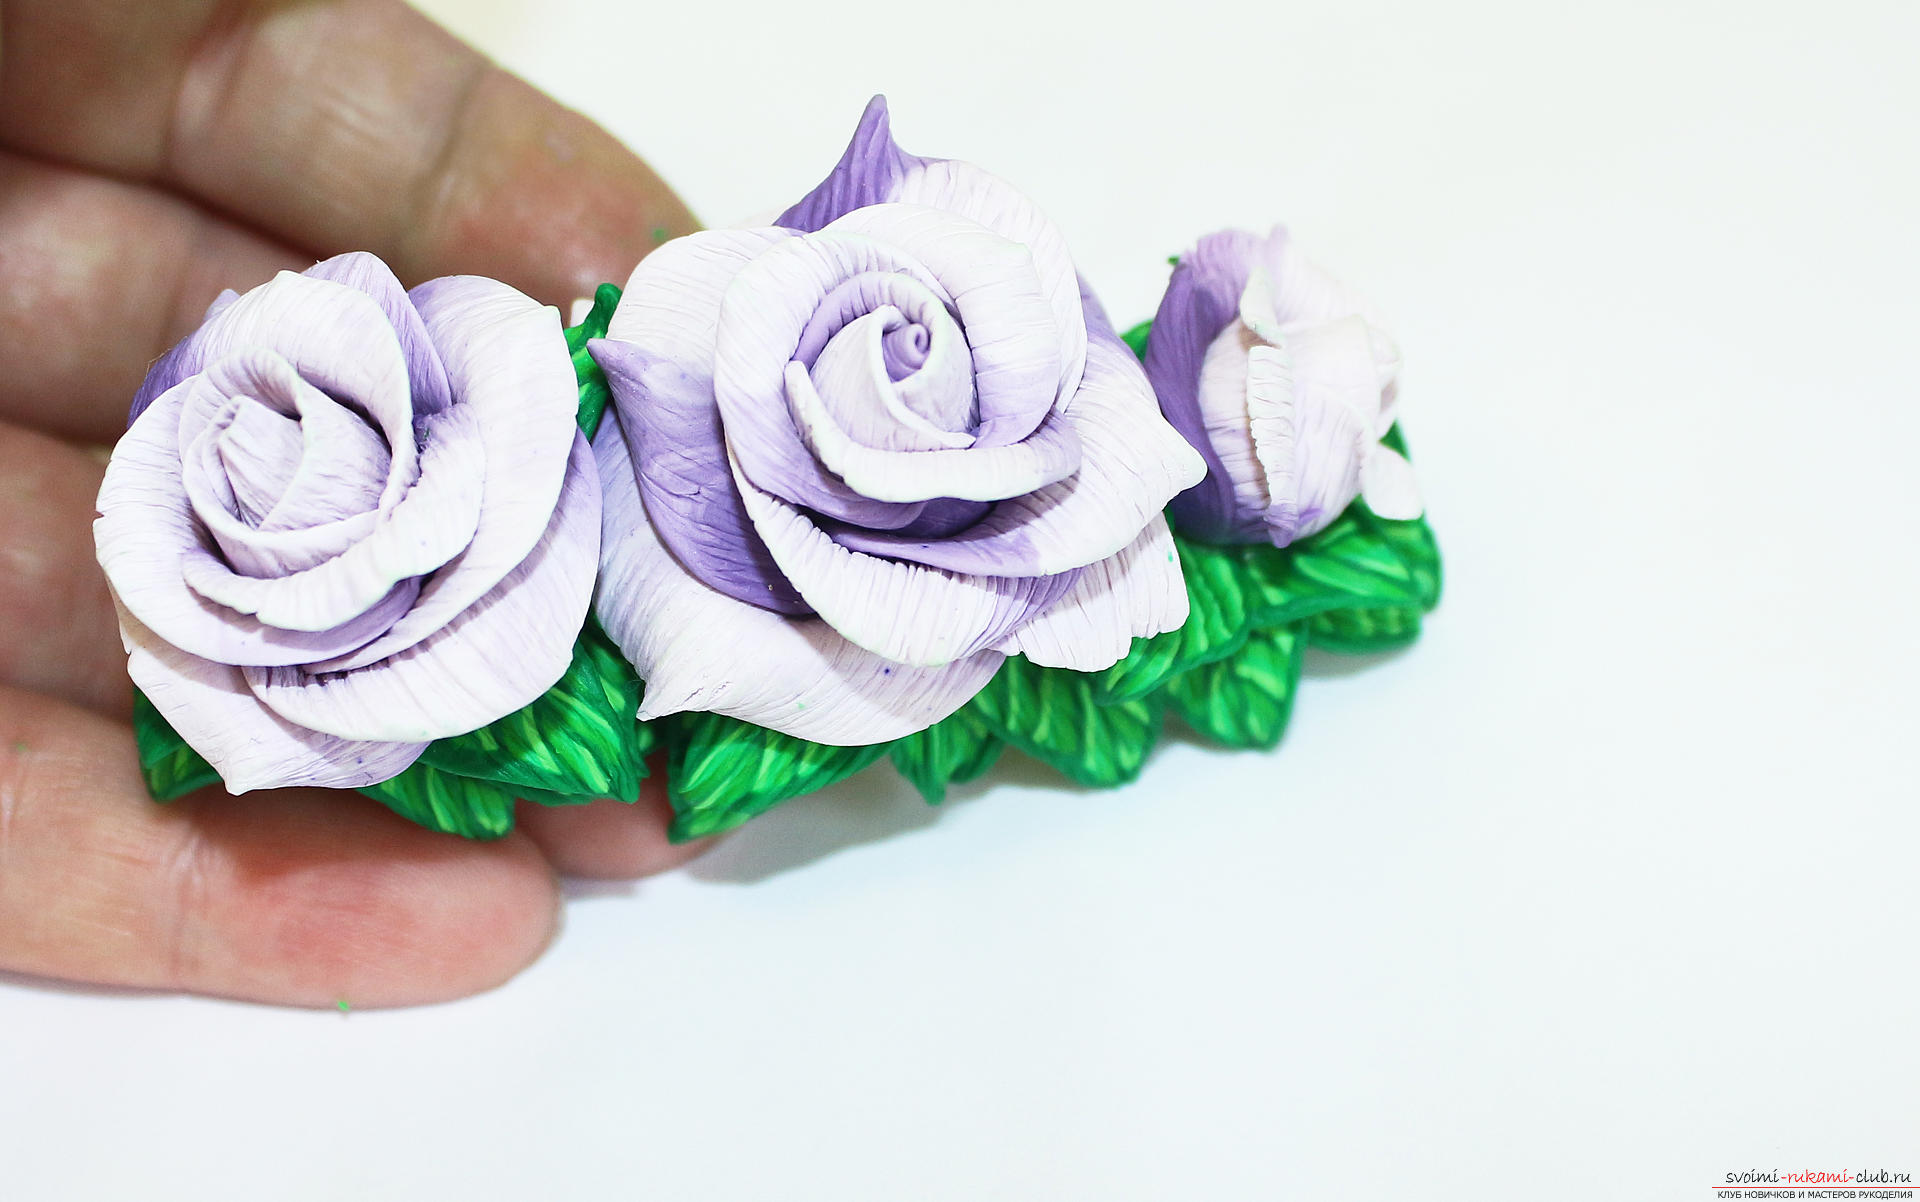
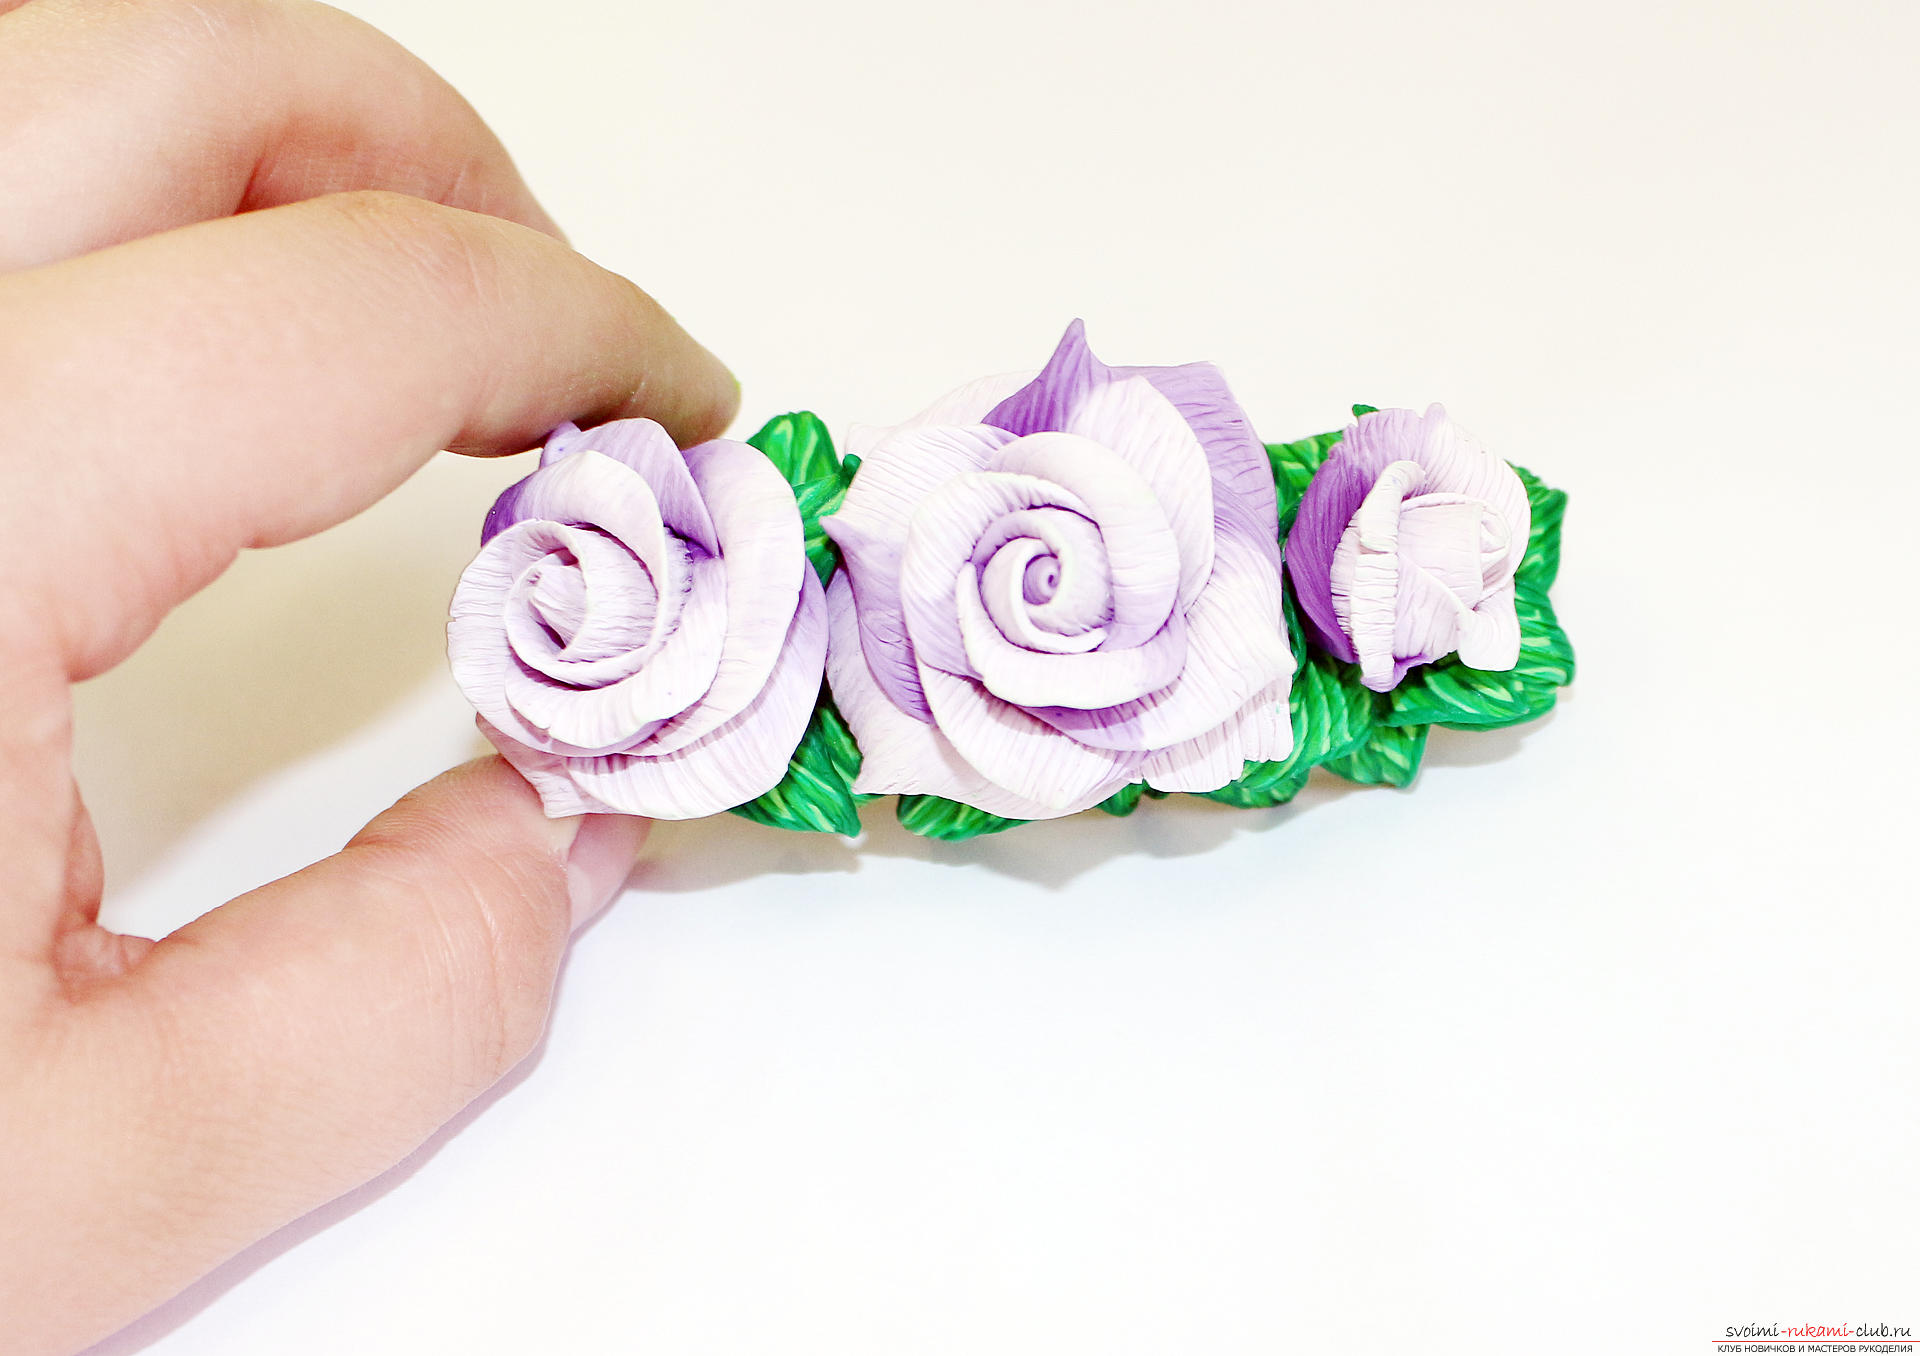
  Similarly, we glue a second rose on the liquid plastic.
  And the third. At this stage, you can expand and stretch the leaves in either direction to improve the composition.
  Now you can send it to the oven for final baking.
Comments
Related posts:
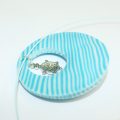 This detailed master class with photo and description will teach how to create with your own hands a set of jewelry made of polymer clay - a pendant and earrings with a turtle.
 This detailed master class contains the technique of working with polymer clay and will teach you how to make Keynes and beads from polymer clay.
 How to make earrings from polymer clay in the form of snowmen, detailed master class with photo and description
 This master class will teach you how to make a violet in a vase in the technique of modular origami.
 This master class with photos will teach you how to make a house of paper with your own hands.