Detailed step-by-step master classes on weaving herringbone beads.
Evergreen trees have long been considered by our peopleancestors magical, because if ordinary plants changed during the year, then the fir trees remained fresh and green both in winter and in summer, and therefore enjoyed a special favor with various deities. The ancient Greeks considered the spruce to be the tree of eternal life. The very first evidence of decorating a Christmas tree for the holiday dates back to the chronicle of the early 17th century. It describes how multi-colored paper flowers, cookies, sugar cubes, and various tinsel were hung on it. Over time, this idea spread throughout Europe. The initiator of the Christmas tree as a decoration for the holiday in Russia was Peter I. Catherine II supported the tradition, and in the second half of the 19th century, Christmas trees decorated with various toys, tinsel, and garlands appeared. In order to create a festive atmosphere, it is not at all necessary to go to the forest to cut down a Christmas tree and take it home or buy it at a Christmas tree market. You can make a beautiful miniature plant with your own hands - weave from beads. The needles from such a tree will not fall off over time, it will remain evergreen and will serve as an excellent decorative element not only during the New Year holidays, but on any day you want. The master classes below show several options for creating Christmas trees from beads. The first master class on weaving a Christmas tree with golden cones.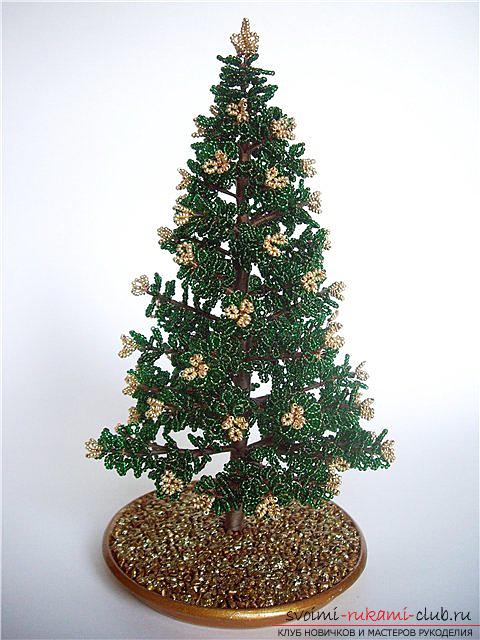 You will need:
- Beads of gold and green color;
- Threads of brown color;
- Procrastination;
- Gypsum;
- PVA glue;
- A mold for fixing a Christmas tree.
First stage.Weaving of blanks of branches and top. 9 golden beads are strung on a wire, several turns of a loop of beads are made. It is necessary to make 3 loops of 9 pieces each. After forming three loops, make a small stalk by twisting two wires. It is necessary to make 60 pieces of such blanks for Christmas tree cones.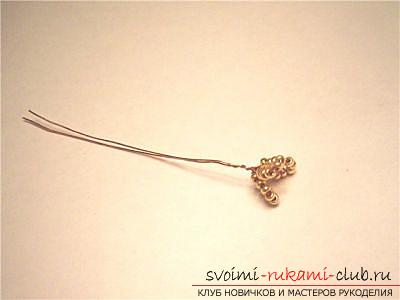 And you will need a lot of blanks of three loops of green beads.
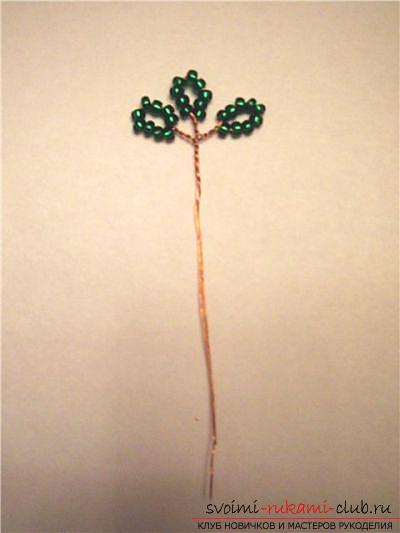 The top of the head.It is necessary to weave one loop from 15 pieces of golden beads and surround it with three more such loops. Then attach 8 pieces of blanks from three loops of green beads. It turns out 4 tiers of green color. It is necessary to attach 3 more green blanks. The top is ready, it is necessary to wind 4 more pieces of wire, twisted together, they will serve as the trunk and roots of our Christmas tree. The second stage. Composing branches for our Christmas tree. All branches begin in blanks with golden beads.
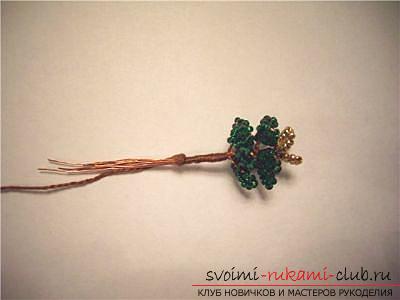 Take the golden-colored blank from the threeloops and screw 4 green blanks, 2 in a row. Wrap with thread. Make five such branches and attach them to the top, 3 pieces in a row. Make the next two rows from 6 branches with six three-loop blanks in each.
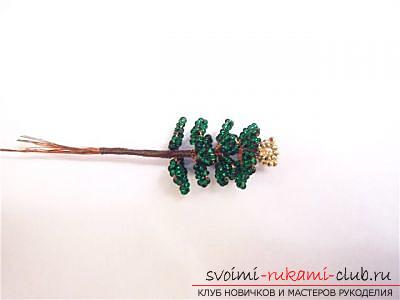 The next two tiers are twisted from 4 branches, 8 green pieces each.
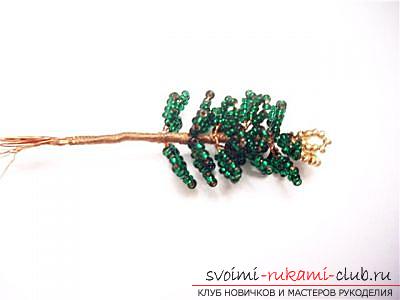 Two more tiers of 4 branches of 10 green blanks each. Weave the next tier of six branches of 12 green blanks each.
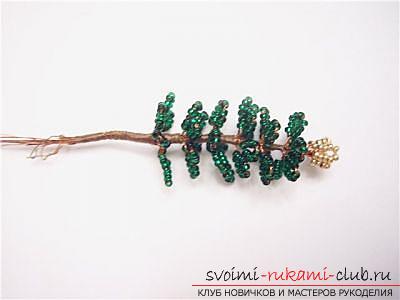 Twist 10 sprigs into eight green pieceseach. Fasten 2 such branches. Twist them together, starting below the six paws, wind them with a thread into one thick branch. Make 5 such double branches. Screw the resulting 5 branches to the trunk.
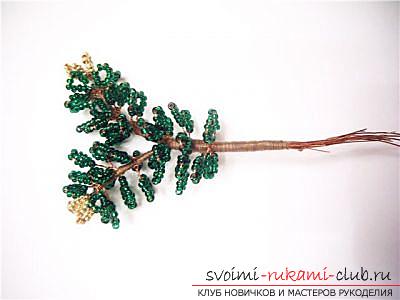 To create the last tier you need five triplestwigs. To do this, you need to make 15 double twigs as in the previous step. Having fastened them in pairs, tie 2 green blanks to the junction. Attach the third twig, tie 4 more green blanks and attach all the twigs to the trunk.
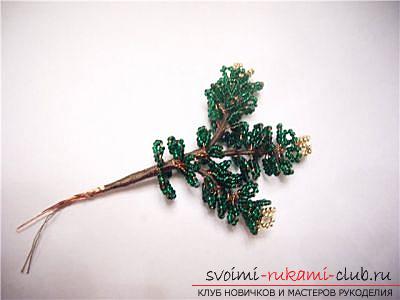 All branches and trunk at the moment of fixing ontightly wrap the branch with a brown thread and tighten it very tightly. The stage of fixing the tree to the stand. Fold the lower part of the wire trunk of the tree into a ring, insert the tree into a previously selected container, fill it with plaster, fix the tree for stability and leave until completely dry.After that, cover the surface of the stand with glue and decorate with beads. After drying, the tree is ready. The next master class on weaving a Christmas tree from beads.
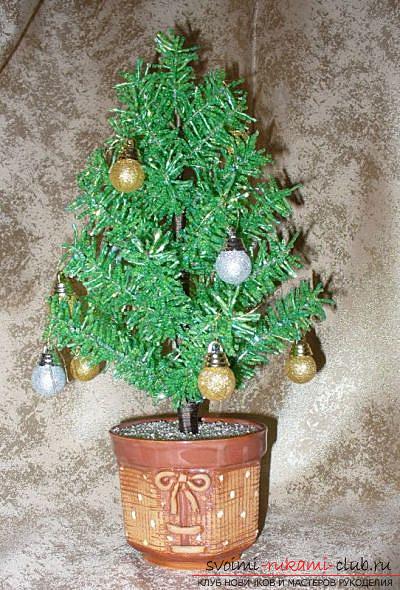 You will need:
- About 300 g of green beads (felling or bugles);
- Procrastination;
- Rod stem for stem;
- Thread;
- Tape tape;
- PVA glue;
- Capacity for delivery;
- Gypsum.
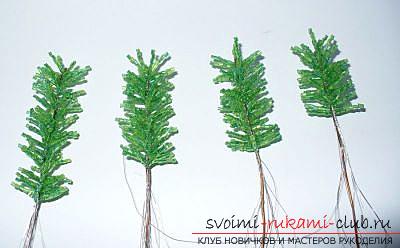
Weaving a Christmas tree begins with creating branches.You need to take a piece of wire about 45 - 50 cm long. Weave 10 needles using the coral method from 7 beads each. This method of weaving is quite simple and consists of the following: beads are strung on the wire, then one end of the wire is taken and passed through all the beads except the first one from the bend of the wire.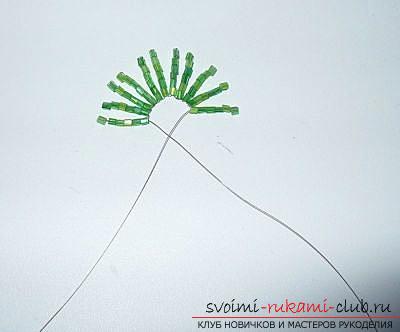 For a 30 cm high Christmas tree, you will need to weave from 260 to 300 ten-needle blanks.
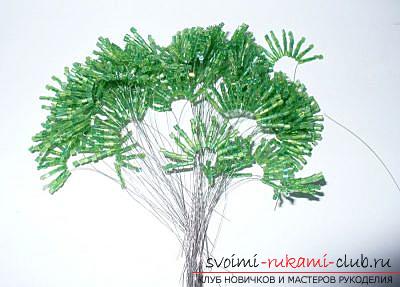 Prepare branches for our Christmas tree.To do this, cut the wire into 27 - 30 pieces. Divide into two parts. Fold one in half. Wrap all the blanks of the base of the branches using floral tape.
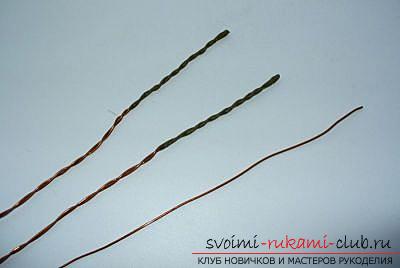 Wind the needle blanks in a spiral onto the base blanks of the branches. Make the lower branches longer than the upper ones.
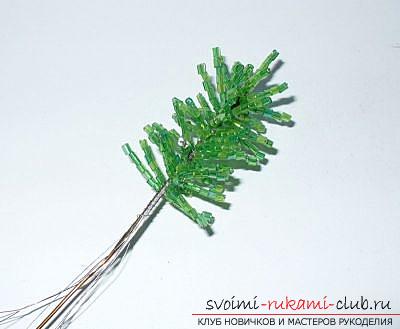 When all the branches are ready, attach them to the stem with floral tape, following the order of attachment similar to a real Christmas tree. Wrap the stem with a thread.It is necessary to place it in the container-standtree and fill its base with plaster. Fix its position and leave until the plaster dries completely. Coat the plaster surface with glue and decorate with the remains of beads and sequins as desired.These wonderful Christmas trees can be used simply for decoration or decorated with balls and tinsel for a New Year's celebration.
Comments
Related posts:
 Detailed step-by-step photos and description of weaving of bead trees, two master classes.
 A detailed master class on weaving a hyacinth flower from beads, step-by-step photos and job description
 Free master classes on weaving tiger and white lilies from beads with photo
 How to weave sakura from beads, detailed master classes with step-by-step photos and descriptions.
 Master classes on weaving snowflakes, free schemes, step-by-step photos, job description