Cross-stitch embroidery: schemes of holy images
Content
An icon, or image of a saint, has always been and will beAre in demand and are sacred in all Christian countries. They are made in various ways, one of which is cross-stitch. Embroidered icons are very much in demand in the most diverse age and social groups of people.
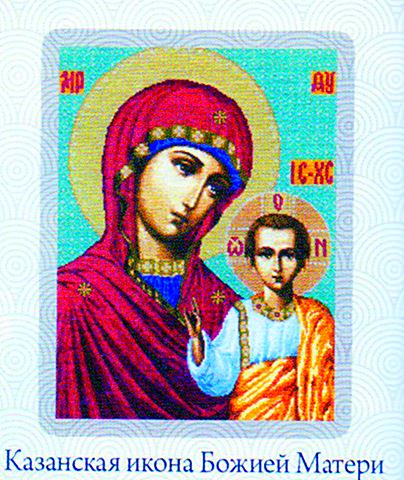

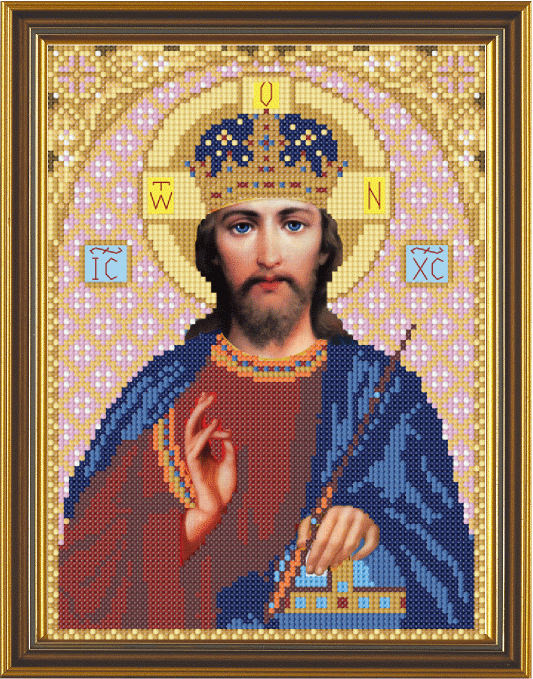


Nominal icons
Very often, people are interested inTo purchase personal icons. The definition of what a nominal icon is, sounds like this: "This is an icon on which a saint is depicted, after whom a person was named at baptism." The cross-stitching of icons is carried out in the same way as other works, where it is necessary to adhere to a specific scheme.
Undisputed beauty and magic, which emitEmbroidered icons, can successfully compete even with those works that are written by the artist's ingenious hand. Each embroiderer puts his spirituality into work, so that the embroidered icons acquire a special spirit, only their own.

Sets for embroidery of icons
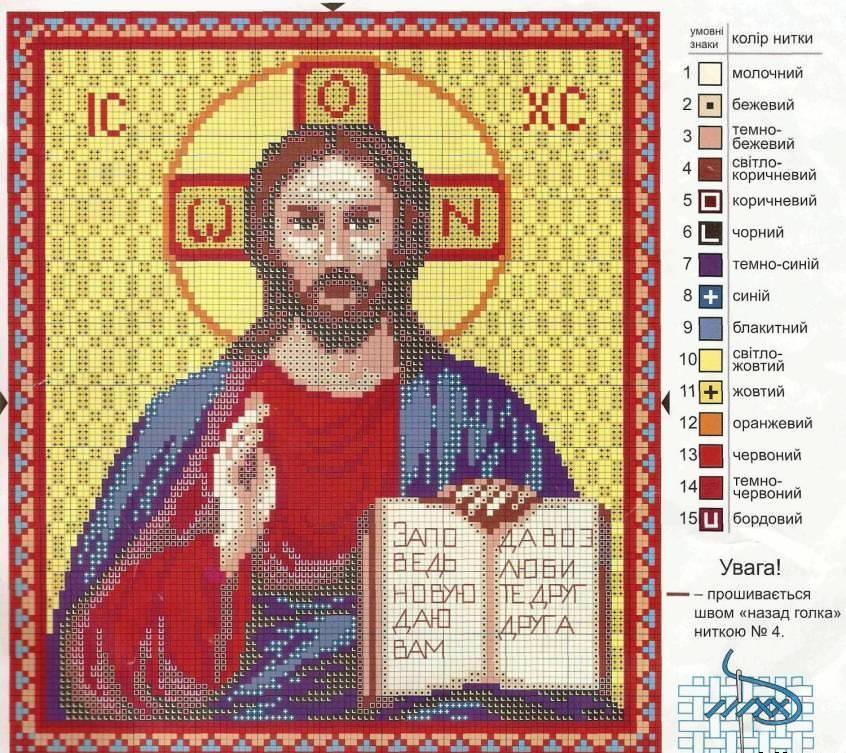
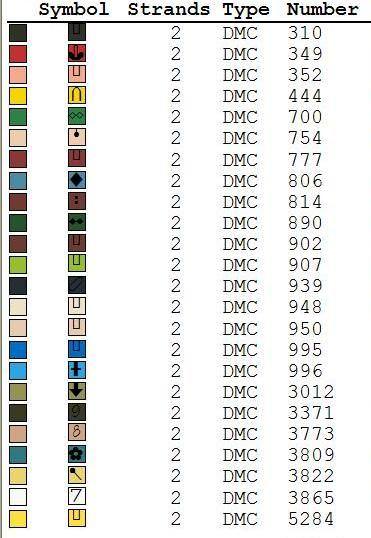
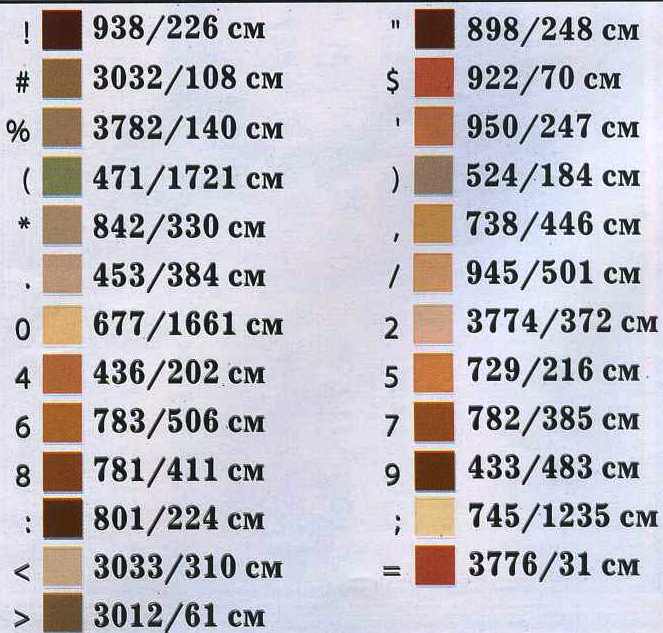
In order to make a cross embroideredIcons, it is desirable to purchase a standard set for embroidery. It is also necessary to have a schema. In each set there is a fabric, which is called a canvas. On the canvas there are special cells that are needed for the convenience of embroidery. Especially convenient is the canvas for cross stitching. Still in the set there are threads, instructions, as well as schemes for a specific embroidery. It is very good for convenience to designate each thread color with a specific icon that corresponds to the schematic icon. In this case, it will be much easier for you to find the color of the thread needed in a given place of the circuit and to perform embroidered icons.
Further it is desirable to mark out a canvas on squaresTen to ten cells, so it was more convenient to embroider. It should be made a special marker, which can be washed off with water. Making embroidered icons, it is most convenient to mark out the canvas from its center. In the event that you do not have such a marker, do not do it with a pencil or pen, because such markup can remain on the canvas. The embroidered canvas needs to be put in cold water, this will be enough to remove the markings.
Needle for embroidery with a cross is calledTapestry, it has a sharp tip, and a large eyelet. Making embroidered icons with a cross, you can start the work either from below or from above. You just need to figure out what colors are used in this area of embroidery. To do this, the scheme has all the necessary instructions. It indicates the thread colors, as well as the types of stitches and the number of yarn creations that correspond to each particular piece of embroidery. But the best option is to start embroidery from the center of the canvas. To do this, you need to fold the canvas in half, then again in half. So you define its center. So the embroidery will be located proportionately, and there will be no cases of lack of canvas size.
Embroidered icons, like any other speciesEmbroidered works, require a hoop. Before starting the work, the canvas is placed in the embroidery frame, firmly fixing it there with a special device. For those embroiderers who do not have much experience, it is advisable to choose small canvases. Embroidered icons are beautiful regardless of their size. But when they are large, it is likely that you will simply leave them unfinished, because for you it will be hard work. It is very important to buy a quality set for embroidery.
On this depends the quality of the work done, andThe beauty of your cross-stitch embroidery. Watch the direction of the crosses. All upper covering semi-crosses should always look in one direction. This direction you choose, but then follow it throughout the work.
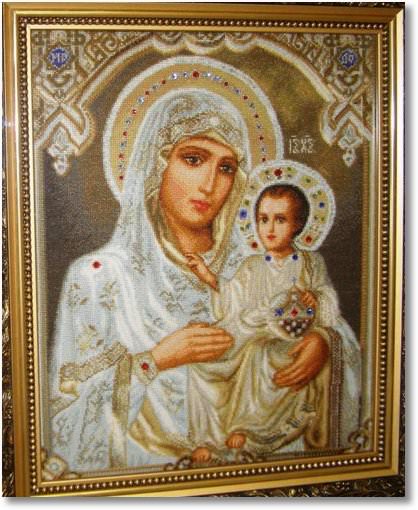
Making an icon in a frame

To complete the work you need to properly draw upYour icon, embroidered with a cross, in a suitable frame. For this we need a frame with glass, and a back wall made of cardboard, an adhesive pencil and a sheet of Whatman. Prepare our embroidery, and warm up the iron. We measure on the back cardboard Whatman, and cut it to the measure. On the finished embroidery from the wrong side, put the cut out paper with the white side down. We spread the paper on the canvas with an adhesive pencil. We smooth places with glue with hot iron.
After this, we put the embroidery inFrame, on the glass, and fix the back of the cardboard. Then attach the hook and clamp the clamps. Instead of a hook, you can use a strong cord, firmly securing it.
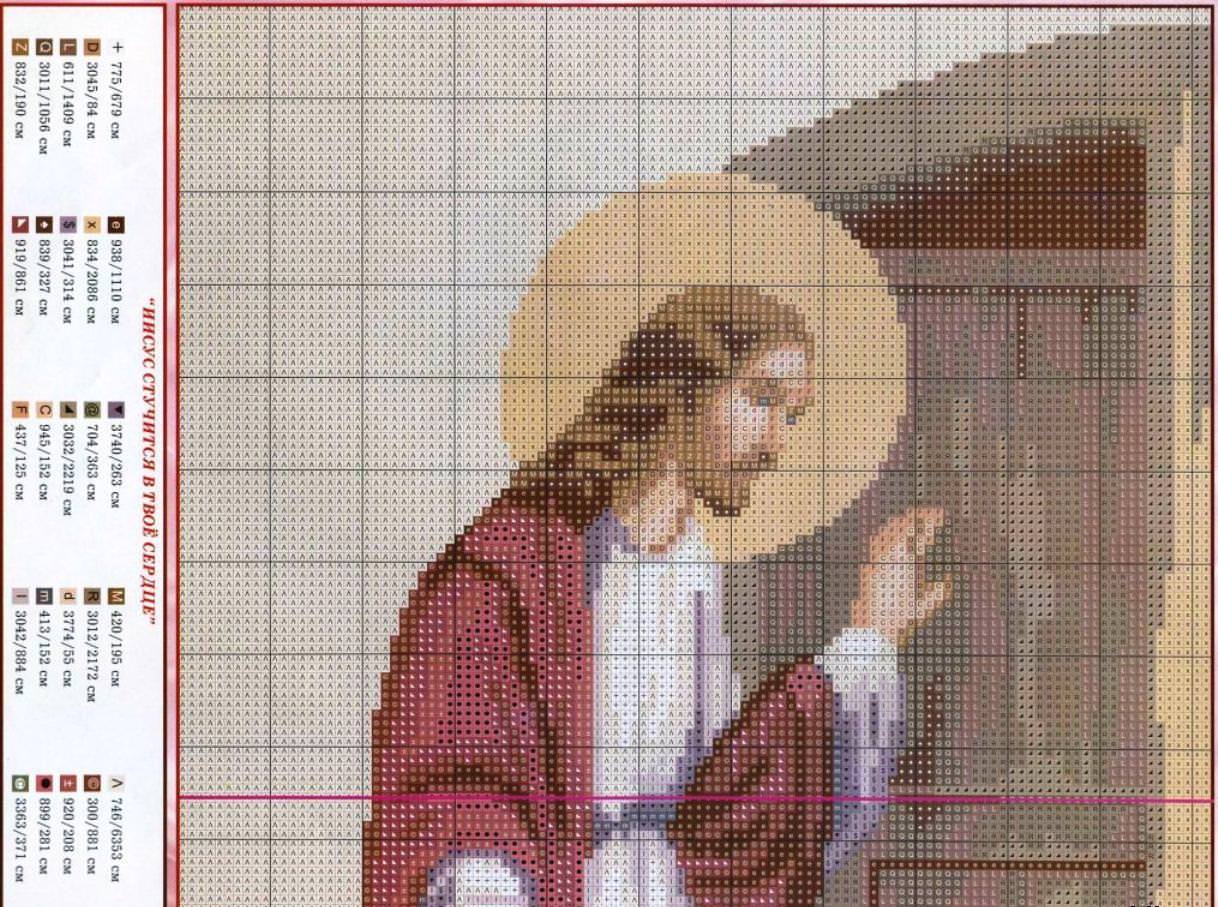
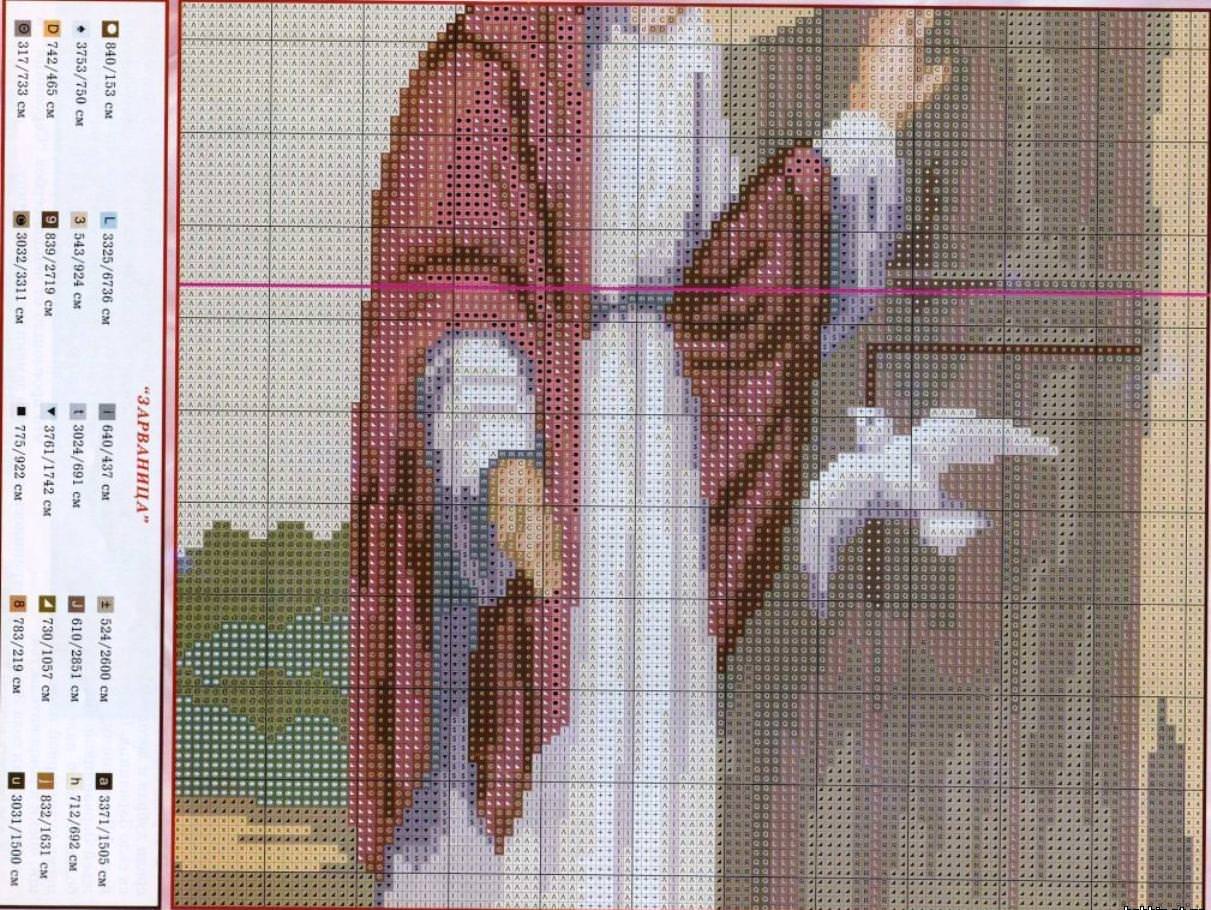
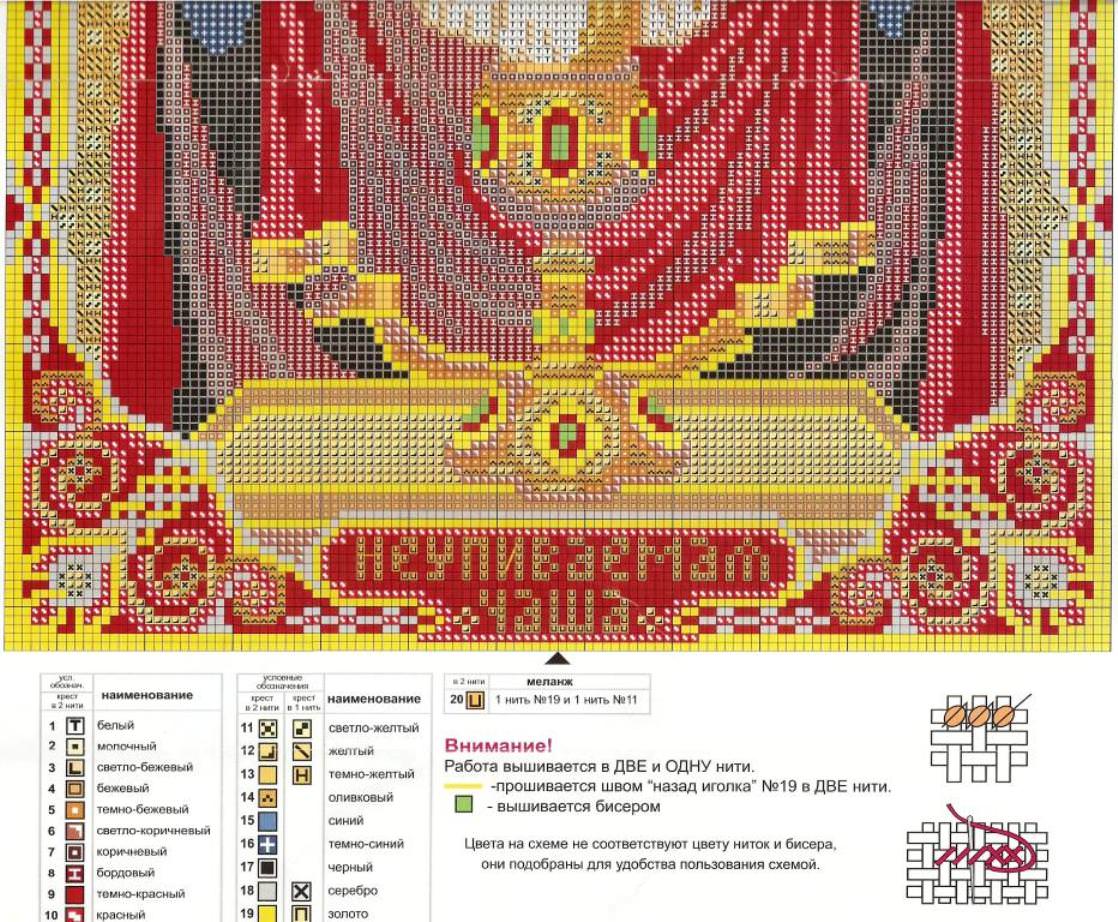
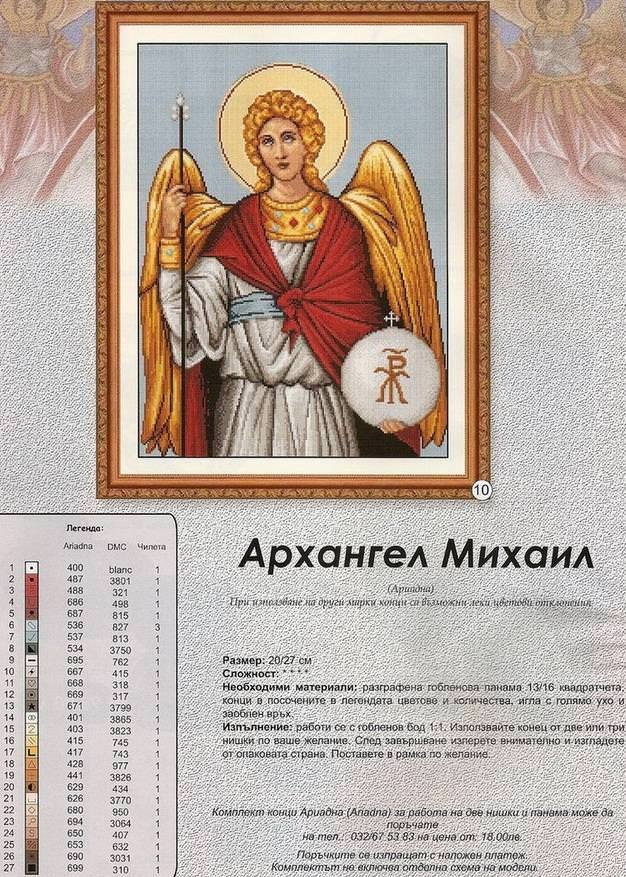
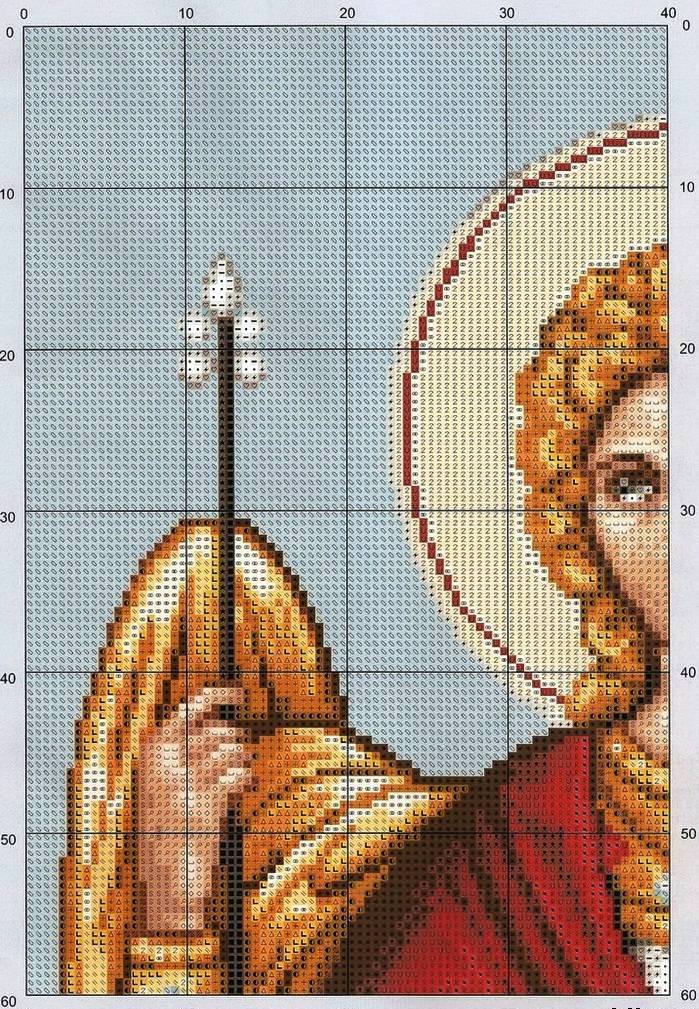
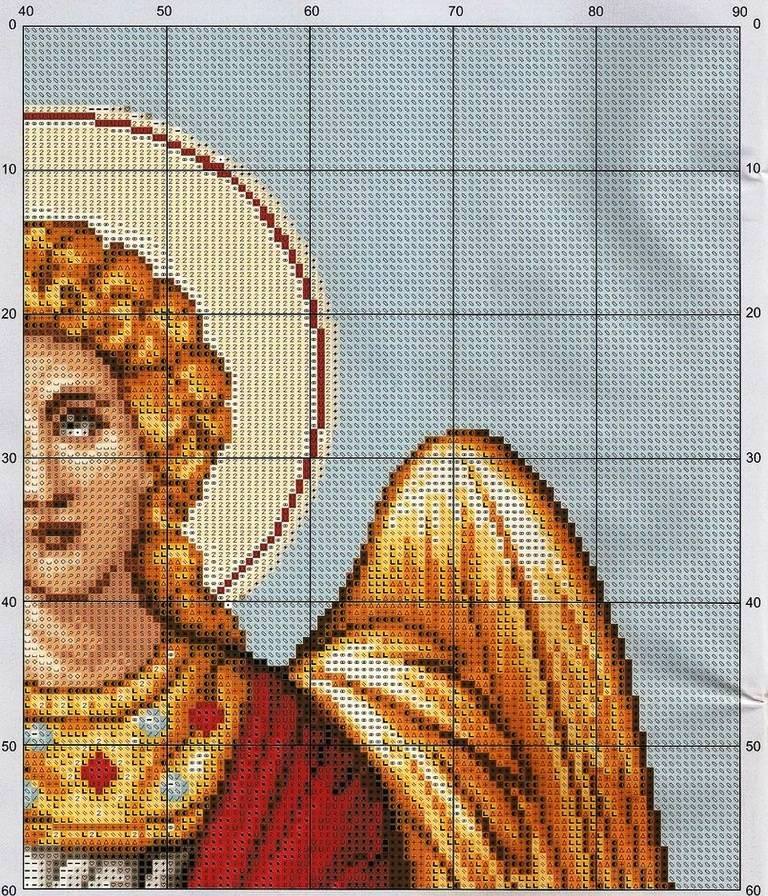
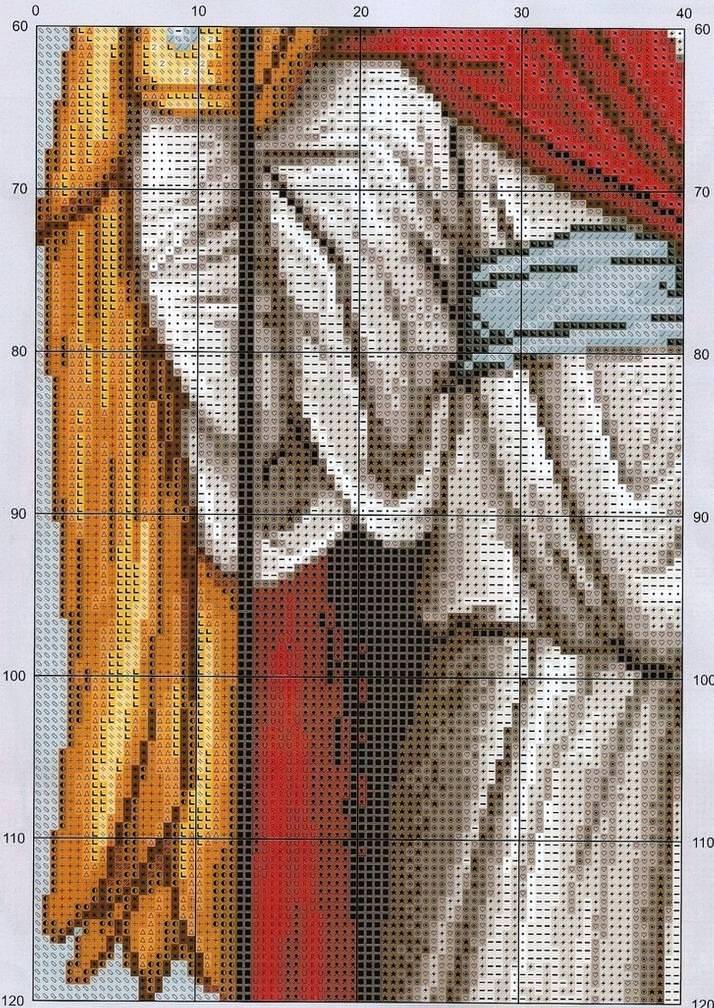
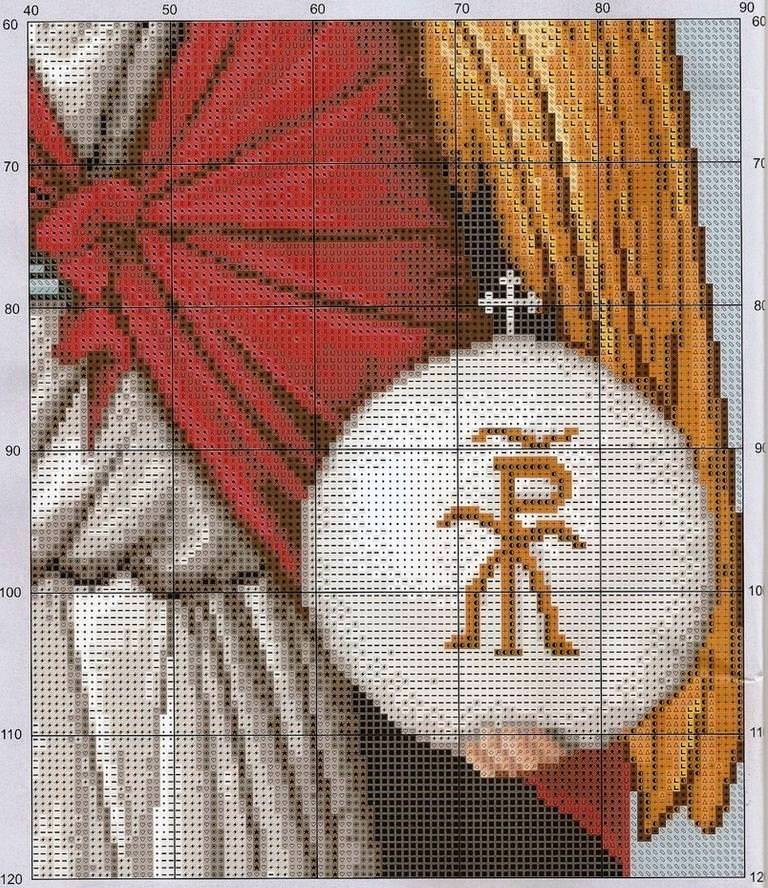
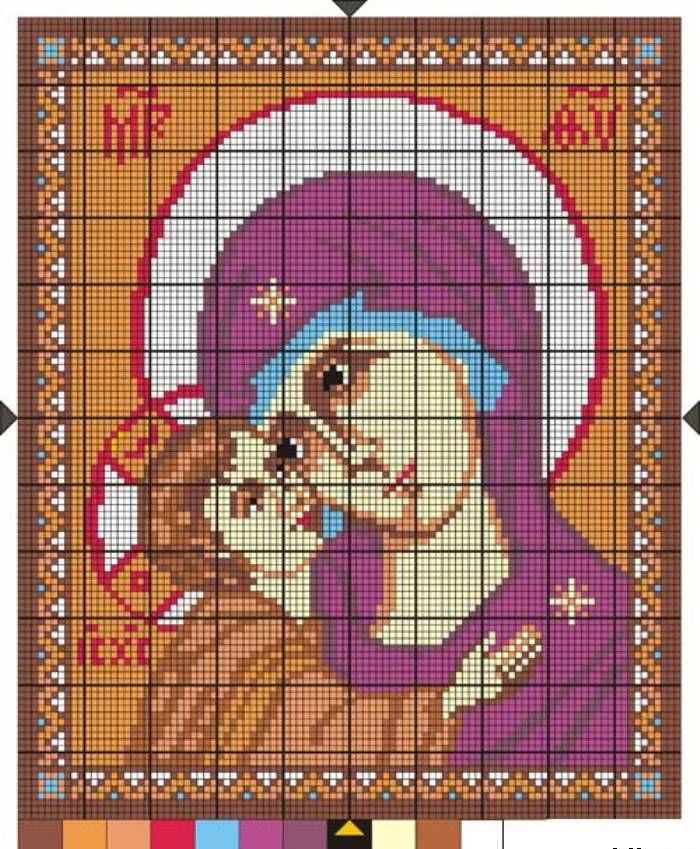
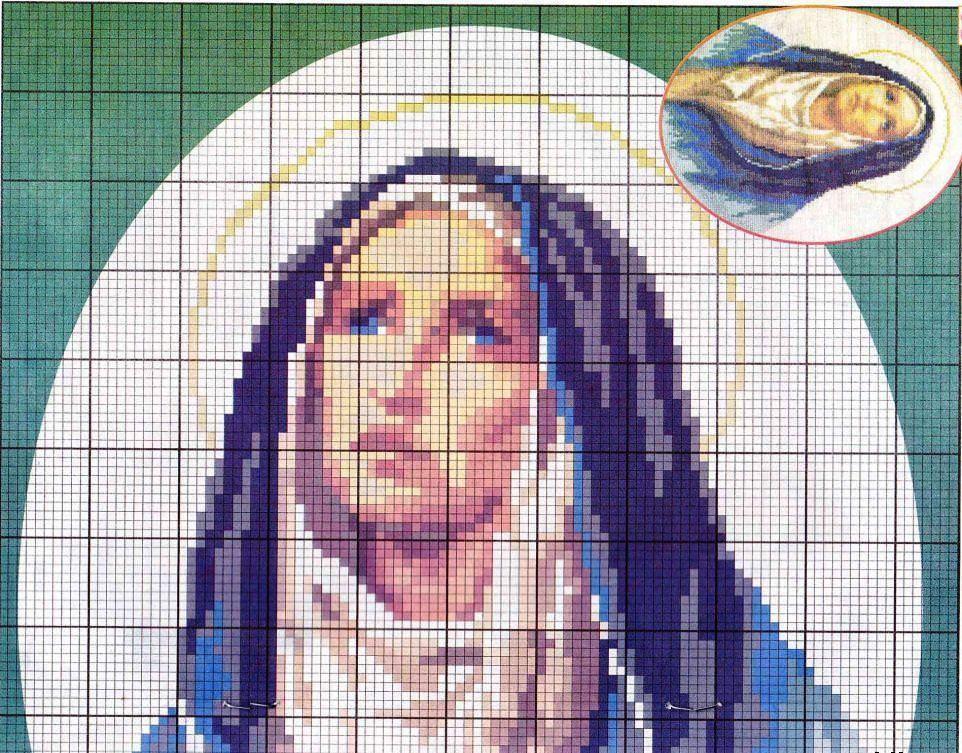
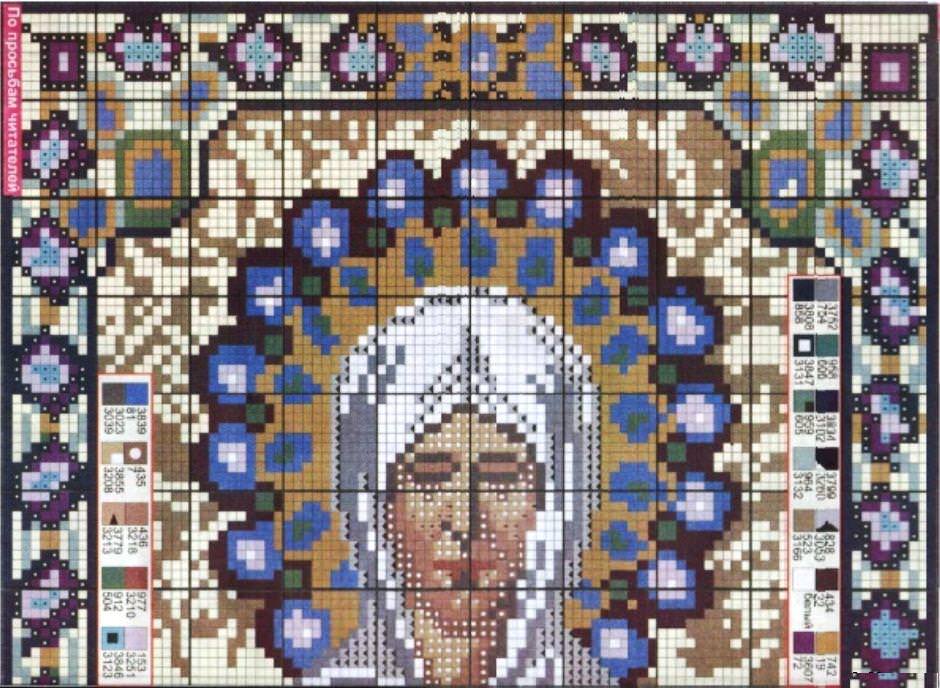
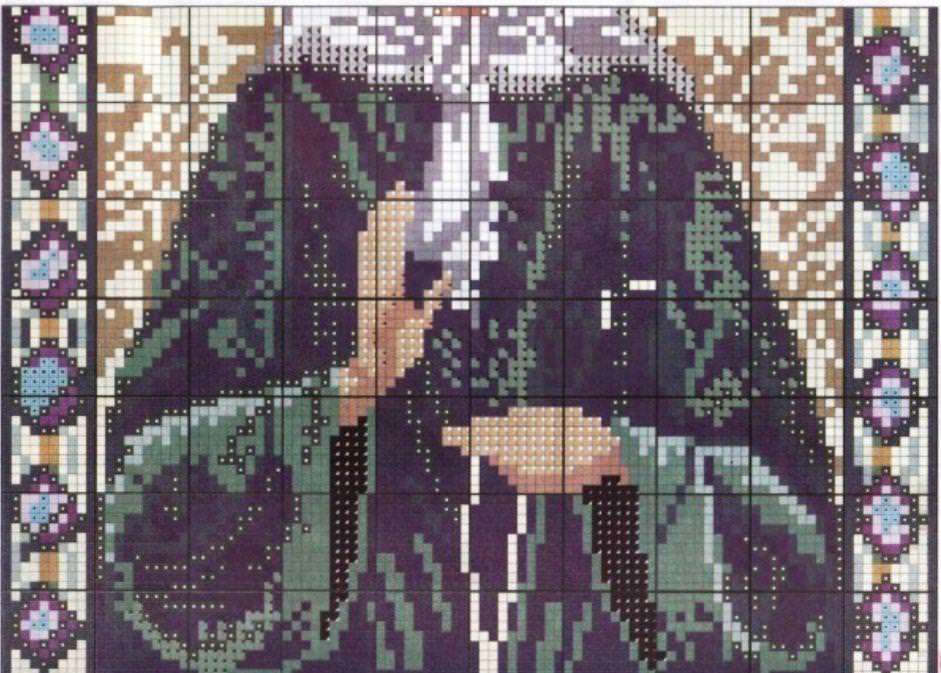
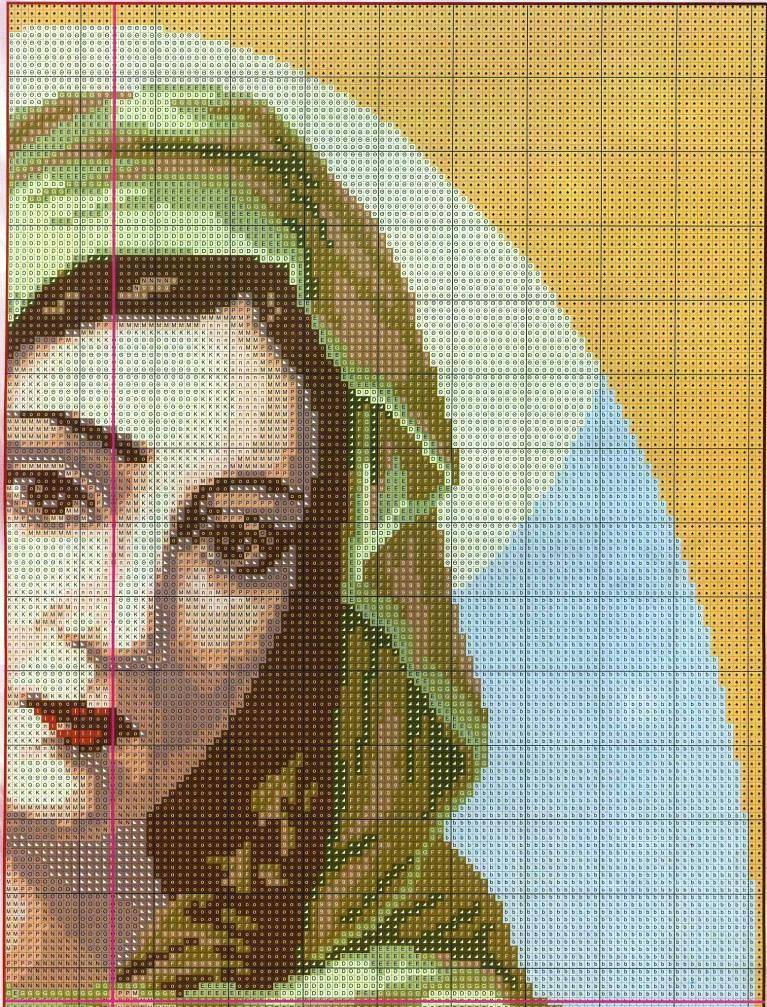
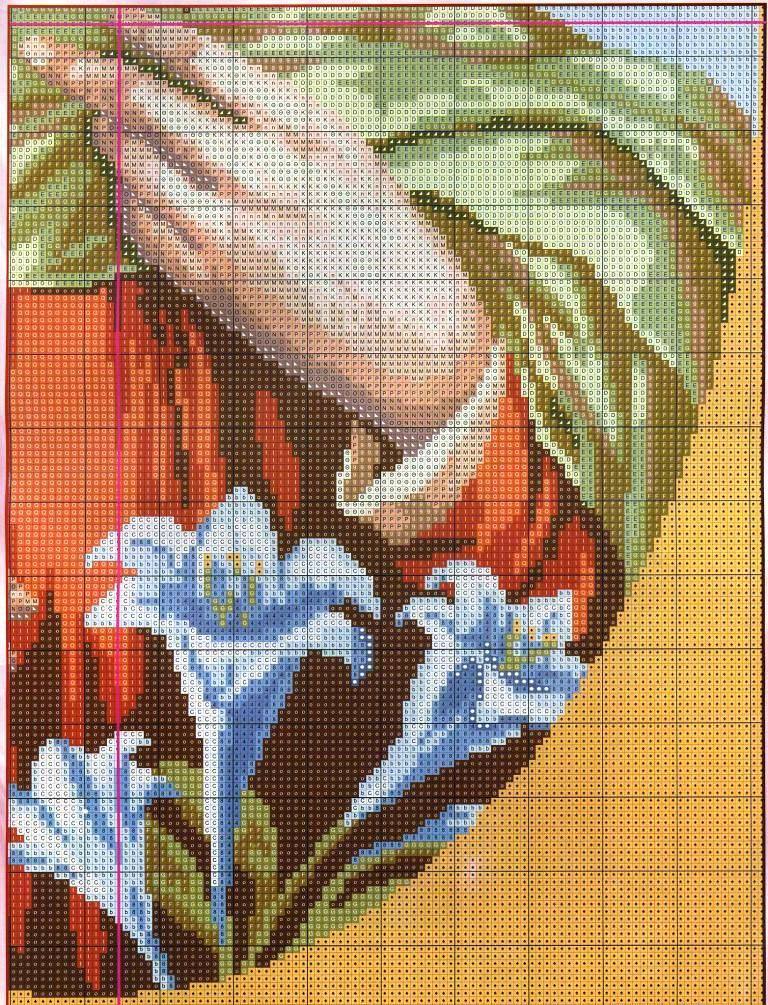
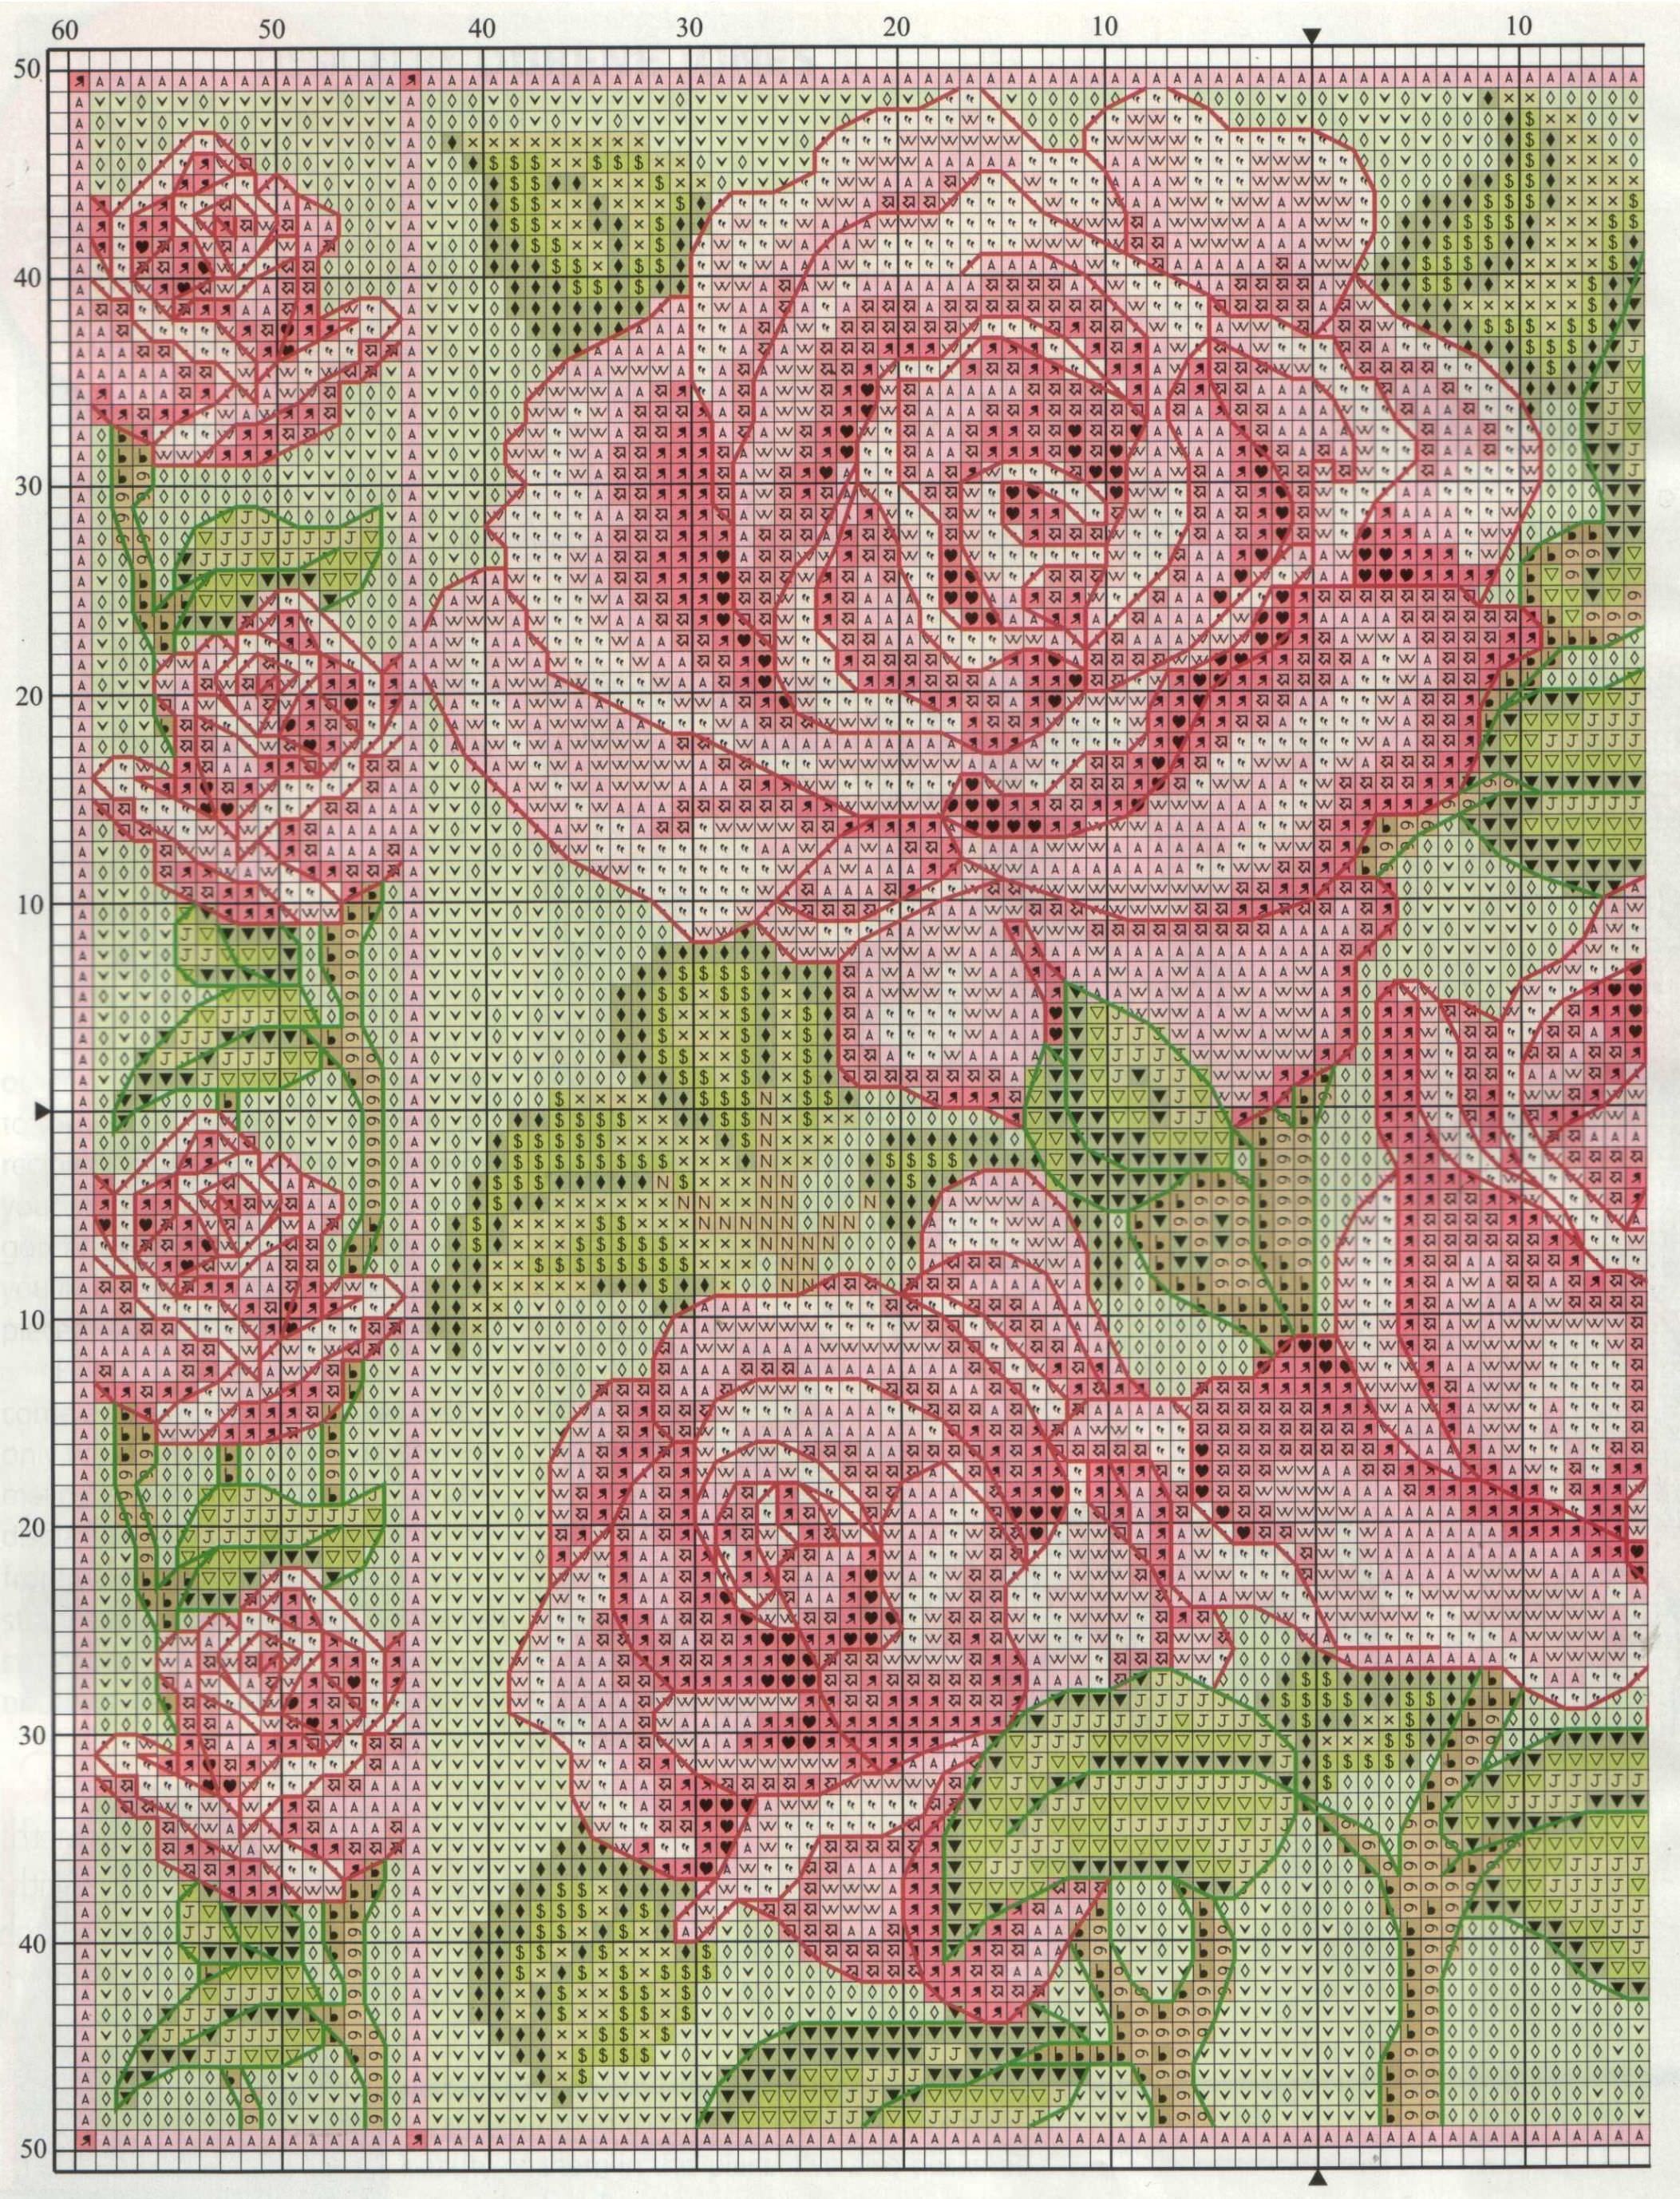
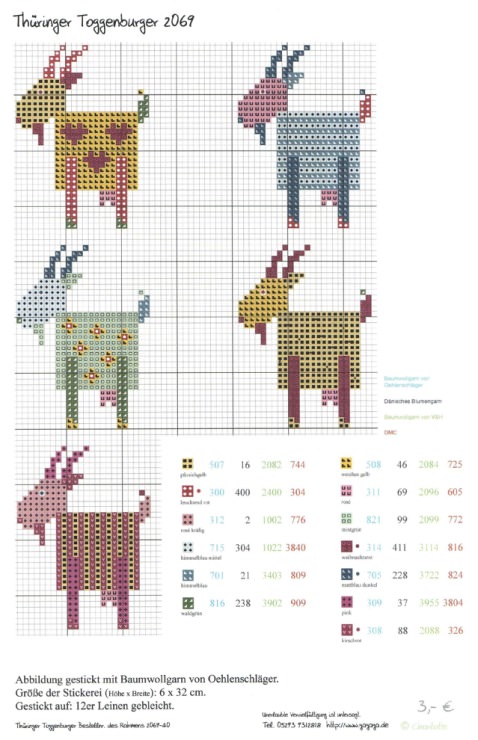
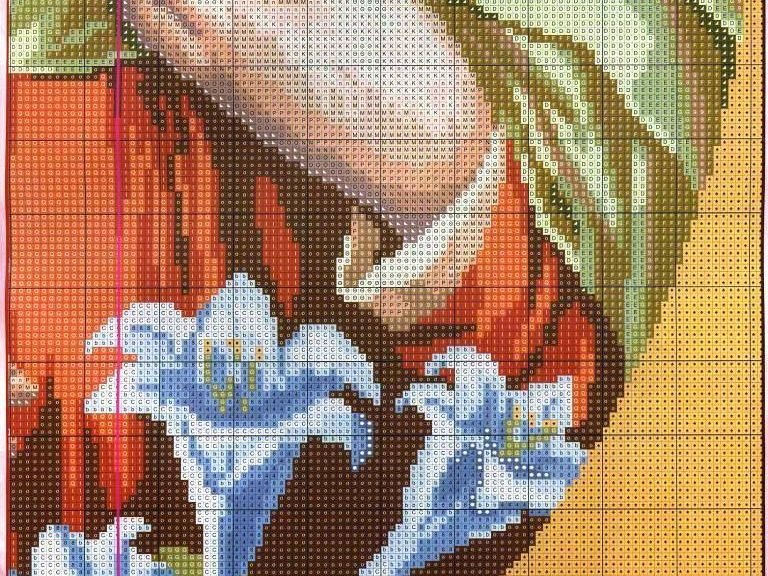
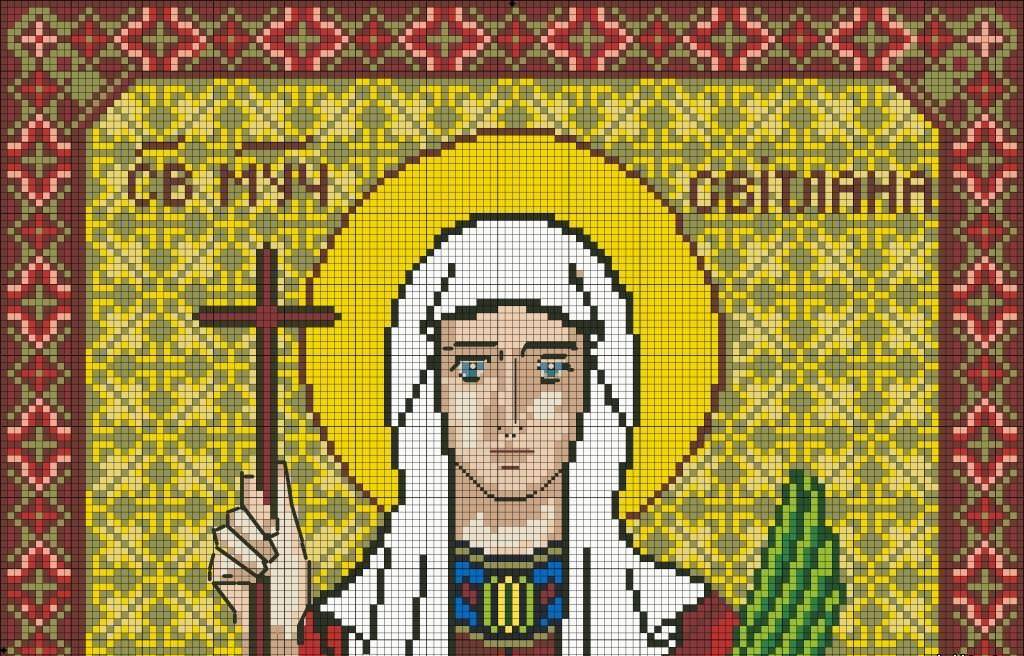
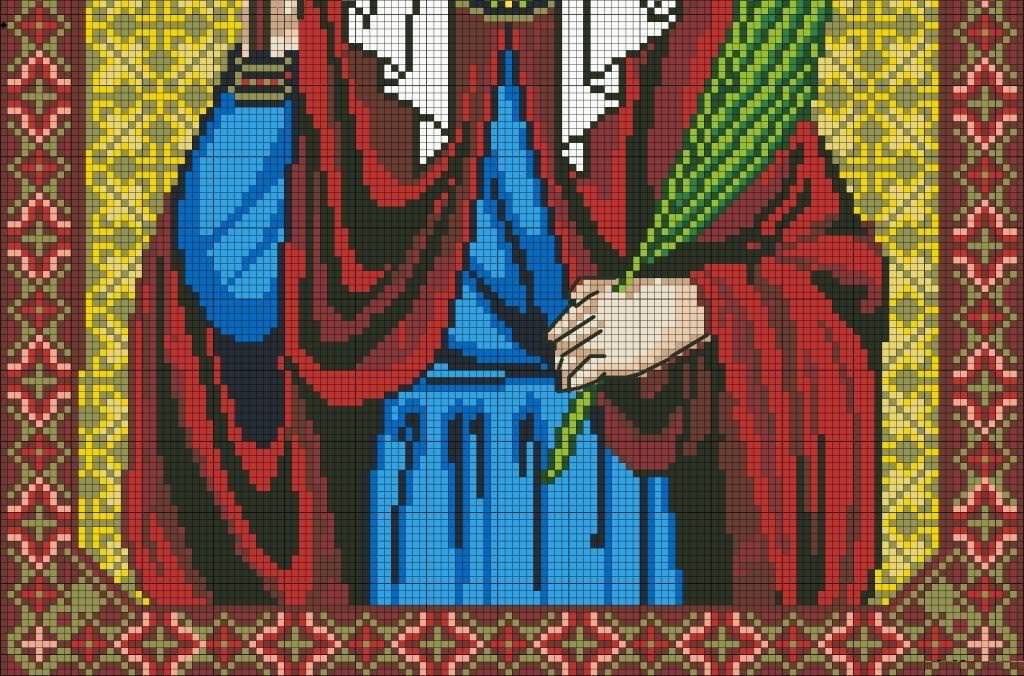
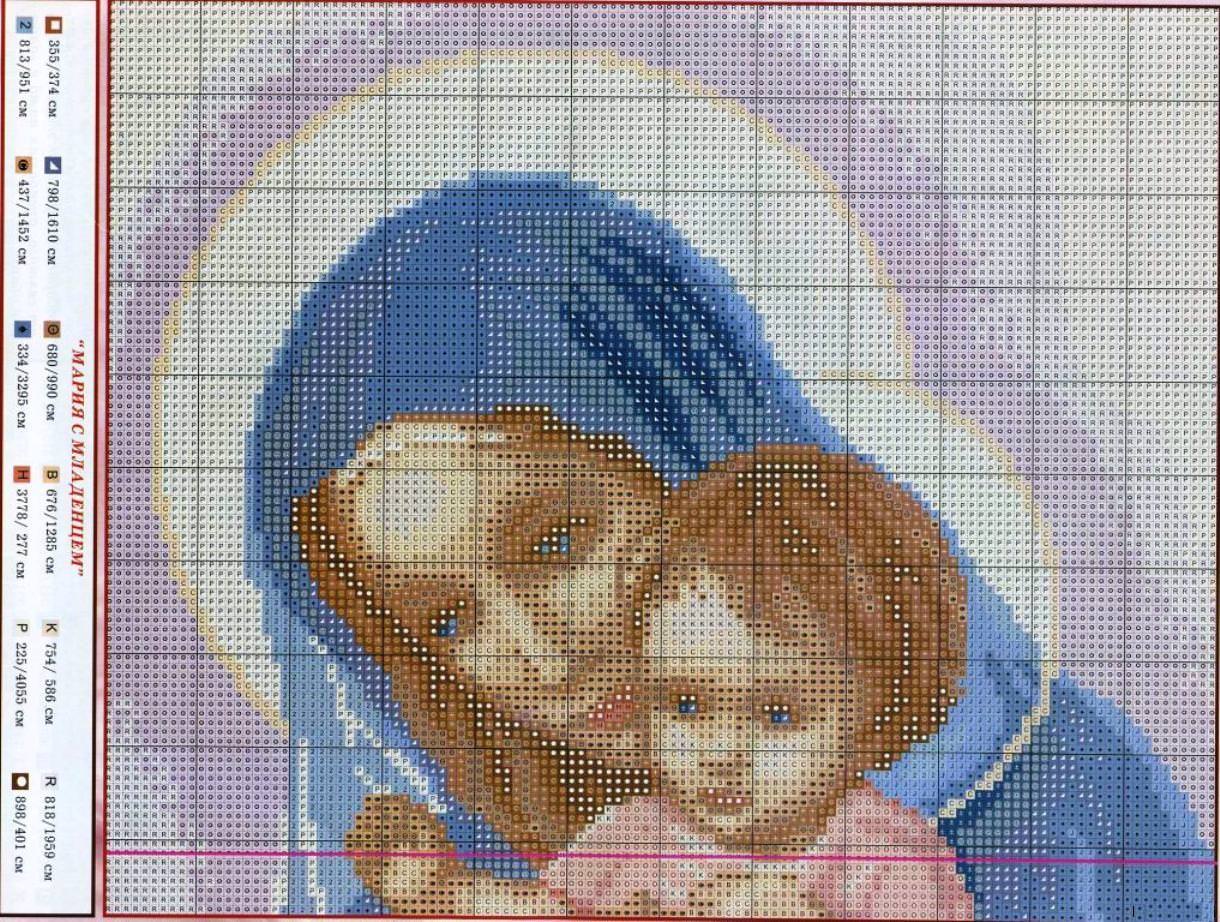
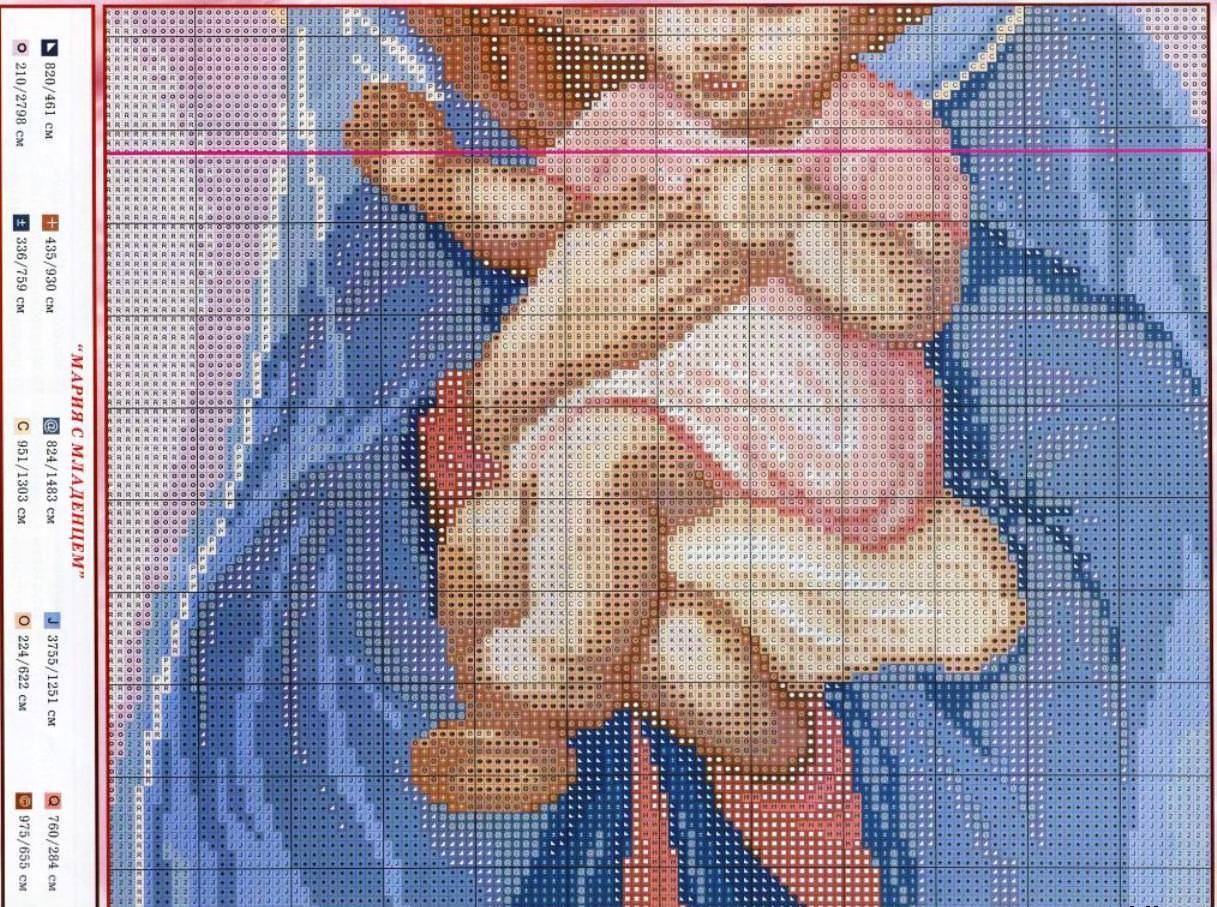
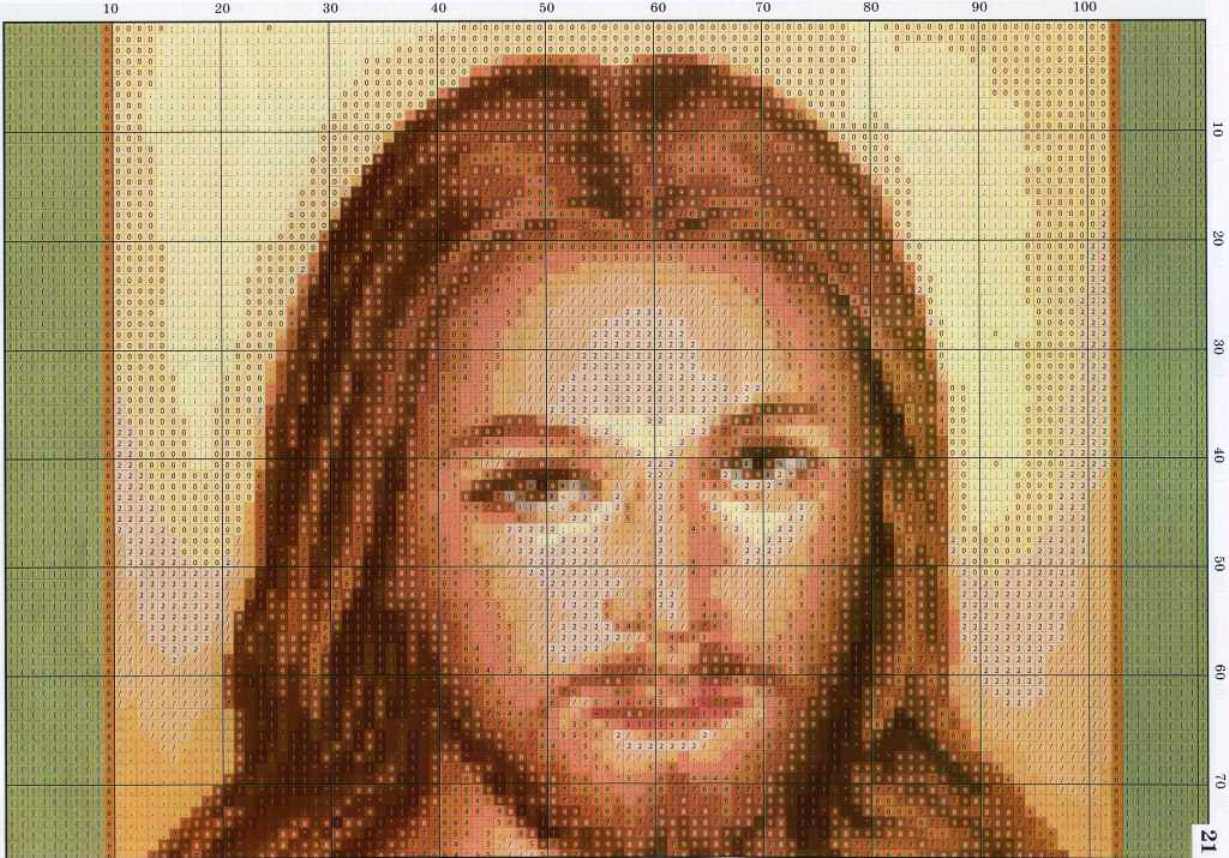
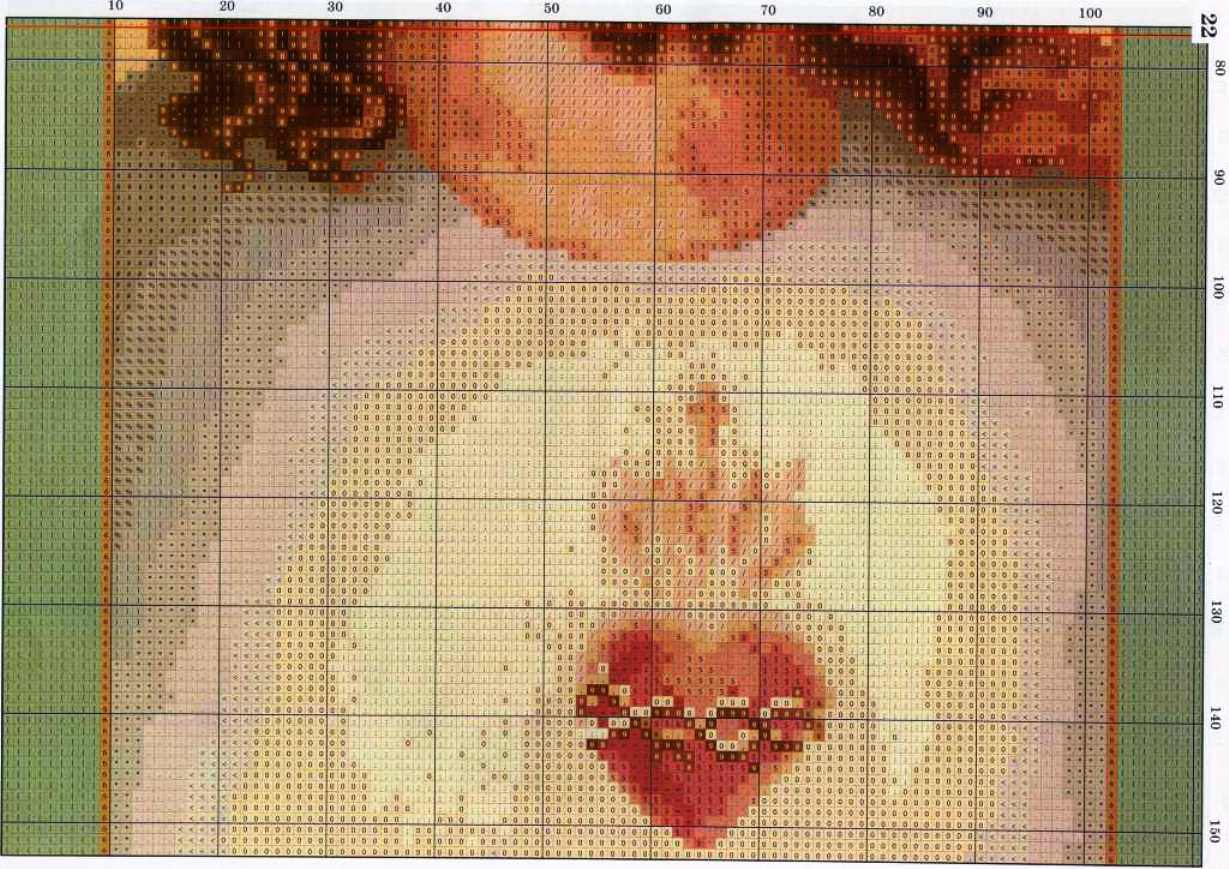
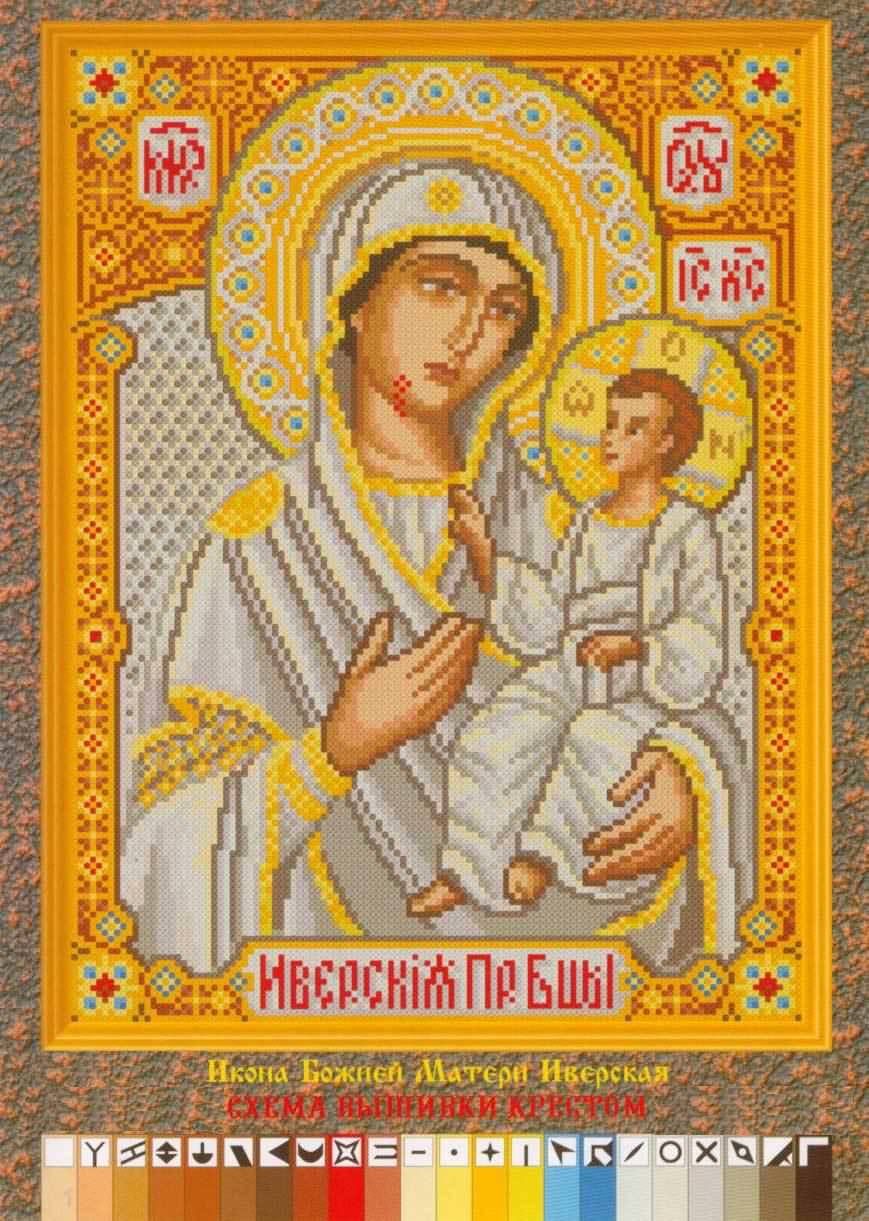
Schemes of icons