We knit knitted mittens with braids according to the schemes and video instructions
Content
- We knit braids
- Lesson knitting white mittens with a pattern of "Scythe"
- Video: How to tie mittens on five knitting needles
- Color mittens with braids
- Video: We knit mitten with a scythe
Warm knitted mittens for frosty wintersare not only a beautiful accessory, but most of all a necessary warming part of the wardrobe. For those of you who have knitting skills, it will not be difficult to make warm mittens. For girls and women, it is important not only to knit warm mittens with knitting needles. We really want the mittens to be spectacular and beautiful, and for this we need to place original patterns on the canvas. Such a type of relief as harnesses and braids looks very stylish. This master class will demonstrate you some options for knitting mittens, using a description of the work and the corresponding patterns.
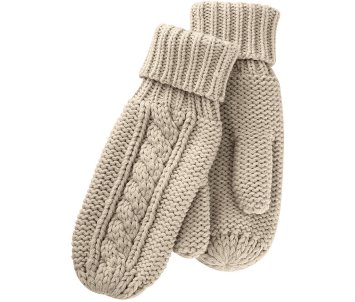
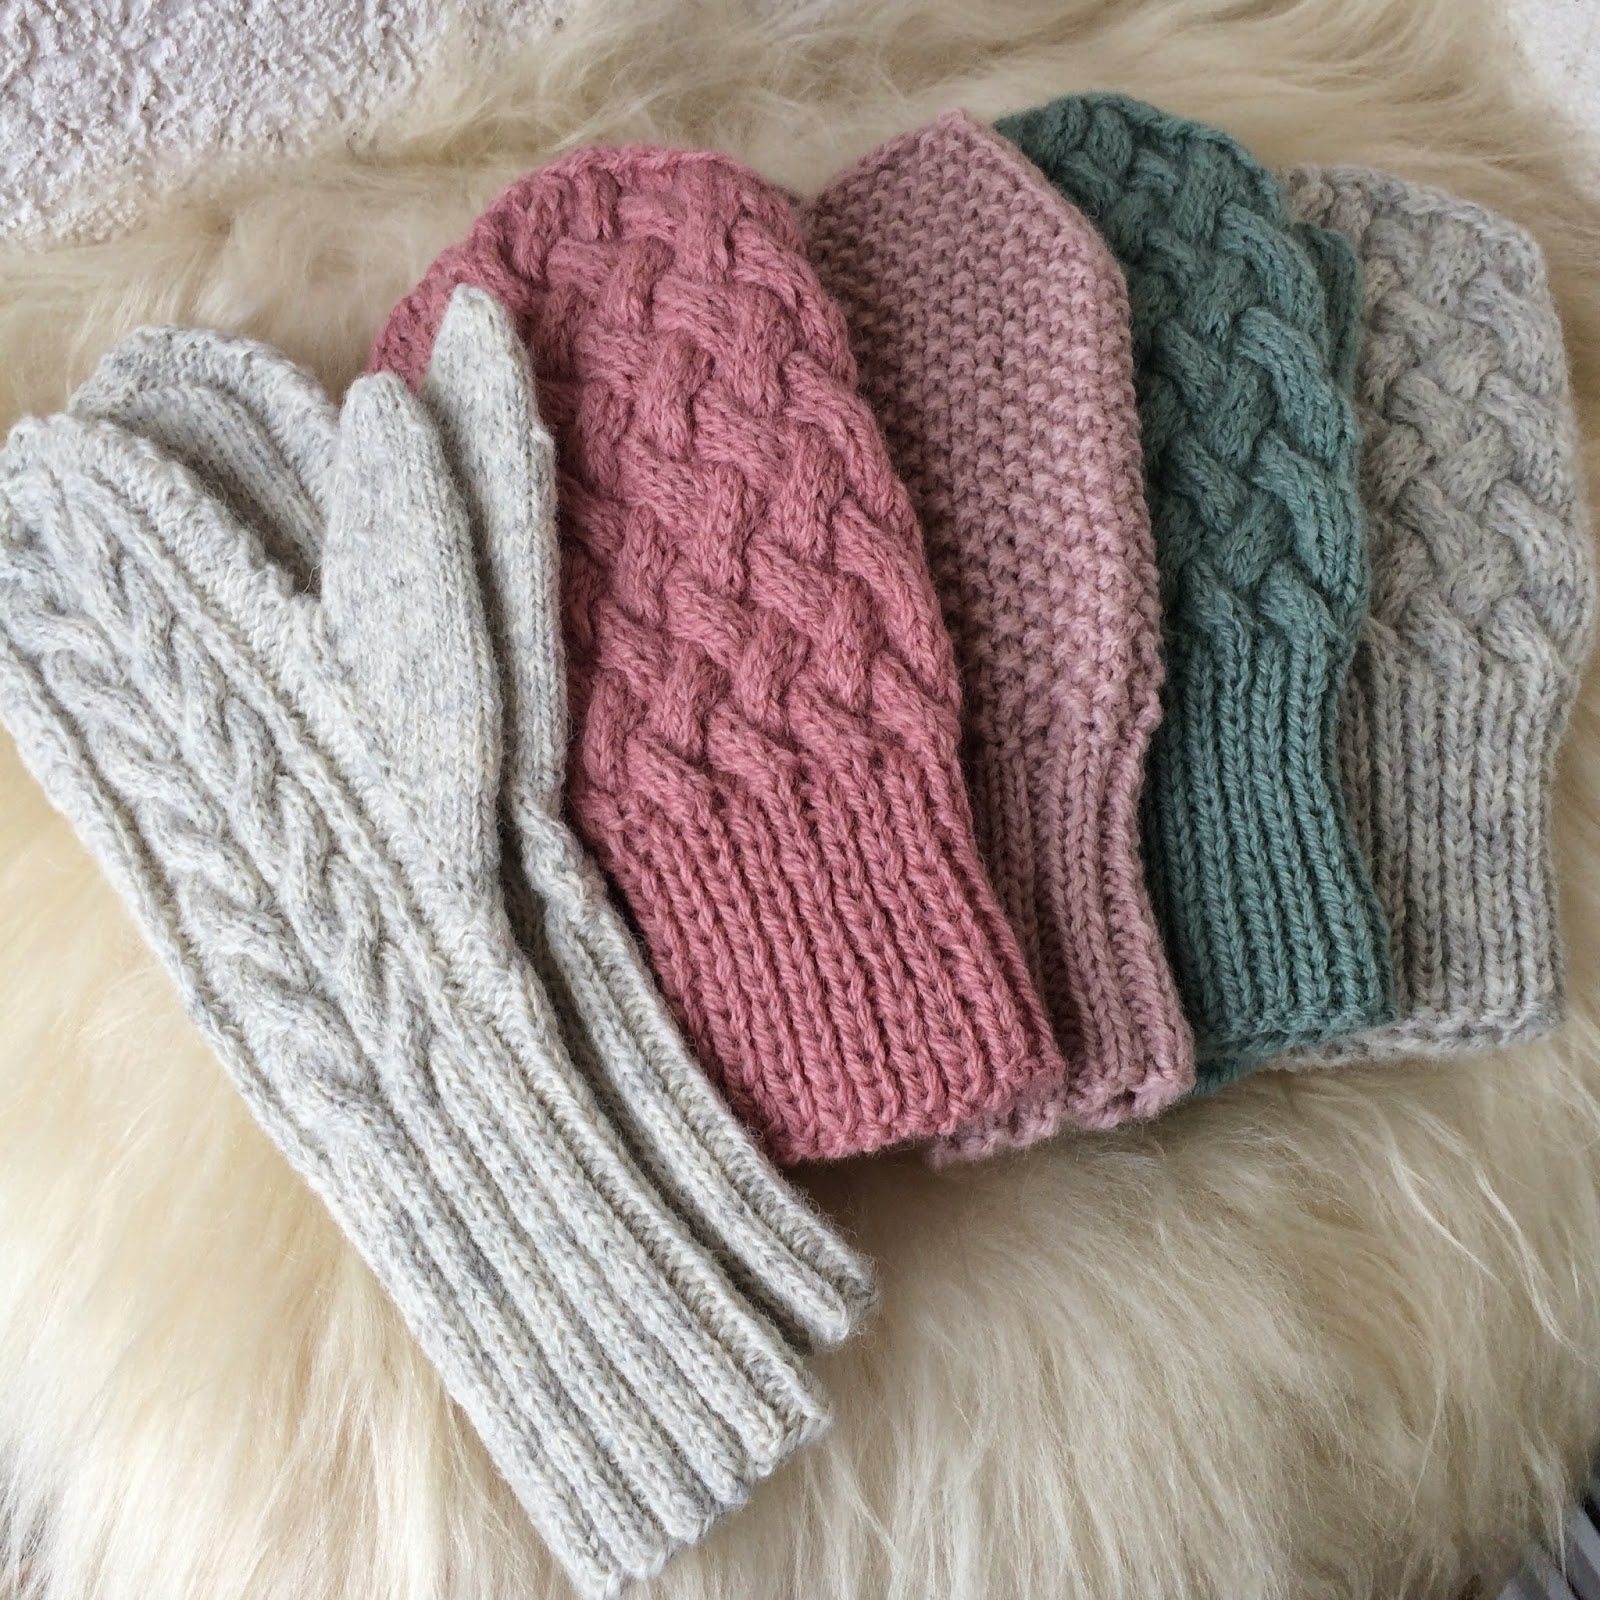

We knit braids
All kinds of mittens with braids are knitted in accordance with various patterns of drawings. It is these patterns that prefer to see on the canvas the majority of our women of fashion, as well as adolescent girls.


A real master class in knitting
with a braid pattern will help you choose exactly the relief that you like the most.
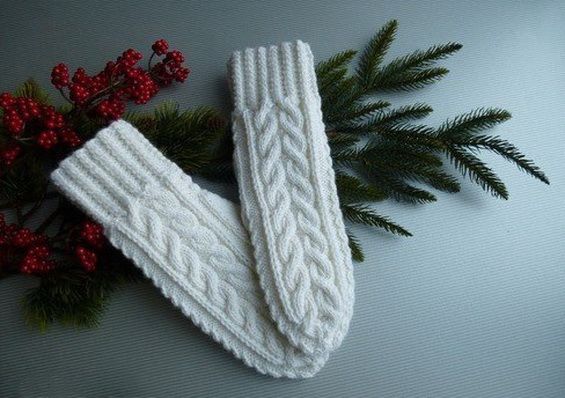
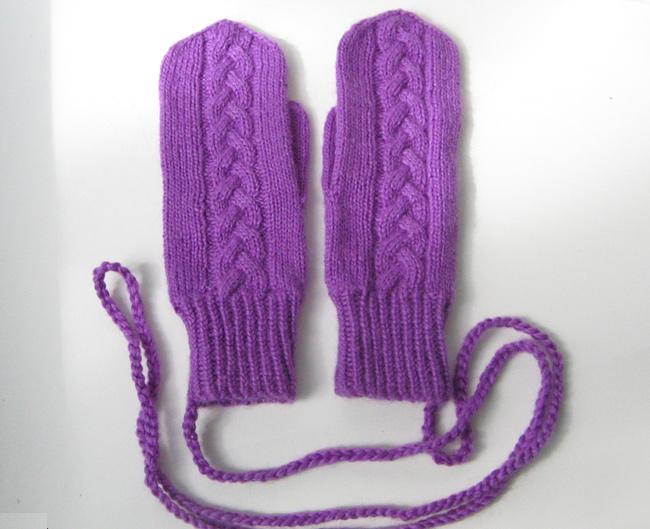
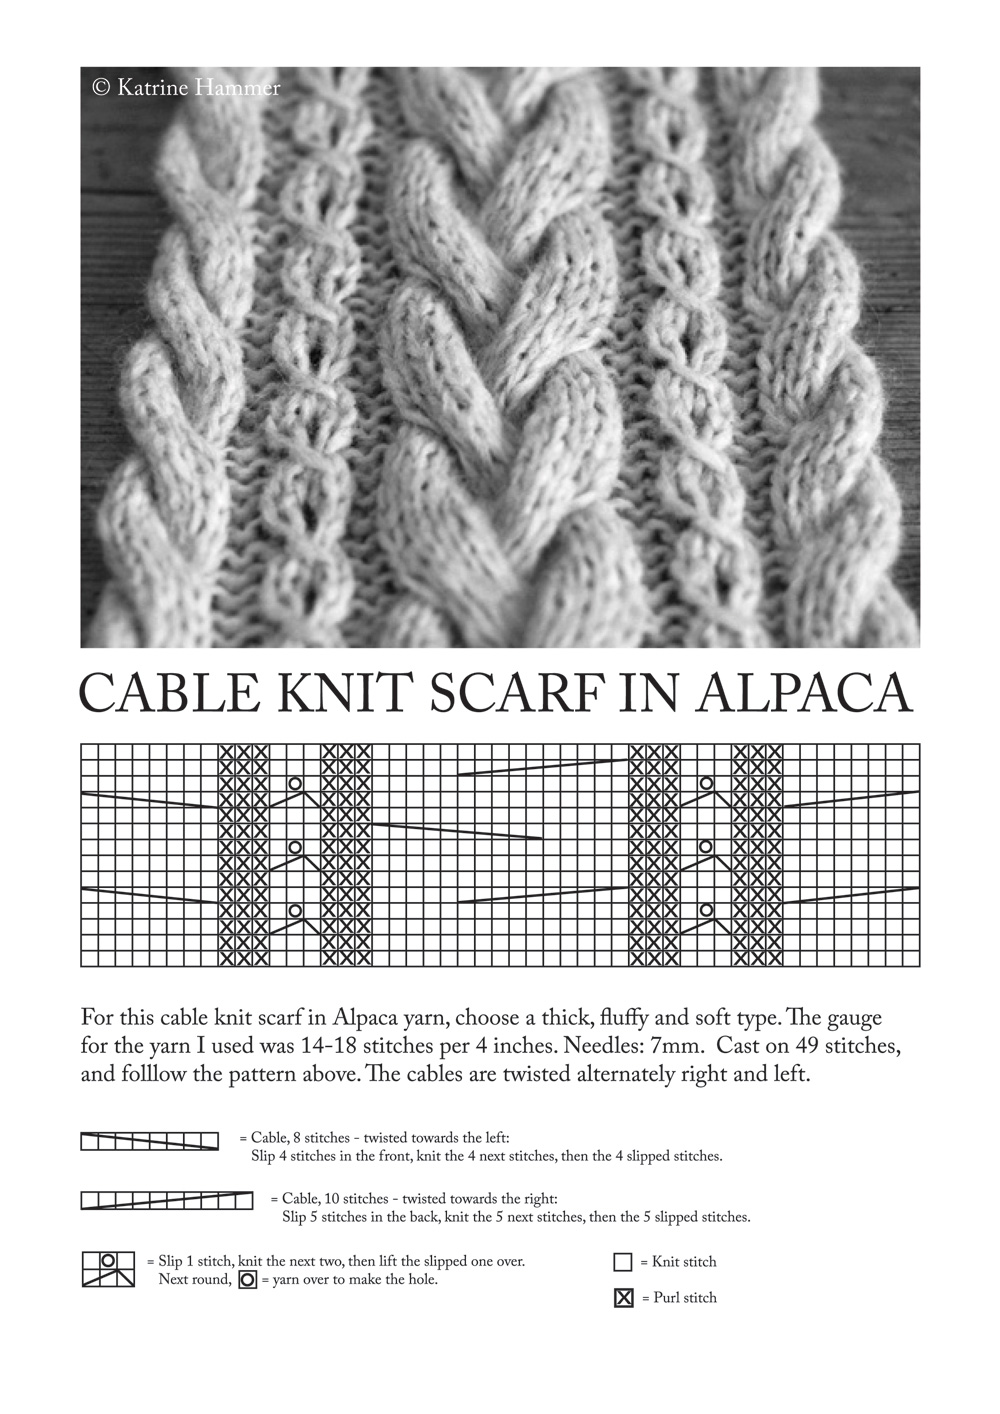
Lesson knitting white mittens with a pattern of "Scythe"

These are the beautiful white mittens we will now look at and knit.
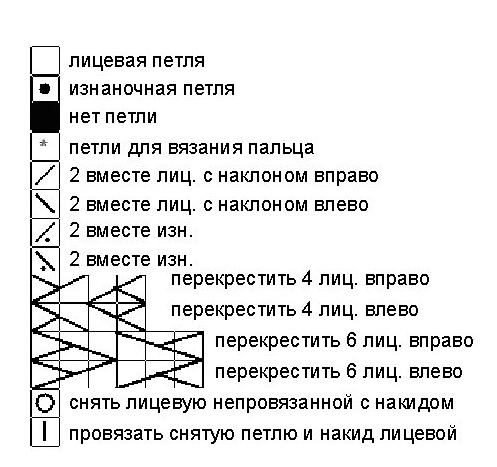
For making mittens with a relief of the Braidprepare one hundred grams of thick yarn. You can knit on circular needles number seven. We will make the first set of loops in the amount of thirty pieces, and knit about nine centimeters (cm) with a 1x1 elastic band. Having finished knitting the elastic band, we begin to make the relief according to the following pattern.
Having knitted about fifteen cm with the Braid pattern along thispattern, move six loops (P) for the finger to an additional pin, and then dial the same amount. Continue needlework until the length reaches the desired size, after which we begin to decrease the amount. Decreases should be performed along the edges of the relief, as well as in the center of the palm. Having brought the number to eight, we pull everything together. We will knit the finger with knitting needles after completing the main part of the product.
Video: How to tie mittens on five knitting needles
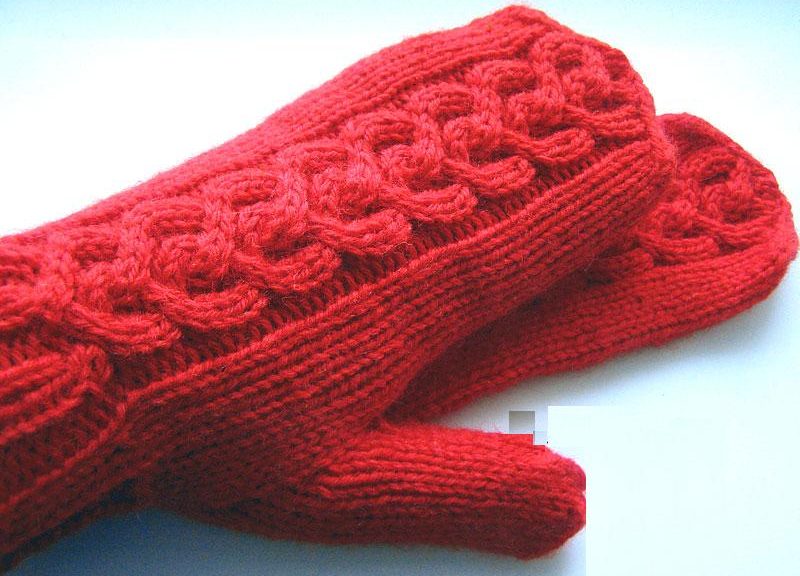
Color mittens with braids
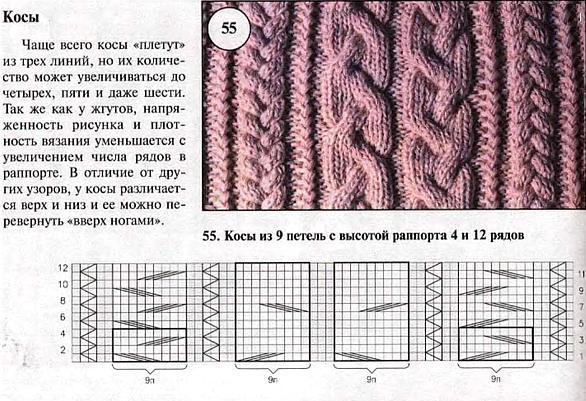
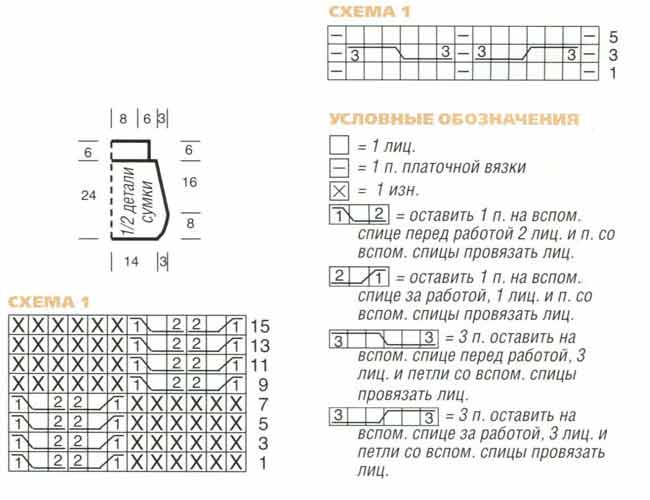
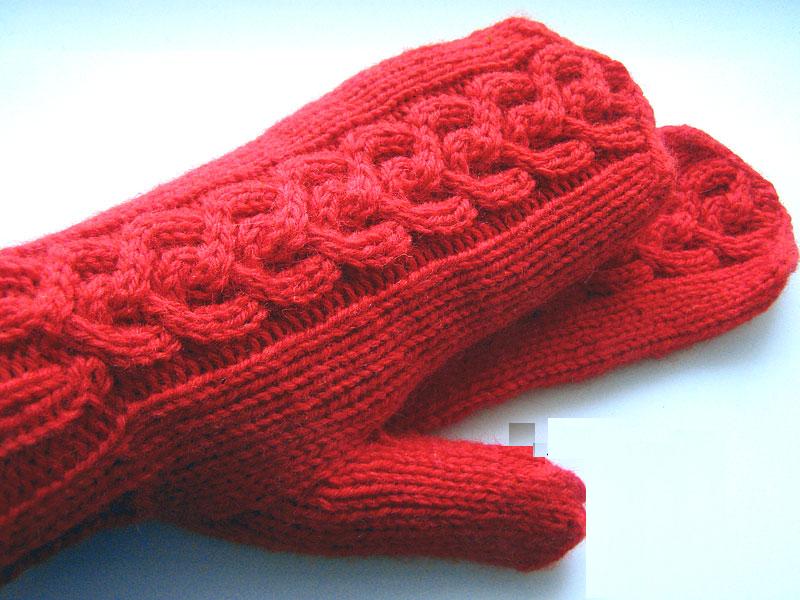
The next master class tells about knitting mittens with knitting needles. The model is decorated with magnificent braids in two rows.
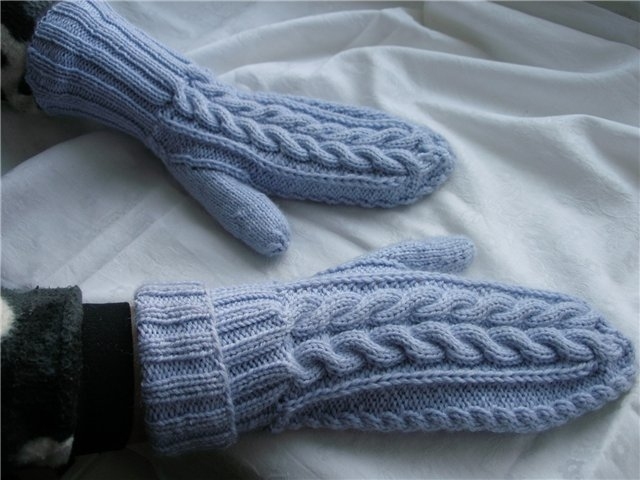
There is also a description and diagrams of the pictureSpit for needlework. Those mittens that you see in the photo, you need to knit like socks. Hinges are located on four spokes, and the fifth is working. We make a set of fifty-two pieces, placing thirteen units equally. First, according to the custom, forty rows (P) are sewn with an elastic band 2x2. Right after the elastic band knitting is performed according to the following scheme.
This scheme has a corresponding description, which you see below.
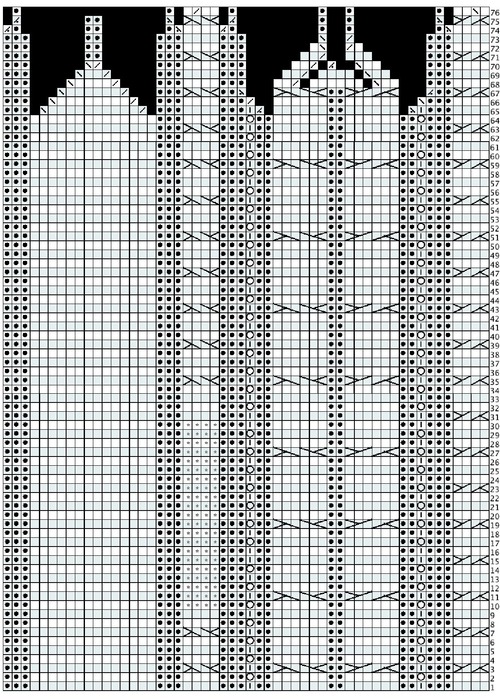
Having copied the pattern of the braids according to the ten P scheme,Finger, then continue the needlework with knitting needles. We knit the mitten for the required length, continuing to follow the pattern and execute the pattern we need. At the level of the little finger, we begin to round the shape by reducing the loops. Having brought their quantity to eight pieces, we tighten everything and fix it with a thread.
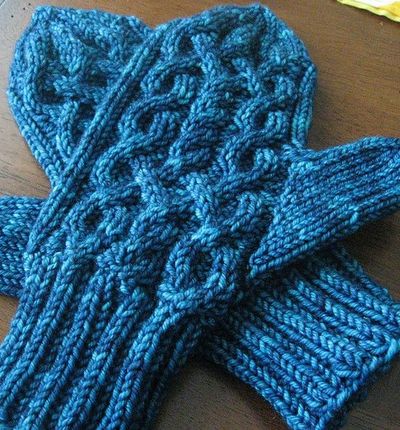
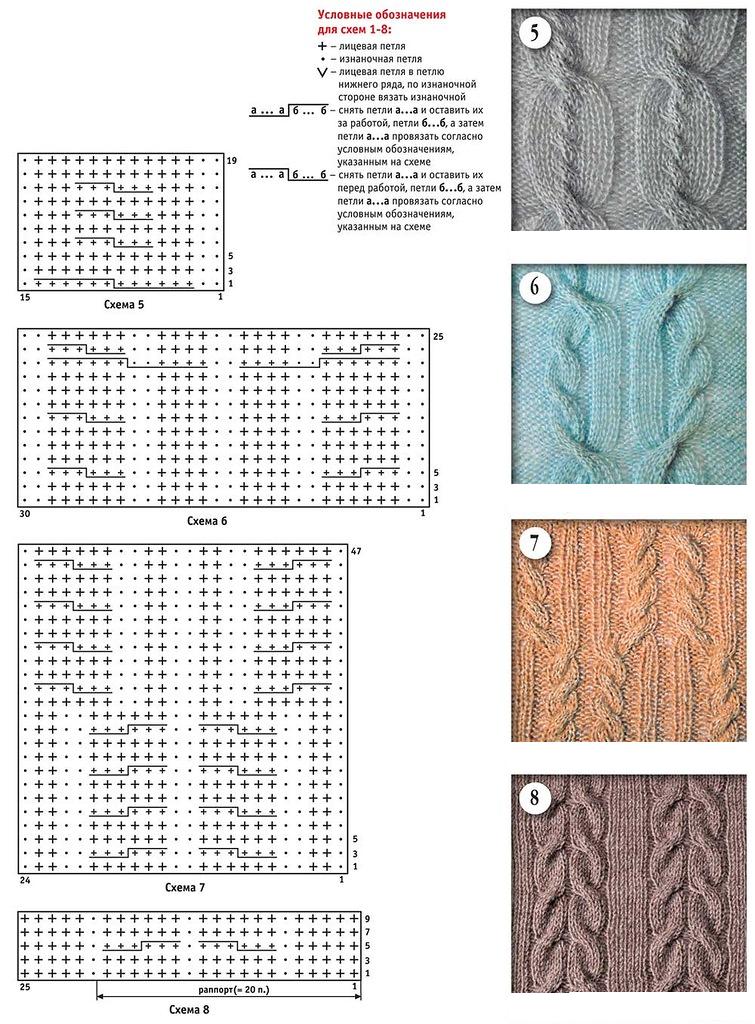
The master class tells how to makeMittens with knitting needles with a pattern Braids. Cast on loops on four knitting needles, eight pieces on each. Then start knitting with a 1x1 elastic band, and knit it to a length of seven centimeters. The video master class contains pattern diagrams for each stage of the work. After the elastic band, knit the first R from front and back loops. The first five rows of the pattern are done similarly. In the sixth R, begin to perform the first crossing of the braid. To do this, transfer four P to an additional pin, place them in front of the work, and knit later. Then perform from the seventh to the thirteenth (R) without changes. In the thirteenth row, knit half of the fabric, after which we make a hole for the thumb on the side of the palm of the mitten. To do this, select six P in the right place, and transfer them to an additional pin. Instead of them, cast on the same number of P. From the fourteenth row, knit according to the pattern. All other rows are also done according to the pattern, and we will finish knitting the fingers when we finish knitting the main part of the mitten. We make the next braid interlacing in the sixteenth row, then in the twenty-sixth, and every ten rows until the end of the fabric. At the twenty-fourth centimeter from the beginning of knitting, we will start closing the loops.
When closed, the pattern is no longer executed.At the beginning of each knitting needle, we will make a decrease, knitting two P together. We work until there is a loop everywhere. Knit two together until there is only one loop left. Cut the thread, pull it through the last P, and tighten. Now we need to knit a finger. We do this with three knitting needles. We cast on four and three pieces on two of them, and add six more deferred loops. We knit a finger from these thirteen P on three knitting needles with face loops and the same technique that was used to make the mitten itself. At this stage, we only have to finish the needlework, carefully threading the remaining threads to the wrong side, and masking them with a hook between the loops of the mitten. To do this, we thread each thread through several nearby loops, after which you can trim the ends. You had the opportunity to see how easy it is to knit beautiful mittens with magnificent patterns. Now each of you can easily cope with such handicrafts.
Video: We knit mitten with a scythe
Comments
Related posts:
 We knit the sweater with braids according to the description and photo scheme
 We knit knitted berets according to the schemes with detailed description
 We knit with knitting needles the original scarf according to the schemes with detailed description
 We knit men's socks models according to the schemes with the description
 We knit openwork blouses with knitting needles according to schemes with a description of the process