Maki Bead different techniques of weaving their own hands (video)
Content
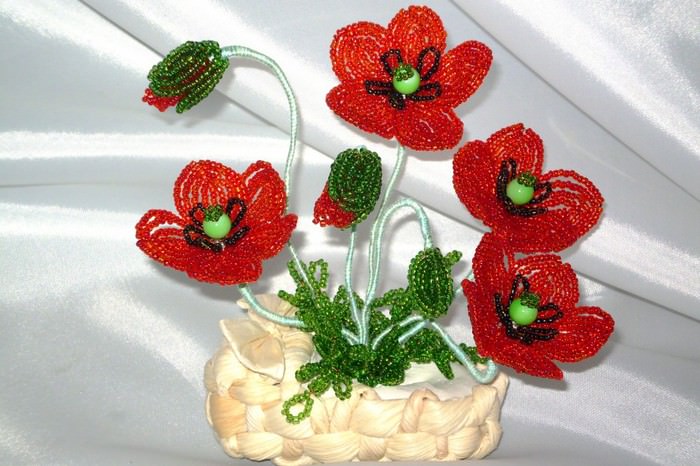
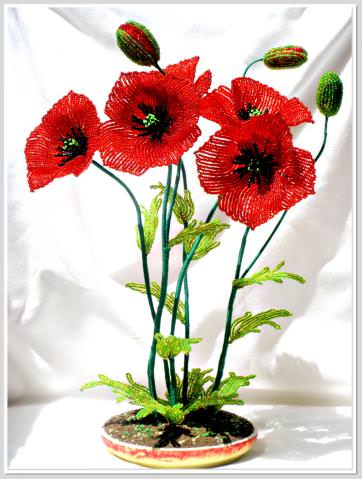
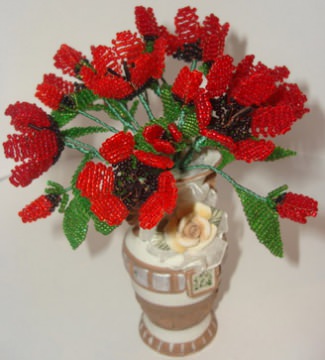
Many people really like poppies in a variety of forms: knitting, embroidery, weaving, and of course, live. And when these flowers more like his girlfriend, appears even more incentive to learn something new in needlework. That we now look at how to spin a mak beaded with it in two ways. Before immediately start weaving poppy was a lot to learn the material, so that it was now based on the experience we can talk about how to weave beads poppies, how to make their own hands. Thus, we begin our master class.

Options Pletnev poppies Bead
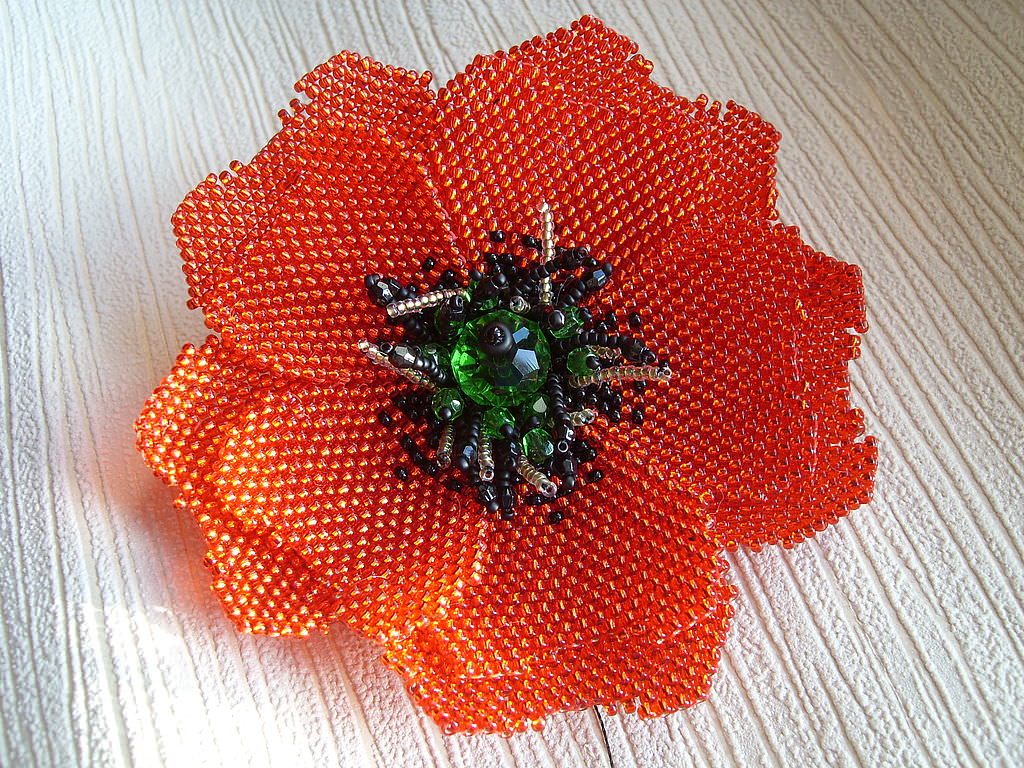
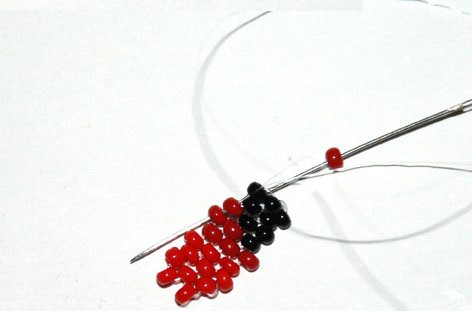
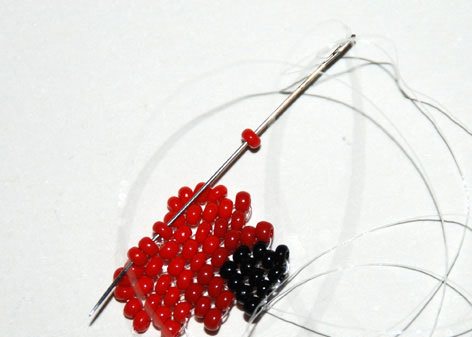
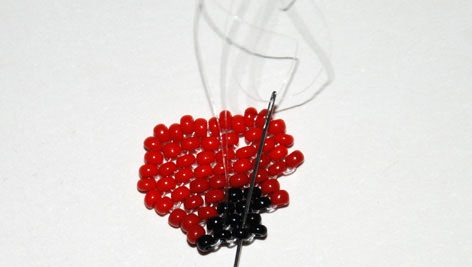
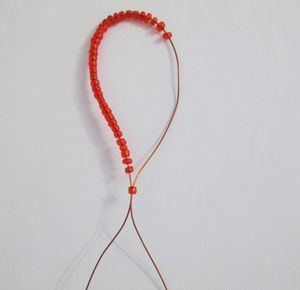
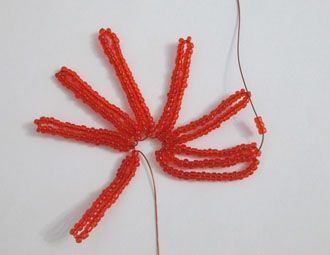
So first method, the first variant. Take the red beads of two different colors, as well as black beads for the poppy heads and stamens. Weave poppy petals made by leaf type, in two parts. Initially, the first half, then - the second. Dress up 9 beads. How exactly to place these two colors, decides performer, it is outside the master class. It is necessary to round the tip, by introducing the needle in the third from the end bead. Further work in the art of weaving a mosaic.
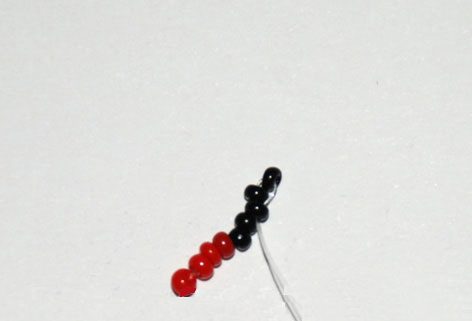

Approaching the end of the series, we collect two beads. It turns out that in the middle of a flat edge is formed, and is closer to the edges of the formed convexity. Once again weave mosaic method. Approaching the end of the next, recruit one more bead with a view to the edge was not convex elements.
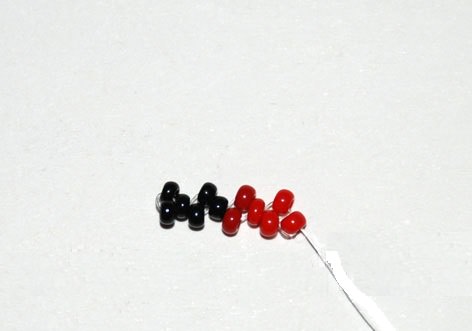
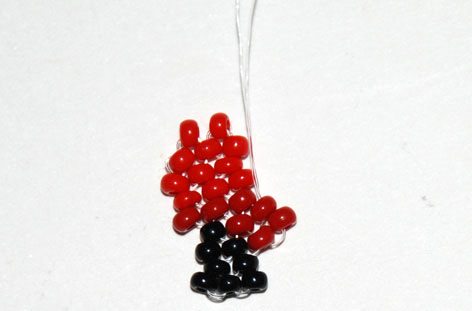
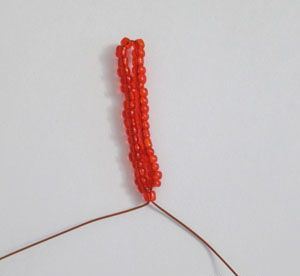
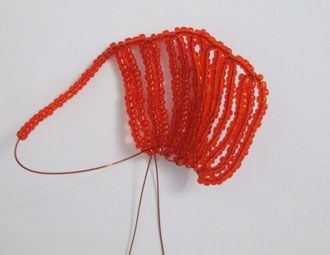
Again perform mosaic in both directions, without reducing the number of rows with red beads.
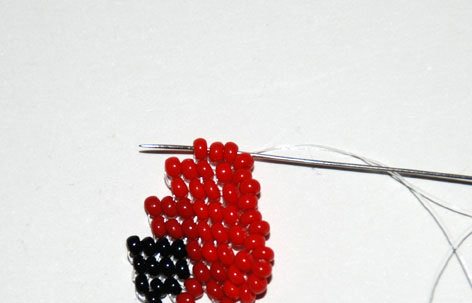
Approaching the black beads, weaving mow. There is no need to bring to the end of the series, you can continue weaving until the penultimate beads, then put on one bead and wrap the subsequent row.
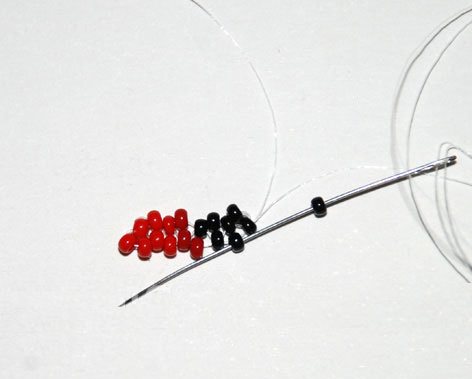
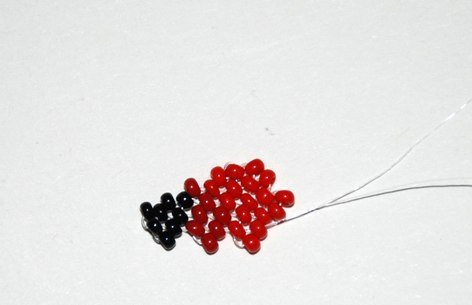
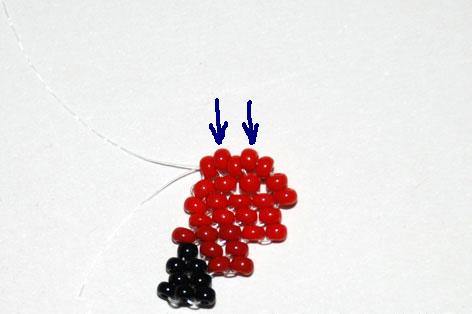
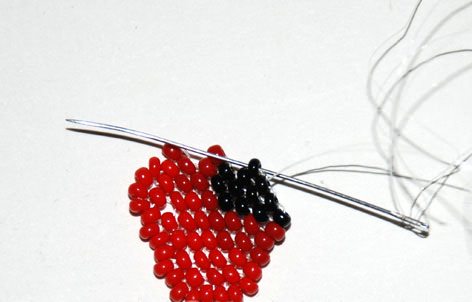
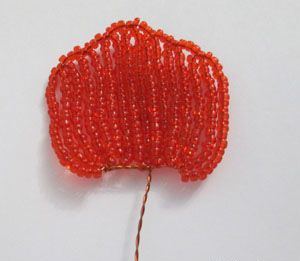
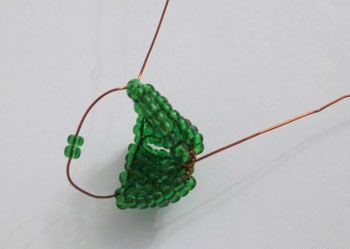
In the future, we make the same action again andMow weaving. Thus, the tab is almost over. When mowed three times, continue to weave a mosaic way, the needle is inserted into the bead, marked by an arrow in the photo and tighten.
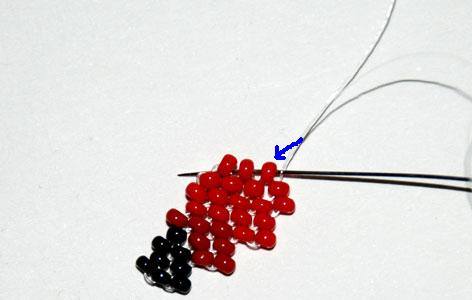
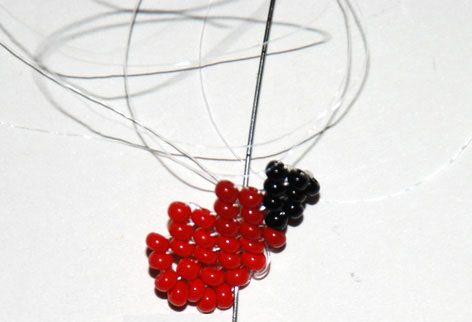
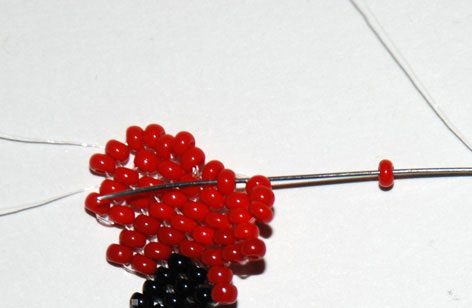
After the bead put on, we hold the needle in the subsequent bulging bead, another recruit and hold the needle still in the subsequent bead (see photo).
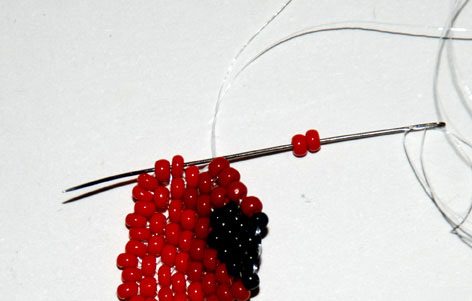
After drawing attention to the photo, it is necessary to stretch the needle so that the carry out of the red beads, located in the center.
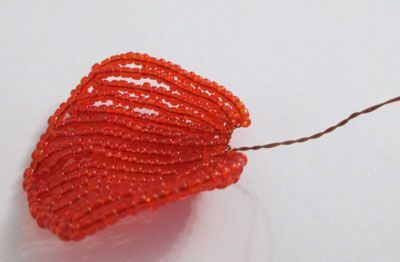
According to the principle of this element weave the following -second part. First, you need to wear beads, then rounded to the second part of the first series. After completing the second part of ending in the same way the first.

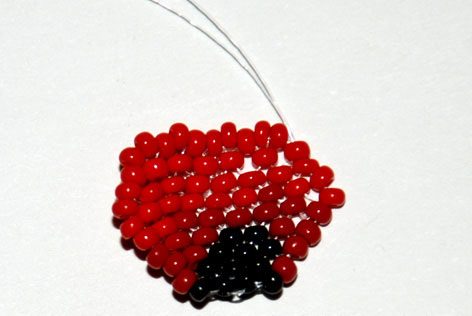
After the middle of the pass (over itextra bead there is no need to wear). Further, the need to enter and leave the needle in a part that is chamfered. Now put on a few beads and holds a needle in a convex bead, rounded edges. The same actions committed before the end of the edge (to a number of black beads).

After the black beads come out for the second half, rounding the edges. At the end of weaving can pass again in a circle, closer to tighten and secure the edge.
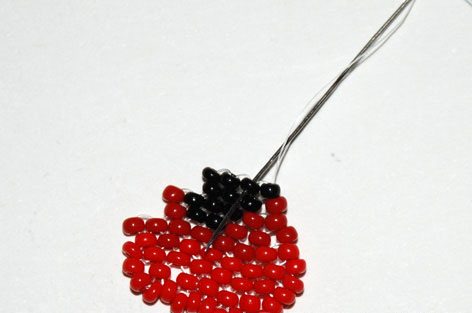
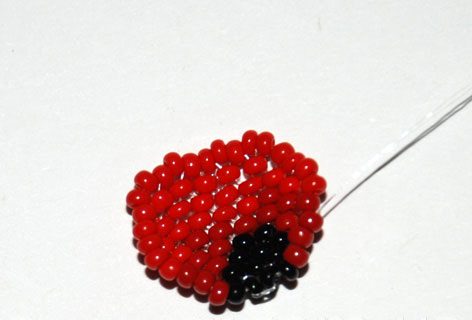
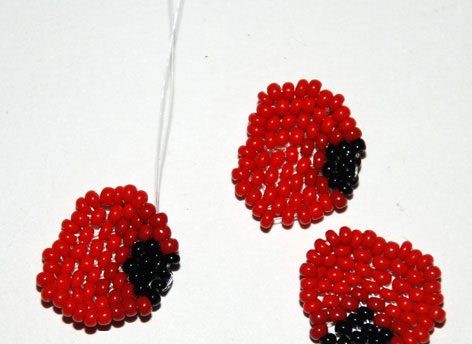
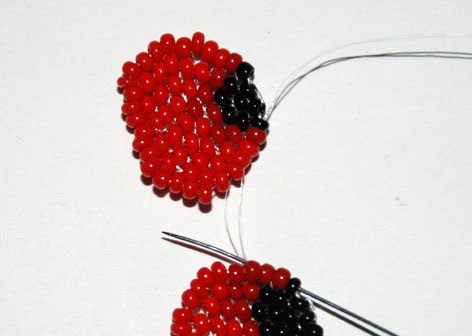
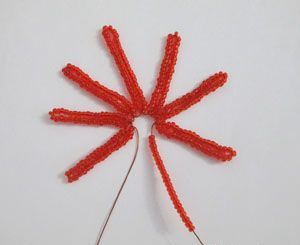
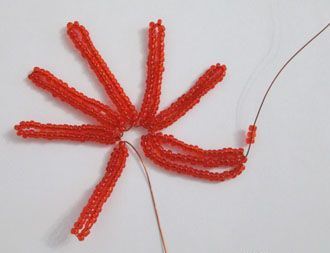
So weave 3 petals, after which they need to make. As a result, we get small poppy bead having three lobes. In general, these flowers are a different number of petals from 3 to 20! The crosslinking takes place in three petals extreme beads of each petal. Putting together three petals. You can make an additional number of small petals, combine them into a flower and produce for their stamens.


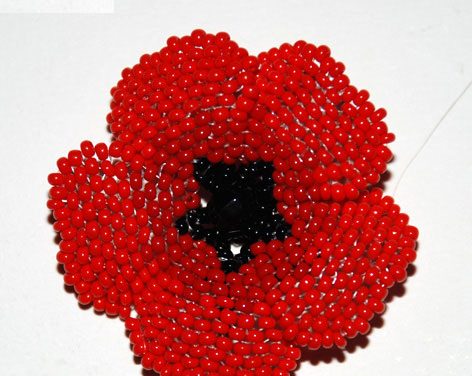
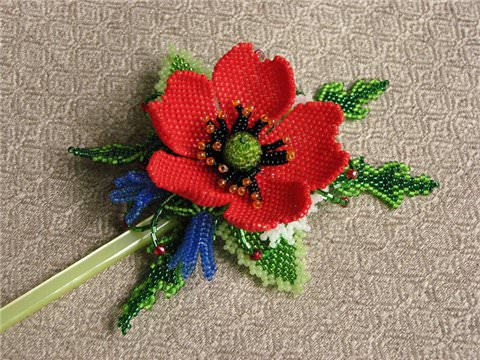
The second way But the second version of the scheme "from poppiesbeads ": for four petalled flower. Also, there are poppy flower box and stamens. Consider our master class in more detail the following elements: the petals and stamens.
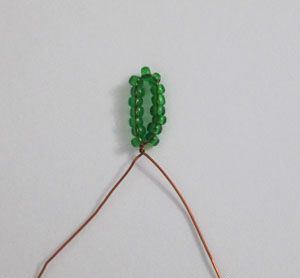
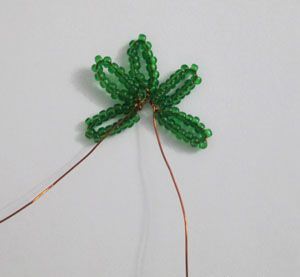
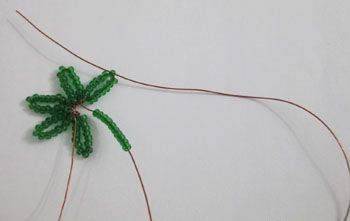
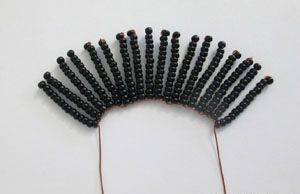
Petals on a piece of metal thread 0.75m gain 37 red beads. Promote them to 0.07-0.09 m from the edge. take the edge of the end, it is passed through the last and stretched. It turns out the loop. Next to the second node is made of 39 beads. It is necessary to make 7 loops in the following scheme prioritization: 37,39,41,45, and then also on the wane but - 41,39,37. At the end of the current put 22 beads and a metal skip thread through the top node. Tightens it. Now put 3 beads and wire is drawn in the same way over the top at the next node. Weave in the same manner until the end of a number of nodes. After the seventh node wear beads 22 and strengthen it between the seventh and sixth loops. The end of the wire is twisted.


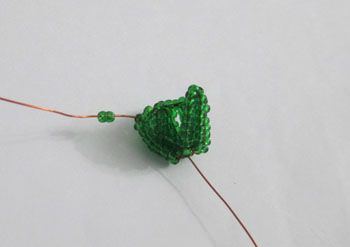
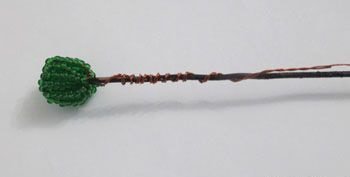
Stamen Stamens are made of two kinds. First take 0,45m wire, put it on the 15 green beads, and not far from the end of the wire loop weave. According to such a scheme, the entire loop 5 must be made.
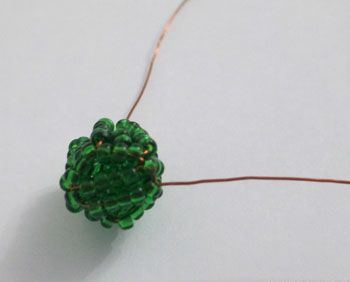
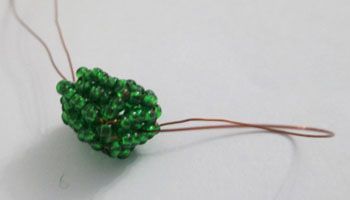
At the end of the operation put 10 beads andare threaded through the upper wire loop. Properly tighten the wire. Next, put on a wire 2 beads and passed it through the bead on the next loop. Entwine all five loops. In order to combine the fifth and the first loop, you need to dial 2 beads and pass the thread through the metal top of the fifth loop. Qualitatively it tighten. Gaining 4 beads and threaded it through the bead opposite. When tightened, put 4 more beads and passed in the same way. Take the active region and a metal wire is inserted in the middle of its products so that the metal thread pulled down. Released poppy capsule.


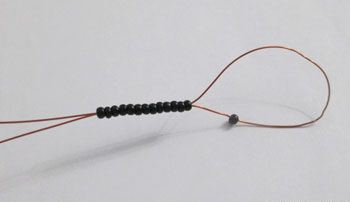
Another type of stamens (needle) weave needlebeading of black material. On the metal wire 1.1 m 14 black beads worn. Place them close by the end of the metal wire and metal wire is passed in the opposite direction through the 13 beads.


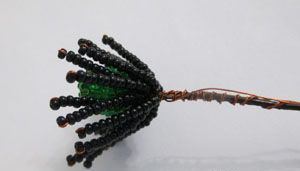
Build Now it's time to collect our flower. On a solid wire need primotat poppy box and around the stamens. Our four-lobe perpendicular to fasten.


All actions must be performed carefully, unitsbetter to tie tightly and make sure that the beads fit tightly. In general, the work should bring joy. At least, hobby, exactly. It is still free time, which should be fun. Also important in this work, the inspiration: where do without it when you need to create art?
At this stage, our workshop came to an end. More details of beading process can be seen on the video. Video tutorials will show you the technique of weaving every detail of a poppy flower, so that later you can repeat the whole process.
Video: How to weave beaded poppies
Comments
Related posts:
 Necklace of beads: the lessons of weaving their own hands (photo and video)
 Lily Bead: different versions of weaving (photo and video)
 Crocuses beads with your hands in the training lessons (video)
Gladiolus Bead: slender flower with his own hands (photo and video)
Crocuses beads with your hands in the training lessons (video)
Gladiolus Bead: slender flower with his own hands (photo and video)
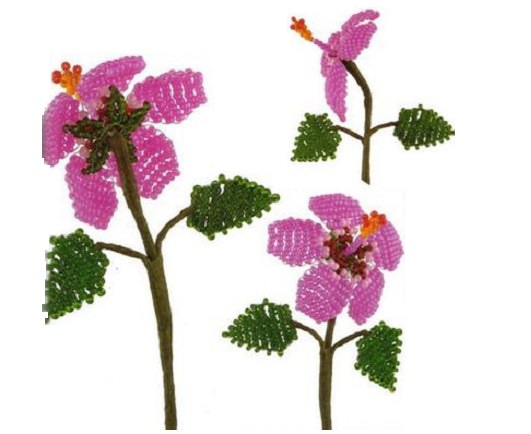 Hibiscus Beaded: beautiful flower with his own hands (video)