Pattern grid in diagrams and photos, detailed her knitting
Content
- Knitting with different types of "grids"
- Video: Net pattern
- Knit sweater with an openwork mesh
- Selection schemes
Often
the most fashionable of clothes based on the basis ofcommon openwork patterns, among which the most important place is occupied by mesh spokes. Why do you need to mesh openwork pattern, we now face it. The fact is that
are extremely diverse, and can have the mostthe various elements and the form. Sometimes they imitate the magnificent lace, or acquire the correct orientation of the lines. Often in a product it has to combine several of these openwork forms at the same time, for which we need the mesh pattern spokes. That it allows successfully combine different patterns, or run between the original and beautiful transition. In addition, this pattern, knitting mesh, can play the role of a stylish insert, or be an independent and major relief. Of particular concern, they are in the period of occurrence of heat when using them knitting needles cute tops, dresses and blouses.


Knitting with different types of "grids"
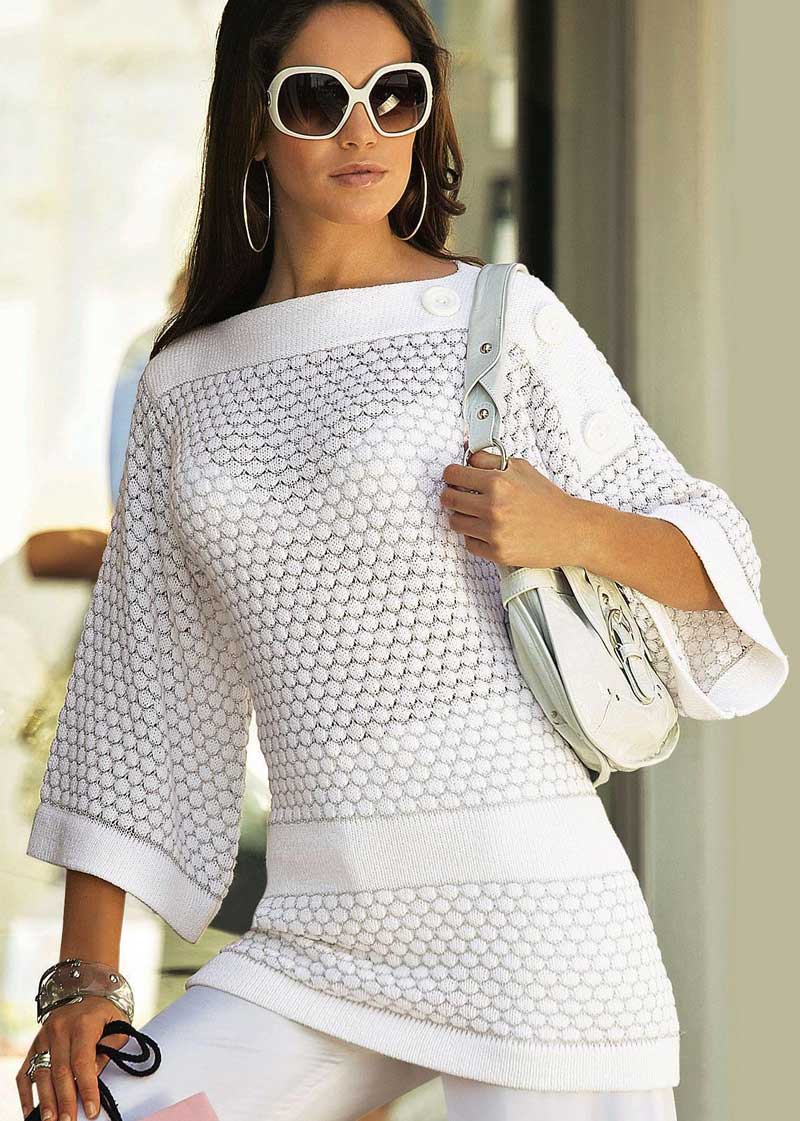
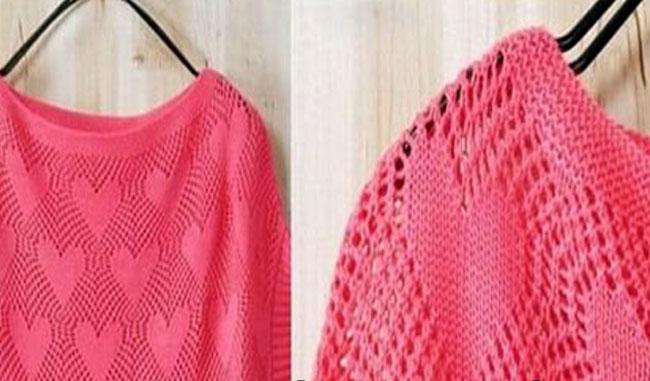
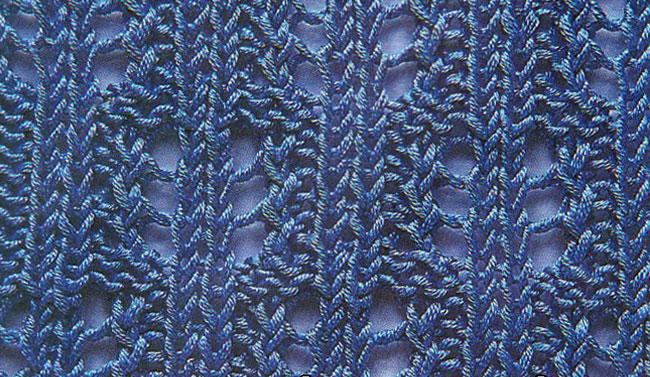
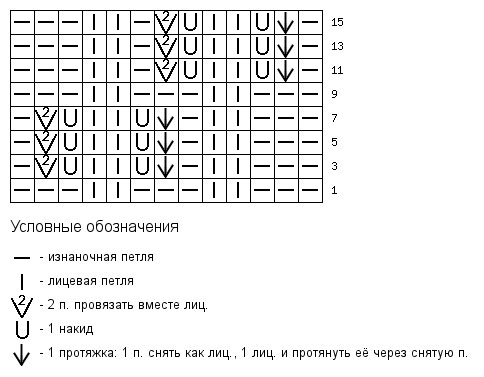
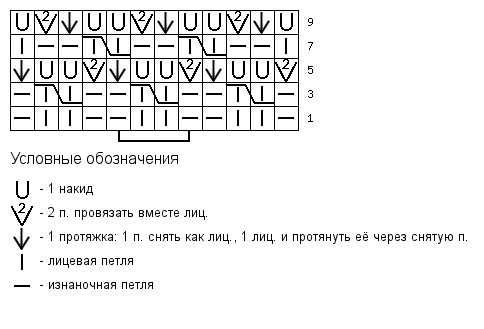
Experienced handy it is known that a meshspoke design has a lot of schemes and techniques. In this case it may be a knitting primitive and quite difficult. Openwork mesh spokes differ mainly in size and shape of their cells, which are small and large. In addition, they may be directed vertically, horizontally and diagonally. There are schemes that are the same on both sides, or have the person with the wrong side. It unites all presence nakida circuit (H) and two loops of knitting together, or three together. Appearance any mesh spokes depends on how alternate with each other all H, and facial and purl loops. As an example serves this beautiful tunic where knitting hearts are connected to each other by diagonal cells.

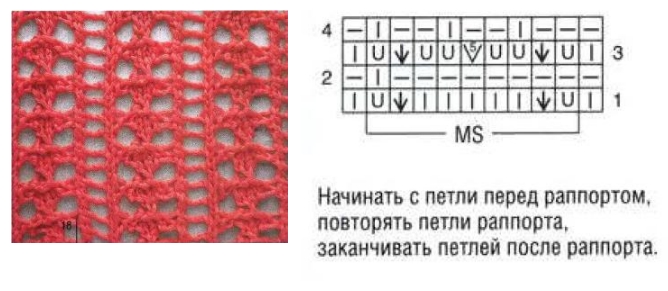
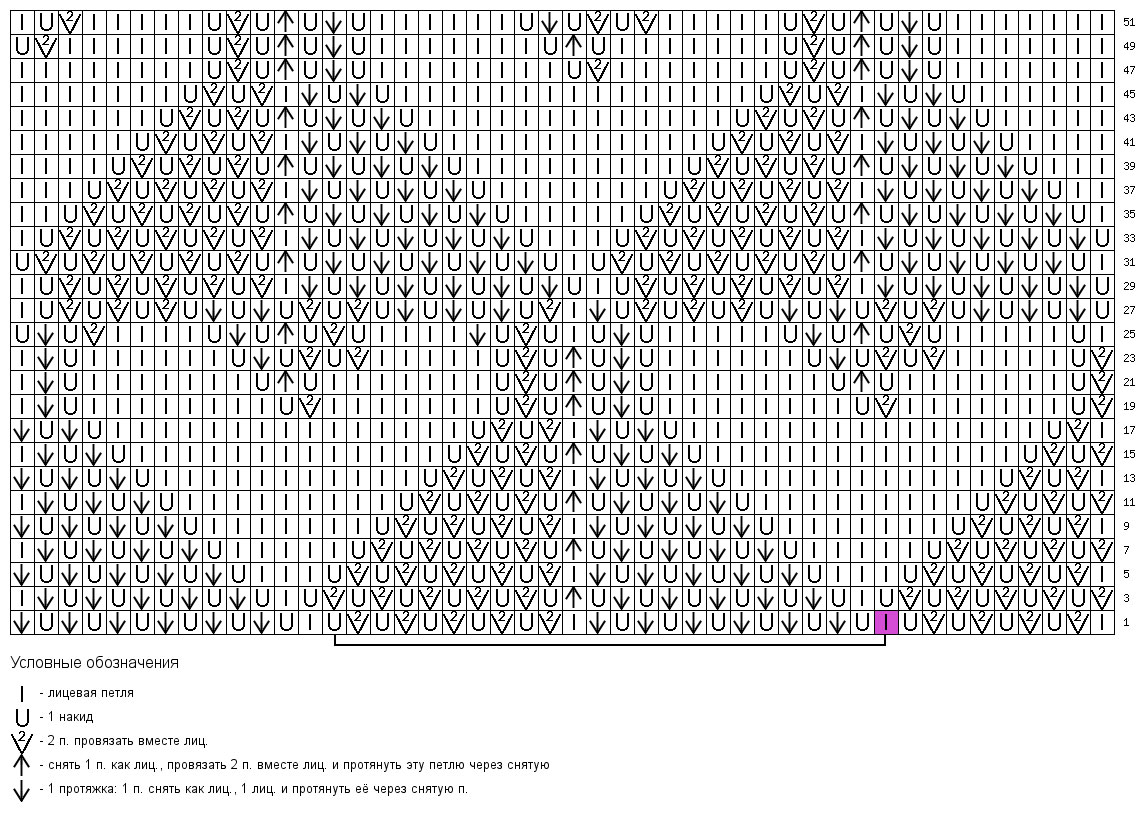
Driving this openwork mesh spokes formedexclusively from the ranks of the facial and purl rows are made up of only backstitches loops. In the diagram, you will see rapport, which begins with the tenth, and ends on the thirty-third loop.
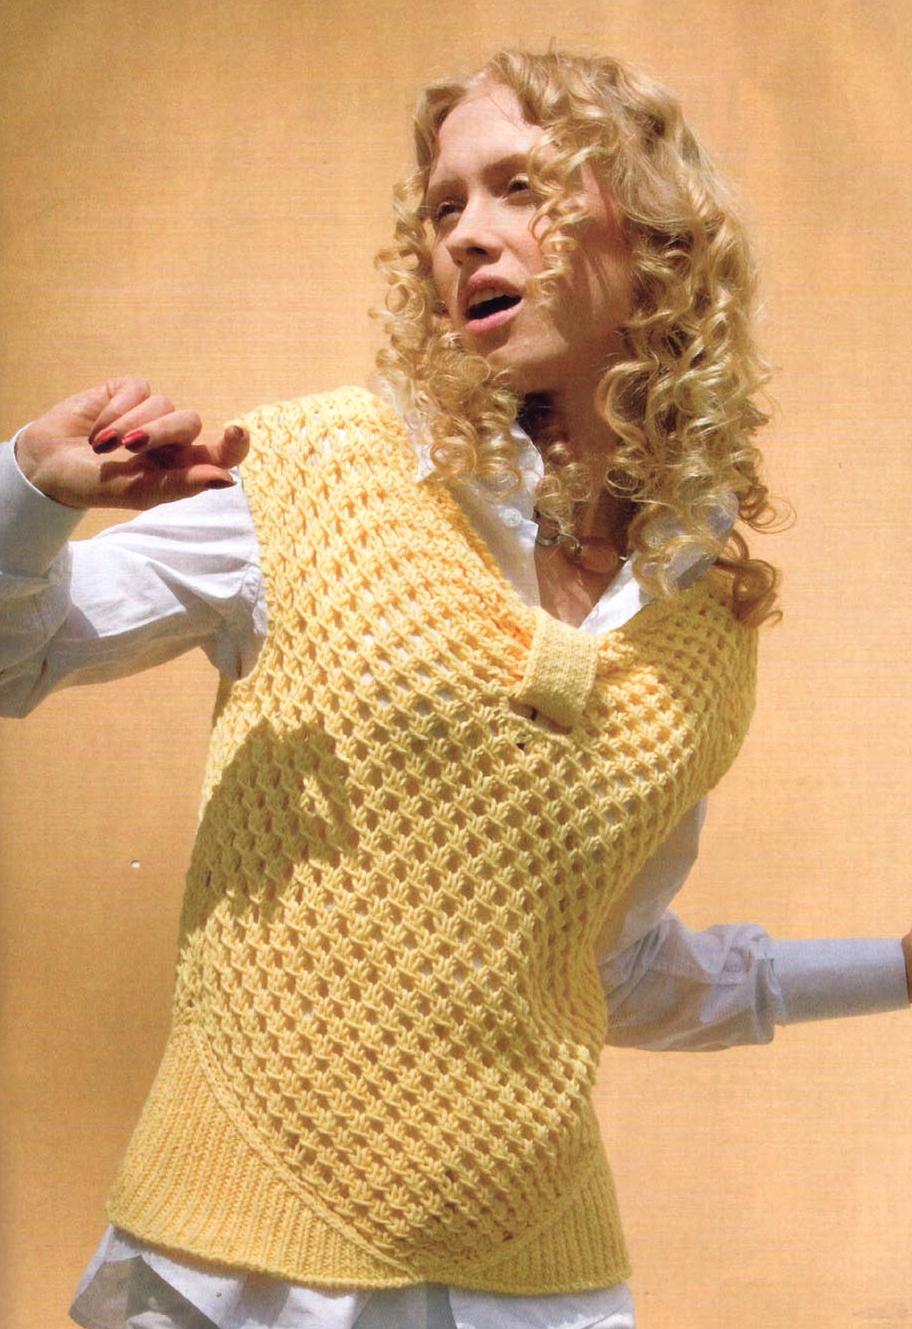
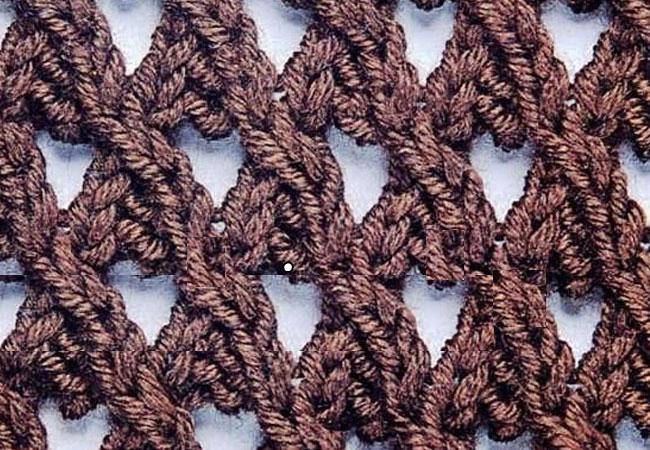
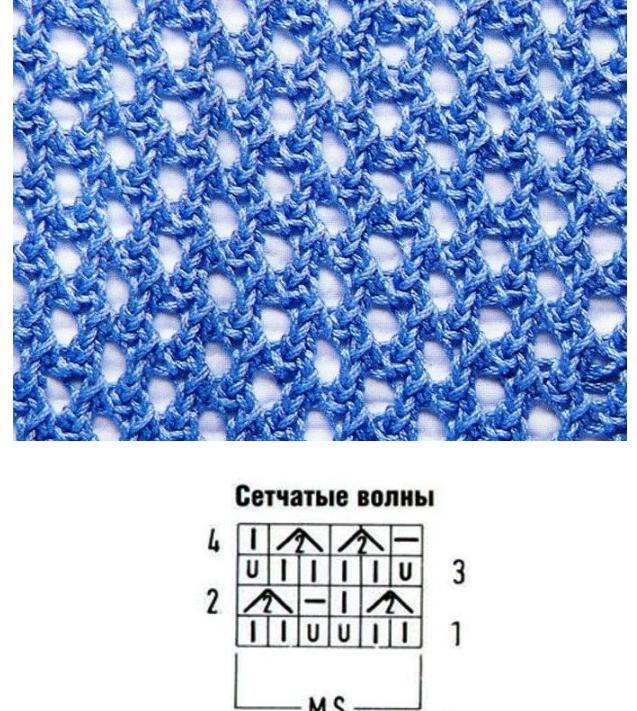
The following model, which is knitted from yarn of any thickness, has a pattern of big openwork mesh.
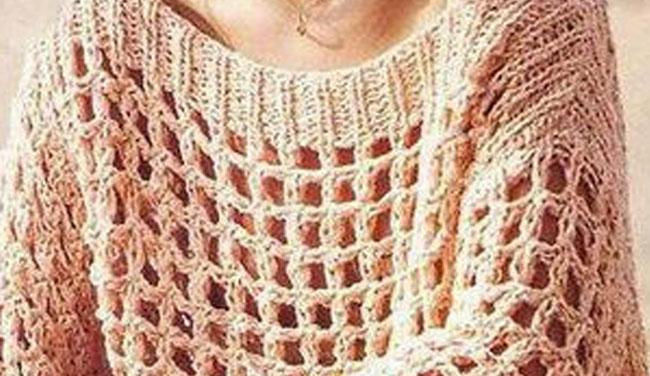
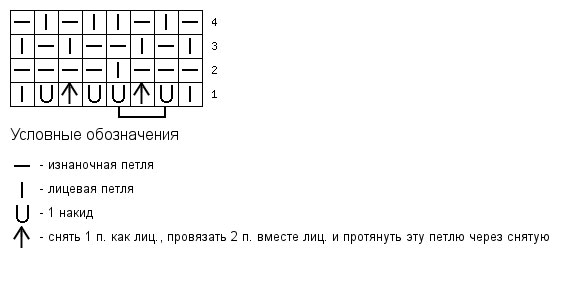
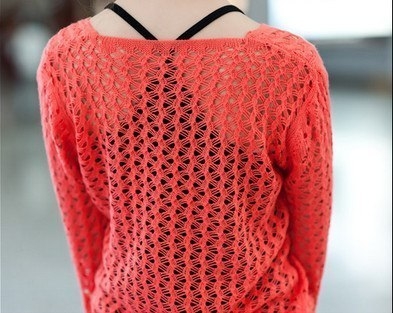
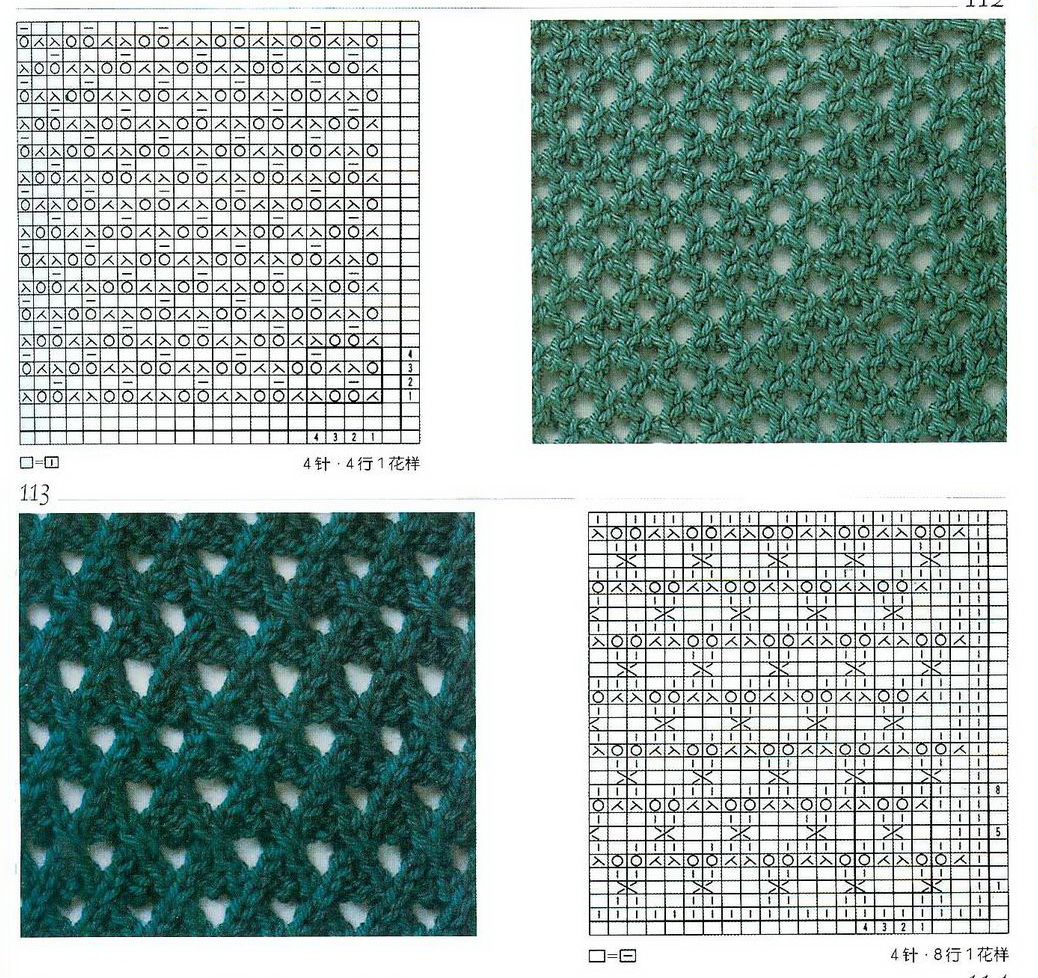
If this tie-spoke mesh of thinthread, you can get a tunic for a summer, then there is a beach tunic. Thicker strings will allow to make the tunic for autumn or spring season. The following line is the vertical direction, which has the original weaving. Patterns like this woven mesh spokes are owned to bilateral relief.


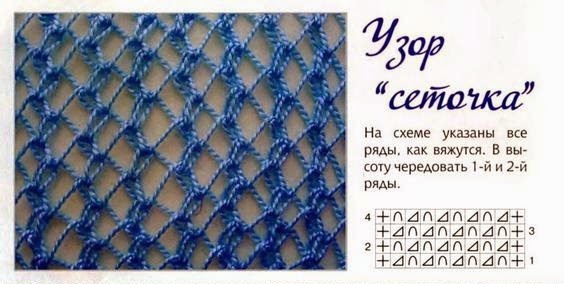
As you have noticed, this scheme openwork meshquite primitive, and even the number of units you need to dial for knitting. Then look at another pattern, which is called "Waterfalls." scheme The difference is that the openwork mesh is not continuous.
Here, two patterns are present, one of whicha mesh, and the second band. These two patterns are arranged according to the scheme in a staggered manner. This pattern is most suitable for knitting needles light clothing.
Video: Net pattern
Knit sweater with an openwork mesh
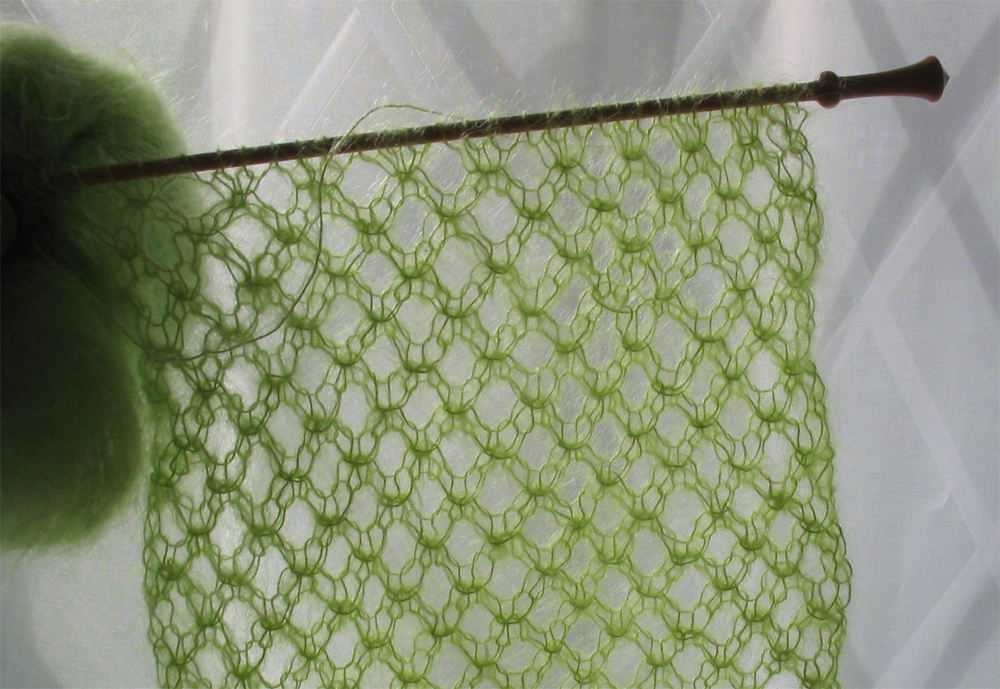
We offer you a video lesson examines knittingopenwork mesh. For this purpose, apply N, which leads to the formation of the pattern of openwork mesh. It will be useful for beginners needlewomen learn that H can be performed in different ways. This video will teach you to knit a portion of the light tunic that runs pattern mesh in the upper region of the article. Knit mesh we will be on the example of a small sample, for which you need to dial an even number of loops. At the beginning of the sample you want to link the front two rows of satin stitch, and then proceed to the immediate implementation of the work. First edge loop must be removed, as is usually done. The second loop should be H, and we throw the thread from right to left working for him. The next two units provyazyvaem along the front loop (LP) of the rear wall. The result of these manipulations number of loops (L) is not changed. So, one and two P nakida together, this is a repeat of the first row (R).
Provyazyvaniya method H, which demonstratedvideo, called direct N. This is a technique we knit the whole of the first row, and the last an edge P knit purl loops (SP). In the second P purl all loops are knitted as SP. In this case all IP nakida tally by the front wall. The fact is that when knitting H of the back wall we do not get us the necessary openwork holes, and it demonstrates a master class. In the next third of the front edge after the first P P knit as LP. After the next is H, then the two P along the rear wall. It's all the same rapport that we have mated in the first row. In this way, we were binding all P for performing rapport rapport. At the end of the third P LP must bind, but do not H ahead so as not to increase the number of units. In the fourth row, all P performed as SP. We have completed the first vertical rapport, which consists of four vertical rows. Here's a openwork mesh can be connected using nakida.
Selection schemes
Comments
Related posts:
 Knitting Step by Step openwork mittens on the needles
 Knit pattern "leaves" spokes video tutorial and read circuits
 Sledkov two spokes seamless: knitting master class (photo)
 Booties on two spokes: step master class in the photo and video
 Mittens needles: knitting on the basis of the master-class (photo)