
Bead weaving crafts different techniques (diagrams and video)
Content
- methods beading
- Parallel weaving
- Video: A figurine of Santa Claus parallel weaving
- Master class fish netting scheme
- Weave surround giraffe Bead
- Video: Lessons from a variety of beading crafts
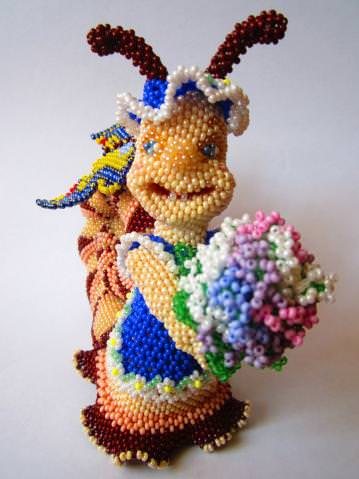
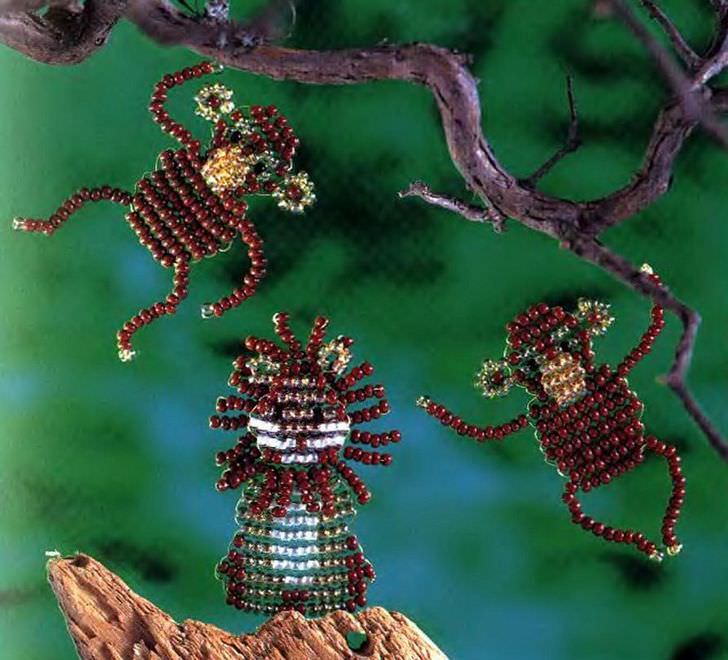
Beads are very firmly entrenched in the range of interestshandy people. This is not just small pieces of plastic, very many very different products can be made from them. Toys, napkins, decorations, here is little that can be done from the beads. Everything depends on the color, size and imagination, which will show the master. Photos figures of beads present in each album achievements true needlewoman. The most bizarre forms acquire handcraft bead, creating the most unexpected and wonderful things.


methods beading
There are many different ways to connecttogether beads. Diagrams and weaves lessons very often in the photo looks very confusing. There are cases where different techniques for performing the figures may look very similar. This is because the beads can be placed only in the direction of motion of the base. The finished product is not always seen as located in the bead weaving, until the tightening and suturing. When you create a craft often used wire. For the beads it should be so thin, so go inside bead at least 2-3 times.
The most striking weaving methods are:
- parallel;
- brick;
- Crosspoint;
- weaving;
- French.
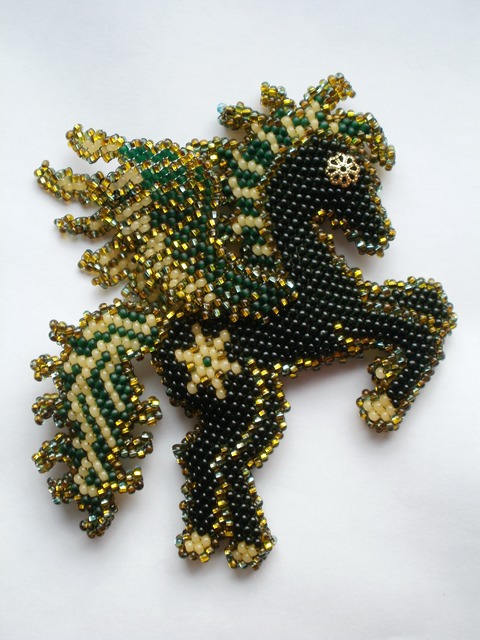
Pegasus bead in mosaic techniques and kkirpichnoypleteniyaTakzhe popular are embroidered and beaded knitting. From embroidered and knitted pieces can also create crafts from beads. Schemes such craft look similar schemes for embroidery and knitting, and only then is the formation of volume figures. The embroidery and knitting wire is not used for the beads, freeze occurs on the monofilament or normal, and strength of the product gives the base crafts. Lessons usually describe one embodiment of the base. Each weave is incremental, small steps, repeating, create a series. Video creation figures usually seem quite complicated, but suffice to master the basic techniques of art and try to weave beaded crafts yourself. The subtleties of the work for each material its own, it all depends on the skills and raw materials.
Those who wish to create crafts from beadswith his hands, should explore and try out a few different techniques. Then the master will be able to freely change the technique of weaving directly during operation, depending on changes in product structure, pattern, size of the product or used beads.
Parallel weaving
It looks the easiest, but it requires a verycareful attention. There are several ways of doing this weaving. This master pattern may perform any number of ways, depending on the materials used.
Figures of animals from beads in the artParallel pleteniyaEsli used wire that can hold a number or range of beads, the central part of the series, you can not connect to each other. Even in the larger photo will not be noticeable gaps. Figures from the beads and wire durable and relatively heavy, need to be addressed when creating. But even a beginner is able to master them show high grade, because the tension of the wire can not spoil the series.
Although it is often convenient to parallel weavingused to create the flat figures, it could well be applied to make a three-dimensional figures of beads. There are 2 basic ways to weave in parallel:
- Weaving a number at once;
- braiding each bead separately.
The first method is carried out step by stepstringing beads according to the scheme, and then each row is attached to the previous one. In the latter case, each bead is attached to the same bead in the previous row. In this technique, create a three-dimensional bead toys. An additional fastening toys wizard gives the necessary strength. Wire Bead is perfect for the first case and is not suitable for the second.
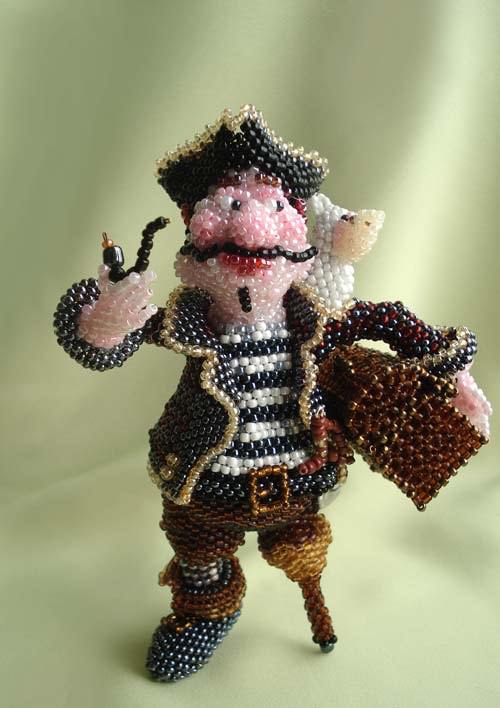
Video: A figurine of Santa Claus parallel weaving
Master class fish netting scheme
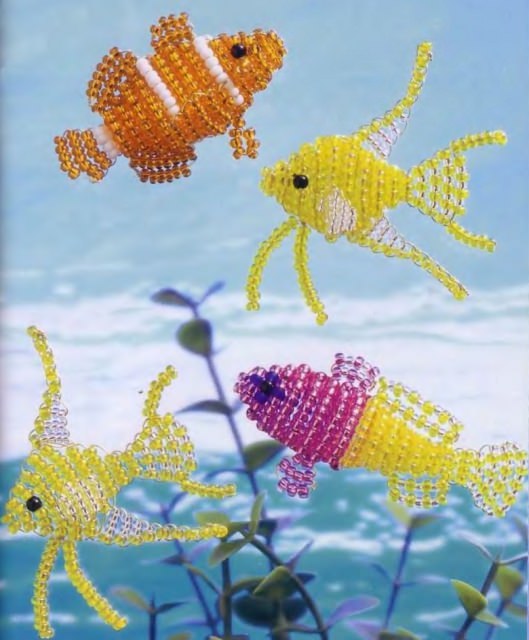
Fish - the most simple in the manufacture of handicraftsbeads. For beginners in this weaving is no big deal. You can use the scheme, and it is possible to spin just looking at the photos the most fish. Only the long lines on the line and monofilament require additional fixation for the creation of the series. Wire beads should be well bent and not be too noticeable on the background of the selected fish. Many schools begin beading lessons it with fish.
Our workshop is based on a scheme netting fish, perch.
Driving weaving pygmy perch frombiseraNabiraem on the basis of - the wire or fishing line 2 beads. We collect beads stepwise manner, threading on a thread, according to the scheme. Further, on both sides of the needle 2 put beads. In the next series of dress 1 1 bead background darker - for eyes and 2 background beads. Both the edge of the base are missing for a number of beads in opposite directions. Another 3-fold increase in the number of beads 2 every 2 rows. The ranks are forming the eye from a dark beads. After 10 rows of beads strung background color. After that, we begin to reduce the number of beads - for the tail. If you look at a photo or video of various fish, we can see that there are a wide variety of fish. The more rows you propletete, the longer will be the tail. The sooner to remove the beads, the more cool body close fish. When he reached the number of 3 beads, it is necessary to re-dial the width of the tail.
To weave the fins should be at the end of a series strung on one of the sides 3-4 and sew beads to the bead number 3 below. Return back in the same way through an arc bead 4-5.
The last row is put on the edge of the base 2 in bothside. Then one end is threaded in the penultimate row. Both edge bind and hide the knot between the beads of. These fish can be performed in various colors and a wide variety of combinations, in the image they may well pass for a living. If you create a very thin and slightly curved fins, fish give the impression of missed images from the video.
We invite you to examine two more weaving scheme of funny fish Bead:
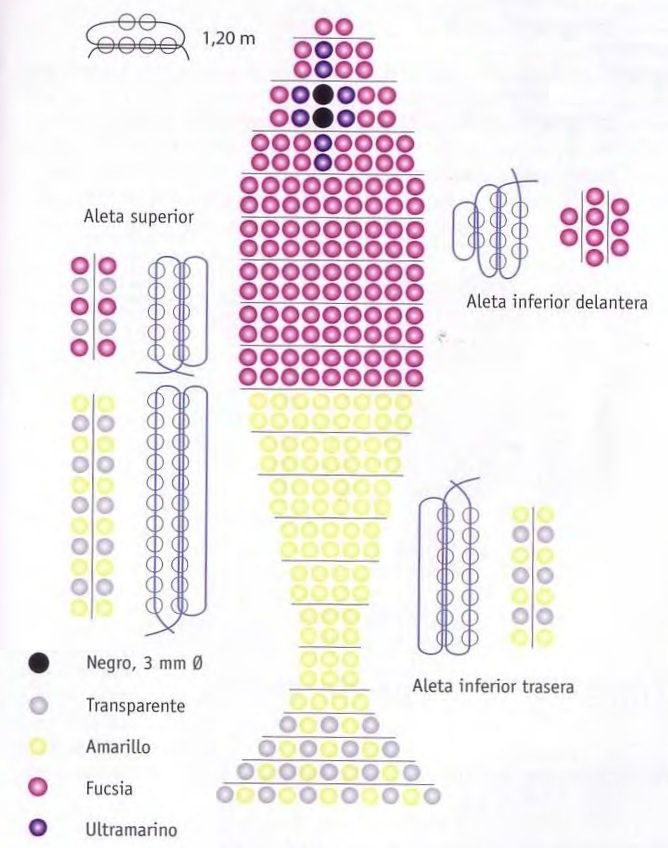
Fish-sailer 
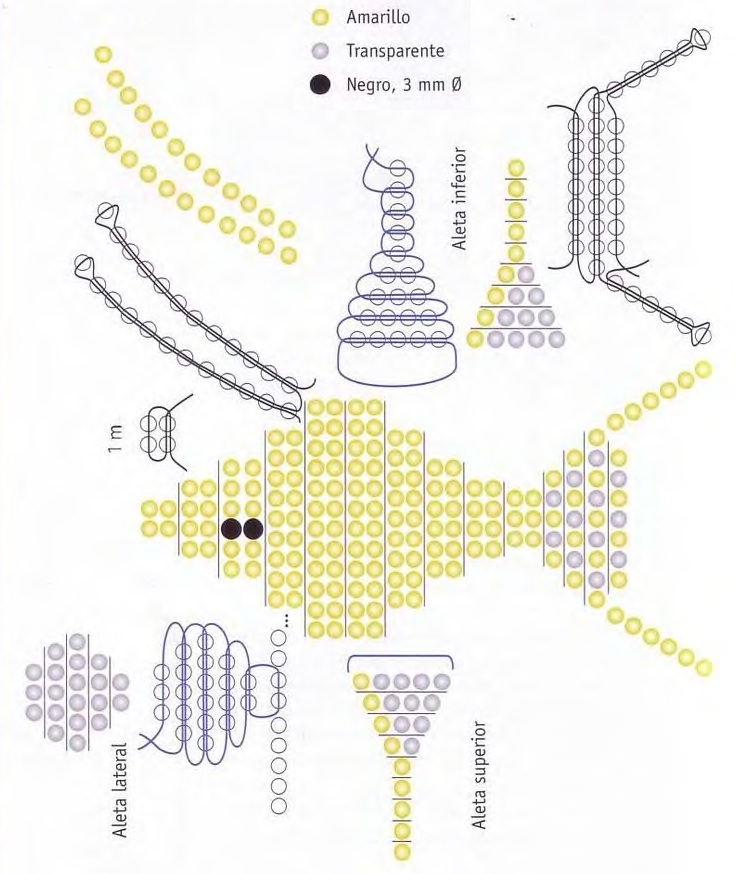
Fish-clown is unique and funbead toys. Videos of creating toys is not difficult to find, much harder to demonstrate patience and class and understand the technique itself. It allows you to create works of beads is not exactly as in the diagram, but also showing his own imagination.
Weave surround giraffe Bead
Bright animals cause a lot of excitement becauseand videos with them so popular. Fans brick netting will be enjoyed by our master class to create interesting crafts from beads in the form of colorful giraffe.
For weaving surround giraffe beaded we will use brick stitch technique in a circle. Pay attention to the accompanying diagrams and step by step description of the art of weaving in the photo material.
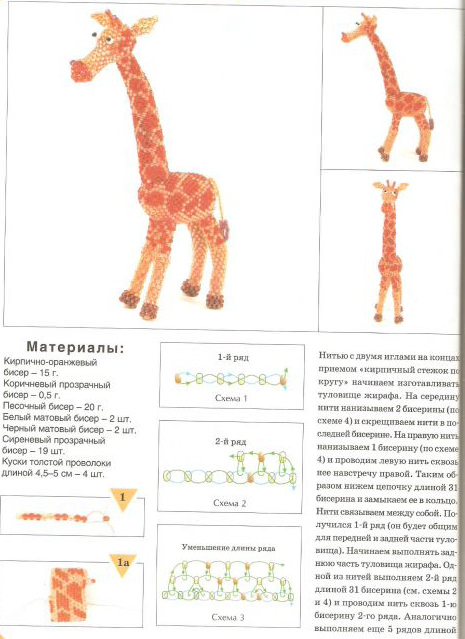


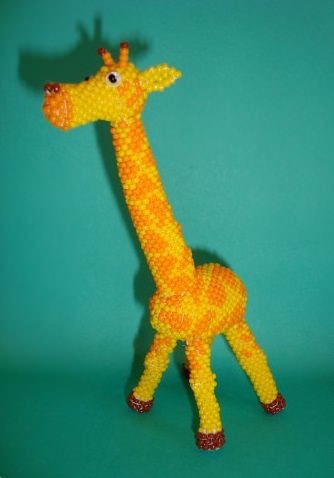
Wire Bead here will not work - toomany twists and loops, any wire just burst. The first circle is formed, since the two beads. The two ends of the base are threaded in a single bead from different sides. After you create the necessary number of length both ends are threaded in the first bead. Next there is the step by step creation of interweaving beads. We put on a bead, attach the thread under the previous close and again miss the thread through the bead up. The color combination should repeat the natural spots. Beading in two colors - yellow and orange, are such markings.
The creation of this work of beads is recommendedstart with the torso. High class - to weave figure in any direction, but it is better to make the trunk and then, depending on the resulting size to determine the required thickness of the neck and legs.
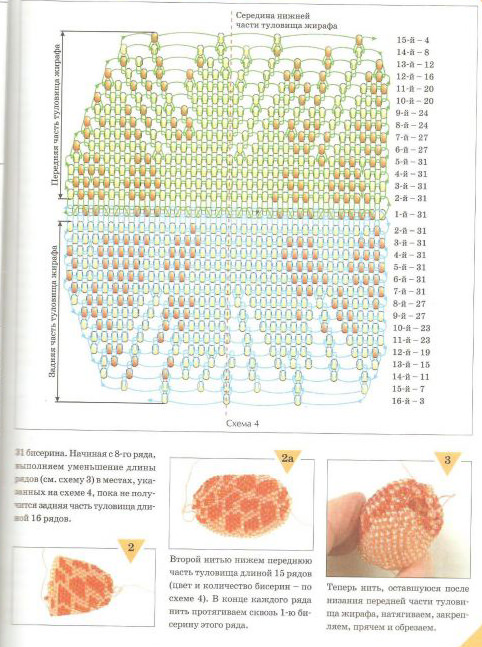
After dialing the first lap forming cylinder,repeating the same number of beads several rows. After that, step by step form the giraffe narrowing the waist, if we want to. 1-2 beads on a row with a shallow and 1 bead on a 3-4 series with large beads. After obtaining the desired waist - 2 rows of sharp increase in the volume of 3-4 beads - form the rear.
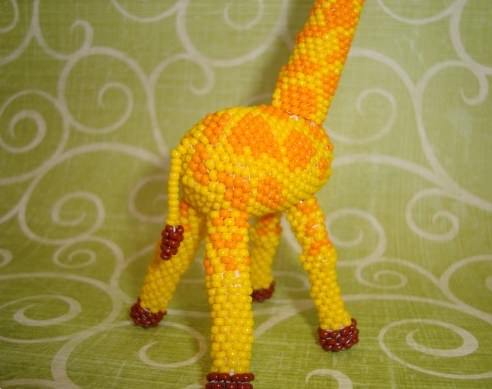
If the hack of beads will not just standon the shelf, the tail better weave and sew separately. Perhaps it will have to sew anew, especially if the giraffe will play. Once achieved the desired expansion, you must close the trunk. Behind it should be closed by a rounded manner, the front - more sharply.
Behind reduce the number of beads on the third of each row, until you close the hole. We fill the trunk to keep the shape. Front halved in each row.
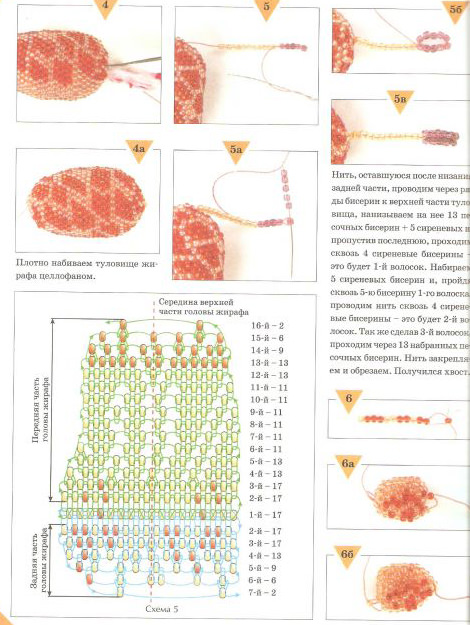
The thickness of the legs 4 to 10 beads, depending on thethe size of the body and beads. Sew simple cylinders, without closing them. The edge of the cylinder strung black beads. Finished legs fill with stuffing and sew monofilament to the body.
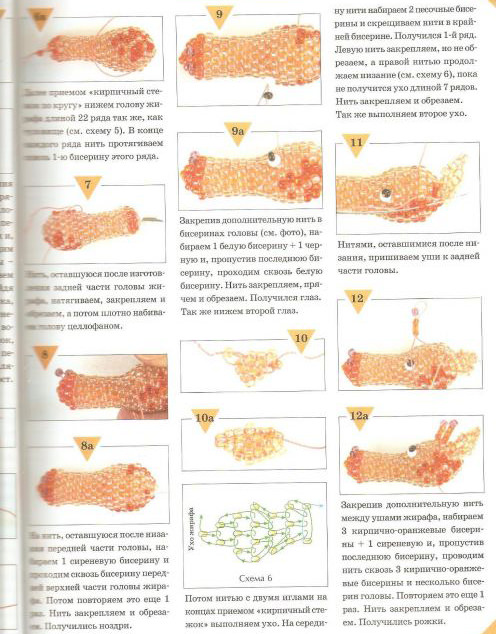
We recruit the initial circle to form a head in2.5-3 times larger than the thickness of the legs. Scourge 3-4 rows maximum width. At the top of the form the horns: stringing 3 beads yellow and 1 orange, and then return the thread to yellow beads and head back into the circle of weaving. Close the head decrease in the number of beads in the third in a row. The front of the sharply reduced number of 2-3 in 2.5 times, and then trudges 7-8 rows unchanged. Inside is placed a filler. Head closes darker beads of 2-3 series. If you do not 7-8, and 2-3 rows and then divide the circle into 2 separate beads circle - it will open your mouth, then the inside should sew two large white beads - teeth, or a piece of red material - the language.
Ears trailing separately, flat parallelweaving and after - sewn to the head. The eyes may be vypleteny directly on the body, colored beads in a pattern of a giraffe, and can be sewn on the outside have the finished figure. Very impressive look dark bead-eye on sequins.
The neck is certainly long, but it should be taken into accountthe length and severity of the body, ready to figure does not fall forward. The width of the neck of the 5 beads near the head from the torso up to 10-15. neck length depends on the length of the legs and trunk size, try to stick to the real proportions.
Lessons emphasize the creation of volume figuresfocus on a strong tightening of each loop and each stitch. Using only possible between the wire stitches as a support rod. With the same purpose can be used and the beads themselves, as well as the packing. Tightly stuffed figure, you ensure the stability of it.
Study of various beading techniques and practices make it possible to create the most diverse and beautiful products from beads and wire.
Video: Lessons from a variety of beading crafts
Comments
Related posts:
 Lily Bead: different versions of weaving (photo and video)
 Necklace of beads: the lessons of weaving their own hands (photo and video)
Maki Bead different techniques of weaving their own hands (video)
Necklace of beads: the lessons of weaving their own hands (photo and video)
Maki Bead different techniques of weaving their own hands (video)
 String of beads with your hands (photo and video)
 Crafts from thread the floss with your hands in the photo and video lessons