Wisteria of beads stunning tree with your own hands (photo)
Content
- Magic wisteria of beads with their own hands
- Bright solar wisteria
- Options for future masterpieces
- Video: inspirational ideas for creating wisteria
- Video: Wisteria shaving from beads
Wisteria consists of a number of deciduous vines striking their imagination with their fantastic unearthly beauty.
Perhaps, for this reason, almost all lovers of needlework are very popular with wisteria from beads.
Magic wisteria of beads with their own hands
Before starting our master class, let's look at the beautiful photo and admire the living tree growing in its natural habitat:
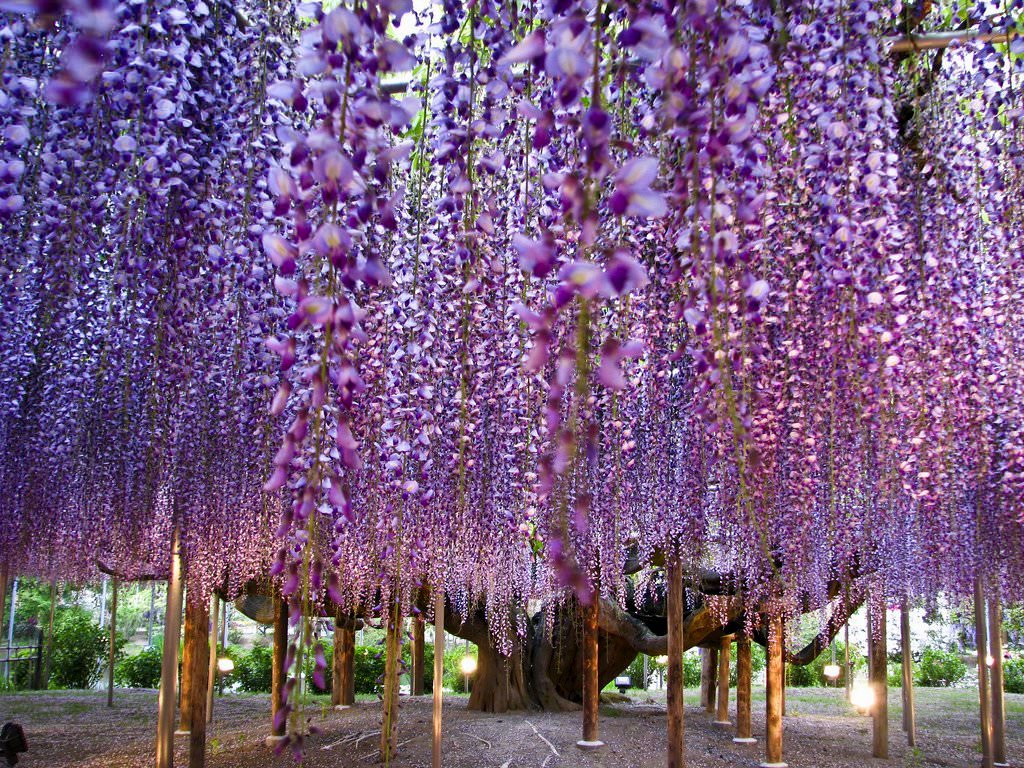
Now imagine that after youFinish our master class, you will have a small copy of such a delightful and incredibly attractive tree. You will be able to create with your own hands such a small miracle tree that will please you and your loved ones with its tenderness and fairytale beauty.
So, in order to make wisteria, we need the following materials:
- Alabaster or gypsum - 1kg;
- brush;
- Stand for indoor flower;
- Brown paint;
- Light blue gel candle or transparent sealant;
- Pebbles and beads to decorate the pond;
- Medium wire;
- 4 coils of fine wire;
- 1 thick wire for the trunk and 7 pieces (each 25 cm) for the branches;
- 25 grams of dark green beads;
- And as many light green beads;
- 30 grams of purple, light pink and transparent white beads.
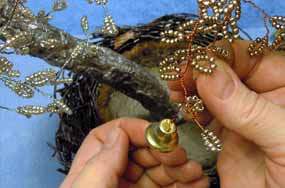
We will begin our master class with the creation of a bunch. At once I would like to note that we need about 60 such bunches.
We proceed directly to work.
Cut off from the coil about 90 cm of wire. Then we collect on it 5 purple beads and in the center make a loop, which you will need to scroll 3 times (photo # 1).
Next, we will continue to work with only one endWire. On it we will need to start to dress 6 more beads and scroll the resulting loop. Then in the same way we make two more loops consisting of 8 and 9 purple beads (photo # 2).
Now we will have to create 1A loop consisting of 3 violet, 4 pink and 3 more purple beads. The next loop will need to be strung first 1 violet, then 10 pink and again 1 violet bead. The seventh loop will consist of 14 pink beads (photo # 3).
The penultimate loop on this side will consist of five pink, five white and five pink beads. And the last loop will be the biggest, for it we need 16 white beads (photo # 4).
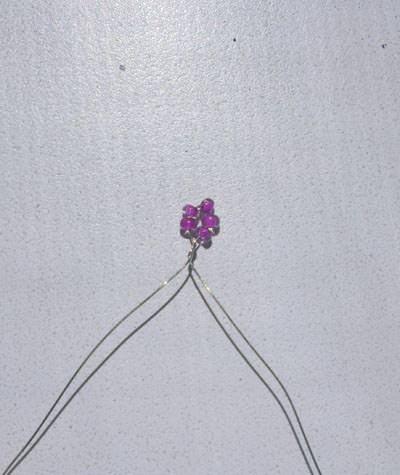
Photo 1 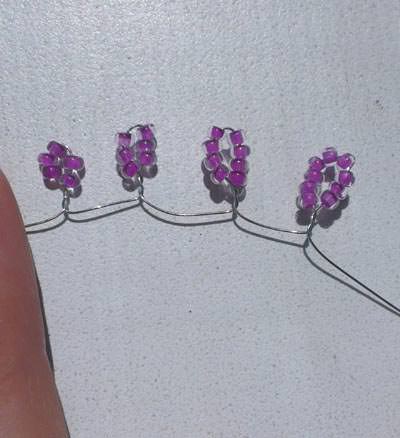
Photo 2 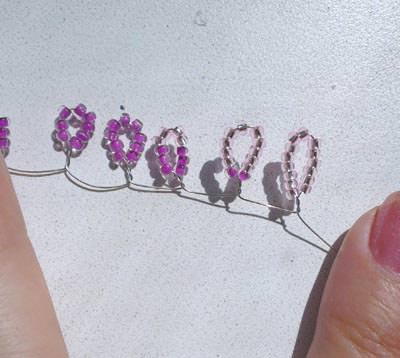
Photo 3 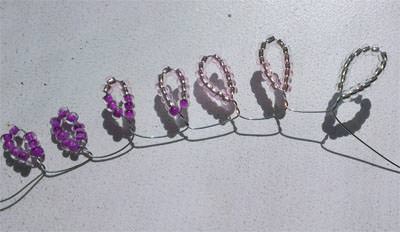
Photo 4 The scheme of weaving remains the same and we are on itWe weave the second end of our wire. This will look like the photo number 5. Total we got 17 loops. Each of which consists of a different number of beads.
Then we will need to twist our twig, starting with the very first loop in the middle (photo # 6).
As a result, you will get a beautiful brush, which eventually turns into a delightful bunch of wisteria (photo # 7).
We remind you that if you want toYour tree has turned out magnificent and thick you will need to make 60 such brushes. And then on each brush rotate its eyelets to the top, while slightly bending the tips.
Look at the photo number 8, and you will see what beautiful twigs have turned out for us.
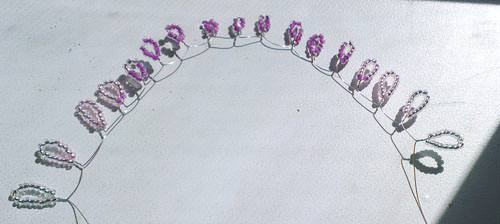
Photo 5 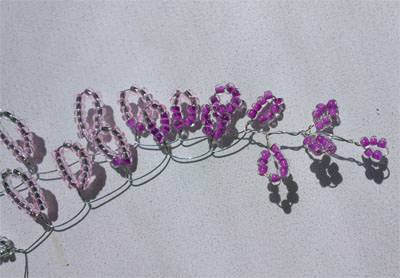
Photo 6 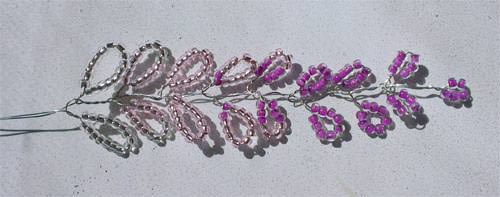
Photo 7 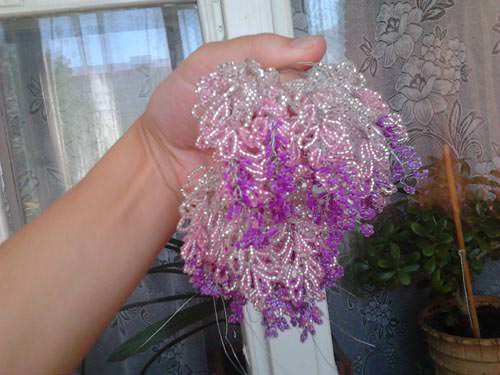
Photo 8 Flutter the leaves of wisteria After you have yourHands make all the brushes you will have to start making leaves. For each leaf you will need about 25 cm of wire, as well as beads of dark and light green color.
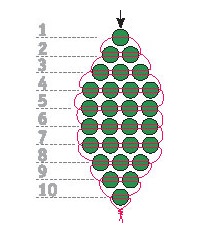
Scheme of parallel weaving with beads SchemeWeaving the leaves is different from the one we used to create the loops. However, it is also quite simple to perform and our master class will help you master it.
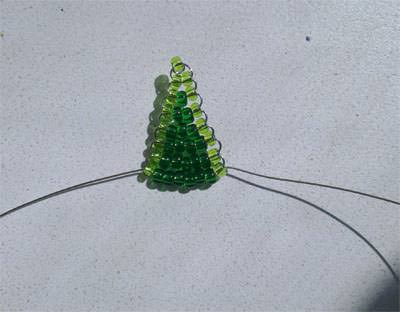
First, put a light green bead on the middle of wire 1. It will form the basis of your first row.
Then you will need to push the ends of the wire in different directions through 2 light green beads of the second row. The third row is done exactly the same.
The weaving scheme we use is called parallel. Look at how it looks in the schematic drawing.
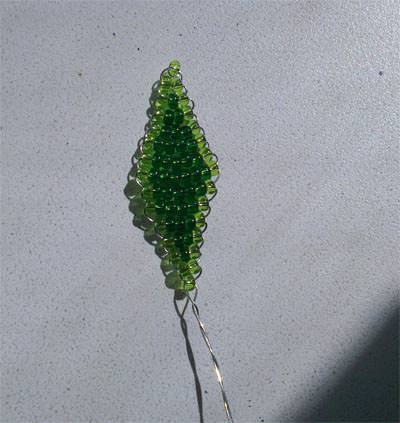
Please note that in the third figureThe series consists of 3 beads, and we have two. This is due to the fact that our leaf has a rhomboid shape and with each new row the number of beads increases by one. Until it reaches 8 pcs. In the end, it turns out that the core of the leaf is made of dark green beads, and its edges - from light green beads.
Then we will also reduce the number of beads and narrow our leaflet.
Form the trunk Now we begin to collect ourTree. As a basis for the trunk, we need a thick wire. We will wind twigs and leaves on it. Note that we twist the branches with whole bundles, each of which has about 10-14 branches. And we need to fasten the leaves so that they "look" upwards, while the lianas themselves will hang down along the trunk almost to the "ground" itself.
Next, we will need to form a barrel andFurther strengthen all the branches with a medium-thick wire. Since the wisteria from the beads has turned out to be quite large and heavy, we will need to make the bottom of its trunk quite thick.
At this stage, our master class will tell you,How to create a stand for wisteria. In order to make a pot of wood we will use the usual stand for a flower in the room. In it we will need to lay out a mixture consisting of gypsum, glue and water. And then "plant" our tree there and further strengthen it, plastering the bottom of the trunk with plaster. Do not forget to make a small hole in advance, which will later turn into a beautiful pond.

Before you put your tree aside beforeFull drying of gypsum, you will need to "plant" a small flower near it. In our case it is a lily, made according to the scheme of the French weaving. Make it better in advance, so that later you have time to decorate it with a stand before the gypsum begins to dry out. Of course, it is not necessary to decorate the clearing near the wisteria with a lily. You can quite make some other exotic flower, such as orchid or passionflower. The main thing is that your flowers blend well with the wisteria itself and give your composition the necessary completeness.

After the plaster in the stand completely dry, you will need to gently apply it to the branches. In order to not accidentally stain the beads, you can pre-wind the sprigs with foil.
Applying gypsum to the trunk and branches, you will have to wait until it completely dries, and only after that it will be possible to start painting.
On this master class on wicker wickerwork can beBe considered complete. We have only to decorate the clearing near our tree. Let's first make a pond. The photo shows that we have chosen a suitable place for him in advance and made a small depression there.
Now in this "hole" we will have to pour a gel candle melted on a water bath. You need to do this very quickly, because the candle almost instantly freezes.
The glade itself can be decorated with green and light green beads, small pebbles, shells or ornamental bushes. Here everything depends on your imagination and personal preferences.


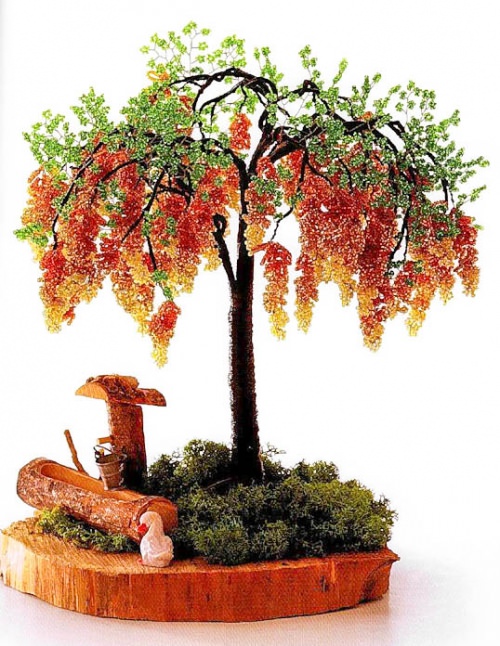
Bright solar wisteria
Let's start another master class thatWill help us create a delightful and incredibly bright wisteria. The tree you make with your own hands will sparkle in warm sunlight. It will warm you with its warmth and help you mentally move to a warm, bright day.
So, before you start beading you have to prepare everything you need to work:
- Scissors and nippers;
- Stand made of wood;
- Moss green;
- Dark brown thread;
- Floristic ribbon of brown color;
- Thick 2 mm wire;
- Thin wire;
- Beads number 10: transparent green, yellow, transparent orange and light orange.

Schematic drawing of weaving twigs of wisteria To start we will need to make about 50 tassels from beads. The scheme of weaving is rather simple.
We start beading with a yellow loopColor (about 5 pieces), then make about 8 light orange eyelets and 14 of bright orange beads. At the beginning of the brush, the eyelets consist of 5 beads, but gradually their number increases.
Such a simple scheme of weaving allows us to independently choose the length of the brush and adjust its splendor. However, do not forget that the branches of wisteria should not lie on the "ground".
Next we will need to make about 40 branchesGreen colour. They are woven along the same principle, but in the end these green branches should not turn out to be so dense. In addition, they must have different lengths. One branch consists of about 5-9 leaflets.
Then we need to collect our tree. The top of the wisteria will consist exclusively of green twigs, and the bottom of orange and yellow brushes.
You will first have to twist small bundles of twigs with fine wires, and then bundles of brushes. They will have to be tightly fastened to a barrel made of thick wire.
Of course, once you will be quite difficult to make a beautiful "composition". However, in time you will necessarily learn to do it.
Next, you will need to wrap your whole arm around the barrel with wire. Do it very carefully, so that it turns smooth and smooth.
Then you will have to wind all the branches with threads, and the trunk itself with a sticky floral tape. Try not to have ugly lumens.
Now you can install wisteria inSpecial wooden stand. You will need to drill in advance 1 large and 2 small holes. In the large hole you insert the barrel itself, and in the small stretch the ends of the wire and firmly fasten them.
In order to hide the protruding ends of the wire, youYou can glue moss around them. Near the tree, you can also install small wooden figures or attach a beautiful bench from the wire. You can also create it yourself.
Wisteria of beads ready! Look how beautifully her hands are shimmering and how the leaves sparkle in the sunlight.
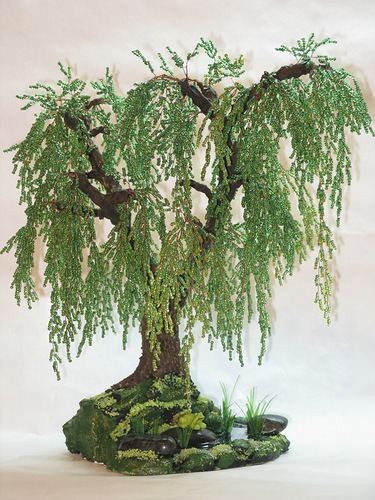
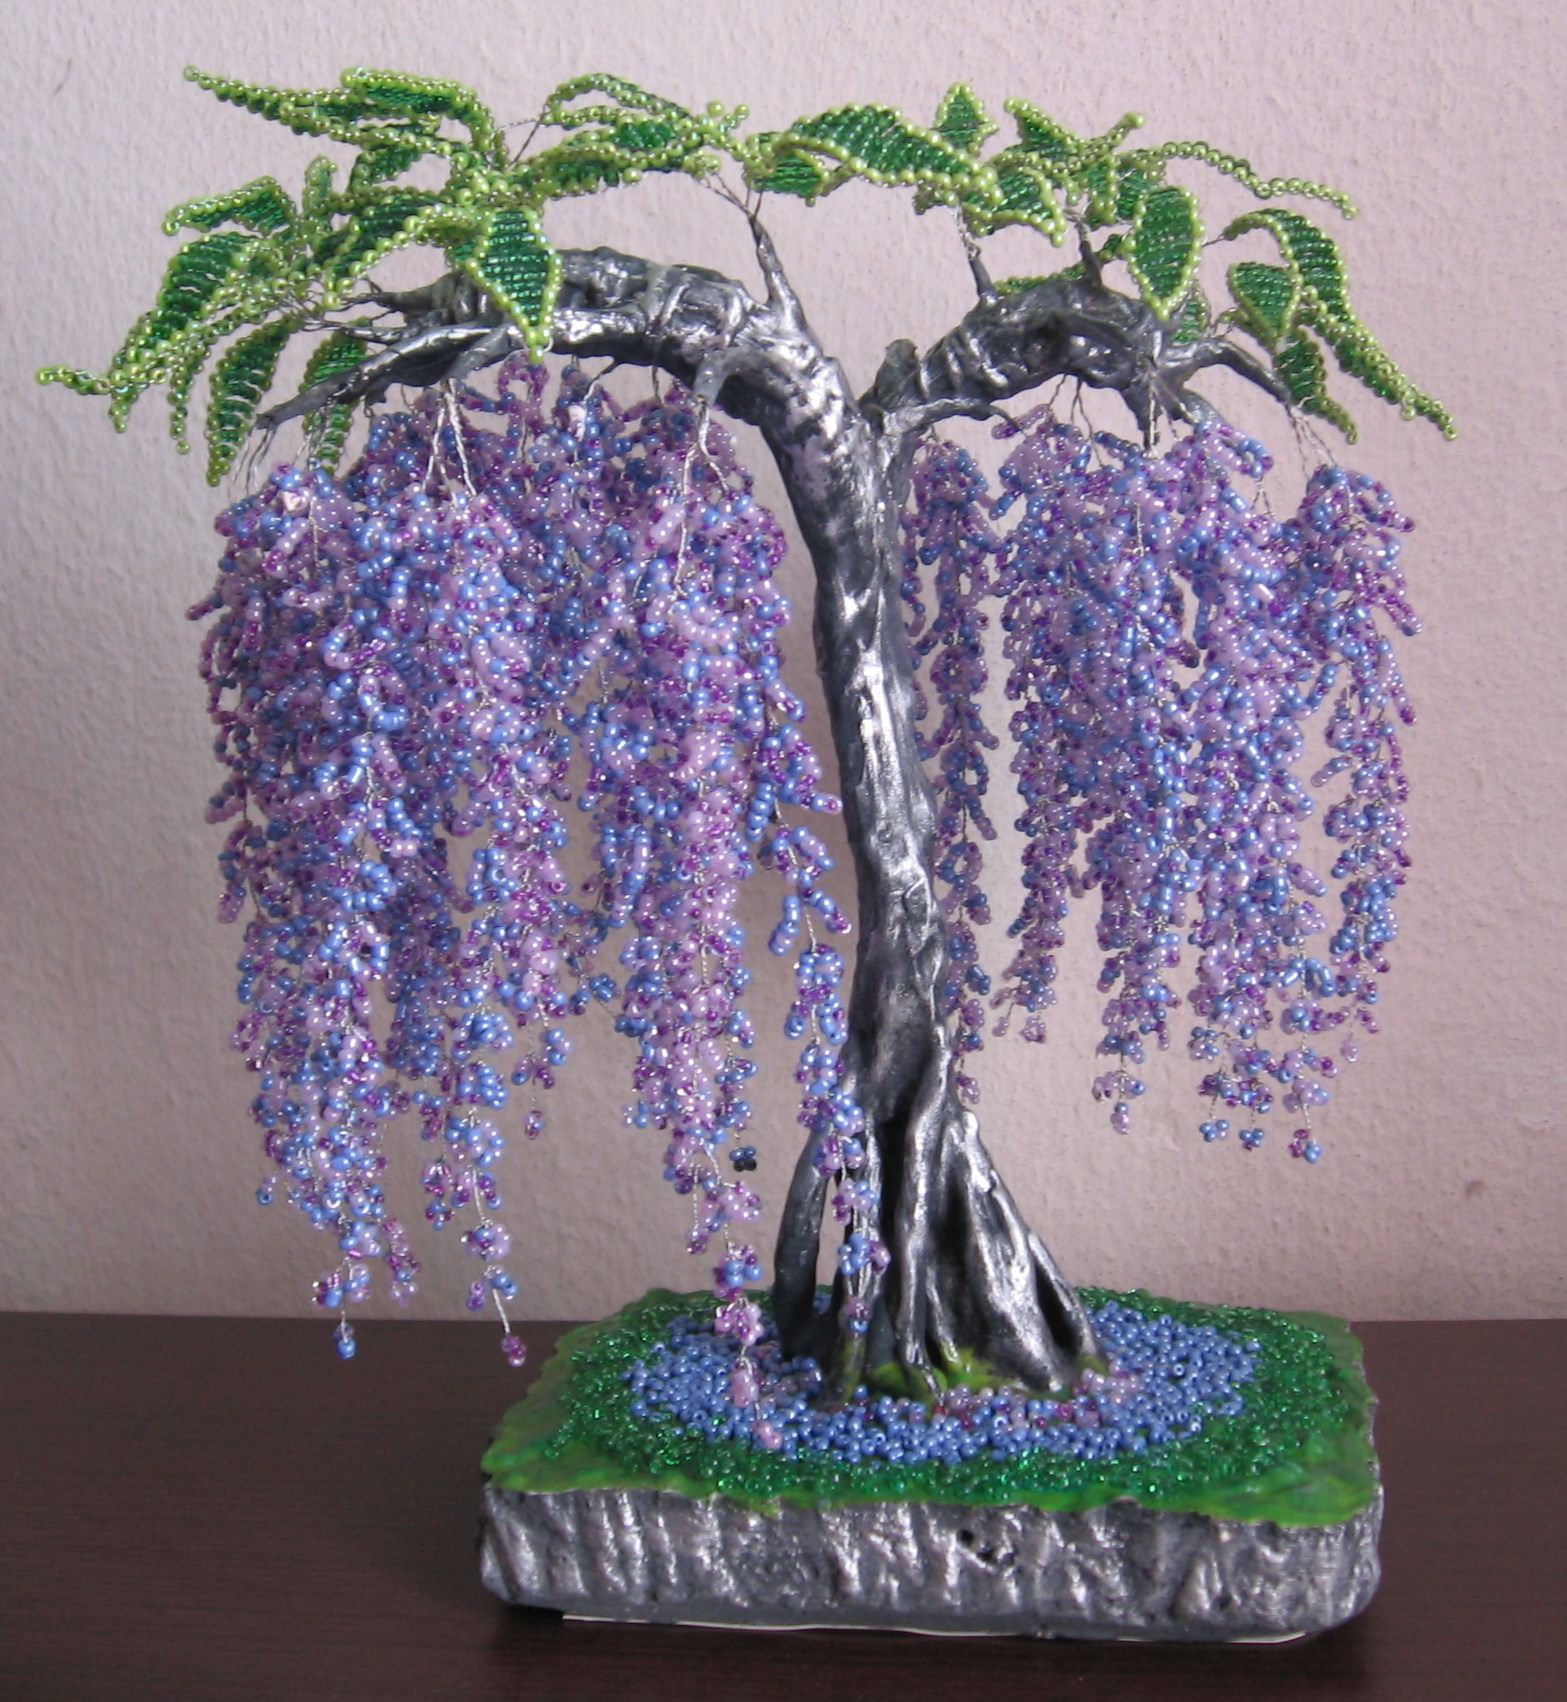
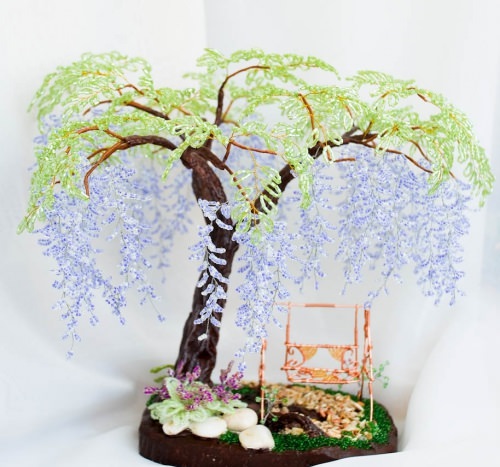
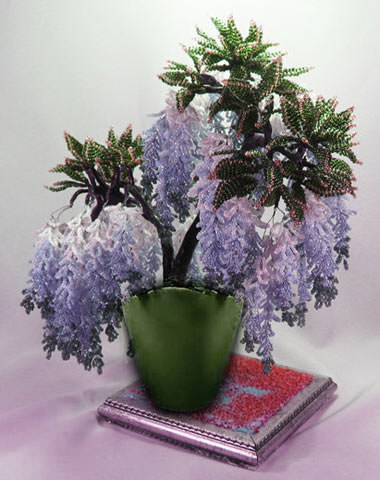
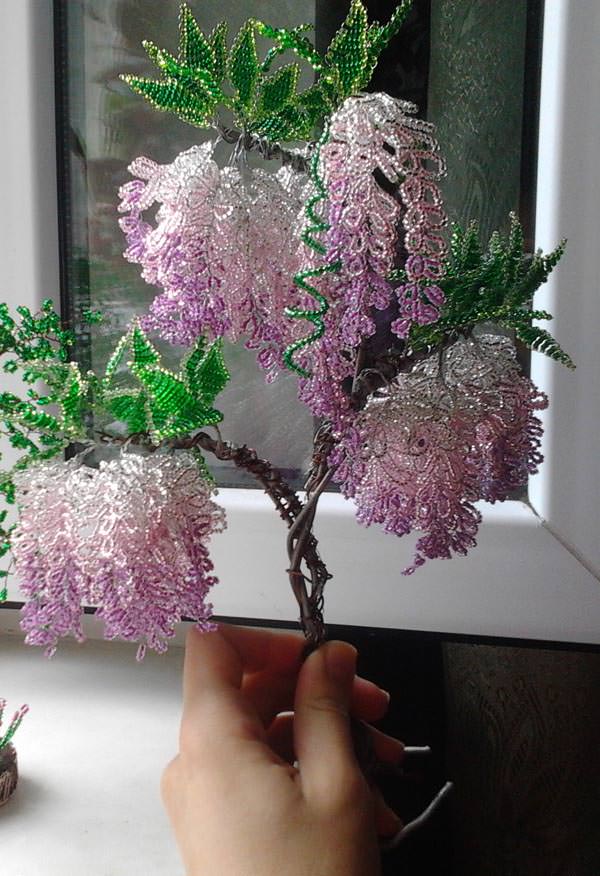
Options for future masterpieces
Of course, in the natural habitat, there are mainly wisteria, the color of which varies from light pink to dark purple. But creating such wonderful
, We can fantasize a little and make them unusual and fantastic. In order to "catch" inspiration and see some new ideas let's look at the photos of the finished works:
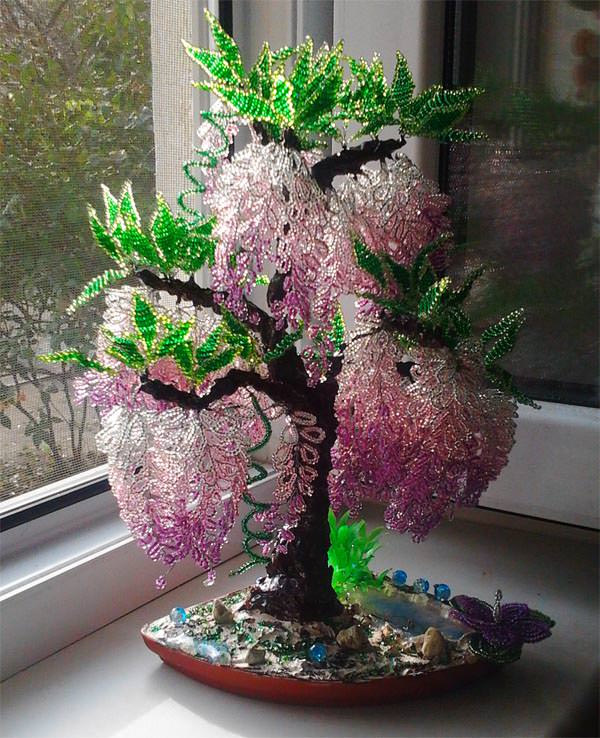
Wisteria in the twilight twilight This photo clearly shows that the branches and brushes of this evening wisteria are made according to one scheme. They are intermixed and seem to be one.
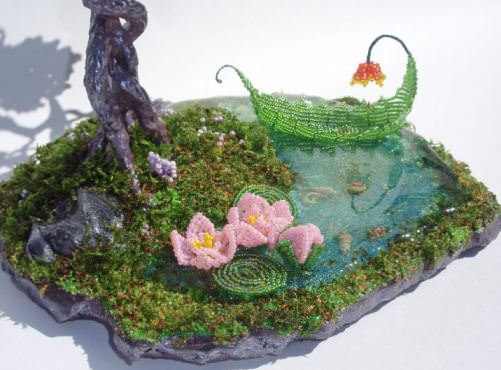
This work has a very interesting basis. To decorate the base, a mixture of crushed moss, sand and grass is used. In order to achieve such an amazing effect, it is necessary first to spread the base with glue, then sprinkle with the previously prepared mixture and at the end sprinkle with usual hair spray.
The pond is made of gel candles and sparkles. In it floats a charming boat of beads and a few lilies.
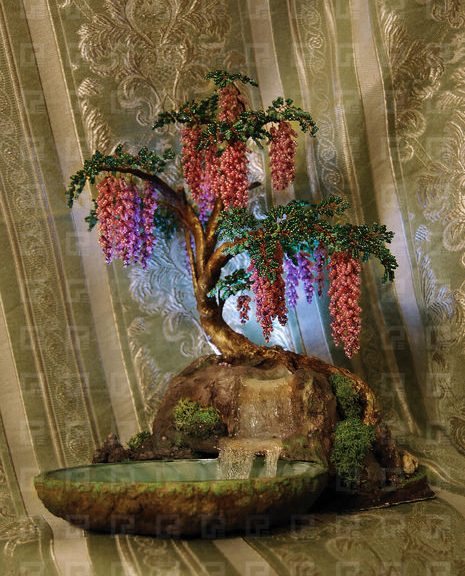
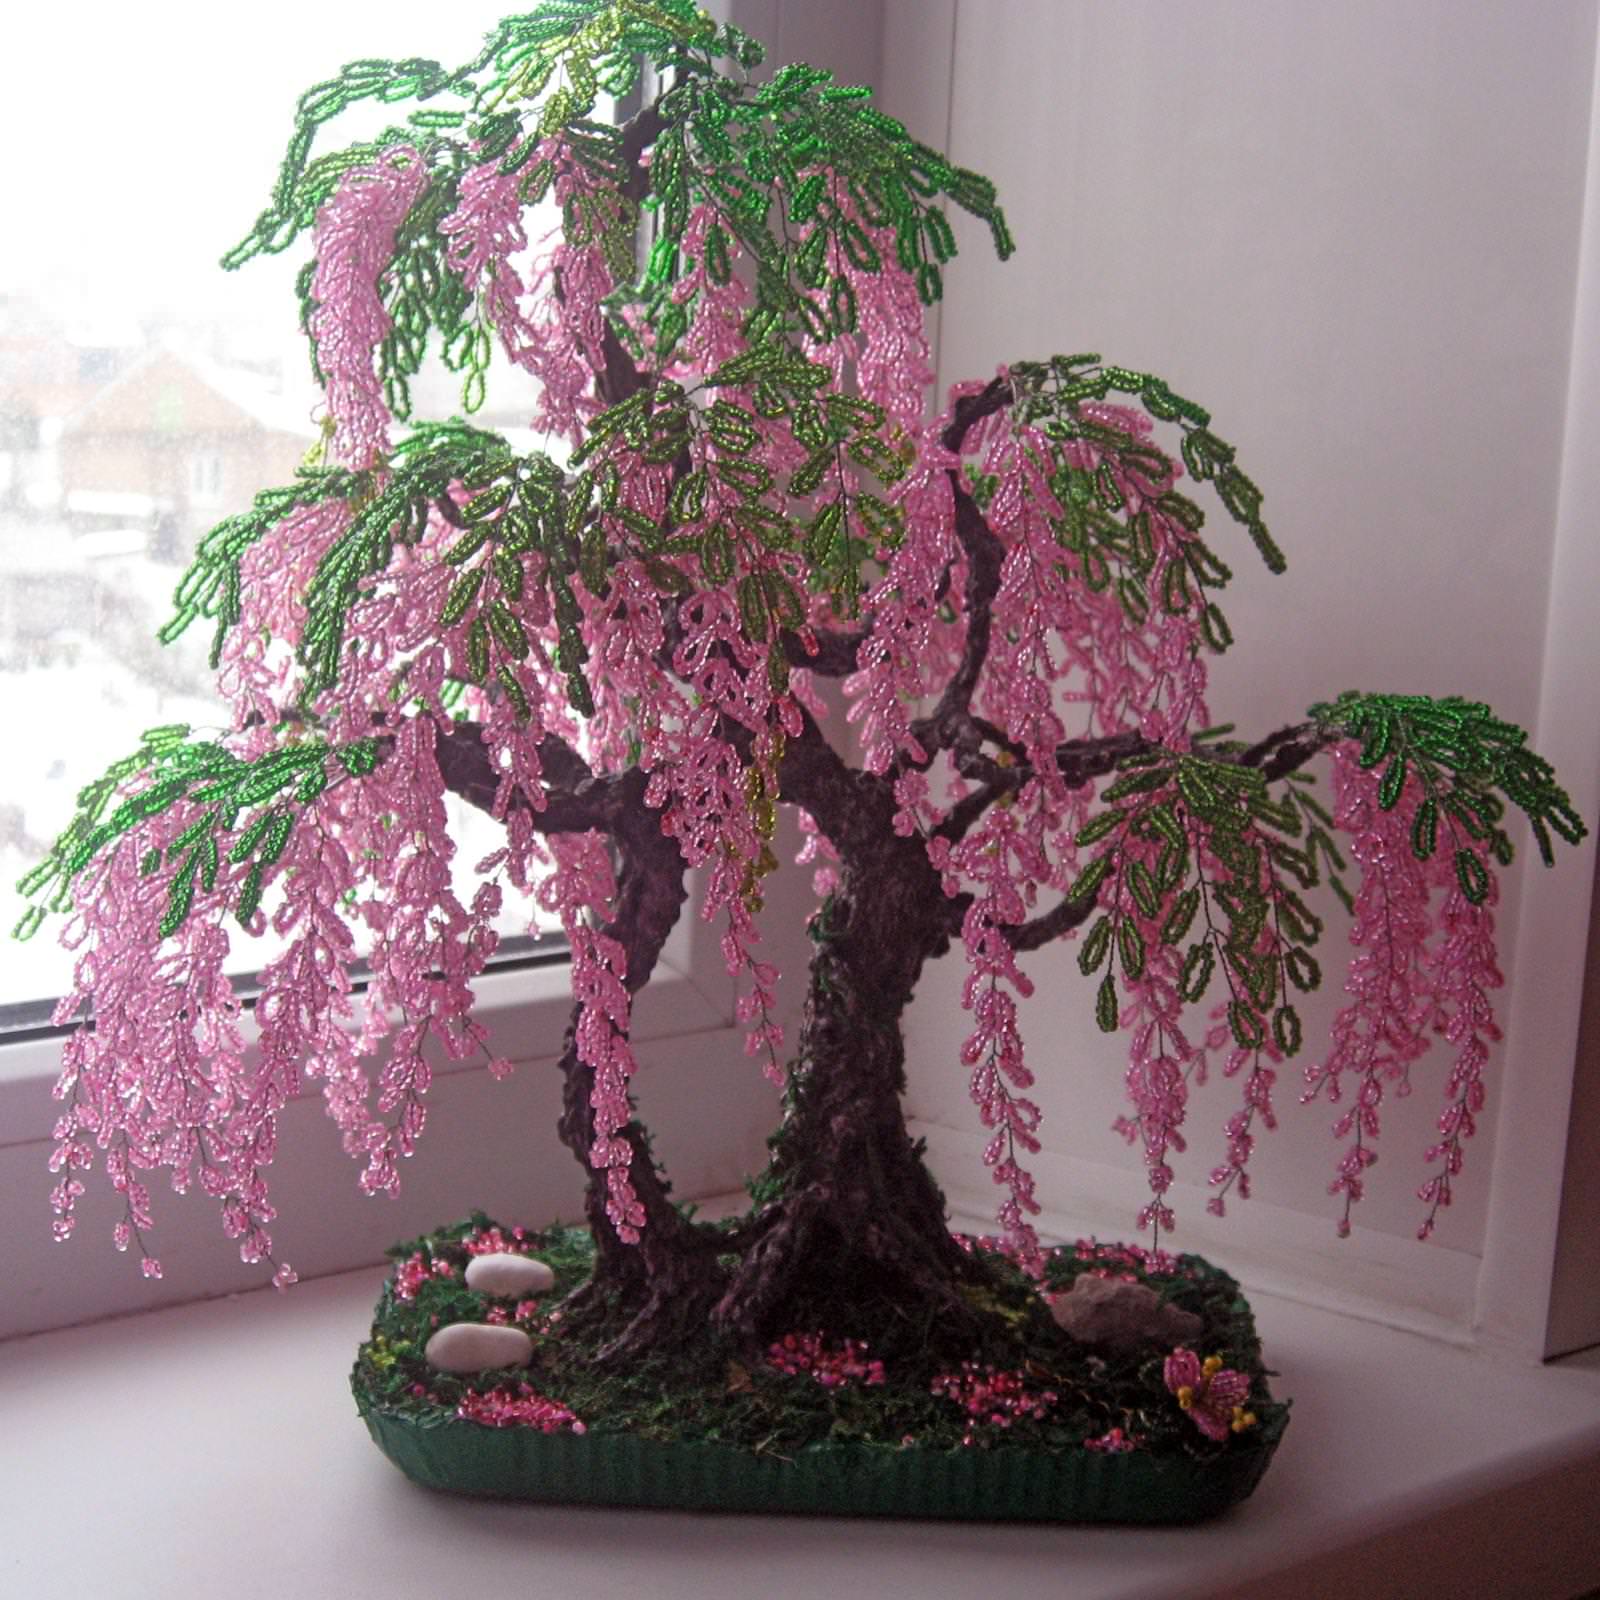
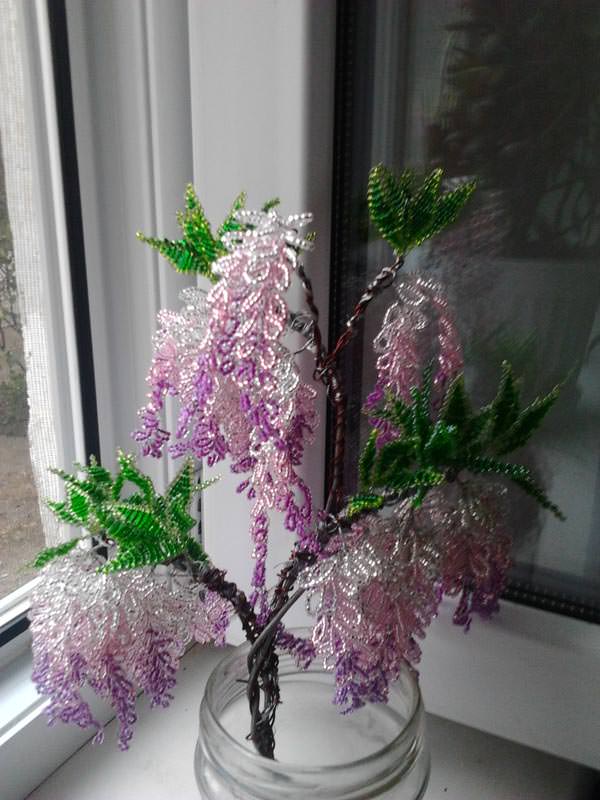
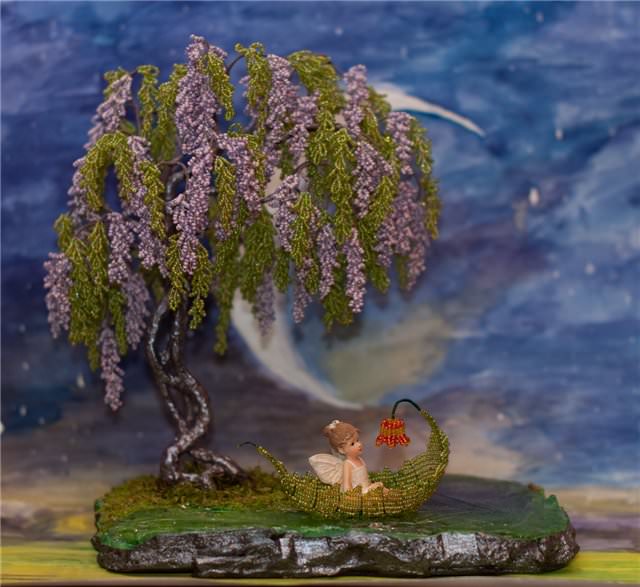
Gently pink wisteria made from beads 
The width of this tree is 65 cm, and itsHeight - 75cm. Note that the technique of weaving brushes and leaves in this work is different. However, it is possible due to this that this wonderful wisteria stands out against other similar trees.
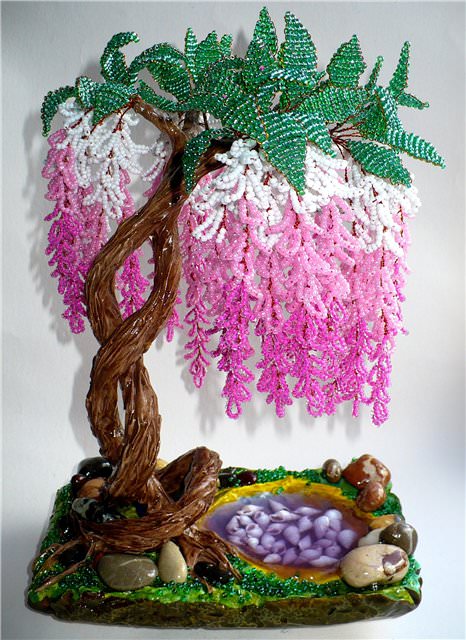
"Keeper of the key" 
Gorgeous work with a unique stand inIn the form of a small waterfall. The tree has a rather massive thick trunk and the same branches, but, nevertheless, the whole composition still seems fragile, gentle, just magical.
We offer you to view a small video, in which the wisteria are different in their form, color and technique.
Video: inspirational ideas for creating wisteria
Perhaps one of these works will inspire you to create your own fabulous tree from vines.
Beading is quite a fascinating and curious occupation. With the help of it, you can make a variety of trees, flowers, ornaments and even figurines of various animals.
Having mastered this kind of needlework as a beadwork, youYou can create stunningly beautiful flowering beaded trees that will later decorate your house or become excellent rather original gifts for people close to you. Each of your creations over the years will please you and help create an atmosphere of love, warmth and tenderness in your home.
Video: Wisteria shaving from beads